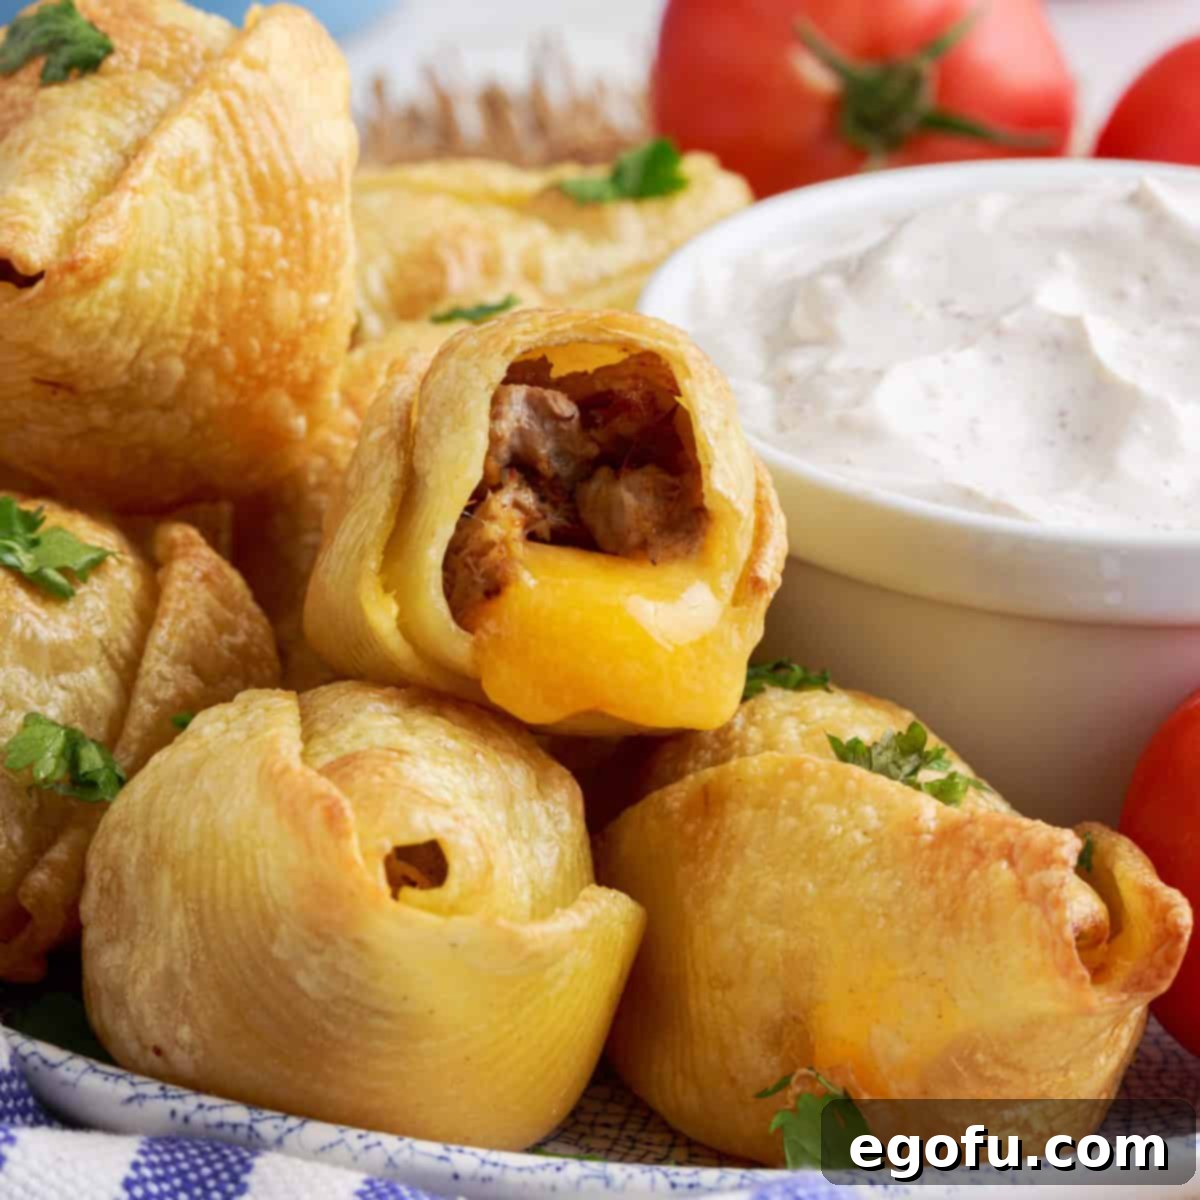
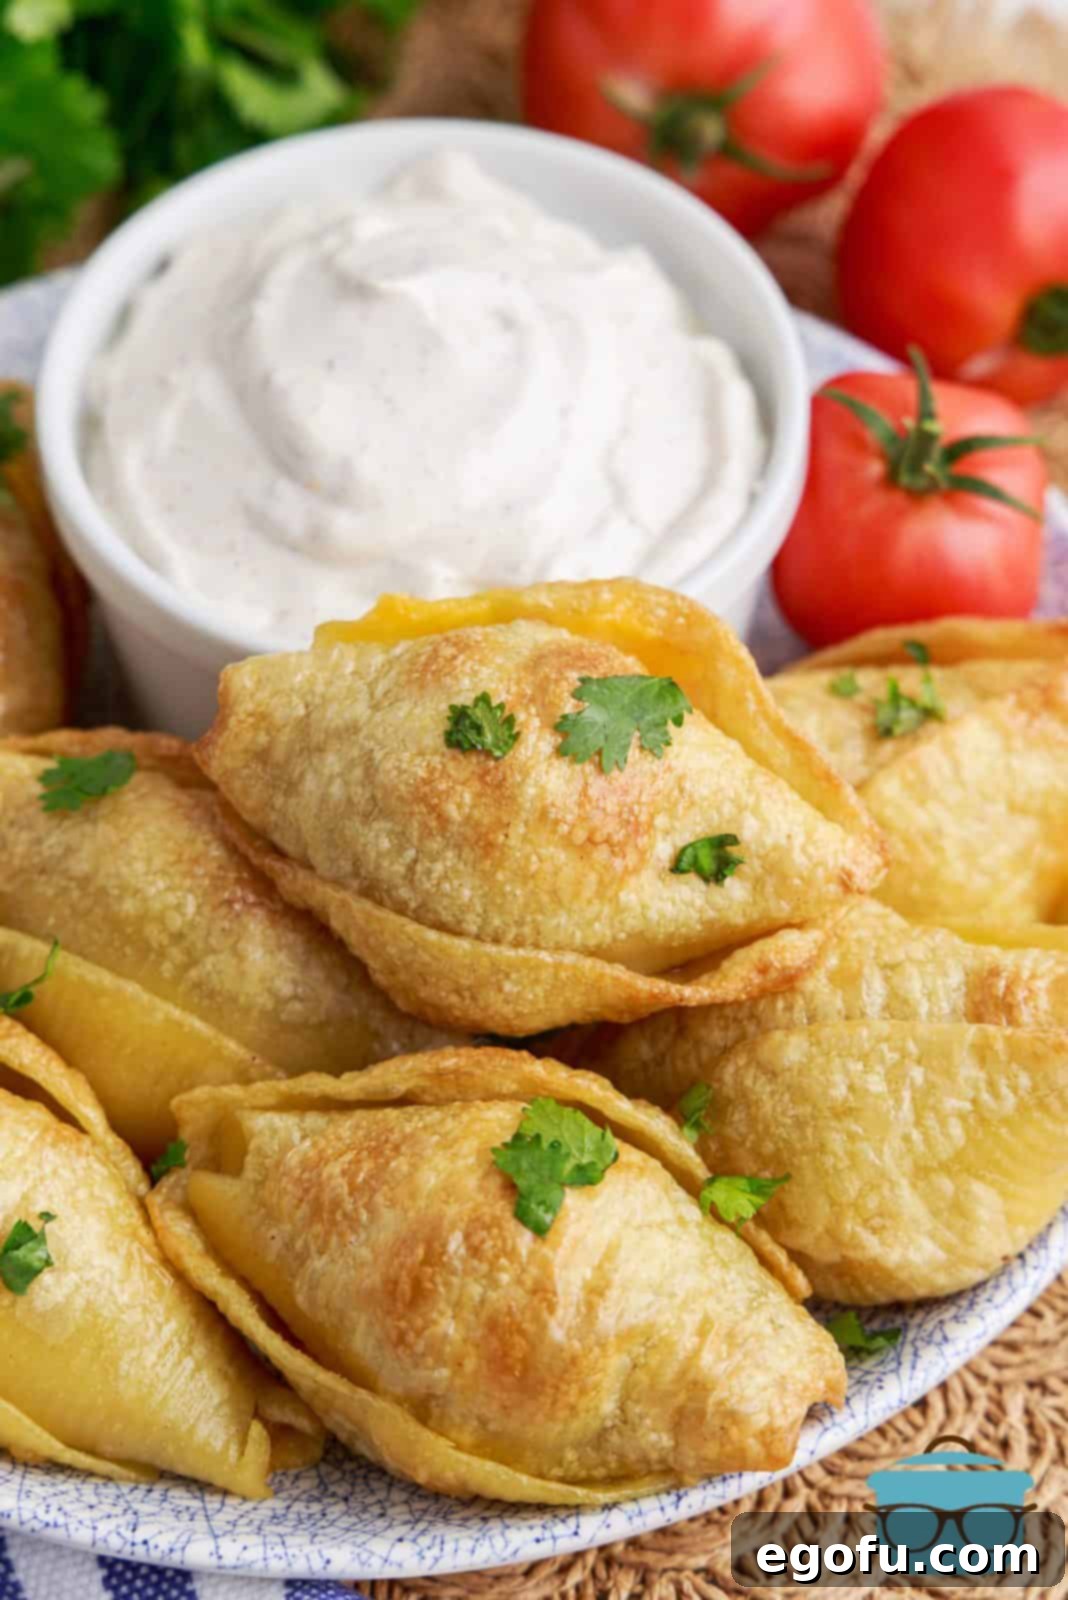
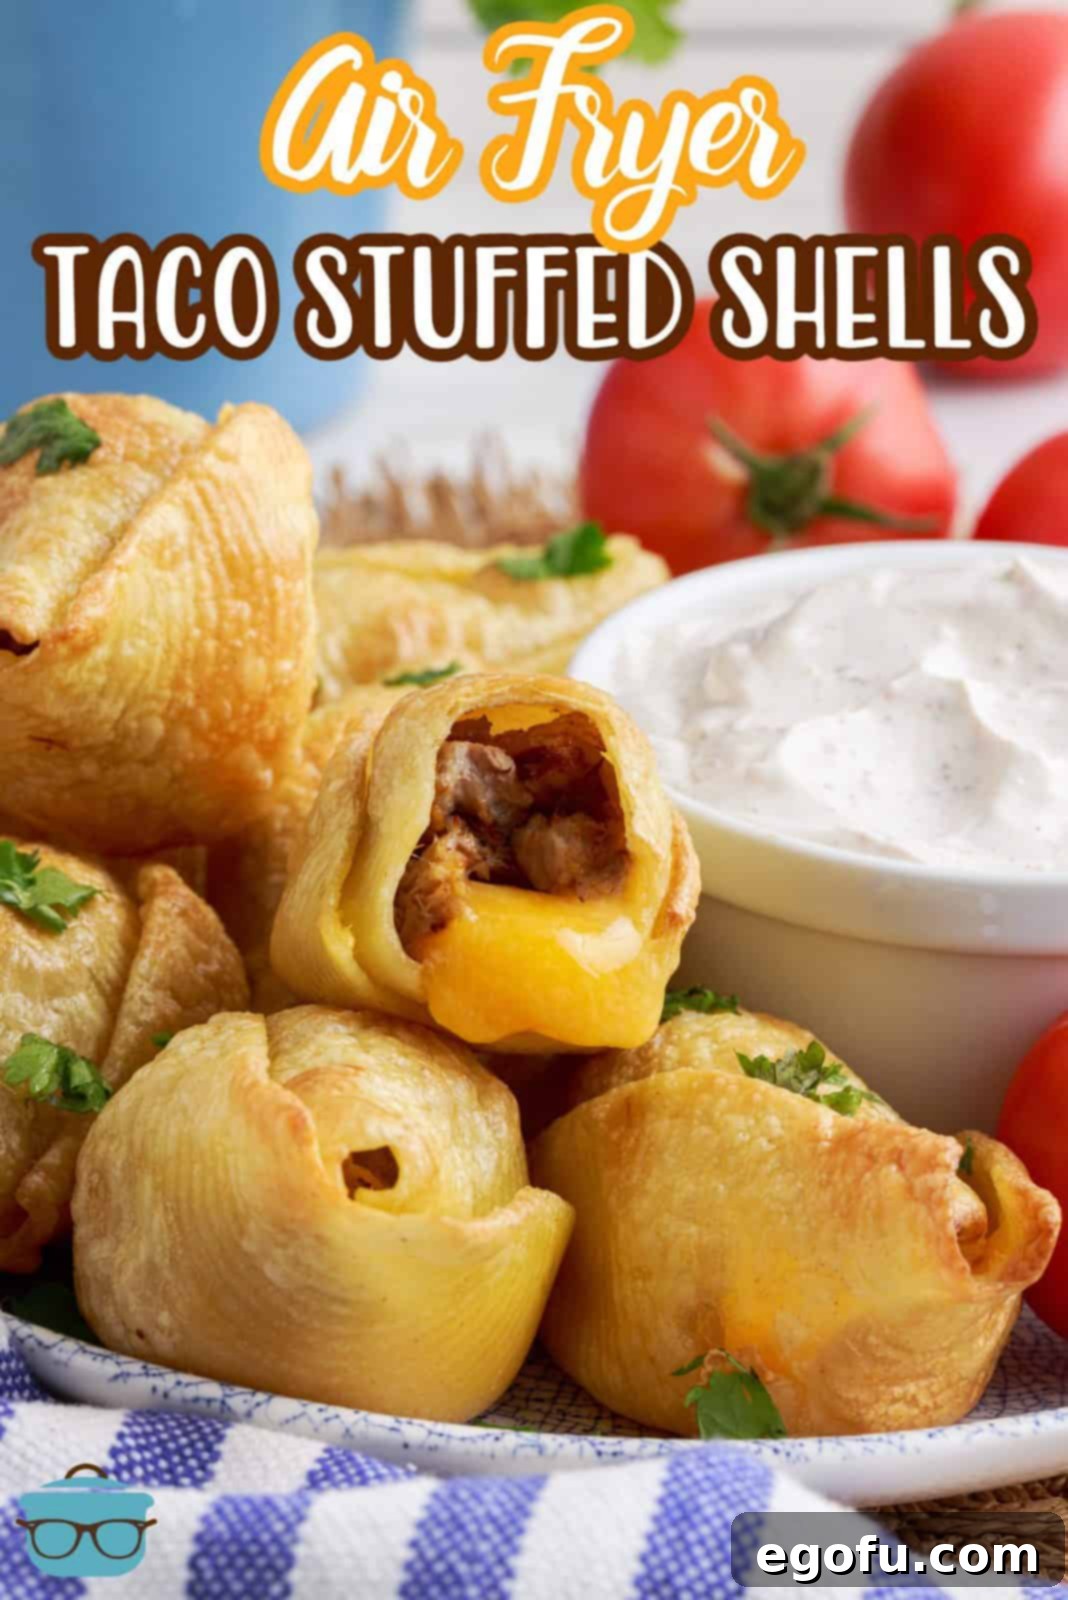
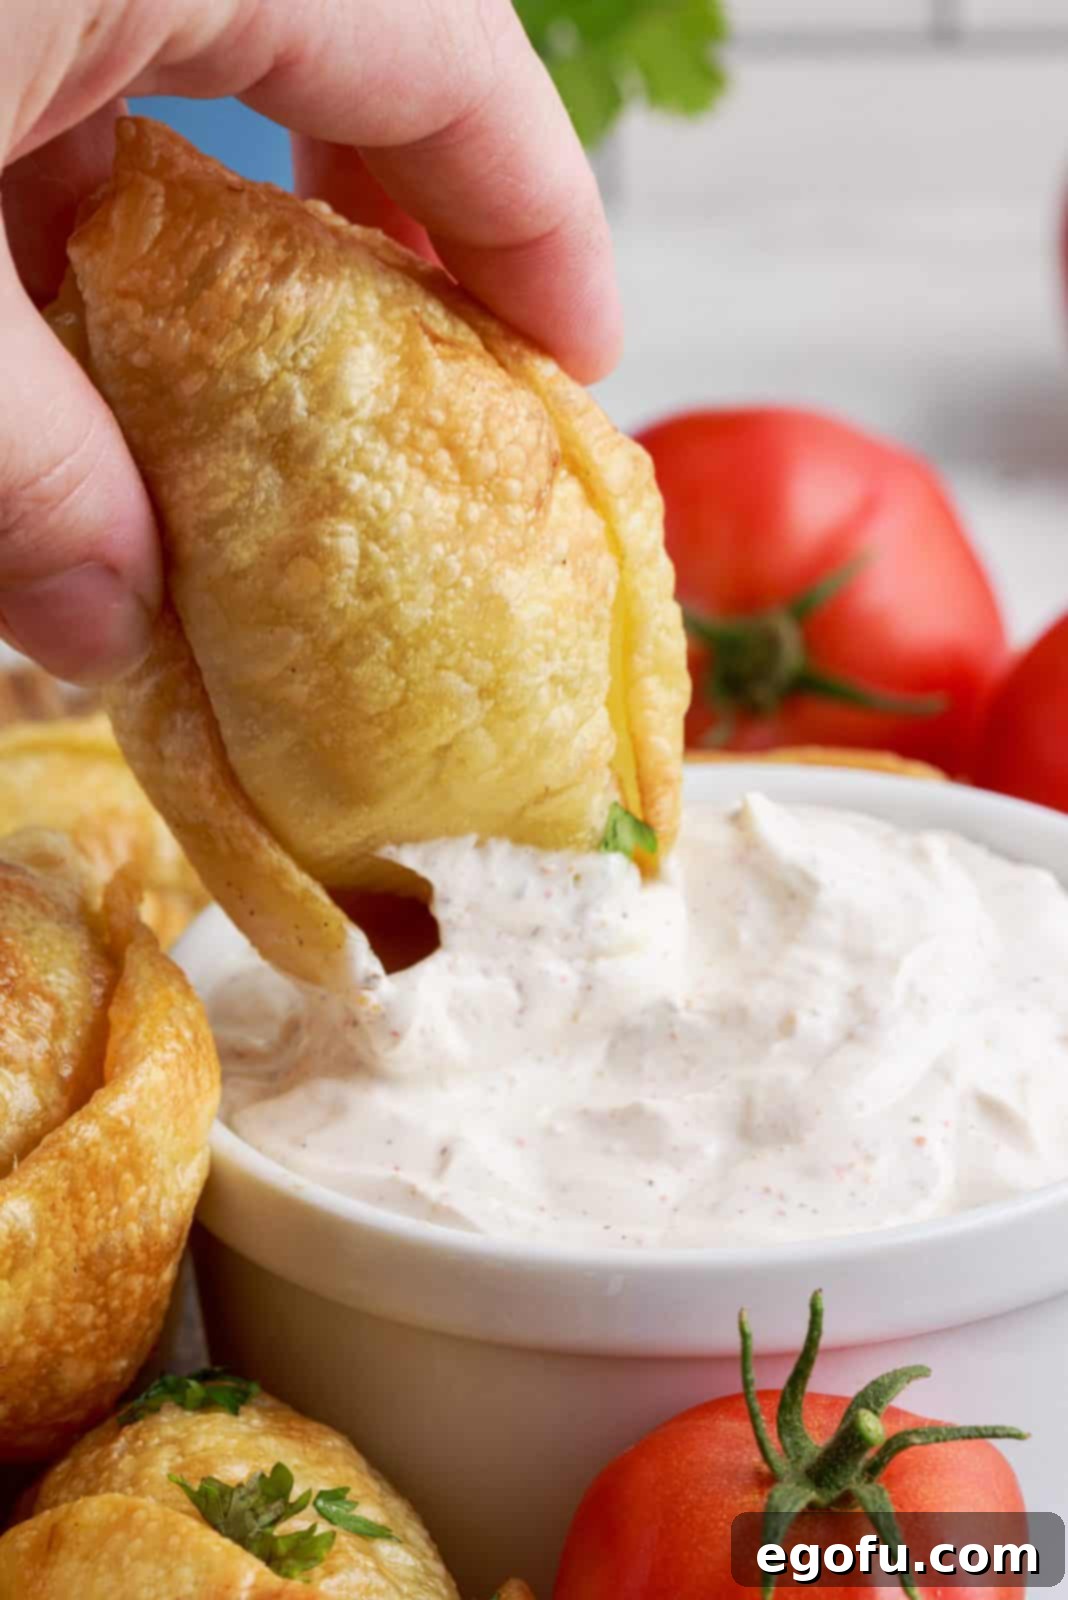
Welcome to a culinary adventure that takes two beloved comfort foods – classic Italian stuffed shells and zesty Mexican tacos – and merges them into an unforgettable dish. These **Air Fryer Taco Stuffed Shells** are not just a recipe; they’re a viral sensation, exploding onto the scene from TikTok and captivating food lovers everywhere. With their perfectly crispy exterior, thanks to the magic of the air fryer, and a gloriously gooey, savory filling of seasoned meat and melted cheese, these shells offer a delightful textural and flavor contrast that will have everyone asking for more. Whether you’re planning a lively game day get-together, a cozy movie night with the family, or simply craving an innovative weeknight dinner, these taco-inspired pasta shells are guaranteed to be a hit. Get ready to impress with this unique and incredibly tasty twist on tradition!
Why You’ll Love These Air Fryer Taco Stuffed Shells
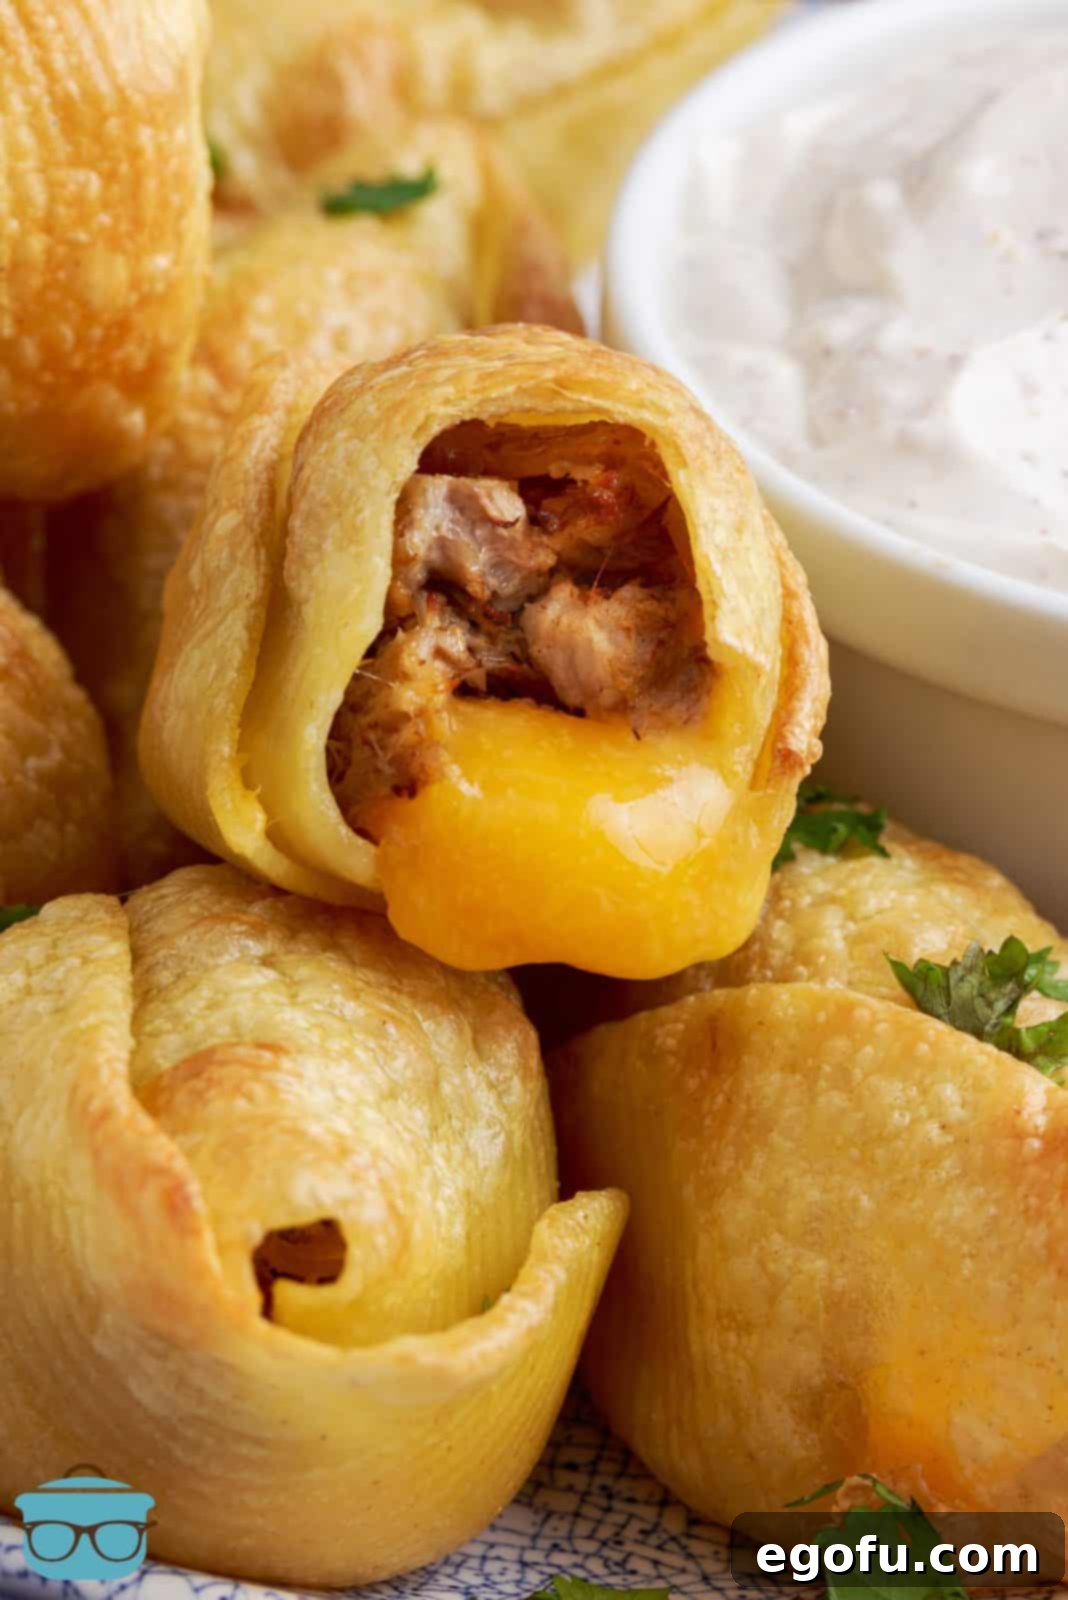
There’s something truly special about dishes that combine simplicity with incredible flavor, and these Air Fryer Taco Stuffed Shells hit all the right notes. First and foremost, their **unbeatable texture** is a game-changer. The air fryer works wonders, transforming ordinary jumbo pasta shells into delightfully crisp pockets, while the inside remains tender and packed with savory goodness. This contrast between a slightly crunchy outer layer and a warm, cheesy, meaty filling creates a sensory experience that’s hard to resist.
Beyond texture, the **flavor profile is pure comfort**. Imagine the familiar, comforting taste of your favorite taco meat—whether it’s rich carnitas, savory ground beef, or zesty chicken fajita filling—perfectly seasoned and nestled with gooey, melted cheddar cheese inside a pasta shell. Each bite is a harmonious blend of Tex-Mex spices and hearty ingredients, making it deeply satisfying and incredibly addictive.
What makes this recipe even more appealing is its **incredible versatility**. Serve them as a crowd-pleasing appetizer that disappears from the platter in minutes, or pair them with your favorite taco night sides like rice, beans, or a fresh salad for a complete and exciting main course. They’re perfect for any occasion, from casual family dinners to festive gatherings. Plus, the customization options are endless, allowing you to tailor the fillings and dipping sauces to suit any palate.
Finally, the **ease of preparation** is a huge bonus. While they look impressive, the process is surprisingly straightforward, especially with the air fryer doing most of the work. If you’re looking to break free from routine and try something new, yet inherently delicious and fuss-free, these Air Fryer Taco Stuffed Shells are an absolute must-try. They offer a unique spin on dinner that promises to become a regular request in your household!
Frequently Asked Questions About Air Fryer Taco Stuffed Shells
While this particular recipe features succulent carnita meat, the beauty of stuffed shells lies in their adaptability. You can easily experiment with a variety of delicious fillings to suit your preferences or what you have on hand. Other fantastic options include well-seasoned taco meat (ground beef or turkey), flavorful chicken fajita filling, or robust beef fajita filling. For an even quicker preparation, don’t hesitate to explore store-bought options from your grocery store’s refrigerated section. Many stores offer pre-cooked carnita, taco, or pulled pork fillings that are ready to go, saving you valuable prep time without sacrificing flavor.
For optimal results with these taco stuffed shells, I highly recommend using a basket-style air fryer. My experience has shown that oven-style air fryers tend to cook these shells unevenly, leading to inconsistent browning and texture. The compact design and powerful circulation of a basket air fryer ensure a more uniform crispness and golden-brown finish on all sides, delivering that perfect crunchy bite we’re aiming for. If you only have an oven-style air fryer, you might need to experiment with placement and potentially flipping for more even cooking.
The goal for these air fryer stuffed shells is a delightful combination of a slightly crisp exterior and a satisfyingly chewy interior. The outside should achieve a light golden-brown crunch, while the pasta itself needs to be fully cooked through to ensure that pleasant chewiness. If your shells turn out overly crispy or hard, it’s often an indication that the pasta wasn’t cooked long enough initially before being air-fried. Ensuring your jumbo shells are tender and cooked completely, not al dente, is key to achieving the desired texture balance.
Spraying the stuffed shells with nonstick cooking spray is a crucial step for achieving that signature crispy texture. The spray helps to facilitate a beautiful golden-brown crust during the air frying process, giving the shells a delicious outer crunch that perfectly complements the soft, flavorful filling. It also prevents the shells from sticking to the air fryer basket, ensuring easy removal and a clean finish.
No, there’s no need to flip these taco stuffed shells during air frying! For the best results, it’s actually preferable to cook them without flipping. The key is to arrange them in a single layer in the air fryer basket, ensuring there’s a little “breathing room” between each shell. This allows the hot air to circulate effectively around them, promoting even cooking and crisping without intervention. In my air fryer, I found that cooking about 8 shells at a time yielded the most consistent and perfectly cooked batches.
While these Air Fryer Taco Stuffed Shells are undoubtedly at their best when served hot and fresh, with that satisfying crispness, you can certainly store any leftovers. Allow them to cool completely before transferring them to an airtight container. They will keep well in the refrigerator for up to 2-3 days. When you’re ready to enjoy them again, you can reheat them in the microwave until they are heated through. Be aware that the exterior might lose some of its initial crispness upon reheating in the microwave, but the delicious flavors will still be there. For a slight return to crispiness, you could try reheating them briefly in the air fryer at a lower temperature, around 300°F-350°F, until warmed through.
Essential Ingredients for Your Taco Stuffed Shells
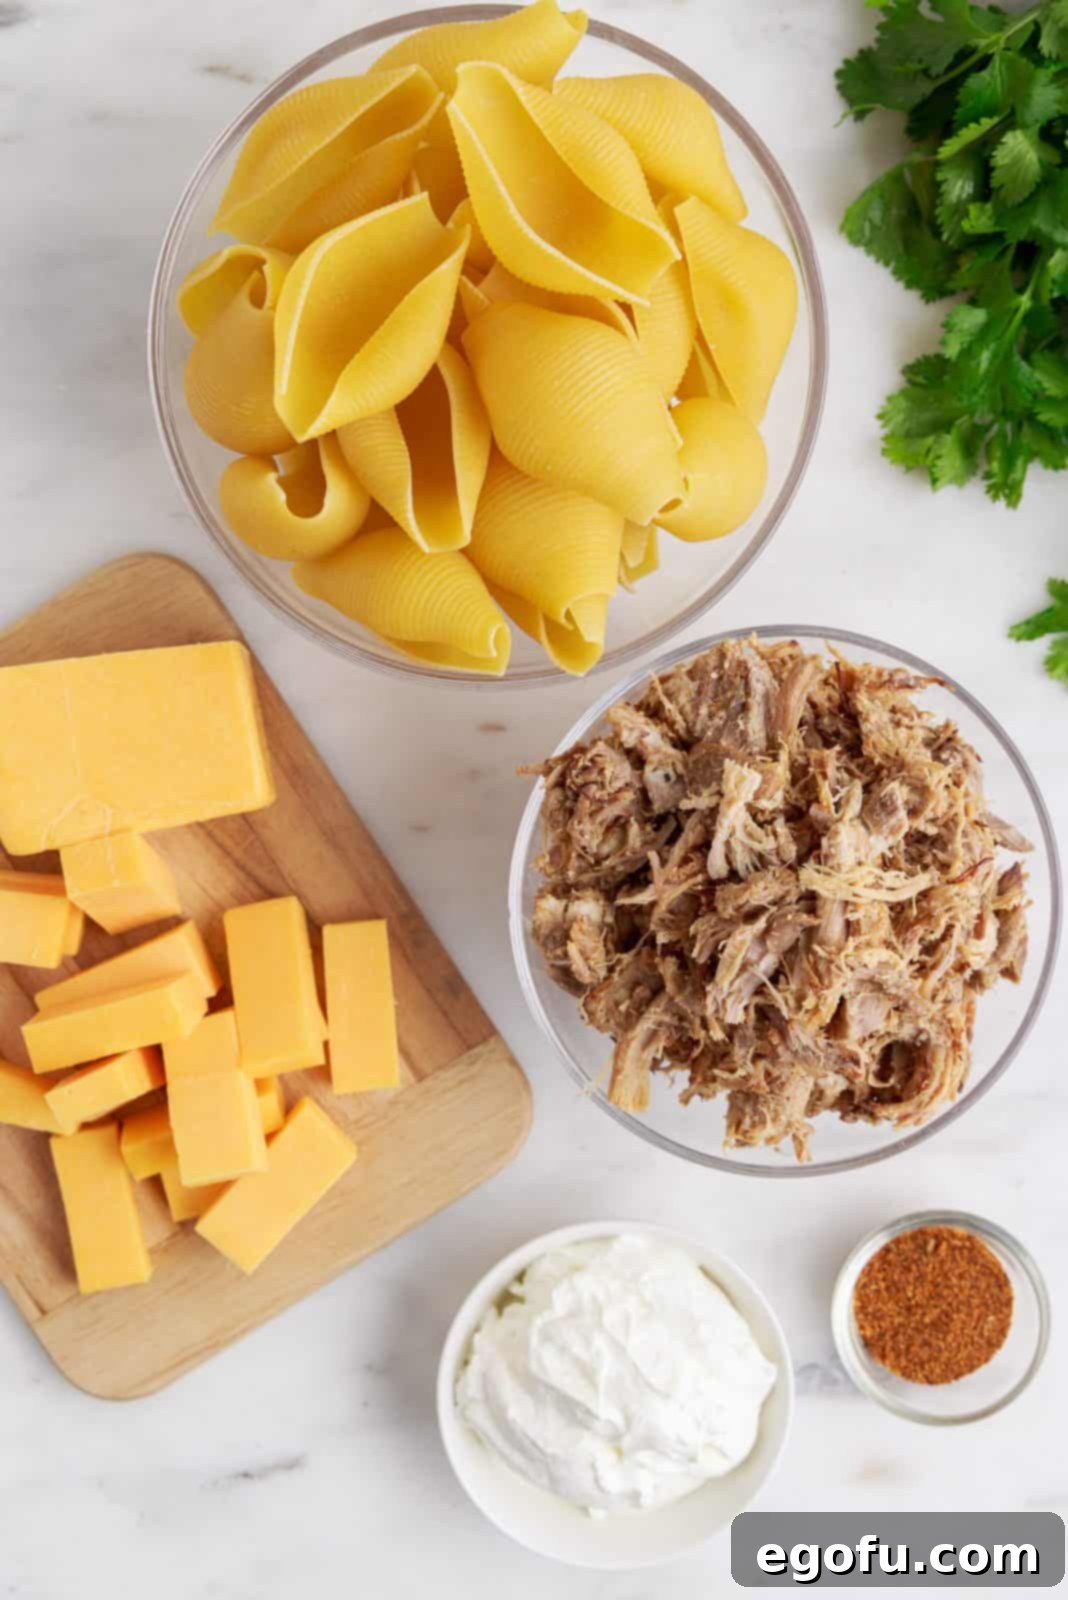
Creating these sensational Air Fryer Taco Stuffed Shells requires just a handful of straightforward ingredients, each playing a vital role in delivering that irresistible flavor and texture. Here’s a closer look at what you’ll need:
- Jumbo Pasta Shells: These are the foundation of our dish. Be sure to select jumbo shells, as their large, curved shape is perfect for holding a generous amount of filling and for creating the “lid” effect.
- Carnitas: Our featured filling for this recipe. Tender, flavorful slow-cooked pork carnitas add a rich, savory depth that is simply unmatched. You can use homemade carnitas for the best flavor, or a high-quality store-bought option for convenience.
- Cheddar Cheese: This cheese is a classic for a reason. Its sharp, familiar flavor and excellent melting properties make it the perfect companion for the taco filling. Cutting it into sticks ensures an easy and even distribution within the shells. Feel free to use a medium or sharp cheddar based on your preference.
- Non-Stick Cooking Spray: Essential for achieving that coveted crispy, golden-brown exterior and preventing the shells from sticking to the air fryer basket.
- Sour Cream: The base for our simple yet delicious dipping sauce. Its creamy texture provides a cooling contrast to the savory shells.
- Taco Seasoning: This spice blend brings all the signature Tex-Mex flavors to life, both in the filling (if you’re making your own taco meat or seasoning the carnitas) and especially in our easy dipping sauce. Adjust the amount to your taste for the perfect kick.
These ingredients, combined with a little creativity and the magic of your air fryer, will come together to create a dish that’s truly extraordinary!
How to Make Air Fryer Taco Stuffed Shells: A Step-by-Step Guide
Crafting these delectable Air Fryer Taco Stuffed Shells is an enjoyable and straightforward process. Follow these detailed steps to achieve perfectly crispy, cheesy, and flavor-packed results every time:
- Prepare the Pasta Shells: Begin by cooking your jumbo pasta shells. In a large pot, bring a generous amount of salted water to a rolling boil. Add the pasta shells and cook them according to the package instructions. It is crucial for this recipe that the shells are cooked all the way through, meaning they should be fully tender and pliable, not al dente. This ensures they have a pleasant chew after air frying and don’t become overly hard or brittle. Once cooked, drain the pasta thoroughly and rinse them under cool water to stop the cooking process and prevent them from sticking together.
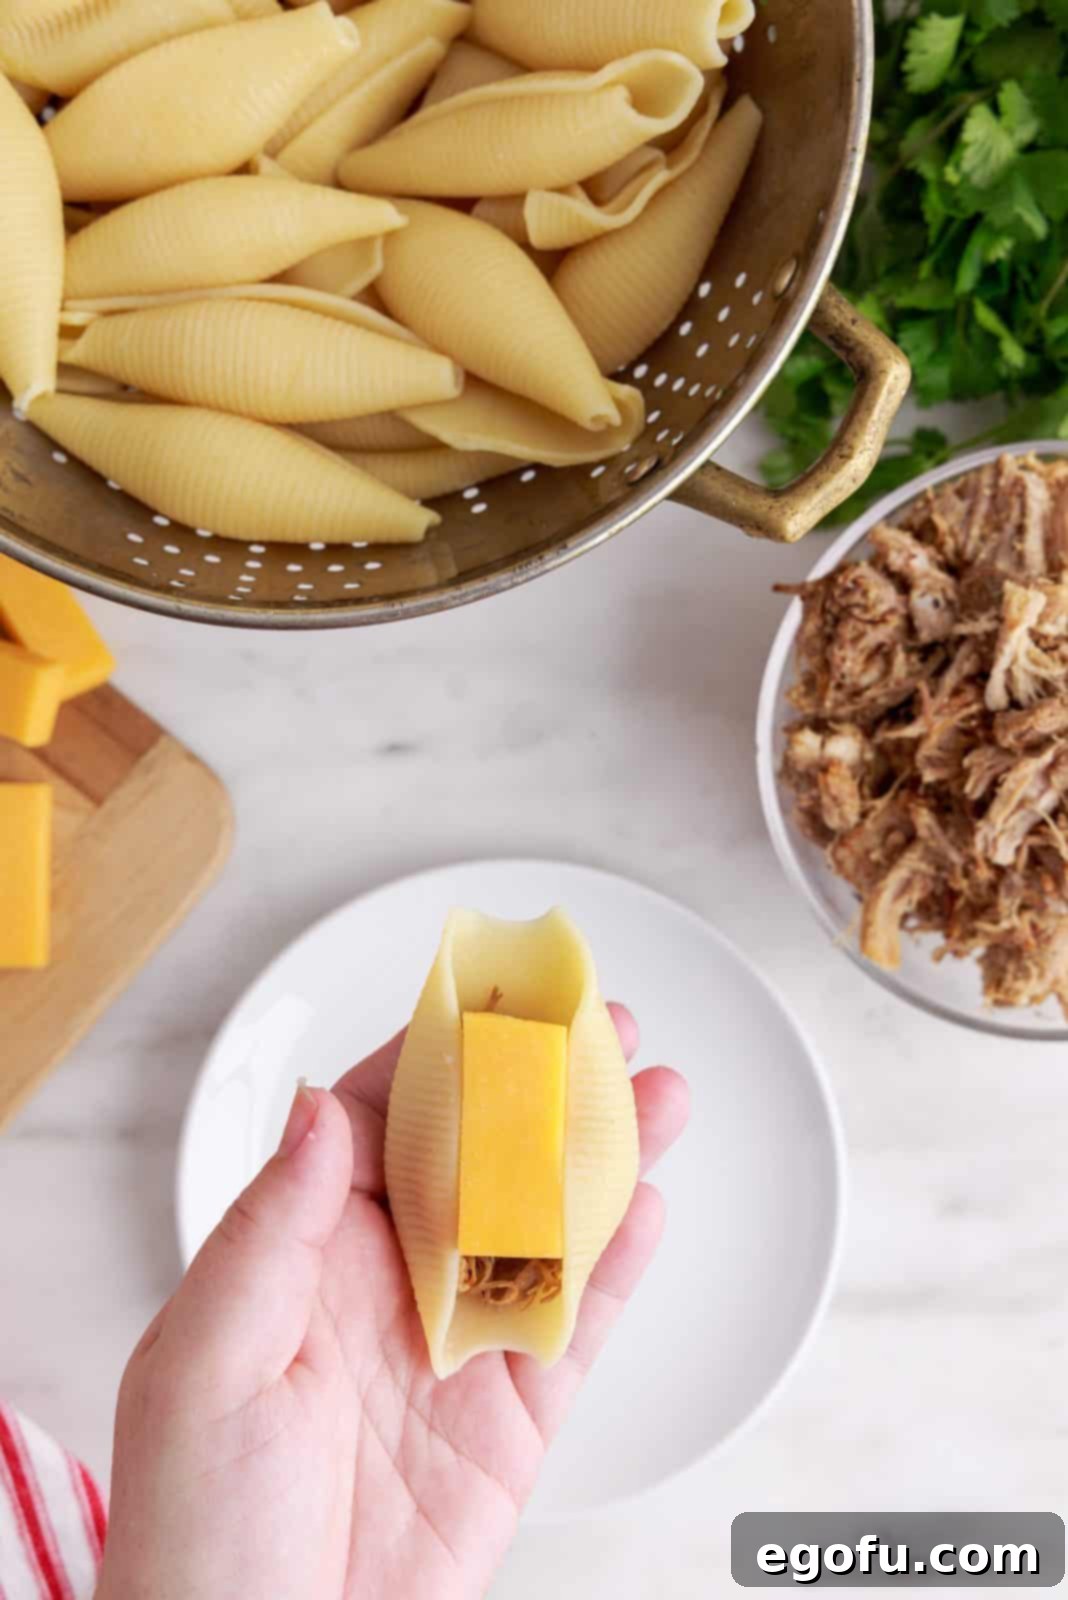
- Fill the First Shell: Once the pasta shells are cool enough to handle, gently cup a single jumbo shell in the palm of your hand. Carefully spoon about one tablespoon of your prepared carnitas (or other chosen meat filling) into the hollow of the shell. Next, take a stick of cheddar cheese and wedge it over the carnitas, ensuring it’s nestled snugly inside. This will create a core of melty cheese that oozes out beautifully when cooked.
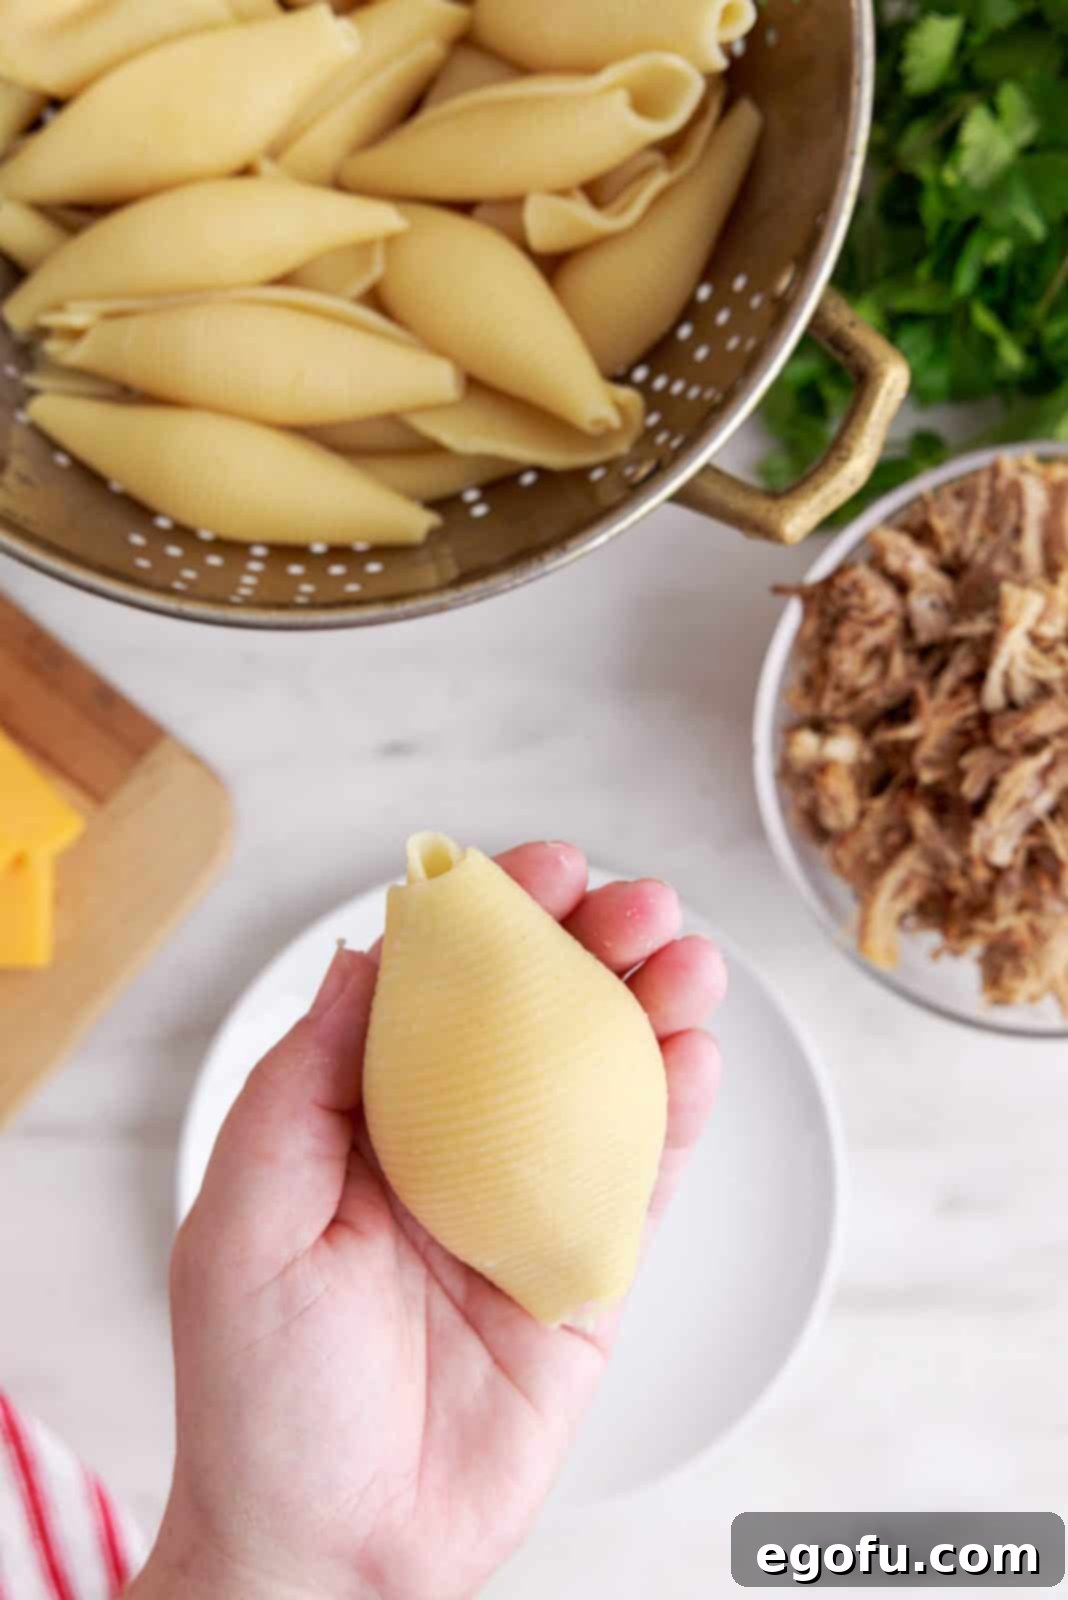
- Create the “Lid”: To complete the individual stuffed shell, take a second cooked jumbo pasta shell. Place it over the open side of the shell you just filled, using it as a “lid.” Gently press the two shells together to form a fully enclosed, taco-like pocket. This ingenious technique helps to keep the filling secure and creates a substantial bite.
- Prepare the Air Fryer: Before loading your delicious creations, lightly spray the bottom of your air fryer basket with nonstick cooking spray. This adds another layer of protection against sticking and contributes to the crispy crust.
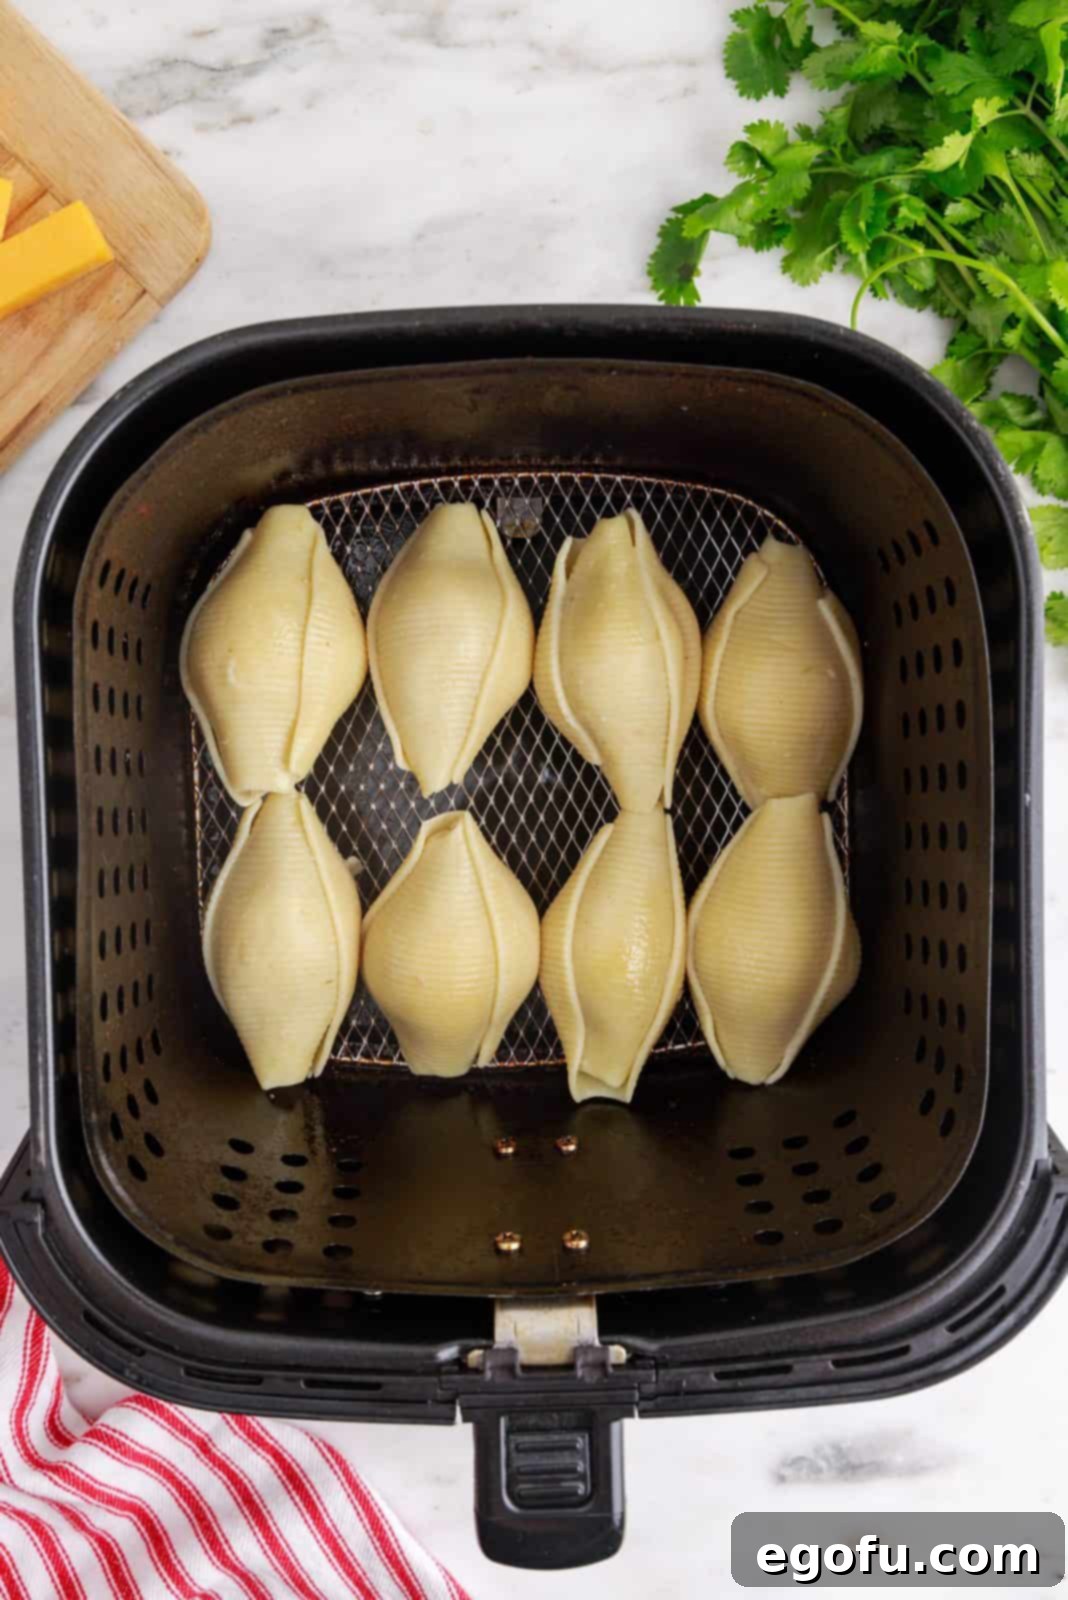
- Arrange Shells for Air Frying: Carefully place the assembled stuffed shells into the prepared air fryer basket. It’s important to leave a small amount of space between each shell. Avoid overcrowding the basket, as this is key for proper air circulation and ensures each shell crisps up evenly. Depending on the size of your air fryer, you’ll likely cook these in batches (I found that 8 shells fit perfectly in my basket at a time).
- Season and Cook the First Batch: Once the air fryer basket is filled with a single layer of shells, give the tops and any exposed sides of the stuffed shells another light spray with nonstick cooking spray. This second spray further promotes that beautiful golden-brown crispness. Close the air fryer and cook the shells at 400°F (200°C) for 13 minutes. Keep an eye on them during the last few minutes to ensure they reach a light golden brown and perfectly crispy texture.

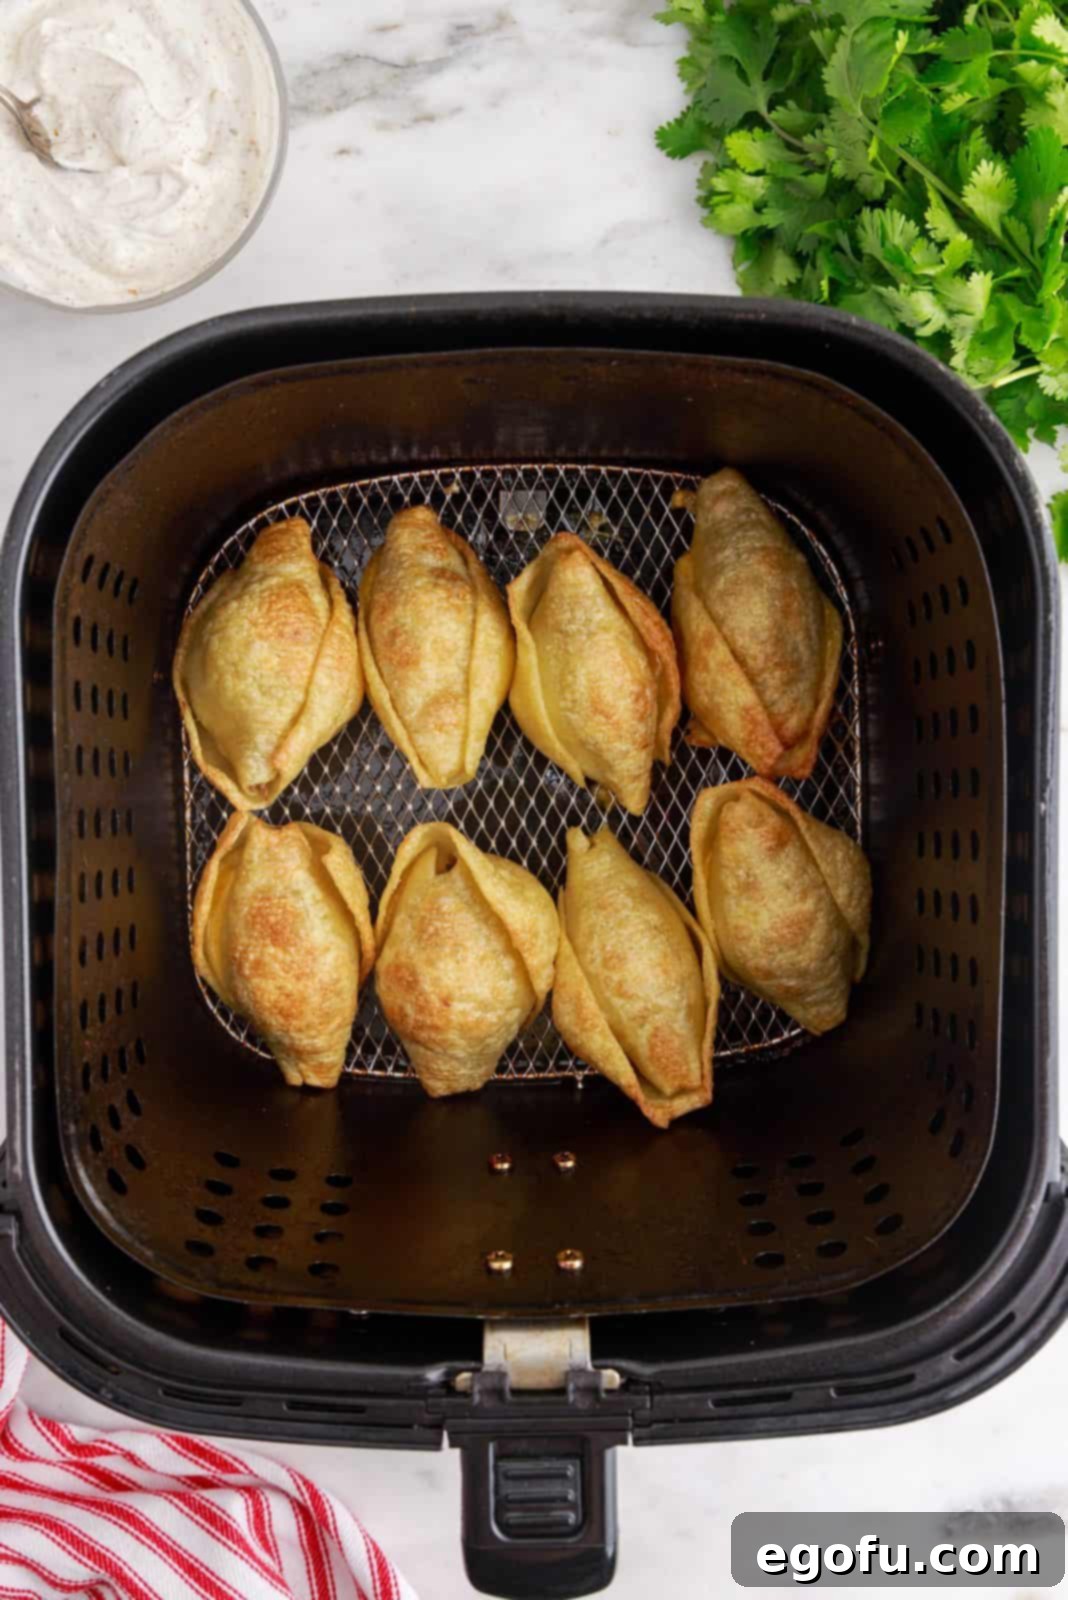
- Repeat and Keep Warm: Once the first batch is cooked to perfection, carefully remove the crispy shells from the air fryer basket. Place them on a serving platter or a plate lined with paper towels (to absorb any excess oil) and keep them warm while you cook the remaining batches.
- Prepare the Dipping Sauce: While the shells are cooking, or during a break between batches, quickly prepare the dipping sauce. In a small bowl, combine the sour cream and taco seasoning. Stir them together until well blended and smooth. Taste and adjust the amount of taco seasoning to your personal preference – some like a milder flavor, while others prefer a more intense kick.
- Serve and Enjoy: Once all the Air Fryer Taco Stuffed Shells are cooked, arrange them attractively on a serving dish alongside your prepared taco-seasoned sour cream dipping sauce. Encourage everyone to dive in and experience this delightful fusion of flavors and textures. Enjoy every crispy, cheesy, and savory bite!
Tips for Perfection and Creative Variations
To ensure your Air Fryer Taco Stuffed Shells turn out perfectly every time, and to inspire your culinary creativity, here are some invaluable tips and exciting variations:
- Pasta doneness is key: As mentioned in the instructions, cook your jumbo shells until they are fully tender, not al dente. This is crucial for achieving the desired soft chewiness inside that complements the crispy exterior from the air fryer. If they’re too firm initially, they can become tough or brittle after air frying.
- Don’t overcrowd the air fryer: For even browning and crispiness, always cook the shells in a single layer, ensuring there is some space around each one. Cooking in batches is necessary and well worth the effort for superior results.
- Experiment with fillings: While carnitas are fantastic, feel free to get creative!
- Ground Beef/Turkey: Brown 1 lb of ground meat, drain excess fat, and season generously with 2 tablespoons of taco seasoning and a splash of water.
- Shredded Chicken: Use leftover rotisserie chicken or cook chicken breasts and shred them. Mix with a little salsa or enchilada sauce for moisture and flavor.
- Vegetarian Options: Try a black bean and corn salsa mixture, seasoned sweet potatoes, or a hearty sautéed mushroom and onion blend with taco seasoning. Ensure vegetarian fillings are not too wet.
- Cheese choices: Cheddar is a classic, but don’t limit yourself! Monterey Jack, Pepper Jack (for a spicy kick), or even a Mexican blend cheese would work wonderfully. You can also mix a little cream cheese into your meat filling for extra creaminess.
- Enhance the dipping sauce: The sour cream and taco seasoning sauce is simple and delicious, but you can elevate it further. Add a squeeze of lime juice, a dash of hot sauce, or a sprinkle of fresh cilantro. Other great dipping options include guacamole, salsa, queso, or even a creamy ranch dressing.
- Spice it up: If you love heat, consider adding finely diced jalapeños (fresh or pickled) to your filling, or a pinch of cayenne pepper to the taco seasoning.
- Garnishes: A sprinkle of fresh cilantro, chopped green onions, or a dollop of extra sour cream or guacamole can add a beautiful finishing touch and fresh flavor.
Serving Suggestions for Any Occasion
These Air Fryer Taco Stuffed Shells are incredibly versatile, making them suitable for a wide array of dining occasions. As a sensational appetizer, arrange them on a platter with your dipping sauce and watch them disappear at parties, game nights, or family gatherings. For a more substantial main course, they pair wonderfully with classic Mexican-inspired sides. Consider serving them alongside a vibrant cilantro-lime rice, hearty black beans, or a crisp, refreshing side salad with a zesty vinaigrette. They also make a fantastic addition to a build-your-own taco bar, offering an exciting new component that guests will love. No matter how you choose to serve them, these crispy, cheesy delights are sure to be a memorable and much-loved dish.
Storage and Reheating Instructions
While these taco stuffed shells are truly best enjoyed fresh out of the air fryer for maximum crispness, leftovers can be stored and reheated. Allow any remaining shells to cool completely to room temperature before transferring them to an airtight container. They will keep well in the refrigerator for up to 2 to 3 days. To reheat, you can use a microwave for convenience; however, be aware that the exterior crispness will likely soften. For a better texture, place the shells back in the air fryer at a moderate temperature (around 300°F – 350°F or 150°C – 175°C) for 5-8 minutes, or until heated through and slightly re-crisped. This method helps restore some of that initial crunch and ensures a more satisfying experience.
CRAVING MORE RECIPES? GIVE THESE A TRY!
- TikTok Cinnamon Rolls
- TikTok Tomato Feta Pasta
- TikTok Quesadilla Hack
- TikTok Marry Me Chicken
- TikTok Grinder Salad Sandwich
Credit for this amazing recipe idea goes to @amyshaba on TikTok!
Air Fryer Taco Stuffed Shells
A fun mash-up of two recipes, these Air Fryer Taco Stuffed Shells make a great dinner or appetizer that everyone will love!
Prep Time: 30 minutes
Cook Time: 13 minutes
Total Time: 43 minutes
Servings: 24 shells
Author: Brandie Skibinski
Print Recipe | Pin Recipe
Ingredients
Main Shells:
- 1 pound box of jumbo pasta shells (about 48 shells)
- 2 cups carnitas
- 24 ounces cheddar cheese, cut into 1 ounce sticks
- Non-stick cooking spray
Dipping Sauce:
- 1 cup sour cream
- 1 tablespoon taco seasoning (more or less to taste)
Instructions
- In a large pot of boiling salted water, cook pasta shells according to package instructions. Shells should be fully cooked, not al dente. Drain pasta and rinse with cool water.
- Cupping a pasta shell in your palm, place about a tablespoon of the carnitas into the shell. Wedge a stick of cheese over the carnitas.
- Wrap a second shell over the open side of the stuffed shell to form a “lid.”
- Spray the bottom of the air fryer basket with nonstick cooking spray.
- Set the stuffed shells in the basket of the air fryer, leaving just a bit of space between each shell.
- Continue assembling the stuffed shells. Once the air fryer basket is filled, you can begin cooking the batch.
- Spray the tops and exposed sides of the stuffed shells in the basket. Cook at 400°F (200°C) for 13 minutes until the shells are crispy and light golden brown.
- Remove shells from the basket and keep warm while cooking the remaining batches.
- To make dipping sauce, in a bowl stir together sour cream and taco seasoning. Serve and enjoy!
Notes
- You can use various fillings in these, such as seasoned ground beef, shredded chicken, or even vegetarian options. See the “Tips for Perfection and Creative Variations” section above for more ideas.
- Feel free to experiment with different types of cheese beyond cheddar, such as Monterey Jack or a Mexican blend.
- The shells should be crispy on the outside but still have a nice chewiness. If they are too crispy and hard, it’s likely the pasta wasn’t cooked long enough initially.
- For the best results, only a basket-style air fryer is recommended, as oven-style air fryers may cook them unevenly.
Course: Appetizer, Main Course
Cuisine: American
Nutrition
Calories: 229kcal | Carbohydrates: 15g | Protein: 13g | Fat: 13g | Sodium: 202mg | Fiber: 1g | Sugar: 1g
Nutritional Disclaimer
“The Country Cook” is not a dietician or nutritionist, and any nutritional information shared is an estimate. If calorie count and other nutritional values are important to you, we recommend running the ingredients through whichever online nutritional calculator you prefer. Calories and other nutritional values can vary quite a bit depending on which brands were used.
Did you make this recipe?
Share it on Instagram @thecountrycook and mention us #thecountrycook!
We hope you love these Air Fryer Taco Stuffed Shells as much as we do! They truly are a fantastic representation of how simple ingredients and smart cooking methods can create something extraordinarily delicious. Whether you’re serving them up for a casual weeknight meal or as an exciting snack for your next gathering, their unique crispy texture and savory taco filling are sure to delight every palate. Don’t be afraid to experiment with your favorite taco fillings and cheeses to make this recipe truly your own. Happy cooking, and get ready for a new family favorite!
