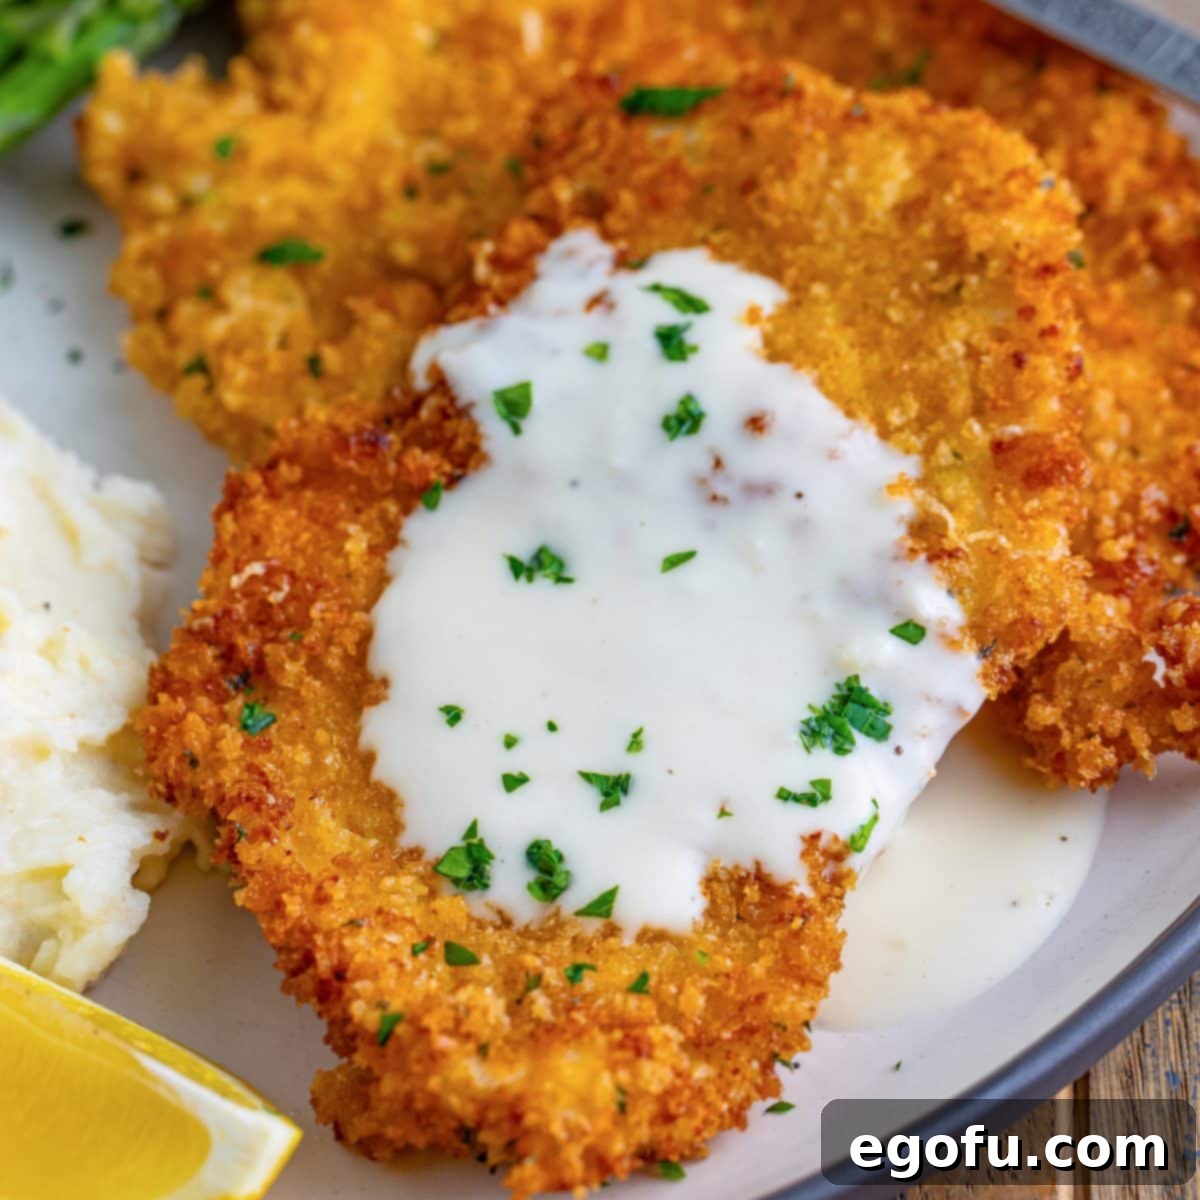
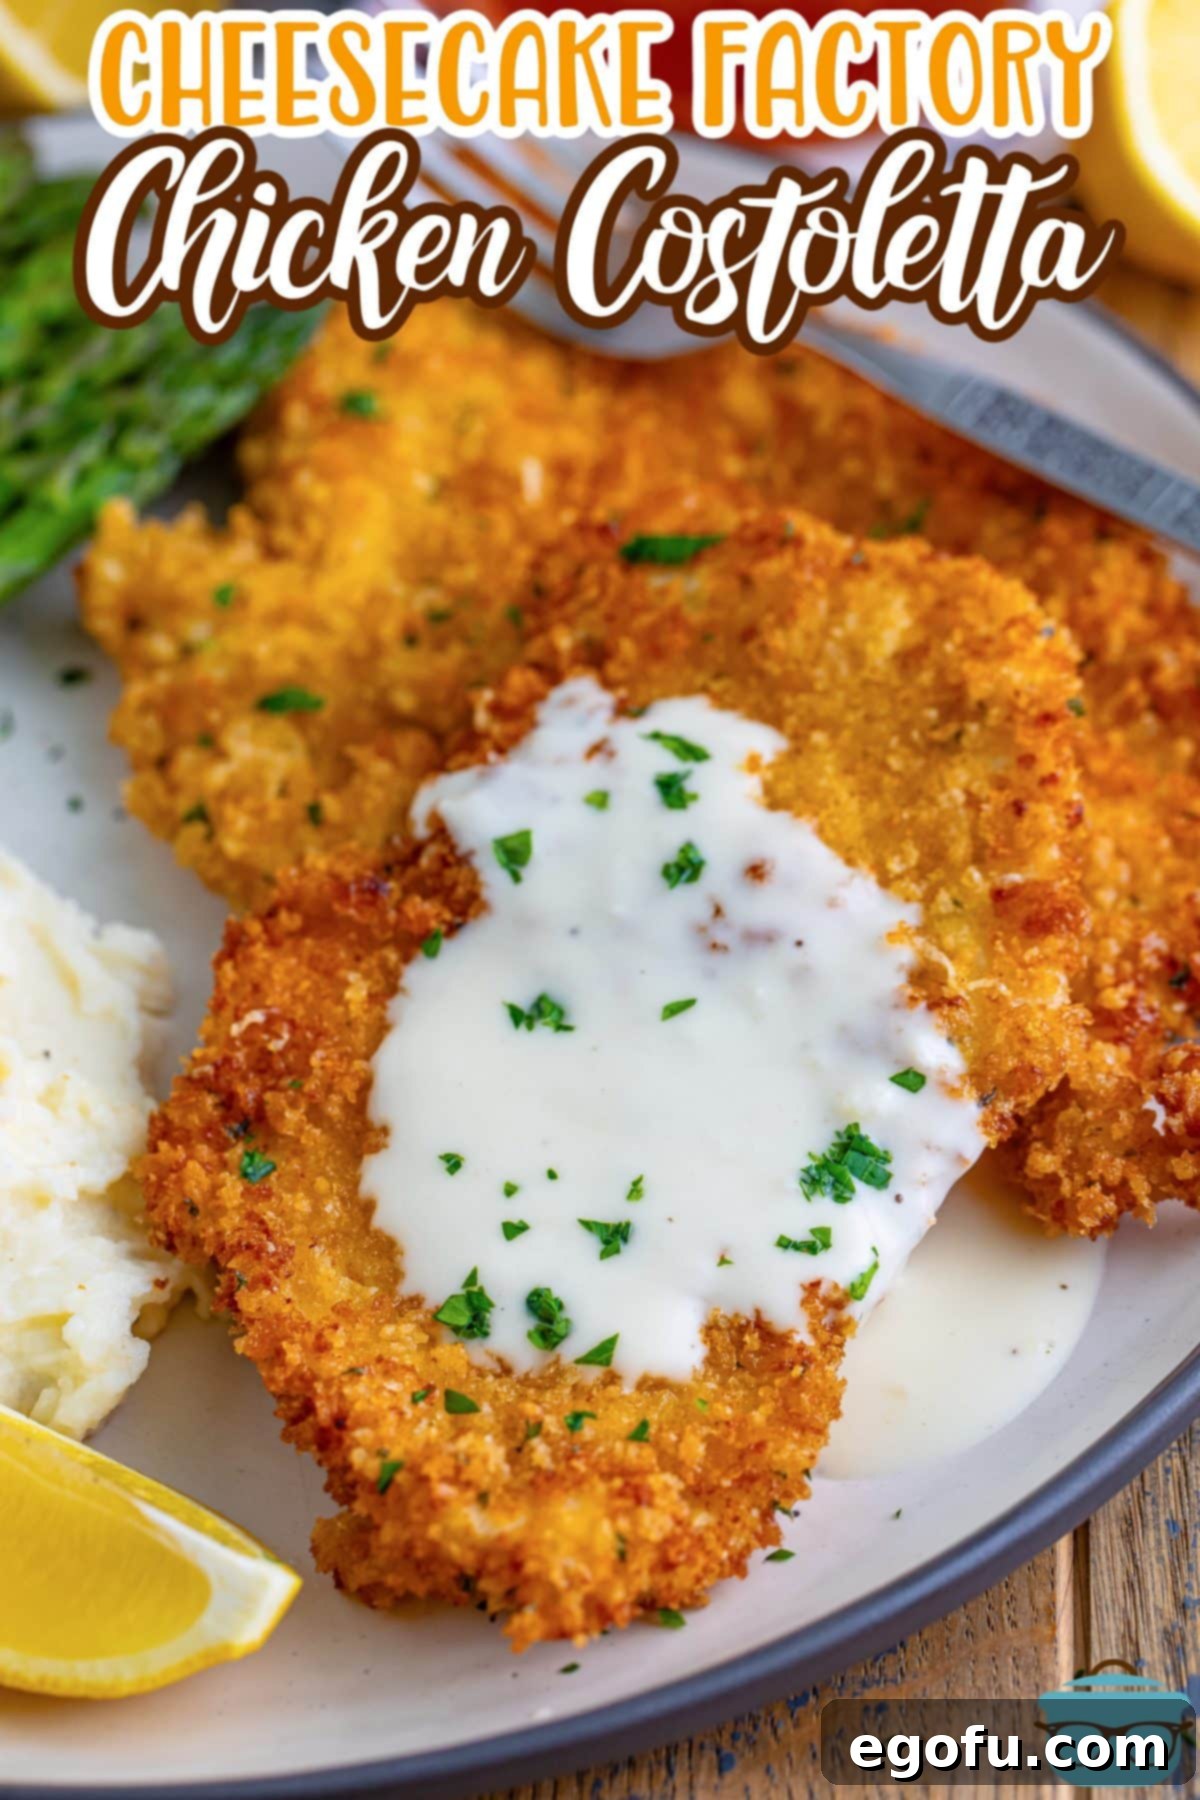
Experience the unparalleled flavor of Cheesecake Factory Chicken Costoletta from the comfort of your home. This exquisite dish features tender, thin-cut chicken breasts, expertly coated in crispy Panko breadcrumbs, fried to golden perfection, and generously topped with a rich, creamy lemon sauce that will transport your taste buds straight to your favorite restaurant table.
Cheesecake Factory Chicken Costoletta: Your Ultimate Copycat Recipe Guide
Have you ever found yourself intensely craving that incredibly delicious Chicken Costoletta from The Cheesecake Factory, only to realize there isn’t a convenient location nearby? You are certainly not alone! This beloved menu item is a true standout, consistently earning its place as a top favorite for many diners. Its irresistible combination of crispy chicken and a vibrant, creamy lemon sauce makes it truly memorable. The wonderful news is that you can effortlessly replicate this gourmet restaurant experience in your own kitchen with our meticulously crafted copycat recipe.
While the detailed ingredient list might initially appear extensive or even a bit complex, we promise that preparing this magnificent dish is far simpler and more approachable than it looks. The secret to its success lies in strategically building layers of incredible flavor, ensuring each bite is as satisfying as the last. Every step contributes to a culinary masterpiece that is absolutely worth the effort. Get ready to impress your family and friends with a restaurant-quality meal that’s both engaging to make and unbelievably tasty!
Frequently Asked Questions About This Delicious Dish
- What does Chicken Costoletta mean in Italian?
In Italian, the term “Costoletta” directly translates to “cutlet.” So, at its very core, this famously named dish is simply a sophisticated way of referring to chicken cutlets, which are then magnificently elevated with a uniquely special and flavorful sauce. While the name itself sounds quite grand and refined, it perfectly captures the elegant simplicity and incredible deliciousness that makes this chicken dish stand out far beyond just “chicken cutlets.” It’s a fun and appealing name for a genuinely outstanding meal.
- Can I air fry the chicken instead of traditional pan frying?
Yes, air frying presents a viable and healthier alternative if you prefer to minimize the use of oil compared to conventional pan frying. However, it’s important to note that for the signature, irresistible crispiness that truly rivals The Cheesecake Factory’s authentic version, pan frying in oil is highly recommended. If you do opt for the air fryer, begin by preheating it to 400°F (200°C). Thoroughly coat the thin chicken breasts as directed in our recipe, then lightly mist them with cooking spray to aid in browning and crisping. Arrange the coated chicken in a single layer in the air fryer basket, ensuring not to overcrowd it to allow for optimal air circulation. Cook for approximately 4-5 minutes per side, or until the chicken achieves a beautiful golden brown color and an internal temperature of 165°F (74°C), verifiable with a reliable meat thermometer. Please be aware that while still delicious, the air-fried texture might be slightly less intensely crispy than its pan-fried counterpart.
- Is this considered a heavy meal?
Despite common perceptions that fried chicken served with a creamy sauce might constitute a heavy, “stick-to-your-ribs” kind of meal, Chicken Costoletta surprisingly defies this expectation. The culinary brilliance of this recipe lies in its perfectly balanced flavors: the vibrant, zesty lemon cream sauce ingeniously cuts through and lightens the richness of the lightly fried, thin chicken cutlets. Unlike a thick, heavy, or traditional sawmill gravy, this delicate sauce is specifically designed to complement and enhance rather than overpower, creating a harmonious and profoundly satisfying meal that leaves you feeling pleasantly full without any undesirable heaviness. Furthermore, the chicken cutlets are pounded thin, making them much lighter than thicker, more substantial fried chicken preparations. For those seeking an even lighter touch, you can easily substitute the heavy cream with half-and-half or even whole milk in the sauce, adjusting the consistency as desired.
- What are the best side dishes to serve with Chicken Costoletta to complete the experience?
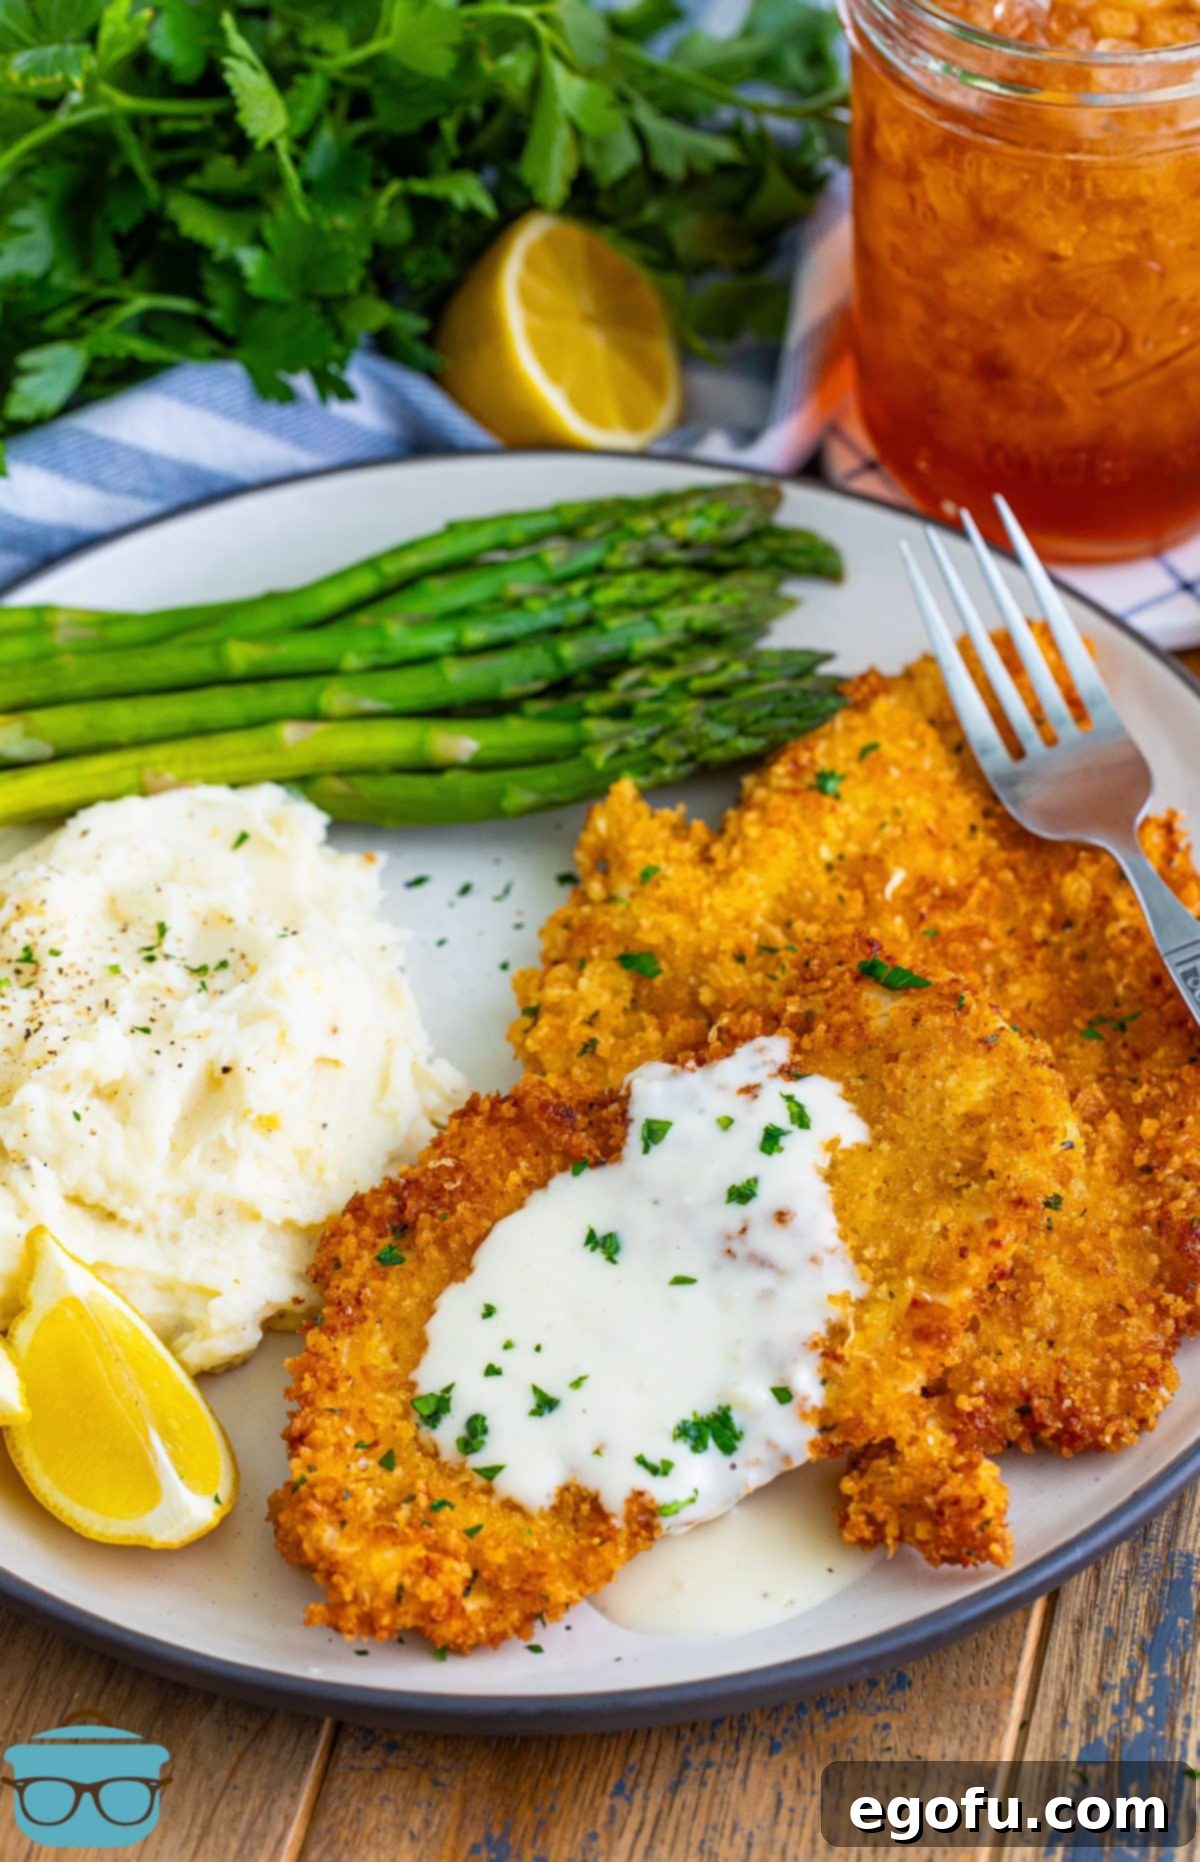
To truly capture and replicate the quintessential Cheesecake Factory dining experience, we highly recommend serving your homemade Chicken Costoletta alongside a generous portion of incredibly creamy Stovetop Mashed Potatoes or delightfully indulgent Crock Pot Million Dollar Potatoes, perfectly paired with fresh, crisp, steamed asparagus. These classic accompaniments provide a magnificent textural and flavor contrast, beautifully complementing the rich chicken and its zesty sauce. Other equally excellent choices include a simple, refreshing green salad dressed with a light vinaigrette, some tender roasted broccoli, or even a side of buttered egg noodles which are perfect for soaking up every last drop of that delectable lemon cream sauce. Ultimately, feel free to choose any side dish that perfectly suits your personal palate and makes your meal complete!
- How many servings does this particular recipe yield?
This recipe is thoughtfully designed to generously serve four individuals. If you are well-acquainted with The Cheesecake Factory’s notoriously large and abundant portion sizes, you might observe that the quantity this recipe produces feels akin to two of their exceptionally substantial restaurant servings. While they are indeed renowned for their generous plates, our recipe provides a realistic and satisfying four individual servings of perfectly cooked chicken, ensuring that everyone at your table receives a hearty portion. Often, this means you might even have some delicious leftovers to anticipate and enjoy the following day!
- Is the provided amount of sauce sufficient, or should I consider making more?
The luscious, creamy lemon sauce is, in our humble opinion, the undisputed star of this entire dish, acting as the magical element that truly binds all the magnificent flavors together. The provided recipe yields a generous and ample amount of this decadent sauce, which is perfectly suited for artfully drizzling over each golden chicken cutlet. However, if you are someone who passionately loves to have an abundance of sauce – enough to truly smother your chicken and perhaps even some of your favorite side dishes – or if you are planning to serve a larger gathering, we wholeheartedly encourage you to double the sauce recipe. Trust us, you will absolutely not regret having a little extra of this liquid gold on hand!
- What is the best method for reheating leftover Chicken Costoletta to maintain its quality?
For the absolute best results when reheating your delicious leftover chicken, we strongly recommend utilizing either an oven or an air fryer. This superior method is crucial for helping to restore the chicken’s delightful crispiness, effectively preventing it from becoming soggy or losing its desirable texture. Simply preheat your oven to 350°F (175°C) or your air fryer to 375°F (190°C), and reheat the chicken until it is thoroughly warmed through and has regained its lovely crispy exterior. We advise against using a microwave for reheating, as it almost invariably tends to make breaded chicken less appealing and often results in a rubbery texture.
- How should I properly store leftover Chicken Costoletta?
To effectively maintain the optimal quality and freshness of your leftovers, it is highly recommended to store the cooked chicken and the luscious lemon cream sauce separately. Place the crispy chicken in an airtight container and transfer the sauce into another separate airtight container, then refrigerate both promptly for up to three days. For extended storage, both the chicken and the sauce are freezer-friendly and can be safely frozen for up to three months. When preparing to freeze, always ensure the chicken is completely cooled before placing it into freezer-safe bags or containers; this crucial step helps to prevent the formation of undesirable ice crystals and preserves the texture.
Essential Ingredients for Your Copycat Chicken Costoletta
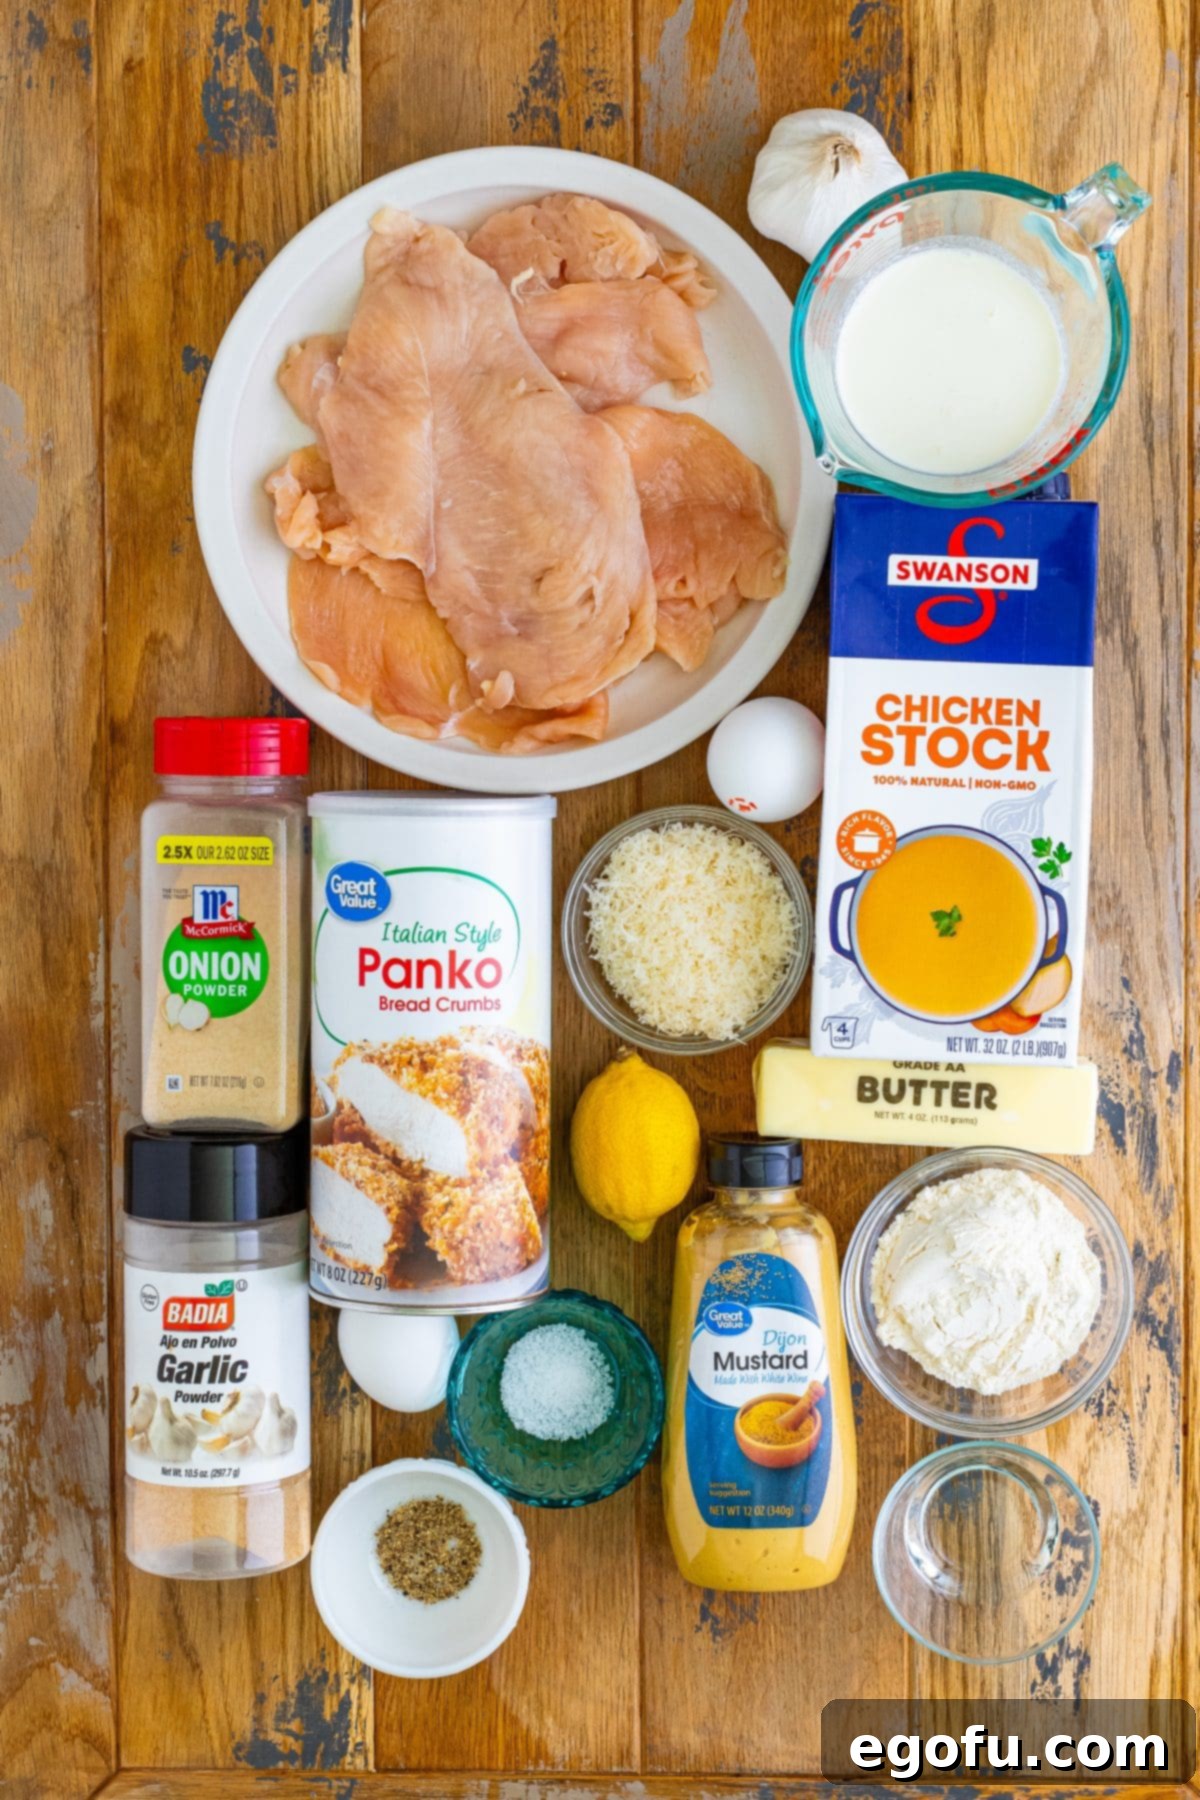
Crafting the perfect Cheesecake Factory Chicken Costoletta from scratch requires a thoughtful selection of quality ingredients, essential for both the irresistibly crispy chicken and its signature decadent creamy lemon sauce. Here’s a detailed look at what you’ll need and precisely why each component is crucial for achieving that authentic, restaurant-quality flavor and texture:
- All-Purpose Flour: This versatile flour forms the essential first layer of our breading process. It provides a dry, starchy base that helps the subsequent egg wash adhere properly and uniformly to the chicken, creating a stable foundation for the Panko breadcrumbs. This ensures an even coating and a consistently crisp exterior.
- Garlic Powder, Onion Powder, Salt, and Pepper: These foundational dry seasonings are indispensable for infusing the chicken with savory depth and a robust flavor from the very first coating layer. When combined with the pre-added seasonings commonly found in Italian Panko breadcrumbs, they create a beautifully balanced and aromatic flavor profile that penetrates the chicken. You can always adjust these quantities to suit your personal taste preferences or even consider adding a pinch of other dried herbs like oregano or thyme for an extra layer of Mediterranean-inspired complexity.
- Large Eggs & Water: Whisked together vigorously with a splash of water, large eggs create the crucial binder known as an egg wash. This sticky mixture ensures that the dry ingredients and breadcrumbs fully adhere to the chicken surface, which is absolutely vital for developing that desirable crunchy and secure crust that defines Chicken Costoletta.
- Italian Panko Breadcrumbs: While regular Italian breadcrumbs can certainly be used, we emphatically recommend Italian Panko breadcrumbs for this recipe. Panko breadcrumbs are distinctly flakier, lighter, and possess a more porous structure, meaning they absorb significantly less oil during frying. This results in a remarkably crispier, airier, and less greasy texture – precisely like the Chicken Costoletta you savor at The Cheesecake Factory. The Italian variety also conveniently contains pre-seasoned herbs and spices, adding an additional layer of aromatic flavor.
- Lemon Zest: Freshly grated lemon zest is an absolute non-negotiable ingredient, paramount for brightening the overall flavor profile of the breading. It infuses the chicken with a delightful, aromatic, and concentrated citrusy note that beautifully complements the creamy lemon sauce and enhances the entire dish. Do not skip this for an authentic and vibrant touch!
- Grated Parmesan Cheese: Incorporating finely grated Parmesan cheese into the breading mixture adds a wonderfully savory, umami-rich flavor. It also plays a key role in contributing to that gorgeous golden-brown finish and delicate crispness achieved during the frying process. Ensure you use finely grated Parmesan for optimal distribution and adhesion.
- Thin-Cut Chicken Breasts: The hallmark characteristic of Chicken Costoletta is its elegantly thin, tender chicken cutlets. If you find that thin-cut chicken breasts are not readily available at your local grocery store, simply purchase standard boneless, skinless chicken breasts and pound them evenly to approximately ¼ to ½ inch thickness using a meat mallet or the flat side of a heavy pan. Then, slice them into 4 individual pieces. For a slightly richer flavor and an even juicier texture, boneless, skinless chicken thighs can also be wonderfully substituted.
- Oil for Frying (e.g., Peanut Oil): It is crucial to choose a cooking oil with a high smoke point for effective frying, such as peanut oil, canola oil, or vegetable oil. Peanut oil is frequently favored due to its neutral flavor profile and its exceptional ability to maintain high temperatures without breaking down or imparting undesirable flavors, thus ensuring a perfectly golden, crispy crust every time without the risk of burning.
For the Decadent Creamy Lemon Sauce:
- Salted Butter: Real, high-quality salted butter is absolutely essential for building the rich, luscious base of the sauce. Its creamy texture and inherently buttery flavor provide a truly luxurious foundation that sets the stage for the other sauce components.
- Garlic Clove (Minced): Freshly minced garlic delivers a pungent, wonderfully aromatic kick that profoundly enhances the sauce’s savory notes and adds a depth of flavor. While pre-minced jarred garlic can be used in a pinch, fresh garlic truly shines through here, offering a more vibrant, authentic, and pronounced taste that makes a significant difference.
- Heavy Cream: This is the secret ingredient behind the sauce’s signature richness, incredibly velvety texture, and its luxurious mouthfeel. For those desiring a slightly lighter version, half-and-half or even whole milk can be used as a substitute, though it will inevitably result in a less decadent and slightly thinner consistency.
- Chicken Stock (Low or No Sodium): Chicken stock adds crucial depth and a fundamental savory flavor to the sauce, marrying all the ingredients together. Opting for low-sodium or no-sodium varieties allows you precise control over the overall saltiness of the finished dish, ensuring it is perfectly seasoned to your exacting preference. For an even more profound flavor, consider using homemade chicken stock.
- Freshly Squeezed Lemon Juice: This ingredient is absolutely non-negotiable and paramount to the dish! Freshly squeezed lemon juice provides that vibrant, bright, tangy, and invigoratingly zesty kick that unequivocally defines the lemon cream sauce. Bottled lemon juice is generally far too acidic and sadly lacks the nuanced, fresh flavor profile of real lemons, which will significantly impact and detract from the final taste of your exquisite dish.
- Dijon Mustard: A subtle yet impactful touch of quality Dijon mustard is added to introduce a delicate tang and a hint of sophisticated sharpness. This element beautifully complements both the lemon and cream components without ever overpowering them. It serves as a fantastic emulsifier, contributing to the sauce’s smooth texture, and acts as a superb flavor enhancer, adding complexity. It’s crucial to avoid using yellow mustard, as its distinctly vinegary and sharp profile is simply not suitable for this delicate and refined sauce.
Step-by-Step Guide: How to Make Cheesecake Factory Chicken Costoletta
Embark on an exciting culinary adventure to create this restaurant-quality dish right in the comfort of your home. Follow these meticulously detailed steps to achieve perfectly crispy chicken cutlets and a luscious, velvety lemon cream sauce that will delight your palate.
Prepping the Chicken Breading Stations:
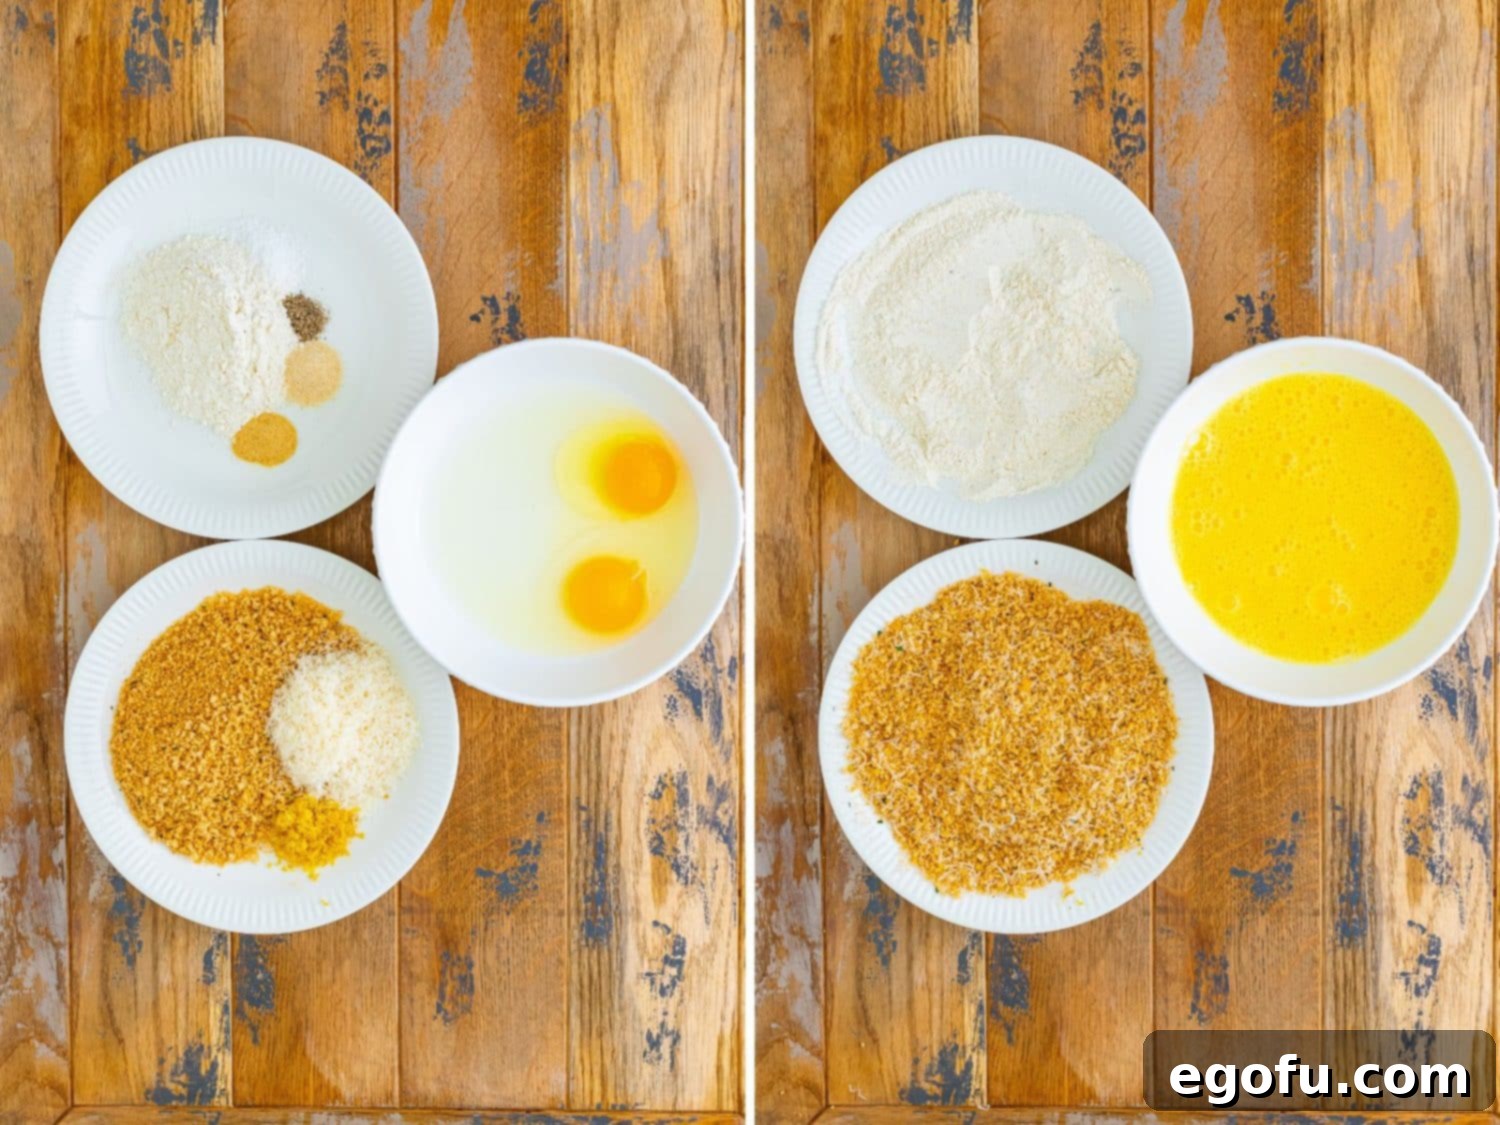
- Prepare the Flour Mixture: In your first medium-sized shallow bowl, meticulously combine the specified amounts of all-purpose flour, garlic powder, onion powder, salt, and pepper. Utilize a whisk to thoroughly blend these dry ingredients until they are completely and evenly distributed, ensuring a consistent seasoning. This well-seasoned flour will serve as your crucial first coating layer. Once mixed, set this bowl aside, ready for action.
- Whisk the Egg Wash: In a second designated medium shallow bowl, carefully crack the large eggs and introduce a modest splash of water. Vigorously whisk the mixture until the yolks and whites are fully combined, achieving a uniform, slightly frothy consistency. This essential egg wash will act as the binding agent, crucial for helping the breadcrumbs adhere securely. Set this bowl aside alongside the first.
- Create the Panko Mixture: Finally, in a third distinct medium shallow bowl, combine the Italian Panko breadcrumbs, the wonderfully fragrant zest of one whole lemon, and the finely grated Parmesan cheese. Stir these components together until they are thoroughly blended. The Panko offers a superior crispness, while the lemon zest and Parmesan contribute incredible depth of flavor and aroma. Set this bowl aside, completing your breading station setup.
Breading the Chicken Cutlets for Optimal Crispness:
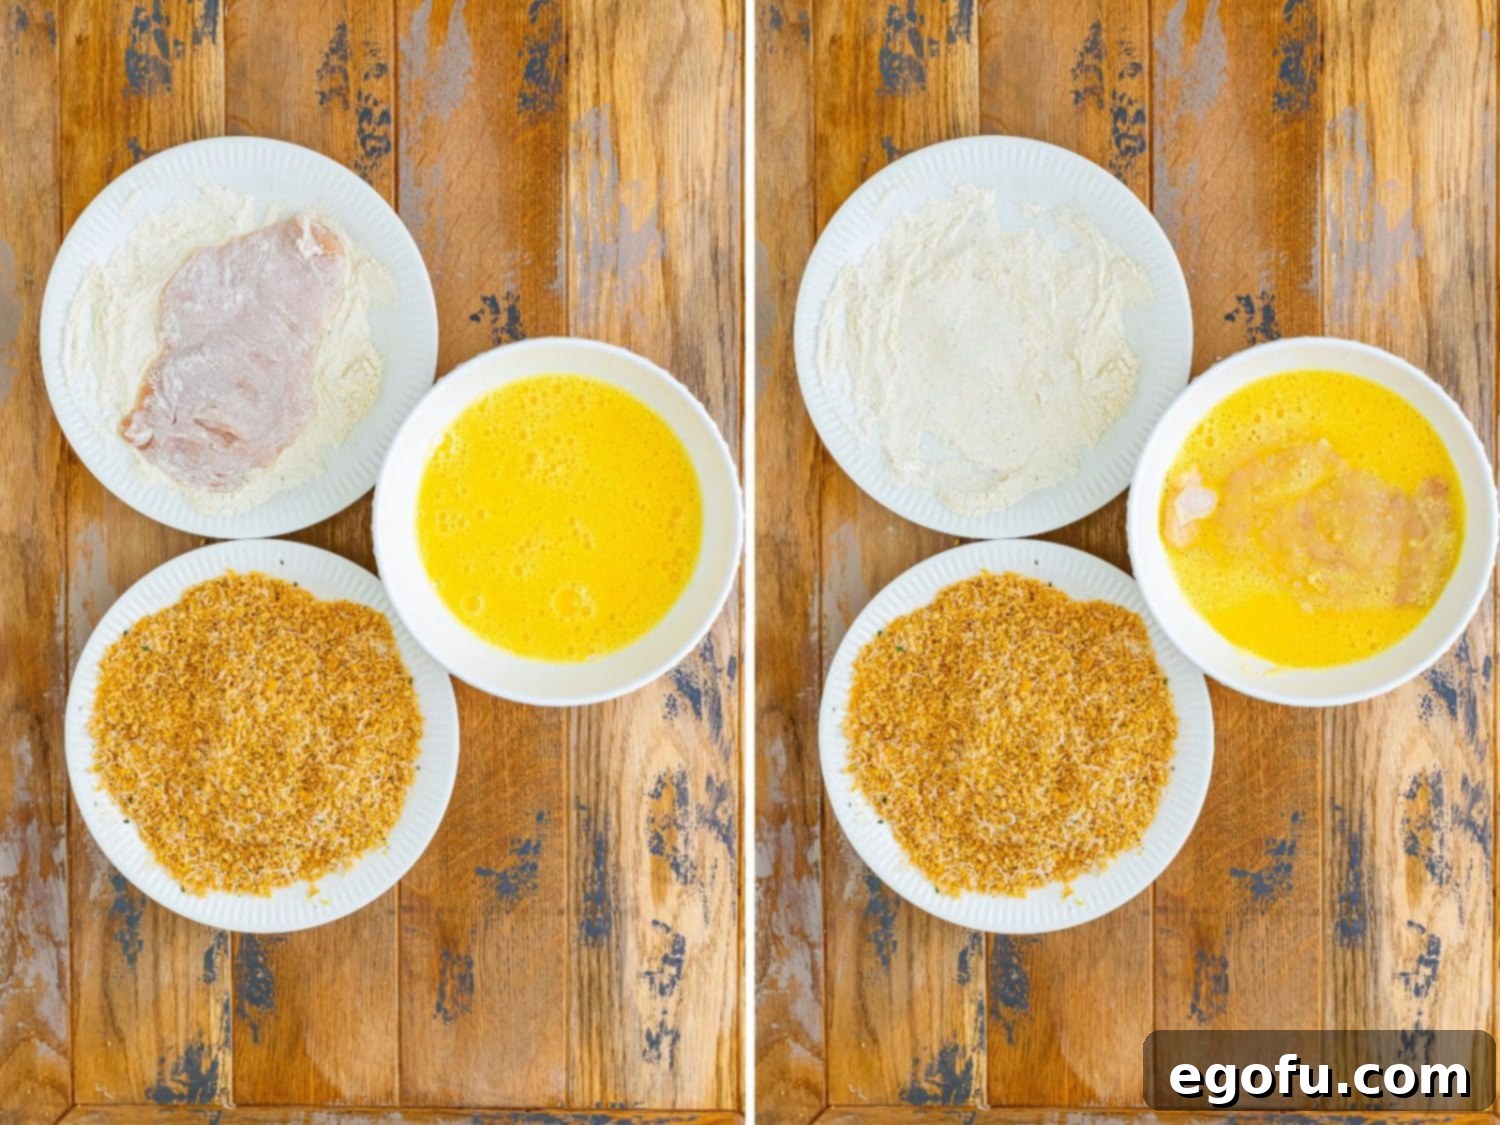
- Flour Coating: Take one thin-cut chicken breast and gently, yet thoroughly, dredge it in the seasoned flour mixture. Ensure every surface is fully coated. Lightly shake off any discernible excess flour – the goal is a thin, even layer, not a thick, clumpy paste, which can become gummy when cooked.
- Egg Wash Dip: Next, carefully transfer the floured chicken into the prepared egg mixture. Confirm that the chicken is completely submerged and covered with the egg wash. Lift it, allowing any excess egg to drip back into the bowl. This step is critical as it creates the necessary sticky surface for the breadcrumbs to firmly adhere.
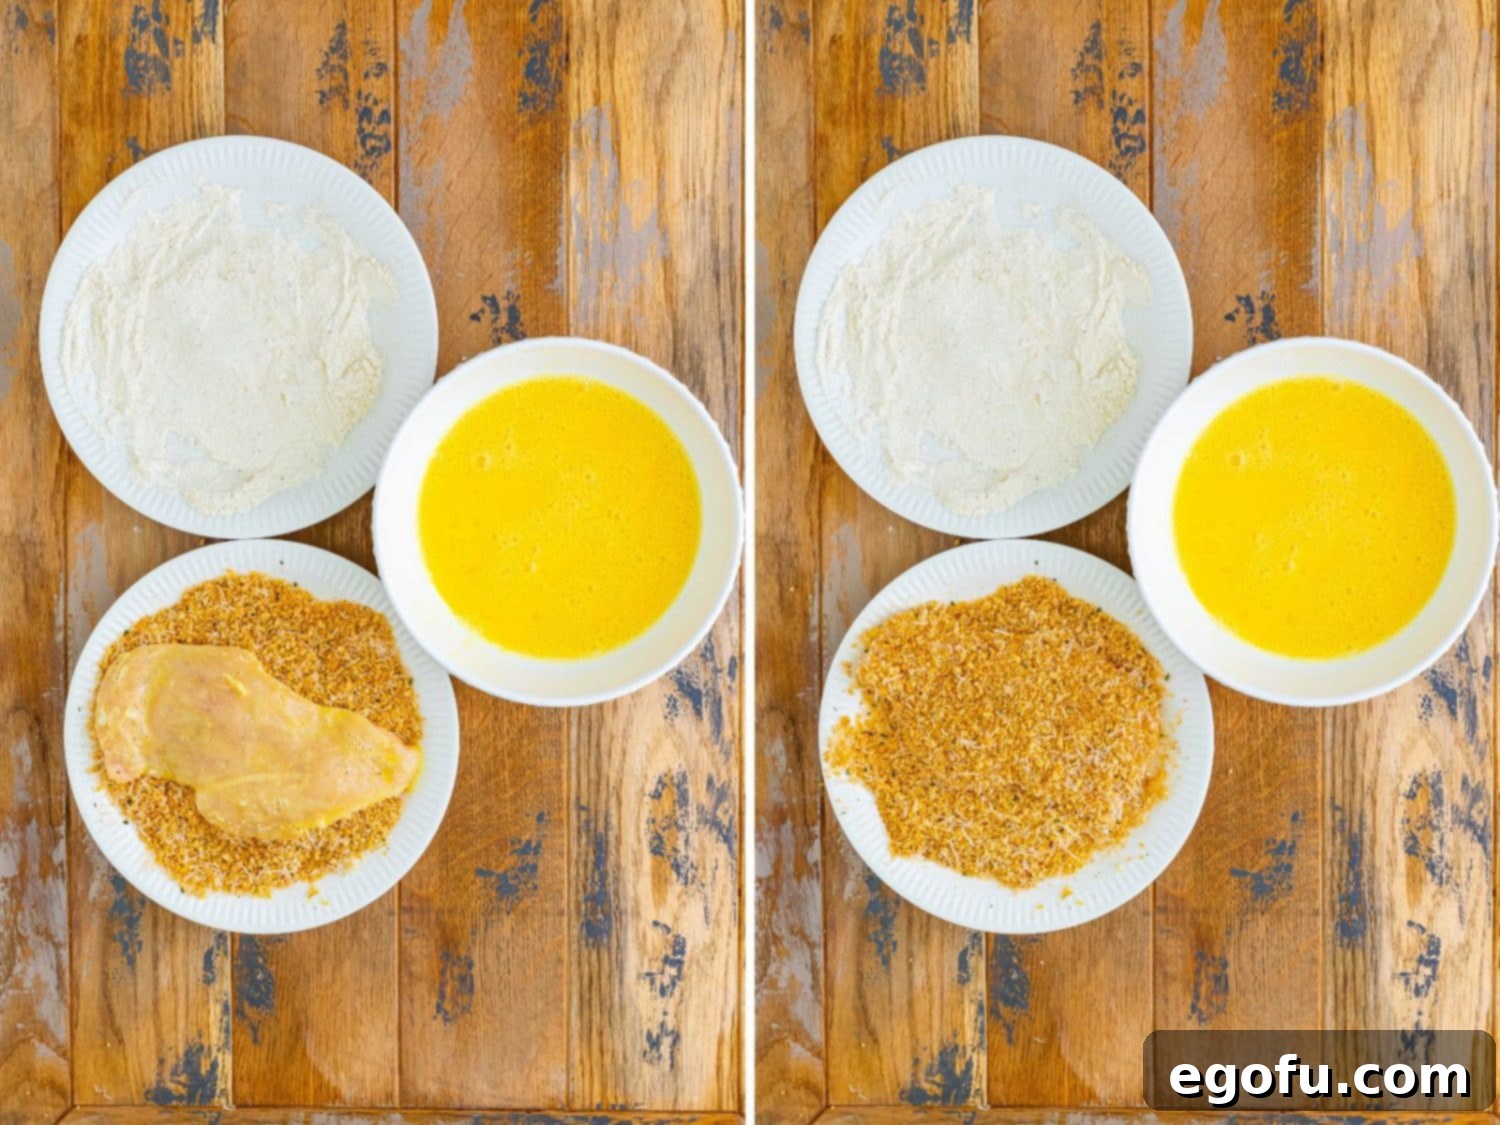
- Panko Crumb Adhesion: Immediately, without delay, transfer the egg-coated chicken to the bowl containing the Panko breadcrumb mixture. Generously coat the chicken on both sides, ensuring full coverage. Crucially, gently but firmly press the breadcrumbs into the chicken to ensure they adhere securely and form a dense, even crust. This pressing step is paramount for achieving that perfectly crispy and satisfying crunch.
- Repeat and Rest: Once breaded, carefully place the finished chicken cutlet on a separate clean plate or baking sheet. Continue this meticulous breading process with the remaining chicken breasts, one at a time. After all pieces are breaded, allow them a brief but important rest period of approximately 10-15 minutes. This crucial resting time permits the breading to hydrate slightly and adhere even more securely, significantly reducing the chance of it falling off during the frying stage.

Crafting the Decadent Creamy Lemon Sauce:
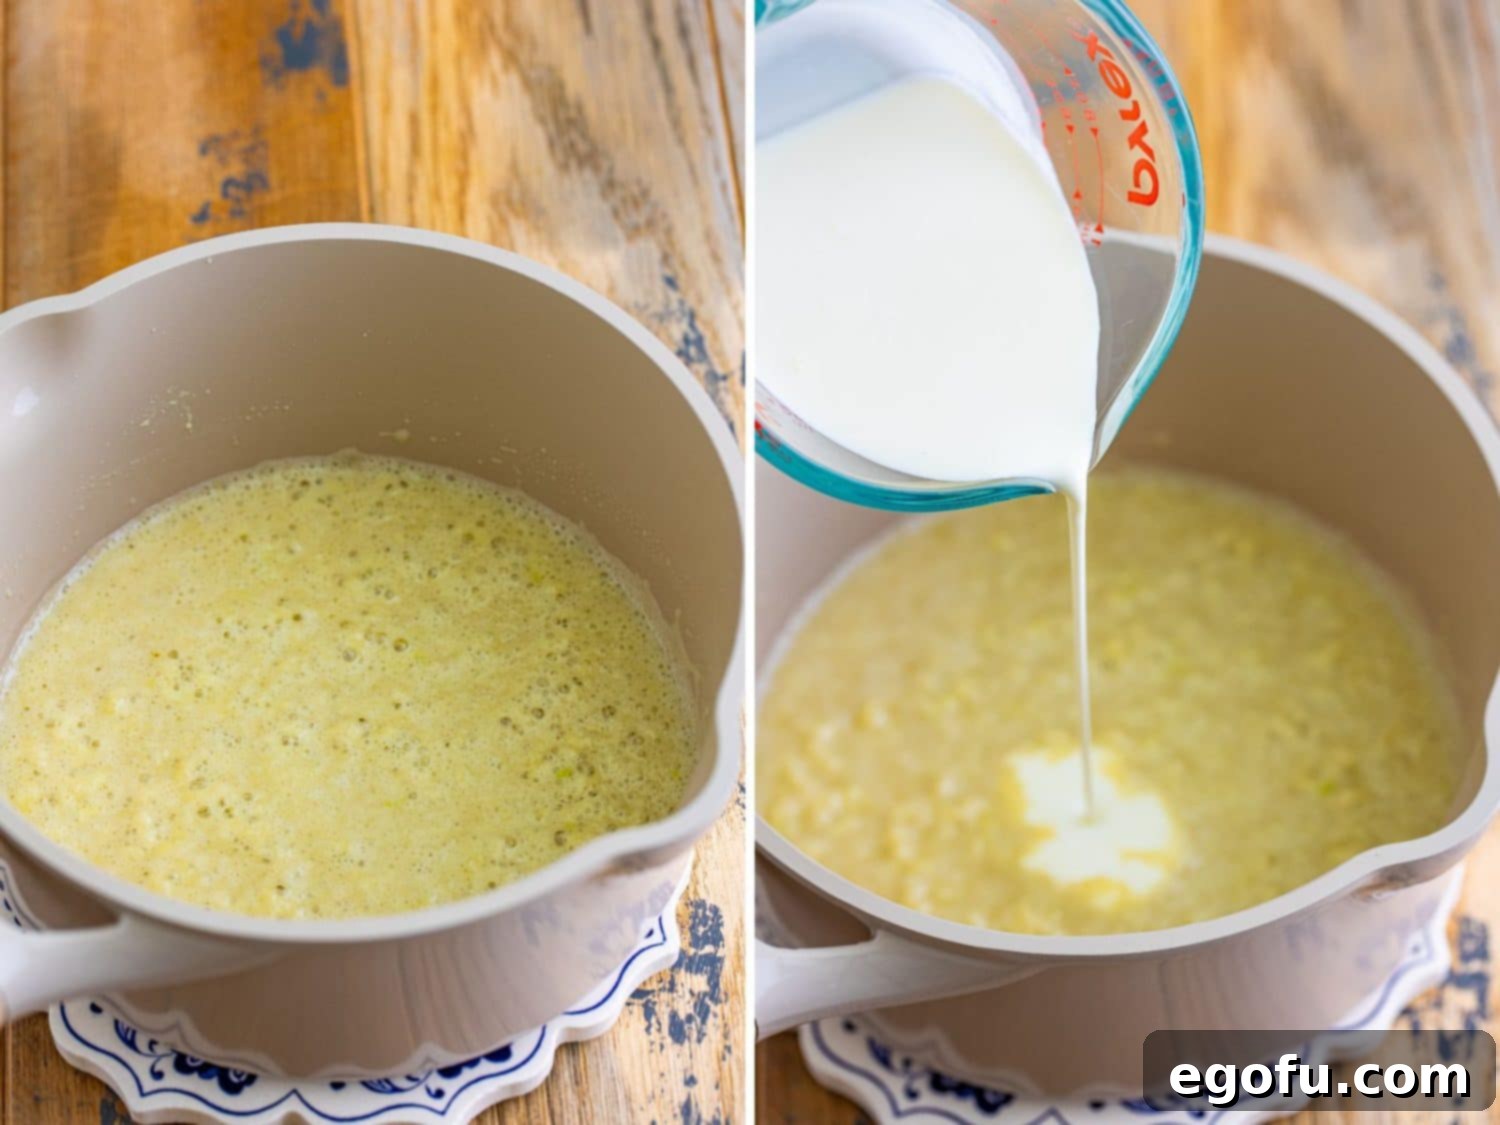
- Melt the Butter: While your perfectly breaded chicken rests, begin the creation of the exquisite lemon cream sauce. In a medium-sized saucepot, melt the specified amount of salted butter over medium heat until it is fully liquefied and just gently bubbling. This provides the rich foundation for your sauce.
- Create a Roux: Whisk in the all-purpose flour until a smooth, consistent paste, known as a roux, forms. Continue cooking and whisking this roux for approximately 1 minute. This vital step effectively cooks out the raw flour taste and will ensure your finished sauce is delightfully thick and smooth, without any starchy flavor. Next, add the freshly minced garlic and cook for an additional minute until it becomes wonderfully fragrant, taking care not to allow it to brown, which can make it bitter.
- Incorporate Liquids Gradually: Slowly and steadily pour in the heavy cream while continuously whisking to prevent any lumps from forming and to ensure a silky texture. Once the cream is fully incorporated and smooth, gradually add the chicken stock, continuing to whisk diligently until the entire mixture is perfectly smooth and uniformly combined.
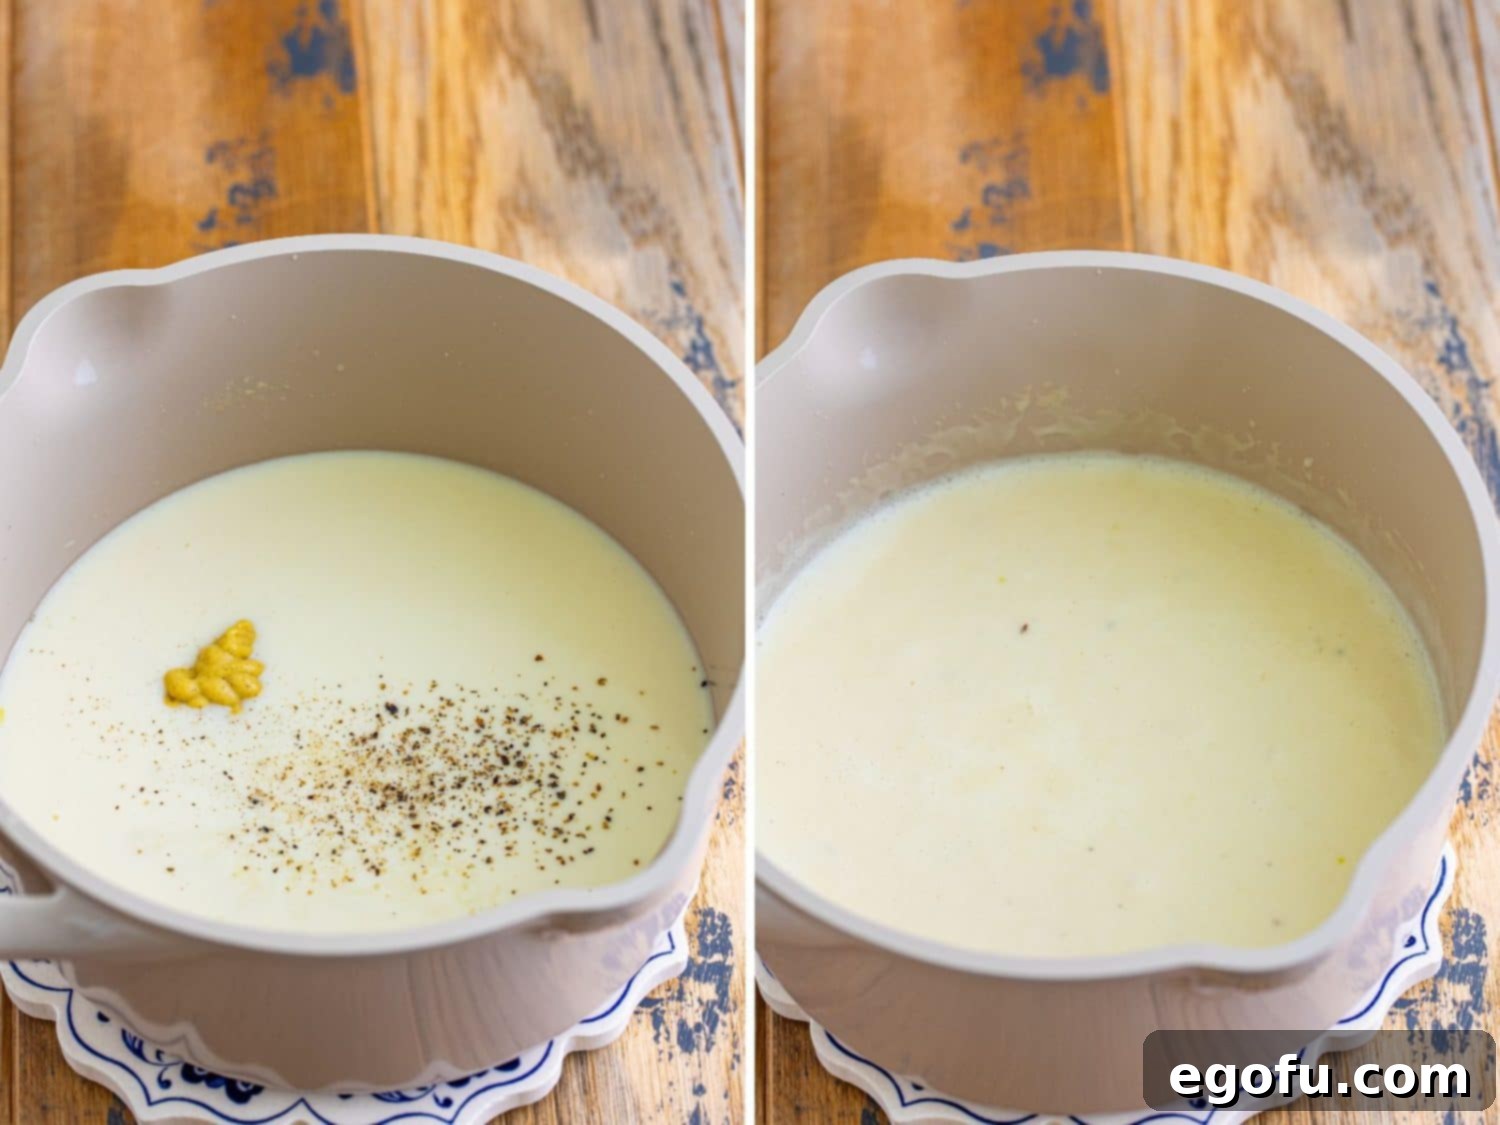
- Season and Simmer to Perfection: Gently stir in the freshly squeezed lemon juice – remember, fresh is best for that vibrant tang – along with the Dijon mustard and the final ¼ teaspoon of pepper. Continue whisking until all ingredients are perfectly integrated and the sauce appears utterly smooth. Bring the sauce to a gentle simmer and allow it to cook for approximately 2 minutes, or until it has thickened to your desired consistency. Once thickened, promptly cover the pot and keep the sauce warm over very low heat while you proceed to fry the chicken.

Frying the Chicken to Golden Perfection:
- Heat the Frying Oil: In a large, heavy-bottomed skillet (a cast-iron skillet works exceptionally well for even heat distribution), add about ½ inch of your chosen high-smoke-point frying oil. Heat the oil over medium heat until it reliably reaches a temperature of 350°F (175°C). If you do not possess a kitchen thermometer, a quick test is to drop a tiny pinch of Panko breadcrumbs into the hot oil; they should immediately sizzle and turn golden brown without burning, indicating the correct temperature.
- Fry in Carefully Managed Batches: Carefully add the breaded chicken cutlets to the hot oil, exercising caution not to overcrowd the pan. Overcrowding can drastically drop the oil temperature and lead to soggy, less crispy results. Therefore, it’s best to fry in batches if necessary, ensuring consistent oil temperature and facilitating even cooking. Cook each side for approximately 3-5 minutes, or until each piece develops a beautiful, rich golden-brown color and reaches a safe internal temperature of 165°F (74°C). The exact cooking time will naturally depend on the precise thickness of your chicken cutlets.
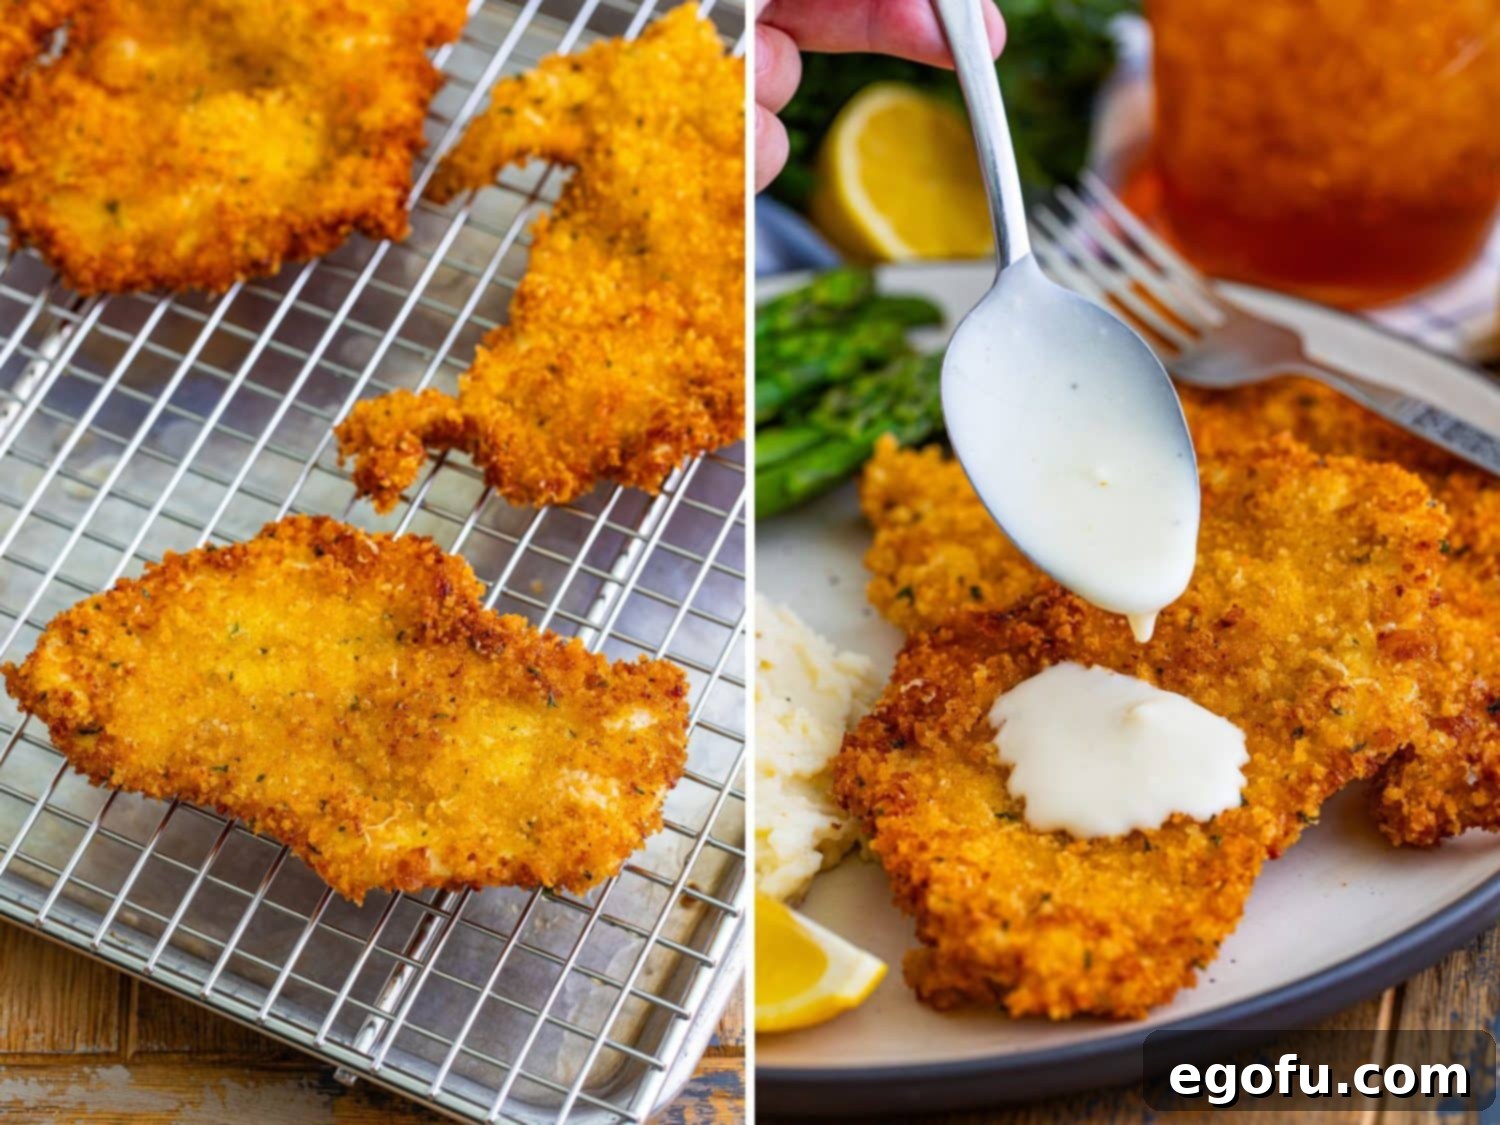
- Drain and Maintain Crispness: As each batch of chicken finishes cooking and is perfectly golden, carefully remove it from the hot oil and briefly place it on a paper-towel-lined plate to absorb any initial excess oil. Immediately thereafter, transfer the crispy chicken pieces to a wire rack that has been set over a baking sheet. This setup is crucial as it allows air to freely circulate around the chicken, effectively preserving its delightful crisp crust while you proceed to finish frying the additional pieces. If needed, you can keep the already cooked chicken warm in a very low oven (around 200°F / 93°C).
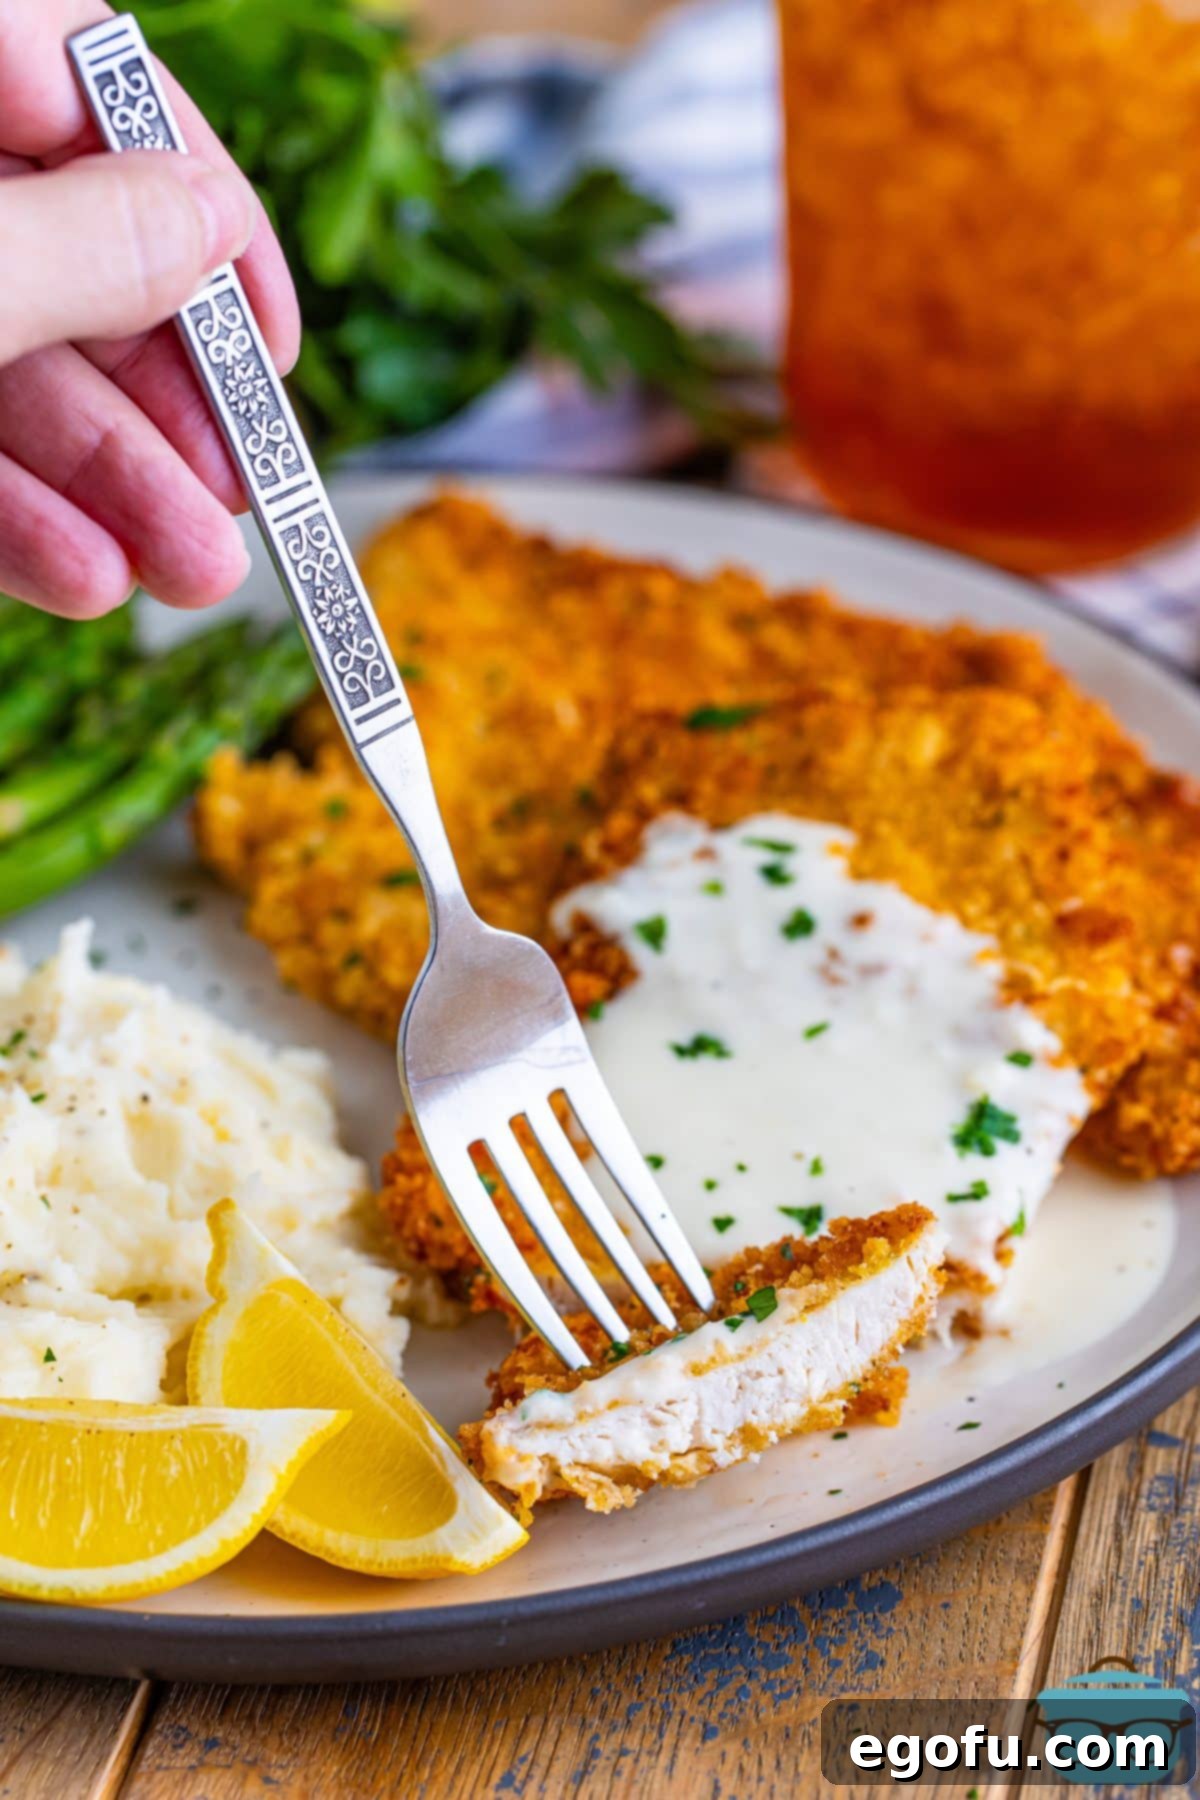
- Serve Immediately with Sauce: Artfully arrange the perfectly fried, golden Chicken Costoletta on individual serving plates. Then, generously spoon the warm, velvety creamy lemon sauce over each piece, ensuring every bite is infused with its delectable flavor. Serve immediately with your carefully chosen side dishes for a truly memorable and exquisite dining experience that rivals any restaurant.
Pro Tips for Success & Delicious Variations
To ensure your homemade Cheesecake Factory Chicken Costoletta turns out absolutely perfect every single time, consider these invaluable tips and creative variations:
- Achieve Uniform Thinness: It is paramount that your chicken breasts are uniformly thin, ideally about 1/4 to 1/2 inch thick, for truly even cooking and to achieve the authentic “cutlet” style. Place chicken between two sheets of plastic wrap and pound gently but firmly with a meat mallet or the bottom of a heavy pan until desired thinness is reached.
- Master Oil Temperature: Maintaining the correct oil temperature (around 350°F / 175°C) is key to success. If the oil is too cool, the chicken will absorb excessive oil, resulting in a greasy and less appealing texture. Conversely, if the oil is too hot, the exterior will burn before the interior is thoroughly cooked. Use a reliable kitchen thermometer for precise accuracy.
- Avoid Overcrowding the Pan: Always fry chicken in manageable batches. Overcrowding the skillet will invariably drop the oil temperature significantly, leading to less crispy, potentially soggy results and uneven cooking. Give each cutlet space to breathe and cook properly.
- The Importance of Resting: After meticulously breading the chicken, allowing it to rest undisturbed for 10-15 minutes before frying is a game-changer. This brief but crucial resting period helps the coating to adhere more securely to the chicken, dramatically reducing the chances of it flaking or falling off during the frying process.
- Adjusting Sauce Consistency: If, after simmering, you find your lemon cream sauce is too thick for your preference, you can easily thin it out by whisking in a small amount of extra chicken stock or water until it reaches your desired pourable consistency. If the sauce happens to be too thin, simply allow it to simmer for a few additional minutes, stirring frequently, until it naturally thickens to perfection.
- Herbaceous Variations: For an exciting aromatic boost and an extra layer of fresh flavor, consider incorporating finely chopped fresh parsley, chives, or even a touch of fresh dill into the lemon cream sauce just before serving. These herbs add a delightful brightness.
- Introduce a Spicy Kick: If you appreciate a subtle warmth and a touch of heat, a tiny pinch of red pepper flakes can be added to the flour mixture during breading or stirred directly into the sauce. This simple addition can give the dish a wonderfully delightful and unexpected spicy dimension.
- Explore Different Proteins: While chicken is the traditional and beloved protein for Costoletta, this versatile recipe works remarkably well with other thin-cut proteins. Consider experimenting with thin pork cutlets or tender veal cutlets for a similar elegant meal, each offering a slightly different but equally delicious flavor profile.
Craving More Restaurant-Inspired Recipes?
If you thoroughly enjoyed the process of recreating The Cheesecake Factory’s Chicken Costoletta, you’ll be absolutely thrilled to dive into these other fan-favorite copycat recipes and classic fried chicken traditions from beloved eateries and cherished comfort food heritage:
- Cheesecake Factory Brown Bread
- Red Velvet Cheesecake Cake (Cheesecake Factory Shortcut Recipe)
- Longhorn Parmesan Crusted Chicken
- Chicken Schnitzel
- Outback Steakhouse Baked Potatoes
- Texas Roadhouse Cinnamon Butter
- Southern Fried Chicken
- Ritz Cracker Chicken
- Chicken Fried Chicken
- Malibu Chicken
- Parmesan Crusted Chicken
- Chicken Fried Steak
- Chicken Fried Steak Fingers
- Country Fried Pork Chops
Cheesecake Factory Chicken Costoletta Recipe

Thin chicken cutlets breaded in a Panko breadcrumb mixture and then fried to a golden brown, generously topped with a rich, creamy lemon sauce – a true Cheesecake Factory classic, perfected at home.
Prep Time: 20 minutes
Cook Time: 15 minutes
Total Time: 35 minutes
Servings: 4
Author: Brandie Skibinski
Ingredients
- For the Chicken:
- ⅓ cup all-purpose flour
- ½ teaspoon garlic powder
- ½ teaspoon onion powder
- ½ teaspoon salt
- ¼ teaspoon pepper
- 2 large eggs
- Splash of water
- 1 cup Italian panko breadcrumbs
- Zest of 1 lemon
- ¼ cup grated Parmesan cheese
- 4 thin-cut chicken breasts (or 2 large, pounded thin and halved)
- Oil, for frying (e.g., peanut oil, canola, or vegetable oil)
For the Decadent Lemon Cream Sauce:
- 2 Tablespoons salted butter
- 2 Tablespoons all-purpose flour
- 1 clove garlic, minced (about 1 teaspoon)
- ½ cup heavy cream (or half-and-half for a lighter sauce)
- ¾ cup chicken stock (low-sodium preferred)
- 2 Tablespoons fresh squeezed lemon juice (absolutely no bottled juice!)
- 1 Tablespoon Dijon mustard (not yellow mustard)
- ¼ teaspoon pepper
Instructions
- Prepare Breading Station 1 (Flour): In a medium shallow bowl, thoroughly combine ⅓ cup all-purpose flour, ½ teaspoon garlic powder, ½ teaspoon onion powder, ½ teaspoon salt, and ¼ teaspoon pepper. Stir well with a whisk until evenly mixed. Set aside.
- Prepare Breading Station 2 (Egg Wash): In a second medium shallow bowl, vigorously whisk 2 large eggs with a splash of water (about 1 Tablespoon) until the yolks and whites are completely combined and slightly frothy. Set aside.
- Prepare Breading Station 3 (Panko Mix): In a third medium shallow bowl, combine 1 cup Italian panko breadcrumbs, the fragrant zest of 1 lemon, and ¼ cup grated Parmesan cheese. Stir to ensure all ingredients are well distributed. Set aside.
- Bred the Chicken (Flour): Take one thin-cut chicken breast. Dredge it completely in the seasoned flour mixture, ensuring an even coat on all sides. Gently shake off any excess flour.
- Bred the Chicken (Egg Wash): Immediately transfer the floured chicken into the egg wash, making sure it’s fully covered. Lift the chicken, allowing any excess egg to drip back into the bowl.
- Bred the Chicken (Panko): Next, place the egg-coated chicken into the panko breadcrumb mixture. Generously coat both sides, gently pressing the breadcrumbs firmly onto the chicken to ensure maximum adhesion and crispness.
- Rest the Breaded Chicken: Place the fully breaded chicken cutlet on a separate clean plate or baking sheet. Repeat the entire breading process (steps 4-6) for the remaining 3 chicken breasts. Allow all breaded chicken pieces to rest for 10-15 minutes at room temperature. This resting period is crucial for the coating to set and stick firmly during frying.
- Start the Sauce (Roux): In a medium saucepot, melt 2 Tablespoons salted butter over medium heat. Once melted, whisk in 2 Tablespoons all-purpose flour until a smooth roux forms. Cook, whisking constantly, for 1 minute to cook out the raw flour taste. Add 1 clove minced garlic and cook for another minute until fragrant, being careful not to let the garlic brown.
- Add Liquids to Sauce: Slowly pour in ½ cup heavy cream while continuously whisking to prevent lumps. Once the cream is incorporated, gradually add ¾ cup chicken stock, continuing to whisk until the mixture is completely smooth and well combined.
- Season and Simmer Sauce: Stir in 2 Tablespoons fresh squeezed lemon juice, 1 Tablespoon Dijon mustard, and ¼ teaspoon pepper. Whisk everything until perfectly smooth. Bring the sauce to a gentle simmer and let it cook for 2 minutes, or until it has thickened to your desired consistency. Cover the pot and keep the sauce warm over very low heat while you prepare the chicken.
- Heat Frying Oil: In a large, heavy-bottomed skillet (such as cast iron), add about ½ inch of your chosen frying oil. Heat the oil over medium heat until it reaches a consistent temperature of 350°F (175°C).
- Fry the Chicken: Carefully add the breaded chicken cutlets to the hot oil in batches, ensuring not to overcrowd the pan (this helps maintain oil temperature and crispness). Fry for approximately 3-5 minutes per side, or until each piece is beautifully golden brown and reaches a safe internal temperature of 165°F (74°C) when checked with a meat thermometer.
- Drain and Keep Warm: As each batch of chicken finishes frying, remove it from the oil and briefly place it on a paper-towel-lined plate to absorb excess oil. Immediately transfer the crispy chicken to a wire rack set over a baking sheet. This allows air to circulate, keeping the crust crisp while you finish cooking any remaining pieces. You can keep cooked chicken warm in a low oven (200°F / 93°C) if desired.
- Serve: Arrange the perfectly fried Chicken Costoletta on individual plates, then generously spoon the warm, creamy lemon sauce over each piece. Serve immediately with your favorite sides for an unforgettable meal!
Notes
- For detailed answers to common questions and ingredient substitution ideas, please refer to the “Frequently Asked Questions” and “Essential Ingredients” sections above.
- The brief resting period after breading is critical for preventing the crust from detaching during frying, ensuring maximum crispiness.
- Always prioritize freshly squeezed lemon juice for the sauce; bottled versions will simply not deliver the same vibrant, authentic flavor profile.
- If making ahead, store chicken and sauce separately and reheat chicken in the oven or air fryer for best texture.
Nutrition Information (Estimated Per Serving)
Calories: 602kcal | Carbohydrates: 27g | Protein: 58g | Fat: 28g | Sodium: 963mg | Fiber: 1g | Sugar: 3g
Nutritional Disclaimer: Please note that “The Country Cook” is not a certified dietician or nutritionist. Any nutritional information shared within this content, including the estimates above, is provided for informational purposes only and should be considered an approximation. Actual nutritional values can vary quite significantly depending on the specific brands of ingredients used, precise portion sizes, and individual preparation methods. If precise calorie counts and other detailed nutritional information are critical for your dietary needs or health considerations, we strongly recommend independently calculating these values using your preferred online nutritional calculator and inputting the exact brands and quantities of ingredients you utilize.
Did you make this delicious Cheesecake Factory Chicken Costoletta recipe? We would absolutely love to see your culinary triumphs! Share your beautiful creations on Instagram by tagging @thecountrycook and using the hashtag #thecountrycook!
