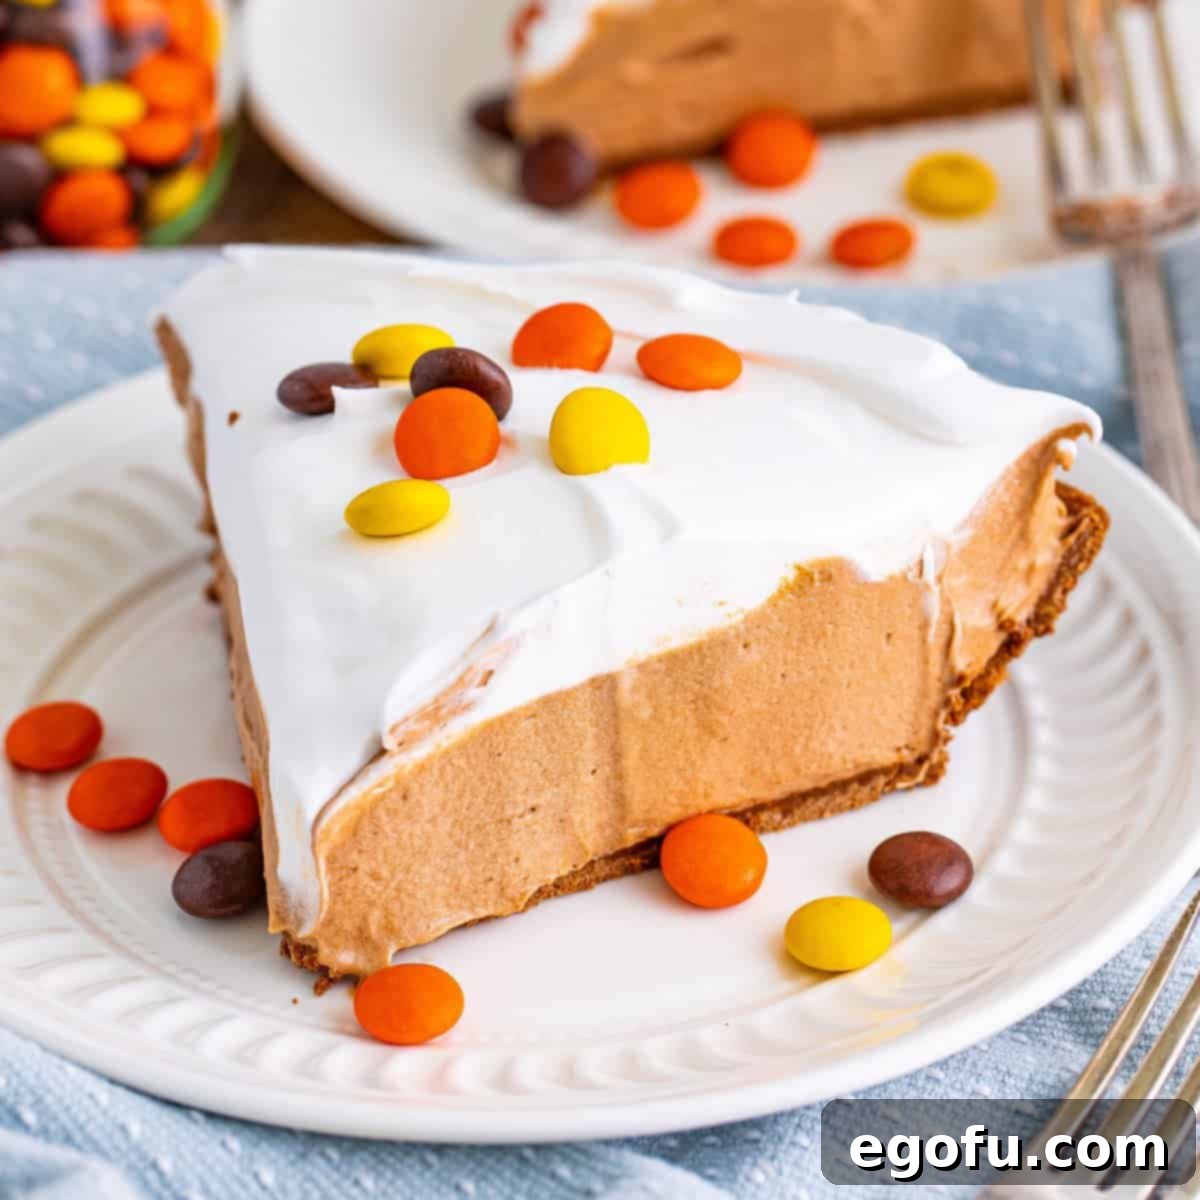
Irresistible No Bake Chocolate Peanut Butter Pudding Pie: Your Easiest Dessert Yet!
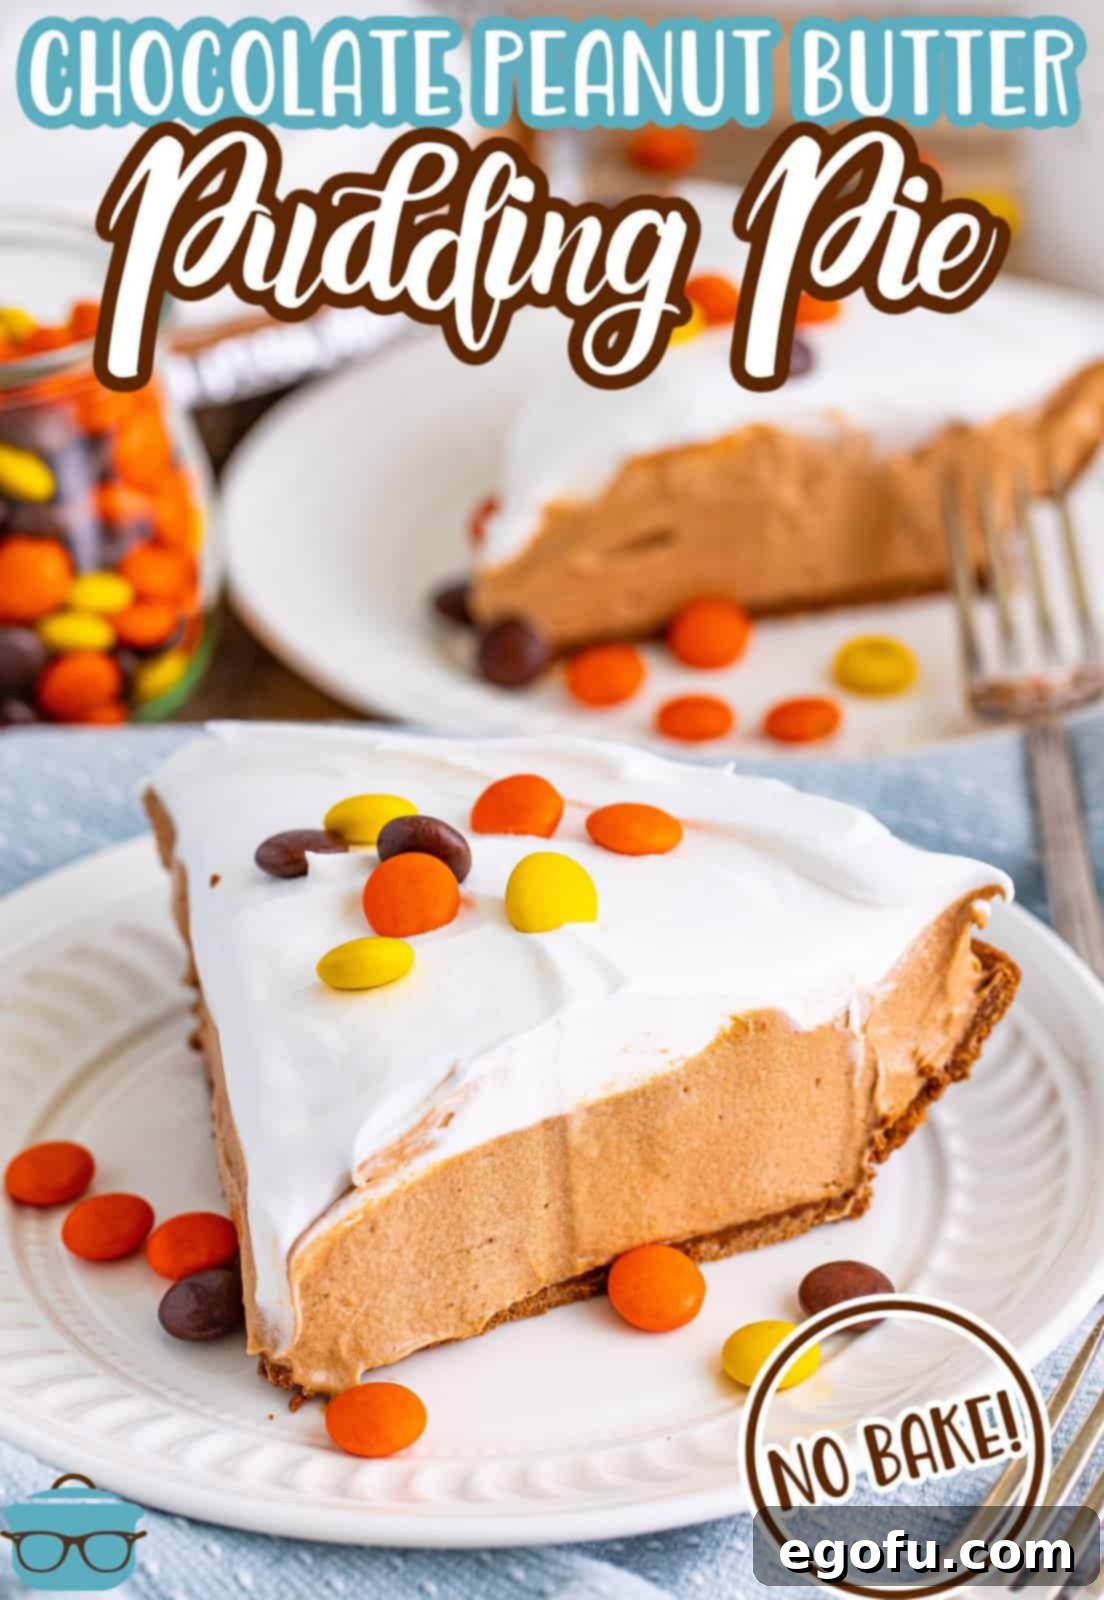
Indulge in the ultimate flavor combination with this creamy, rich, and utterly irresistible No Bake Chocolate Peanut Butter Pudding Pie. This dream dessert delivers the perfect harmony of decadent chocolate and smooth peanut butter, requiring minimal effort and no oven at all. Get ready to impress your family and friends with a dessert that comes together in mere minutes, making it the ideal treat for any occasion, from casual weeknight dinners to special gatherings.
Why You’ll Adore This Effortless Dessert
If the mere thought of chocolate and peanut butter together makes your mouth water, prepare to fall in love with every single bite of this amazing No Bake Chocolate Peanut Butter Pudding Pie. Its rich, velvety texture and deep, satisfying flavors make it a stand-out dessert that’s incredibly simple to prepare. Forget about heating up your kitchen, especially on warm days; this chilled delight is whipped up quickly, leaving you with more time to enjoy life and less time baking. It’s truly a game-changer for those who crave homemade goodness without the fuss.
One of the best features of this particular recipe is its generous yield – it makes two whole pies! This means you can effortlessly serve one pie tonight to satisfy immediate cravings and tuck the other away in your freezer for a future treat, making it a fantastic make-ahead option. It’s also perfect for sharing with a friend, bringing to a potluck, or ensuring everyone gets to experience this delightful combination of flavors. Imagine having a gourmet-tasting dessert ready in your freezer, waiting to be pulled out whenever a sweet tooth strikes. This recipe makes that convenience a delicious reality, proving that extraordinary desserts don’t have to be complicated.
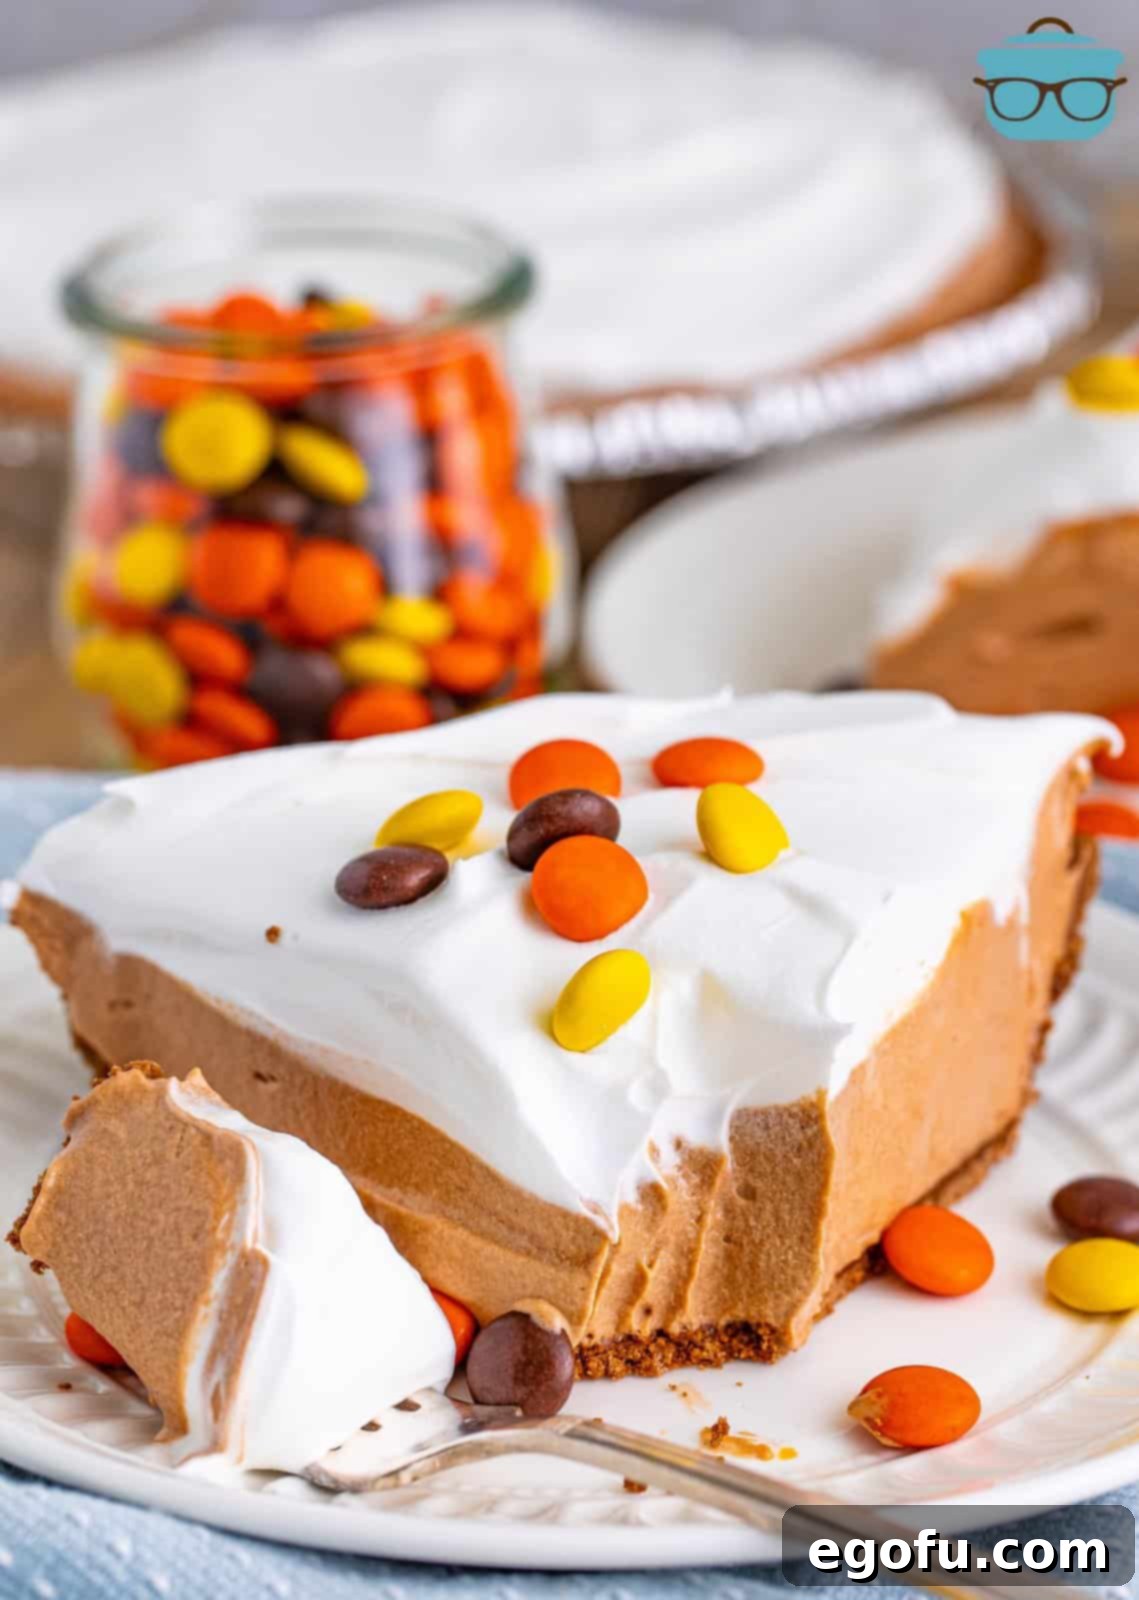
Unlock More Flavor: Tips and Variations
While this No Bake Chocolate Peanut Butter Pudding Pie is absolutely divine as is, its versatility allows for numerous customizations. Whether you’re looking to add extra crunch, introduce different flavor notes, or elevate the presentation, these suggestions will help you tailor the pie to your exact preferences and truly make it your own.
Exciting Add-Ins for the Filling
To boost both the texture and flavor of your pie, consider stirring in some delightful extras directly into the pudding pie filling. For example, a handful of mini chocolate chips can add wonderful bursts of chocolatey goodness throughout each slice. Finely chopped candy bars, such as Snickers, Heath, or Butterfinger, can introduce an irresistible crunch and a complex flavor profile. Crushed cookies, like Oreos (for a cookies-and-cream twist) or Nutter Butters (to intensify the peanut butter flavor), can also add another layer of delightful texture contrast. Don’t hesitate to experiment with your favorite sweet treats to personalize your pie and discover new favorite combinations.
Creative Topping Ideas
The presentation of your pie can be just as important and exciting as its taste. For a classic and crunchy touch, sprinkle a generous amount of chopped peanuts over the whipped topping. This not only adds texture but also enhances the nutty aroma. For the ultimate peanut butter fan, chopped Reese’s Peanut Butter Cups are a fantastic choice, creating a visually appealing and extra delicious top layer. For an even more decadent and elegant finish, artfully drizzle melted peanut butter and chocolate sauce over each slice just before serving. A light dusting of cocoa powder or a few delicate chocolate shavings can also add a sophisticated touch, making your pie truly restaurant-worthy.
Exploring Different Crust Options
The pre-made chocolate pie crust provides a convenient and delicious base, but this versatile recipe can shine equally well with other types of crusts. A classic graham cracker crust offers a delightful, slightly sweet crunch that beautifully complements the creamy filling. For those who enjoy a more traditional dessert experience, a shortbread crust could also work wonderfully, providing a buttery foundation. Alternatively, an Oreo cookie crust can intensify the chocolate flavor, while a vanilla wafer crust offers a milder, sweeter base. Remember to ensure any alternative crust is either no-bake or pre-baked and completely cooled before adding the filling to maintain the integrity of your no-bake creation.
Peanut Butter Alternatives
If you’re looking to change up the flavor profile or need to accommodate dietary preferences (though this recipe contains dairy), the peanut butter can be thoughtfully swapped out for other creamy spreads. Nutella, the beloved chocolate-hazelnut spread, is an absolutely fantastic choice; it creates an incredibly decadent, rich, and smooth filling that pairs exceptionally well with the chocolate pudding. For another nutty alternative, almond butter or cashew butter can provide a slightly different, yet equally delicious, character to the pie. When choosing alternatives, always opt for creamy, stir-free varieties to ensure the best possible texture and ease of blending in your pie filling.
Serving Your Pie Frozen: An Ice Cream-Like Treat
Yes, you absolutely can serve this pie frozen, transforming it into a luxurious, ice cream-like dessert that is particularly refreshing on hot days or whenever you desire a different, firmer texture. To achieve optimal slicing and a pleasant creamy consistency, simply allow your frozen pie to sit on the counter at room temperature for approximately 30 to 45 minutes before attempting to cut into it. This brief thawing period makes it easier to slice into clean wedges and ensures it maintains a wonderfully firm, yet delightfully creamy, consistency reminiscent of a decadent frozen mousse. It’s a delightful variation that’s sure to be a hit with everyone who tries it!
Experimenting with Pudding Flavors
The base of this recipe is incredibly adaptable, making it simple to swap the instant chocolate pudding mix for a variety of other flavors. Craving a different taste sensation? You could try instant vanilla pudding for a milder profile, banana cream pudding for a fruity twist, or even pistachio pudding for a unique and vibrant dessert. The key is to ensure you use an instant pudding mix of the same size box (5.9 ounces, or the larger size) as specified in the recipe. This consistency in size is crucial for maintaining the correct texture, setting time, and overall structure of your no-bake pie, allowing for endless delicious possibilities.
Storing Your Delicious Creation
Proper storage is paramount for enjoying your No Bake Chocolate Peanut Butter Pudding Pie for as long as possible and maintaining its freshness. Since it is a soft-set, no-bake pie containing perishable ingredients (like milk and cream cheese), it must be kept refrigerated at all times when not actively being served. To prevent it from absorbing other odors from your refrigerator and to maintain its ideal moisture, ensure it is covered tightly with plastic wrap or aluminum foil. Stored correctly in the refrigerator, your pie will remain delicious and safe to eat for up to 1 week. For longer preservation, this pie freezes exceptionally well; you can freeze it for up to 3 months. When preparing to freeze, wrap the entire pie very well in several layers of plastic wrap, followed by a layer of aluminum foil, to protect it from freezer burn and maintain its quality.
Key Ingredients for Your Chocolate Peanut Butter Pie
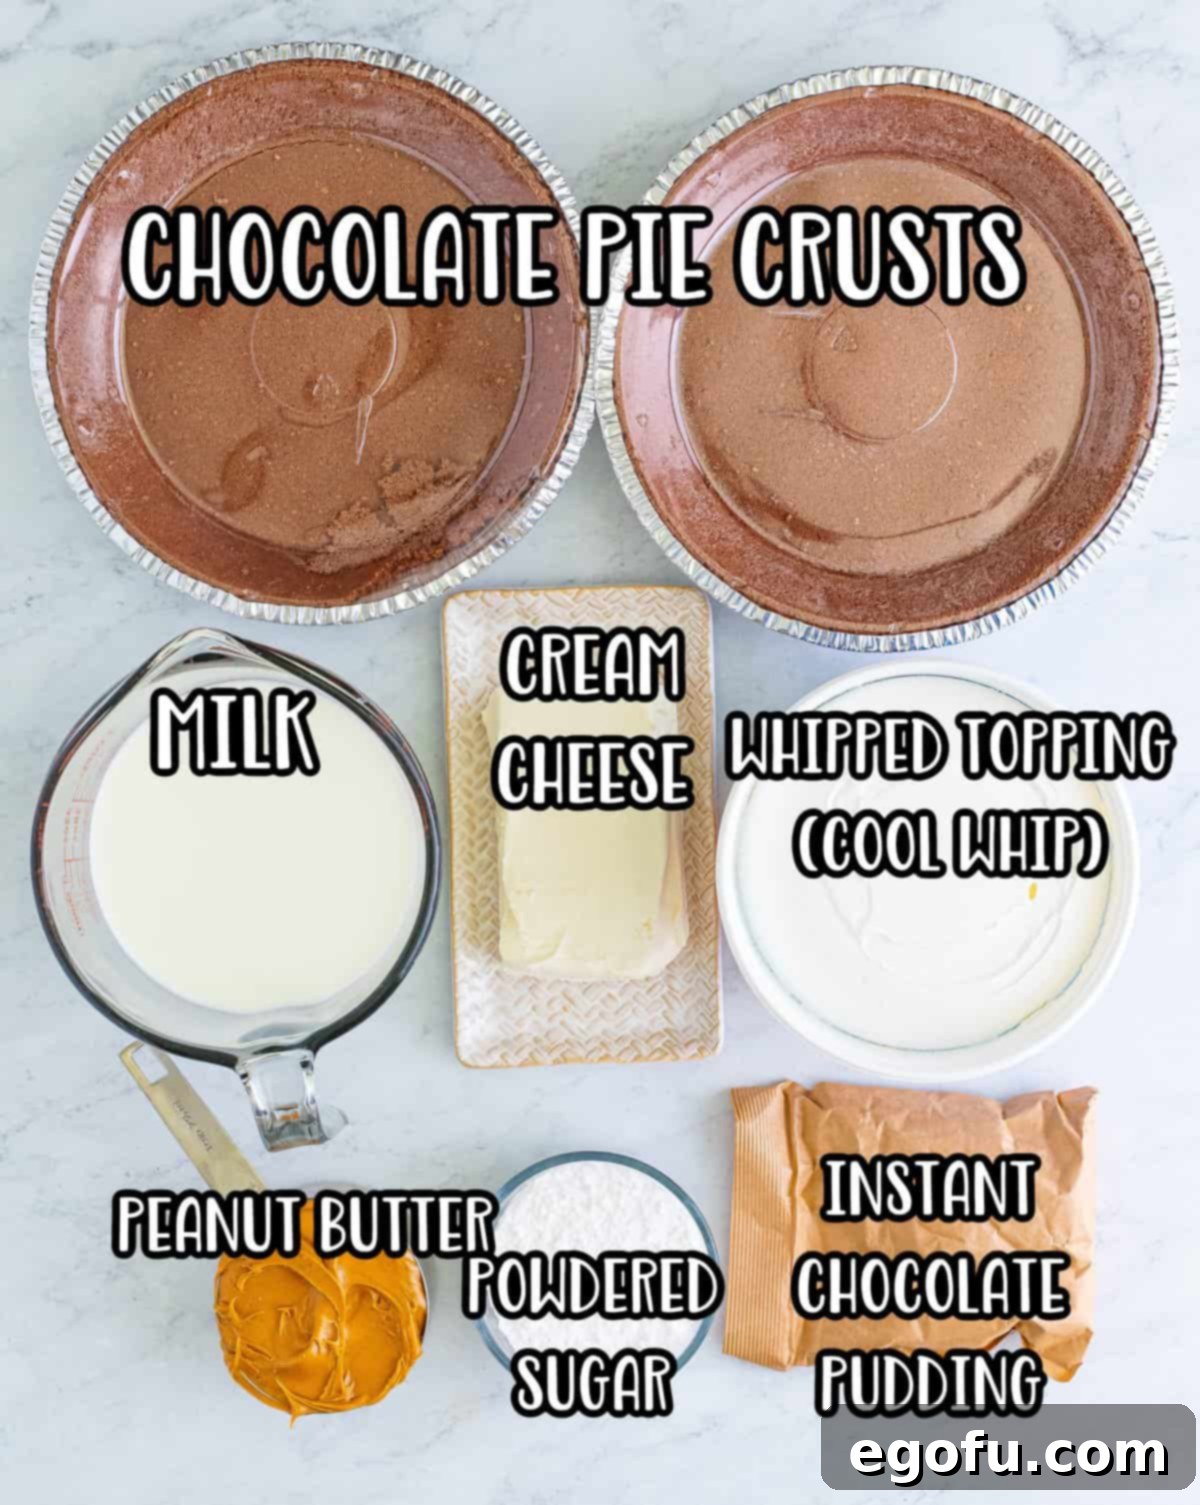
Crafting this incredible No Bake Chocolate Peanut Butter Pudding Pie starts with selecting the right ingredients. Each component plays a vital role in achieving the perfect creamy texture and rich, balanced flavor that makes this dessert so universally popular and satisfying. Here’s a closer look at what you’ll need and important notes for each:
- Instant Chocolate Pudding Mix (5.9 oz, larger box): This is the crucial foundation for our pie’s chocolate layer and is absolutely essential for its no-bake setting. The keyword to remember is “instant” – it is critically important that you grab the instant variety and not the “cook and serve” kind. These boxes often sit very close to each other on grocery store shelves, so please double-check the label carefully, as the word “instant” may not always be prominently displayed. Using cook and serve pudding will unfortunately result in a runny, unset pie, which is definitely not what we’re aiming for! The larger box size ensures you have ample chocolate flavor and the proper amount of thickening agent for a firm, yet creamy, pie.
- Whole Milk (3 cups): Whole milk contributes significantly to the pie’s luxurious, creamy, and decadent texture. Its higher fat content creates a richer, more indulgent filling that truly elevates the dessert. While 2% milk can be used if that is your preference, be aware that it might yield a slightly less rich and creamy result. For this particular recipe, it is best to avoid skim milk entirely, as it simply won’t provide the necessary richness and body required for such an indulgent pie.
- Cream Cheese (8 oz block, softened to room temperature): Softened cream cheese is an absolute must for achieving a smooth, lump-free peanut butter layer. If your cream cheese is cold and firm straight from the refrigerator, it will be incredibly difficult to blend properly, resulting in unpleasant lumps that you’ll struggle to get out of your filling. Plan ahead by taking it out of the refrigerator at least an hour before you intend to begin preparing the pie. If you’re pressed for time, you can gently soften it in the microwave on a very low setting, in 10-15 second intervals, until it’s just pliable but not melted.
- Creamy Peanut Butter (1 cup): The star of the show, perfectly complementing the chocolate! Creamy peanut butter provides that iconic, smooth, and deeply nutty flavor that defines this pie. While the recipe specifically calls for creamy, you can certainly experiment with crunchy peanut butter if you desire an added textural element and bursts of peanut crunch. It’s generally best to choose a good quality, traditional peanut butter rather than natural peanut butter that often separates, as the oil separation in natural varieties can affect the overall texture and consistency of the pie filling.
- Powdered Sugar (¾ cup): Also widely known as confectioners’ sugar, this finely milled sugar is superior for this recipe because it blends seamlessly into the cream cheese and peanut butter mixture. This ensures a beautifully smooth consistency without any gritty texture that granulated sugar might leave. Granulated sugar will not dissolve as effectively in a no-bake context and is therefore not recommended for this particular recipe. Beyond sweetness, powdered sugar also helps to slightly thicken the peanut butter layer, contributing to the pie’s overall stability.
- Whipped Topping (16 oz large tub, divided use): Commonly recognized by the brand name “Cool Whip,” whipped topping adds wonderful lightness and airiness to both the pie filling and serves as a beautiful, fluffy topping. This product typically comes frozen, so it is crucial to remember to transfer it from your freezer to your refrigerator overnight. This allows it ample time to thaw completely before you plan to make the pie, ensuring it’s ready for use. The “divided use” instruction means that half of the tub will be gently folded into the pie filling, and the other half will be reserved for generously topping the finished pies just before serving.
- Chocolate Pie Crusts (2 x 6 oz): Pre-made chocolate pie crusts offer incredible convenience and significantly save you time and effort in the kitchen. You’ll typically find these handy crusts near the graham cracker crusts in the baking aisle of your local grocery store. Utilizing pre-made crusts means you don’t have to worry about the baking or chilling a homemade crust, thereby keeping this dessert truly “no-bake” and making your preparation process much faster and simpler.
Step-by-Step Guide: Crafting Your Chocolate Peanut Butter Pie
Creating this delightful No Bake Chocolate Peanut Butter Pudding Pie is surprisingly straightforward and incredibly rewarding. Follow these detailed steps precisely to achieve a perfectly layered, wonderfully creamy, and utterly irresistible dessert every single time.
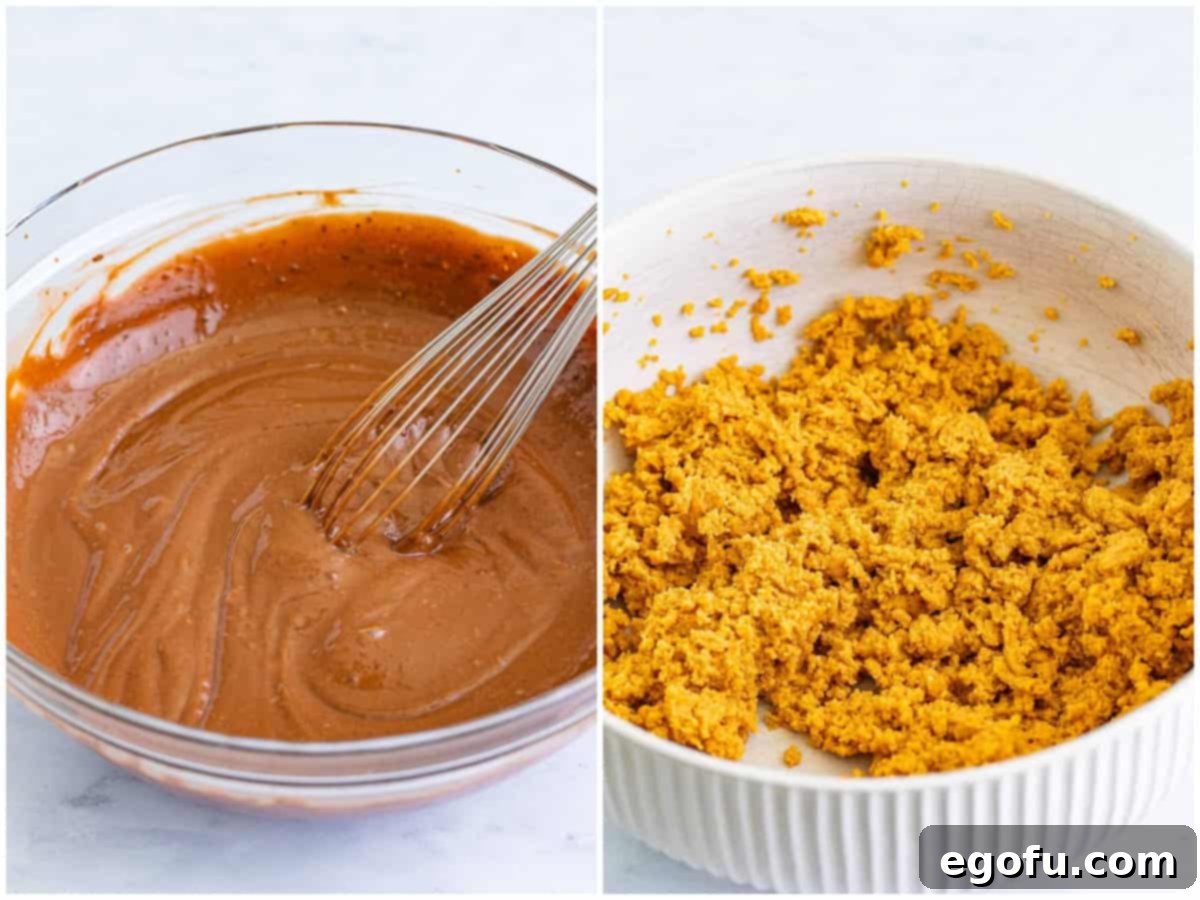
- Prepare the Chocolate Pudding Base: In a clean, medium-sized mixing bowl, combine the entire 5.9-ounce package of instant chocolate pudding mix with 3 cups of cold whole milk. Use a whisk to vigorously blend these ingredients together for approximately 2 minutes. During this time, you will notice the mixture beginning to thicken considerably. Once it has thickened to a pudding-like consistency, transfer the bowl to the refrigerator for a brief 5-minute chill. This quick refrigeration helps the pudding set a bit more firmly, preparing it perfectly for the next step.

Create the Peanut Butter Cream Cheese Mixture: While the chocolate pudding is chilling, grab a large mixing bowl. Using an electric hand mixer (or a stand mixer fitted with the paddle attachment), thoroughly beat together the 8-ounce block of fully softened cream cheese, 1 cup of creamy peanut butter, and ¾ cup of powdered sugar. Continue mixing until all the ingredients are thoroughly combined, resulting in a mixture that is perfectly smooth, thick, and uniform in consistency. Ensure there are absolutely no visible lumps of cream cheese remaining; the mixture should resemble a dense, smooth paste or thick dough.
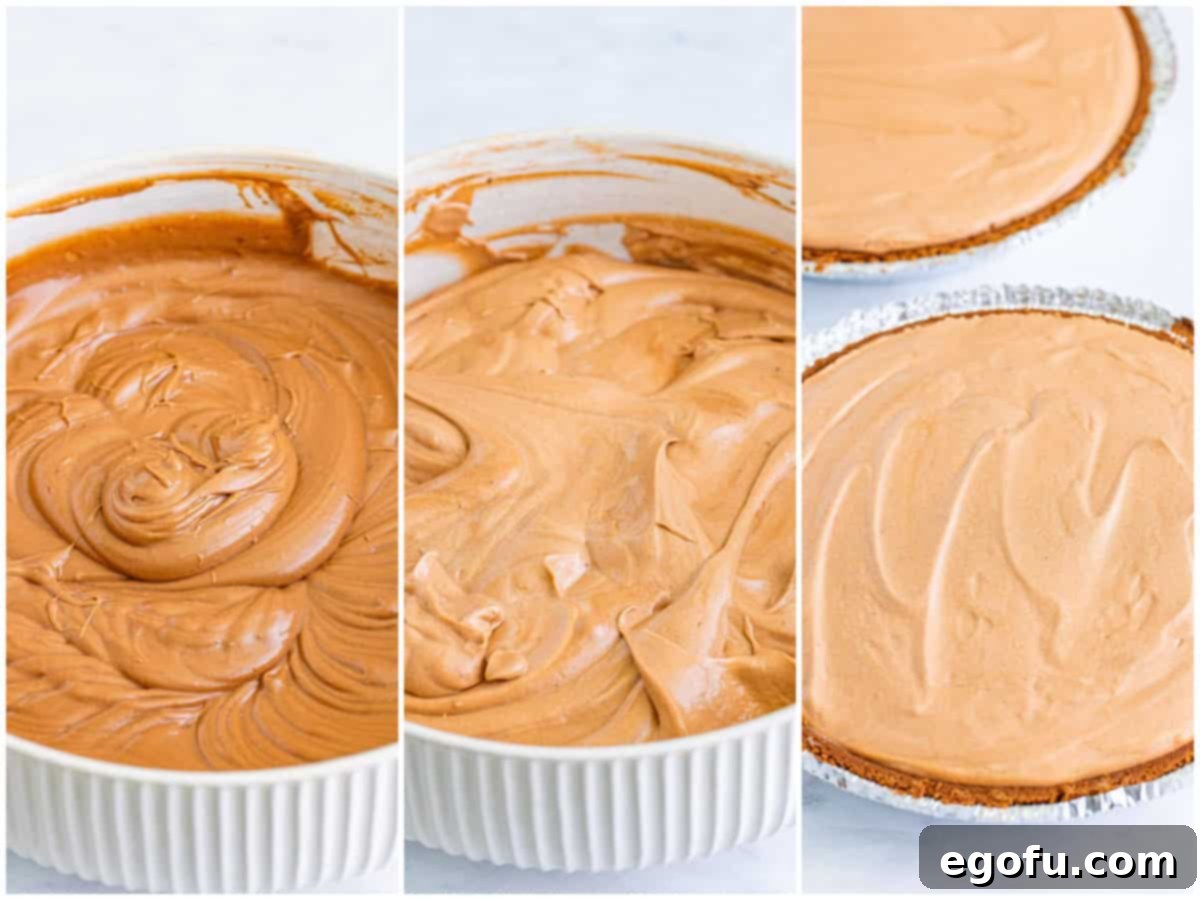
- Combine Layers Gradually: Now it’s time to skillfully bring the two main flavor components together. Begin by gradually adding spoonfuls of the slightly set, prepared chocolate pudding into your peanut butter cream cheese mixture. It is crucial to add the pudding incrementally. After each spoonful is added, use your electric mixer to fully incorporate it into the peanut butter mixture before adding the next one. This deliberate, gradual process ensures a perfectly smooth and evenly blended pie filling without any separation or uneven textures.

Fold in Whipped Topping: Once all the chocolate pudding has been completely incorporated into the peanut butter mixture, gently fold in half of the thawed 16-ounce tub of whipped topping. Use a rubber spatula or a large spoon to carefully fold it in, working with a light hand until the mixture is evenly combined and no distinct white streaks of whipped topping remain. Be very careful not to overmix at this stage, as excessive agitation can deflate the whipped topping, which would unfortunately reduce the pie’s desired light and airy texture.
- Fill the Pie Crusts: Take your two pre-made chocolate pie crusts and place them on a flat surface. Divide the luscious, creamy filling mixture evenly between them, spooning half of the mixture into each crust. Use the back of your spoon or a spatula to gently spread the filling into an even, smooth layer, ensuring it fills the crusts beautifully and uniformly.
- Chill to Perfection: This is arguably the most vital step for a successful and firm no-bake pie. Once both pies are filled, cover them tightly with plastic wrap or aluminum foil. Transfer them to the refrigerator and allow them to chill for a minimum of 6 hours. For the absolute best results, achieving a fully set, firm pie that slices cleanly, it is highly recommended to let them set overnight. Do NOT skip or shorten this crucial chilling step, as it is absolutely essential for the pudding and cream cheese components to firm up properly.
- Serve and Enjoy: Once your pies are perfectly chilled and gloriously set, they are ready for their grand debut! Remove them from the refrigerator. Take the remaining half of the whipped topping and generously dollop or spread it over the top of each pie. For an extra flourish, you can add your preferred toppings such as chopped nuts, mini chocolate chips, chocolate shavings, or a drizzle of chocolate or peanut butter sauce. Slice into generous portions and prepare to savor every single decadent bite of your homemade No Bake Chocolate Peanut Butter Pudding Pie!
Tips for No-Fail No Bake Chocolate Peanut Butter Pie
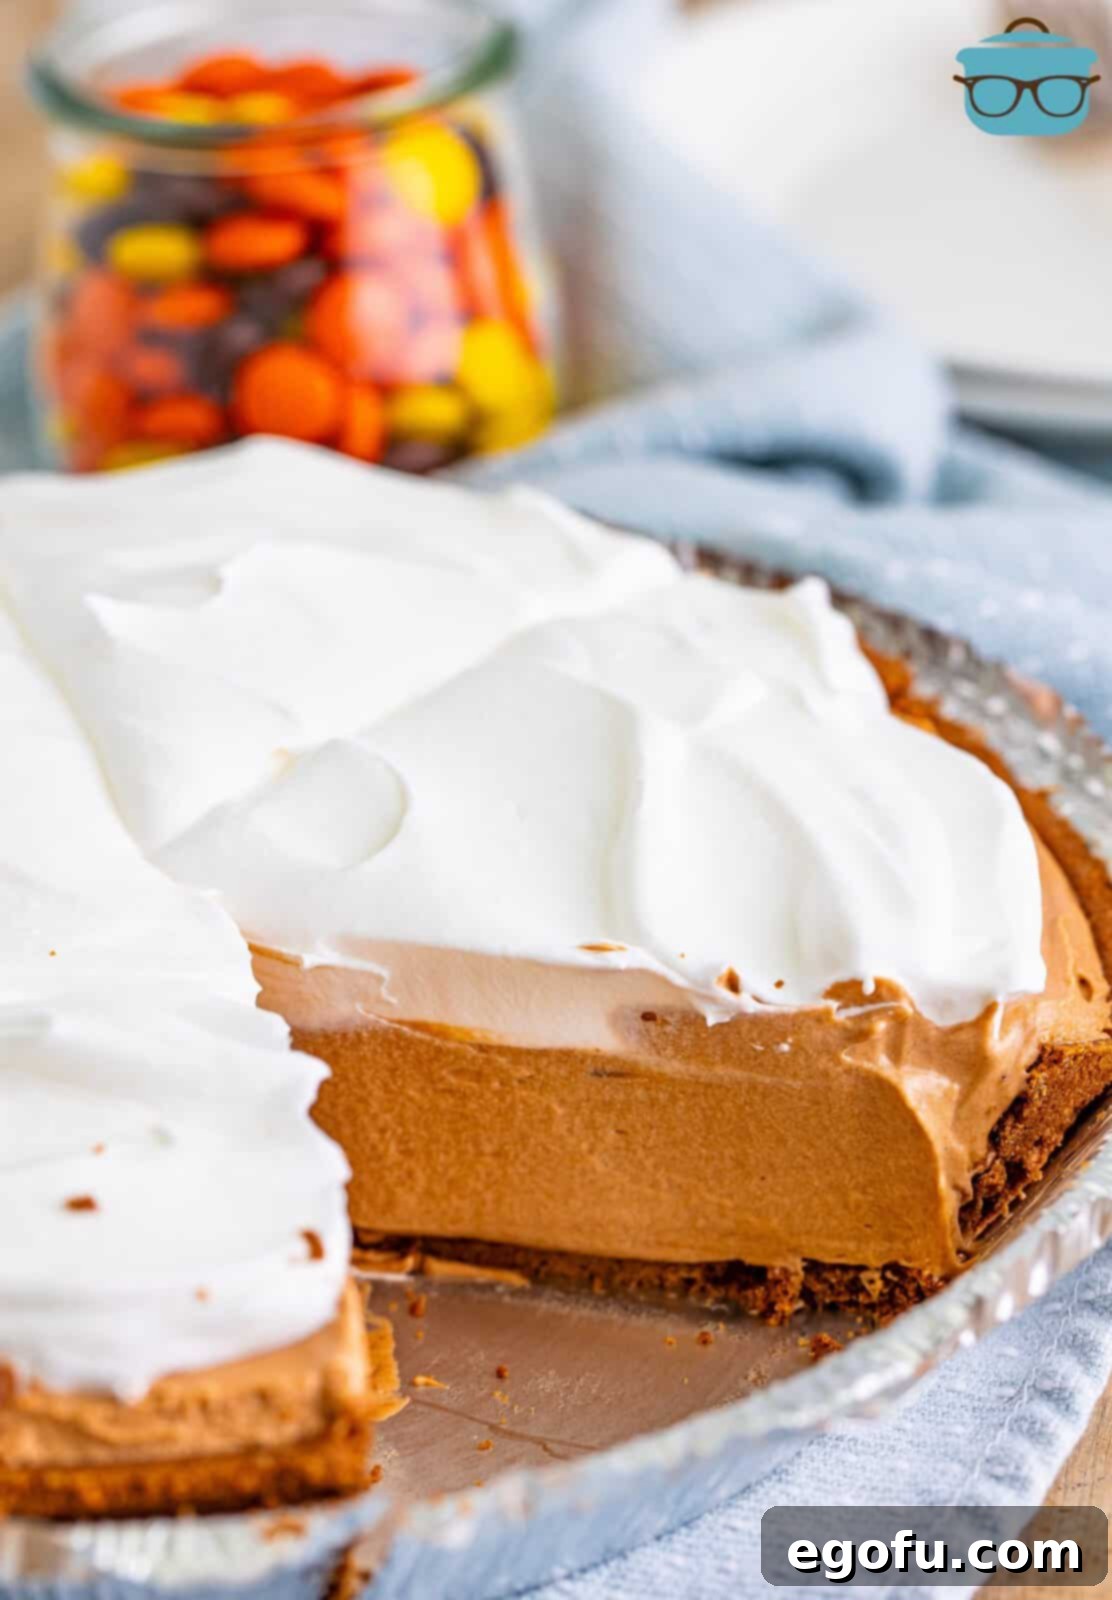
Achieving a perfect No Bake Chocolate Peanut Butter Pudding Pie is remarkably simple when you keep a few essential tips in mind. These insights will help ensure your pie is wonderfully creamy, perfectly set, and utterly delicious every single time, making you a no-bake dessert master.
- Room Temperature Cream Cheese is Non-Negotiable: We cannot stress the importance of this enough! Using cold, firm cream cheese will inevitably lead to stubborn lumps in your peanut butter layer, no matter how much you try to blend it. For a truly silky-smooth filling, ensure your block of cream cheese has completely softened to room temperature. This typically requires letting it sit out on the counter for at least an hour. If you find yourself short on time, carefully remove it from its foil wrapper and microwave it in a safe bowl for very short bursts (10-15 seconds at a time) until it’s just pliable, but certainly not melted.
- Read Pudding Labels Carefully: The distinction between “instant” and “cook and serve” pudding is absolutely critical for this recipe’s success. Only instant pudding contains the necessary ingredients to set properly without the application of heat. Always double-check the box meticulously before you make your purchase to ensure you have the correct “instant” type for this no-bake recipe. This small step prevents a potentially runny pie disaster.
- Don’t Skimp on Chill Time: Patience truly is a virtue, especially when it comes to no-bake desserts. The minimum 6-hour refrigeration period is essential as it allows all the delicious ingredients to meld together beautifully and for the entire pie to set firmly. An overnight chill, if you can manage it, is truly ideal and will consistently give you the best, most stable, and cleanly sliceable results. Rushing this step will invariably lead to a soft, potentially runny pie that is difficult to cut and serve elegantly.
- Gentle Folding for Airiness: When it comes to incorporating the whipped topping into your filling, always use a gentle folding motion with a rubber spatula. Avoid the temptation to use an electric mixer at this final stage, as overmixing can easily deflate the precious air from the whipped topping, leading to a denser, less appealing pie. The goal here is to maintain a light, airy, and wonderfully creamy consistency that melts in your mouth.
- Evenly Divide Filling: For two consistently sized, equally delicious, and aesthetically pleasing pies, it’s important to make a conscious effort to divide the luscious filling as evenly as possible between the two pre-made chocolate pie crusts. This ensures both pies have the same generous, satisfying layers and balanced flavor.
- Storage is Key to Freshness: As detailed in the comprehensive FAQ section, this pie absolutely requires refrigeration. Always keep it covered tightly with plastic wrap or aluminum foil in the refrigerator when it’s not being served to maintain its freshness and prevent it from absorbing unwanted odors. If you plan to freeze one for later enjoyment, wrap it exceptionally tightly in multiple layers of plastic wrap, followed by a layer of aluminum foil, to protect it effectively from freezer burn.
- Get Creative with Garnishes: While the basic whipped topping is wonderfully delicious on its own, consider elevating your pie’s presentation and flavor with simple yet effective garnishes. A sprinkle of mini chocolate chips, a delicate dusting of cocoa powder, a creative drizzle of chocolate syrup or melted peanut butter, or even a few chopped Reese’s pieces can transform your pie, making it look as incredible and enticing as it tastes.
Frequently Asked Questions (FAQ) About Your No Bake Pie
Absolutely! To add extra texture and bursts of flavor, feel free to mix in various treats directly into the pudding pie filling. Popular choices include mini chocolate chips for added sweetness, finely chopped candy bars (such as Snickers, Heath bars, or Butterfinger pieces) for an irresistible crunch, or crumbled cookies like Oreos or Nutter Butters for another layer of delicious texture. These add-ins create wonderful pockets of surprise and enhance the pie’s overall appeal in every bite!
While the pie is perfectly delicious as is, you can certainly enhance its appeal with additional toppings. Consider sprinkling chopped peanuts over the whipped topping for an extra nutty crunch and a more pronounced peanut flavor. For the ultimate peanut butter lover, diced Reese’s Peanut Butter Cups are a fantastic and festive choice. For a more elegant presentation, a swirl of melted peanut butter and chocolate sauce artfully drizzled over each slice before serving creates a beautiful and flavorful finish. A simple dusting of cocoa powder can also add a sophisticated touch.
Yes, absolutely! This versatile Chocolate Peanut Butter Pie would be equally delicious in alternative crusts. A traditional graham cracker crust is a classic and popular choice, offering a slightly sweet and crumbly contrast that pairs wonderfully with the creamy filling. You could also experiment with a vanilla wafer crust for a milder sweetness, an Oreo cookie crust for even more chocolate intensity, or even a homemade shortbread crust for a buttery base. Just ensure your chosen crust is either ready-made or prepared and fully cooled if it requires baking, to maintain the “no-bake” integrity of this dessert.
If peanut butter isn’t your preference, or if you wish to try a different flavor combination, there are excellent and equally delicious substitutes. Nutella, the beloved chocolate-hazelnut spread, makes for an incredibly decadent alternative, creating a rich and smooth filling that pairs wonderfully with the chocolate pudding. For another delightful nutty flavor, almond butter or cashew butter can be used, providing a slightly different, yet equally delicious, profile. When opting for alternatives, always ensure you select creamy, stir-free varieties for the best texture and ease of blending into your pie filling.
You certainly can, and it’s a fantastic way to enjoy it, transforming the pie into a luxurious, ice cream-like dessert that is particularly refreshing on a hot day or whenever you desire a firmer texture. For optimal slicing and serving, allow your frozen pie to sit at room temperature for approximately 30-45 minutes before cutting into wedges. This brief thawing period makes it significantly easier to manage and ensures a pleasant, creamy consistency reminiscent of a decadent frozen mousse. It’s a delightful variation that’s sure to be a hit with everyone!
Absolutely! The beauty of this recipe truly lies in its incredible adaptability. You can easily swap out the instant chocolate pudding mix for a variety of other delicious flavors. Instant vanilla pudding, butterscotch, white chocolate, or even a banana cream pudding mix would create unique and delightful variations. The key is to ensure you use an instant pudding mix of the same size package (5.9 ounces, or the larger size) as specified in the recipe. This consistency in size is crucial for ensuring proper setting, maintaining the correct texture, and guaranteeing the overall success of your no-bake pie, opening up a world of endless dessert possibilities.
Due to its perishable ingredients and soft-set nature, this no-bake pie requires diligent refrigeration. Always keep your pie covered tightly with plastic wrap or aluminum foil when it’s not being served. This prevents it from absorbing other odors from your refrigerator and helps maintain its optimal freshness. Stored correctly in the refrigerator, your pie will remain delicious and safe to eat for up to 1 week. For longer preservation, you can freeze the pie for up to 3 months. When preparing to freeze, wrap the entire pie securely in several layers of plastic wrap, followed by a layer of aluminum foil, to protect it effectively from freezer burn and preserve its quality.
Related Dessert Inspiration
If you’ve fallen in love with the irresistible combination of chocolate and peanut butter, or simply enjoy discovering easy, crowd-pleasing desserts that require minimal effort, explore these other fantastic recipes from our collection:
- Classic No Bake Peanut Butter Pie
- Decadent Peanut Butter Pie Brownies
- Rich Peanut Butter Fudge Bars
- Explosive Peanut Butter Earthquake Cake
- Quick No Bake Twix Pies
- Easy No-Churn Peanut Butter Chocolate Chip Ice Cream
- Chewy Peanut Butter Oatmeal Cookies
- Reese’s Peanut Butter Poke Cake
- Traditional Peanut Pie
- Scrumptious Reese’s Cheesecake Bars
- Classic Buttermilk Pie
Originally published: November 2023
Updated & Republished: March 2025

No Bake Chocolate Peanut Butter Pudding Pie
This incredibly creamy, rich, and easy-to-make No Bake Chocolate Peanut Butter Pudding Pie offers the quintessential chocolate and peanut butter flavor combination, ready in minutes with no baking required. It’s the perfect fuss-free dessert!
Ingredients
- 5.9 ounce instant chocolate pudding mix (larger box – essential for proper setting)
- 3 cups whole milk (for ultimate creaminess and rich texture)
- 8 ounce block cream cheese, softened to room temperature (crucial for a smooth, lump-free filling)
- 1 cup creamy peanut butter (the classic flavor backbone of this delicious pie)
- ¾ cup powdered sugar (for a smooth, lump-free sweetness that blends perfectly)
- 16 ounce (large tub) whipped topping (divided use – half for mixing into the filling, half for generous topping)
- 2 (6 ounce) chocolate pie crusts (pre-made for incredible convenience and a true no-bake experience)
Instructions
- In a medium-sized bowl, whisk together the instant chocolate pudding mix and whole milk for approximately 2 minutes until the mixture noticeably thickens. Transfer this bowl to the refrigerator for 5 minutes to allow it to set further.
- In a separate large bowl, using an electric hand mixer or stand mixer, blend the softened cream cheese, creamy peanut butter, and powdered sugar until the mixture is smooth, thick, and fully combined. Ensure there are no lumps of cream cheese.
- Gradually add spoonfuls of the prepared and slightly set chocolate pudding into the peanut butter mixture. It’s important to incorporate each spoonful fully before adding the next, ensuring a smooth and even blend throughout the filling.
- Once all the pudding is incorporated, gently fold in half of the thawed whipped topping using a spatula. Continue folding until no streaks of whipped topping remain and the mixture is uniformly combined. Be careful not to overmix, which can deflate the topping.
- Divide the finished pie filling evenly between the two chocolate pie crusts, spreading it smoothly to fill each one from edge to edge.
- Cover both pies tightly with plastic wrap and refrigerate them for at least 6 hours, or ideally overnight, to allow them to set completely. This chilling step is absolutely crucial for the pie’s structure and sliceability.
- When ready to serve, remove the pies from the refrigerator. Top each pie generously with the remaining whipped topping. You can add extra garnishes like chocolate shavings or chopped peanuts if desired. Slice and serve your delectable No Bake Chocolate Peanut Butter Pudding Pie!
Notes for Success
- For more creative ideas, substitutions, and answers to common questions, please refer to the detailed “Unlock More Flavor: Tips and Variations” and “Frequently Asked Questions” sections located above in the article.
- This versatile recipe yields two delicious pies, making it perfect for entertaining or enjoying over several days. Enjoy one now and consider freezing the second for a delightful treat later!
- Leftovers should always be stored, covered tightly, in the refrigerator for up to 1 week. For longer preservation, the pie can be frozen for up to 3 months when wrapped securely. Always ensure this soft-set pie is refrigerated when not being served to maintain its freshness and safety.
Nutritional Information (per serving)
Calories: 324kcal | Carbohydrates: 38g | Protein: 11g | Fat: 15g | Sodium: 475mg | Fiber: 2g | Sugar: 29g
Nutritional Disclaimer
The provided nutritional information is an estimate based on standard calculations and ingredient values. The Country Cook is not a dietician or nutritionist. Actual calorie counts and other nutritional values can vary significantly depending on specific brands used, individual preparation methods, and any ingredient substitutions. If precise nutritional values are important to you, we highly recommend calculating them using your preferred online nutritional calculator and the exact brands of ingredients you utilize in your own kitchen.
Made This Delicious Pie?
We’d absolutely love to see your creation! Share a photo on Instagram and tag us @thecountrycook. Don’t forget to mention us using the hashtag #thecountrycook!
