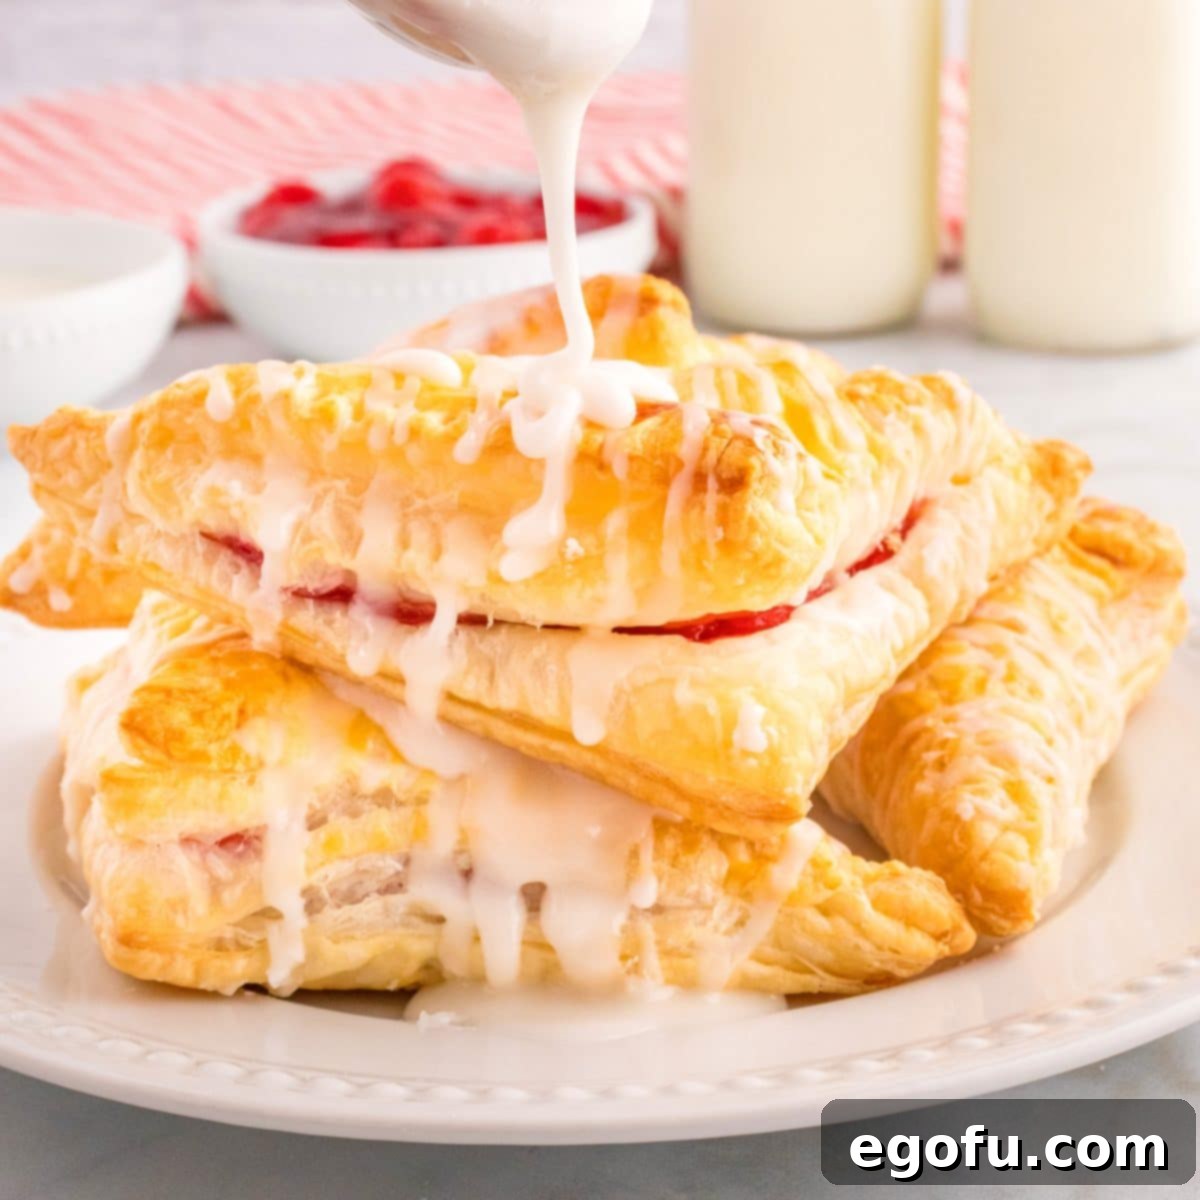
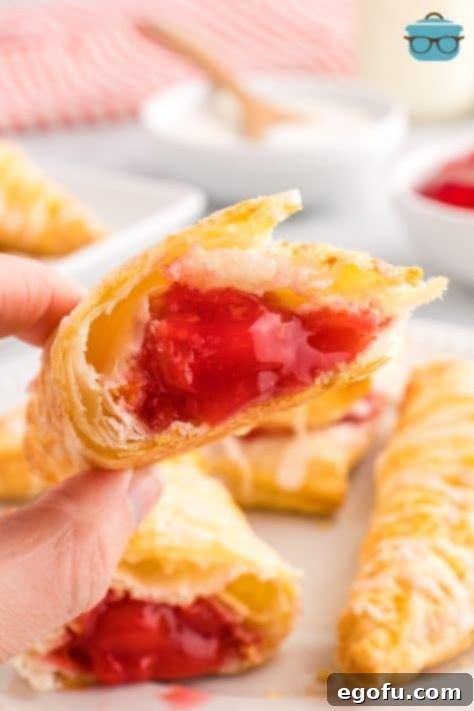
These sweet and flaky Cherry Turnovers are made from puff pastry, cherry pie filling, and topped with a sweet glaze. A quick and easy dessert!
Irresistibly Flaky Cherry Turnovers: Your Go-To Easy Dessert
Imagine a warm, golden-brown pastry, its delicate layers flaking with every bite, revealing a burst of sweet, tangy cherry filling, all crowned with a glistening vanilla glaze. That’s the magic of these homemade Cherry Turnovers! This isn’t just a dessert; it’s a delightful experience that comes together with surprising ease, making it a perfect choice for any occasion – from a casual family brunch to an elegant potluck. In just about 40 minutes, you can transform simple ingredients into a bakery-quality treat that will have everyone asking for the recipe. Our simple, fool-proof method utilizes convenient premade puff pastry, saving you precious time without compromising on that signature flaky texture. Get ready to impress with minimal effort and enjoy the satisfying process of creating these beloved sweet pastries!
Frequently Asked Questions About Perfect Cherry Turnovers
While crescent roll dough can certainly be used to create a delicious fruit-filled pastry, it’s important to understand that the result will differ significantly from traditional puff pastry turnovers. Crescent roll dough is inherently thicker and denser, often having a richer, chewier texture more akin to a soft biscuit or a croissant. This means you won’t achieve the same light, airy, and incredibly delicate flaky consistency that puff pastry is renowned for. If you prefer this denser style, it’s still a wonderful and enjoyable option for a sweet treat. For a comparison, you might explore recipes using crescent rolls for fruit fillings, such as our Cherry Pie Bites, which offer a different, yet equally satisfying, dessert experience tailored to that dough type.
Leaking is a common issue when baking turnovers, but it’s easily preventable with a few careful techniques. The primary culprit is often overfilling. While it’s tempting to load up each pastry with as much luscious cherry filling as possible, too much can put excessive pressure on the seams, causing them to burst open as the pastry expands in the oven. Aim for about one tablespoon of filling per pastry square, leaving a generous margin (at least a half-inch) around the edges. Secondly, a proper and secure seal is crucial. Don’t rely solely on your fingers; use the tines of a fork to firmly crimp the edges together. This creates a stronger, more robust bond that helps contain the filling effectively. Ensure there are no visible gaps or weak spots along the crimped edges, and you’ll enjoy beautifully sealed, leak-free turnovers every time.
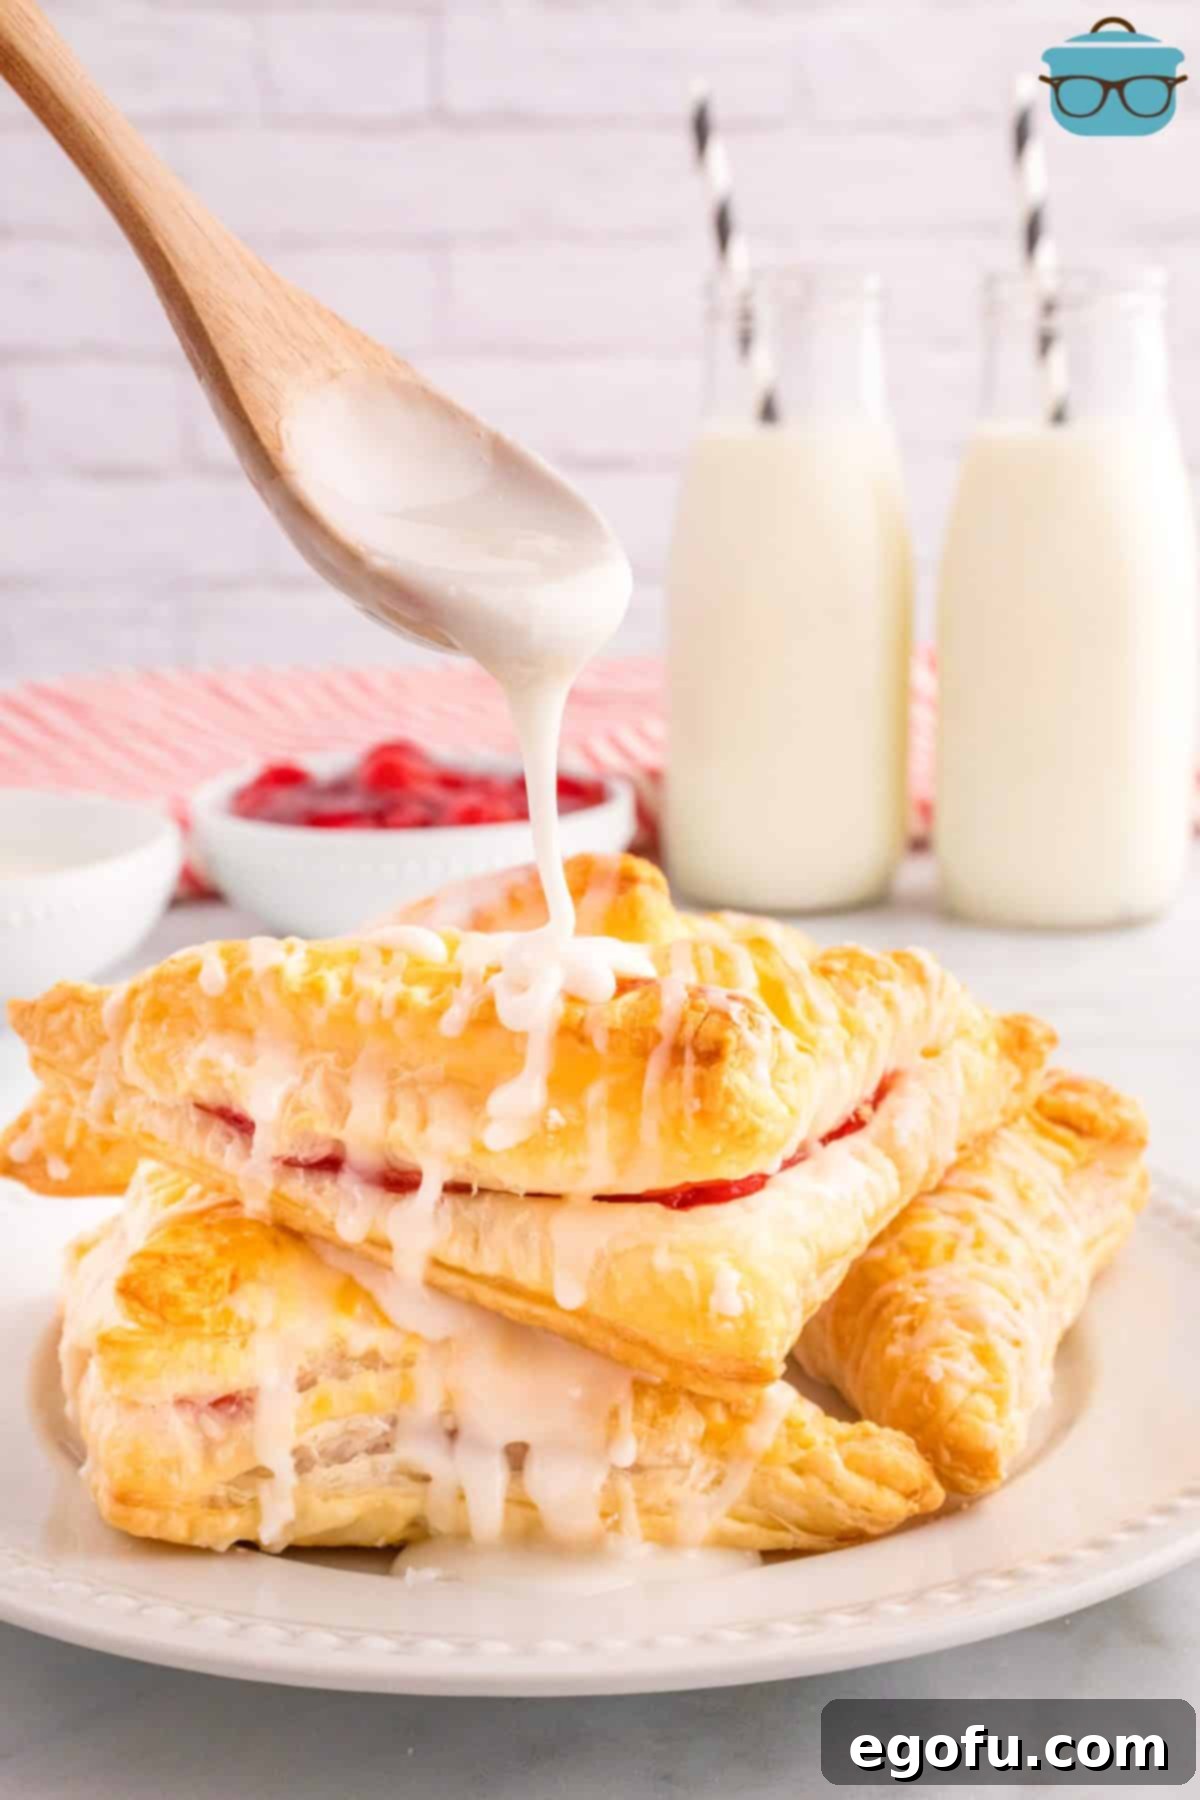
The secret to a perfect, set glaze lies in patience and precise temperature control. Applying glaze to warm turnovers will inevitably cause it to melt and run off, leaving you with a sticky mess and a less-than-ideal presentation. Always wait until your turnovers have cooled completely to room temperature before drizzling on the glaze. This allows the glaze to set properly, creating that lovely, opaque, and somewhat firm finish. Additionally, consider the consistency of your glaze. If it’s too thin, it will melt faster and be more prone to running. You can easily adjust the thickness by adding a little more powdered sugar, a teaspoon at a time, and whisking until you reach a smooth, pourable, yet sufficiently viscous consistency. A thicker glaze will hold its shape better and provide a more satisfying coating.
Absolutely! The beauty of this turnover recipe lies in its incredible versatility when it comes to fillings. While cherry is a classic and much-loved choice, feel free to unleash your culinary creativity and experiment with other fruit pie fillings. Imagine the delightful taste of a juicy Homemade Peach Pie Filling or a vibrant Blueberry Pie Filling nestled within the flaky puff pastry. Apple, raspberry, mixed berry, or even apricot fillings would also be absolutely delicious. The key is to ensure that whatever filling you choose is adequately thickened to prevent sogginess or leaking during baking. If using canned fillings, they are usually ready to go, but for homemade versions, a touch of cornstarch can ensure the perfect, spoonable consistency.
The vanilla glaze certainly adds an extra layer of sweetness, a beautiful visual finish, and a delightful touch to these cherry turnovers, elevating them to a true bakery-style treat. However, it is entirely optional, and the turnovers are wonderfully delicious even without it. If you prefer a less sweet dessert, have dietary restrictions, or are simply short on time, you can confidently omit the glaze. For a subtle, elegant finish, a light dusting of powdered sugar after the turnovers have cooled provides a lovely touch without the full glaze. Ultimately, it’s all about personal preference and how you best enjoy your sweet pastries!
Doubling this recipe is incredibly simple, making it perfect for feeding a larger crowd, a special gathering, or simply preparing extra to enjoy later. Most standard packages of frozen puff pastry dough come with two rolls, which aligns perfectly with doubling the quantities. You can use an entire standard 21-ounce can of cherry pie filling for a double batch. When adjusting the brown sugar and cornstarch for the filling, double those amounts accordingly. However, almond extract is quite potent, so you might want to keep its quantity the same or only slightly increase it to avoid overpowering the delicate cherry flavor. Remember to bake only one sheet of turnovers at a time to ensure even heat distribution and consistent baking results. This prevents overcrowding the oven and ensures each turnover achieves that desirable golden-brown crispness.
Proper storage ensures your turnovers remain fresh and delicious for as long as possible. Once completely cooled, store any leftover cherry turnovers in an airtight container at room temperature for up to two days. For longer storage, they freeze exceptionally well. To freeze, arrange cooled turnovers in a single layer on a baking sheet and freeze until solid (this prevents them from sticking together). Once frozen solid, transfer them to a freezer-safe bag or container. They can be frozen for up to three months. To reheat, simply place frozen turnovers in a preheated oven at 350°F (175°C) for about 10-15 minutes, or until warmed through and crisp again. This method helps restore their flaky texture, making them taste almost freshly baked.

Essential Ingredients for Flaky Cherry Turnovers
Crafting these delightful cherry turnovers requires a handful of accessible ingredients, most of which you might already have in your pantry. Each component plays a vital role in achieving that perfect balance of sweetness, flakiness, and rich cherry flavor. Here’s a closer look at what you’ll need and some helpful tips for each ingredient:
- Puff Pastry Dough: This is undoubtedly the star of our turnovers! You’ll find it in the freezer section of your grocery store, typically located near other pie crusts or frozen desserts. Puff pastry is a marvel of French baking, a laminated dough consisting of many ultra-thin layers of butter and dough, which expand dramatically and create its signature airy, incredibly flaky texture when baked. For the best results, it absolutely needs to be properly thawed before use, ensuring it’s pliable enough to work with without tearing but still cold enough to maintain its structural integrity. Always follow the package directions for optimal thawing, usually overnight in the refrigerator or a few hours at cool room temperature.
- Cherry Pie Filling: The heart of your turnover, providing that burst of sweet-tart fruit flavor. While canned cherry pie filling offers incredible convenience and consistent results, you can certainly opt for a homemade version if you prefer. If making your own, ensure it’s thickened to a similar consistency as canned filling to prevent it from becoming too runny and making the pastry soggy. A little cornstarch mixed in can work wonders here to achieve that perfect, spoonable texture. This recipe generally uses one cup of filling per roll of puff pastry, but if you’re doubling the recipe (which is highly recommended for gatherings!), you can easily utilize an entire standard 21-ounce can.
- Brown Sugar (Optional but Recommended): A touch of brown sugar stirred into the cherry pie filling adds a wonderful depth of flavor and a slight molasses note that elevates the taste beyond a standard store-bought filling. It complements the natural tartness of the cherries beautifully, giving the filling a more “homemade” and gourmet feel. You can adjust the quantity based on your desired sweetness level.
- Cornstarch: This acts as a crucial thickening agent for the fruit filling. Even with pre-thickened canned pie filling, a small additional amount of cornstarch helps ensure the filling remains delightfully jammy and doesn’t become overly runny during baking. This prevents soggy pastry bottoms and helps contain the filling, creating a more stable and delicious turnover interior.
- Almond Extract (Optional but Highly Recommended): This is truly a secret weapon for intensifying cherry flavor! A small dash of almond extract works synergistically with cherries, amplifying their natural taste and adding a sophisticated, slightly nutty aroma that many find irresistible. Like the brown sugar, it transforms a basic canned filling into something truly special and reminiscent of a freshly baked, artisanal pie. Don’t skip it if you want to unlock an extra layer of deliciousness and impress your taste buds!
- Large Egg (for Egg Wash): An essential component for that perfect golden finish. An egg wash, made simply by beating one large egg, is brushed over the turnovers before baking. This serves two key purposes: it helps create that gorgeous, shiny, golden-brown crust, giving your turnovers a professional, appealing look, and it aids in the flaking process by providing moisture and helping the delicate pastry layers separate beautifully. For easier whisking and smoother spreading, allow the egg to come to room temperature before preparing the wash.
- Powdered Sugar: The foundation of our sweet vanilla glaze. Powdered sugar (also known as confectioners’ sugar) is finely milled, allowing it to dissolve easily and quickly to create a smooth, lump-free glaze. You’ll use this to adjust the glaze’s thickness – more powdered sugar for a thicker, more opaque glaze, or less for a thinner, more translucent drizzle. Always whisk thoroughly to ensure no powdery lumps remain, resulting in a silky-smooth consistency.
- Milk: Used to thin the powdered sugar into a pourable glaze. Any type of milk (dairy or non-dairy, such as almond milk or soy milk) will work perfectly, so use what you have on hand. Start with a small amount and add more gradually, a teaspoon at a time, until you achieve your desired consistency for drizzling.
- Clear Vanilla Extract (or Regular Vanilla Extract): Clear vanilla extract is preferred if you desire a stark white glaze, as regular vanilla extract has a brownish tint that can slightly alter the color. However, if clear vanilla isn’t available, regular vanilla extract works perfectly fine for flavor. It adds that classic sweet, aromatic vanilla note that beautifully complements the cherry and pastry, creating a balanced and irresistible overall taste.

Step-by-Step Guide: How to Make Irresistible Cherry Turnovers
Making these flaky cherry turnovers is a straightforward and immensely rewarding process. Follow these simple, detailed steps to create a dessert that not only looks like it came from a professional bakery but tastes even better!
Step 1: Prepare Your Workstation and Filling
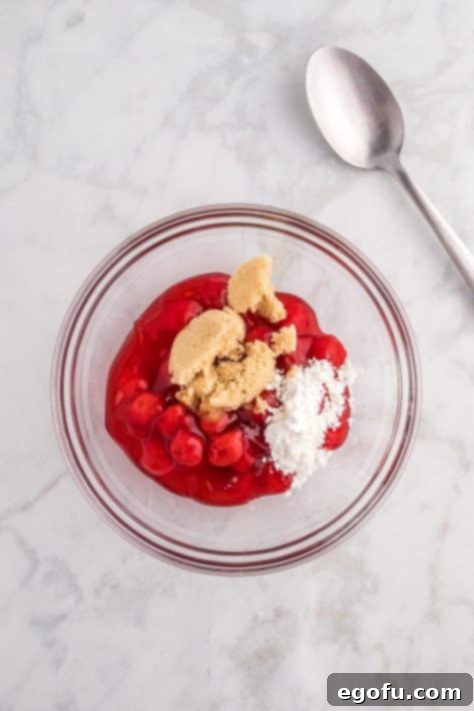
Begin by preheating your oven to a steady 375°F (190°C). As your oven warms, line a large baking sheet with parchment paper. This simple yet crucial step is a game-changer, preventing any sticking and making cleanup an absolute breeze. In a medium mixing bowl, combine your cherry pie filling. If you’re opting for the enhanced flavor (which we highly recommend!), add the brown sugar, cornstarch, and a hint of fragrant almond extract. Stir everything together thoroughly until all ingredients are well combined and the cornstarch has completely dissolved into the filling. This ensures your cherry mixture will be perfectly thickened and bursting with flavor. Set this delicious mixture aside while you prepare the pastry.

Step 2: Prepare the Puff Pastry
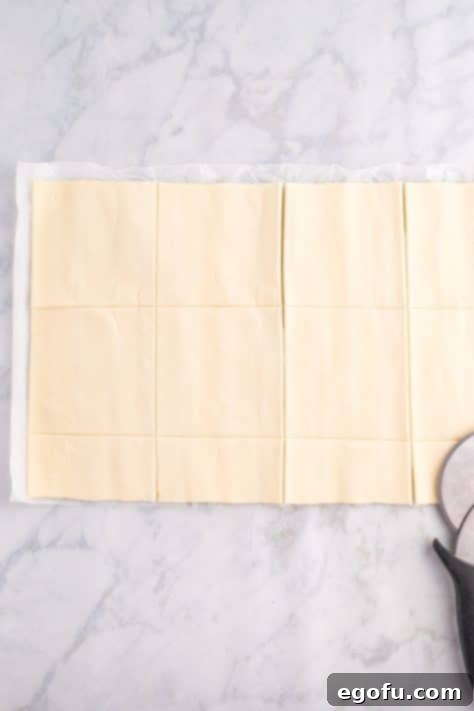
Gently unroll your thawed puff pastry dough onto a lightly floured surface. Many brands of puff pastry come conveniently pre-rolled on a sheet of parchment paper; if yours does, you can simply unroll it and work directly on that parchment. This minimizes mess and makes transferring the prepared pastries easier later on. Using a sharp knife or a pastry wheel, carefully cut the dough into approximately 4×4-inch squares. Precision isn’t strictly necessary, but aiming for relatively even sizes will help ensure uniform baking and a consistent presentation for all your turnovers.

Step 3: Fill and Fold Your Turnovers
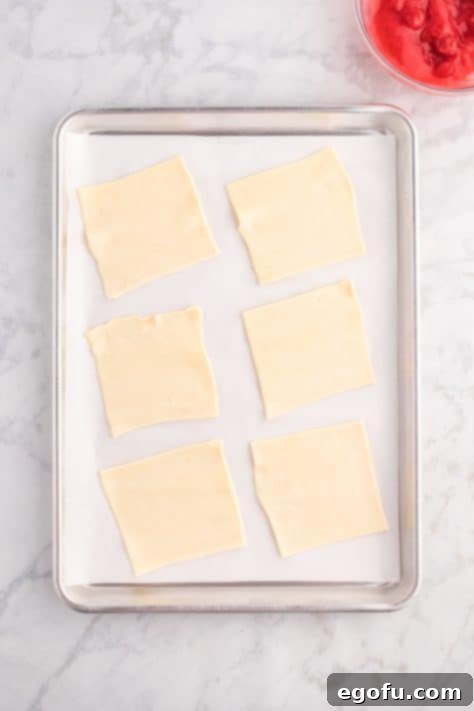
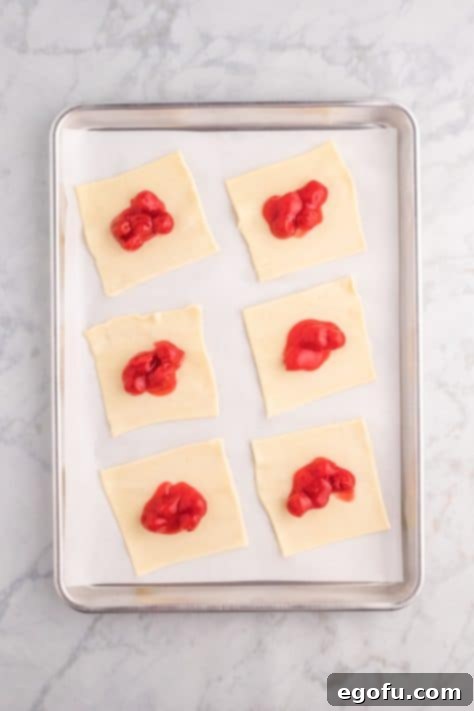
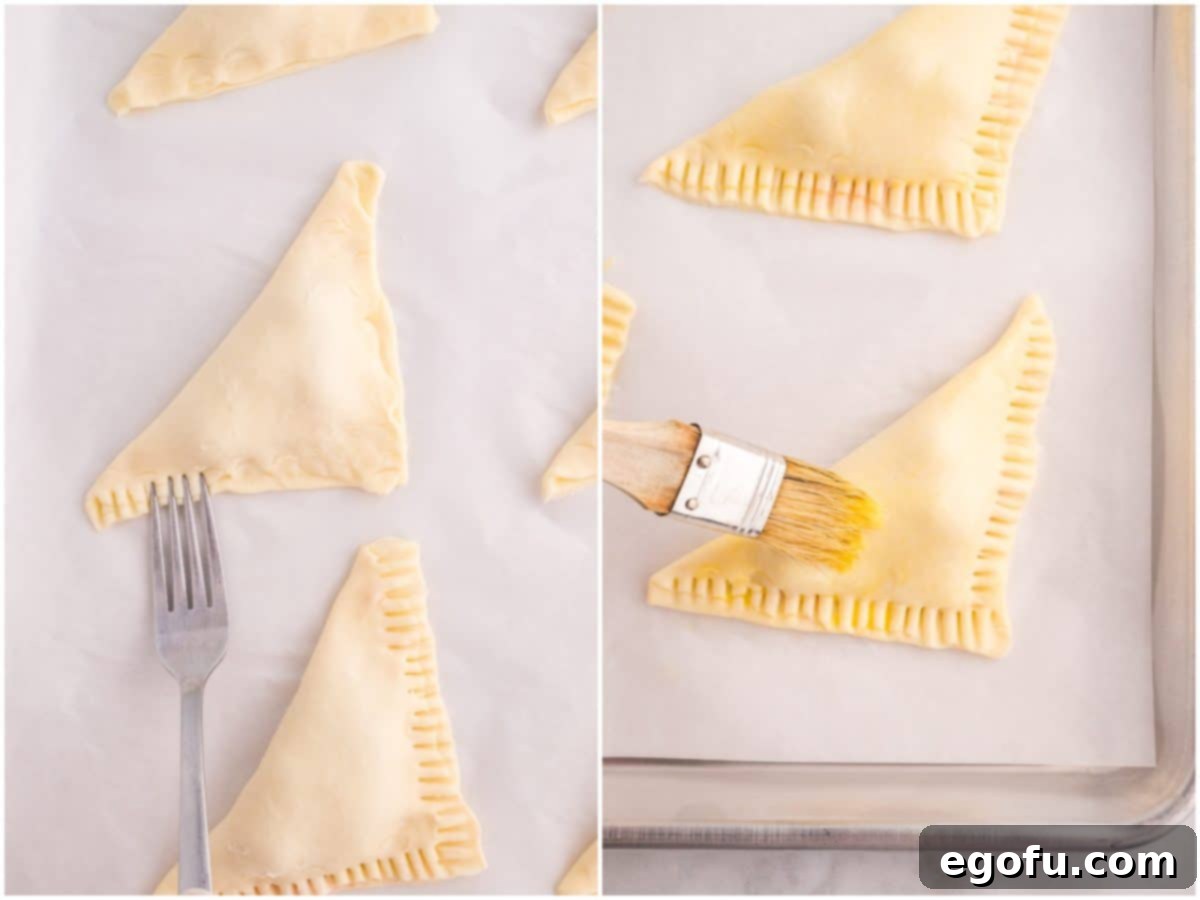
Carefully transfer your freshly cut pastry squares onto the prepared baking sheet, ensuring you leave sufficient space (at least 2 inches) between each one to allow for proper expansion during baking. Now, place approximately one level tablespoon of your prepared cherry filling directly into the center of each pastry square. Remember, the golden rule here is: don’t overfill! To form the classic turnover shape, fold one corner of the pastry diagonally over the filling to meet the opposite corner, creating a perfect triangle. Lightly press down around the edges with your fingers to begin sealing. For a truly secure closure that prevents any delicious filling from escaping, use the tines of a fork to firmly crimp along all three open edges. A good, tight seal is absolutely key to preventing leaks and ensuring your turnovers maintain their beautiful shape and flaky layers.
Step 4: The Golden Finish: Egg Wash Application
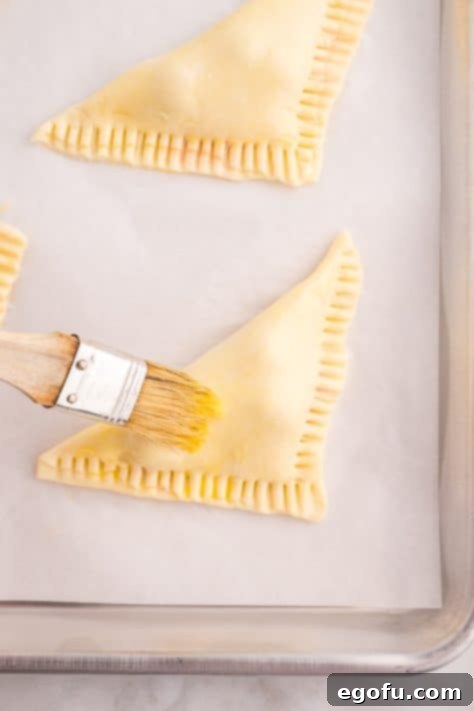
In a small separate bowl, whisk one large egg until it’s thoroughly beaten and uniform in consistency. This creates our magical egg wash. Using a pastry brush, gently apply a thin, even layer of this beaten egg over the entire top surface of each turnover. This simple step is vital for achieving that stunning golden-brown color and slightly crisp, shiny finish that makes baked goods so incredibly appealing. Beyond aesthetics, it also contributes to the flaky texture of the puff pastry by adding a little moisture and encouraging the layers to separate beautifully during baking.
Step 5: Bake to Perfection
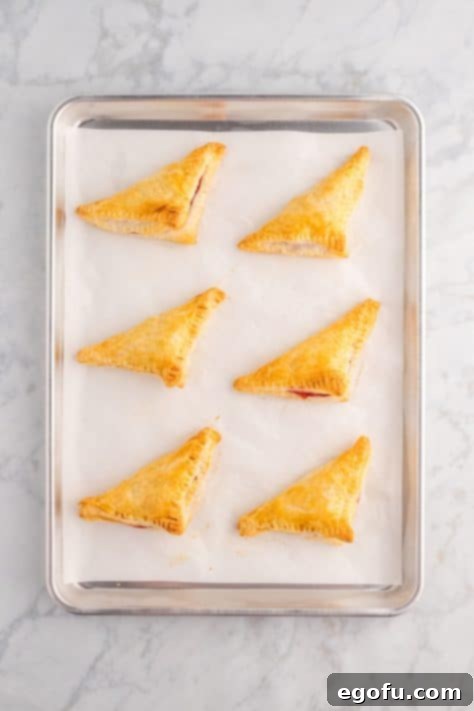
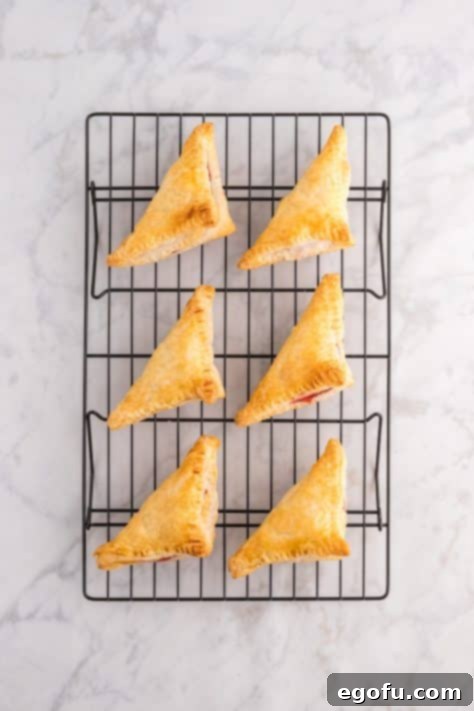
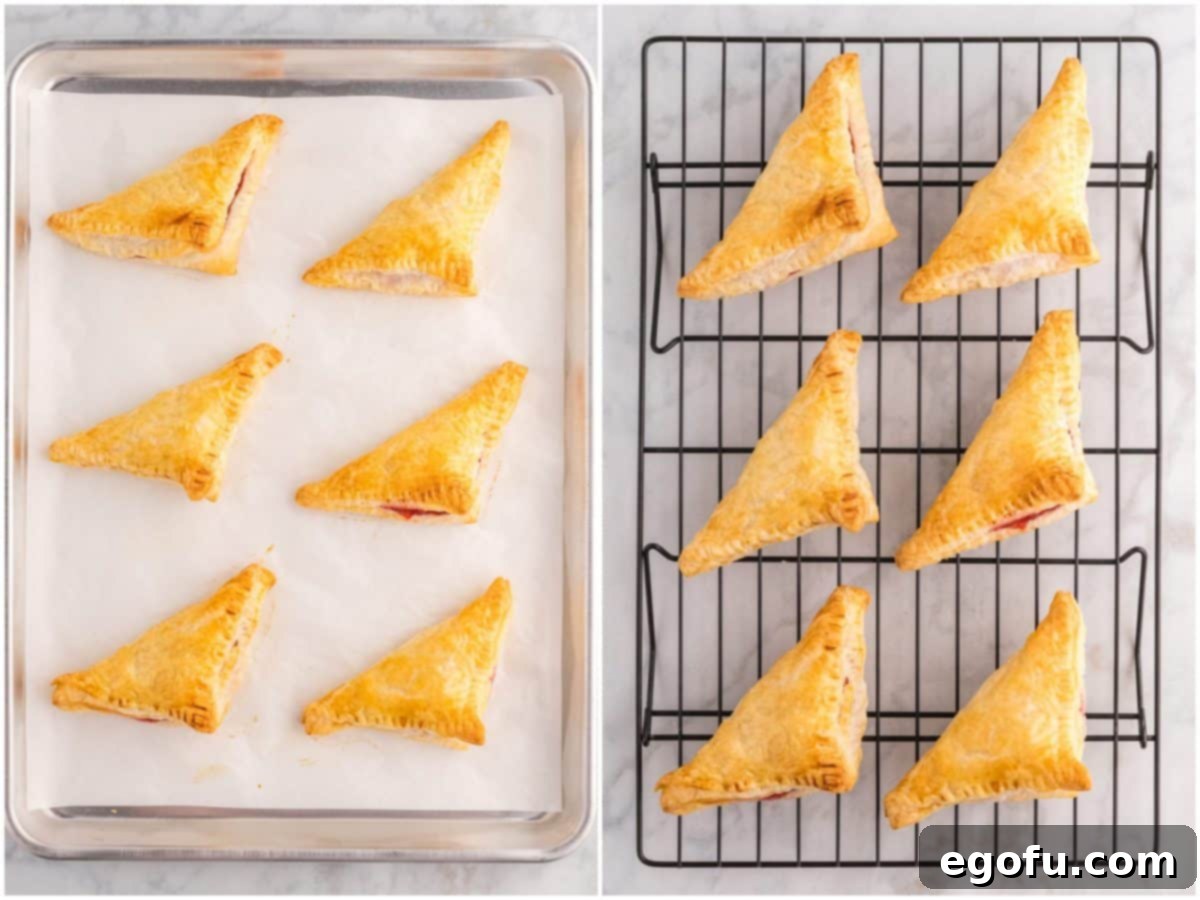
Carefully transfer the baking sheet with your prepared turnovers to your preheated oven. Bake for approximately 20-25 minutes, or until the turnovers have beautifully puffed up, turned a rich, appealing golden brown, and appear wonderfully crisp. Keep a close eye on them during the last few minutes, as oven temperatures can vary. Once baked to perfection, remove the baking sheet from the oven and allow the turnovers to cool on the sheet for a few minutes. This initial cooling helps them firm up slightly before you move them. Then, gently transfer them to a wire rack to cool completely. This crucial step prevents the bottoms from becoming soggy due to trapped steam and allows air to circulate, maintaining their desired crispiness.
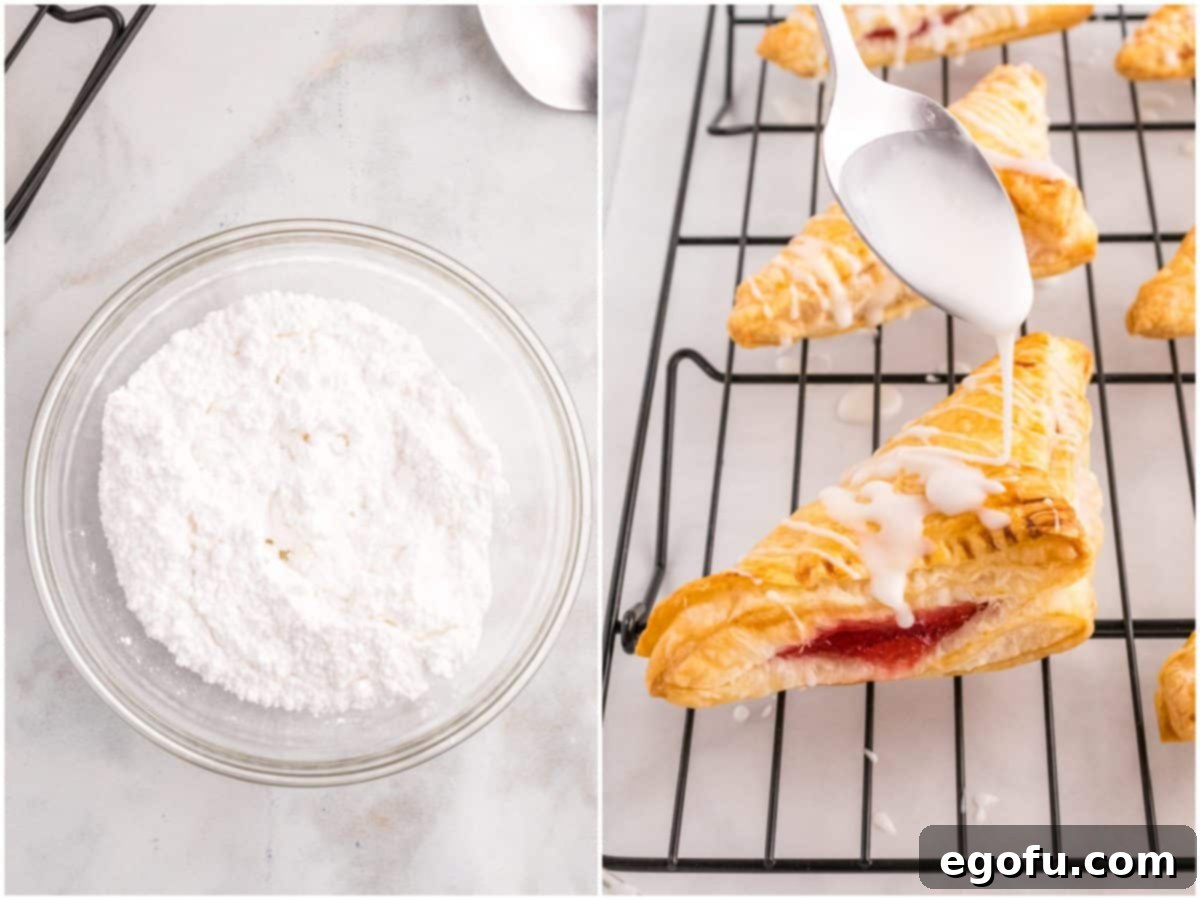
Step 6: Prepare and Apply the Vanilla Glaze
While your turnovers are cooling completely, it’s the perfect time to whip up the sweet vanilla glaze. In a small bowl, combine the powdered sugar, milk, and clear vanilla extract. Whisk vigorously until the mixture is completely smooth and free of any lumps. You can easily adjust the consistency of the glaze to your liking: add a bit more milk or vanilla extract if you prefer a thinner, more translucent glaze, or incorporate more powdered sugar for a thicker, more opaque and dominant coating. Once the turnovers are entirely cool – this is absolutely essential to prevent the glaze from melting – use a spoon to artfully drizzle the vanilla glaze over the tops of each one. For a professional touch, you can even use a small offset spatula to spread it evenly.
Step 7: Set and Serve Your Masterpiece
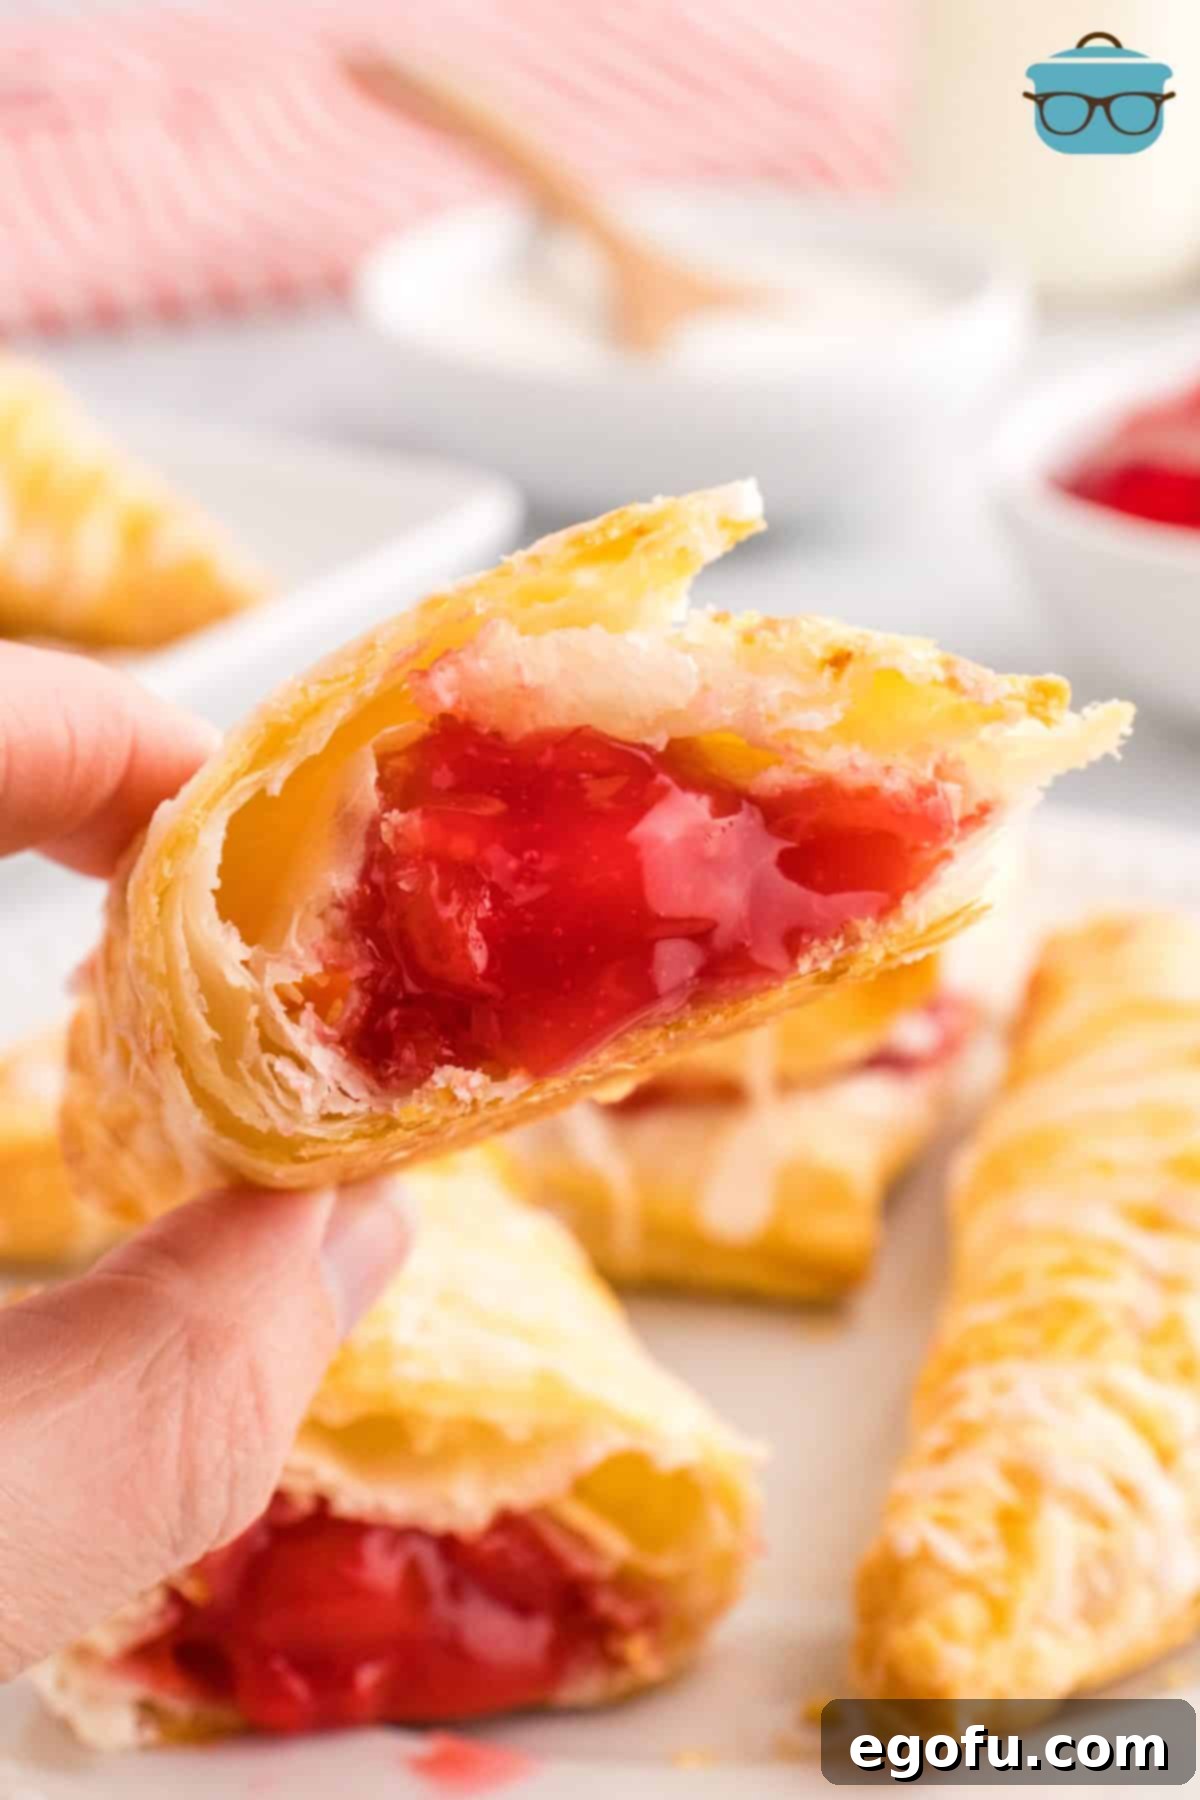
Allow the glaze a few minutes to set and harden slightly before serving. This will prevent any mess and ensure the beautiful presentation holds up. Once set, your homemade cherry turnovers are ready to be enjoyed! Serve them as a delightful breakfast treat, an afternoon snack, a stunning dessert after dinner, or alongside a warm cup of coffee or tea. They are truly irresistible, offering a perfect blend of crisp, buttery pastry and sweet-tart cherry goodness that will become an instant favorite.
Craving More Delicious Recipes?
If you’ve fallen in love with these cherry turnovers, you’re in for a treat! The world of easy, fruit-filled pastries and desserts is vast and delightful. Explore some of our other cherished recipes that are sure to satisfy your sweet cravings and expand your baking repertoire. From different fruit fillings to other creative ways to use pie filling, there’s something here for every dessert enthusiast and occasion:
- Apple Turnovers: A classic comfort dessert with a sweet and spiced apple filling, perfect for autumn.
- Cherry Pie Bites: Smaller, adorable bite-sized versions that are perfect for snacking or entertaining.
- No-Bake Cherry Yum Yum: A cool, creamy, and incredibly easy cherry dessert, ideal for warmer weather.
- Crescent Cherry Cheesecake Cobbler: A decadent dessert combining the best of cheesecake and cherry cobbler.
- Cherry Pie Bars: All the delightful flavor of cherry pie presented in a convenient, easy-to-serve bar form.
- Cherry Crumble Danishes: A delightful morning pastry featuring a sweet cherry filling and a buttery crumble topping.
- Cherry Pie Bubble Up: An unexpected and fun twist on cherry pie, great for family desserts.
- Cherry Dump Cake: The ultimate easy dessert requiring minimal effort – just dump and bake!
- Cherry Crumble Bars: A rustic and comforting dessert with a buttery, streusel-like crumble topping.
- Cherry Cobbler: A classic, warm, and inviting fruit dessert, especially perfect when served with a scoop of vanilla ice cream.
- Cherry Cheesecake Dip: A sweet and creamy dip, excellent for parties and sharing with fruit or cookies.
- Cherry Dessert Pizza: A fun and customizable dessert with a sweet cookie-like crust and fruit topping.
- Apple Hand Pies: Similar to turnovers, but made quickly in an air fryer for a wonderfully crisp result.
- Blueberry Hand Pies: Another delicious hand pie variation, perfect for blueberry lovers and air fryer enthusiasts.
- Brown Sugar Pop Tarts: A nostalgic breakfast or snack treat, elevated to homemade perfection with real ingredients.
Cherry Turnovers
These sweet and flaky Cherry Turnovers are made from puff pastry, cherry pie filling, and topped with a sweet glaze. A quick and easy dessert that’s perfect for any occasion!
(2 Reviews)
Pin Recipe
Ingredients
For the Cherry Turnovers:
- 1 cup cherry pie filling
- 2 Tablespoons brown sugar
- ½ Tablespoon cornstarch
- ⅛ teaspoon almond extract (optional)
- 1 roll puff pastry dough, thawed in the refrigerator (Note: most packages contain 2 rolls of dough)
- 1 large egg (for egg wash)
For the Vanilla Glaze:
- ¾ cup powdered sugar
- 1-2 Tablespoons milk
- 2 teaspoons clear vanilla extract (to keep the icing white, regular vanilla works too)
Instructions
- Preheat the oven to 375°F (190°C) and line a baking sheet with parchment paper.
- In a mixing bowl, combine the cherry pie filling, brown sugar, cornstarch, and almond extract. Stir until well combined and the cornstarch is dissolved. Set aside.

- Roll out the thawed puff pastry dough on a lightly floured surface. If it comes pre-rolled on parchment paper, you can simply unroll and leave it on the parchment.
- Cut the puff pastry dough into squares, approximately 4×4-inches each.

- Place the pastry squares on the prepared baking sheet, ensuring some space between each for expansion during baking.

- Place 1 Tablespoon of the prepared cherry filling in the center of each pastry square. Avoid overfilling.

- Fold the pastry diagonally over the filling, forming a triangle. Use a fork to crimp the edges, sealing the turnovers shut securely to prevent leaking during baking.

- In a small bowl, beat the large egg well for an egg wash. Brush the tops of the turnovers with the beaten egg. This will give them a beautiful golden-brown color when baked.

- Bake for 20-25 minutes, or until the turnovers are puffed and beautifully golden brown.

- Remove the turnovers from the oven and allow them to cool on the baking sheet for a few minutes before transferring them to a wire rack to cool completely.

- While the turnovers are cooling, prepare the vanilla glaze. In a small bowl, whisk together the powdered sugar, milk, and clear vanilla extract until smooth. Adjust the consistency by adding more milk or vanilla extract if too thick, or more powdered sugar if too thin.

- Once the turnovers have cooled completely, drizzle the vanilla glaze generously over the tops using a spoon.

- Allow the glaze to set for a few minutes before serving and enjoy your homemade flaky cherry turnovers!

Notes
- Please refer to the Frequently Asked Questions (FAQ’s) and detailed ingredient list above for other substitution ideas or for the answers to the most common questions you might have about this recipe.
- This recipe can easily be doubled if you need to make a larger batch for a gathering or simply want to have more delicious turnovers on hand.
- For an extra touch of sparkle and a subtle crunch, consider sprinkling a pinch of coarse sugar (like turbinado or demerara sugar) over the turnovers before baking. This adds a lovely professional finish.
- Always ensure your puff pastry is thoroughly thawed but still cold when you start working with it. If it gets too warm, the butter layers can melt, hindering the development of that signature flakiness.
Nutrition
Calories: 362kcal |
Carbohydrates: 49g |
Protein: 4g |
Fat: 16g |
Sodium: 122mg |
Fiber: 1g |
Sugar: 19g
Nutritional Disclaimer
“The Country Cook” is not a dietician or nutritionist, and any nutritional information shared is an estimate. If calorie count and other nutritional values are important to you, we recommend running the ingredients through whichever online nutritional calculator you prefer. Calories and other nutritional values can vary quite a bit depending on which brands were used, and these are merely estimations for general guidance.
Did you make this recipe?
Share your delightful creations on Instagram! We love seeing what you bake. Tag @thecountrycook and make sure to use the hashtag #thecountrycook so we can find and admire your baking masterpieces!
