This classic deviled eggs recipe is a must-serve for every holiday or cookout. They’re so irresistibly good, you might find yourself wanting to double or even triple the recipe! Plus, we’ll share indispensable tips on how to achieve the perfect hard-boiled egg every single time, making peeling a breeze.
A Foolproof Deviled Eggs Recipe for Any Occasion
No festive holiday meal or lively backyard cookout feels truly complete without a platter of classic deviled eggs. There’s something undeniably magical about these simple yet sophisticated appetizers that makes them disappear faster than you can blink. I’ve witnessed it countless times – guests just can’t get enough! You’ll often wish you had prepared two or three batches. I believe their enduring appeal stems from being a special treat we don’t enjoy often, so when they make an appearance, everyone gets a little excited. Join me as I guide you through making the best deviled eggs, complete with the secret to perfectly cooked and effortlessly peelable hard-boiled eggs!
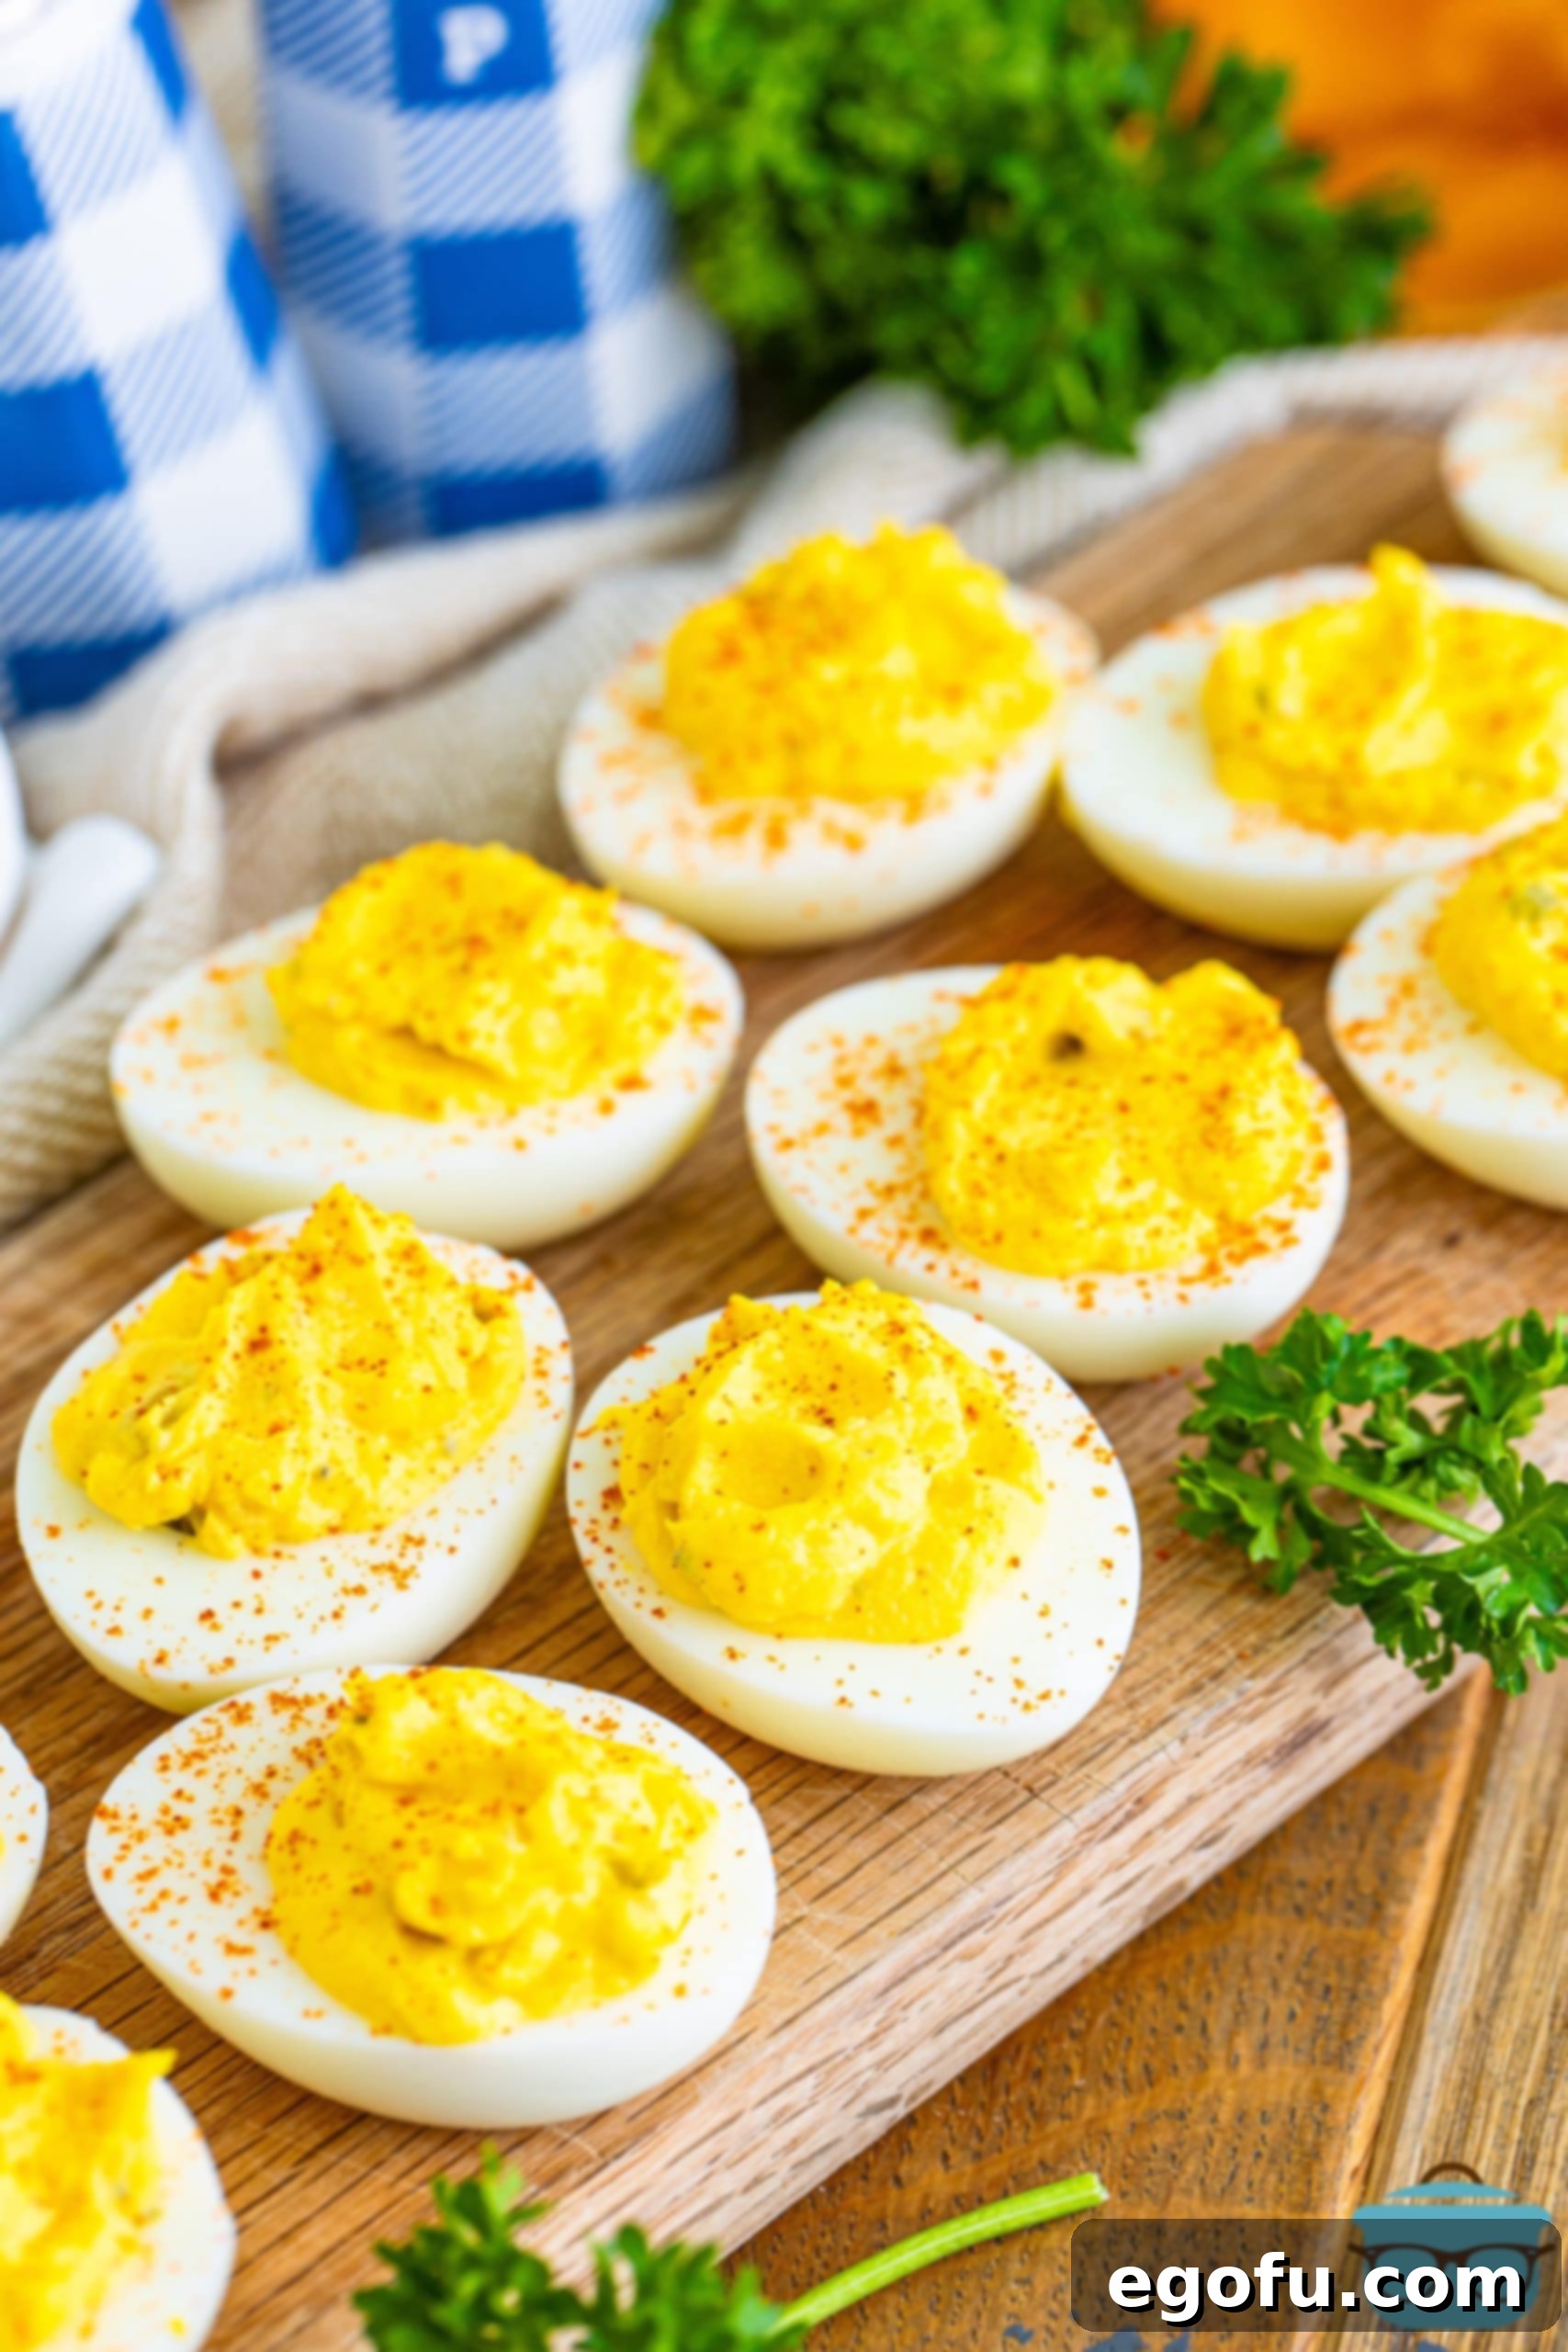

This is our favorite deviled egg recipe! Don’t tell my grandma I said so. Hers were good and everyone bragged on them but now everyone tells me that mine are even better! Ha! Thank you for making me look like a star!
– Maria
The Secret to Perfectly Cooked and Easily Peelable Hard-Boiled Eggs
The foundation of an outstanding deviled egg lies in a perfectly cooked and effortlessly peelable hard-boiled egg. Many people struggle with peeling eggs, often ending up with pitted whites or losing half the egg in the process. Fear not! I’m here to share a tried-and-true method that guarantees smooth, beautiful egg whites every time, ensuring your deviled eggs look as good as they taste.
Achieving the Ideal Hard-Boiled Egg Texture
For the perfect hard-boiled egg, it’s crucial to avoid overcooking, which can lead to a grayish-green ring around the yolk – a common sign of sulfur compounds reacting with iron in the egg. We want a vibrant, golden-yellow yolk and firm, tender whites, indicative of a perfectly cooked egg. Here’s my preferred method:
- Start with Cold Water: Place your large eggs in a single layer at the bottom of a pot. Cover them with at least an inch of cold water. Adding eggs to cold water helps prevent them from cracking as they heat up, and it also ensures more even cooking from the outside in.
- Bring to a Rolling Boil: Place the pot on high heat and bring the water to a rapid, rolling boil. Ensure the water is bubbling vigorously across the surface.
- Turn Off the Heat & Cover: As soon as the water reaches a full, continuous boil, immediately remove the pot from the heat. Cover it tightly with a lid. This step is critical for consistent results.
- Let Them Sit: Allow the eggs to sit undisturbed in the hot water for exactly 12 minutes. This “passive cooking” method provides gentle, consistent heat, preventing rubbery whites and that undesirable green ring around the yolk. For those who prefer a slightly softer, creamier yolk, you can reduce the sitting time to 9-10 minutes.
The Essential Ice Bath for Effortless Peeling
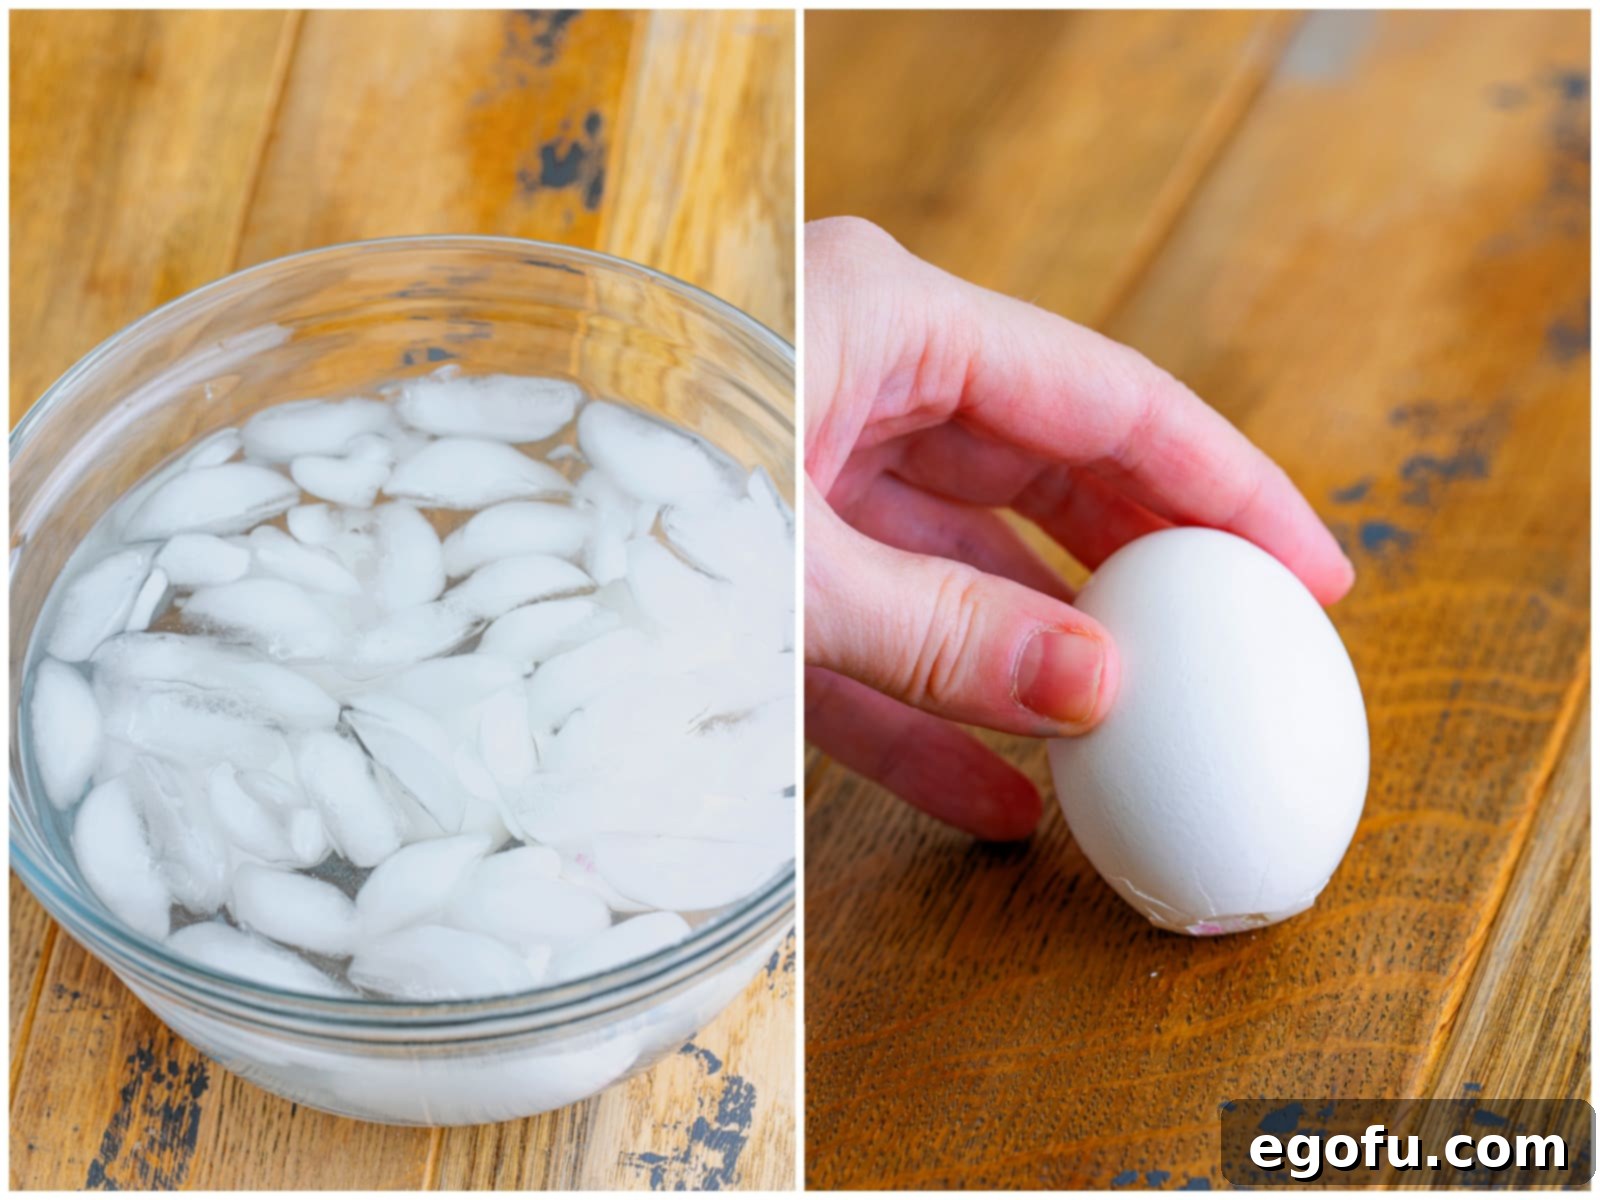
Once your 12 minutes are up, it’s critical to stop the cooking process immediately. This rapid cooling is where the ice bath comes into play. Plunging the hot eggs into ice water helps the egg whites contract quickly, separating them from the inner membrane and the shell, which is the ultimate key to easy peeling. This thermal shock is what makes all the difference.
- Prepare Your Ice Bath: While your eggs are resting in the hot water, prepare your ice bath. Fill a large bowl with plenty of ice and cold water. The colder the water, the more effective the shock!
- Transfer the Eggs: Carefully transfer the hot eggs from the pot into the ice bath using a slotted spoon. Avoid dropping them too forcefully, which could cause them to crack.
- Chill Thoroughly: Let the eggs sit completely submerged in the ice bath for at least 30 minutes, or until they are completely cool to the touch. This step is non-negotiable for easy peeling and should not be rushed.
Mastering the Art of Peeling Hard-Boiled Eggs
With your perfectly cooked and thoroughly chilled hard-boiled eggs ready, it’s time for the moment of truth: peeling. The secret truly lies in that thin membrane located just beneath the shell. Once you get past that, the shell practically slides off in large, satisfying pieces, leaving you with perfectly smooth egg whites.
- Gentle Tap: Start by gently tapping the wider, fatter end of the egg on a hard surface, like your countertop. This helps to crack the shell and create a starting point without crushing the egg.
- Locate the Membrane: Once cracked, carefully pick off a small piece of the shell. Look for the thin, almost invisible membrane that lines the inside of the shell. This membrane is your target.
- Slide and Peel: Using your fingers or even the tip of a spoon, gently slide underneath this membrane. The membrane is attached to the shell, so once you get a grip on it, the shell should come off in larger pieces. You’ll feel it detach smoothly.
- Optional Water Rinse: If you’re encountering particularly stubborn spots or small fragments of shell, try peeling the egg under cool running water. The water helps to wash away small shell fragments and can make the peeling process even smoother and cleaner.
- Roll to Loosen: Another useful trick is to gently roll the egg on the counter after cracking it. Apply light pressure to create tiny cracks all over the shell. This helps to loosen the shell from the membrane all around, making it even easier to remove.
Even with these tips, sometimes you’ll encounter a stubborn egg. Don’t worry, even experienced cooks have them! Just set those aside for a delicious egg salad sandwich or another dish where aesthetics aren’t paramount. The goal is perfectly smooth eggs for your deviled egg masterpiece.

Frequently Asked Questions About Deviled Eggs
- Why are they called deviled eggs?
- The term “deviled” originates from an 18th-century English culinary expression. It was used to describe dishes that were highly seasoned, spicy, or fried. In the context of deviled eggs, it refers to the zesty and often piquant filling, which typically includes mustard, vinegar, or other strong flavors that give it a “fiery” kick.
- Why do some people put vinegar in deviled eggs?
- Vinegar introduces a delightful hint of acidity that beautifully balances the richness of the egg yolks and mayonnaise. This acidity works wonders to create a surprisingly light, fluffy, and well-rounded filling, preventing it from tasting overly heavy. It also contributes to a brighter, more appealing yellow color in the yolk mixture. In my recipe, I achieve this same effect by using prepared mustard, which naturally contains vinegar, offering both flavor and that desired tang without needing a separate vinegar addition.
- How many deviled eggs does this make per person?
- When planning for a gathering, I generally estimate at least two deviled egg halves per person. However, if you know your guests are particularly enthusiastic about deviled eggs – and many are, especially if they’re homemade! – it’s always a good idea to double that amount to ensure there are plenty to go around. They truly are that popular, and leftovers are rare!
- Will deviled eggs keep overnight?
- Absolutely! Deviled eggs can be made a day in advance, making them an ideal appetizer for party prep. For best results, cover them tightly with plastic wrap or store them in an airtight container and refrigerate promptly. They are best enjoyed within two days of preparation. So, if you’re hosting an event tomorrow, feel free to prepare them today to save valuable time!
- Can deviled eggs be frozen?
- Unfortunately, no. Freezing deviled eggs is generally not recommended as it significantly alters the texture of the egg whites, making them watery, rubbery, and unappetizing upon thawing. While you could technically freeze just the yolk filling, the classic appeal of deviled eggs largely relies on the smooth, firm texture of the whites. It’s best to enjoy them fresh or refrigerated.
- How do I store leftover deviled eggs?
- To maintain their freshness, flavor, and food safety, always store leftover deviled eggs in a covered, airtight container in the refrigerator. They will remain delicious for up to three days. For optimal presentation and taste, aim to consume them within two days, as their texture and flavor are at their peak.

Essential Ingredients for Your Best Deviled Eggs
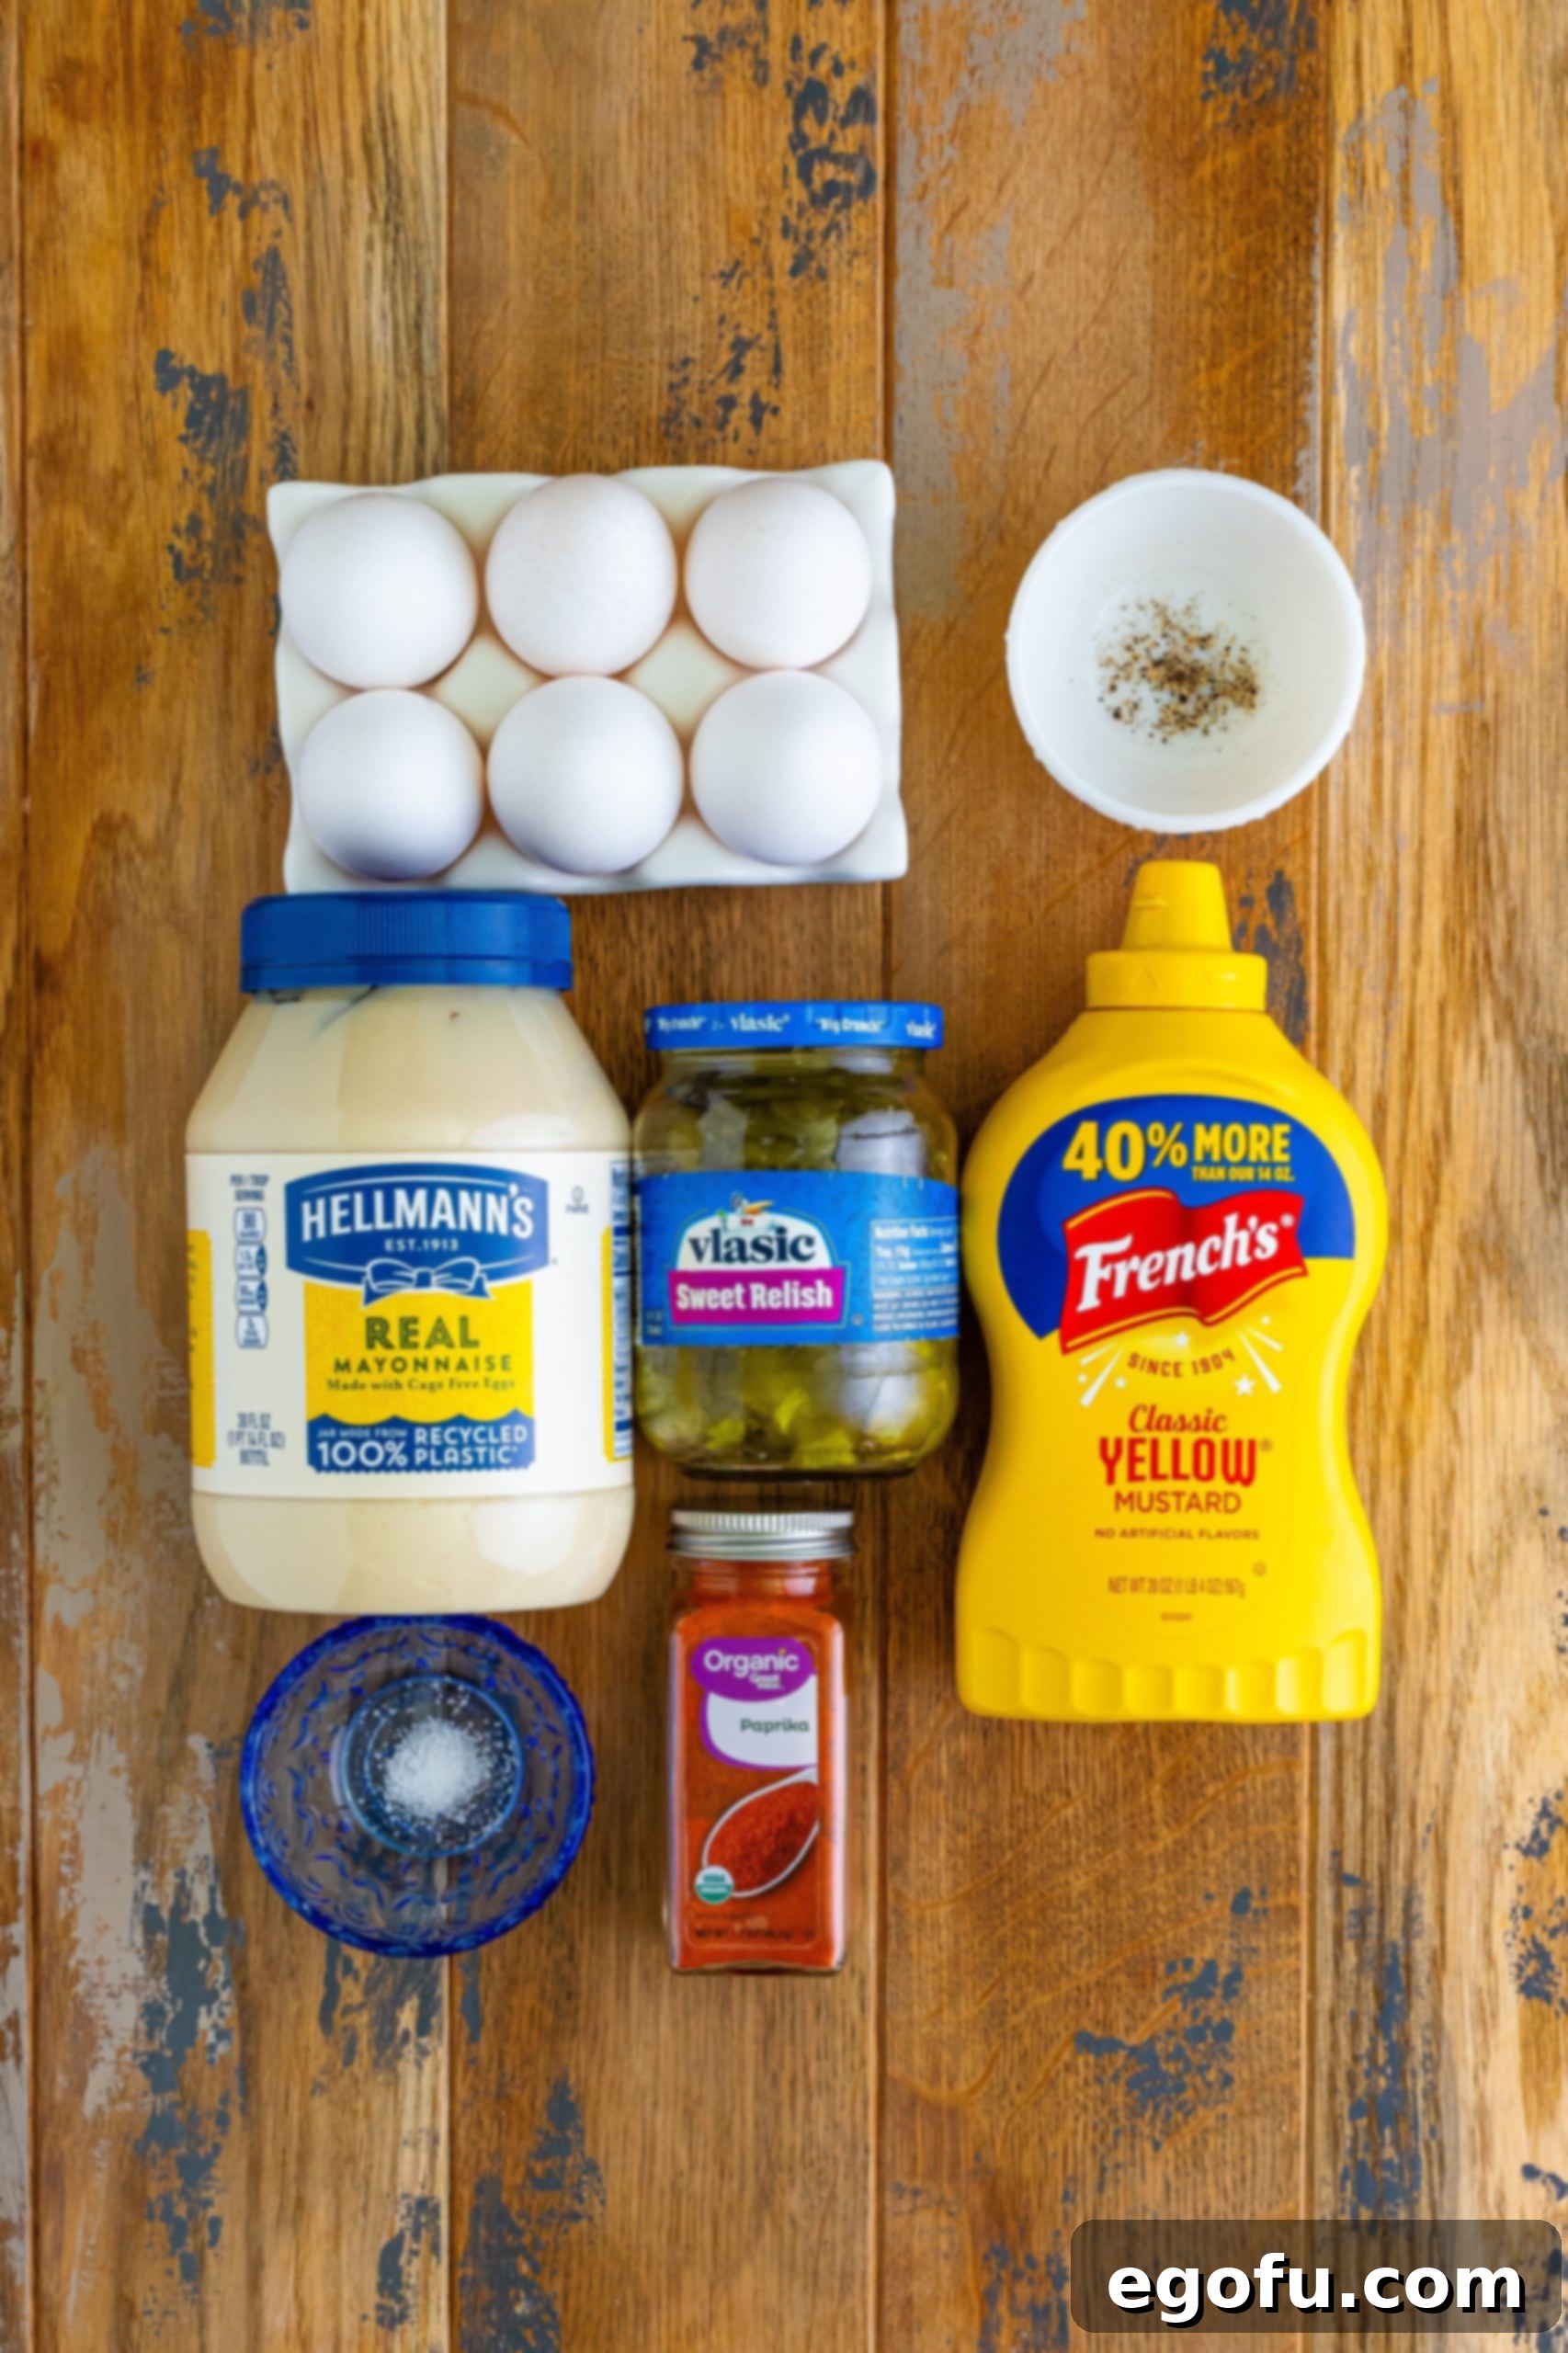
Crafting the perfect deviled egg is all about balancing rich, creamy textures with bright, tangy flavors. Here’s a closer look at the simple yet powerful ingredients that come together to create this beloved appetizer, along with some insights and tips for each:
- Large Eggs: The undisputed star of the show! While super fresh eggs are wonderful for many dishes, for easier peeling when hard-boiling, many cooks find that eggs that are a few days old (but still well within their expiration date) tend to peel much better. This is because as eggs age slightly, the pH of the albumen (egg white) increases, causing it to stick less to the shell membrane.
- Mayonnaise: This is the creamy binder that gives your yolk filling its signature richness and smooth texture. The quality and type of mayonnaise can significantly impact the final flavor. I personally lean towards Hellmann’s or Duke’s for their rich, tangy, and classic profiles, but the best choice is always the one you genuinely enjoy most. I typically steer clear of Miracle Whip as it has a distinctly sweeter and tangier flavor profile that dramatically changes the traditional deviled egg taste.
- Sweet Pickle Relish: This ingredient adds a fantastic textural crunch and a crucial sweet-tangy counterpoint to the rich yolk mixture. While I’m a big fan of sweet pickle relish for its balanced sweetness, some people prefer the bolder, less sweet, and more vinegary flavor of dill pickle relish. This preference often comes down to regional taste – anecdotal evidence suggests folks from northern states often prefer dill, while southern palates gravitate towards sweet. Feel free to use an equal amount of your preferred relish, or for an extra special homemade touch, consider making your own Homemade Sweet Pickle Relish!
- Prepared Mustard: While it might seem a small addition, mustard plays a multi-faceted and crucial role in deviled eggs. The vinegar naturally present in prepared mustard not only brightens up all the other flavors, making them pop with zest, but also contributes to that signature vibrant yellow color in the yolks, enhancing visual appeal. Furthermore, the acidity from the vinegar helps to create a slightly fluffier and lighter filling, preventing it from being too dense or heavy on the palate.
- Paprika: Primarily used as a visually appealing garnish, paprika adds a delightful pop of color – usually a warm red – and a subtle earthy aroma to the finished deviled eggs. Standard sweet paprika is perfectly fine and most commonly used, but for an extra layer of smoky depth and complexity, some enthusiasts enjoy using smoked paprika.
- Salt and Fresh Black Pepper: These fundamental seasonings are absolutely essential for enhancing and balancing all the other flavors in the yolk mixture. They bring out the best in each ingredient. Always taste your filling and adjust the salt and pepper to your personal preference before spooning it into the egg whites.
Step-by-Step Guide: Crafting Your Classic Deviled Eggs
Now that you have your perfectly hard-boiled and peeled eggs, let’s move on to assembling these delightful treats. The process is straightforward and enjoyable, ensuring you can whip up a batch of creamy, flavorful deviled eggs with ease, whether for a crowd or just a special snack.
- Prepare the Eggs for Filling: Once your hard-boiled eggs are completely peeled and thoroughly dry (you can gently pat them with a paper towel to remove any excess moisture), carefully slice each egg in half lengthwise. A sharp knife will help achieve clean, even cuts, which is important for presentation.
- Separate Yolks from Whites: Gently scoop out all the bright yellow yolks into a medium-sized mixing bowl. Be extremely careful not to tear or damage the delicate egg whites, as these will serve as your perfect vessels for the delicious filling. Set the hollowed-out egg whites aside on your serving platter or a clean plate.
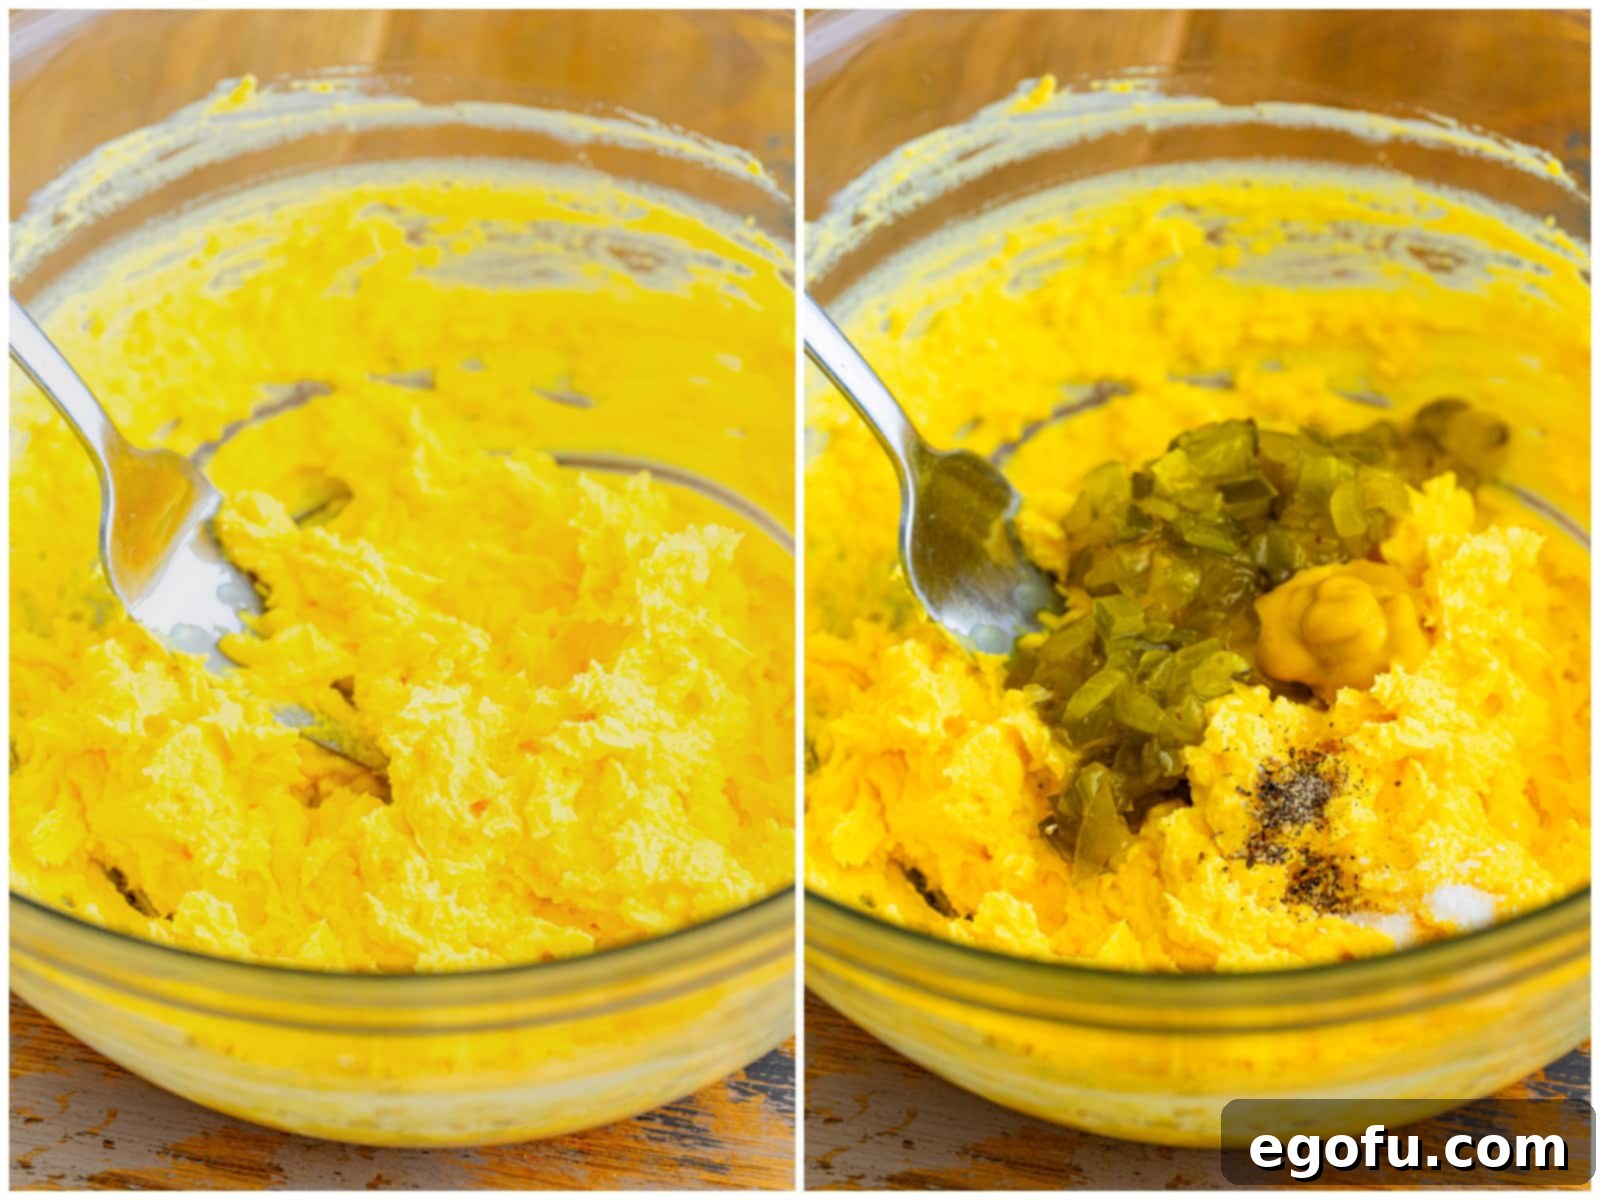
- Mash the Yolks: Using a fork, thoroughly mash the egg yolks until they are smooth and free of any large lumps. For an extra creamy and velvety texture, you can even push the mashed yolks through a fine-mesh sieve, though simple mashing works perfectly well for most preferences.
- Create the Creamy Filling: To the bowl with the mashed yolks, add the mayonnaise, sweet pickle relish (or dill pickle relish, if that’s your preference), prepared mustard, salt, and a dash of fresh black pepper. Mix all these ingredients together very well until the mixture is completely smooth, wonderfully creamy, and evenly combined. Take a moment to taste the mixture and adjust the seasonings as needed – perhaps a little more salt, pepper, or a tiny touch more mustard if you like extra tang and zest.
- Fill the Egg Whites: Now comes the fun part – filling! You have two excellent options for transferring the creamy yolk mixture into the hollowed-out egg whites:
- Spoon Method: For a quick, rustic, and equally delicious approach, simply spoon the yolk mixture evenly into each hollowed-out egg white. This method is straightforward and efficient.
- Piping Method (for a fancier look): For a more elegant and polished presentation, transfer the filling into a piping bag fitted with your favorite star tip (or any decorative tip). If you don’t have a piping bag, a sturdy resealable plastic bag with one corner snipped off works just as well. Pipe the creamy mixture neatly into each egg white, creating an attractive swirl or mound.
- Garnish and Serve: Once all the egg whites are beautifully filled, sprinkle a light dusting of paprika over the top of each deviled egg. This adds a lovely pop of color and a subtle, appealing aroma. If you’re not serving them immediately, ensure they are covered with plastic wrap or stored in an airtight container and refrigerated promptly to maintain their freshness, texture, and food safety.


Then enjoy! These classic deviled eggs are always a crowd-pleaser and are sure to be a hit at any gathering, from casual barbecues to elegant holiday meals. Remember to keep them covered and chilled if not serving right away to maintain their optimal taste and freshness.

Your Ultimate Deviled Eggs Recipe Card

The Best Classic Deviled Eggs
These classic deviled eggs are an absolute must-serve for any holiday, picnic, or cookout. This recipe includes invaluable tips for making the perfect hard-boiled egg every single time, ensuring a smooth, creamy filling and easy peeling!
Cook Time: 20 minutes
Total Time: 30 minutes
Ingredients
- 6 large eggs
- 2 ½ Tablespoons mayonnaise
- 1 ½ Tablespoons sweet pickle relish (or dill pickle relish, to taste)
- 1 teaspoon prepared mustard
- ⅛ teaspoon salt
- Dash of fresh black pepper
- Paprika (for garnish)
Instructions
- Bring a pot of water to a rolling boil. Once boiling, gently and carefully add the 6 large eggs into the pot. Set a timer for 12 minutes.
- Once the timer goes off, carefully drain the hot water from the pot. Immediately transfer the eggs into an ice bath (a large bowl filled with plenty of ice and cold water). Allow the eggs to sit in the ice bath for at least 30 minutes to cool completely.

- The key to easy peeling is the thin membrane under the shell. Gently tap the wider end of each egg on a hard surface to crack the shell.

- Peel off a piece of the cracked shell, then carefully locate the thin membrane.

- Using your fingers or the inside of a spoon, slide under the membrane to lift the shell off. Rolling the egg gently on the counter or peeling under cool running water can greatly assist in loosening the shell.

- Once all eggs are peeled, gently pat them dry with a paper towel.

- Slice each peeled egg in half lengthwise.

- Carefully remove the yolks from the egg whites (to avoid tearing the whites) and place the yolks into a bowl. Set the egg whites aside.

- Mash the yolks thoroughly with the 2 ½ Tablespoons of mayonnaise until smooth and creamy.

- Add the 1 ½ Tablespoons sweet pickle relish, 1 teaspoon prepared mustard, ⅛ teaspoon salt, and a dash of fresh black pepper to the mashed yolks. Stir until all ingredients are well combined and the mixture is wonderfully creamy.

- Spoon (or pipe, for a more decorative look) the yolk mixture evenly into the hollowed-out egg whites. For piping, use a piping bag with a star tip or a ziploc bag with a corner snipped off.

- Lightly sprinkle each filled egg with paprika for garnish. Serve immediately or keep covered and refrigerated until ready to serve.

Video Tutorial
Notes
- It’s always a good idea to boil a couple of extra eggs beyond what the recipe calls for. This way, if you encounter any peeling issues or if an egg white gets torn, you’ll still have enough for your recipe. Those “mistake” eggs can be happily repurposed into a quick egg salad sandwich!
- If you prefer a richer, more generously stuffed deviled egg, you can use the yolks from your extra boiled eggs to make your filling even more abundant.
- Not a fan of sweet pickle relish? Feel free to omit it entirely or substitute with an equal amount of dill pickle relish for a different, tangier flavor profile.
- This recipe is excellent for making ahead of time! You can prepare the deviled eggs up to one day in advance. To store, simply cover them tightly with plastic wrap or place them in an airtight container and refrigerate.
- Planning for a larger crowd, perhaps for a big holiday gathering or a large party? This recipe can easily be doubled or tripled to accommodate more guests without any issues.
Cuisine: American
Nutrition Information (Estimate Per Serving)
Carbohydrates: 1 g
Protein: 3 g
Fat: 4 g
Sodium: 94 mg
Sugar: 1 g
Nutritional Disclaimer
The nutritional information provided here is an estimate and should be used as a guide only. It is based on standard ingredient values and may vary depending on specific brands, exact measurements, preparation methods, and any ingredient substitutions you make. This content is for informational purposes only and is not intended as a substitute for professional nutritional advice. If precise calorie counts or specific dietary values are critical for you, we highly recommend calculating them using your preferred online nutritional calculator with the exact ingredients and quantities you use.
Explore More Delicious Recipes
- The Best Classic Egg Salad
- Sheet Pan Eggs Made Easy
- Our Best Ever Creamy Potato Salad
- Hearty Southern Baked Beans
- Delightful Southern Chicken Salad
Originally published: April 2017
Updated photos and republished: March 2024
Whether you’re hosting a grand holiday feast or a simple backyard barbecue, these classic deviled eggs are guaranteed to be a hit. With our foolproof method for perfectly hard-boiled eggs and a deliciously creamy filling, you’ll be making these crowd-pleasers like a pro in no time. We hope these tips and the detailed recipe empower you to create the most delicious deviled eggs your friends and family have ever tasted. Enjoy the process, and most importantly, savor every bite of the delightful results!


