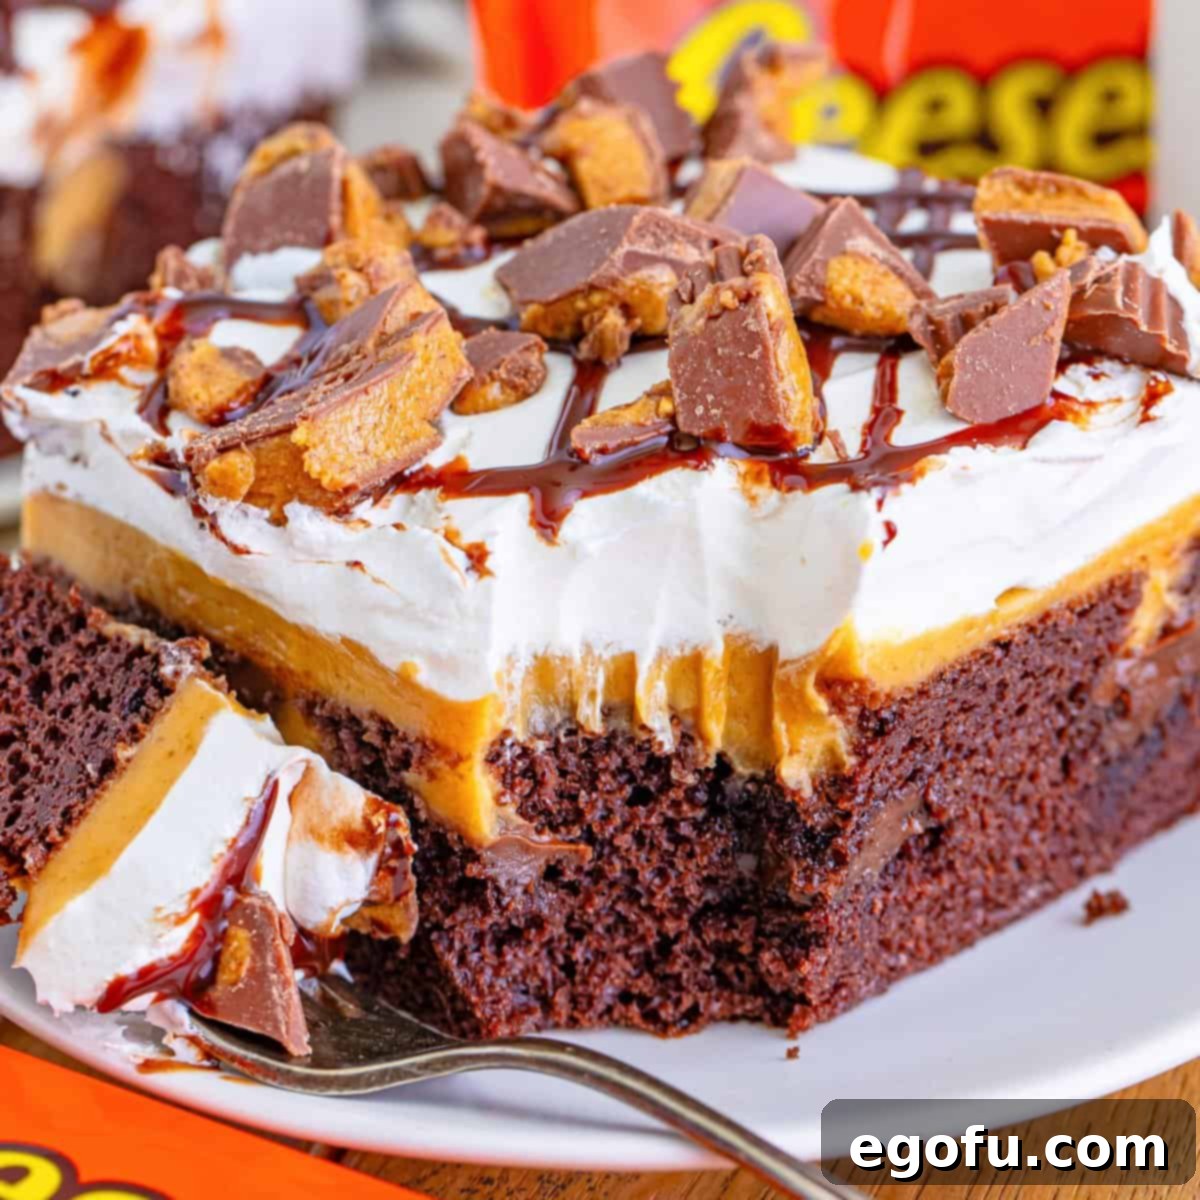
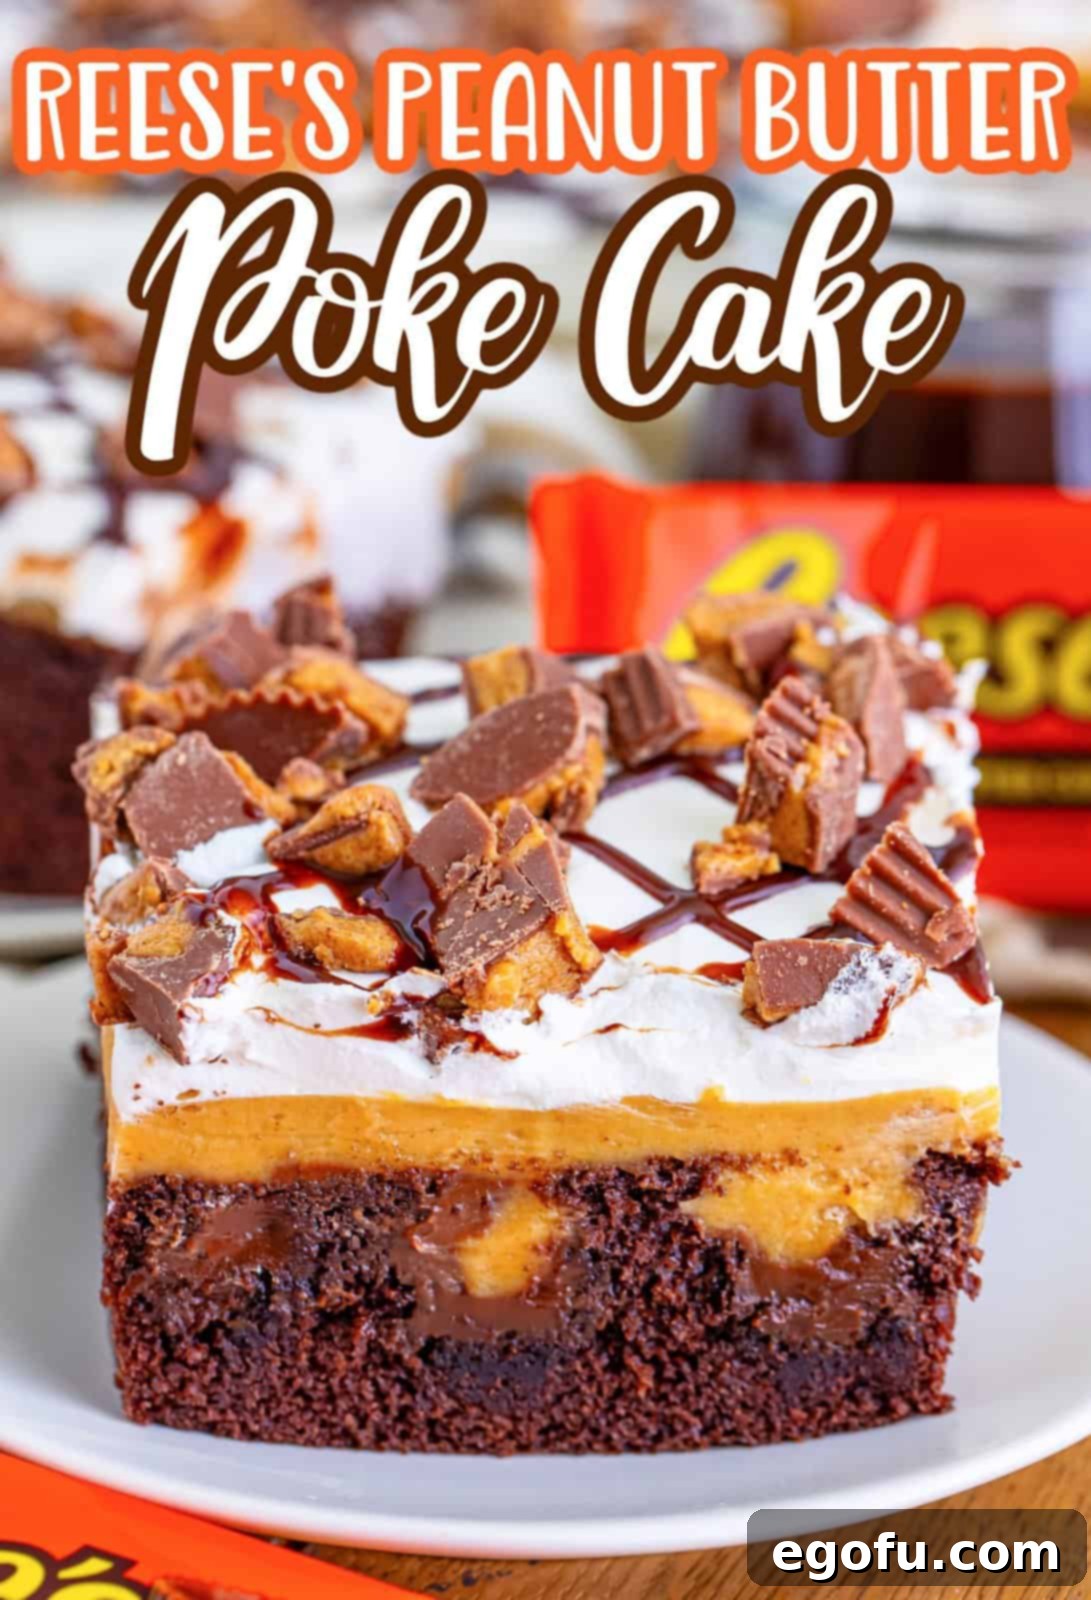
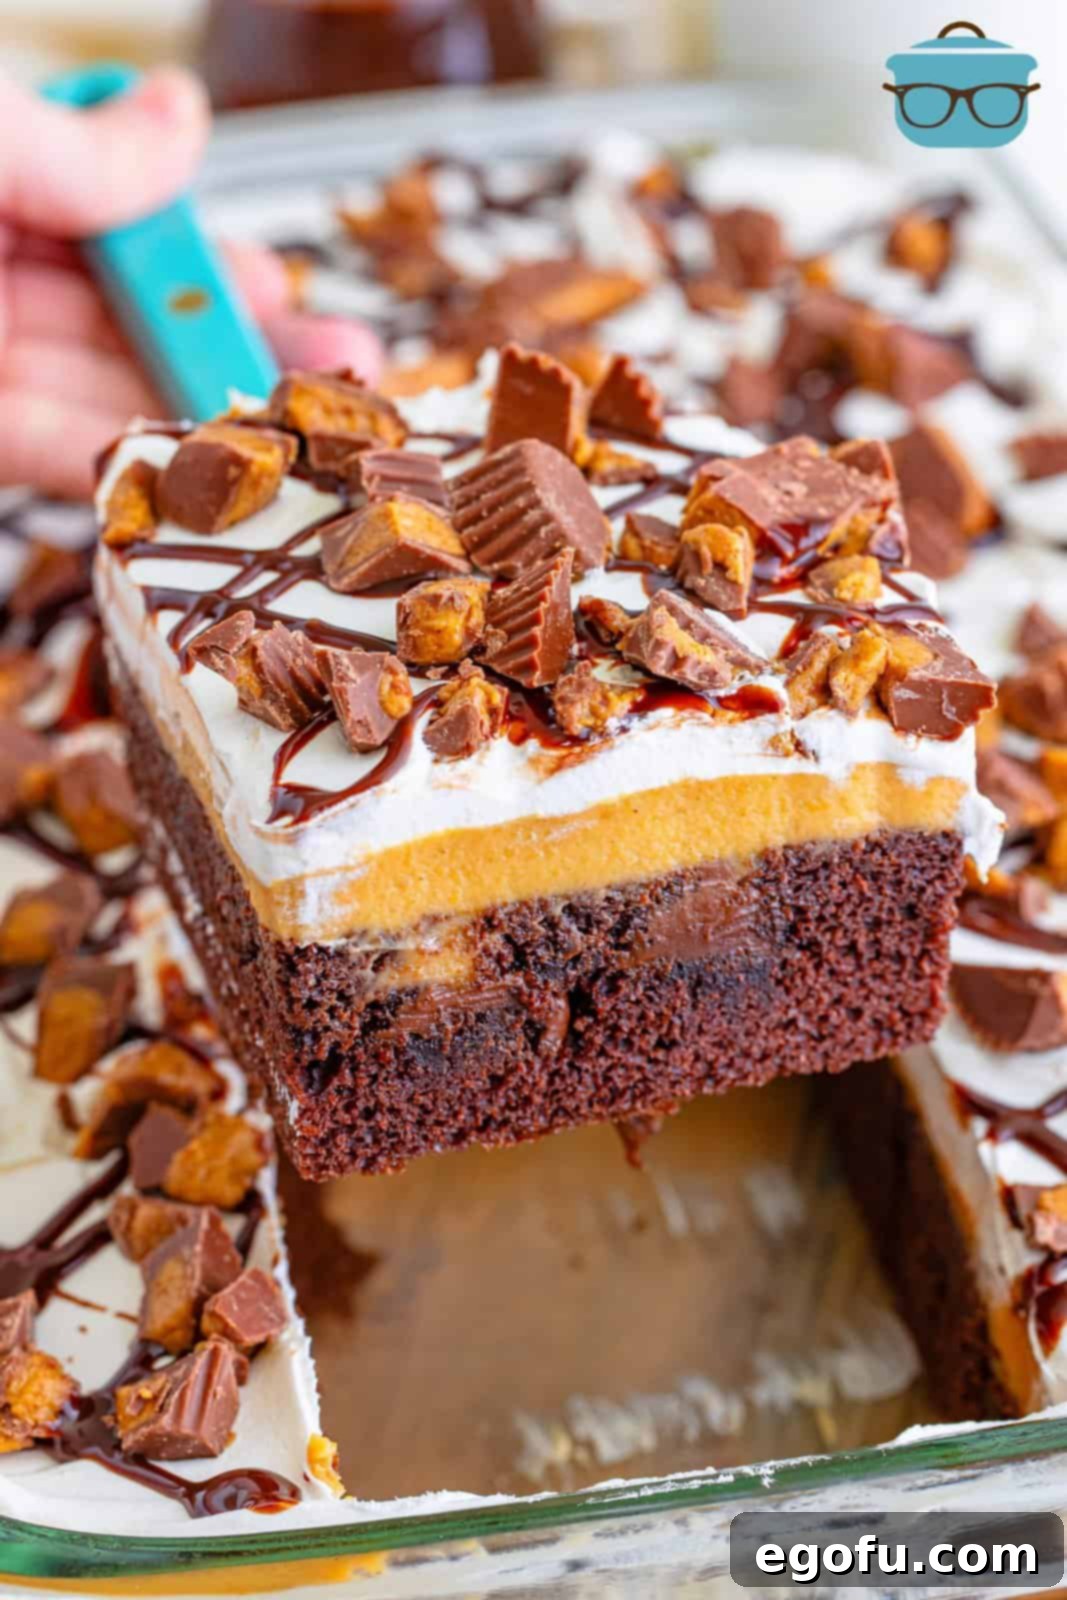
Welcome to the ultimate indulgence! This incredible Reese’s Peanut Butter Poke Cake is a dream come true for anyone who adores the classic combination of rich chocolate and creamy peanut butter. Imagine a moist chocolate cake, generously saturated with warm, gooey hot fudge, then topped with a luscious peanut butter pudding layer, and finally crowned with fluffy whipped topping and a shower of chopped Reese’s Peanut Butter Cups. This isn’t just a cake; it’s a celebration in every single bite – a decadent treat that promises to be the star of any dessert table or a delightful surprise for your family.
Why This Reese’s Peanut Butter Poke Cake is a Must-Try
There’s a special magic that happens when chocolate and peanut butter come together, and this poke cake masterfully captures it. It’s more than just a dessert; it’s an experience. Here’s why this particular Reese’s Peanut Butter Poke Cake recipe stands out:
- Unforgettable Flavor Combination: The timeless pairing of rich chocolate and savory-sweet peanut butter is elevated in this cake, creating a symphony of flavors that will have everyone asking for a second slice.
- Incredibly Moist Texture: The “poke” method ensures that every crumb of the chocolate cake is infused with hot fudge, resulting in a wonderfully moist and tender base that melts in your mouth.
- Effortlessly Decadent: Don’t let the impressive layers fool you; this cake is surprisingly easy to make. Using a chocolate cake mix and instant pudding streamlines the process without compromising on flavor or richness.
- Perfect for Any Occasion: Whether it’s a birthday party, a holiday gathering, a potluck, or just a weekend craving, this cake is guaranteed to be a crowd-pleaser. Its inviting appearance and irresistible taste make it a hit every time.
- Make-Ahead Friendly: Much of the preparation can be done in advance, allowing you to enjoy your event without last-minute baking stress. The chilling time actually enhances the flavors and allows the layers to set beautifully.
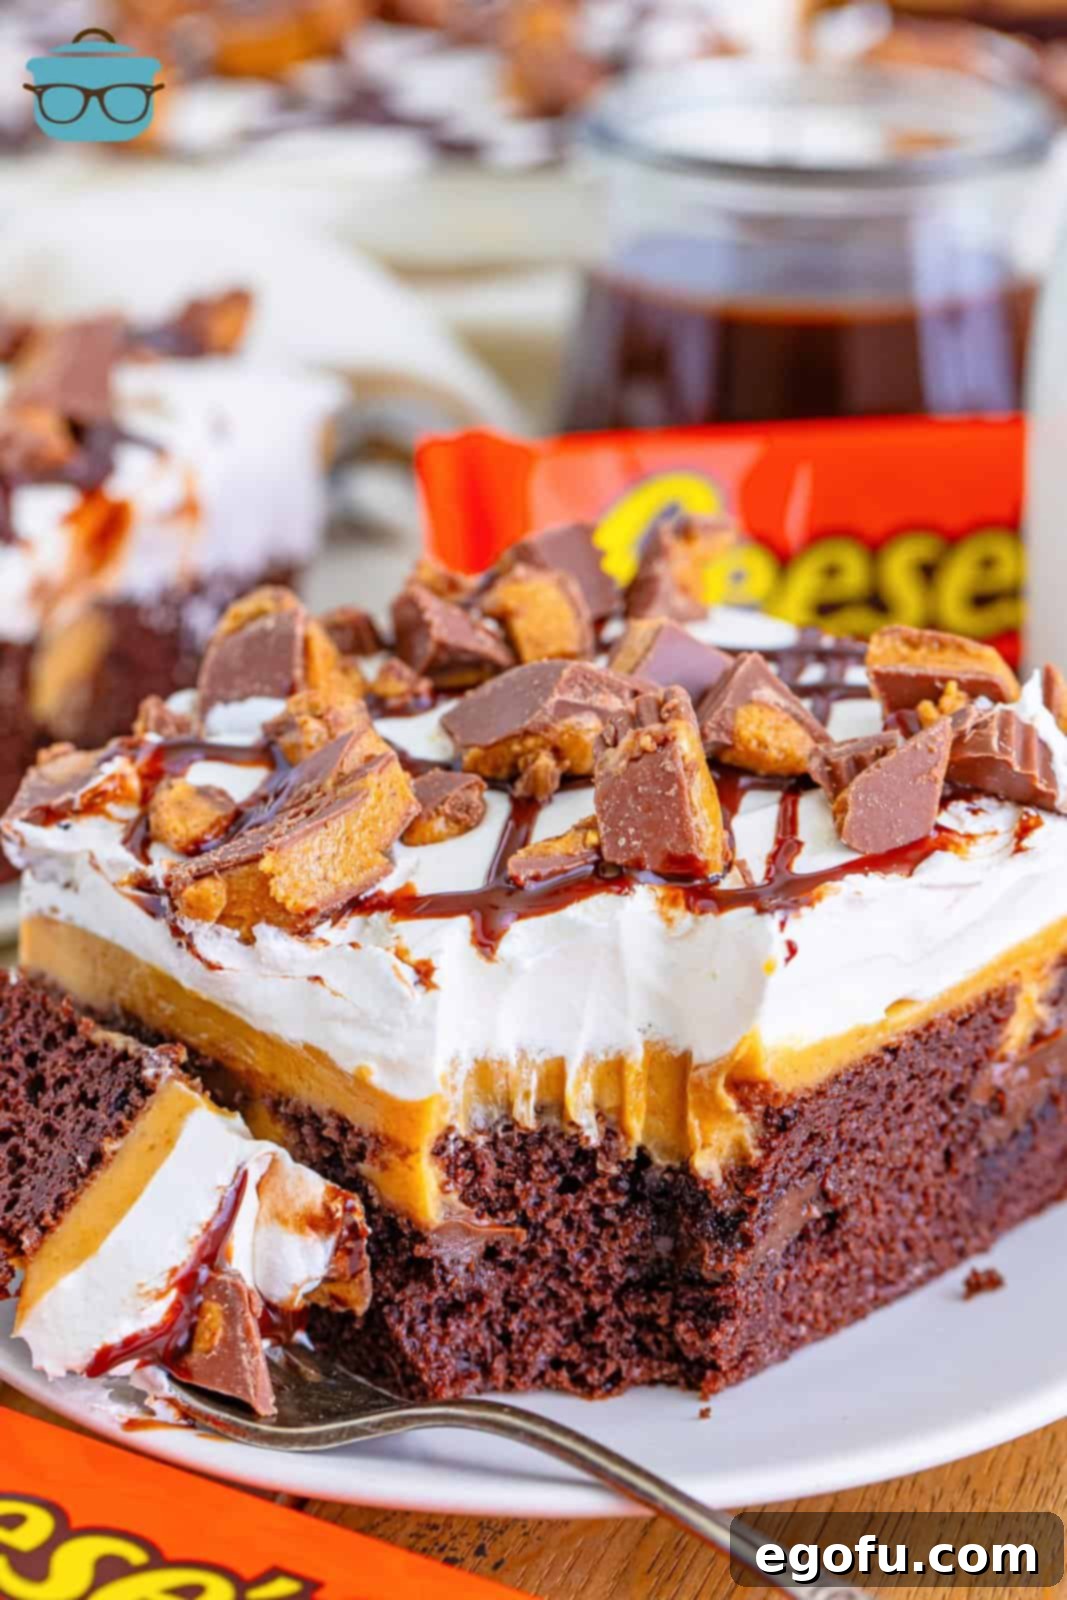
Each spoonful offers a delightful interplay of textures and temperatures, from the warm fudge-soaked chocolate cake to the cool, smooth peanut butter pudding and the light, airy whipped topping, all punctuated by the satisfying crunch of Reese’s Peanut Butter Cups. It’s truly a dessert that satisfies every craving!
Frequently Asked Questions About This Chocolate Peanut Butter Poke Cake
Before you dive into baking, here are some common questions and helpful answers to ensure your Reese’s Peanut Butter Poke Cake turns out perfectly every time:
While the hot fudge adds an incredible depth of chocolate flavor and moisture that truly elevates this dessert, you absolutely can omit it if you prefer. The cake will still be delicious with just the peanut butter pudding soaking into the holes, but for the ultimate experience, we highly recommend including that warm, decadent fudge layer.
The beauty of this poke cake lies in its versatility! While chopped Reese’s Peanut Butter Cups are a classic choice, feel free to get creative with your toppings. Consider adding Reese’s Pieces for extra crunch and color, peanut butter chips for more concentrated peanut butter flavor, a drizzle of melted peanut butter, chopped roasted peanuts for textural contrast, or even chocolate chips. You can also keep it simple and just enjoy the creamy layers as they are – it’s your cake, so customize it to your heart’s desire!
Due to the perishable ingredients like milk and whipped topping, any leftover cake must be stored in the refrigerator. Ensure it is tightly covered with plastic wrap or in an airtight container to prevent it from drying out and to absorb any fridge odors. It will keep well in the refrigerator for up to 5 days. For longer storage, you can freeze individual slices or the entire cake (well-wrapped) for up to 3 months. Thaw frozen cake overnight in the refrigerator before serving.
Absolutely! This Reese’s Peanut Butter Poke Cake is an excellent make-ahead dessert. In fact, it tastes even better the next day as the flavors have more time to meld together and the pudding and fudge fully soak into the cake. You can prepare the entire cake up to 24-48 hours in advance, keeping it covered in the refrigerator. Simply add the final garnishes like chocolate syrup and chopped Reese’s just before serving for the freshest look.
For the deepest and most intense chocolate flavor, we recommend a chocolate fudge or devil’s food cake mix. However, any standard chocolate cake mix you enjoy will work wonderfully. Feel free to use your favorite brand; just follow the package directions for a 9×13-inch baking pan.
Of course! If you have a beloved homemade chocolate cake recipe, you can certainly use it as the base. Just ensure it’s baked in a 9×13-inch pan and allowed to cool slightly before poking holes and adding the hot fudge. Using a homemade cake will add an extra touch of personalized flavor to your poke cake.
Aim to poke the holes about ¾ of the way through the cake, almost reaching the bottom, but without piercing it entirely. This allows the hot fudge and peanut butter pudding to seep deeply into the cake, ensuring maximum flavor and moisture distribution throughout each slice. The ideal tool is typically the handle of a wooden spoon or a thick skewer.
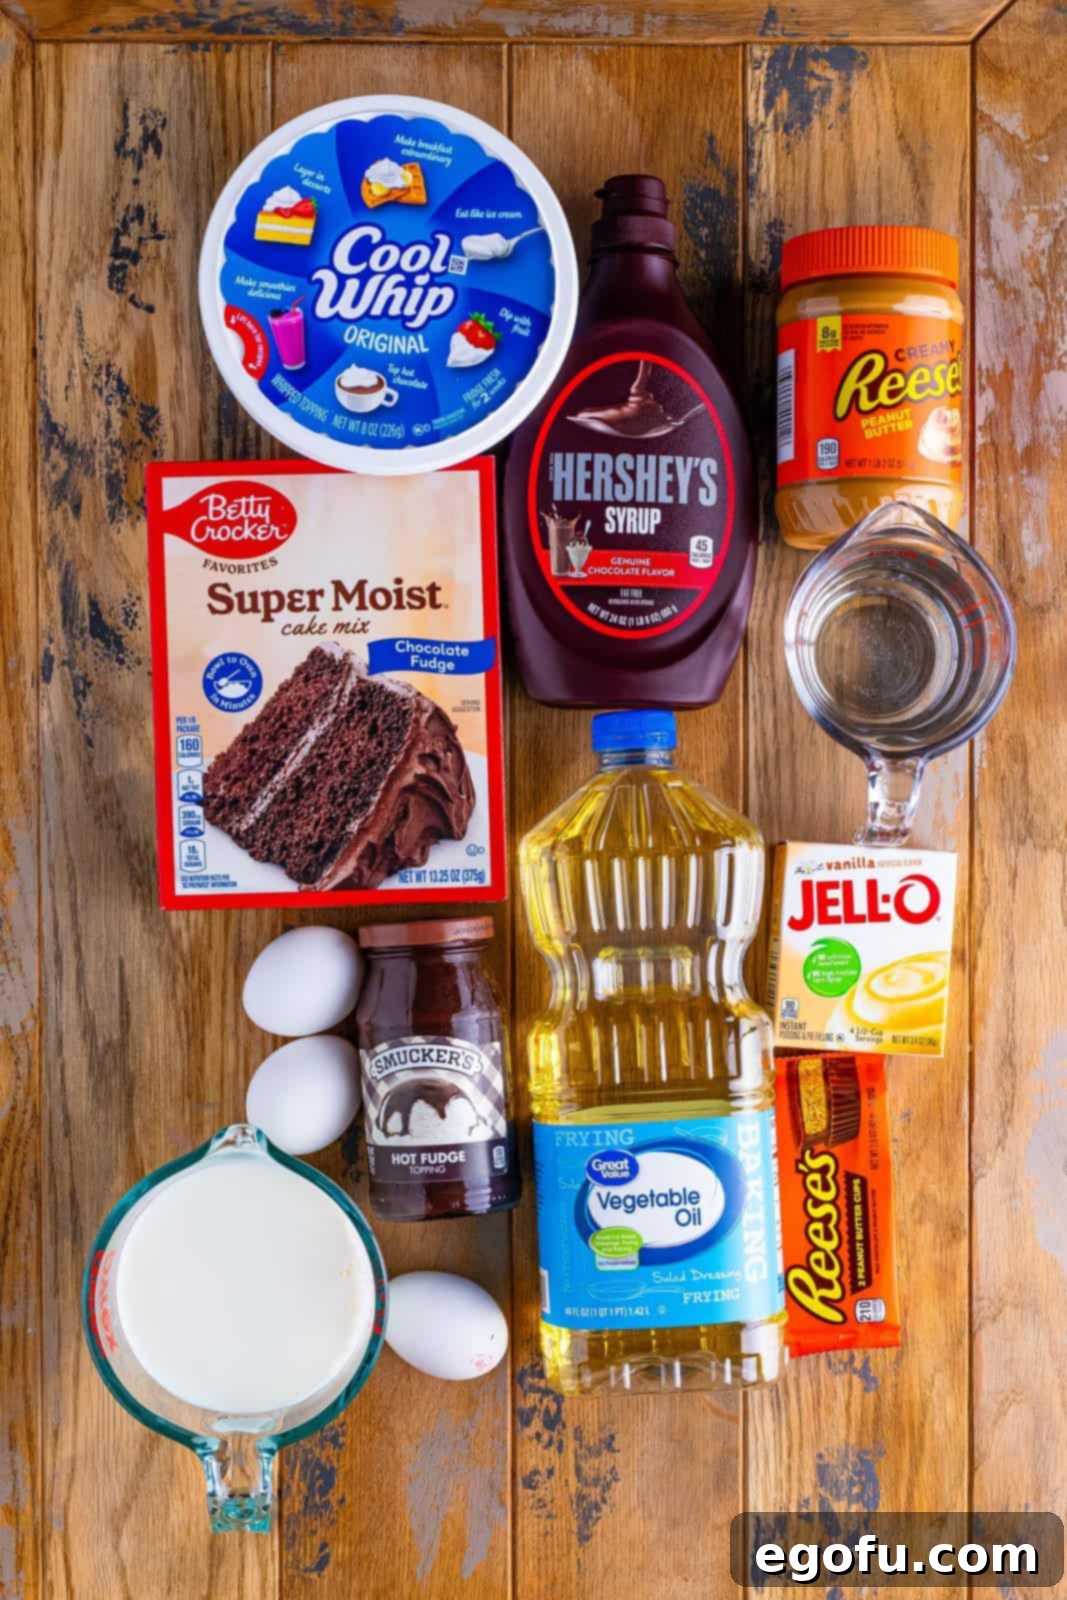
Essential Ingredients for Your Reese’s Peanut Butter Poke Cake
Crafting this luscious poke cake requires a thoughtful selection of ingredients. Here’s a detailed look at what you’ll need, along with some helpful tips for each component:
- Chocolate Cake Mix: We recommend a chocolate fudge or devil’s food variety for a deep, rich chocolate foundation. However, feel free to use any brand or type of chocolate cake mix that you prefer. Ensure it’s suitable for a 9×13-inch baking pan.
- Standard Cake Mix Ingredients (Eggs, Oil, Water): You’ll need to follow the specific quantities listed on the back of your chosen chocolate cake mix box to prepare the cake batter correctly. These are crucial for the cake’s structure and moisture.
- Hot Fudge Topping: A generous amount of hot fudge topping is key to making this a true poke cake. Any store-bought brand of hot fudge will work beautifully. Make sure to warm it gently so it’s pourable and can easily seep into the poked holes of the cake.
- Creamy Peanut Butter: While the original recipe suggests Reese’s brand, any high-quality creamy peanut butter will deliver excellent results. Avoid natural peanut butter that separates, as its oil content can affect the pudding’s consistency. You could even experiment with a crunchy peanut butter for added texture in the pudding layer, though creamy is traditional.
- Instant Vanilla Pudding Mix: This is a critical component, and it must be instant pudding. Do not use “cook and serve” pudding, as it requires stovetop preparation to thicken, which won’t work for this no-bake pudding layer. Double-check the box when purchasing, as they are often placed side-by-side on store shelves.
- Milk: For the richest and creamiest pudding, 2% or whole milk is highly recommended. Skim milk might result in a slightly less decadent texture.
- Whipped Topping: A large tub of whipped topping, such as Cool Whip or a store-brand equivalent, provides a light and airy counterpoint to the dense chocolate and peanut butter layers. Ensure it’s thawed in the refrigerator before use.
- Chocolate Syrup (Optional, for Garnish): A drizzle of chocolate syrup just before serving adds an extra touch of chocolate goodness and a beautiful presentation. If you’re a true chocoholic, this is a highly recommended addition!
- Reese’s Peanut Butter Cups (for Topping): You can chop up regular-sized Reese’s cups, or for convenience, purchase the mini unwrapped ones that come in a bag. These iconic candies are the perfect final touch, adding flavor, texture, and an undeniable visual appeal that shouts “Reese’s!”
Gathering these simple ingredients will set you on the path to creating a truly spectacular dessert that combines convenience with irresistible flavor.
Step-by-Step Guide: How to Make Reese’s Peanut Butter Poke Cake
Creating this decadent Reese’s Peanut Butter Poke Cake is an enjoyable process, broken down into simple, manageable steps. Follow these instructions carefully for a stunning and delicious result:
Step 1: Prepare and Bake the Chocolate Cake
Preheat your oven to 350°F (175°C). Following the package directions for a 9×13-inch baking dish, prepare your chosen chocolate cake mix. Pour the batter into a greased and floured (or parchment-lined) 9×13-inch baking dish and bake according to the instructions. Once baked, remove the cake from the oven and allow it to cool on a wire rack for about 10-15 minutes.
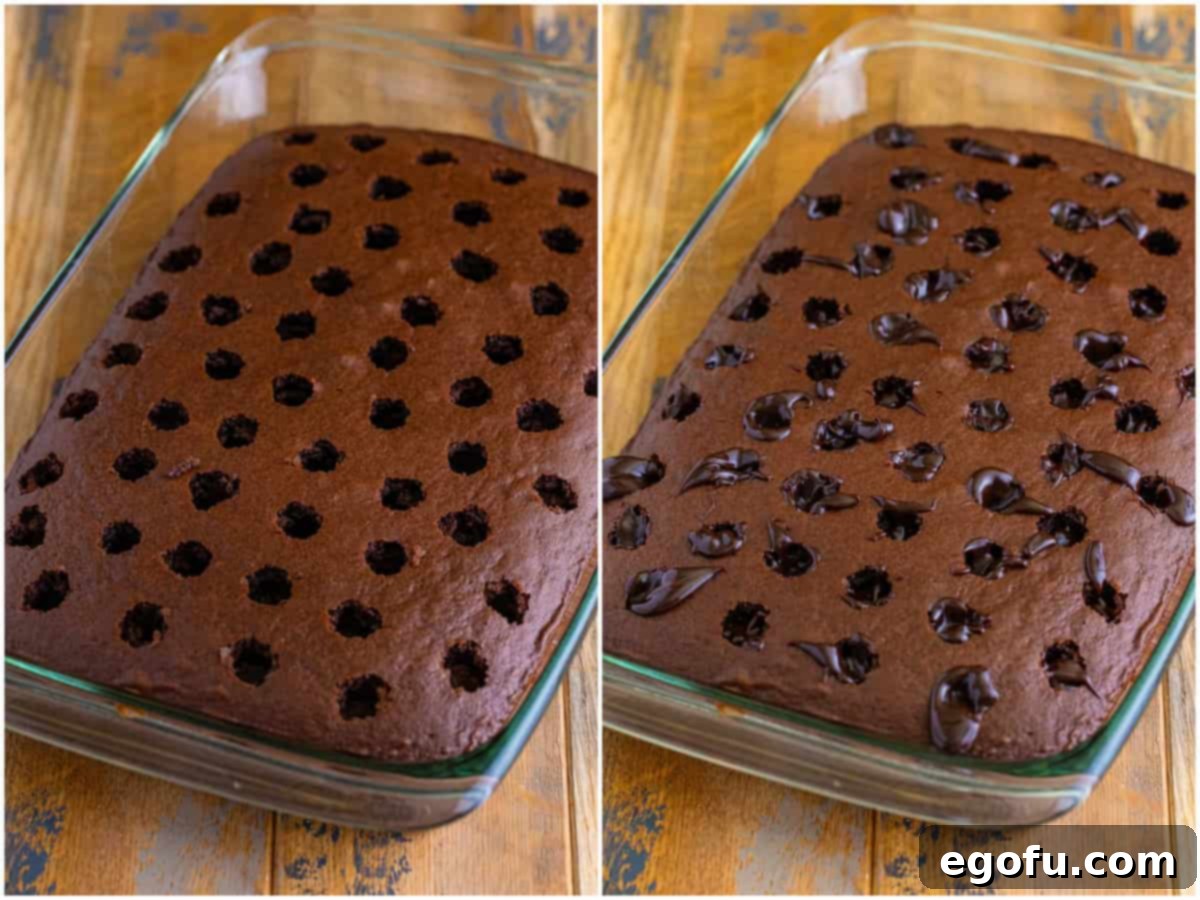
Step 2: Poke and Fill with Hot Fudge
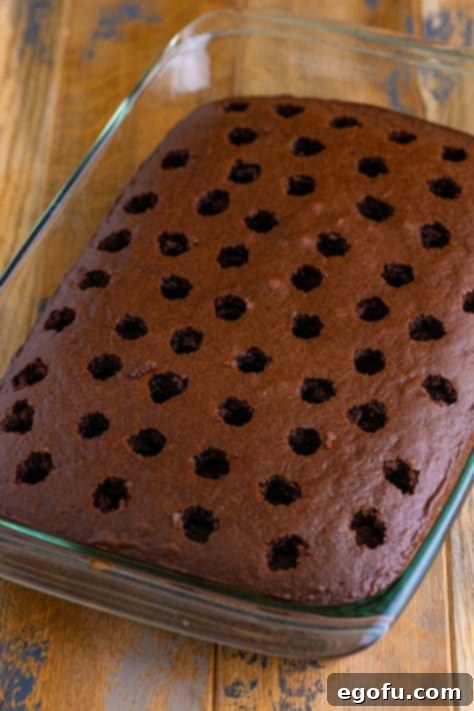
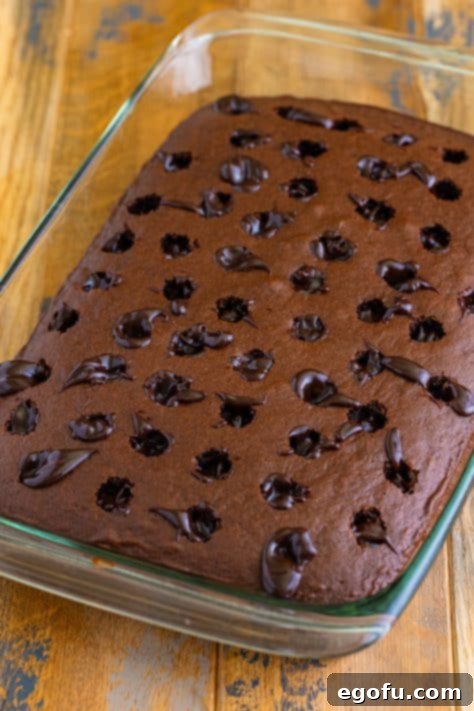
While the cake is still warm, take the handle of a wooden spoon or a similar round utensil (about 1 inch in diameter) and gently poke holes all over the surface of the cake. Aim for holes about 1 inch apart and ensure they go nearly to the bottom of the cake without piercing through. Next, warm your hot fudge topping according to its package directions until it’s smooth and easy to pour. Carefully spoon the warm hot fudge over the entire cake, making sure to fill each hole generously. The warm cake will absorb the fudge, creating incredibly moist and flavorful pockets.
Step 3: Prepare the Peanut Butter Pudding Mixture
In a medium-sized microwave-safe bowl, add the creamy peanut butter. Microwave it in 15-second intervals, stirring thoroughly after each interval, until the peanut butter is smooth and easily pourable. Be careful not to overheat it. In a separate large bowl, whisk together the instant vanilla pudding mix and the cold milk until the mixture is smooth but has not yet fully thickened. It should still be relatively liquid.
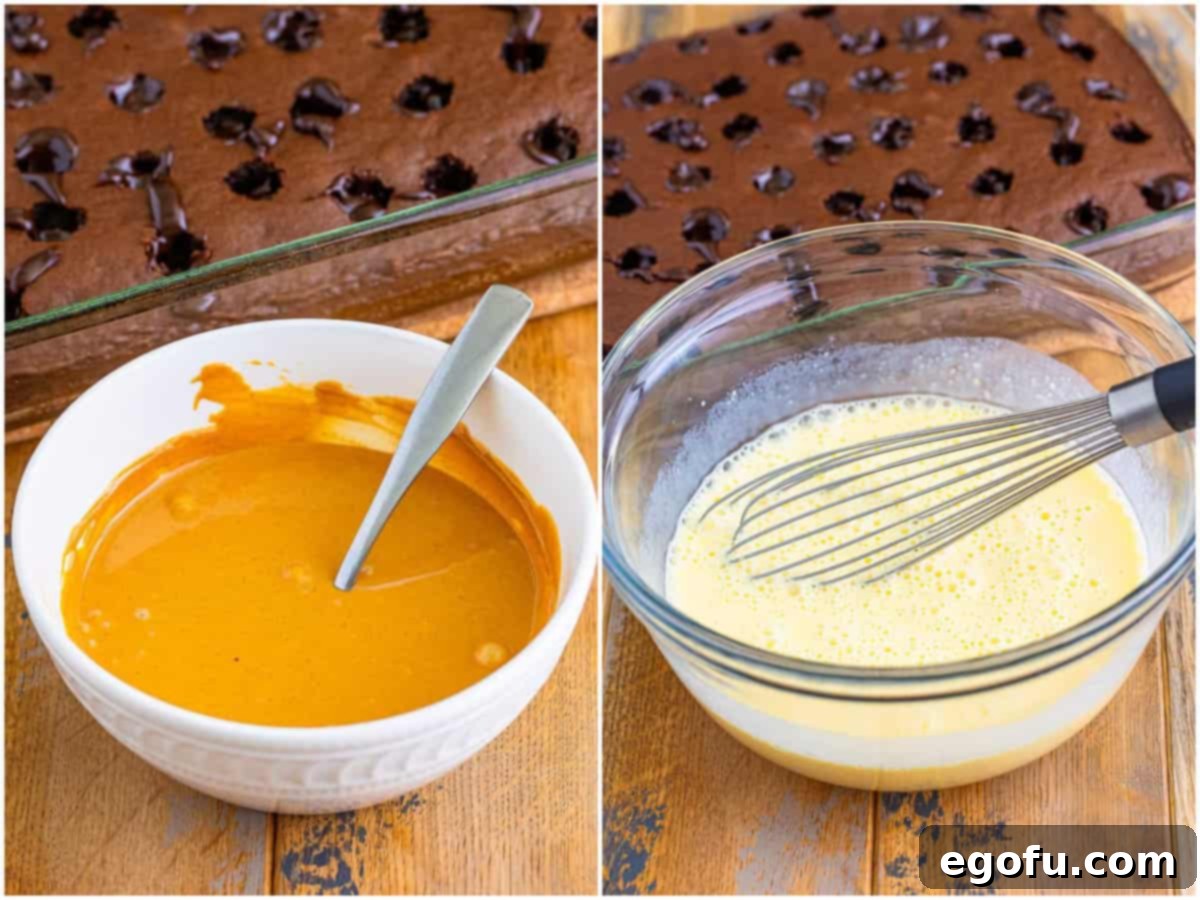
Step 4: Combine Pudding and Peanut Butter, Layer on Cake
Once the peanut butter is warm and smooth, quickly whisk it into the pudding and milk mixture. Work swiftly, as the pudding will begin to thicken as soon as it interacts with the peanut butter. Pour this peanut butter pudding mixture over the entire cake. Since the pudding will be quite thick, use the back of a spoon or an offset spatula to gently spread it evenly across the cake’s surface. Make sure to encourage some of the pudding to sink into the holes alongside the hot fudge. Don’t worry if a good amount of pudding remains on top; it forms a luscious layer.

Step 5: Chill the Cake (First Round)
Once the peanut butter pudding is spread, cover the cake loosely with plastic wrap and place it in the refrigerator. Allow it to chill for at least 2 hours. This crucial step allows the pudding layer to fully set and bond with the cake, creating distinct and stable layers.
Step 6: Add Whipped Topping and Final Chill
After the pudding layer has set, remove the cake from the fridge. Gently spread the thawed whipped topping evenly over the peanut butter pudding layer. Once again, cover the cake and return it to the refrigerator for another 2 hours, or even longer (up to overnight). This final chilling period ensures the whipped topping sets nicely and the entire cake is perfectly cool and firm, making for clean slices.

Step 7: Garnish, Slice, and Serve
When you’re ready to serve your spectacular Reese’s Peanut Butter Poke Cake, remove it from the refrigerator. Drizzle generously with chocolate syrup and scatter the chopped Reese’s Peanut Butter Cups over the top for a festive and delicious garnish. Use a sharp knife to cut into individual slices and serve immediately. Enjoy the pure bliss of this chocolate and peanut butter masterpiece!
Tips for Success with Your Poke Cake
Achieving poke cake perfection is easy with a few key tips:
- Don’t Overbake the Cake: A slightly underbaked cake will be moister and more receptive to absorbing the fudge and pudding. Watch it carefully and remove it as soon as a toothpick inserted in the center comes out with moist crumbs.
- Warm Fudge for Best Absorption: Ensure your hot fudge is adequately warmed and pourable. This allows it to easily penetrate the poked holes and infuse the cake with moisture and flavor.
- Work Quickly with Pudding: Instant pudding sets relatively fast, especially when combined with peanut butter. Have all your ingredients measured and ready before you start whisking the pudding and milk, and then incorporate the peanut butter immediately.
- Even Spreading: When spreading the pudding and whipped topping, use an offset spatula for a smooth, even layer. This not only looks professional but also ensures each slice has a balanced proportion of all layers.
- Proper Chilling is Key: Do not rush the chilling times. They are essential for the pudding and whipped topping layers to set properly, ensuring a firm cake that holds its shape when sliced.
- Clean Slicing: For neat slices, use a sharp knife and clean it with a warm, damp cloth between each cut. This prevents layers from dragging and smudging.
Serving Suggestions & Variations
This Reese’s Peanut Butter Poke Cake is fantastic on its own, but here are some ideas to make it even more special:
- A la Mode: Serve a slice with a scoop of vanilla bean ice cream for an extra cool and creamy treat, especially if the cake is slightly chilled.
- Coffee Pairing: The richness of the cake pairs wonderfully with a hot cup of coffee, a latte, or a cold glass of milk.
- Mini Servings: Instead of a large 9×13 cake, consider baking the chocolate cake in individual ramekins or a muffin tin for mini poke cakes. Adjust baking times accordingly.
- Different Pudding Flavors: While vanilla pudding is classic, you could experiment with chocolate pudding for an even more intense chocolate experience, or banana pudding for a unique twist.
- Nut Butter Alternatives: If peanut allergies are a concern, you can use an alternative nut butter or seed butter (like sunflower seed butter) in place of peanut butter, ensuring all other ingredients are safe.
- Seasonal Touches: Garnish with festive sprinkles or candies for holidays, making it a versatile dessert for any time of year.
CRAVING MORE RECIPES?
- Reese’s Peanut Butter Cup Cake
- Peanut Butter Cookie Bars
- Peanut Butter Earthquake Cake
- No Bake Chocolate Peanut Butter Pudding Pie
- Reese’s Peanut Butter Cup Mini Cheesecakes
- Reese’s Cheesecake Bars
- German Chocolate Poke Cake
- Peanut Butter Pie
- Peanut Butter Fudge Bars
- Peanut Butter Bomb Cake
- Peanut Butter Rice Krispies Treats

Reese’s Peanut Butter Poke Cake
A layered cake featuring a moist chocolate base, hot fudge sauce, creamy peanut butter pudding, light whipped topping, and garnished with chopped Reese’s peanut butter cups and chocolate syrup. This easy dessert is a true chocolate and peanut butter lover’s dream!
Cook Time: 33 minutes
Chill Time: 4 hours
Total Time: 4 hours 48 minutes
Servings: 12 servings
Author: Brandie Skibinski
Pin Recipe
Rate This Recipe
Ingredients
- 1 box chocolate cake mix
- Ingredients needed to make cake (eggs, oil, and water – as per box instructions)
- 11.75 ounce jar hot fudge topping
- 1 cup Reese’s peanut butter (or any creamy peanut butter)
- 3.4 ounce box instant vanilla pudding mix
- 2 cups milk (2% or whole milk recommended)
- 8 ounce tub whipped topping (such as Cool Whip)
- Chocolate syrup (for topping, optional)
- 8 Reese’s peanut butter cups, chopped (for topping)
Instructions
Preheat the oven to 350°F (175°C). Prepare the cake mix and bake per the directions on the back of the box for a 9×13-inch baking dish.

When the cake comes out of the oven, take a wooden utensil handle or something similar and poke holes all over the cake, about 1 inch apart. Ensure the holes go almost to the bottom of the cake.

Warm the hot fudge per the directions on its packaging until easy to handle and pour. Evenly fill the holes of the cake and spread any excess over the top.

In a medium-sized microwave-safe bowl, add the peanut butter and microwave in 15-second intervals, stirring in between until smooth and melted.

In a separate large bowl, whisk together the instant vanilla pudding mix and milk until smooth but not yet thickened. Work quickly.

Quickly whisk in the warmed-up peanut butter into the pudding mixture until well combined.

Pour the pudding mixture over the cake. Since it is thick, you will need to spread it all out. Using the back of a spoon, gently push the pudding down into the holes. A lot will also sit on the top of the cake, forming a layer.

Place the cake in the fridge, covered, for at least 2 hours to allow the pudding layer to set.
Once the pudding has set, spread the thawed whipped topping evenly on top of the cake. Place it back in the fridge, covered, for another 2 hours or longer to allow the whipped topping to set.

When ready to serve, garnish with a drizzle of chocolate syrup and sprinkle chopped Reese’s peanut butter cups over the top. Slice and serve chilled.

Video
Notes
- For more common questions and ingredient substitutions, please refer to the “Frequently Asked Questions” and “Essential Ingredients” sections above.
- This cake is best enjoyed chilled. Leftovers should always be refrigerated.
Nutrition
Carbohydrates: 69g |
Protein: 12g |
Fat: 27g |
Sodium: 619mg |
Fiber: 3g |
Sugar: 44g
Nutritional Disclaimer
“The Country Cook” is not a dietician or nutritionist, and any nutritional information shared is an estimate. If calorie count and other nutritional values are important to you, we recommend running the ingredients through whichever online nutritional calculator you prefer. Calories and other nutritional values can vary quite a bit depending on which brands were used.
Share it on Instagram @thecountrycook and mention us #thecountrycook!
This Reese’s Peanut Butter Poke Cake is truly a celebration of two beloved flavors, masterfully combined into an easy-to-make yet incredibly impressive dessert. With its moist chocolate base, creamy peanut butter pudding, and decadent fudge, it’s destined to become a go-to recipe for any occasion. So, gather your ingredients, follow these simple steps, and prepare to delight your taste buds with this unforgettable treat!
