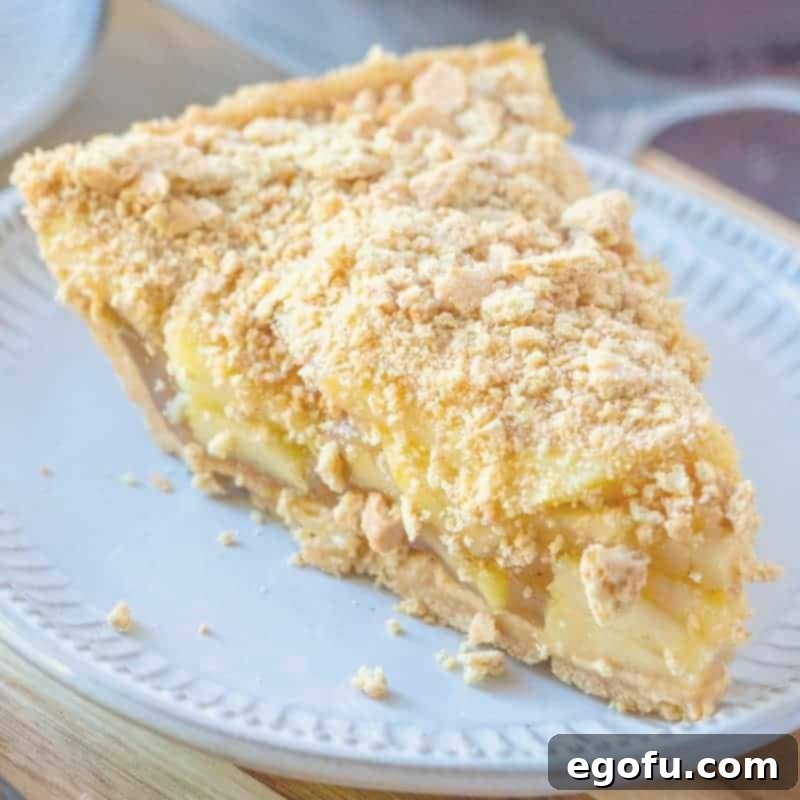
It may sound strange, but preparing a truly delicious no-bake apple pie is not only possible but wonderfully simple! This recipe comes together in mere minutes, offering a delightful taste that’s absolutely perfect for summer enjoyment, or any time you crave a quick, refreshing dessert.
Easy No-Bake Apple Pie: The Ultimate Oven-Free Dessert for Summer
Imagine this: a warm summer evening, a gentle breeze, and a craving for the comforting taste of homemade apple pie. But the thought of firing up your oven and heating your kitchen? No thank you! This is precisely where our **easy no-bake apple pie recipe** steps in as your culinary hero. You might be a skeptic, wondering if a pie made without baking can truly capture that beloved apple pie magic. We understand your hesitation, but prepare to be genuinely amazed. This isn’t just a substitute; it’s a revelation. This pie delivers all the rich, spiced apple flavor you adore, nestled in a crisp graham cracker crust, with a surprisingly refreshing chill. It’s proof that sometimes, the best pies require absolutely no oven at all. Get ready to experience a **quick apple dessert** that masterfully brings classic flavors together in a revolutionary, simple, and utterly delicious way.
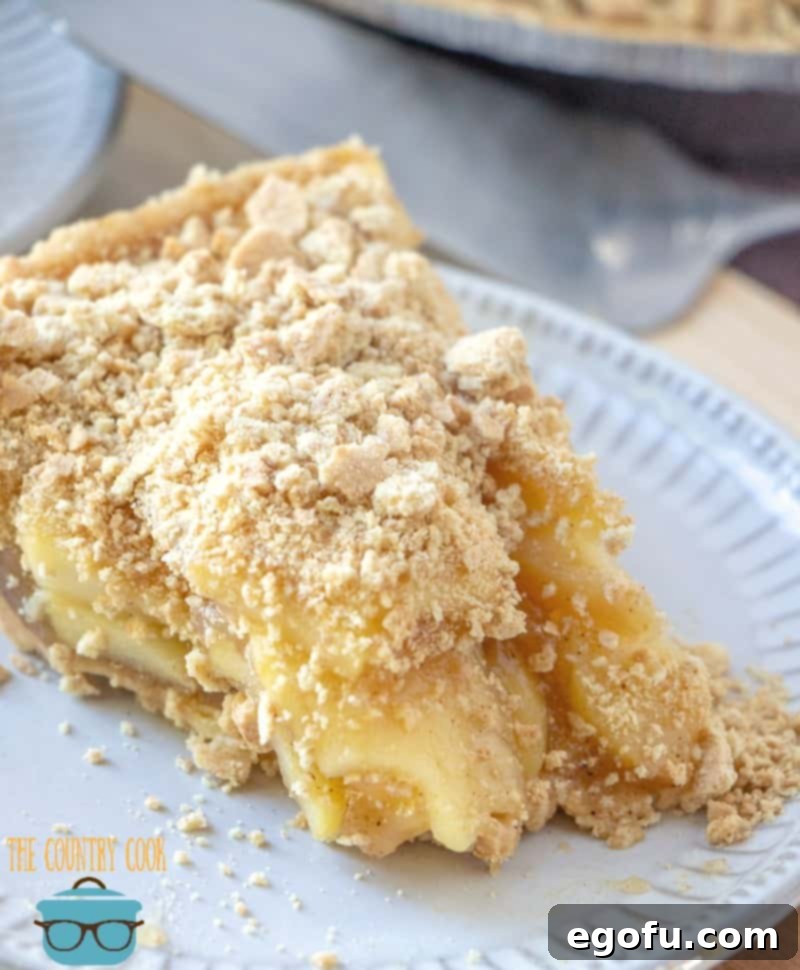
Why You’ll Fall in Love with This Oven-Free Apple Pie
This recipe isn’t just about convenience; it’s a complete game-changer for anyone who adores pie but wants to bypass the usual fuss and heat of traditional baking. Beyond the undeniable benefit of keeping your kitchen cool, this **simple apple pie recipe** offers a wealth of advantages that make it an instant favorite:
- Keep Your Kitchen Cool: The most obvious benefit! There’s no need to turn on the oven, making this the ideal dessert for scorching hot summer days or when you simply want to avoid adding extra heat to your home. Enjoy a truly **oven-free dessert** anytime.
- Lightning-Fast Preparation: Forget hours of dough preparation, rolling, and baking. The active cooking time for this pie is largely focused on the stovetop, expertly crafting the apple filling. The assembly takes mere minutes, letting you spend less time in the kitchen and more time enjoying.
- Minimal Cleanup Effort: Wave goodbye to stacks of dirty baking sheets, pie weights, and complex mixing bowls. This recipe elegantly streamlines the process, typically requiring just one saucepan and a few basic utensils. It’s a dream for anyone who appreciates less scrubbing after a delightful meal.
- Perfect for Any Skill Level: Whether you’re a seasoned baker or someone new to the culinary world, this recipe is incredibly forgiving and easy to follow. It eliminates the common pitfalls of traditional pie-making, such as soggy crusts or overbaked fillings, making it a fantastic entry point into creating impressive desserts.
- Deliciously Refreshing When Chilled: Served straight from the refrigerator, this pie offers a cool, sweet, and perfectly spiced treat. It’s a wonderful contrast to heavier baked desserts, providing a light yet satisfying experience that’s especially welcome in warmer weather.
- A Guaranteed Crowd-Pleaser: The concept of a no-bake apple pie often sparks curiosity and conversation. Its delightful taste and unique, refreshing texture consistently turn skeptics into enthusiastic fans, making it a perfect dish for potlucks, family gatherings, or casual entertaining.
This dessert is so refreshingly easy and incredibly satisfying, it has earned a permanent, top-tier spot on my list of go-to weeknight desserts! This particular **quick apple pie** rendition was originally inspired by a clever submission from Deanna P.L. of NC, and I’ve adapted it with a few personal touches from Gooseberry Patch’s delightful cookbook, “Game-Day Fan Fare.” It truly is compelling proof that some of the very best culinary innovations stem from the simplest, most ingenious ideas.
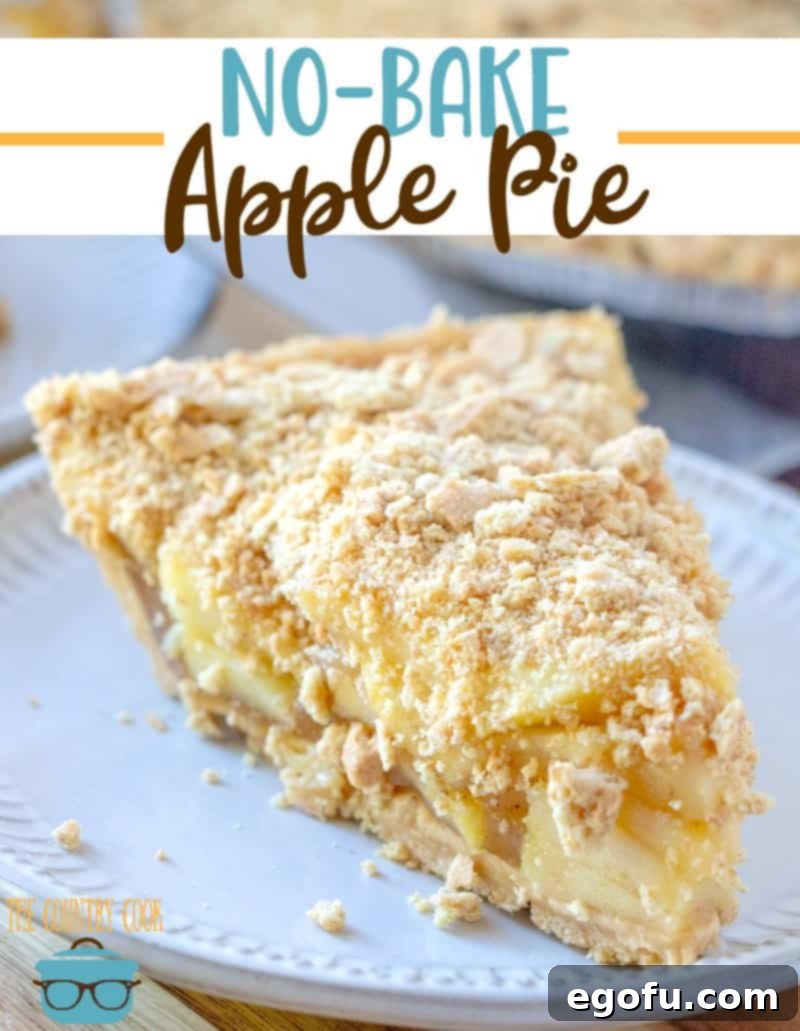
Essential Ingredients for Your Perfect No-Bake Apple Pie
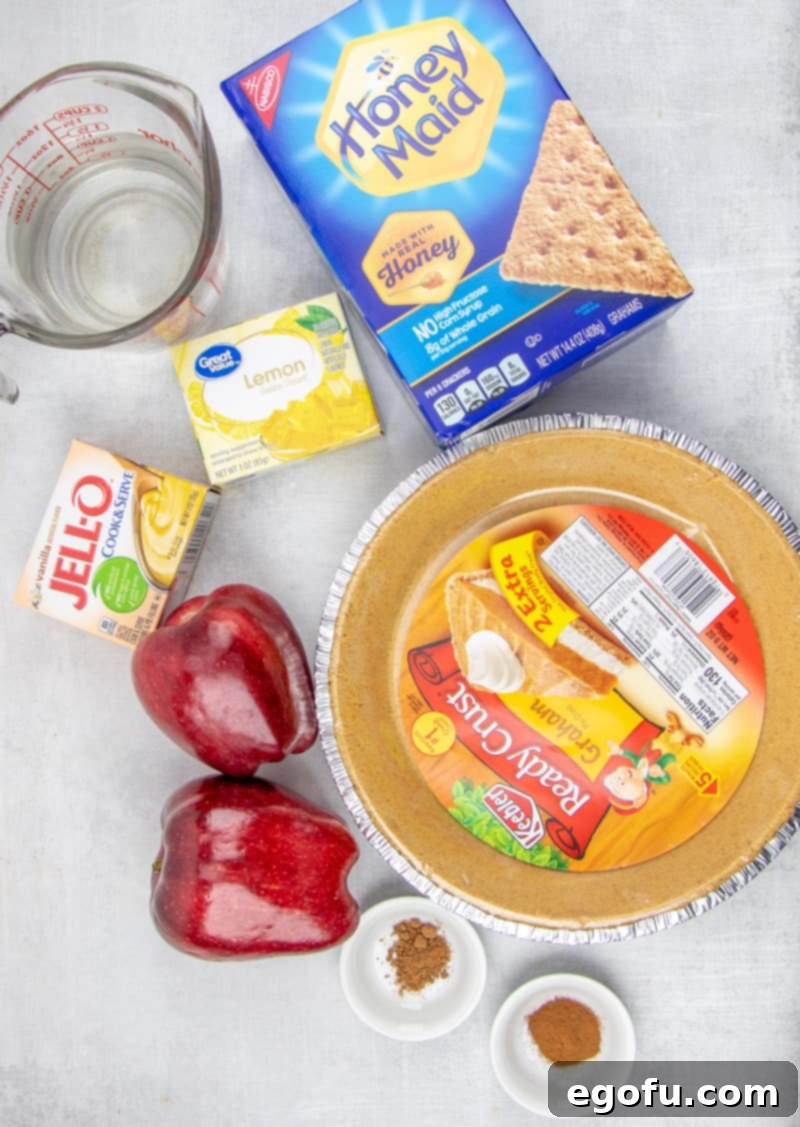
Crafting this incredible no-bake marvel requires just a handful of common pantry staples. When combined with a little kitchen magic, these ingredients transform into something truly extraordinary. Here’s a detailed look at what you’ll need, along with some helpful tips to guide your selections and preparation:
- Apples (3 pounds, approximately 5 medium apples): The star of our pie! For the best texture in a no-bake recipe, choose firm apples that hold their shape well after a short simmer. Excellent choices include Granny Smith (if you prefer a tart flavor), Honeycrisp, Fuji, Gala, or Braeburn. Feel free to mix and match varieties for a more complex flavor profile. Remember to peel, core, and thinly slice them for even cooking and a tender bite.
- Water (1 ¾ cups, divided use): Essential for simmering the apples to perfect tenderness and for properly dissolving the pudding mix to create a smooth, thick filling.
- Lemon Jell-O (3 oz box): This is truly the **secret ingredient** that elevates this pie! It not only acts as a binder, helping the pie to set beautifully, but also imparts a subtle, bright, and tangy note that perfectly complements the sweetness of the apples and spices. Do not omit this!
- Cinnamon (½ teaspoon): The quintessential spice for apple pie. Ground cinnamon delivers that warm, familiar, and comforting aroma and taste that instantly evokes classic apple desserts.
- Nutmeg (¼ teaspoon): A small touch of ground nutmeg deepens and enriches the overall spice profile, harmonizing wonderfully with the cinnamon to create a truly authentic apple pie flavor.
- Cook & Serve Vanilla Pudding (3 oz box): This is a critical ingredient, and the “Cook & Serve” distinction is paramount. Unlike instant pudding, which won’t achieve the desired consistency, “Cook & Serve” pudding is formulated to thicken beautifully when heated, giving our apple mixture that perfect, luscious syrupy consistency. Always double-check the box to ensure you have the right type!
- Graham Cracker Crust (10-inch): For ultimate convenience and speed, a pre-made graham cracker crust is a fantastic choice. Look for one that indicates “2 extra servings” or a “10-inch” size, as these are typically deeper and can comfortably accommodate all the delicious filling.
- Crushed Graham Crackers (for topping): While optional, a sprinkle of crushed graham crackers on top adds a delightful textural contrast and an extra layer of graham flavor. Cinnamon graham crackers are especially wonderful here for an added spice note.
Pro Tip: While a store-bought graham cracker crust is a fantastic time-saver, you can easily make your own from scratch. Simply crush about 1½ cups of graham cracker crumbs (roughly 10-12 full graham crackers) and mix with ¼ cup of melted butter and 2 tablespoons of sugar. Press this mixture firmly into a 9 or 10-inch pie dish and chill it in the refrigerator for at least 30 minutes before adding the filling.
Crafting Your Delightful No-Bake Apple Pie: A Simple Step-by-Step Guide
Follow these straightforward and easy-to-understand steps to create a truly show-stopping dessert without ever needing to use your oven. The process is simple, incredibly quick, and yields wonderfully rewarding results!
Step 1: Prepare the Apple Filling Base
Begin by gathering your peeled, cored, and thinly sliced apples. In a large, sturdy saucepan, combine these apple slices with 1½ cups of water, the entire contents of the dry lemon Jell-O mix, the ground cinnamon, and the ground nutmeg. Stir everything together thoroughly, ensuring that the dry ingredients are evenly distributed among all the apple slices. This initial mix is crucial for infusing every piece of apple with flavor. Place the saucepan over medium heat on your stovetop.
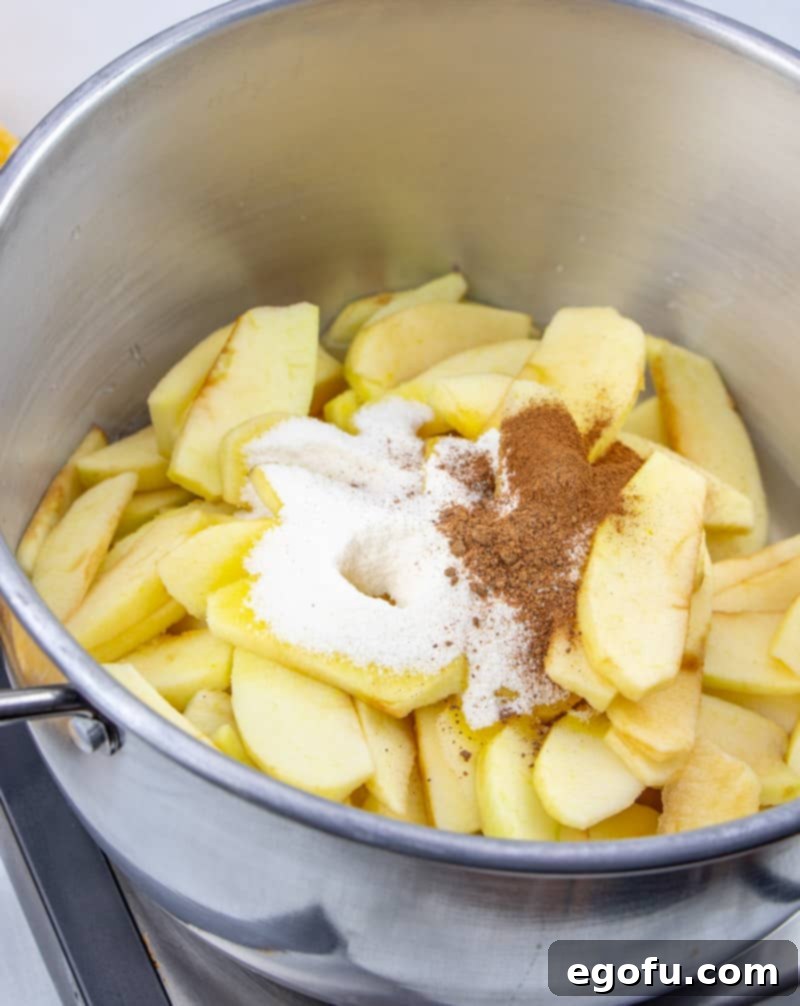
Step 2: Simmer and Thicken the Apple Mixture
Bring the apple mixture in the saucepan to a gentle, rolling boil. Once it reaches a boil, immediately reduce the heat to low to maintain a light simmer. Allow the mixture to simmer for approximately 4 to 6 minutes, stirring occasionally to prevent sticking and ensure even cooking. The key here is for the apples to become tender, yet still retain a slight firmness and not turn mushy. They should be just soft enough to easily bite through. Once the apples achieve this desired tenderness, stir in the dry Cook & Serve vanilla pudding mix along with the remaining ¼ cup of water. Continue to cook and stir constantly for about 2 minutes. During this time, you will observe the mixture visibly thickening to a rich, syrupy consistency. This thickening step is absolutely vital for the pie’s final structure and texture.
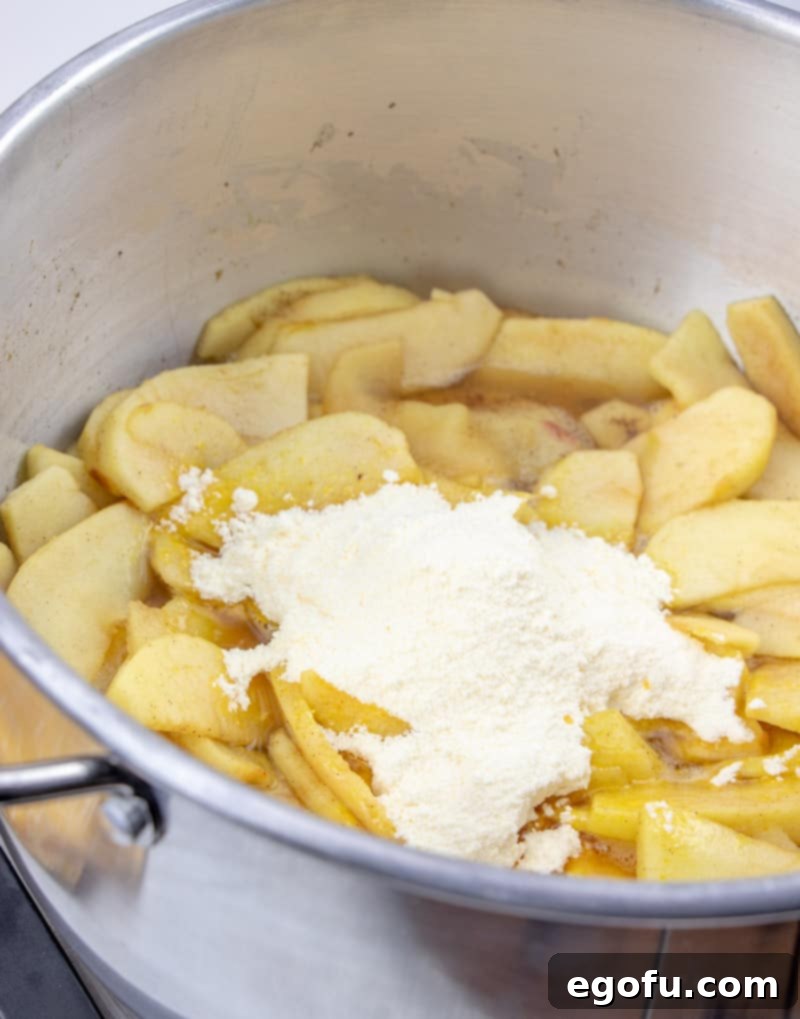
Step 3: Fill the Crust and Allow to Chill
Once the apple filling has reached its desired consistency, remove the saucepan from the heat. Carefully and evenly spoon the warm apple mixture into your prepared 10-inch graham cracker crust. Spread the filling gently to ensure it’s distributed smoothly across the crust. Now, patience is a virtue! Allow the pie to cool on your countertop at room temperature for about 30 minutes to an hour. This initial cooling helps to prevent condensation from forming when it goes into the fridge. Once mostly cooled, cover the pie tightly with plastic wrap, ensuring the wrap doesn’t touch the filling if possible, and transfer it to the refrigerator. This step is absolutely crucial for the pie’s success: it needs to chill and set completely. Ideally, this means refrigerating it overnight (a minimum of 6-8 hours). The cold temperature allows the Jell-O and pudding to fully activate and firm up, transforming the syrupy filling into a perfectly sliceable, delightful pie.
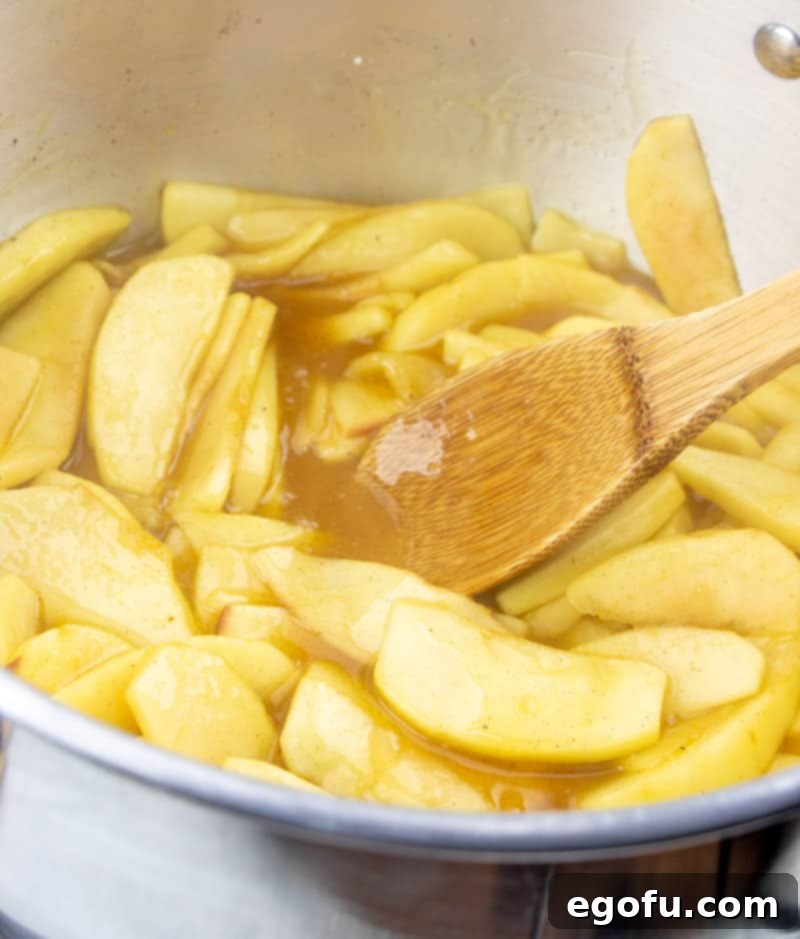
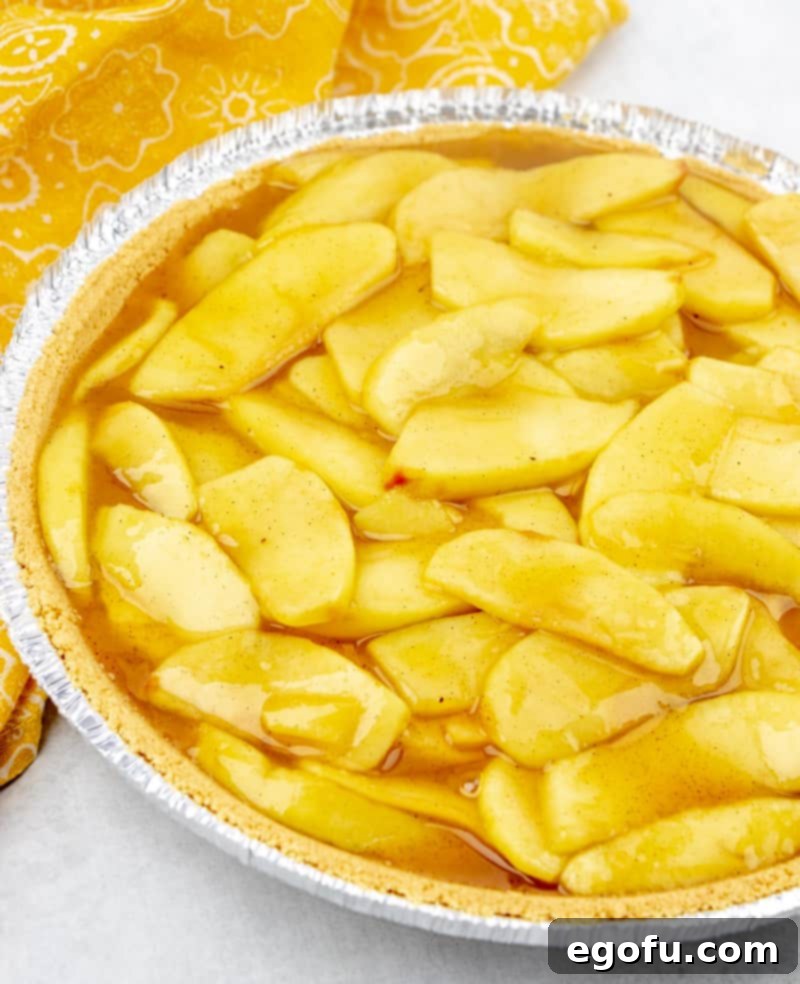
Step 4: The Perfect Topping and Serving Suggestions
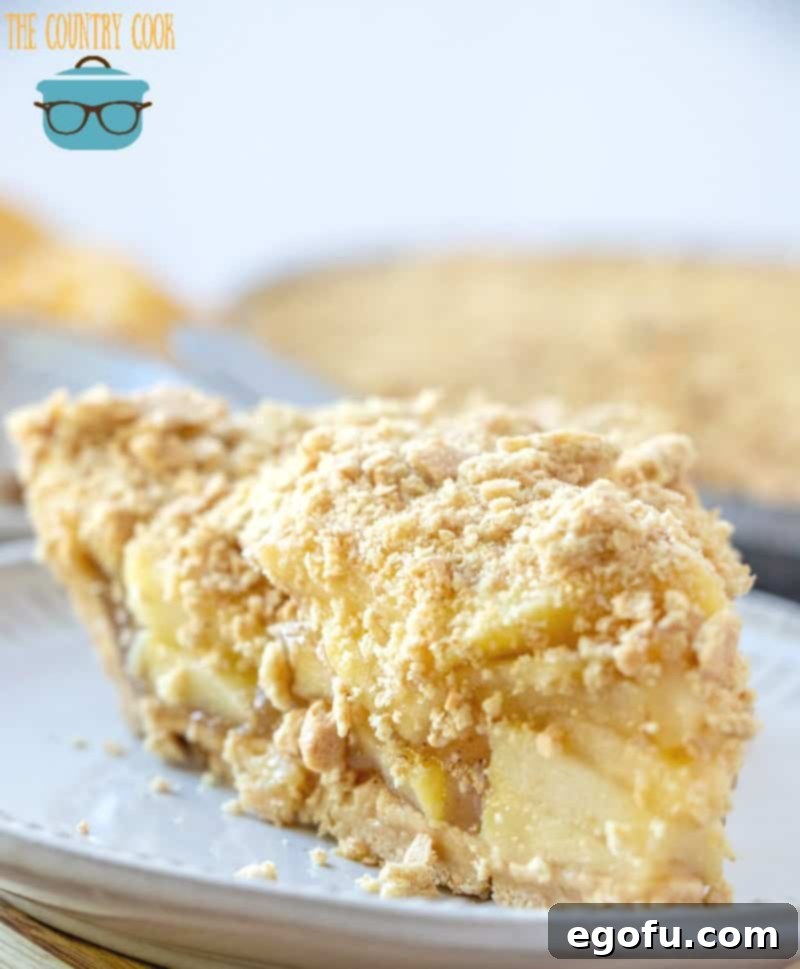
Once your no-bake apple pie has thoroughly chilled and set, becoming firm and ready for slicing, it’s time for the delightful crowning glory – the graham cracker topping. To prepare this, take about 4-5 graham cracker squares and place them inside a sturdy Ziploc bag. Using a rolling pin or any other heavy object (even the bottom of a heavy glass), crush the crackers into coarse crumbs. You’re looking for a texture that offers a satisfying crunch, not a fine powder. Just before you’re ready to serve, generously sprinkle these crushed graham crackers over the entire surface of the cooled pie. This simple addition provides a wonderful textural contrast and an extra layer of graham flavor that perfectly complements the soft apple filling.
Now, slice your beautiful pie and serve it up! For an added touch of indulgence, consider topping each slice with a generous dollop of fresh whipped cream, a scoop of creamy vanilla bean ice cream, or a luxurious drizzle of caramel sauce. The combination of cool, perfectly spiced apples, creamy or icy toppings, and the delightful crunch of the graham cracker crust is simply irresistible. This is truly the **best no-bake pie** for any occasion, from casual family dinners to festive summer gatherings.
Serving Warm (A Comforting Optional Twist)
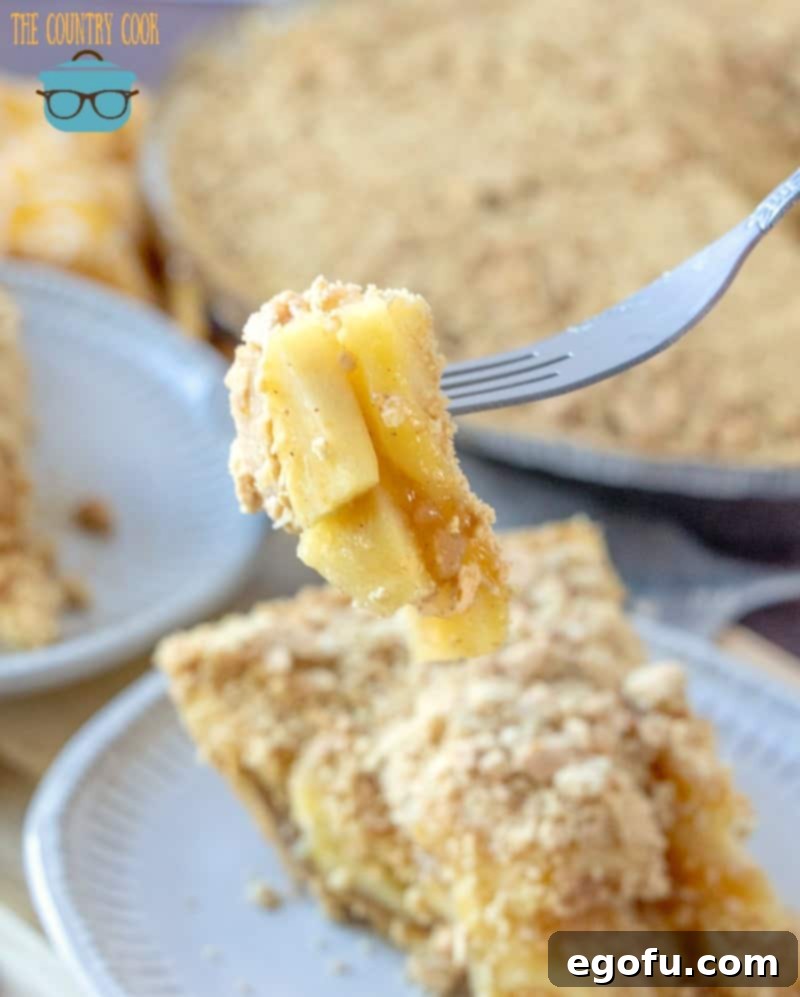
While this no-bake apple pie is typically cherished for its refreshing chilled quality, we understand that some days simply call for a warm, comforting apple dessert. If you prefer a warm apple pie experience, you can easily achieve this with individual slices. Simply place a slice of pie (ensure it’s on a microwave-safe plate) into your microwave and heat it for just a few seconds until it’s warmed through. Exercise caution not to overheat, as the filling could become too soft and lose its structure. Serve immediately with a generous scoop of classic vanilla ice cream. The delightful contrast of the warm, spiced apple filling against the cold, melting ice cream is a truly satisfying sensation – a comforting twist on a refreshing classic.
Frequently Asked Questions (FAQ) about Our Easy No-Bake Apple Pie
What kind of apples are best for no-bake apple pie?
For this no-bake recipe, we highly recommend using apples that are known for holding their shape well when cooked, even during the short simmering process. Excellent choices include Granny Smith (if you enjoy a tart flavor that balances sweetness), Honeycrisp, Fuji, Gala, or Braeburn. Using a blend of sweet and tart apples can also create a wonderfully complex and balanced flavor profile in your pie.
Can I use instant pudding instead of Cook & Serve?
No, this is a very important distinction! It is absolutely crucial to use “Cook & Serve” vanilla pudding for this recipe. Instant pudding is formulated differently and will not thicken properly when heated with the apple mixture. Using instant pudding will unfortunately result in a runny pie filling that won’t set. Always double-check the box to ensure you have the correct type of pudding!
How long does no-bake apple pie last in the refrigerator?
When properly covered and stored in the refrigerator, your delicious no-bake apple pie will remain fresh and enjoyable for approximately 3 to 5 days. For the best texture, especially to maintain the delightful crunch of the graham cracker topping, it’s best to add the crushed crackers just before you plan to serve the pie.
Can I make this pie ahead of time for a party or event?
Absolutely! This no-bake apple pie is a fantastic make-ahead dessert, making it perfect for entertaining or when you need to save time on the day of an event. Since the pie requires an overnight chilling period to fully set and firm up, it’s actually ideal to prepare it the day before your party or gathering. Just remember the tip about adding the crushed graham cracker topping right before you’re ready to serve to ensure maximum crunch and freshness.
Are there any fun variations or additions I can try?
Of course! While the classic recipe is wonderful on its own, feel free to get creative and experiment with these delicious variations:
- Caramel Apple Delight: For an extra layer of indulgence, drizzle warm caramel sauce over the pie just before serving. You can also stir a tablespoon or two of caramel sauce into the apple filling during the last minute of cooking for an integrated caramel flavor.
- Buttery Crumble Topping: Instead of simply sprinkling plain crushed graham crackers, try mixing the crumbs with a little melted butter and a spoonful of brown sugar. Bake this mixture briefly until slightly toasted, then sprinkle it over the chilled pie for a richer, more buttery crumble.
- Nutty Crunch: Add some finely chopped pecans, walnuts, or even candied almonds to your graham cracker topping for an enhanced nutty flavor and satisfying crunch.
- Spice It Up: If you love a bolder spice profile, consider increasing the amounts of cinnamon and nutmeg slightly, or add a pinch of allspice or ground ginger to the apple filling for extra warmth and complexity.
- Cream Cheese Layer: For a richer base, spread a thin layer of sweetened cream cheese (mixed with a little sugar and vanilla) at the bottom of the graham cracker crust before adding the apple filling.
Craving More Apple Recipes and Delightful No-Bake Desserts?
If you’ve fallen completely in love with the simplicity, irresistible taste, and sheer convenience of this no-bake apple pie, then you’re truly in for a treat! We have an extensive collection of other fantastic apple-inspired desserts and incredibly easy no-bake recipes that are guaranteed to satisfy your sweet cravings and keep your kitchen cool. Explore some of our top picks and discover new favorites:
- Easy Apple Pie Cinnamon Rolls
- The Best Apple Bread
- Slow Cooker Apple Butter
- No Bake Twix Pie
- Instant Pot Southern Fried Apples
- Easy Apple Dessert Pizza
- Apple Dumplings
- Apple Streusel Muffins
- Fried Apples
- Apple Pretzel Salad

No-Bake Apple Pie Recipe
Print
Pin
20 minutes
10 minutes
30 minutes
6
Brandie Skibinski
Ingredients
- 3 pounds apples (about 5 apples), peeled, cored and thinly sliced
- 1 ¾ cups water, divided use
- 3 ounce box lemon Jell-O
- ½ teaspoons cinnamon
- ¼ teaspoon nutmeg
- 3 ounce box Cook & Serve vanilla pudding
- 10 inch graham cracker crust
- Crushed cinnamon graham crackers, for topping
Instructions
- In a large saucepan, over medium heat, combine apples, 1 1/2 cups water, lemon Jell-O mix, cinnamon and nutmeg.
- Bring to a boil then reduce heat to low. Simmer for about 4 to 6 minutes, until apples are tender.
- Stir in vanilla pudding mix and add remaining 1/4 cup water.
- Cook and stir for about 2 minutes, or until mixture is thickened (like syrup).
- Remove from heat. Spoon filling into graham cracker crust.
- Then cover and refrigerate overnight. It will thicken and set as it cools in the fridge so it’s important you give it time to completely cool.
- Take about 4-5 graham cracker squares and place in a Ziploc bag. Crush the crackers using a rolling pin or some other heavy object.
- Sprinkle crushed graham crackers over cooled pie.
- Slice and serve. Top with whipped cream (optional.)
Video
Notes
- If you prefer your pie warm, you can always put your slices of pie (on a microwave-safe plate) and heat for a few seconds until warmed through. And serve with a good dollop of ice cream!
Dessert
American
Nutrition
Calories: 227kcal
|
Carbohydrates: 57g
|
Protein: 1g
|
Sodium: 162mg
|
Fiber: 5g
|
Sugar: 47g
Nutritional Disclaimer
“The Country Cook” is not a dietician or nutritionist, and any nutritional information shared is an estimate. If calorie count and other nutritional values are important to you, we recommend running the ingredients through whichever online nutritional calculator you prefer. Calories and other nutritional values can vary quite a bit depending on which brands were used.
Did you make this recipe?
Share it on Instagram @thecountrycook and mention us #thecountrycook!
