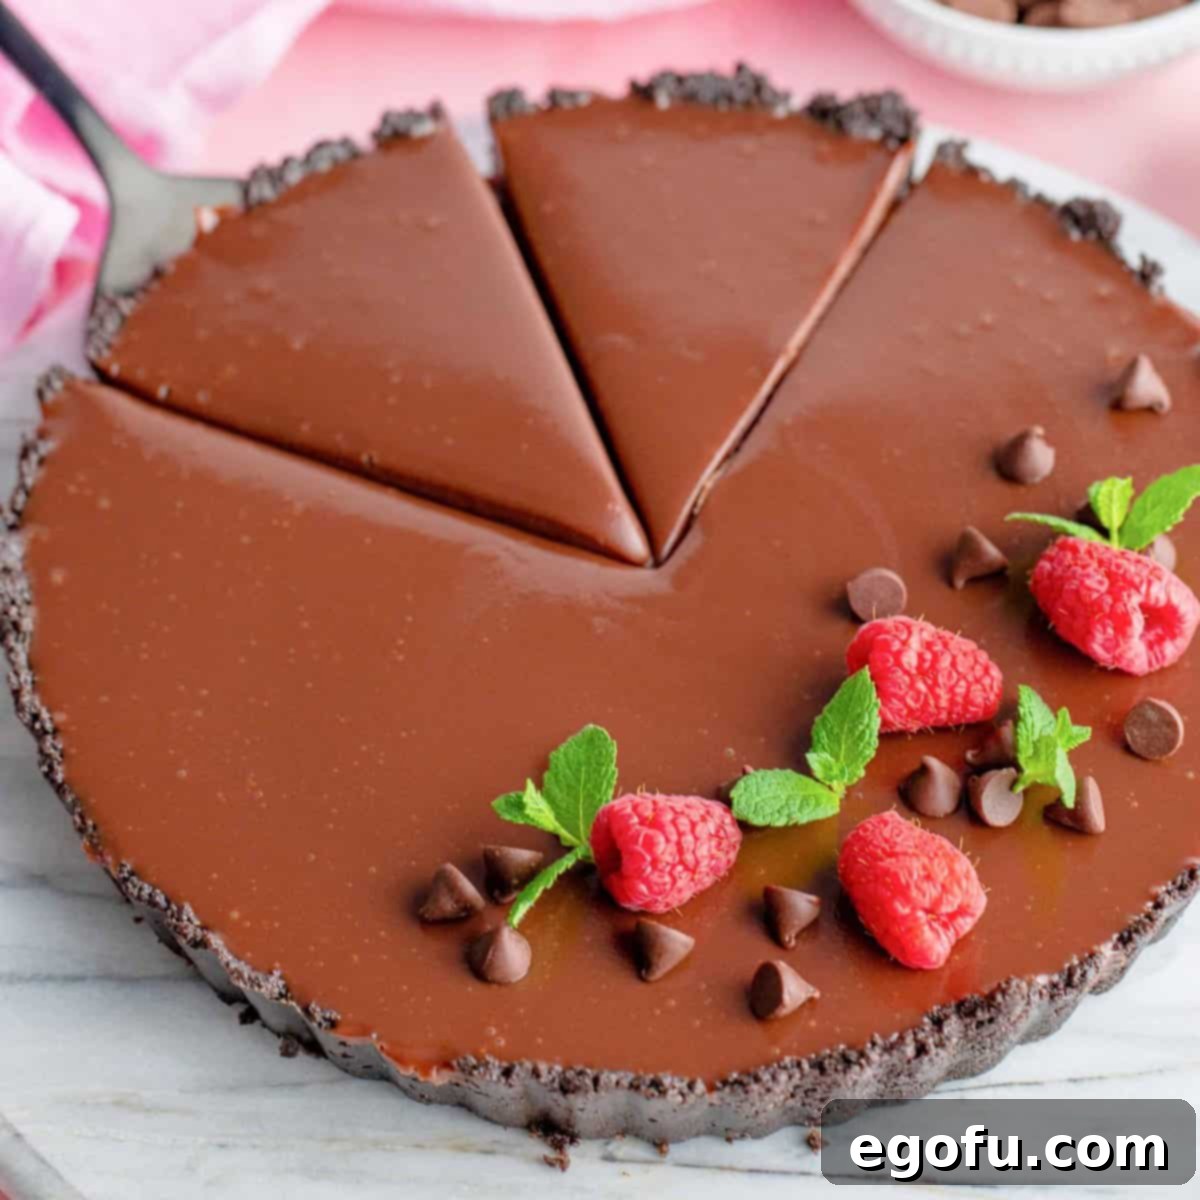
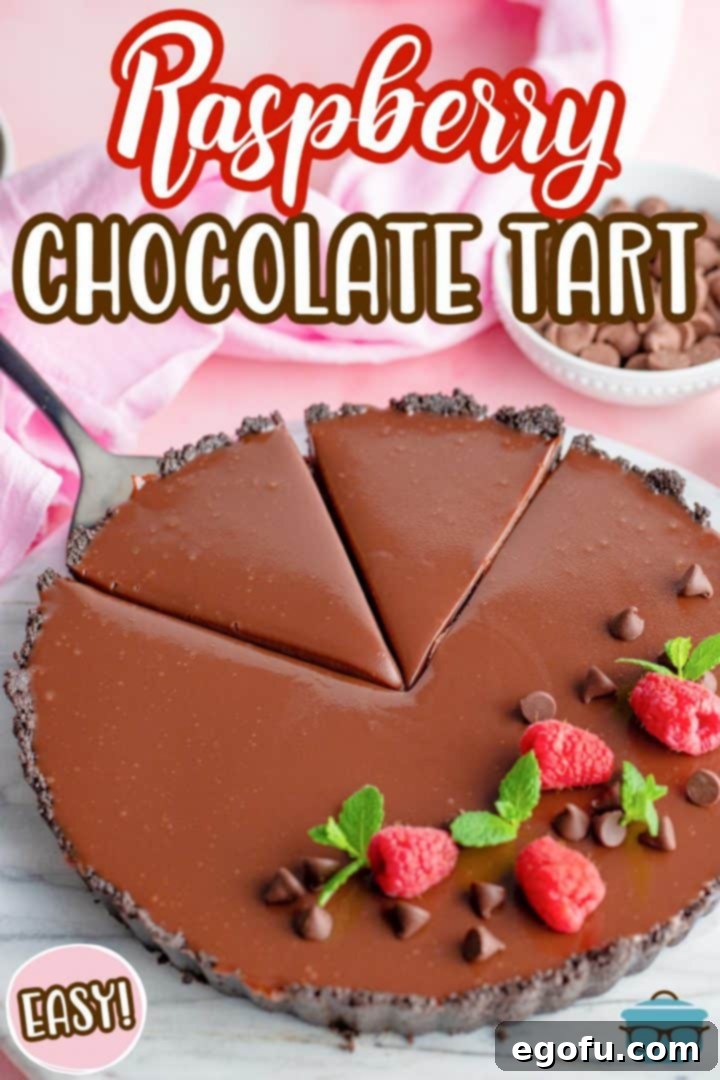
Easy Raspberry Chocolate Tart: Your New Favorite No-Bake Dessert
Prepare to fall in love with this Easy Raspberry Chocolate Tart, a dessert that masterfully blends convenience with gourmet appeal. Crafted with readily available ingredients, this delectable treat boasts a crunchy Oreo cookie crust, a vibrant layer of sweet-tart raspberry preserves, and a luxurious, smooth chocolate ganache topping. It’s an effortlessly impressive dessert that promises to delight your taste buds and earn you rave reviews, all without ever turning on your oven!
Whether you’re hosting a sophisticated dinner party or simply seeking a delightful treat for a casual gathering, this no-bake tart is your perfect solution. Its stunning presentation and irresistible flavor combination make it an instant crowd-pleaser. With every bite, you’ll experience a symphony of textures—from the satisfying crunch of the crust to the fruity burst of the preserves and the velvety decadence of the chocolate ganache.
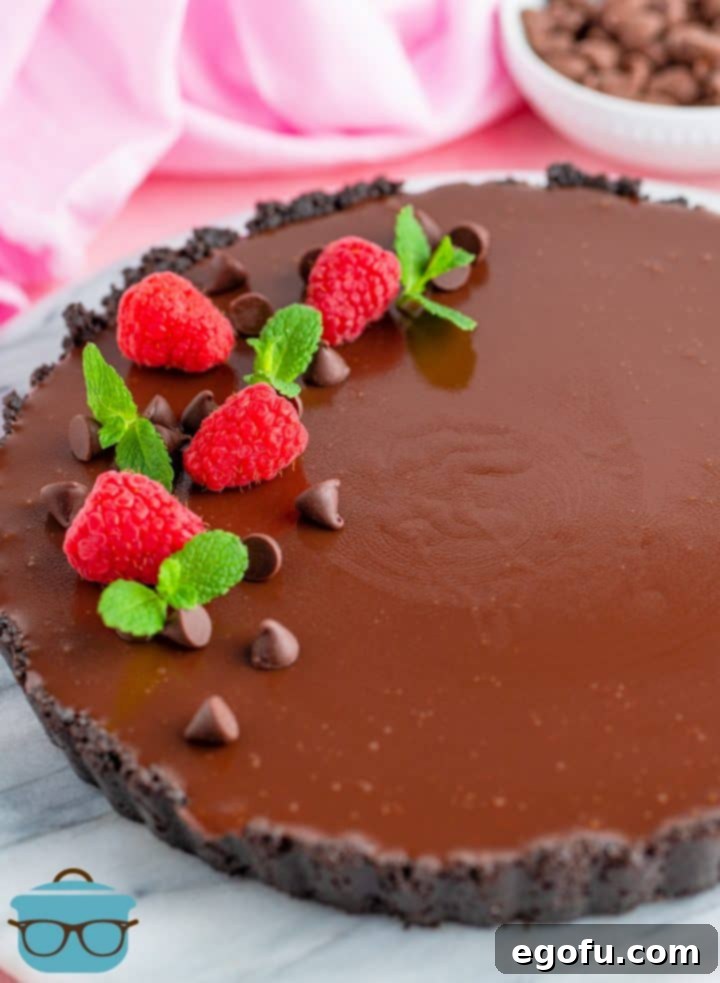
Why This Raspberry Chocolate Tart Will Become Your Go-To Dessert
There’s something truly magical about a dessert that looks incredibly sophisticated but comes together with minimal effort. This Easy Raspberry Chocolate Tart is precisely that kind of recipe. It’s an ideal choice for those busy weeknights when you’re craving something sweet and decadent, yet elegant enough to be the star attraction at any dinner party, holiday celebration, or special occasion.
The secret to its universal appeal lies in the brilliant contrast of textures and flavors. Imagine the crisp, buttery crunch of the Oreo crust providing a perfect foundation for the bright, slightly tart fruitiness of the raspberry layer. Topped with a rich, melt-in-your-mouth chocolate ganache, each forkful delivers an unforgettable sensory experience. As a passionate lover of raspberries myself, I can confidently attest that this tart holds a prime spot at the very top of my dessert rotation. It’s consistently one of the most requested recipes by friends and family, and for very good reason – it’s simply divine and incredibly satisfying without being overly heavy.
Essential Tips for Crafting the Perfect Raspberry Chocolate Tart
Creating this stunning tart is straightforward, but adhering to a few key tips will ensure your success and make the entire process even smoother, guaranteeing a professional-looking and tasting dessert every time.
- Patience is Key for Optimal Setting: This tart requires a minimum of 2 hours in the refrigerator to properly set before it can be sliced. Do not be tempted to rush this crucial step! Allowing it to chill longer, ideally overnight, will result in a firmer, more stable tart that slices beautifully, holding its shape perfectly. A well-set tart ensures each distinct layer maintains its integrity and delivers the best possible textural experience.
- Prevent Leaks with a Sheet Pan: Always make it a habit to place your tart pan on a sturdy sheet pan, especially during the chilling process in the refrigerator. This simple but effective precaution helps to catch any potential drips or leaks that might occur from the bottom of the tart pan, keeping your refrigerator shelves clean and preventing unnecessary mess. It’s a small step that saves a lot of hassle.
- Choose Your Chocolate Wisely: While the recipe primarily calls for good quality milk chocolate chips, feel free to customize the ganache to your personal preference and desired sweetness level. Semi-sweet chocolate chips or a high-quality baking bar (chopped) can be used for a richer, less sweet ganache. For those who adore a more intense and complex flavor profile that beautifully complements the tart raspberries, dark chocolate can also be a fantastic choice.
- Experiment with Preserve Flavors: The beauty of this recipe lies in its incredible versatility. Don’t feel confined to only raspberry preserves! Strawberry preserves are a fantastic alternative and a common family favorite, offering a similar sweet-tart balance that harmonizes wonderfully with chocolate. You could also explore other delightful variations such as apricot, cherry, or even a mixed berry preserve, allowing you to tailor the tart to your taste preferences or capitalize on seasonal fruit availability.
- Seeded vs. Seedless Raspberry Preserves: The choice between regular (seeded) and seedless raspberry preserves is entirely a matter of personal preference. I personally lean towards using seeded raspberry preserves for this particular tart. The tiny seeds add a subtle textural dimension and a rustic, homemade charm that I find quite appealing, enhancing the authentic fruit experience. However, if you prefer a perfectly smooth, uninterrupted filling, seedless preserves will work just as wonderfully.
The Simple Ingredients You’ll Need
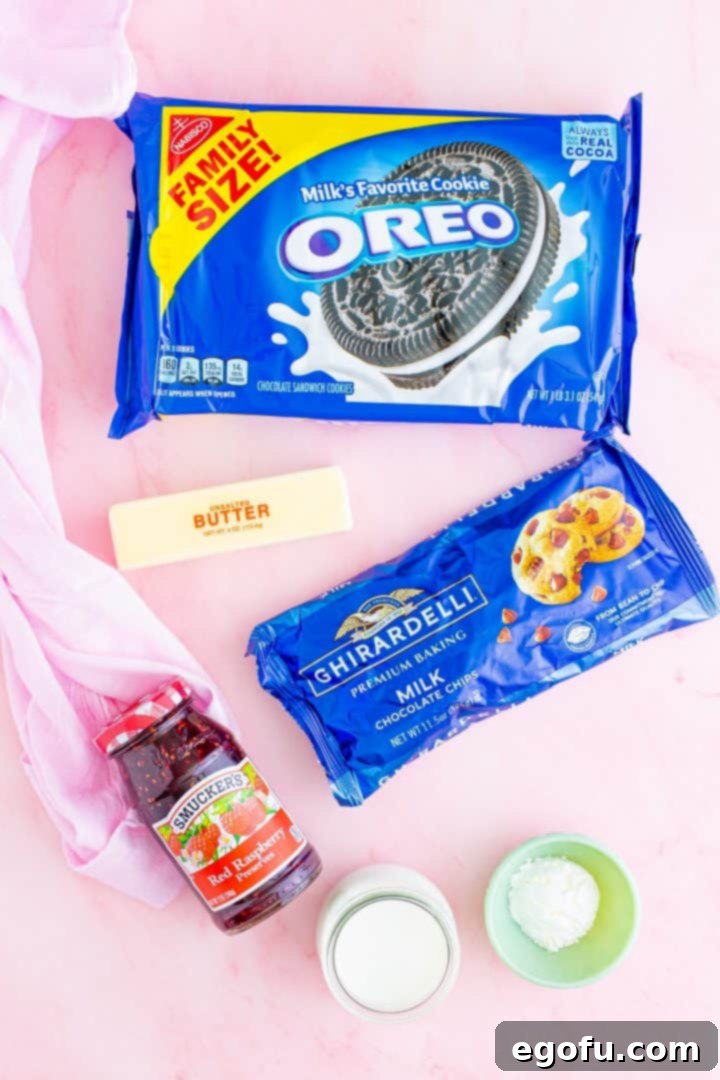
One of the most appealing aspects of this Easy Raspberry Chocolate Tart is its surprisingly short and accessible ingredient list. You’ll likely find that you have many of these essential staples already in your pantry or refrigerator! We’ll be focusing on three main, yet distinct, components to build this delightful dessert: the irresistible and crunchy Oreo crust, the vibrant and flavorful raspberry filling, and finally, the luscious and decadent chocolate ganache.
Key Ingredients Breakdown:
- For the Crust:
- Oreo cookies: These iconic chocolate sandwich cookies form the delightful, no-bake foundation of our tart. They provide a rich, deep chocolatey base with a satisfying crunch.
- Unsalted butter: Essential for binding the crushed cookie crumbs together into a firm, buttery, and utterly delicious crust that holds its shape beautifully.
- For the Filling:
- Raspberry preserves: This ingredient is the star of the middle layer, bringing a bright, sweet, and slightly tart burst of authentic fruity flavor that perfectly complements the chocolate.
- Cornstarch: A crucial thickening agent that ensures our raspberry preserves set beautifully and hold their form, preventing a runny filling.
- Water: Used to create a smooth cornstarch slurry, which helps to activate the thickening properties of the cornstarch without lumps.
- For the Ganache:
- Good quality milk chocolate chips: These are the core of our smooth, unbelievably decadent topping. While milk chocolate is recommended for its creamy sweetness, semi-sweet or even dark chocolate chips can be used for a more intense flavor profile.
- Heavy cream: When gently heated and combined with the chocolate chips, heavy cream is what transforms them into that rich, silky, and pourable ganache that crowns our tart.
Step-by-Step Guide: How to Make This Raspberry Chocolate Tart
Follow these easy, detailed steps to assemble your stunning no-bake tart. Precision and a little patience during the chilling phases will yield perfect, bakery-worthy results every single time.
Preparing the Oreo Crust: The Perfect Chocolatey Base
The foundation of our tart is a remarkably simple yet incredibly satisfying Oreo crust. It’s quick to prepare and, best of all, requires absolutely no baking.
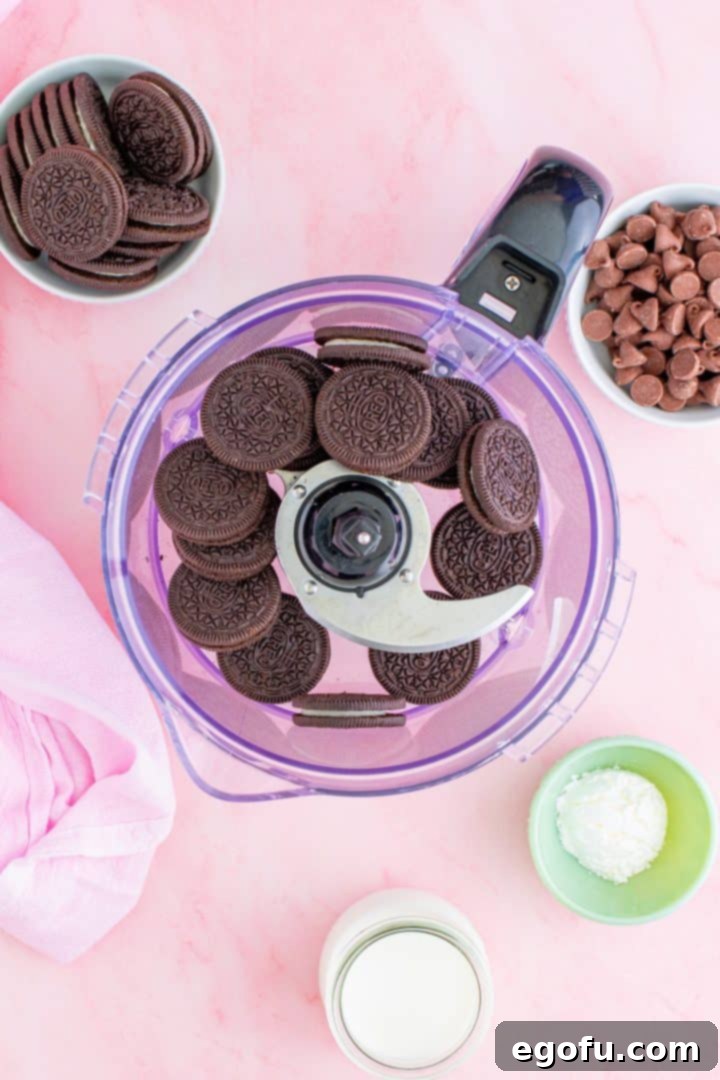
Begin by lightly greasing a 9-inch tart mold with nonstick cooking spray, then place it on a sturdy sheet tray for easy handling and to prevent leaks. Now, place the Oreo cookies into a food processor and pulse them until fine, uniform crumbs are formed. Next, drizzle in the melted unsalted butter. Stir thoroughly with a spoon or continue pulsing briefly until the crumbs are well combined and resemble wet sand. This ensures a cohesive and stable crust.
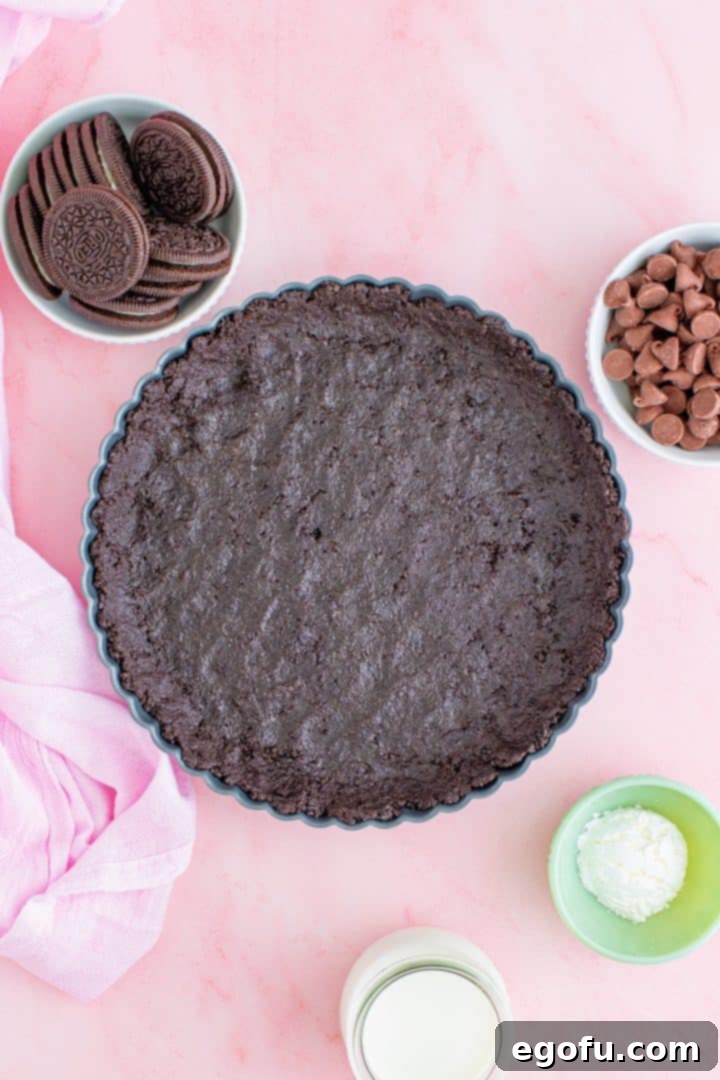
Firmly press this buttery cookie mixture evenly into the bottom and up the sides of your prepared tart mold. Use the back of a spoon or your clean fingertips to create a neat, compact crust that extends slightly up the edges. Once formed, set the crust aside while you prepare the vibrant filling.
Crafting the Raspberry Preserves Filling: A Burst of Fruity Flavor
This vibrant, fruity layer adds a delightful tang and beautiful color that perfectly balances the richness of the chocolate components.
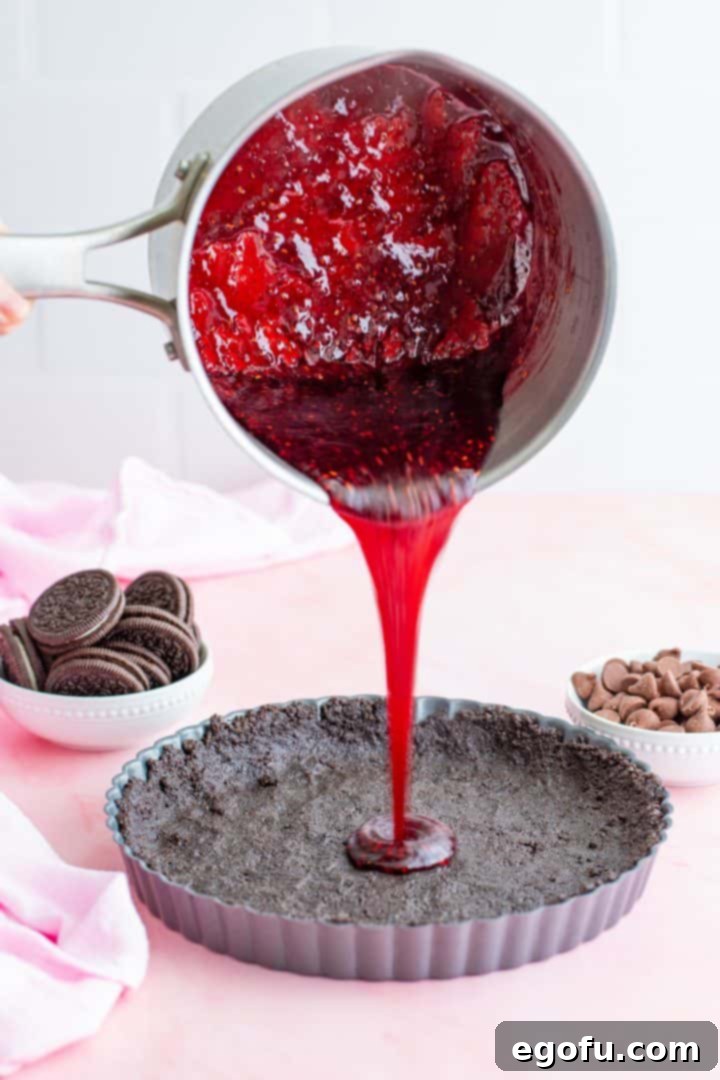
Transfer the raspberry preserves into a small saucepan. Place the saucepan over low heat, stirring occasionally to help the preserves melt down and loosen. In a separate small bowl, whisk together the cornstarch and water until a smooth slurry is formed, ensuring there are no lumps. As soon as the preserves have melted down and become loose and easy to whisk, add the cornstarch slurry to the pot. Whisk diligently and vigorously to ensure everything is thoroughly combined and perfectly smooth. Bring the mixture to a light simmer and continue to simmer gently for just 1 minute to fully activate the cornstarch and allow it to thicken. Immediately pour this warm, thickened raspberry mixture evenly over the prepared Oreo cookie crust. Gently smooth the surface with a spatula if needed to create an even layer, then set it aside while you quickly prepare the decadent ganache.
Preparing the Luxurious Chocolate Ganache: The Decadent Crown
The crowning glory of this tart, the chocolate ganache, is smooth, intensely rich, and utterly irresistible, providing a perfect counterpoint to the fruity layer.
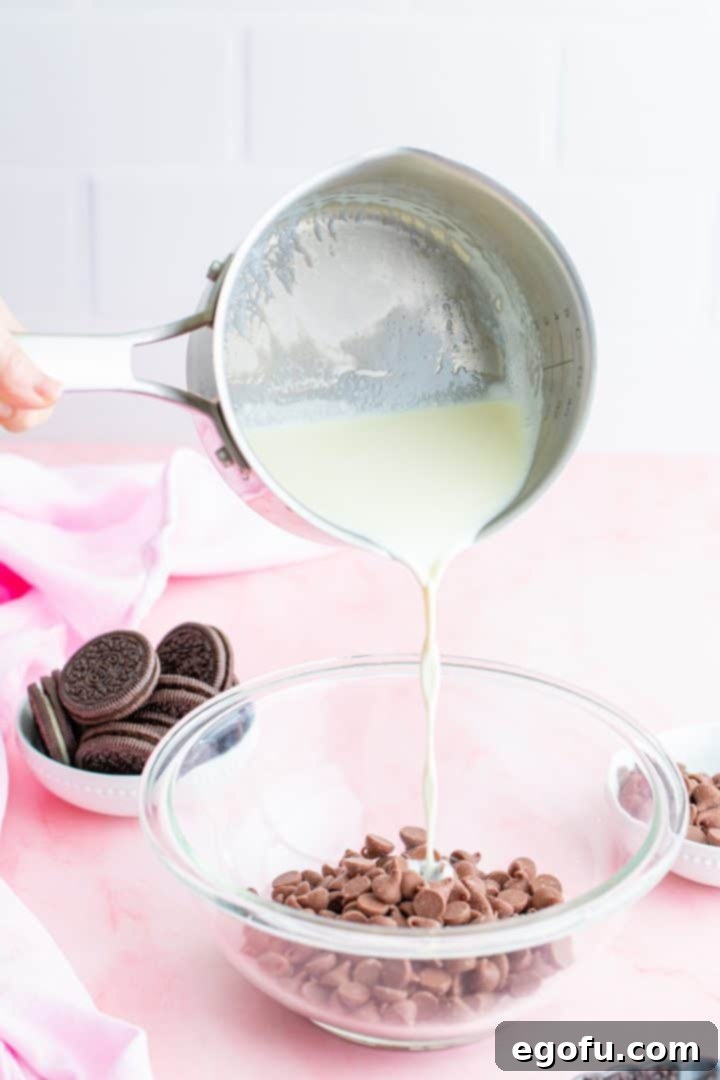
Place your chosen chocolate chips (milk, semi-sweet, or dark) into a medium-sized, heatproof bowl. In a separate small saucepan, heat the heavy cream over medium-low heat. Keep a close eye on it and stir occasionally, removing it from the heat just as you see a few small bubbles begin to form around the edges of the pan (it’s important not to let it come to a rolling boil). Carefully pour the hot heavy cream directly over the chocolate chips in the bowl. Resist the urge to stir immediately; instead, let the mixture sit undisturbed for 3 minutes. This crucial resting period allows the residual heat from the cream to melt the chocolate thoroughly and evenly. After 3 minutes, begin to stir gently with a whisk or spatula, starting from the center of the bowl and slowly working your way outwards, until the chocolate is fully melted and the mixture is smooth, glossy, and beautifully combined into a luscious ganache.
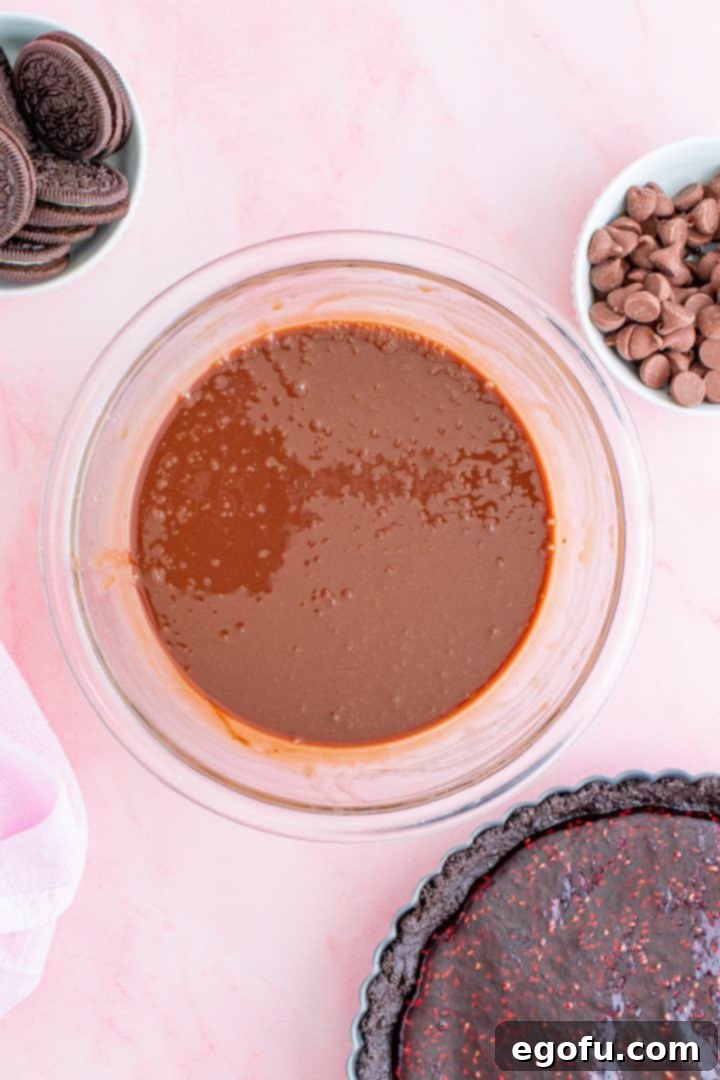
Assembling and Chilling Your Tart: The Final, Crucial Steps
The final steps involve bringing all the delicious layers together and allowing them ample time to set, which is critical for a structurally sound and aesthetically pleasing tart.
Once your ganache is perfectly smooth and free of lumps, gently pour it evenly over the raspberry preserves layer in the tart mold. If necessary, use the back of a spoon or an offset spatula to gently smooth the ganache into an even, beautiful top layer, ensuring it covers the raspberry completely. Let the assembled tart cool at room temperature for approximately 15 minutes. This initial cooling helps to prevent excessive condensation when it’s moved to the colder environment of the refrigerator. Then, carefully transfer the tart to the fridge to set for a minimum of 2 hours. For the absolute best results and a perfectly firm tart that is easy to unmold and slice cleanly, I highly recommend chilling it overnight.
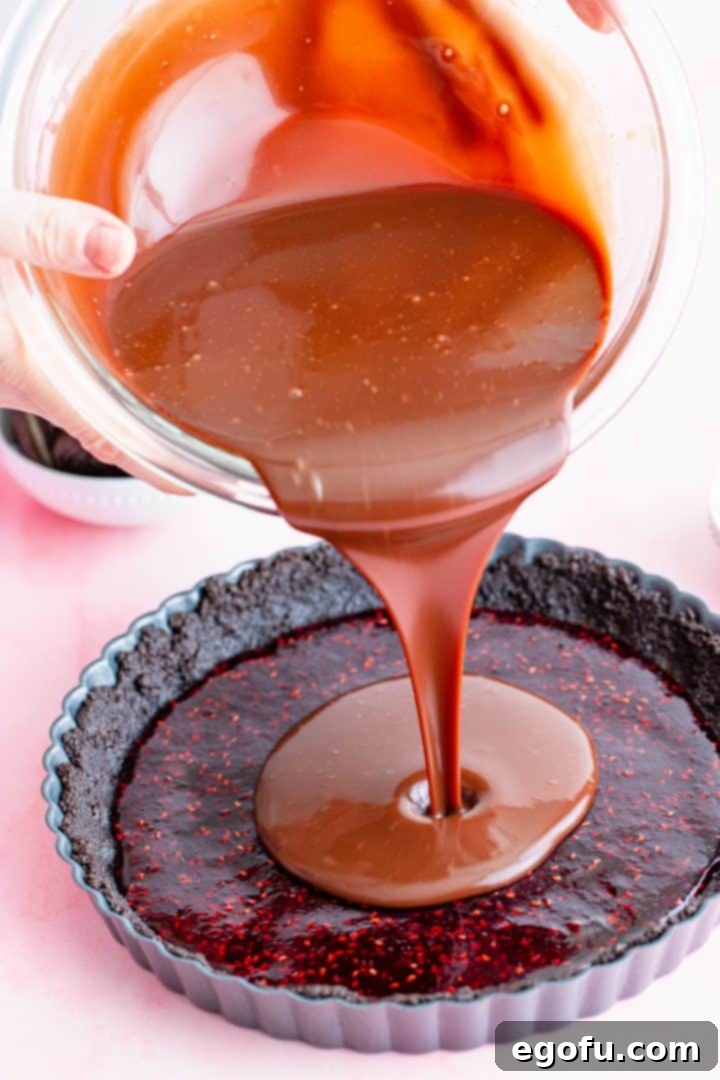
After sufficient chilling, carefully unmold your gorgeous tart. If desired, you can garnish it with fresh raspberries, a delicate sprinkle of chocolate shavings, or a vibrant sprig of fresh mint for an extra touch of elegance and visual appeal. Slice into generous portions using a sharp knife for clean cuts, and serve immediately to appreciative guests (or keep it all to yourself—we won’t tell!).
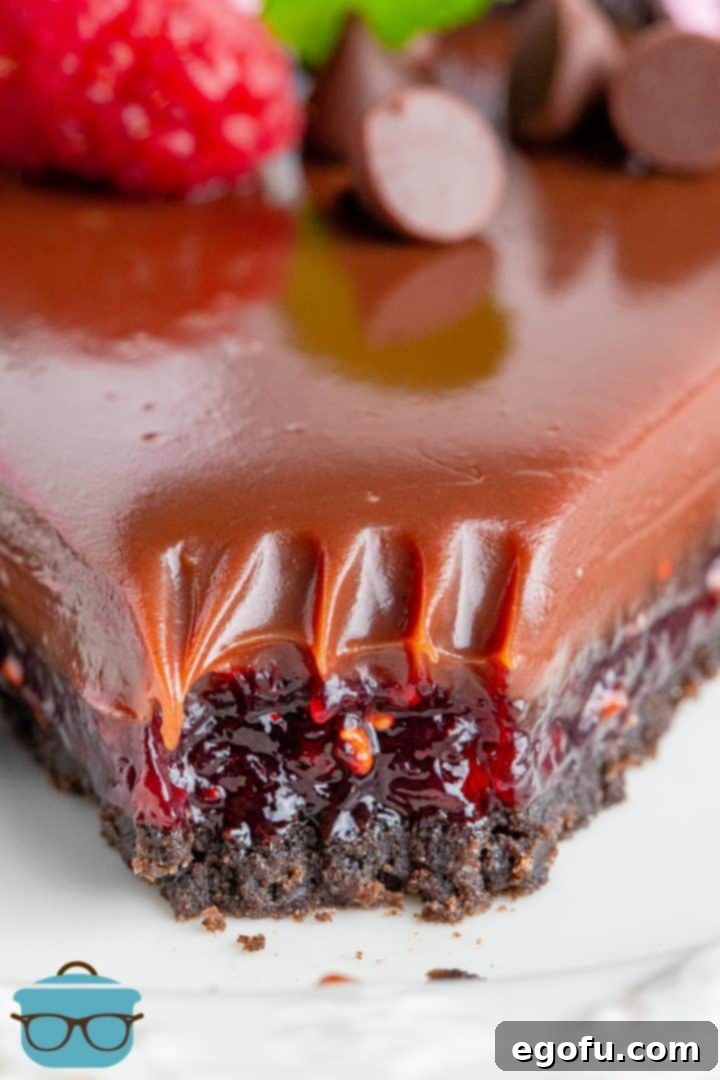
Storing Your Raspberry Chocolate Tart
Proper storage is essential to ensure your delicious Easy Raspberry Chocolate Tart stays fresh, delightful, and maintains its exquisite texture for days after preparation. Since this tart features a creamy and luxurious chocolate ganache topping, refrigeration is absolutely critical to preserve its quality and prevent the ganache from becoming too soft.
- Refrigerator Storage: Any leftover slices or the entire remaining tart should be stored in an airtight container or tightly covered with plastic wrap. Place it in the refrigerator. This method will keep the ganache firm and the tart fresh for approximately 4-5 days.
- Freezing Instructions: For longer preservation, this tart freezes remarkably well! To freeze, tightly wrap the entire tart (or individual slices if you prefer) first in a layer of plastic wrap, ensuring it’s completely sealed. Then, add a second layer of aluminum foil for extra protection against freezer burn. Place the wrapped tart in the freezer, where it can be stored for up to 3 months. When you’re ready to indulge, simply transfer the frozen tart to the refrigerator and allow it to defrost overnight before serving.
Frequently Asked Questions (FAQ) About This Tart
Here are some common questions you might have about making and enjoying your Raspberry Chocolate Tart:
- Can I make this Easy Raspberry Chocolate Tart ahead of time?
- Absolutely! This tart is an excellent make-ahead dessert, making it perfect for entertaining or when you want to plan ahead. In fact, it significantly benefits from extended chilling time. Preparing it a full day in advance and allowing it to set overnight in the refrigerator is highly recommended for achieving the best possible flavor integration and a perfectly firm, easy-to-slice texture.
- What if I don’t have a food processor for the Oreo crust?
- No food processor? No problem at all! You can still achieve perfectly fine cookie crumbs. Simply place the Oreo cookies in a large, sturdy zip-top bag, seal it, and then crush them using a rolling pin, the bottom of a heavy pan, or even a meat mallet until very fine crumbs are achieved. It might require a bit more manual effort, but it yields the same delicious, compact crust.
- Can I use fresh raspberries instead of preserves for the filling?
- While this recipe is specifically designed around the convenience and consistent texture of raspberry preserves for a smooth, stable fruit layer, you could certainly adapt it to use fresh raspberries. To do so, you would need to cook down fresh raspberries with a little sugar and a cornstarch slurry (similar to how we thicken the preserves) to create a comparable thickened fruit filling. However, using preserves is undoubtedly the simpler, quicker, and more “easy” method for this no-bake tart.
- How do I achieve clean slices of the tart?
- For perfectly neat and professional-looking slices, ensure your tart is thoroughly and completely chilled. A warm or insufficiently set tart will lead to messy cuts. Use a sharp, thin-bladed knife that has been run under hot water and then wiped completely dry just before each cut. The heat helps the knife glide through the ganache and preserves cleanly. Cleaning the knife between each slice will also help prevent the layers from smearing and ensures every slice is pristine.
Craving More Raspberry Desserts?
If you’re a devoted fan of the delightful and versatile combination of raspberries in your desserts, then you are absolutely in luck! We have an enticing array of other fantastic recipes that brilliantly showcase this vibrant and flavorful fruit, ensuring there’s always a new raspberry-infused treat for you to try:
- Raspberry Upside Down Cake
- Raspberry Crumble
- Lemon Raspberry Poke Cake (+Video)
- Raspberry White Chocolate Muffins
- Raspberry Tartlets
- White Chocolate Raspberry Cake
Raspberry Chocolate Tart
Print
Pin
Rate
15 minutes
5 minutes
2 hours
6
Brandie Skibinski
Ingredients
For the crust:
- 15 Oreo cookies
- 5 Tablespoons unsalted butter, melted
For the filling:
- 1 cup raspberry preserves
- 1 Tablespoon cornstarch
- 1 Tablespoon water
For the Ganache:
- 11.5 ounce bag good quality milk chocolate chips
- 1 cup heavy cream
Instructions
- Grease a 9-inch tart mold with nonstick cooking spray, place it on a sheet tray, and set aside.
- Place the Oreo cookies in a food processor and process until fine crumbs are formed. Drizzle in the melted butter. Stir together with a spoon to make sure it’s well combined.
- Press the cookie mixture into the bottom and up the sides of the tart mold, set aside.
- Place the raspberry preserves into a small saucepan. Place over low heat, stirring occasionally.
- Whisk together the cornstarch and water in a small bowl, add it to the pot with the preserves as soon as the preserves melt down (it will become loose and easy to whisk.) Whisk well to combine. Bring to a light simmer and simmer for 1 minute.
- Immediately pour this mixture on top of the cookie crust and smooth it out if needed, set aside.
- Place the chocolate chips in a medium-sized heatproof bowl. Add the heavy cream to a small saucepan over medium-low heat. Heat it just until you see it bubble a few times, stirring occasionally.
- Pour over the chocolate chips, let it sit for 3 minutes then stir until fully combined.
- Pour the chocolate on top of the raspberry preserves and smooth it out if necessary.
- Let it cool down for about 15 minutes then place it in the fridge to set for at least 2 hours, up to overnight if you can.
- Unmold the tart, garnish if desired, slice, and serve!
Notes
- This needs at least 2 hours to set up before slicing. Do not skip that step. The longer you let it sit the more firm it will be.
- Place the tart on a sheet pan while chilling to prevent anything from leaking off the bottom of pan.
- You can use semi-sweet chocolate chips or a baking bar for this recipe if you’d like.
- Feel free to switch up your preserves for different flavors. Strawberry is another family favorite!
- You can use regular or seeded raspberry preserves. I prefer seeded for this recipe.
Dessert
American
Nutrition
Nutritional Disclaimer
“The Country Cook” is not a dietician or nutritionist, and any nutritional information shared is an estimate. If calorie count and other nutritional values are important to you, we recommend running the ingredients through whichever online nutritional calculator you prefer. Calories and other nutritional values can vary quite a bit depending on which brands were used.
Did you make this recipe?Share it on Instagram @thecountrycook and mention us #thecountrycook!
