Classic Cafeteria Chili: A Beloved Taste of Childhood Nostalgia
This authentic Cafeteria Chili recipe is guaranteed to transport you straight back to your school days! Simple to prepare, incredibly comforting, and a dish that truly fills your belly and warms your soul. With its minimal ingredient list and straightforward method, it’s the ultimate “dump and stir” meal, perfect for any busy weeknight when you crave a touch of comforting familiarity.
Unlock Childhood Memories with Every Flavorful Spoonful
For countless individuals, the aroma and taste of a particular dish can evoke powerful, heartwarming memories, and school cafeteria chili is undoubtedly one of those iconic comfort foods. This isn’t just another chili recipe; it’s a genuine, time-tested staple that generations have grown up savoring. If you’ve been searching to replicate that exact, comforting flavor that defines your youth, this Cafeteria Chili is precisely what you need. Its perfectly balanced, mild yet rich taste makes it an instant hit with everyone, from the pickiest eaters to the most seasoned chili connoisseurs, and its ease of preparation is a welcome bonus for any home cook.

The Enduring Legacy of Sally Paulson’s Signature Chili
The remarkable origins of this specific chili recipe add an extra layer of charm and authenticity. This isn’t a modern culinary interpretation but the genuine article, directly from the kitchen of Sally Paulson, a dedicated and much-loved School Cafeteria Supervisor. For years, students, teachers, and parents alike tirelessly clamored for her secret chili recipe, captivated by its unique and comforting flavor. Upon her well-deserved retirement, Sally generously shared her treasured recipe with the community, publishing it in her local newspaper, The Rapid City Journal, on December 11, 1983. The fact that this particular recipe has been cherished, faithfully recreated, and passed down through families for decades is a profound testament to its undeniable deliciousness and timeless appeal. It strikes the ideal balance of classic chili flavor without being overly spicy or complex, making it the perfect, universally loved choice for families and those who prefer a gentler heat profile in their comfort food.
This “dump and stir” approach ensures that even novice cooks can achieve a delicious result, while the slow simmering process allows the humble ingredients to transform into a deeply flavorful and satisfying meal. It’s more than just food; it’s a taste of history and a spoonful of nostalgia.
Frequently Asked Questions About Cafeteria Chili
What are the best ways to serve this Cafeteria Chili?
This incredibly versatile chili is fantastic on its own, offering a hearty and complete meal. However, its slightly looser, yet still substantial, consistency makes it an excellent “dipping” chili. It pairs wonderfully with crusty slices of buttered bread, grilled cheese sandwiches, or even simple crackers. In the Midwest, a surprising but beloved tradition in many schools involved serving chili alongside sweet cinnamon rolls or even peanut butter crackers and sandwiches – a delightful sweet and salty combination that many find surprisingly addictive and worth exploring! My husband, for instance, particularly enjoys his bowl of chili with a classic ham sandwich. Another unique pairing, fondly remembered by many, is serving this chili with something called “Cowboy Bread.” No matter how you choose to enjoy it, don’t forget your favorite toppings like a generous sprinkle of shredded cheddar cheese, a cooling dollop of sour cream, or fresh green onions for a vibrant burst of flavor. A warm square of sweet cornbread is also an absolute must for a truly complete and comforting meal experience.
What other ingredients or variations can I add to customize this chili?
This recipe provides a robust and flavorful base, making it incredibly adaptable to your personal preferences and what you have on hand. For added texture and a hint of bright, tangy acidity, consider stirring in a can of diced tomatoes (undrained). If you appreciate more savory depth and a slight crunch, finely diced green bell peppers are a fantastic addition; they cook down beautifully and complement the chili’s flavors. You can also experiment with other vegetables like corn for sweetness, zucchini for a fresh touch, or even finely chopped carrots for extra nutrients and a subtle sweetness that deepens as it simmers. For those looking to introduce different protein textures, consider adding an extra can of beans – kidney, pinto, or black beans would all work well.
Is the long simmering time truly necessary for this recipe?
Absolutely! The simmering step is not merely a suggestion; it is crucial and should not be skipped or shortened. Allowing the chili to simmer for at least 1.5 to 2 hours is essential for two primary, interconnected reasons: First, it allows all the individual flavors from the meat, spices, and tomato products to meld and deepen significantly, transforming them into a harmonious and complex blend that simply cannot be rushed. Second, this extended gentle heat helps to naturally thicken the chili to that perfect, hearty, and satisfying cafeteria consistency. Patience during this stage will be richly rewarded with a more complex, robust, and utterly satisfying dish that truly tastes like it simmered all day.
Can I prepare this Cafeteria Chili recipe in a slow cooker?
Yes, this recipe adapts beautifully to a slow cooker, offering an even more hands-off approach to meal preparation. To start, you’ll need to brown the ground beef and sauté the chopped onion in a separate pan on the stovetop. This initial step is important for developing deep flavors and ensuring the meat is properly cooked. Once the meat is thoroughly browned and any excess fat has been carefully drained, transfer it along with all the other chili ingredients into your slow cooker. Stir everything thoroughly to ensure even distribution of spices and liquids. Set your slow cooker to the low setting and cook for approximately 6-8 hours, or on high for 3-4 hours. Give it a final good stir before serving to ensure all the flavors are well distributed and enjoy a comforting meal with minimal fuss.
How can I add more spice or heat to this chili?
While the original Cafeteria Chili recipe is intentionally mild to appeal to a broad audience, it’s incredibly simple to adjust the heat level to suit your preferences or those of your guests. To introduce more warmth and a spicier kick, you can easily swap the mild chili powder for a medium or hot variety. For a direct heat boost, consider adding finely diced green chiles (such as Hatch or Anaheim), red pepper flakes, or fresh jalapeños (seeded and minced for milder heat, or with seeds left in for more intensity). A pinch of cayenne pepper or a dash of your favorite hot sauce, stirred in during the simmering process, will also elevate the spice level without altering the core flavor profile too much. Experiment gradually to find your perfect balance of heat!
What exactly are chili beans and where can I find them?
Chili beans are typically either kidney beans or pinto beans that come pre-seasoned in a savory, spiced chili sauce. This distinctive sauce is absolutely key to the recipe’s unique flavor profile and contributes significantly to the overall taste of the chili. Therefore, it’s vital not to rinse the beans – you want to pour the entire contents of the can, including the flavorful sauce, directly into your pot. You’ll find chili beans conveniently located alongside all the other canned beans in the grocery store aisle. Specific brands may vary depending on your geographic location, but they are generally easy to spot. If for any reason chili beans are unavailable, a combination of plain kidney and pinto beans, or just one of these, can be used as a substitute, but be aware that the specific “chili flavor” from the seasoned beans and their sauce will be a notable missing element. You might want to boost the chili powder slightly if substituting.
How should I store any leftover chili and can I freeze it?
Leftover Cafeteria Chili is often just as delicious, if not more so, the next day, as the flavors continue to meld and deepen! Allow the chili to cool completely to room temperature before transferring it to an airtight container. It can be safely stored in the refrigerator for up to 3-4 days. For longer-term storage, this chili freezes exceptionally well, making it perfect for meal prepping. Simply portion it into freezer-safe containers or heavy-duty freezer bags, leaving a little headspace at the top for expansion. Label with the date and freeze for up to 4-6 months for best quality. To reheat, thaw overnight in the refrigerator and then gently warm on the stovetop over low heat, stirring occasionally, or reheat in the microwave until piping hot throughout. Add a splash of water or broth if it seems too thick after thawing.
Key Ingredients for Crafting Authentic Cafeteria Chili
Creating this classic, heartwarming chili requires a straightforward list of ingredients, most of which are readily available pantry staples. Each component plays a crucial and specific role in achieving that nostalgic, well-rounded flavor that defines cafeteria chili. Below is a detailed look at the essential ingredients and why they are so important to the success of this beloved recipe.
- Ground Beef: The robust foundation of this hearty chili. The original recipe specifies 1.5 pounds of ground beef, which provides a rich, meaty texture. However, it’s perfectly acceptable and common to use 1 pound if that’s what’s readily available or fits your budget – it will simply be slightly less “beefy” but still incredibly delicious. For those seeking alternatives or a lighter option, ground chicken, ground pork, or ground turkey can be substituted, though it’s important to note that this will subtly alter the traditional taste profile of the classic cafeteria chili. Remember to thoroughly drain any excess fat after browning to prevent a greasy final product.
- Chopped Onion: A fundamental aromatic that provides a savory depth and a subtle sweetness that melts into the chili as it cooks. Finely dicing the onion ensures it blends seamlessly into the sauce. If you’re looking for a slightly milder, more refined onion flavor, a shallot can be used. Alternatively, for an extra layer of savory flavor and texture, consider adding some finely diced green bell pepper along with the onion (though some folks have a love-hate relationship with peppers in chili!).
- Light Brown Sugar: Don’t let the inclusion of sugar surprise you! This isn’t about making a sweet chili, but rather about achieving a perfect balance. Light brown sugar plays a vital role in counteracting and mellowing the natural acidity from the tomato products, creating a smoother, more harmonious flavor profile. Its inherent hint of molasses also subtly contributes to the chili’s overall depth and richness, a small but impactful touch that elevates the entire dish beyond a simple tomato base.
- Mild Chili Powder: The primary spice that defines the classic chili flavor. Following the original recipe, a mild chili powder is highly recommended. This choice allows all the other nuanced flavors from the tomatoes, beans, and beef to shine through without being overwhelmed by excessive heat. However, if you genuinely enjoy a bolder, spicier kick, feel free to use a medium or hot chili powder, adjusting the amount to your personal taste preference.
- Tomato Sauce and Tomato Juice: This specific combination is absolutely key to achieving the chili’s unique consistency and its deep, well-rounded tomato flavor. The tomato sauce provides the necessary body and concentrated tomato richness, while the tomato juice thins the mixture slightly and contributes a distinct, underlying savory depth. This prevents the chili from tasting overwhelmingly like plain, acidic tomato sauce, adding complexity instead. This duo is integral to the original recipe’s success, and while not tested, substitutions may yield significantly different results.
- Water: The amount of water added is a flexible element, allowing you to fine-tune the chili’s thickness to your preference. If you prefer a very thick, stew-like chili, you can reduce or even omit the water. However, 1 cup of water typically achieves a perfect balance between thick and thin, creating a “dipping” chili that’s hearty and substantial without being soupy. Adjust the quantity to match your personal desired consistency.
- Chili Beans (Canned): These are arguably a secret weapon in this particular recipe. Pre-seasoned chili beans (typically kidney or pinto beans) contribute an extra, distinct layer of chili flavor directly from their spiced sauce. Using them significantly enhances the overall taste profile and authenticity. While you could certainly use plain kidney beans or pinto beans (or a mix of both) as a substitute, if you can find chili beans, they truly make a noticeable difference in the final flavor. Remember, do not rinse them – their flavorful sauce is essential!
- Salt: A foundational seasoning, essential for enhancing and balancing all the other flavors in the chili. Adjust to taste as you simmer.
- Garlic Powder: Adds a fundamental savory aromatic without the pungency or texture of fresh garlic, blending seamlessly into the background flavor and contributing to the overall depth.

How to Prepare This Classic Cafeteria Chili: Step-by-Step Guide
Making this nostalgic chili is a straightforward process, making it perfect for cooks of all skill levels. Follow these simple steps to bring the comforting taste of your childhood cafeteria into your home, filling it with wonderful aromas and the promise of a delicious meal.
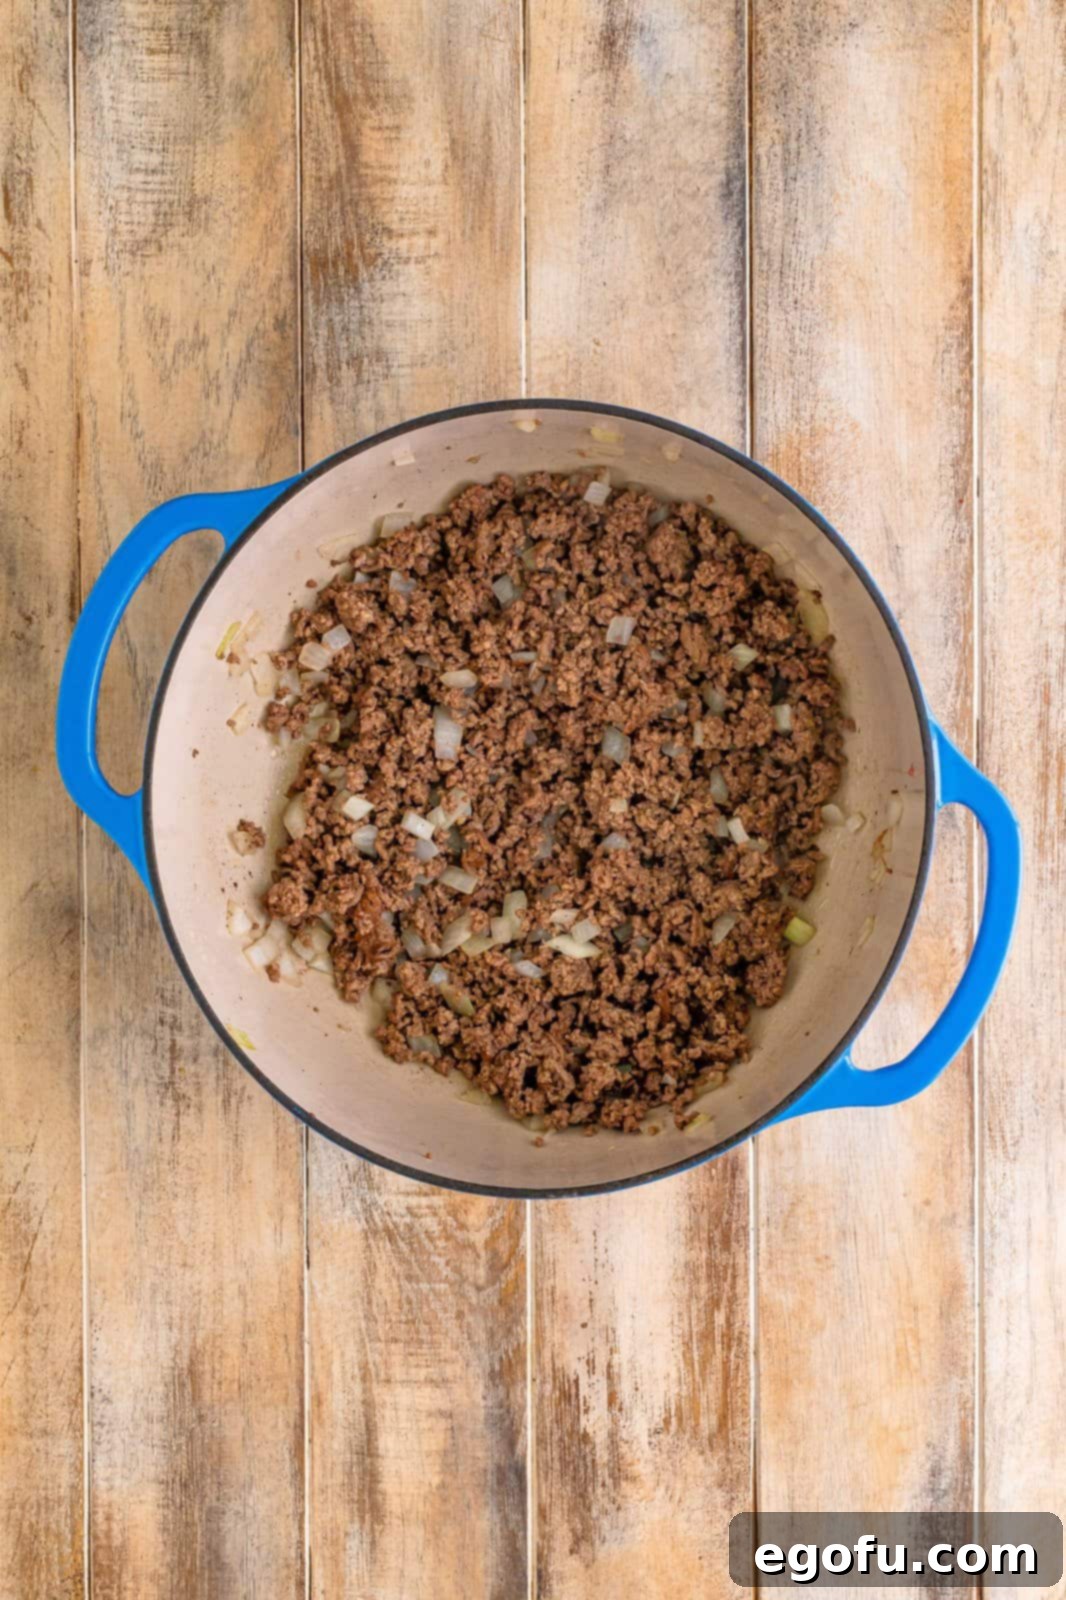
Step 1: Brown the Beef and Onion. In a large, heavy-bottomed pot or Dutch oven, combine 1 ½ pounds of ground beef with ½ cup of chopped onion. Cook over medium-high heat, using a sturdy spoon to break up the beef into small crumbles, until it is thoroughly browned and the onion is softened and translucent. This initial step is absolutely crucial for building the foundational savory flavor of the chili. Once cooked, carefully drain any excess grease from the pot to ensure a cleaner, less oily final product. Return the browned beef and onion mixture to the clean pot.

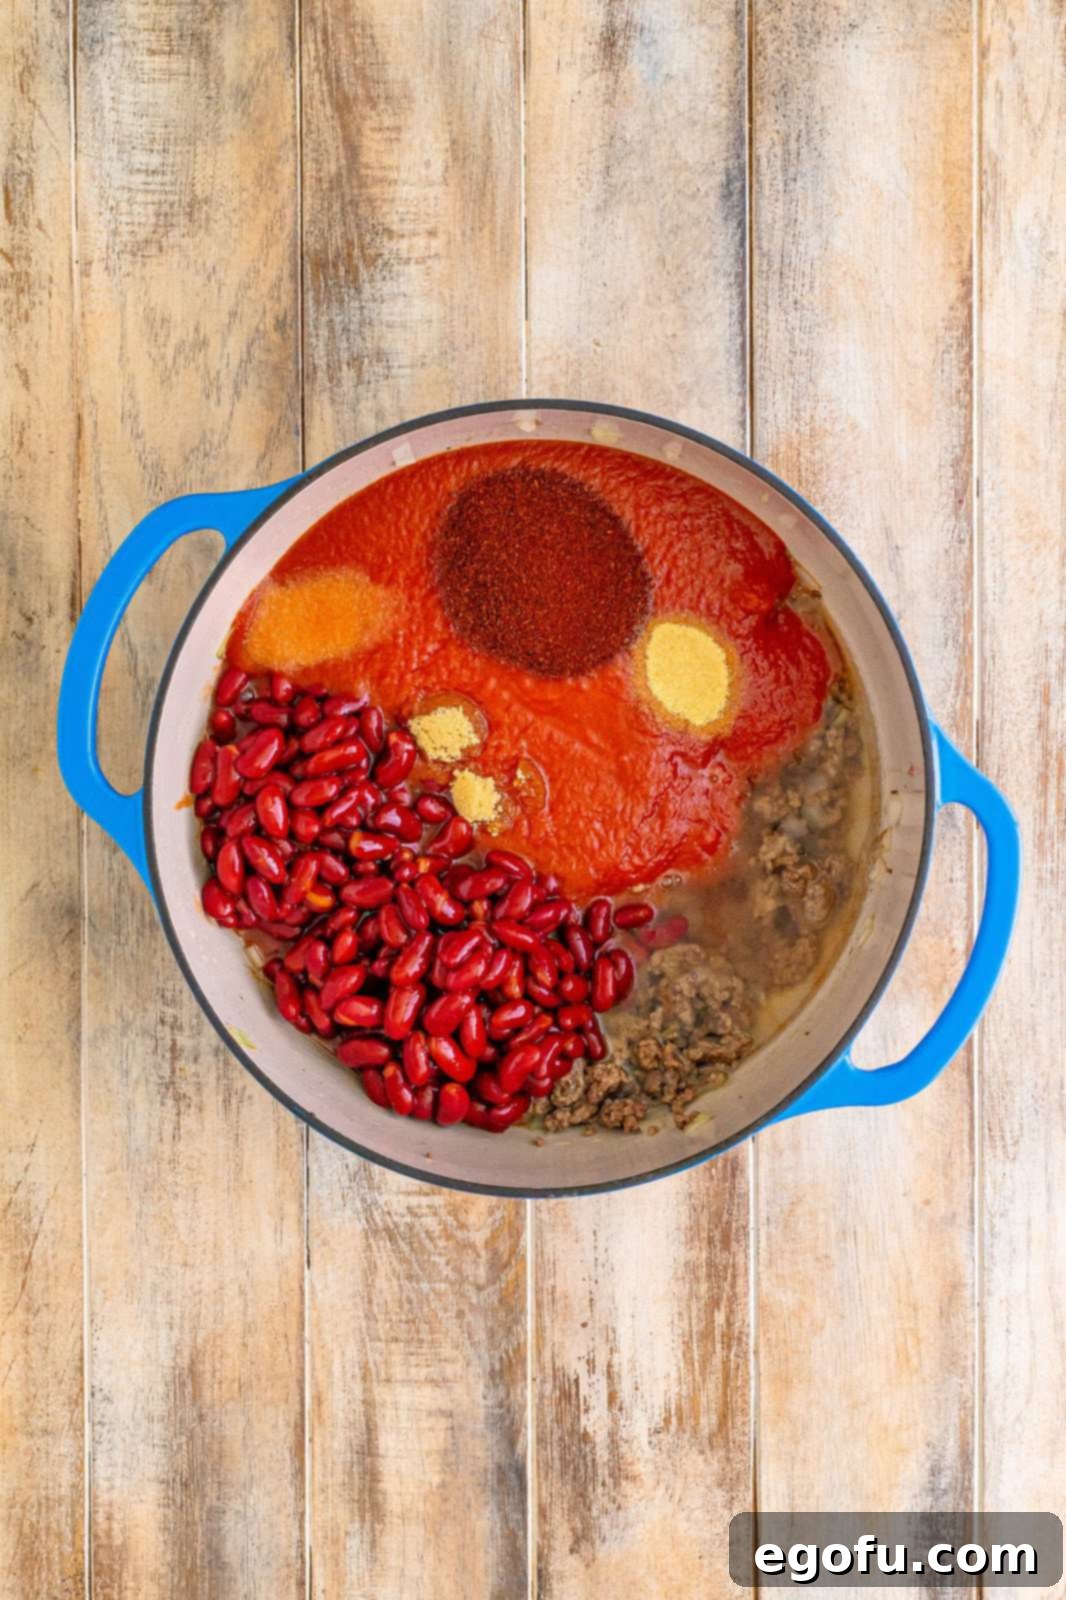
The first crucial step: browning the ground beef and onion to build a rich flavor base. Step 2: Combine All Remaining Ingredients. To the pot containing the browned beef and onion, add all the remaining ingredients. This includes 1 teaspoon of salt, 2 teaspoons of light brown sugar, 2 Tablespoons of mild chili powder (adjusting for heat preference), ¾ teaspoons of garlic powder, 3 cups of tomato sauce, 2 cups of tomato juice, 1 cup of water (adjust for desired thickness), and the two (16 ounce) cans of chili beans (remember, do not rinse them, as their sauce is essential for flavor!). Stir everything thoroughly with a large spoon or spatula until all ingredients are well combined and the spices are evenly distributed throughout the mixture. Ensure there are no clumps of spice remaining.

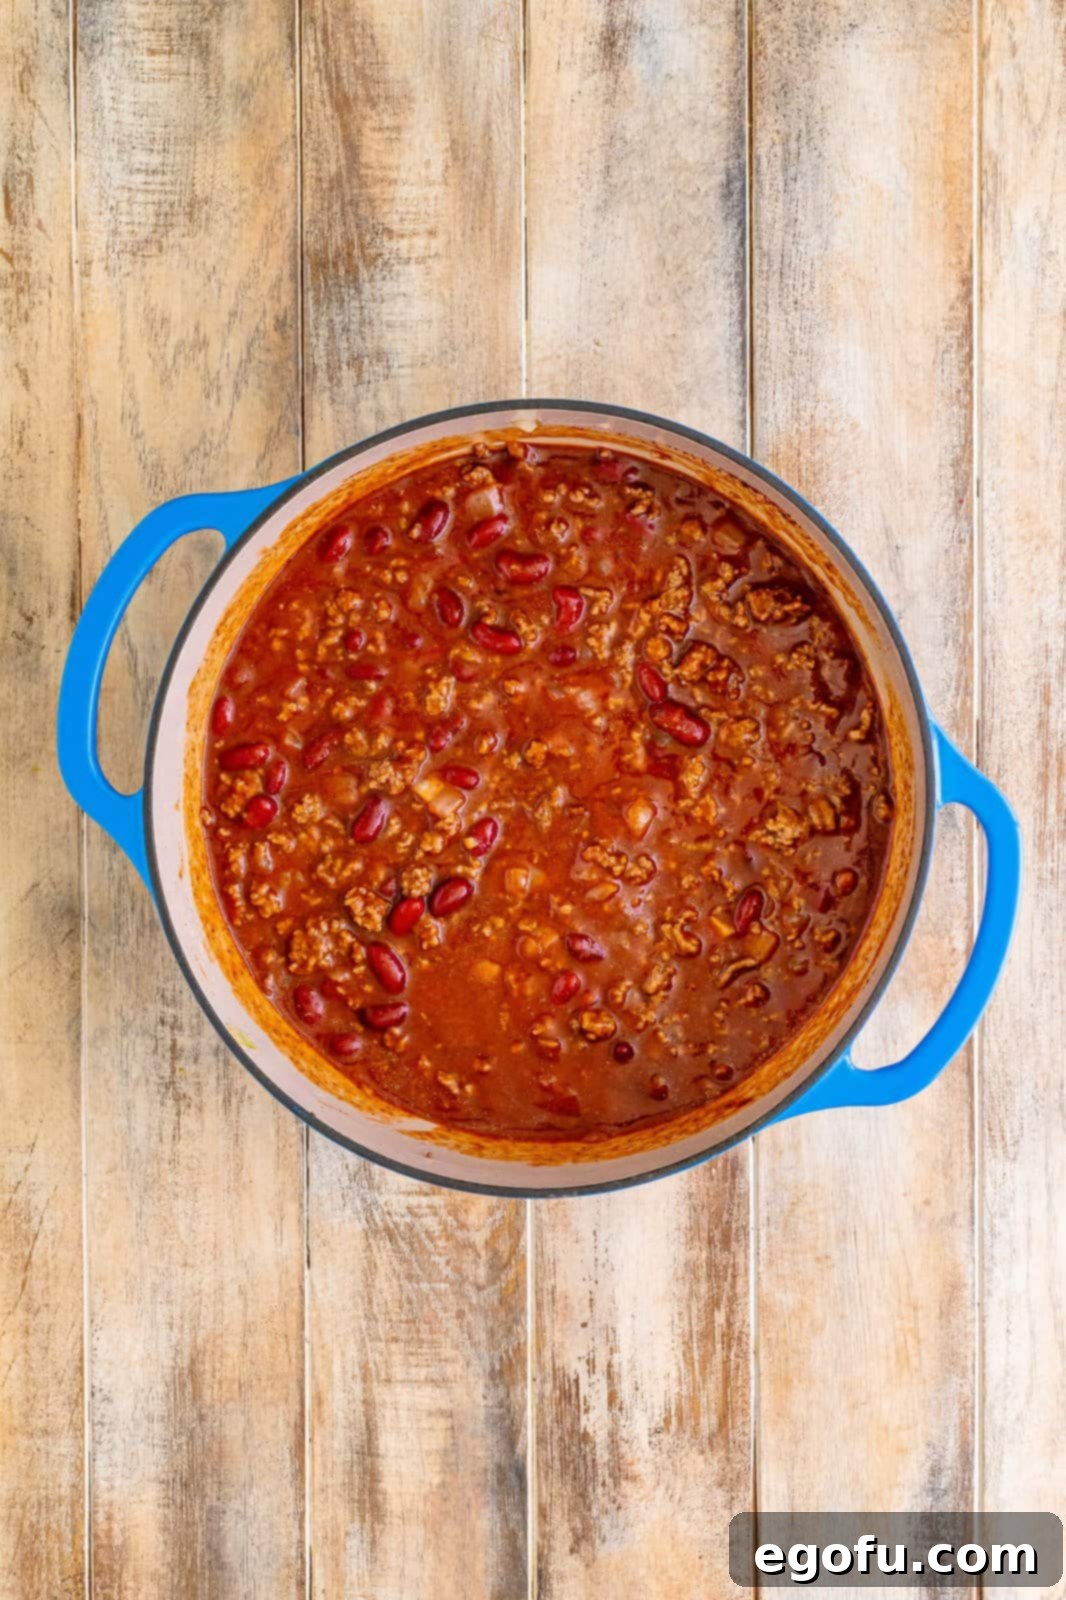
Adding all the rich, flavorful ingredients to the pot for the chili to begin its transformation. Step 3: Simmer to Perfection. Bring the chili mixture to a gentle simmer over medium heat. Once it begins to bubble softly, reduce the heat to low, ensuring the chili maintains a very gentle simmer. Cover the pot with a lid and let it cook undisturbed for approximately 1 ½ to 2 hours. This extended simmering time is non-negotiable for two critical reasons: it allows the chili’s deep, complex flavors to fully develop and meld together, and it helps achieve that signature thick, hearty consistency that defines cafeteria chili. Make sure to stir the chili occasionally throughout this period (every 20-30 minutes) to prevent any sticking to the bottom of the pot and to ensure even cooking and thickening.

The chili bubbling gently under the lid, allowing all the wonderful flavors to meld and deepen beautifully. Step 4: Serve and Enjoy! Once the chili has thickened to your desired consistency and the flavors have fully developed, it’s ready to be served. Turn off the heat and give it one final stir. Ladle generous portions into individual bowls and invite everyone to customize their chili with their favorite toppings. Classic and highly recommended choices include a generous sprinkle of freshly shredded cheese (cheddar or Monterey Jack are excellent options), a cooling dollop of sour cream or Greek yogurt, and a garnish of fresh green onions or chives for a pop of color and mild onion flavor. Other great options include a dash of your favorite hot sauce, a sprinkle of fresh cilantro, or even some crushed corn chips for added texture and crunch. Serve piping hot and savor the comforting, nostalgic taste of homemade cafeteria chili!

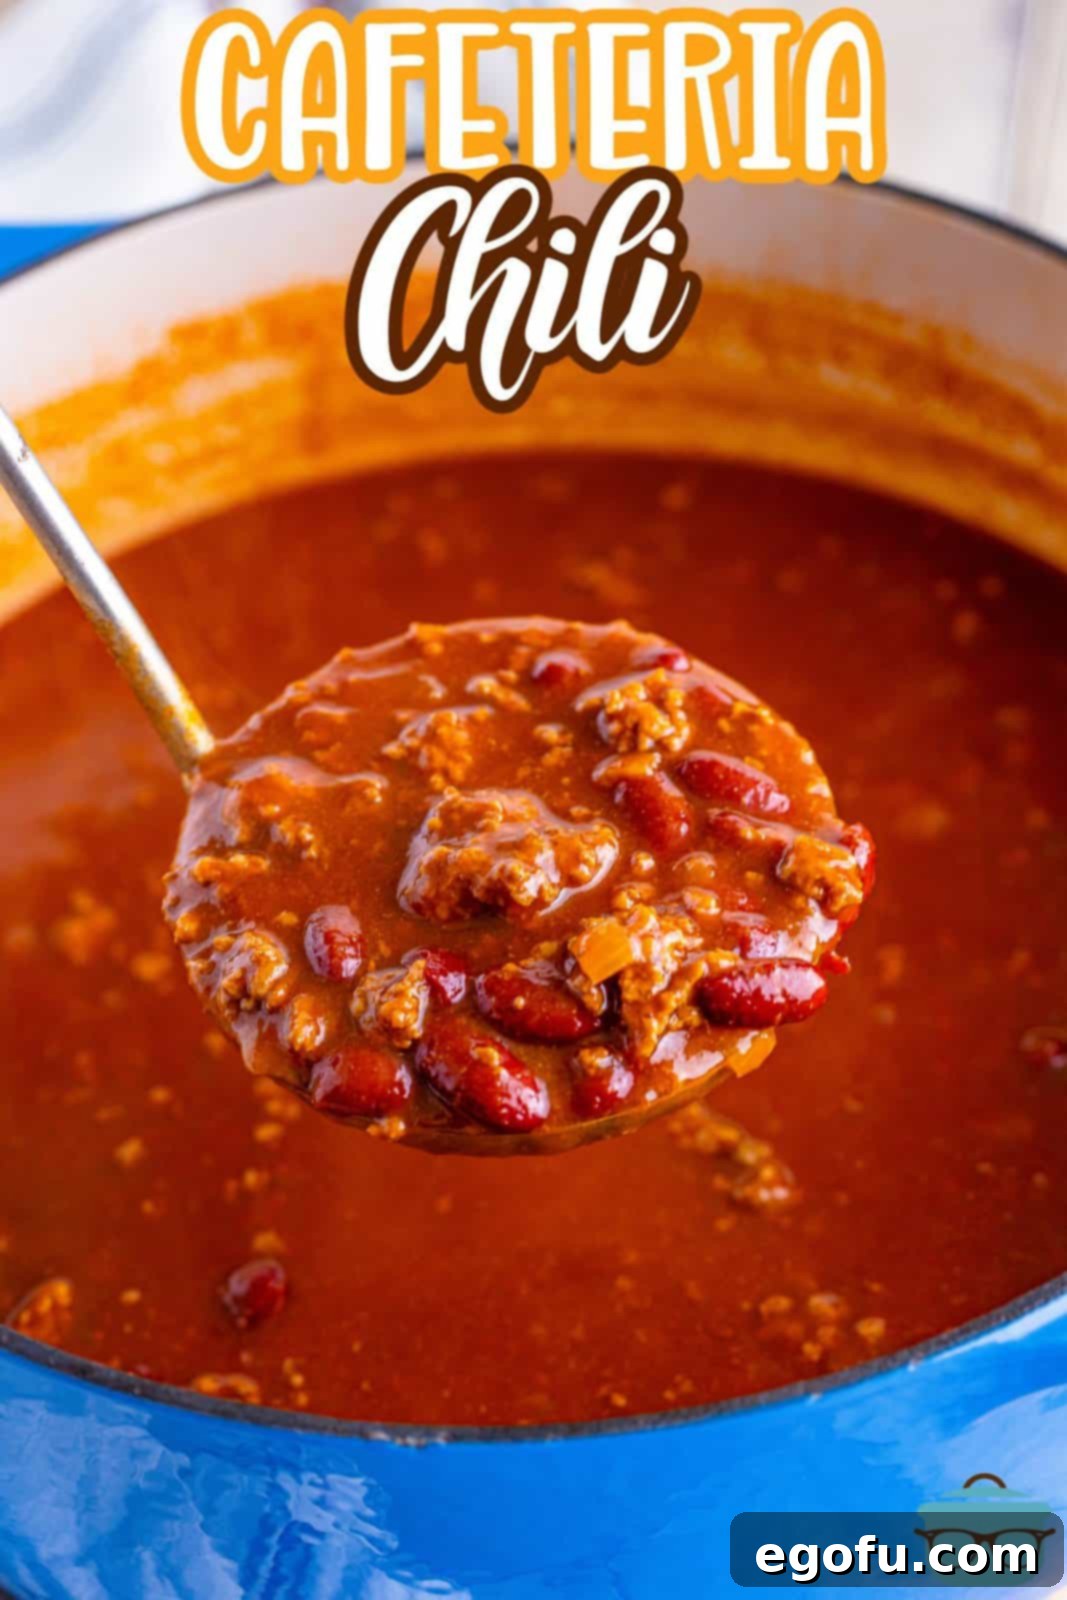
The finished chili, beautifully garnished and ready to be enjoyed, promising a truly satisfying meal.
Craving More Comfort Food Classics? Explore Our Recipes!
If this delightful Cafeteria Chili has left you yearning for more delicious, home-style recipes that evoke warmth and comfort, you’re in luck! We’ve curated a collection of other comforting dishes perfect for family meals, cozy nights in, or simply satisfying that craving for classic flavors. From more school-inspired favorites to hearty chili variations and other timeless comfort foods, there’s something here to satisfy every palate and bring a smile to your face.
- Cafeteria Noodles
- School Cafeteria Spaghetti
- Crock Pot Dr Pepper Chili
- Rectangle School Pizza
- Cornbread Waffles with Chili and Fixins’
- Chili Cheese Dog Sliders
- Best Crockpot Chili
- Slow Cooker Ultimate Beef Chili
- Pepperoni Rolls
- Homemade Spaghettios
Detailed Recipe: Classic Cafeteria Chili

Cafeteria Chili
This authentic Cafeteria Chili is guaranteed to take you back to your school days! It fills your belly and warms your soul with its perfectly balanced, mild flavor. Made with pantry staple ingredients, this dish is always a hit with young and old alike, offering a timeless taste of comfort and nostalgia that is incredibly easy to achieve.
Rating: 5 out of 5 stars based on 14 reviews.
Pin Recipe
Prep Time: 10 minutes
Cook Time: 2 hours
Total Time: 2 hours 10 minutes
Servings: 6 servings
Author: Brandie Skibinski
Ingredients
Instructions
In a large pot or Dutch oven, cook and crumble 1 ½ pounds ground beef with ½ cup chopped onion over medium-high heat until the beef is fully browned and the onion is translucent. Drain any excess grease and return the mixture to the pot.

Add 1 teaspoon salt, 2 teaspoons light brown sugar, 2 Tablespoons mild chili powder, ¾ teaspoons garlic powder, 3 cups tomato sauce, 2 cups tomato juice, 1 cup water, and 2 (16 ounce) cans chili beans. Stir all ingredients well to combine thoroughly.

Bring the chili to a gentle simmer, then reduce heat to low, cover the pot, and let it simmer for approximately 1 ½ – 2 hours, stirring occasionally. This simmering time is crucial for developing deep flavors and achieving the proper thickness.
Serve hot, topped generously with your favorite garnishes such as sour cream, shredded cheese, and fresh green onions.

Video Guide
Recipe Notes
- For more detailed information on ingredient substitutions, common questions, or customization tips, please refer to the comprehensive FAQ and ingredient sections provided above in the article.
- For added texture and a hint of acidity, consider stirring in a can of diced tomatoes (undrained) or some finely diced green bell peppers during Step 2.
- The recommended 1.5-2 hour simmering time is essential for optimal flavor development and achieving the perfect chili thickness; we strongly advise against shortening this crucial step.
- This chili can be easily adapted for a slow cooker. After completing Step 1 (browning the ground beef and onion), transfer everything to your crockpot and cook on low for 6-8 hours or on high for 3-4 hours.
- Chili beans, which come pre-seasoned in sauce, are a key ingredient for the authentic flavor and can be found with other canned beans in your grocery store. Remember not to rinse them!
- Leftovers store wonderfully in the refrigerator for 3-4 days in an airtight container or can be frozen for up to 4-6 months.
Course: Main Course
Cuisine: American
Nutrition Information (Estimated Per Serving)
Calories: 497kcal | Carbohydrates: 40g | Protein: 30g | Fat: 25g | Sodium: 2195mg | Fiber: 10g | Sugar: 17g
Nutritional Disclaimer: Please note that all nutritional information provided is an estimate. “The Country Cook” is not a certified dietician or nutritionist, and specific calorie counts and other nutritional values can vary quite a bit depending on the exact brands of ingredients used and portion sizes. If precise dietary values are important to you, we highly recommend running the ingredients through your preferred online nutritional calculator for the most accurate figures based on your specific products.
Did you make this comforting recipe?
We’d love to see your creation! Share it on Instagram by tagging @thecountrycook and mentioning us with the hashtag #thecountrycook!

