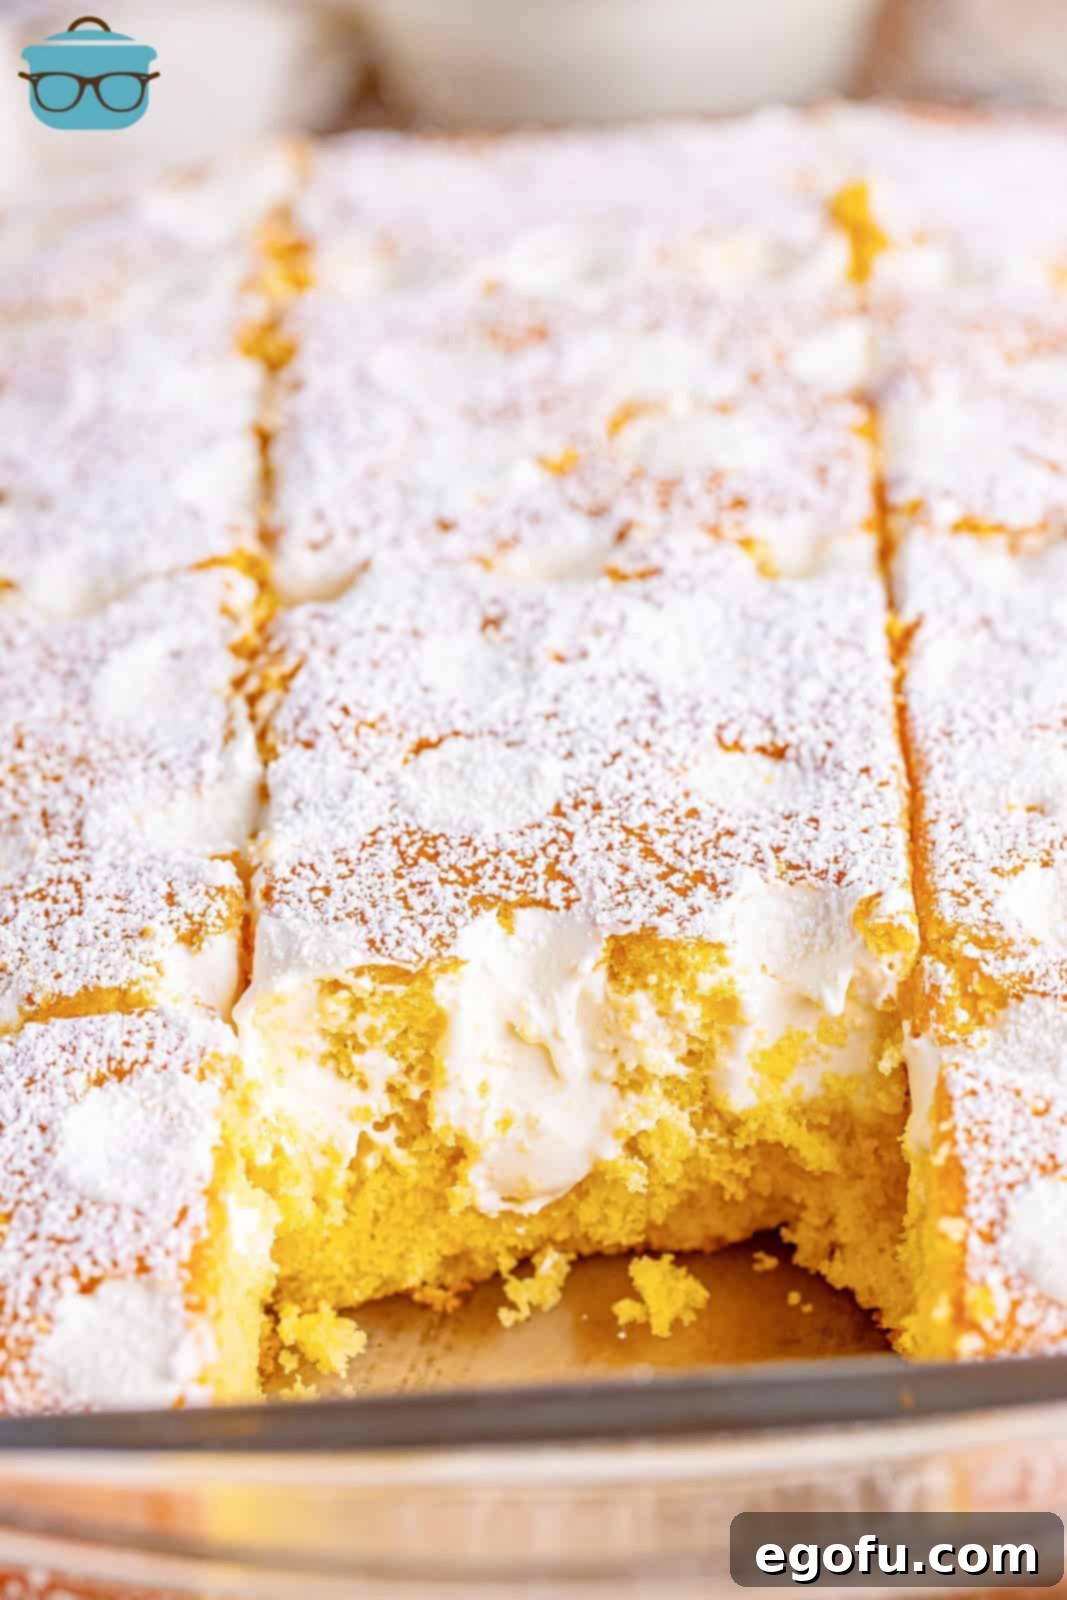
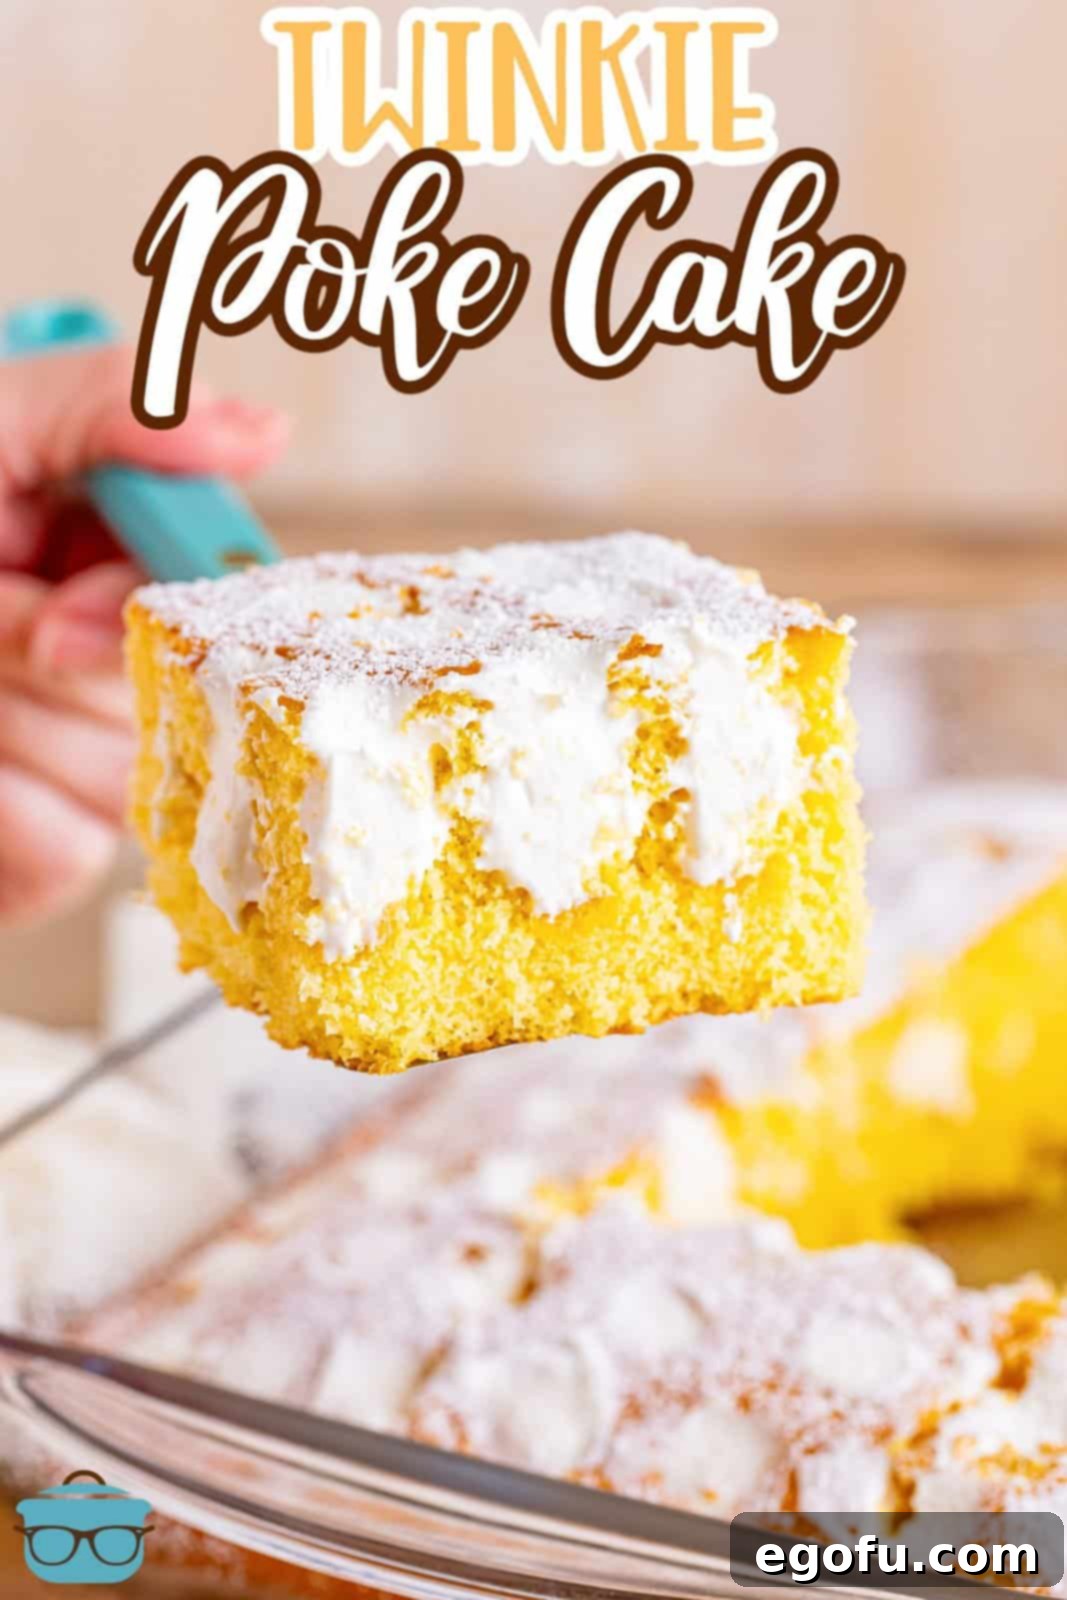
Twinkie Poke Cake is a beloved dessert that captures the nostalgic essence of the iconic snack cake, but in a wonderfully moist and irresistible homemade form. Imagine a fluffy yellow cake, generously infused with a dreamy marshmallow frosting, and finished with a delicate dusting of powdered sugar. This isn’t just a cake; it’s a culinary journey back to childhood, delivering all the familiar flavors of a Twinkie, elevated to a truly gourmet experience. Prepare to be amazed – many find this homemade version to be even better than the original!
Recreating a Classic: The Ultimate Homemade Twinkie Poke Cake
Are you searching for a dessert that’s both wonderfully nostalgic and incredibly easy to make? Look no further than this delightful Twinkie Poke Cake. This recipe transforms a simple yellow cake mix into an extraordinary treat, perfect for any gathering, celebration, or just a sweet craving. The magic lies in how the warm, freshly baked yellow cake is strategically “poked” and then filled with a rich, creamy marshmallow frosting. This ingenious method ensures every bite is bursting with flavor and a unique, moist texture that’s utterly addictive. It’s a fantastic choice for those who appreciate classic American desserts with a homemade touch.
Poke cakes have long been celebrated for their ability to deliver moisture and flavor directly into the heart of the cake. This Twinkie-inspired version takes that concept to a new level by emulating the signature creamy filling of the famous snack. The delicate balance of sweet yellow cake and the luscious, fluffy marshmallow cream creates a symphony of textures and tastes that will transport you straight back to your fondest childhood memories. Forget those store-bought snack cakes; this homemade Twinkie Poke Cake offers a superior taste, a fresher texture, and an undeniable charm that only a home-baked dessert can provide. It’s truly the ultimate indulgence for anyone with a love for sweets.
Frequently Asked Questions About Twinkie Poke Cake
The marshmallow frosting is undeniably the star of this cake, contributing significantly to its authentic Twinkie flavor and delightful texture. The recipe provided makes a generous double batch of frosting, and you will use a little over half of it to fill the poked holes in the cake. If you prefer to have just enough for the holes, you can certainly halve the frosting recipe. However, many bakers find the extra frosting to be a wonderful bonus! You could spread the remaining frosting over the top of the cake, creating a thicker, more decadent layer instead of just powdered sugar. Alternatively, you can serve the extra frosting on the side for guests to add to their individual slices, enhancing their dessert experience. The choice is yours, but be warned: this frosting is so good, you might regret making less!
Absolutely! As mentioned above, this frosting recipe is quite versatile and makes enough to fill the poked holes and generously frost the entire top of the cake. While seeing the poked holes distinctly visible on the surface contributes to the cake’s playful, “Twinkie-like” appearance, you are the artist of your cake! If you prefer a smooth, fully frosted top, simply use an offset spatula or knife to spread the remaining frosting evenly over the entire surface after filling the holes. Then, you can dust it with powdered sugar or leave it as is. Feel free to decorate it in any way that pleases you and your guests!
No piping bag? No problem! The marshmallow frosting is thick enough to work with easily, even without specialized tools. A large, heavy-duty Ziploc bag makes an excellent substitute. Simply spoon all the frosting into one corner of the bag. Once the frosting is settled, snip a small portion off the very tip of that corner with scissors. This will create an impromptu piping bag opening. You can then proceed to fill the holes in your cake just as you would with a traditional piping bag. This simple hack ensures you can still achieve that signature filled effect without any fuss.
While vanilla extract gives the frosting its classic, universally loved flavor, you absolutely can experiment with other extracts to customize your cake. Interestingly, the original Twinkie snack cakes actually featured a banana-flavored cream filling! For a delightful throwback to this vintage flavor, consider substituting a quality banana extract for the vanilla extract in the frosting recipe. This small change can create a unique twist on the classic, offering a subtle yet distinct flavor profile that might just surprise and impress your guests. Feel free to explore other flavors that pique your interest as well!
To keep your Twinkie Poke Cake fresh and delicious, store any leftovers at room temperature, well-covered, for up to 2 days. It’s important to note that if the cake sits for several hours, the powdered sugar dusting on top may absorb moisture from the air and the cake, causing it to “melt” and disappear. If you want to maintain that pristine, freshly dusted look for leftovers, simply add another light dusting of powdered sugar just before serving. For longer storage, cover the cake tightly and refriger refrigerate it for up to 1 week. For even extended freshness, you can freeze individual slices or the whole cake (well-wrapped) for up to 3 months. Thaw frozen cake in the refrigerator overnight before serving.
Essential Ingredients for Your Twinkie Poke Cake
Crafting this delightful Twinkie Poke Cake is surprisingly simple, especially when using a convenient cake mix as the base. Here’s a detailed look at the ingredients you’ll need, along with some helpful tips for each:
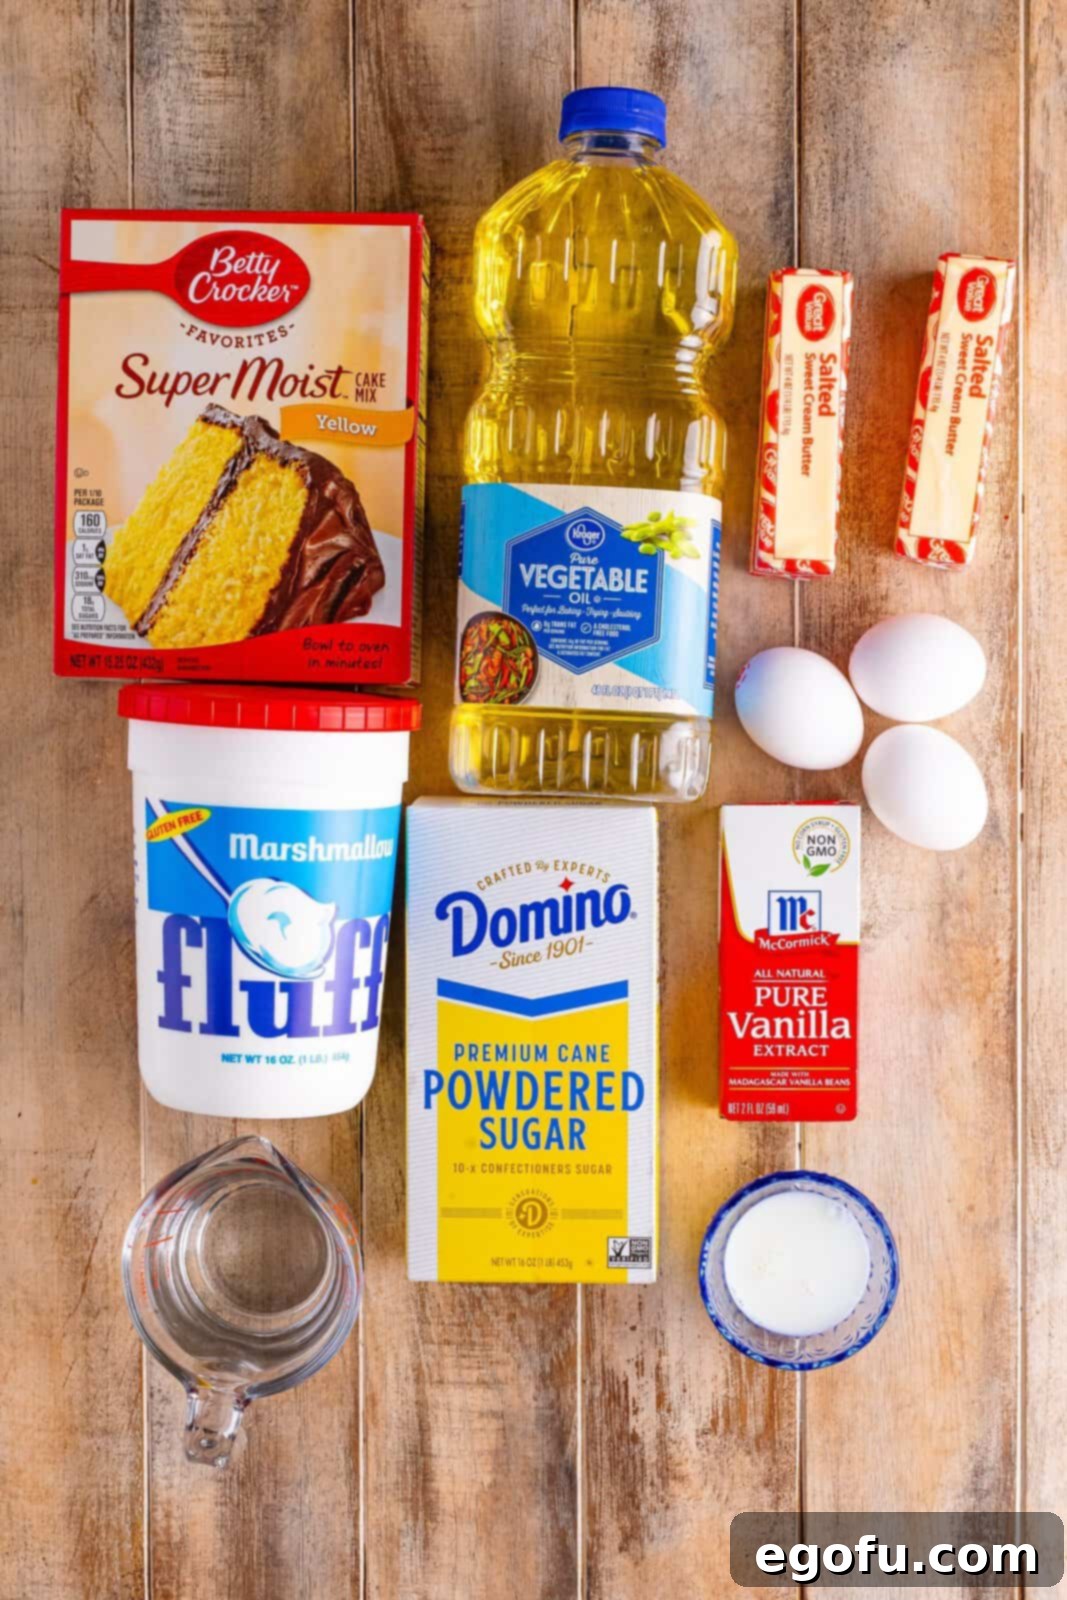
- Yellow Cake Mix: This is the foundation of our cake, providing that signature golden hue and a tender crumb reminiscent of a classic Twinkie. While a butter cake mix could also work, a standard yellow cake mix typically yields the most authentic look and flavor for this particular recipe. Choose your favorite brand to ensure a taste you’ll love.
- Eggs, Oil, and Water: You’ll follow the specific measurements indicated on the back of your chosen yellow cake mix box for these liquid ingredients. These components are crucial for the cake’s structure, moisture, and overall texture, so adhering to the package instructions is key for a perfect bake.
- Salted Butter: For the rich, creamy marshmallow frosting, salted butter is essential. It’s incredibly important that your butter is softened to room temperature – not melted! Softened butter creams together beautifully with other ingredients, creating a smooth and luscious frosting. If your butter is too cold, it won’t incorporate properly, leading to a lumpy frosting. If it’s melted, the frosting will be too thin. A good trick for softening butter quickly is to cut it into smaller pieces and let it sit for about 15-30 minutes, or you can gently warm it in the microwave for a few seconds (being careful not to melt it). Planning ahead by taking it out the night before is ideal.
- Marshmallow Fluff: This magical ingredient is what gives our frosting that iconic, airy, and sweet marshmallow flavor and texture, truly mimicking the filling of a Twinkie. You might also find it sold as “marshmallow cream” or “marshmallow creme.” Look for it in the baking aisle near other dessert toppings or baking ingredients. Refer to the ingredient photo below to see what the container typically looks like. Keep in mind the notes above regarding the generous amount of frosting this recipe yields.
- Powdered Sugar: Also known as confectioners’ sugar, this finely ground sugar is vital for a silky-smooth frosting. Do NOT substitute with granulated sugar, as it will result in a grainy, unpleasant texture in your frosting. The fine particles of powdered sugar dissolve perfectly, contributing to the light and airy consistency we’re aiming for.
- Whole Milk: A small amount of whole milk helps to achieve the perfect consistency for the frosting, making it smooth and pipeable. You can use any milk you have on hand, but whole milk often provides a richer flavor and creamier texture.
- Vanilla Extract: This classic flavoring enhances all the other sweet notes in the frosting, adding depth and warmth. Use a good quality pure vanilla extract for the best results. As discussed in the FAQs, you can experiment with other extracts like banana for a unique twist.
How to Make an Irresistible Twinkie Poke Cake: Step-by-Step Guide
Creating this delicious Twinkie Poke Cake is a straightforward process that yields incredibly impressive results. Follow these simple steps for a dessert that’s sure to be a crowd-pleaser.
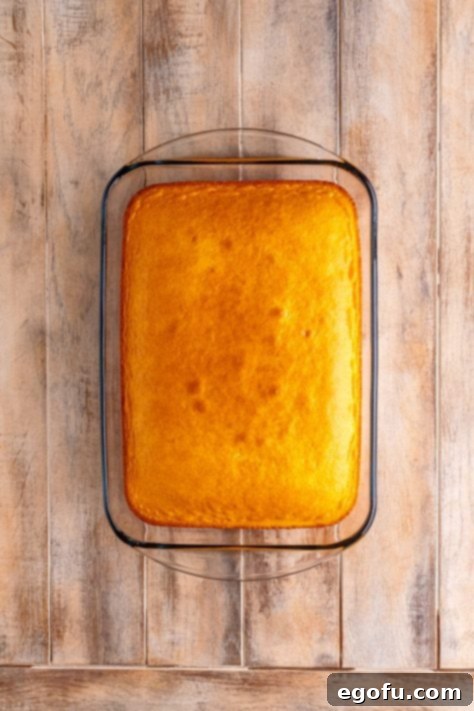
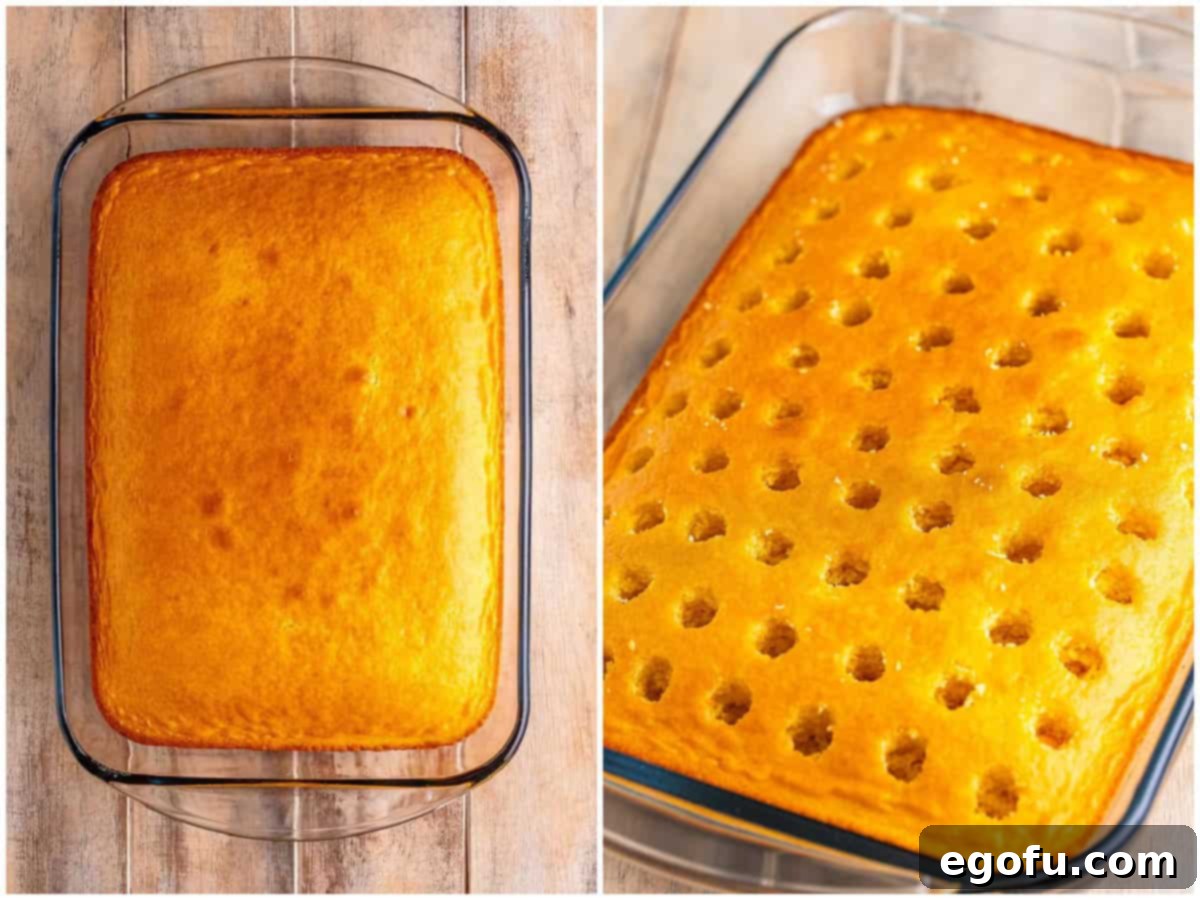
- Prepare the Yellow Cake Base: Begin by preparing your favorite yellow cake mix according to the package directions. This typically involves combining the cake mix with eggs, oil, and water. Mix until the batter is smooth and well combined. Pour the batter into your chosen baking dish (a 9×13 inch pan is ideal) and bake as directed on the box. Once baked, remove the cake from the oven and allow it to cool completely on a wire rack. This cooling step is crucial; the cake must be entirely cool before proceeding to prevent the frosting from melting.
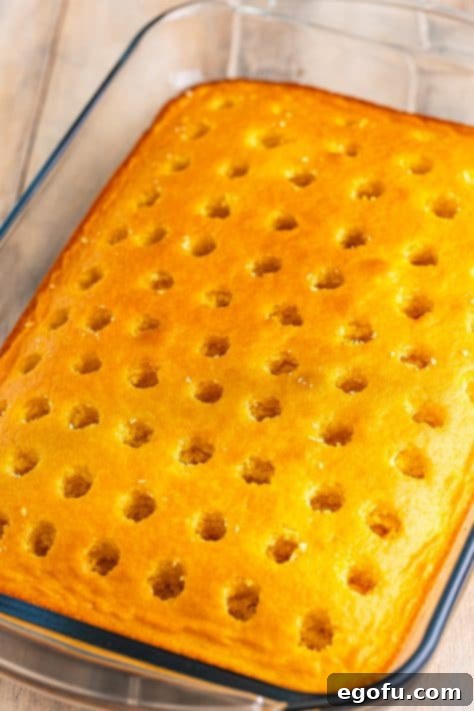
- Poke the Cake: Once the cake has fully cooled, it’s time for the “poke” part! Using the handle of a wooden spoon, a chopstick, or any similar round object, poke holes evenly across the entire surface of the cake. Aim for holes about 1 inch apart. Ensure the holes are large enough to comfortably accommodate the frosting you’ll be piping in, but not so large that the cake crumbles. The depth should go nearly to the bottom of the cake, but not all the way through, creating perfect pockets for your filling.
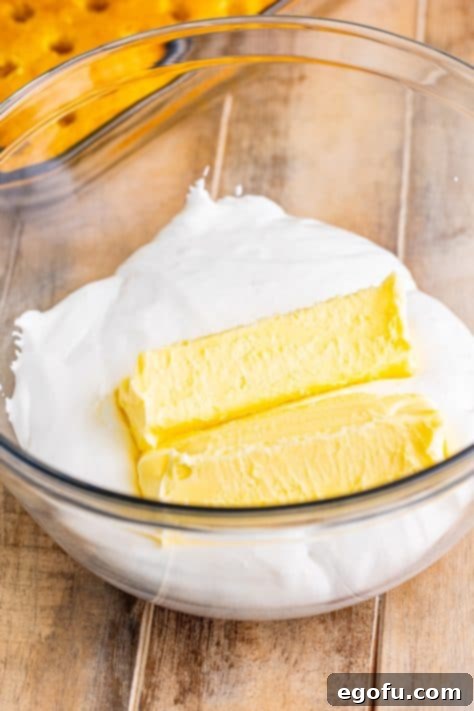
- Prepare the Marshmallow Frosting: While the cake cools, you can begin making the delicious marshmallow cream filling. In a large mixing bowl, combine the softened salted butter and the marshmallow fluff (or marshmallow cream). Using an electric hand mixer or a stand mixer fitted with the paddle attachment, beat these two ingredients together until the mixture is light, fluffy, and perfectly smooth. This initial creaming ensures a consistent base for your frosting.
- Gradually Add Powdered Sugar: With the mixer on low speed, begin adding the powdered sugar to the butter and marshmallow mixture, one cup at a time. Mix thoroughly after each addition until the sugar is fully incorporated and the frosting starts to thicken. Continue this process until all 3 cups of powdered sugar have been added and the frosting is smooth and lump-free.
- Incorporate Milk and Vanilla: Finally, add the whole milk and vanilla extract to the frosting mixture. Beat on medium speed until the frosting is incredibly smooth, creamy, and has reached a pipeable consistency. It should be thick enough to hold its shape but soft enough to flow easily into the cake holes. Set this luscious frosting aside momentarily.
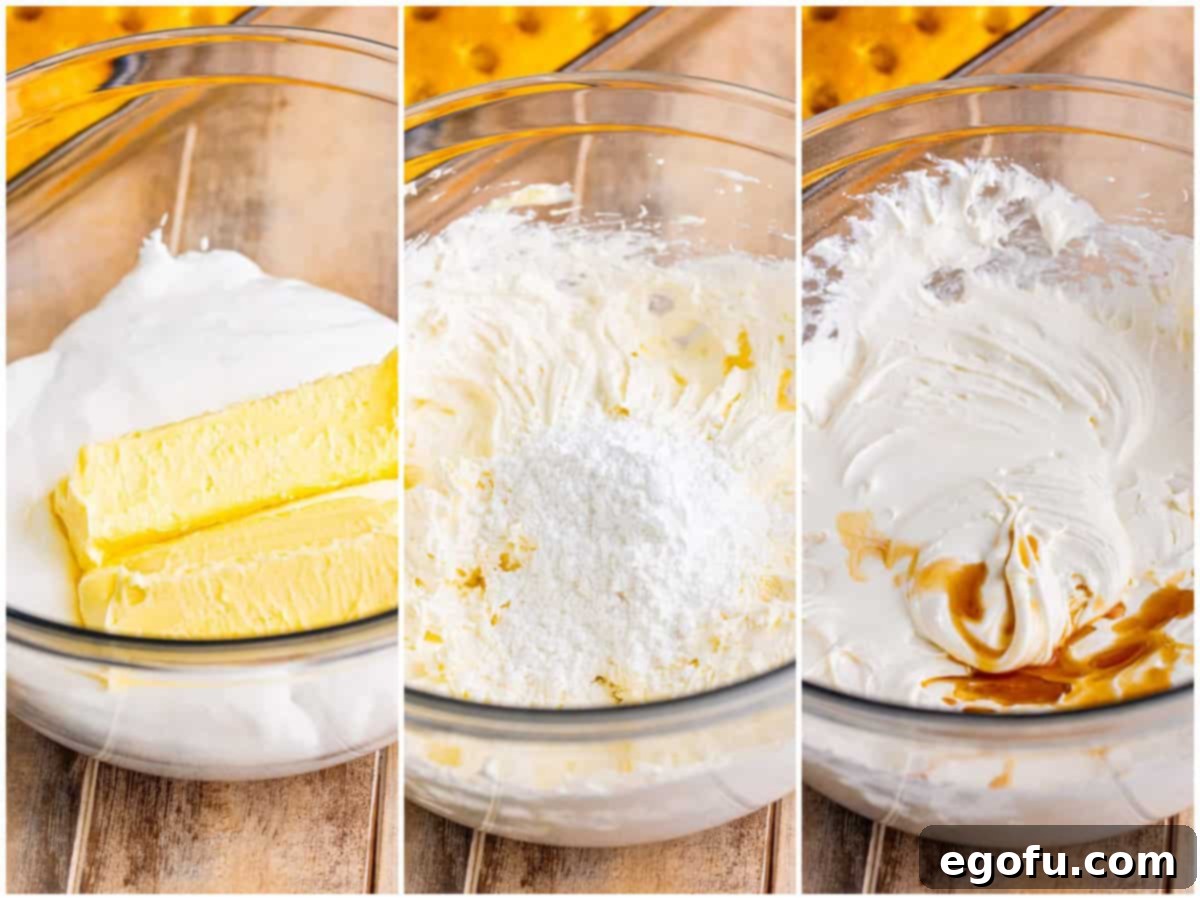
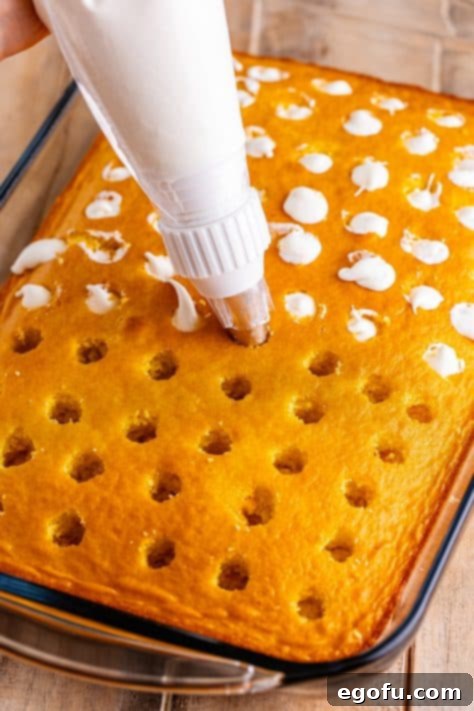
- Fill the Poked Holes: Now for the fun part! Transfer the prepared marshmallow frosting into a piping bag fitted with an open circle tip. If you don’t have a piping bag, a large Ziploc bag with a corner snipped off works perfectly. Carefully insert the tip of the piping bag into each hole you poked in the cake. Gently squeeze the bag to fill each hole with a generous amount of frosting. Continue this until all the holes are filled with the creamy goodness.
- Smooth and Even Out the Frosting: After filling all the holes, use an offset spatula or a regular flat spatula to gently press the frosting down into the holes, ensuring they are thoroughly filled and the frosting is settled. Scrape off any excess frosting from the surface of the cake, aiming for a relatively flat top. If you notice any holes that look under-filled, simply go back and add a little more frosting until they are adequately plump. This step ensures a beautiful presentation and even distribution of filling.

- Dust and Serve: For that final, iconic Twinkie look, generously dust the entire surface of the cake with an ample amount of powdered sugar. This not only adds a touch of sweetness but also gives it a classic, soft appearance. Once dusted, your Twinkie Poke Cake is ready to be sliced and served! Each slice will reveal the beautiful pockets of marshmallow filling, making every bite a delight.

Explore More Delightful Poke Cake Recipes!
If you’ve fallen in love with the ease and deliciousness of this Twinkie Poke Cake, you’re in luck! There’s a whole world of poke cakes to explore, each offering a unique flavor profile and a burst of moisture. These recipes are perfect for any occasion, from casual family dinners to festive parties. Dive into these other fantastic poke cake creations:
- No-Bake Twinkie Cake
- Banana Pudding Poke Cake
- Red Velvet Poke Cake
- Strawberry Pudding Poke Cake
- Boston Cream Poke Cake
- The Best Poke Cake Recipes
- Cinnamon Roll Poke Cake
- Oreo Poke Cake
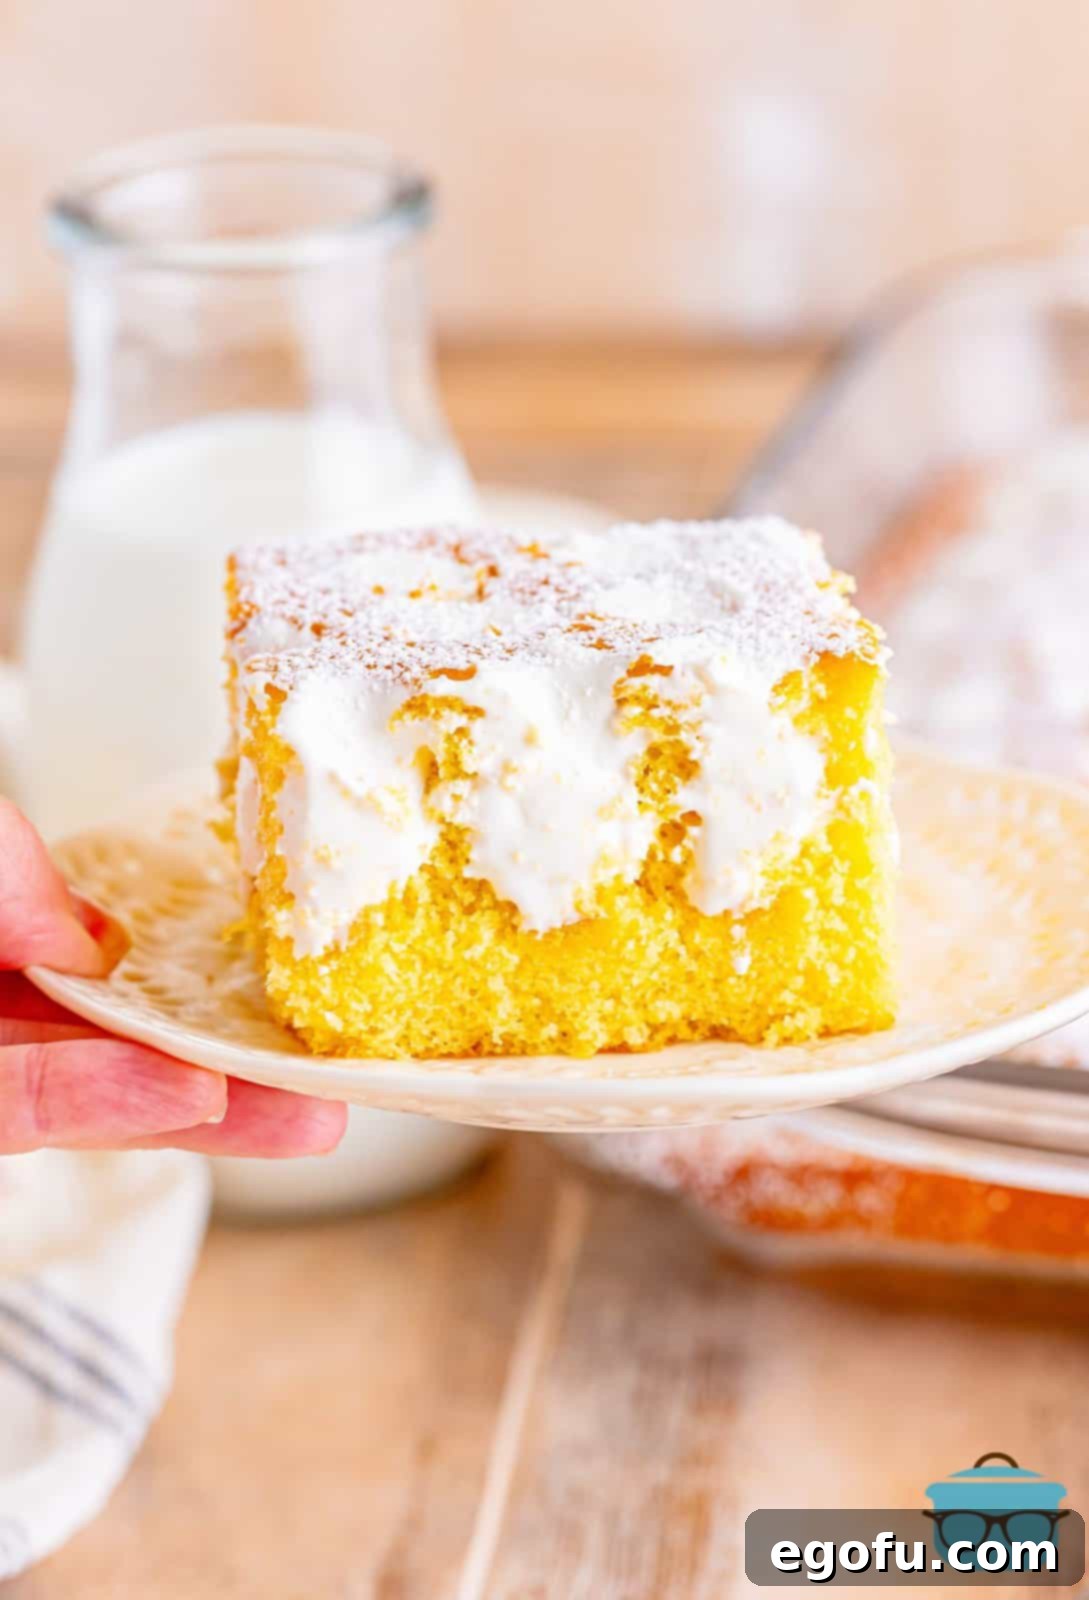
Twinkie Poke Cake
Twinkie Poke Cake is a delightful dessert featuring a moist yellow cake generously poked and filled with creamy marshmallow frosting, then dusted with powdered sugar. It perfectly mimics the flavor and look of a classic Twinkie, but with an irresistible homemade touch that makes it even better!
Print Recipe | Pin Recipe
Ingredients
For the cake
- 1 box yellow cake mix
- Ingredients needed to make the cake: eggs, oil, and water (refer to package directions)
For the frosting (this makes a double batch)
- 1 cup (2 sticks) salted butter, softened to room temperature
- 16 ounce container marshmallow fluff (or marshmallow cream)
- 3 cups powdered sugar, plus more for dusting on top
- 2 Tablespoons whole milk
- 1 teaspoon vanilla extract
Instructions
Mix and prepare 1 box yellow cake mix with the ingredients needed to make the cake (eggs, oil, and water) per the directions on the back of the box. Allow the cake to cool completely before proceeding.

With the bottom of a wooden spoon or another similar object, poke holes about 1 inch apart all over the cooled cake. Ensure the holes are large enough for the frosting to penetrate properly.

Once the cake is cool, make the filling by mixing together 1 cup (2 sticks) salted butter, softened to room temperature, and 16 ounce container marshmallow fluff in a large bowl with an electric hand mixer or a stand mixer with the paddle attachment. Mix until smooth and creamy.

Gradually add 3 cups powdered sugar, a little at a time, mixing until fully combined and smooth.

Add 2 Tablespoons whole milk and 1 teaspoon vanilla extract to the frosting mixture. Continue to mix until the frosting is perfectly smooth and has a pipeable consistency. Set aside.

Place the frosting into a piping bag fitted with an open circle tip (or use a large Ziploc bag with the corner snipped).

Carefully insert the tip of the piping bag into each poked hole and fill it generously with the marshmallow frosting.

Once all the holes are filled, use an offset spatula or a regular spatula to gently press the frosting into the holes and scrape off any excess from the top surface. If any holes appear under-filled, add more frosting as needed.

Heavily dust the entire cake with additional powdered sugar for that classic Twinkie finish. Cut into slices and serve immediately.

Video
Notes
- For further details, substitutions, or answers to common questions, please refer to the “Frequently Asked Questions” and detailed ingredient list provided above.
- This frosting recipe makes a double batch. You’ll use a little over half of it to fill the holes. You can choose to spread the remaining frosting over the entire top of the cake for a richer experience, or serve it on the side with individual slices. If you only desire enough frosting for the holes, a half recipe will suffice.
- The specific amounts of eggs, oil, and water required for the cake mix will vary based on the brand of yellow cake mix you select. Always follow the instructions on your cake mix box.
- Store leftover cake at room temperature, covered, for up to 2 days. Be aware that the powdered sugar dusting may “melt” into the cake over a few hours; re-dust with powdered sugar before serving leftovers if desired. The cake can also be refrigerated, tightly covered, for up to 1 week, or frozen for up to 3 months.
Nutrition
Nutritional Disclaimer
“The Country Cook” is not a dietician or nutritionist, and any nutritional information shared is an estimate. If calorie count and other nutritional values are important to you, we recommend running the ingredients through whichever online nutritional calculator you prefer. Calories and other nutritional values can vary quite a bit depending on which brands were used.

