Deliciously Fluffy 7Up Biscuits: Your Secret to Quick & Easy Homemade Perfection
Imagine sinking your teeth into a warm, fluffy biscuit, made from scratch in under half an hour with just a handful of everyday ingredients. These incredible 7Up Biscuits are not only surprisingly simple to make but also deliver a light, tender texture that melts in your mouth. Perfect for any meal, from a hearty breakfast to a comforting dinner side, they’re about to become your new favorite go-to recipe!
The Magic of 4-Ingredient 7Up Biscuits
Are you looking for a biscuit recipe that’s incredibly easy, remarkably quick, and consistently delicious? Look no further than these sensational 7Up Biscuits! This beloved Southern classic has been delighting taste buds since the 1970s, proving that you don’t need a long list of ingredients or hours in the kitchen to create something truly special. With just four core components, you can whip up a batch of light, airy, and wonderfully flavorful biscuits that will impress everyone at your table.
What’s the secret behind their irresistible fluffiness? The effervescence of 7Up! The carbonation in this iconic lemon-lime soda acts as a leavening agent, working alongside the baking mix to create an incredibly tender crumb. But don’t worry, these biscuits won’t taste like soda; instead, the 7Up imparts a subtle sweetness and an unparalleled lightness that makes them utterly addictive. They’re an absolute lifesaver when you crave homemade biscuits but are short on time, offering a quick prep and bake time that fits seamlessly into your busy schedule.

Frequently Asked Questions About 7Up Biscuits
7Up Biscuits are a classic Southern-inspired treat renowned for their exceptional fluffiness and ease of preparation. Originating in the 1970s, these biscuits cleverly incorporate lemon-lime soda, typically 7Up, into a simple dough mixture. The result is a wonderfully buttery, tender, and flaky biscuit that quickly became a staple in many homes.
The magic of 7Up in biscuits lies in its carbonation. The bubbles in the soda act as a natural leavening agent, contributing significantly to the light and airy texture of the finished product. Beyond texture, 7Up also adds a touch of subtle sweetness, enhancing the overall flavor profile without imparting a distinct soda taste. It’s a clever trick to achieve incredible fluffiness with minimal effort.
Absolutely! Preparing 7Up Biscuits ahead of time is a fantastic way to enjoy fresh, warm biscuits whenever you desire. Simply follow the initial instructions to create the biscuit dough. Instead of cutting them immediately, form the dough into small, individual balls. Place these on a lightly greased baking sheet, cover them tightly with plastic wrap, and store them in an airtight container or bag in the refrigerator for up to two days. When you’re ready to bake, allow them to come to room temperature for about 15-20 minutes before baking according to the regular instructions.
While the original recipe calls for regular 7Up, you can certainly experiment with diet versions or other lemon-lime sodas like Sprite. Be aware that diet sodas might impart a slightly different flavor, which some find less desirable. If you opt for another soda, stick to lemon-lime varieties to maintain the intended flavor balance. Sodas like Mountain Dew or Ginger Ale might introduce stronger, distinct flavors that could alter the biscuit’s traditional taste, unless you specifically enjoy those nuances. Club soda could also work, but you might consider adding a touch of sugar to compensate for the lack of sweetness.
No need to panic! You can easily create your own homemade Bisquick substitute with common pantry staples. Here’s what you’ll need:
- 6 cups all-purpose flour
- 3 Tablespoons baking powder
- 1 Tablespoon salt
- 1 cup vegetable shortening (like Crisco)
To prepare, sift the flour, baking powder, and salt into a large bowl. Cut in the vegetable shortening using a pastry blender or your fingertips until the mixture resembles fine crumbs. Store this homemade mix in an airtight container in the refrigerator for up to 4 months, ready for your next batch of biscuits or other baking projects.
The key to light and fluffy biscuits often lies in gentle handling of the dough. A common culprit for dense biscuits is overworking the dough, which develops the gluten too much, leading to a tough texture. Be careful not to incorporate too much extra Bisquick (or flour) when kneading or handling the dough on your work surface. The dough should remain sticky but manageable. Over-mixing the initial ingredients can also contribute to a less fluffy result. Always aim for a light touch!
Leftover 7Up Biscuits are best stored at room temperature in an airtight container for up to 3 days to maintain their freshness. While they are delicious cold, their texture and flavor truly shine when warmed. You can easily reheat them in the microwave for a few seconds or in a preheated oven (around 300°F/150°C) for 5-7 minutes until thoroughly warmed through. This helps restore their delightful softness and warmth.
Yes, 7Up Biscuits freeze beautifully, whether baked or unbaked. For baked biscuits, allow them to cool completely before placing them in a freezer-safe bag or airtight container. They will keep well for up to 3 months. To freeze unbaked dough, flash freeze the individual biscuit rounds on a baking sheet until solid, then transfer them to a freezer bag. This prevents them from sticking together. When ready to bake, thaw them in the refrigerator overnight or on the counter until they reach room temperature, then bake as directed. Freezing is an excellent way to always have homemade biscuits on hand!

Essential Ingredients for Your 7Up Biscuits
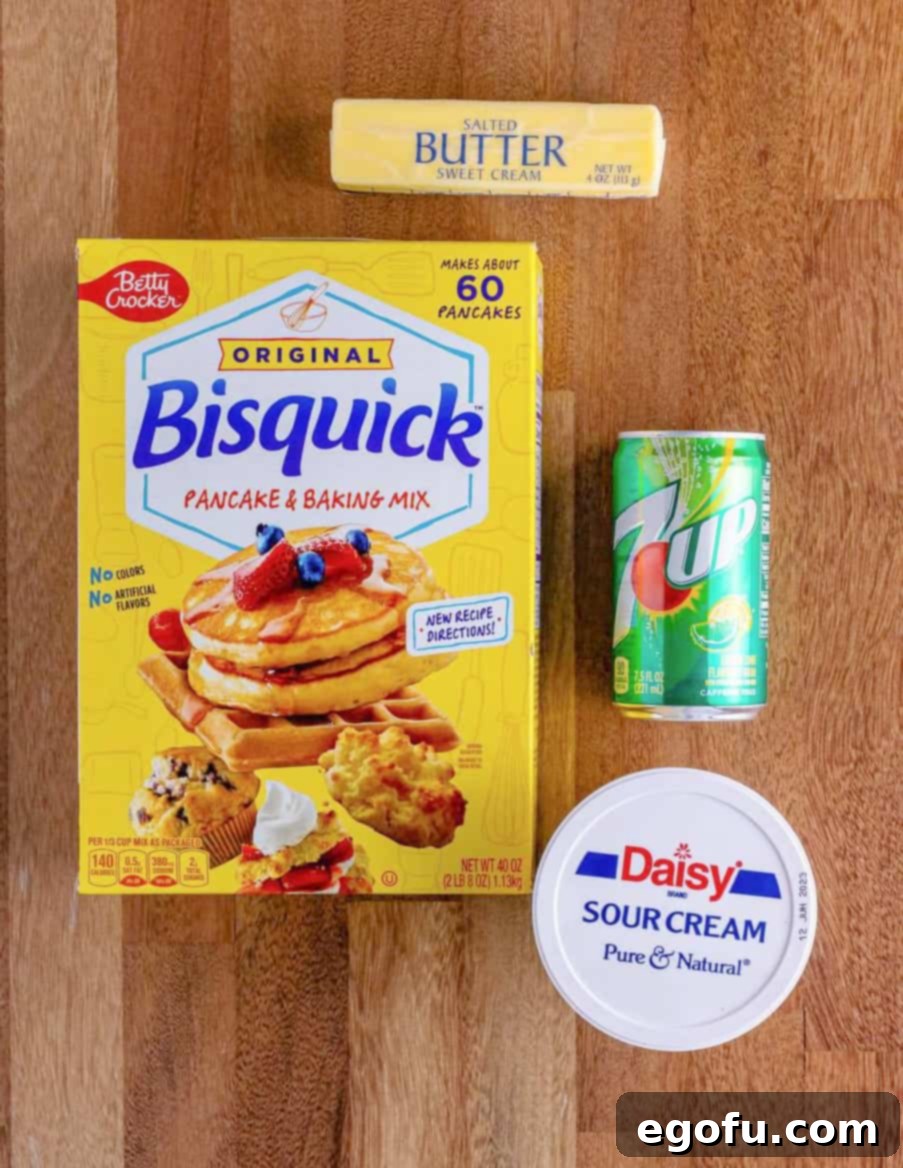
Crafting these delectable biscuits requires just four simple ingredients, each playing a crucial role in achieving that perfect fluffy texture and rich flavor. Here’s a closer look at what you’ll need:
- Salted Butter: This is the foundation of flavor and tenderness. The recipe calls for salted butter, which adds a lovely depth. However, if you’re mindful of sodium intake, feel free to substitute with unsalted butter; just a pinch of extra salt can be added to the dry mix if desired. The butter is melted and serves as the base for the biscuits to bake in, ensuring a moist, rich bottom crust.
- Bisquick Baking Mix: The convenience of Bisquick (or any store-brand baking mix) is what makes this recipe so incredibly quick and easy. This pre-mixed blend of flour, leavening, and shortening eliminates several steps, making biscuit-making accessible to even novice bakers. It’s essential to use a baking mix, not just plain flour, as the leavening agents within Bisquick are key to the biscuits’ rise.
- Sour Cream: Don’t skip this ingredient! Sour cream is the secret weapon for ultimate moistness and tenderness. Its creamy texture and slight tang contribute significantly to the rich flavor and soft crumb of the biscuits, counteracting any potential dryness. If sour cream isn’t available, plain Greek yogurt can be used as a worthy substitute, offering a similar texture and moisture content.
- 7Up Lemon-Lime Soda: The star of the show! As mentioned, the carbonation in 7Up (or your preferred lemon-lime soda like Sprite) creates an incredibly light and airy biscuit without the need for traditional kneading or lengthy rising times. The flavor of the soda itself largely dissipates during baking, leaving behind only a subtle sweetness and an unmatched fluffiness. It’s best to avoid sodas with strong, artificial flavors like Mountain Dew, as they might overpower the delicate biscuit taste.
Step-by-Step Guide: How to Make Perfect 7Up Biscuits
Get ready to create an unforgettable batch of homemade biscuits with this straightforward, step-by-step guide. You’ll be amazed at how quickly these come together!
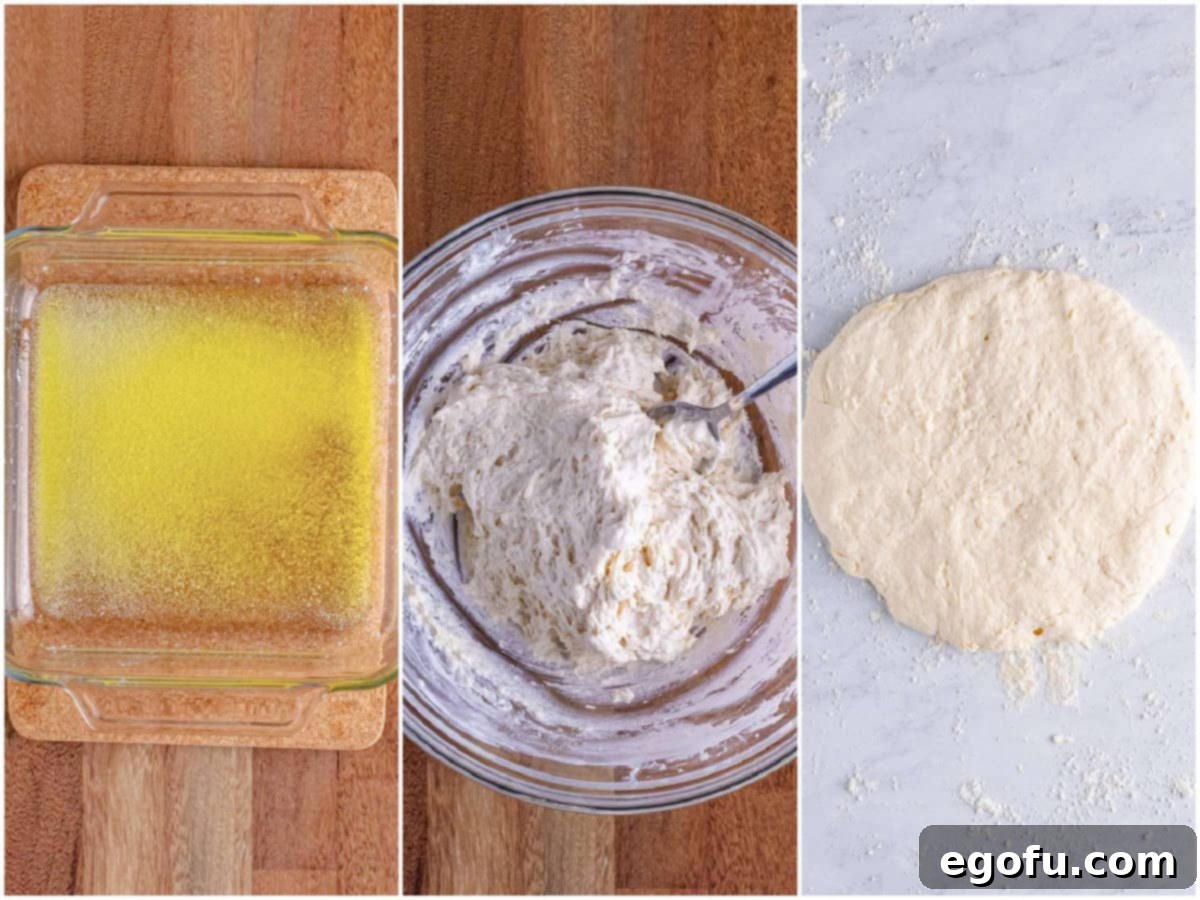
- Prepare Your Oven and Baking Dish: Begin by preheating your oven to a precise 425°F (220°C). While the oven heats, cut your salted butter into tablespoon-sized pieces. Place these butter pieces evenly into a 9×9-inch baking dish. Carefully place the baking dish into the preheated oven for 4-5 minutes, allowing the butter to melt completely. Keep a close eye on it to ensure it doesn’t burn. Once melted, remove the dish from the oven and set it aside. The melted butter will create a delicious, savory bed for your biscuits to bake in.
- Mix the Dough: In a large mixing bowl, combine 2 cups of Bisquick baking mix with the sour cream and 7Up lemon-lime soda. Using a spoon or spatula, stir these ingredients together until they are just combined and a sticky, shaggy dough forms. It’s important not to overmix at this stage; a few lumps are perfectly fine. Overmixing can lead to tough biscuits, so mix only until the ingredients are incorporated.
- Prepare Your Work Surface and Gently Knead: Sprinkle the remaining ¼ cup of Bisquick evenly onto a clean, flat work surface. Carefully transfer the sticky dough from the bowl onto this floured surface. Sprinkle a bit more Bisquick on top of the dough. Now, with a very gentle touch, knead the dough a few times – just enough to bring it together and make it slightly less sticky. Avoid heavy kneading. Then, pat the dough out with your hands (or a rolling pin, if preferred) to an approximate thickness of ¾ to 1 inch.
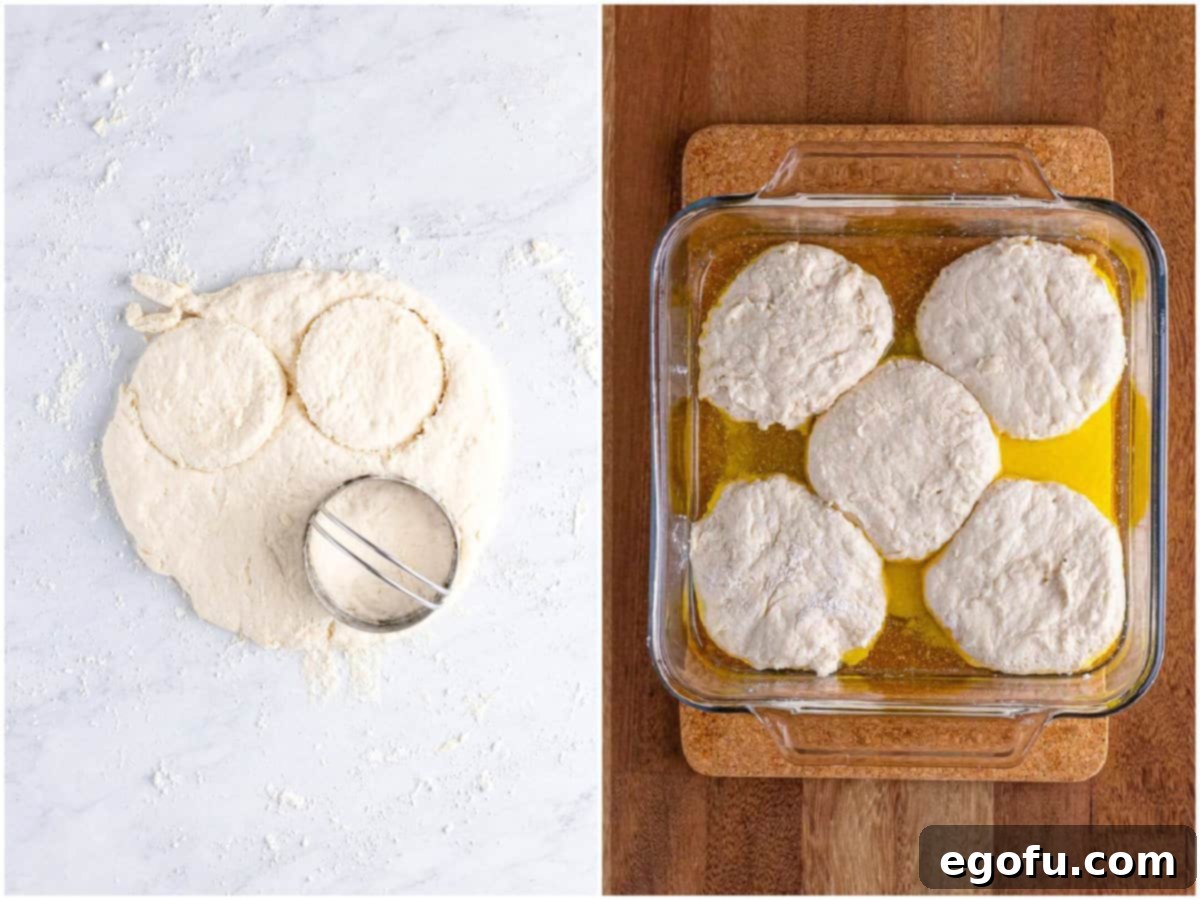
- Cut the Biscuits: Using a biscuit cutter (a 3 ¼ inch diameter is standard and works well), press straight down into the dough to cut out individual biscuits. The key here is not to twist the cutter as you press; simply press firmly down and then lift straight up. Twisting can seal the edges of the biscuit, preventing it from rising properly.
- Utilize Leftover Dough: Gather any leftover dough scraps, gently combine them, pat them out again, and cut out more biscuits until all of the dough has been used. Remember to handle the dough minimally to maintain tenderness.
- Arrange and Bake: Carefully place the cut biscuits into the prepared baking dish with the melted butter. Try to arrange them so they are just touching, which helps them rise evenly and stay soft. Place the dish in your preheated 425°F (220°C) oven and bake for 12-15 minutes, or until the tops are beautifully golden brown and the biscuits are puffed up and cooked through.
- Cool and Serve: Once baked, remove the dish from the oven. Allow the biscuits to cool in the pan for about 5 minutes. This crucial resting period allows the biscuits to absorb some of that delicious excess melted butter, infusing them with even more flavor and keeping them incredibly moist. Serve them warm, straight from the pan, and enjoy the fruits of your effortless labor!
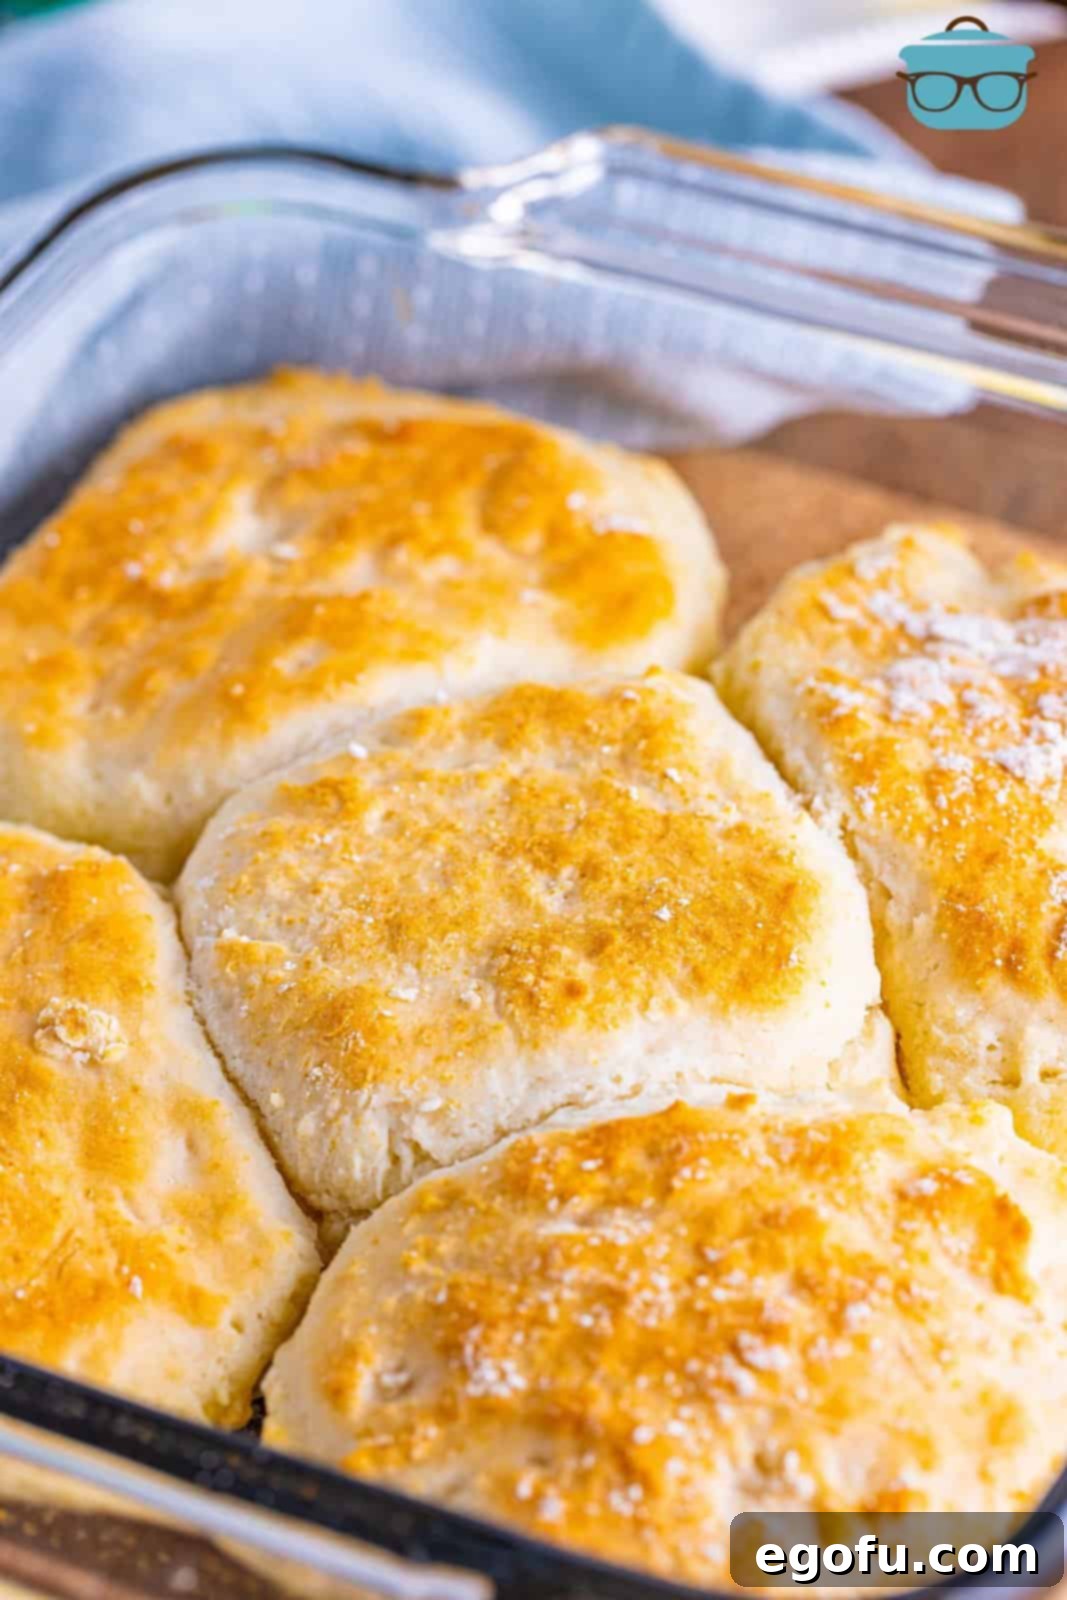
These 7Up Biscuits are best served warm, perhaps with a generous dollop of butter, a smear of your favorite jam or preserves, or alongside savory dishes like fried chicken, chili, or a hearty stew. Their versatility makes them a fantastic addition to any meal, proving that simple ingredients can yield extraordinary results.

Craving More Delicious Recipes?
If you loved the ease and flavor of these 7Up Biscuits, you’re in for a treat! Explore more comforting and delightful recipes to expand your baking repertoire:
- Fluffy 7Up Cake
- Classic Southern Buttermilk Biscuits
- Incredibly Easy 2-Ingredient Cream Biscuits
- Rich Butter Dip Biscuits
- Copycat Red Lobster Cheddar Bay Biscuits
- Traditional Hot Cross Buns

7Up Biscuits
Print
Pin
Ingredients
- ¼ cup (½ stick) salted butter, melted
- 2 ¼ cups Bisquick, divided use
- ½ cup sour cream
- ½ cup 7-up lemon lime soda
Instructions
- Preheat the oven to 425°F (220°C).
- Cut the butter into tablespoon pieces and place them into a 9×9-inch baking dish. Melt the butter in the preheated oven for 4-5 minutes, watching carefully to prevent burning. Remove and set aside.
- In a large bowl, combine 2 cups of Bisquick, sour cream, and 7Up. Stir gently until a sticky dough forms; do not overmix.
- Sprinkle the remaining ¼ cup Bisquick onto a clean work surface. Transfer the dough to the surface and sprinkle more Bisquick on top. Gently knead a few times and pat the dough to ¾ to 1 inch thickness.
- Using a 3 ¼-inch biscuit cutter, press straight down without twisting to cut out biscuits.
- Gently combine leftover dough scraps, pat out, and cut additional biscuits until all dough is used.
- Place the biscuits into the prepared baking dish, allowing them to touch slightly.
- Bake for 12-15 minutes, or until golden brown.
- Let cool in the pan for about 5 minutes to absorb excess butter before serving warm.
Video Tutorial
Chef’s Notes & Tips
- For more detailed answers to common questions and ingredient substitutions, please refer to the comprehensive FAQ section and ingredient list provided above.
- While these biscuits are incredibly fluffy, they may not rise as high as some traditional buttermilk biscuits, but their tender crumb is unmatched.
- The dough will be very sticky. It’s crucial not to add too much extra Bisquick (or flour) during kneading, as this can make the biscuits dense and prevent them from being light and fluffy. Aim for a dough that is sticky but manageable.
- You won’t distinctly taste the 7Up in the final product. Its role is primarily textural, providing a subtle sweetness and an incredible lightness that enhances the biscuit’s overall appeal.
- This recipe typically yields about 5 standard-sized biscuits using a 3 ¼-inch cutter. If you prefer smaller biscuits or need more servings, you can use a smaller cutter or easily double the recipe.
- If substituting 7Up, stick to other clear lemon-lime sodas like Sprite. While diet versions can be used, some may find they impart a slightly artificial aftertaste. Avoid sodas with strong, distinct flavors like Mountain Dew or Ginger Ale unless you specifically want those flavors in your biscuits.
- Store any leftover biscuits in an airtight container at room temperature for up to 3 days. For the best experience, reheat them briefly in the microwave or oven before serving to restore their warmth and softness. Biscuits can also be frozen for up to 3 months; see the FAQ for freezing instructions.
Nutrition Facts
Nutritional Disclaimer
Please note: “The Country Cook” is not a certified dietician or nutritionist. All nutritional information provided is an estimate based on the ingredients and preparation methods. If precise calorie counts and other nutritional values are important for your dietary needs, we strongly recommend calculating them using your preferred online nutritional calculator. Values can vary considerably depending on the specific brands and exact quantities of ingredients used.
Did you make this recipe?Share your creation on Instagram @thecountrycook and tag us with #thecountrycook!
