This Lemon Layer Cake recipe delivers an explosion of fresh, vibrant lemon flavor in every single bite! It’s an effortlessly impressive homemade cake, perfect for any special occasion, or simply to brighten a summer afternoon.
The Ultimate Fresh Lemon Layer Cake: A Zesty Delight for Every Occasion
There’s something truly magical about the taste of fresh lemon. For many, including myself, it’s an irresistible flavor that instantly evokes sunshine and happiness. If you, like me, find yourself constantly drawn to lemon-infused treats, then prepare to fall in love with this incredible Lemon Layer Cake. It’s not just a dessert; it’s an experience – a beautiful, bright, and utterly delicious centerpiece for any gathering. While it looks stunning enough for the most special celebrations, you’ll be delighted to discover how surprisingly easy it is to create from scratch. So, whether you’re hosting a party, celebrating a birthday, or just craving a burst of citrusy sweetness, this recipe is a must-try for every lemon aficionado.
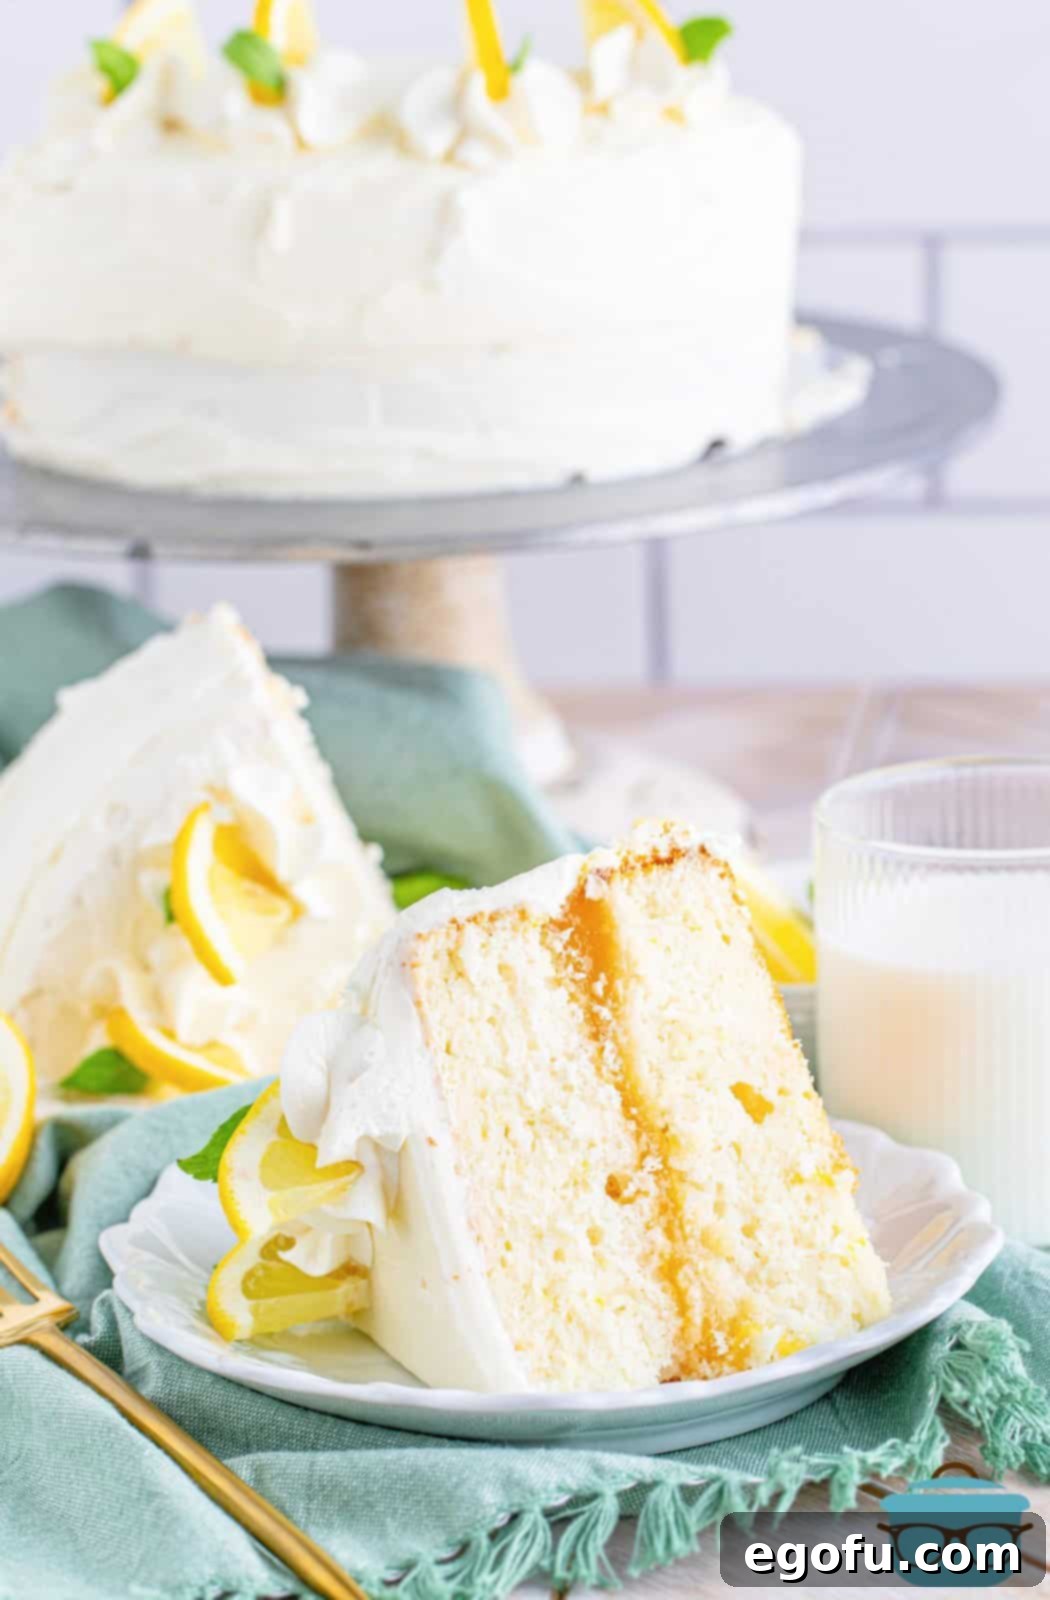
Why This Lemon Layer Cake Stands Out
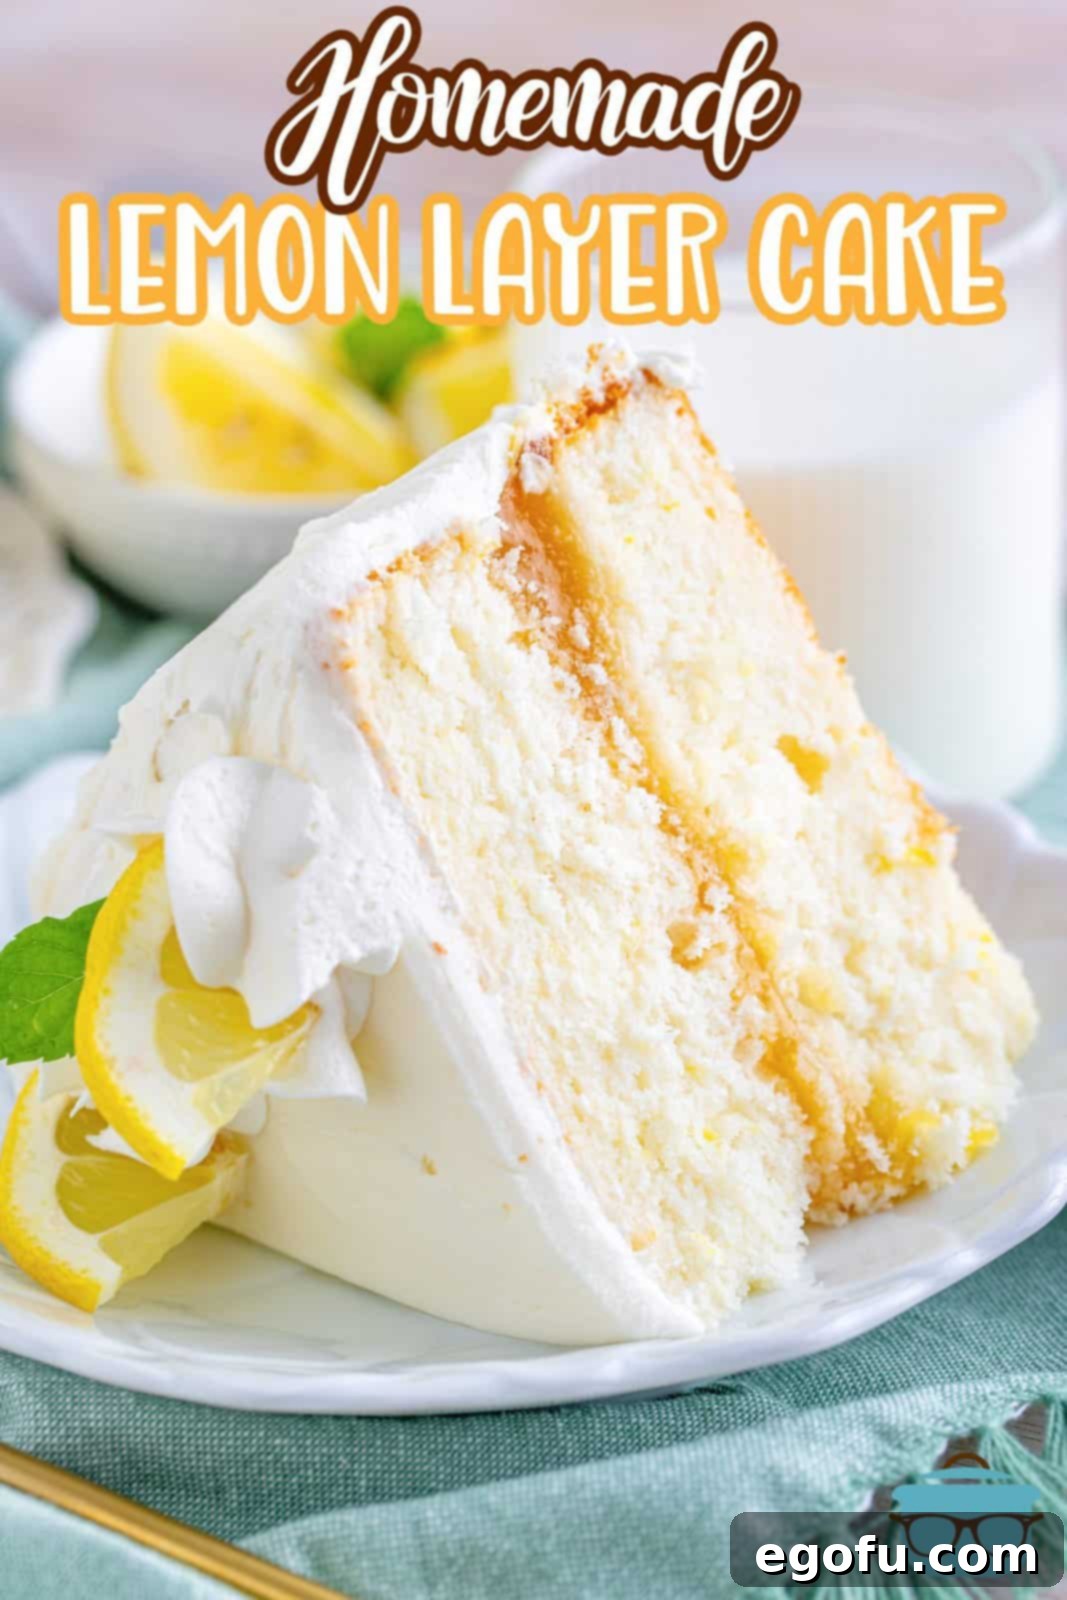
What makes this lemon cake truly special? It’s the perfect harmony of moist, fluffy cake layers, a tangy, rich lemon curd filling, and a light, airy lemon buttercream frosting. Each component is infused with genuine lemon flavor, derived from fresh lemons, ensuring an authentic and invigorating taste. The texture is key here – soft, tender, and never dry, achieved through careful ingredient selection and precise baking techniques. This cake isn’t just about bold flavor; it’s also about a delightful mouthfeel that leaves you craving another slice. It’s a testament to simple, quality ingredients creating an extraordinary dessert.
Frequently Asked Questions About Baking Lemon Layer Cake
While you can substitute all-purpose flour by sifting it first, I highly recommend using cake flour for this recipe. Cake flour has a lower protein content, which results in a noticeably softer, lighter, and fluffier cake crumb. It truly makes a difference in achieving that delicate texture this lemon layer cake is known for.
This is a crucial step rooted in baking science! When ingredients like eggs, butter, and buttermilk are at room temperature, they emulsify more effectively. This creates a smoother, more uniform batter that can trap more air. As the cake bakes, this trapped air expands, leading to a beautifully light, airy, and fluffy texture. Cold ingredients, on the other hand, can cause the batter to curdle and result in a denser cake.
For the freshest and most authentic lemon flavor, I strongly advise against using bottled lemon juice. Freshly squeezed lemon juice provides a bright, natural tang that bottled versions simply cannot replicate. Bottled lemon juice often contains preservatives and can have an artificial or bitter taste that would significantly detract from the overall quality and taste of this exquisite cake. Invest in fresh lemons; you won’t regret it!
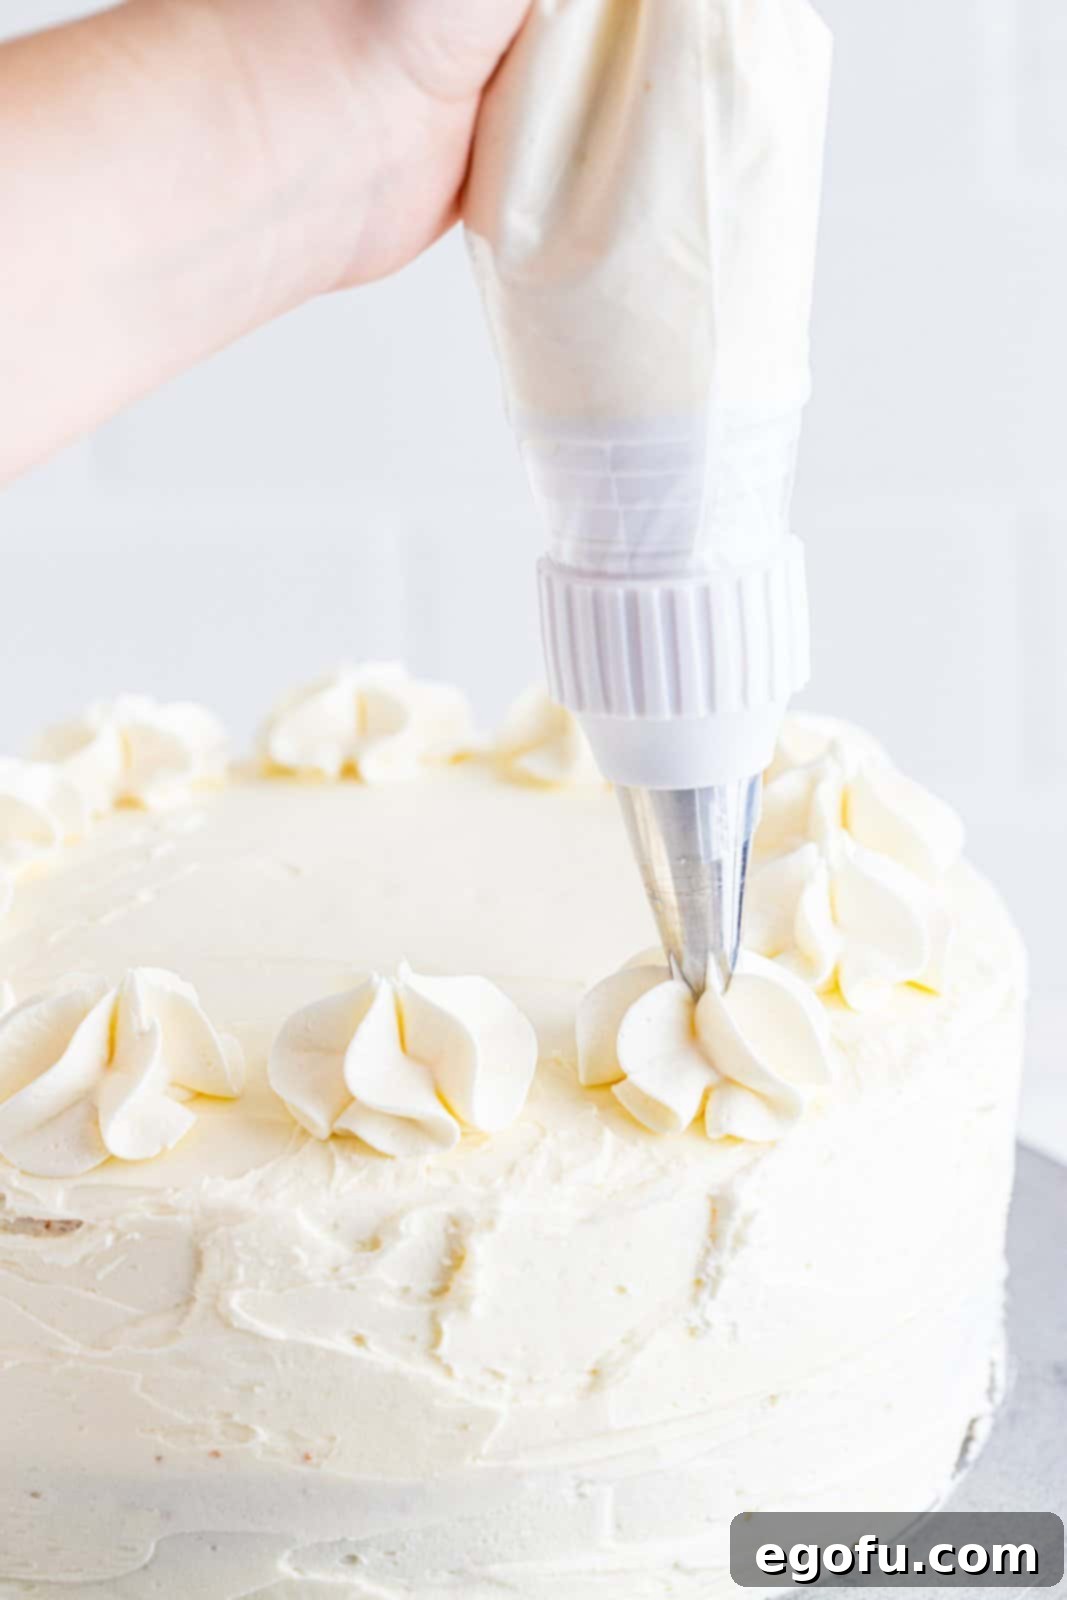
Decorating this cake can be as simple or as elaborate as you desire. You don’t need any special equipment for a beautiful finish. However, if you wish to recreate the elegant swirls seen in the photos, a Wilton 1M open star piping tip is what I used. It’s a versatile tip that creates lovely rosettes and borders, adding a professional touch.
Absolutely! Making your own lemon curd from scratch is a fantastic way to elevate the flavors of this cake even further. Its bright, intensely lemony profile is unparalleled. If you prefer, however, a high-quality store-bought lemon curd will also work beautifully and save you some time. Choose your favorite brand for convenience.
A crumb coat is a thin layer of frosting applied to the cake before the final, thicker layer. Its primary purpose is to “seal in” any loose crumbs that might come off the cake layers during the frosting process. By chilling the cake with this initial thin coat, you prevent those crumbs from mixing into your beautiful final layer of frosting, ensuring a smooth, pristine finish. It’s a small step that makes a big difference in presentation!
Due to the lemon curd filling, this cake requires refrigeration. Store any leftover cake covered or in a cake saver in the refrigerator, where it will remain fresh for up to 3-4 days. For longer storage, you can freeze the cake, but I recommend freezing only the unfrosted cake layers. Wrap baked and cooled layers tightly in plastic wrap and then foil, and freeze for up to 6 months. To defrost, simply place them on the countertop overnight before assembling and frosting the cake.
Essential Ingredients for Your Lemon Layer Cake
Crafting this delightful lemon cake starts with selecting quality ingredients. Here’s what you’ll need to gather:
For the Cake Layers:
- Cake Flour: Essential for that light, tender crumb.
- Baking Powder: Our leavening agent for a beautiful rise.
- Salted Butter: At room temperature for perfect creaming.
- Granulated Sugar: For sweetness and structure.
- Egg Whites: Also at room temperature, contributing to lightness and a delicate texture.
- Buttermilk: Room temperature buttermilk adds moisture and a subtle tang, enhancing the lemon flavor.
- Fresh Lemon Juice: The heart of our lemon flavor profile.
- Vanilla Extract: A touch of warmth and balance.
- Lemon Zest: Where most of that vibrant lemon aroma comes from.
For the Lemon Buttercream Frosting:
- Salted Butter: Softened, for a smooth and creamy frosting.
- Powdered Sugar: Sifted, to prevent lumps and ensure a silky texture.
- Fresh Lemon Juice: To infuse the frosting with zesty flavor.
- Vanilla Extract: A complementary flavor that rounds out the sweetness.
For the Zesty Lemon Curd Filling:
- Prepared Lemon Curd: Store-bought or homemade, this is the luscious surprise between the layers.

Step-by-Step Guide to Baking Your Luscious Lemon Layer Cake
Follow these detailed instructions to create a show-stopping lemon layer cake that will impress everyone.
Preparing the Cake Layers:
Step 1: Preheat and Prepare. Begin by preheating your oven to 350°F (175°C). Generously spray two 9-inch round cake pans with baking spray that contains flour (such as Baker’s Joy) to ensure your cakes release easily. Line the bottom of each pan with a circle of parchment paper, then give the parchment another light spray. Set these prepared pans aside.

Step 2: Whisk Dry Ingredients. In a medium bowl, whisk together the cake flour and baking powder. This step helps to evenly distribute the leavening agent and break up any lumps in the flour. Set this mixture aside.
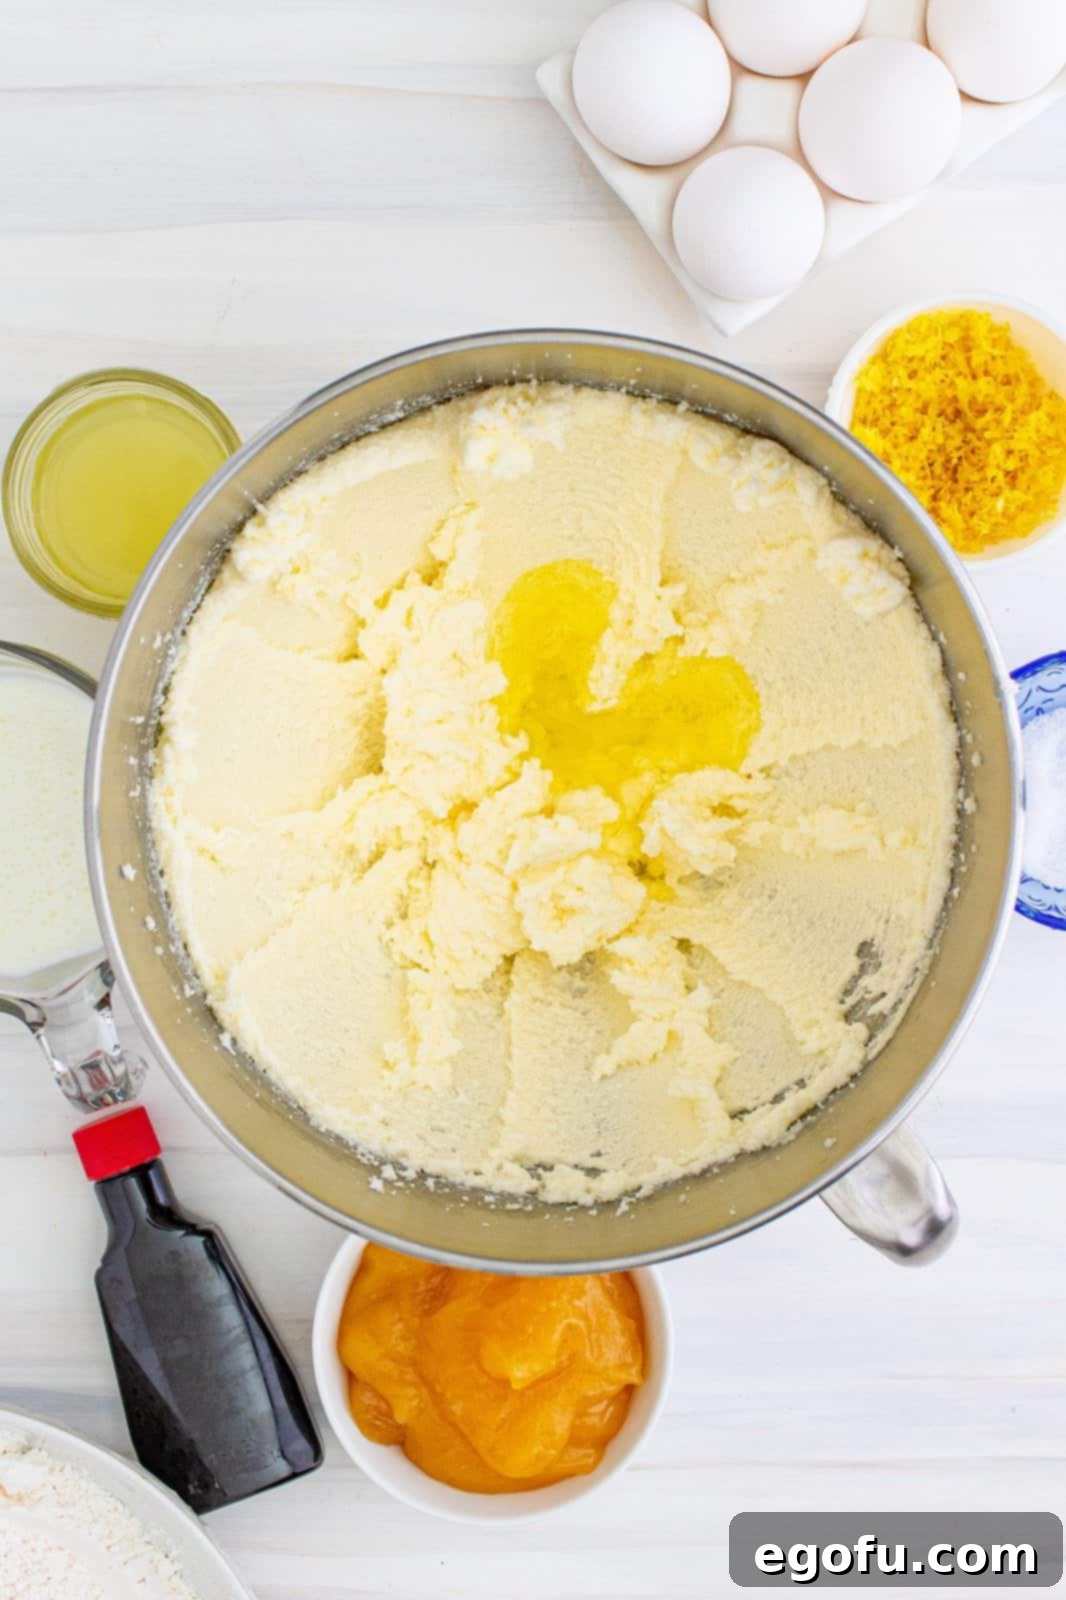
Step 3: Cream Butter and Sugar. In the bowl of a stand mixer fitted with the paddle attachment, combine the room temperature salted butter and granulated sugar. Beat on medium speed for about 2 minutes, until the mixture is light, pale, and fluffy. This creaming process incorporates air, which is vital for a light cake texture.

Step 4: Incorporate Egg Whites. Add the room temperature egg whites into the butter-sugar mixture in three separate batches. Mix thoroughly after each addition, ensuring the egg whites are fully incorporated before adding the next batch. Scrape down the sides of the bowl as needed to ensure everything is well combined.
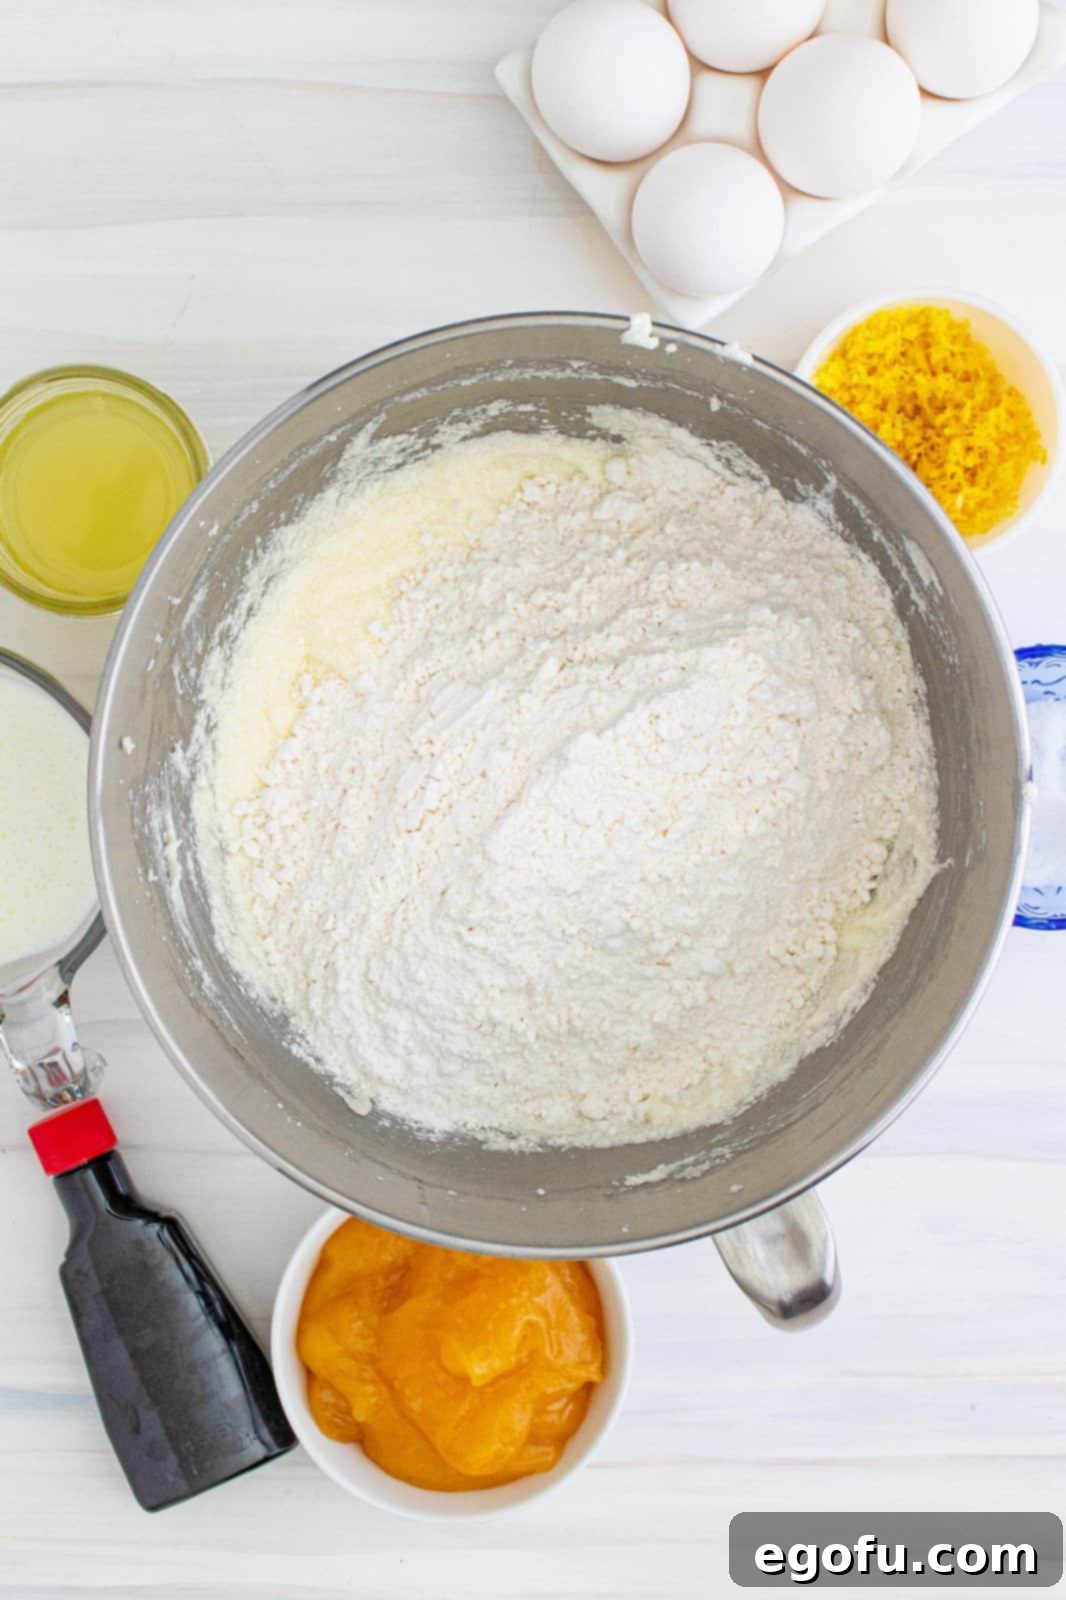
Step 5: Add Dry Ingredients. Next, gradually add the whisked flour mixture to the wet ingredients. Mix on low speed until just combined. Be careful not to overmix at this stage; overmixing can lead to a tough cake. Scrape down the sides of the bowl to ensure all dry ingredients are incorporated.
Step 6: Introduce Wet Ingredients. Finally, pour in the room temperature buttermilk, fresh lemon juice, vanilla extract, and delicate lemon zest. These liquid components add moisture and the signature lemon flavor to your cake.
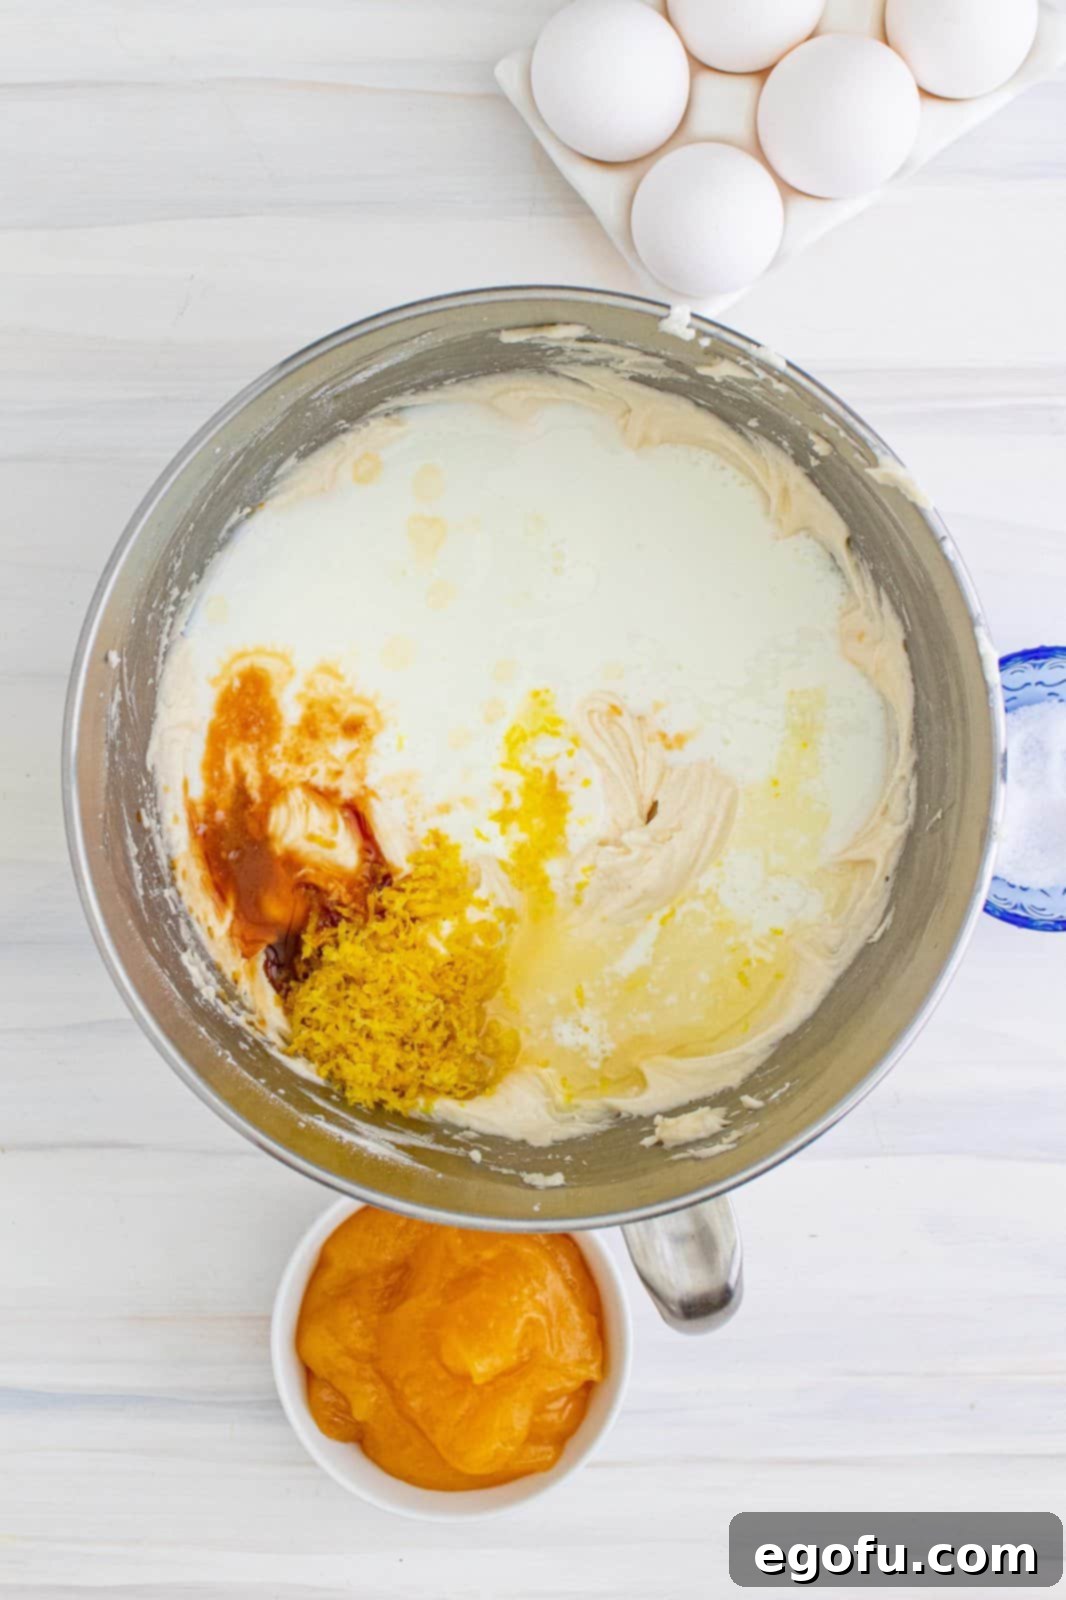
Step 7: Final Mix. Stir the batter on low speed until all the ingredients are just combined. Once again, avoid overmixing. Scrape down the sides of the bowl one last time and give it a final 10 seconds of mixing to ensure uniformity. The batter should be smooth and fragrant.

Step 8: Bake to Golden Perfection. Divide the cake batter evenly between the two prepared cake pans. Smooth out the tops with a spatula. Bake for 22-27 minutes, or until the tops are lightly golden brown and a toothpick inserted into the center comes out clean. A few moist crumbs on the toothpick are acceptable, but any wet batter means it needs a little more time in the oven. Baking times can vary by oven, so keep an eye on your cakes.

Step 9: Cool Completely. Once baked, remove the cakes from the oven and let them cool in their pans on a wire rack for 5 minutes. This allows them to set slightly before handling. After 5 minutes, carefully invert the cakes onto the wire rack (top side up) to cool completely. Cooling thoroughly is essential before frosting to prevent your buttercream from melting.

Crafting the Fluffy Lemon Buttercream:
Step 10: Cream the Butter. While your cake layers are cooling, it’s time to prepare the luscious lemon buttercream. In a stand mixer with the paddle attachment, cream the softened salted butter on medium speed until it is smooth and light, which should take about 30-45 seconds. This initial creaming helps to aerate the butter.
Step 11: Add Powdered Sugar. Gradually add the powdered sugar to the creamed butter, a little at a time, mixing on low speed until fully combined. It’s helpful to sift your powdered sugar beforehand to avoid any lumps. Scrape down the sides of the bowl as needed to ensure an even consistency.
Step 12: Flavor and Whip. Stir in the fresh lemon juice and vanilla extract until they are fully incorporated. Increase the mixer speed to medium-high and whip the frosting for a full 3 minutes. This prolonged whipping will make the buttercream incredibly light, airy, and fluffy, perfect for frosting your cake. Set the finished buttercream aside.

Step 13: Prepare for Assembly. To assemble your masterpiece, place a tablespoon-sized dollop of buttercream onto the center of your chosen serving dish or cake plate. This acts as an anchor, preventing the cake from sliding around as you build it. Carefully peel the parchment paper off one of the cooled cake layers. Place this layer (bottom side down for a flat surface) onto the dollop of buttercream on your serving platter.
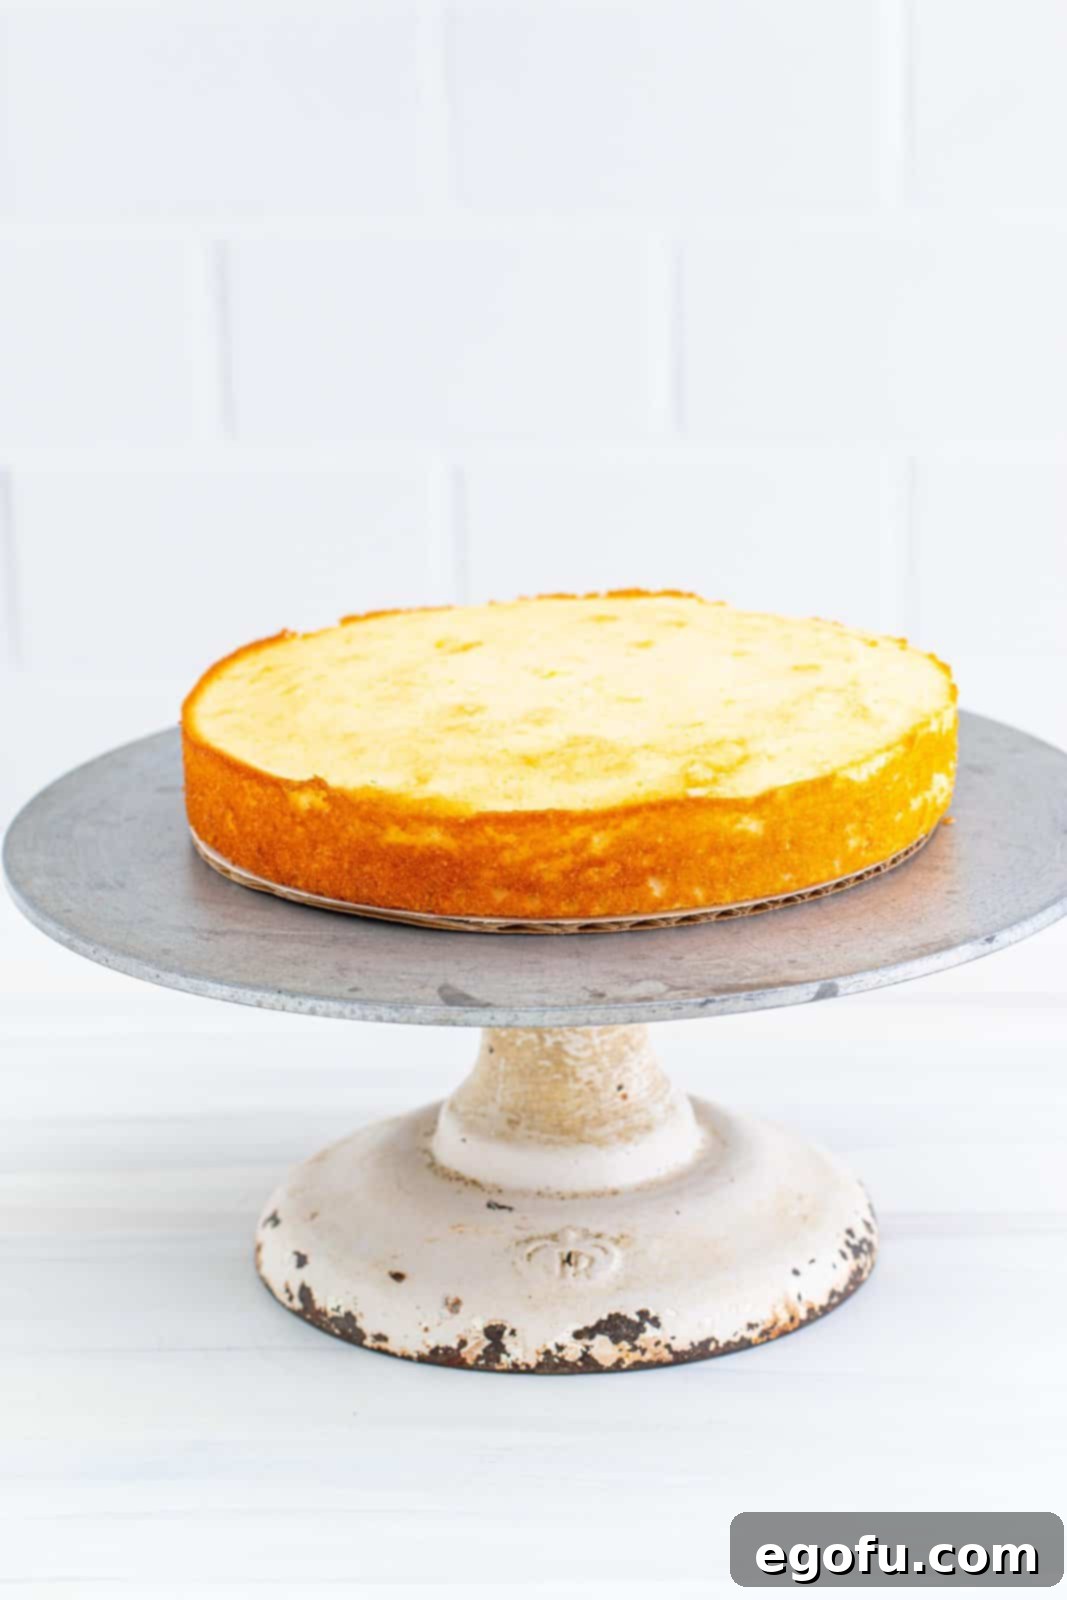
Assembling Your Lemon Layer Cake:
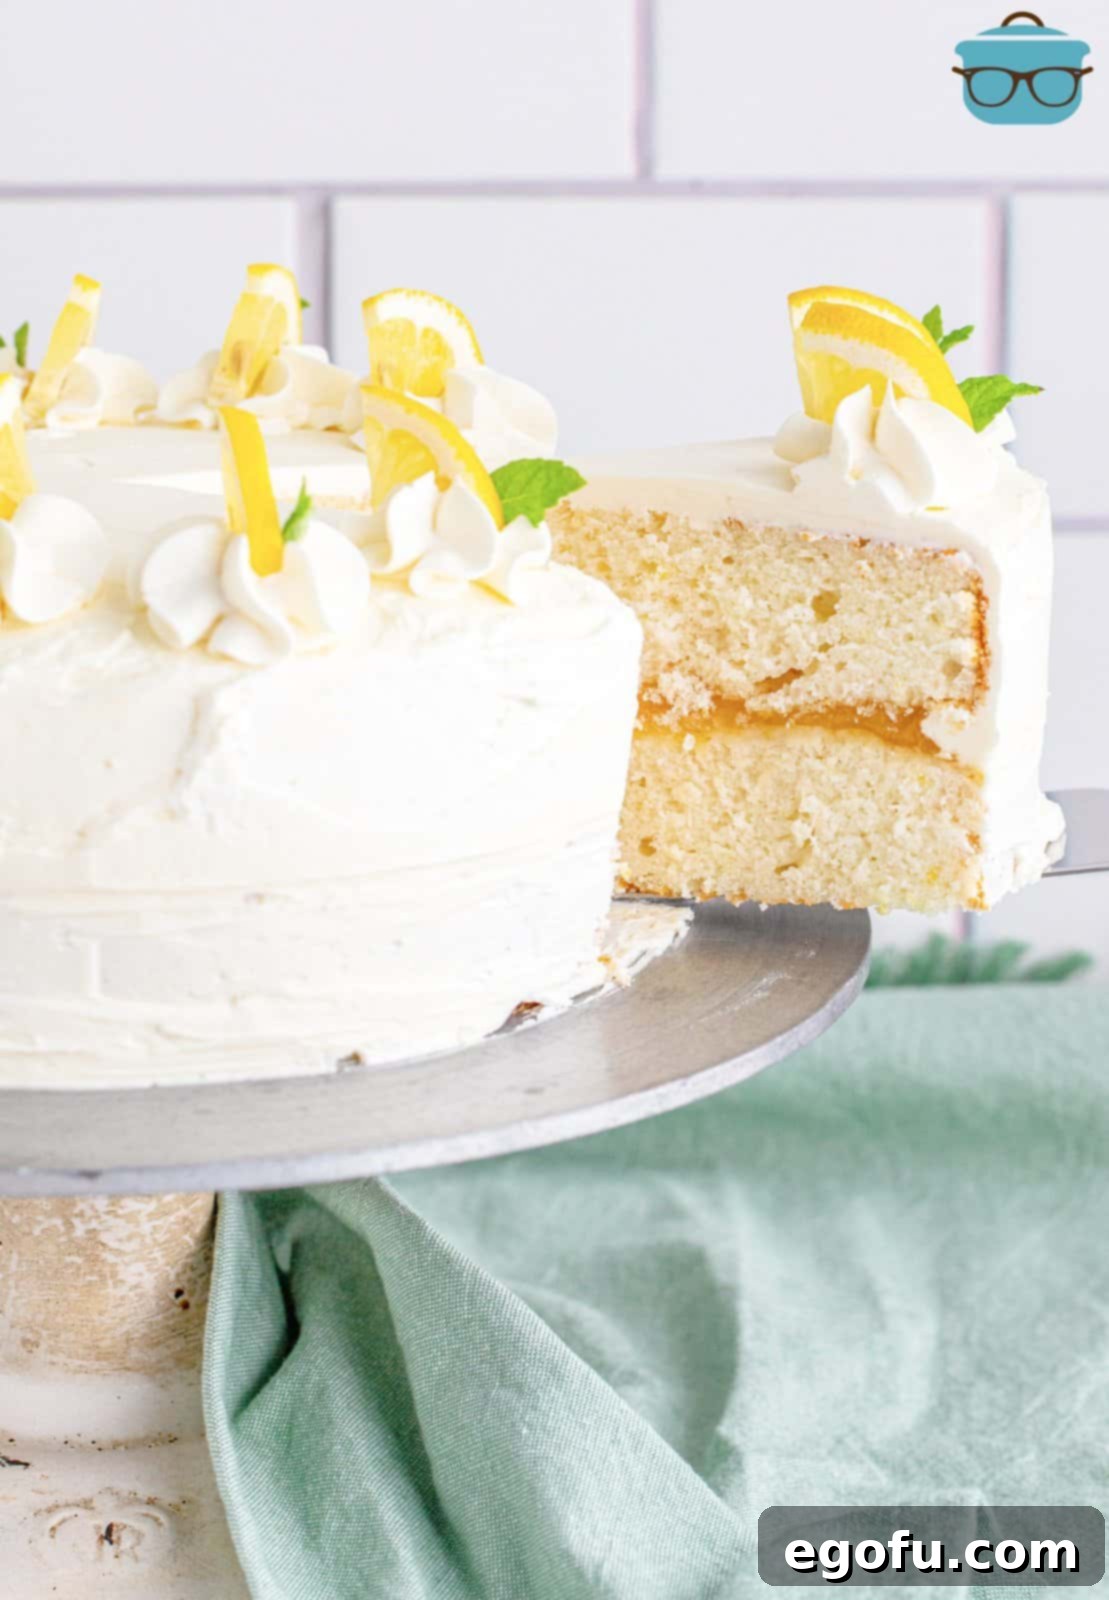
Step 14: Add Lemon Curd Filling. Spoon the prepared lemon curd over the top of the first cake layer. Using an offset spatula or the back of a spoon, gently spread the curd out to the edge, leaving a half-inch border. This border helps contain the curd once the next layer is added.
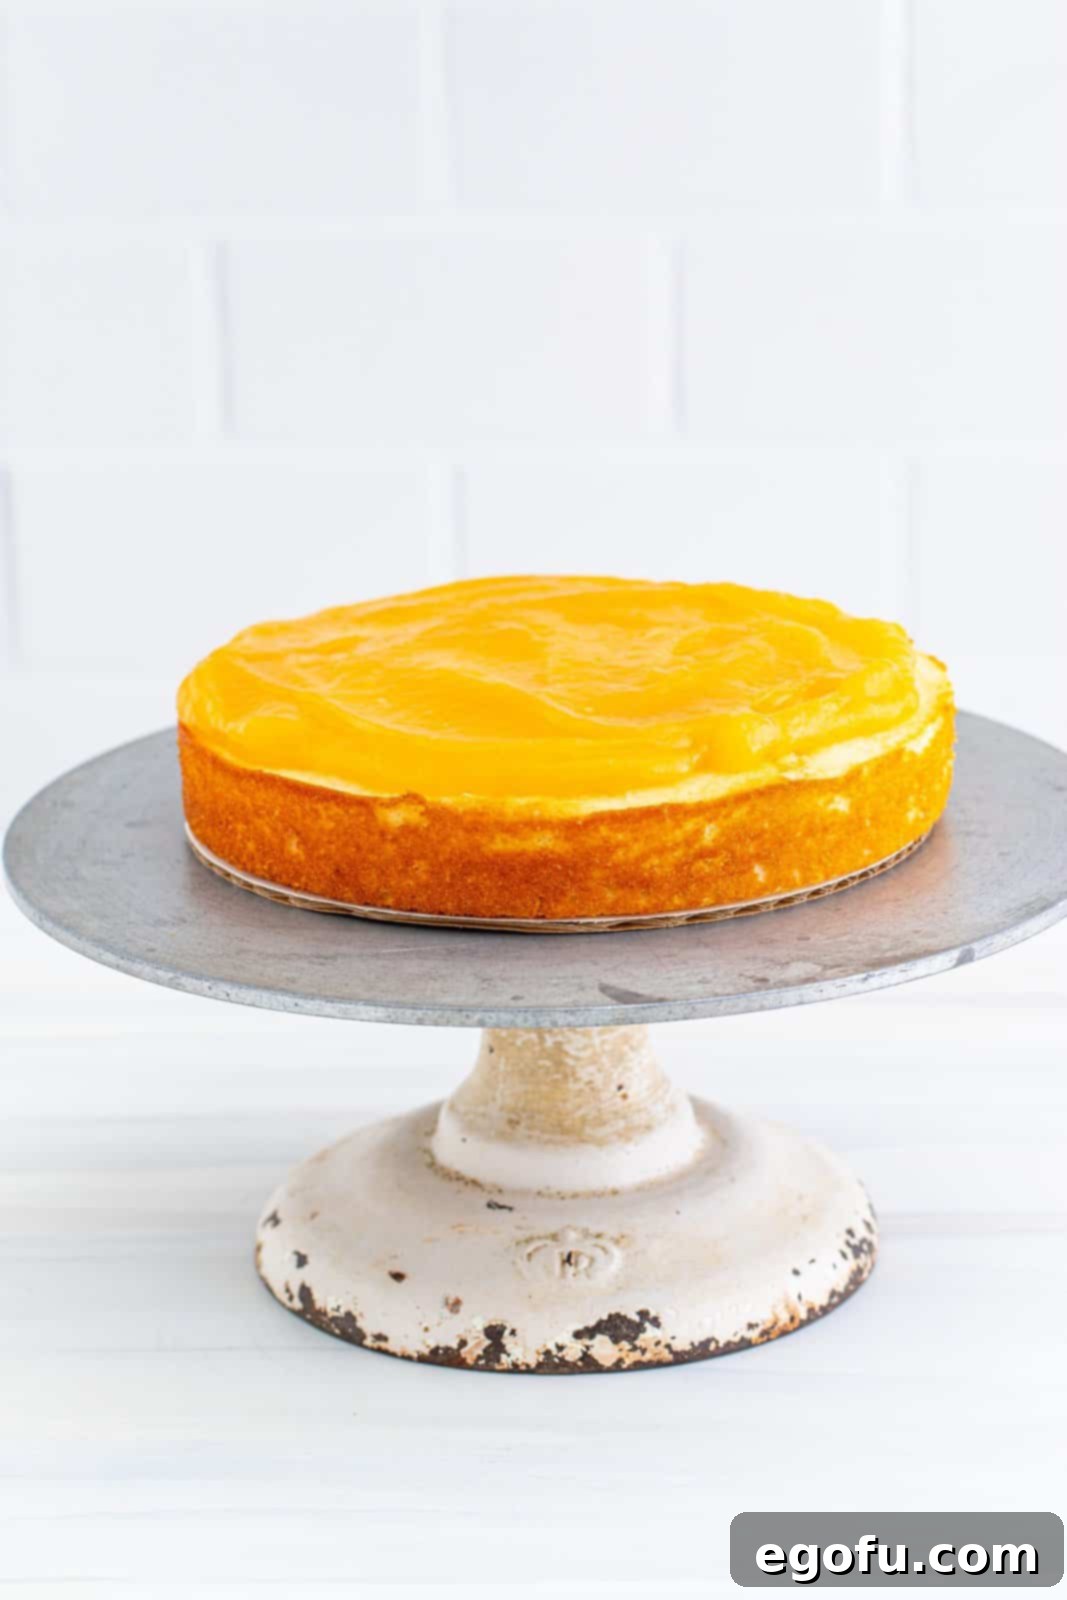
Step 15: Place Second Layer. Take the second cake layer, remove its parchment paper liner, and carefully place it top-side down over the lemon curd. Gently press down on the cake layer to help distribute the curd slightly towards the sides, but be careful not to press so hard that the curd squeezes out excessively from between the layers.
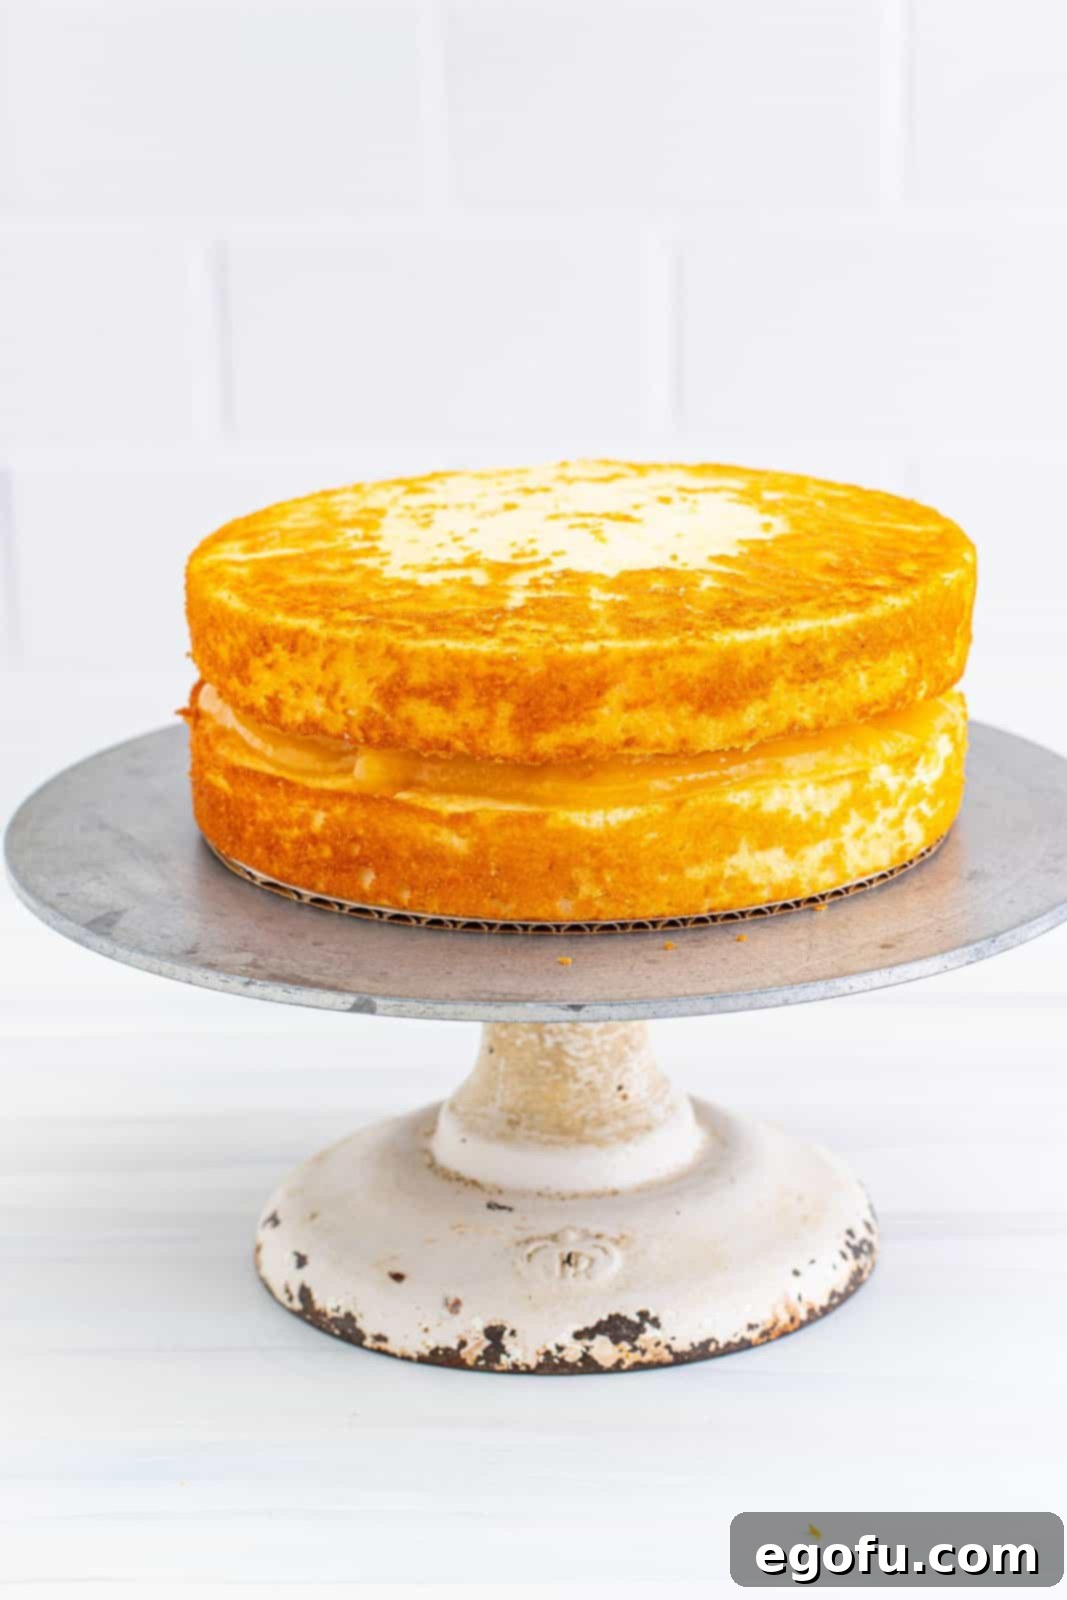
Step 16: Apply Crumb Coat. With a small amount of your prepared buttercream, apply a thin, even layer over the entire cake – top and sides. This is your essential crumb coat. Once applied, place the cake (and any remaining buttercream) in the refrigerator for at least 2 hours. This chilling time allows the crumb coat to set firm, locking in any loose crumbs and creating a stable base for your final frosting layer.
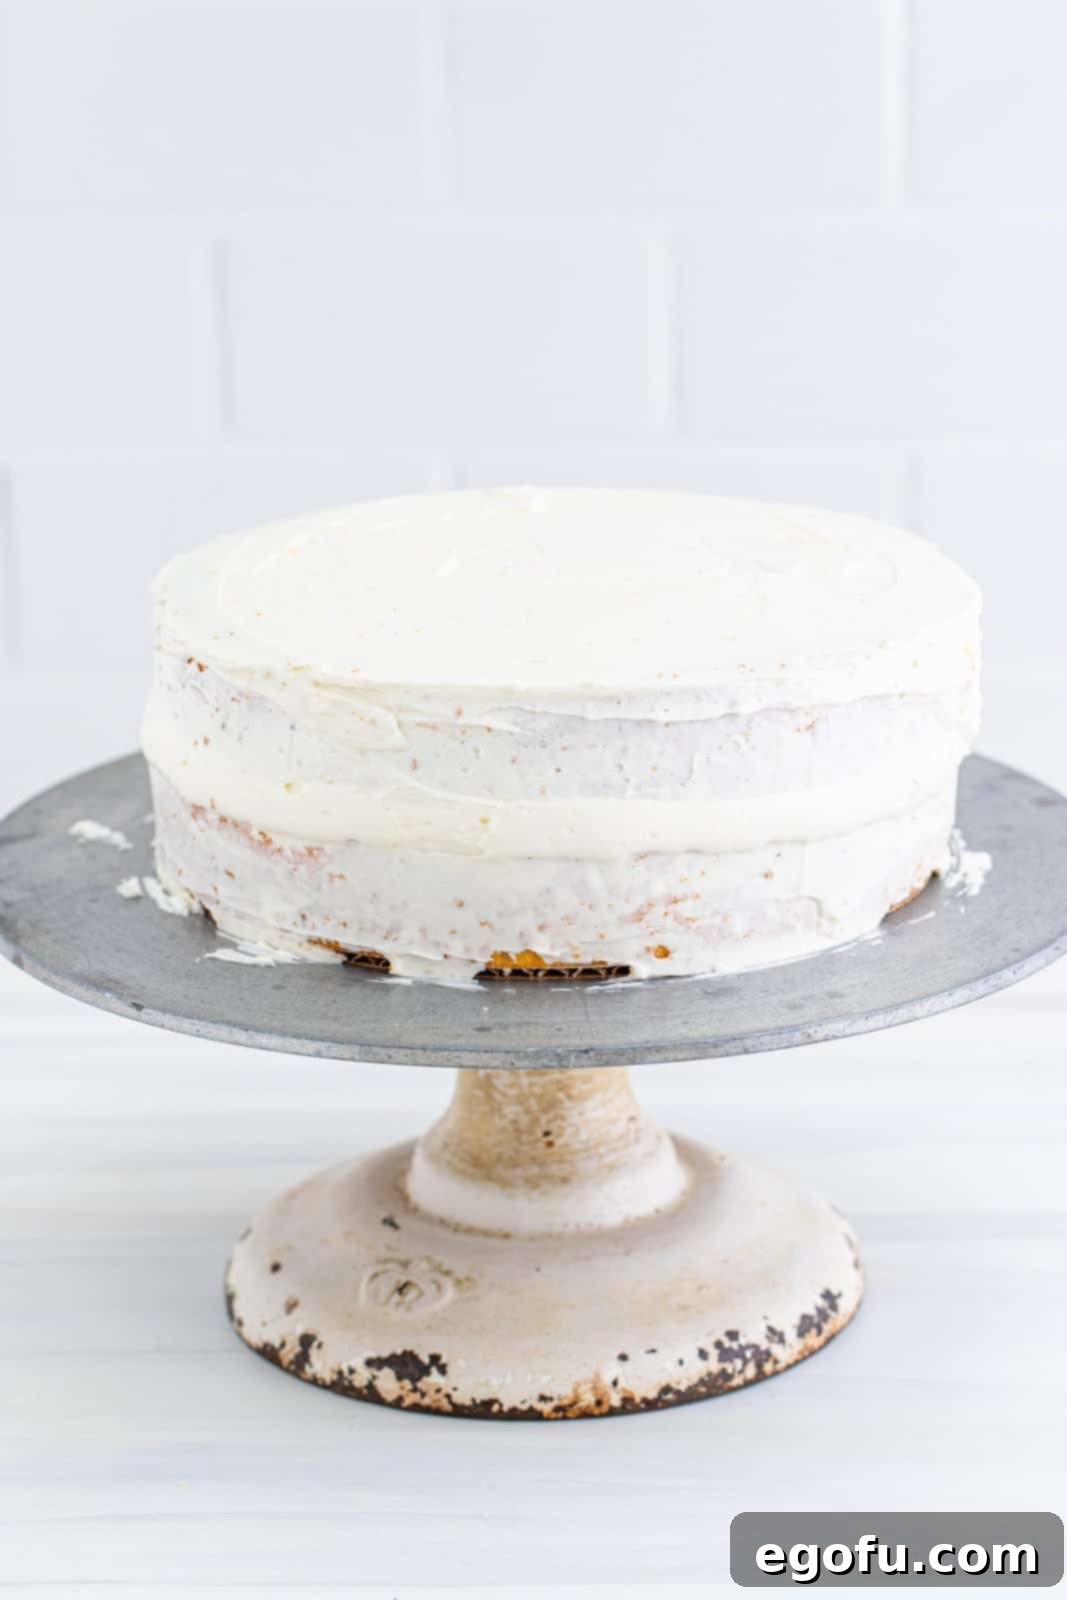
Step 17: Final Frosting and Decoration. Once the crumb coat has completely set, remove the cake and the remaining buttercream from the refrigerator. If the buttercream has stiffened too much, let it sit at room temperature for a few minutes or whip it briefly to regain its smooth consistency. Generously frost the entire cake with the remaining buttercream, aiming for a smooth, elegant finish or decorative swirls as desired. If you’re using a piping tip like the Wilton 1M, now is the time to add your decorative touches.
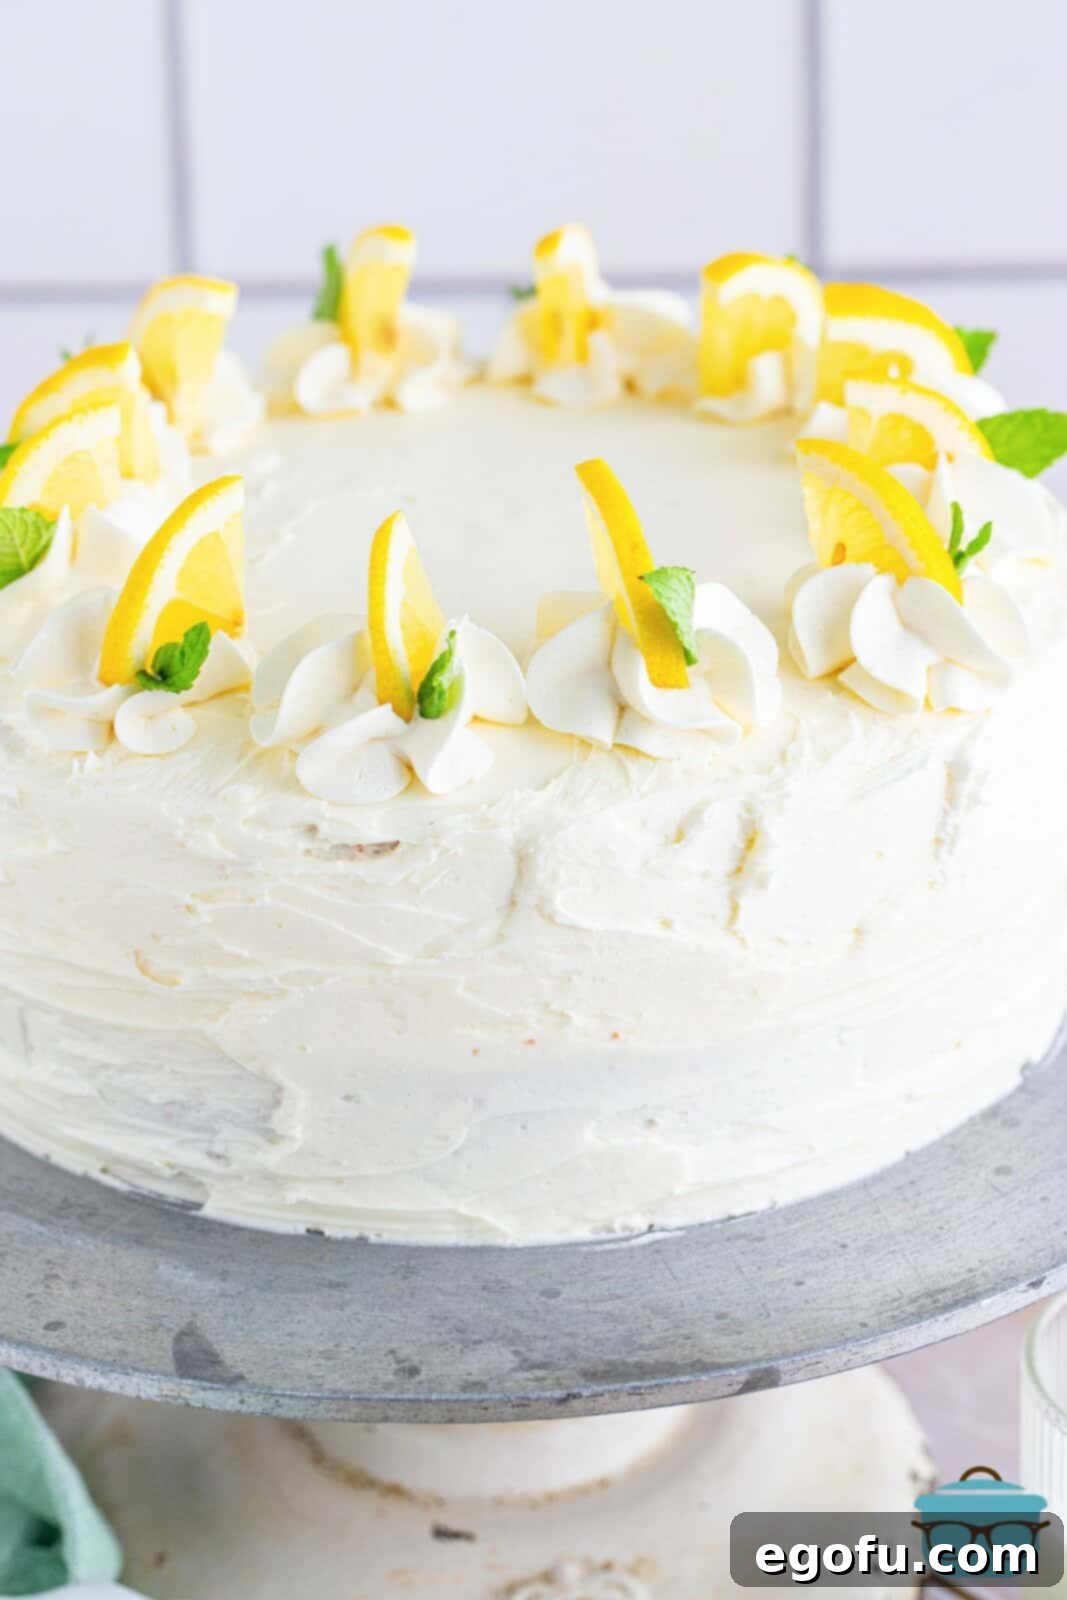
For an extra touch of elegance and visual appeal, consider decorating your finished cake with thin slices of fresh lemon, sprigs of mint, or even a sprinkle of lemon zest. These garnishes not only look beautiful but also reinforce the cake’s delightful lemon flavor.
Once your beautiful Lemon Layer Cake is fully assembled and decorated, it’s ready to be the star of your table. Slice it carefully with a sharp, warm knife for clean portions, and serve immediately to delighted guests. Enjoy the burst of fresh, zesty flavor!
More Irresistible Lemon Dessert Recipes
If you’re a true lemon lover, your culinary journey doesn’t have to end with this magnificent layer cake. Explore these other fantastic lemon-infused recipes that are sure to satisfy your citrus cravings:
- Lemon Blueberry Poke Cake
- Lemon Poke Cake
- Starbucks Lemon Loaf
- Homemade Lemon Cupcakes
- Lemon Dream Cake
- Lemon Magic Cake
- Homemade Yellow Cake Mix

Lemon Layer Cake
Print
Pin
30 minutes
27 minutes
2 hours
2 hours 57 minutes
12
Brandie Skibinski
Ingredients
For the cake:
- 2 ¼ cups cake flour
- 1 Tablespoon baking powder
- ¾ cup (1 1/2 sticks) salted butter, room temperature
- 1 ¾ cup granulated sugar
- 6 large egg whites room temperature
- 1 cup buttermilk room temperature
- ¼ cup lemon juice fresh squeezed
- 1 Tablespoon vanilla extract
- zest of 3 lemons (about 3 Tablespoons)
For the frosting:
- 1 cup (2 sticks) salted butter, softened
- 4 ½ cups powdered sugar
- 3 Tablespoons lemon juice, fresh squeezed
- 2 ½ teaspoons vanilla extract
For the filling:
- 1 ½ cups prepared lemon curd
Instructions
- Preheat the oven to 350°F (175°C). Spray 2 9-inch cake pans liberally with baking spray that contains flour (like Baker’s Joy). Place a parchment paper liner in the bottom and brush more baking spray on top, then set aside.
- In a medium-sized bowl, whisk together the cake flour and baking powder, and set aside.
- Add the room temperature butter and granulated sugar to a stand mixer with the paddle attachment and mix on medium speed until light and fluffy (about 2 minutes).
- Add the egg whites into the bowl in three batches, mixing thoroughly in between each addition. Scrape down the sides of the bowl as needed.
- Next, add the flour mixture and stir it in on low speed until just combined, scraping down the sides of the bowl. Do not overmix.
- Lastly, add the buttermilk, fresh lemon juice, vanilla extract, and lemon zest.
- Stir on low speed until just combined. Scrape down the sides and give it another 10 seconds of mixing to ensure uniformity.
- Divide the batter evenly amongst the two prepared cake pans and smooth out the tops. Bake for 22-27 minutes until lightly golden brown on top and a toothpick inserted into the center comes out clean. A few crumbs on the toothpick are okay, but any wet batter means it needs to bake longer.
- Let the cakes cool on a wire rack in their pans for 5 minutes, then turn out the cakes and place them (top side up) on the wire rack to cool completely.
- While the cakes cool, make the frosting: place the softened butter in a stand mixer with the paddle attachment. Cream the butter until smooth (about 30-45 seconds).
- Add the powdered sugar a little at a time until fully combined, scraping down the sides of the bowl as needed.
- Stir in the lemon juice and vanilla extract until incorporated. Then, place the speed on medium-high and whip the frosting for 3 minutes until it is light and fluffy. Set aside.
- To assemble the cake: place a tablespoon-sized dollop of the buttercream onto the bottom of your serving dish or cake plate; this will help keep the cake in place. Take the parchment paper off of one of the cooled cakes and place it (bottom side down) onto the buttercream on your serving platter.
- Place the prepared lemon curd on top of the first cake layer and smooth it out to the edge, leaving a half-inch border.
- Take the next cake layer, remove the parchment paper liner, and place it top-side down on top of the lemon curd. Lightly press the cake down to distribute the curd out toward the sides, but not so much that it pours out.
- Frost the cake with a small amount of buttercream to create a thin crumb coat. Place the cake in the refrigerator for 2 hours to set. Place the extra buttercream in the fridge too, to use after the cake has set.
- When the crumb coat is set, remove the cake and remaining buttercream from the fridge. Frost the cake with the rest of the buttercream, slice, and serve. Decorate with lemon slices or zest if preferred.
Notes
- Feel free to make your own lemon curd from scratch for an enhanced flavor experience.
- If planning to freeze the cake, only freeze the unfrosted cake layers. Wrap them tightly to prevent freezer burn.
- Customize your cake decoration! For the swirled effect in the photos, I used a Wilton 1M open star piping tip.
- The crumb coat is a vital step to prevent crumbs from mixing into your final frosting layer, ensuring a smooth, clean finish.
Dessert
American
Nutrition
Nutritional Disclaimer
“The Country Cook” is not a dietician or nutritionist, and any nutritional information shared is an estimate. If calorie count and other nutritional values are important to you, we recommend running the ingredients through whichever online nutritional calculator you prefer. Calories and other nutritional values can vary quite a bit depending on which brands were used.
Did you make this recipe?
Share it on Instagram @thecountrycook and mention us #thecountrycook!
