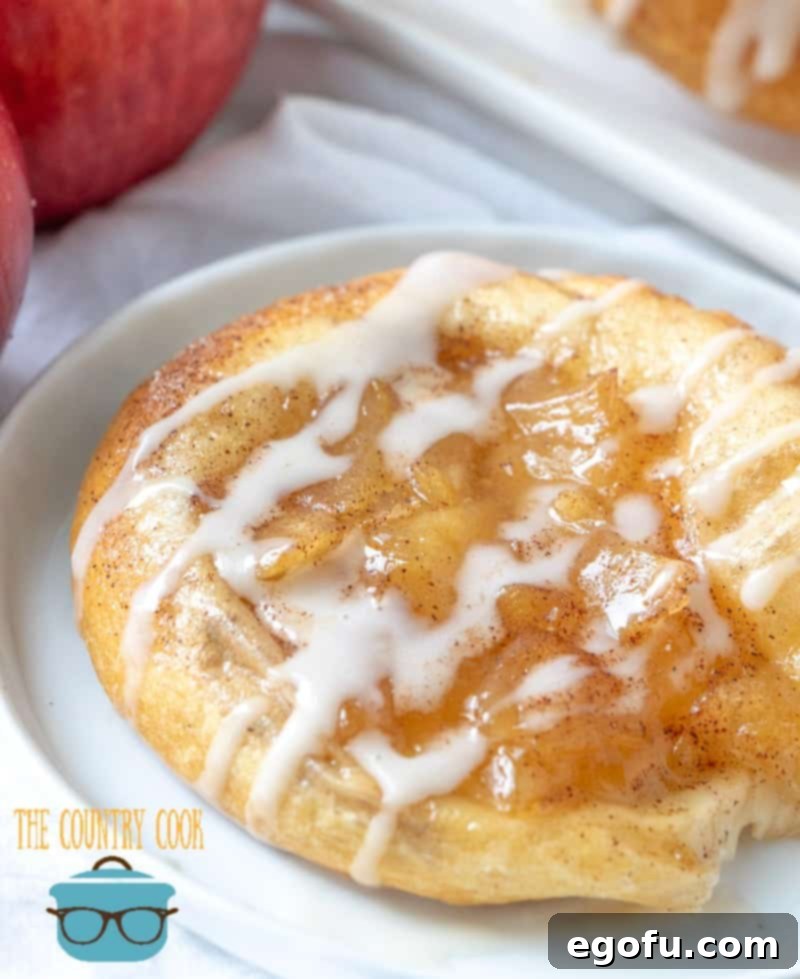
This recipe for Easy Apple Danishes is a game-changer for anyone craving a warm, flaky pastry without the fuss. Made with readily available crescent rolls, generously topped with sweet apple pie filling, and finished with a delicate vanilla icing drizzle, these danishes transform simple ingredients into an extraordinary treat.
Discover the Joy of Effortless Apple Danishes with Crescent Rolls
Life is busy, and sometimes, the thought of elaborate baking can feel overwhelming. Many of us consider ourselves “lazy bakers” on most days, yet the desire for homemade goodness remains strong. While there are moments for throwing down in the kitchen with complex recipes, there are far more days when we simply want to whip up something delicious and satisfying with minimal effort. This is where the magic of crescent rolls truly shines, offering a shortcut to delectable pastries that taste like they took hours to create.
These Easy Apple Danishes are the epitome of convenient baking. They require just a handful of ingredients, most of which you might already have in your pantry, and come together in a flash. Whether you’re looking for a delightful breakfast, an impressive brunch addition, or a comforting dessert, this recipe delivers on flavor, texture, and ease. Forget the laborious process of making pastry from scratch; with crescent rolls, you’re just minutes away from warm, golden danishes bursting with cinnamon-spiced apple goodness.
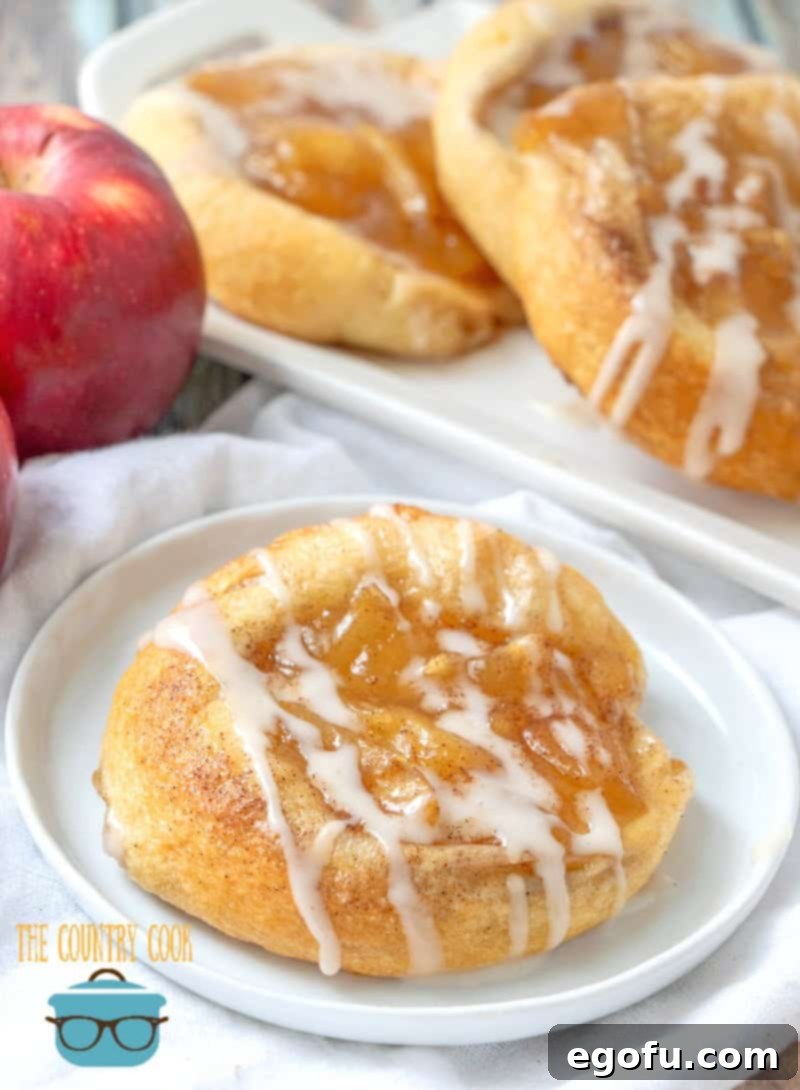
Mastering the Perfect Crescent Roll Apple Danish: Essential Tips for Success
Making delicious danishes with crescent rolls is surprisingly simple, but a few key tips can elevate your baking from good to absolutely outstanding. These insights will help you achieve the perfect texture, maximize flavor, and even adapt the recipe to suit your specific needs or preferences.
- Incredibly Versatile: These danishes are a true all-rounder! They are fantastic as a sweet breakfast treat to kickstart your day, an elegant addition to any brunch spread, or a warm, comforting dessert after a meal. Their simplicity makes them suitable for impromptu gatherings or a quick indulgence.
- Endless Flavor Possibilities: Don’t limit yourself to just apple! This recipe is incredibly adaptable. Feel free to experiment with any canned pie filling you adore. Cherry, peach, blueberry, or even a mixed berry filling can create an entirely new and exciting danish experience. Each fruit brings its unique profile, allowing you to tailor the flavors to the season or your cravings.
- Adjusting the Recipe Size: Only need a small batch? No problem! This recipe is easily scalable. Instead of using two cans of crescent rolls, simply use one. Save the remaining pie filling in an airtight container in the refrigerator for up to a week, or freeze it for future use in another batch of danishes or a different dessert.
- Freezing for Later Enjoyment: Planning ahead or have leftovers? These danishes freeze beautifully! Once cooled, wrap each individual danish tightly in plastic wrap, then place them in a freezer-safe Ziploc bag or airtight container. They can be frozen for up to 3 months. To reheat, simply warm them in a preheated oven (around 300°F/150°C) until heated through, or use a microwave for a quicker option. An air fryer also works wonderfully for crisping them up.
- Crafting Your Own Cinnamon Sugar: While pre-made cinnamon sugar is convenient, making your own ensures the freshest flavor. For a standard blend, combine 1/2 cup (100g) granulated sugar with 2 Tablespoons ground cinnamon. Feel free to adjust the ratio to your liking – some prefer more cinnamon, others a sweeter mix. This mixture is not just for danishes; it’s perfect for toast, oatmeal, or other baked goods.
- Butter Choice Matters (or not!): The recipe calls for melted butter, and whether you choose salted or unsalted is entirely up to your personal preference. Salted butter can add a subtle depth of flavor and counteract the sweetness, providing a nice balance. If using unsalted butter, you might consider adding a tiny pinch of salt to the cinnamon sugar mixture for that same hint of contrast.
- Sealing the Dough Perfectly: When separating the crescent roll dough into rectangles, ensure you firmly pinch the perforations together. This step is crucial for preventing the filling from leaking out during baking and for creating a cohesive danish base. A well-sealed dough results in a more professional-looking and tastier pastry.
- Don’t Overcrowd the Baking Sheet: Give your danishes ample space to bake evenly. Placing them too close together can lead to uneven browning and prevent the edges from getting properly crisp. Leave about 1-2 inches between each danish on the cookie sheet.

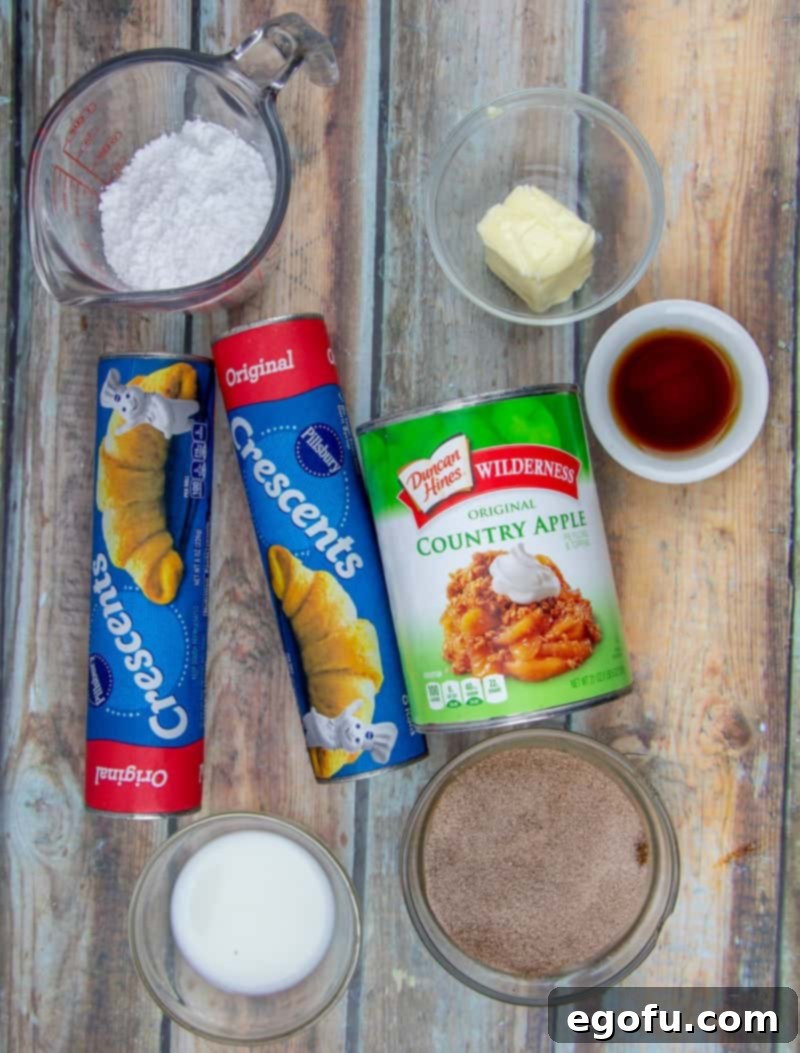
Gather Your Ingredients: What You’ll Need for These Delightful Danishes
The beauty of this recipe lies in its simplicity, requiring just a few common ingredients that come together to create something truly special. Here’s what you’ll need to have on hand:
- Crescent Rolls: The star of the show, providing that wonderfully flaky, buttery base. Two (8-ounce) tubes are typically used, yielding 8 danishes per tube, totaling 16 danishes.
- Apple Pie Filling: The sweet, spiced heart of your danishes. A 20-ounce can is usually sufficient for a full batch.
- Butter: Melted butter is brushed onto the crescent dough, adding richness and helping the cinnamon sugar adhere. Salted butter is preferred by some for an extra flavor dimension, but unsalted works just as well.
- Cinnamon Sugar: A delightful blend of granulated sugar and ground cinnamon that adds a warm, aromatic spice.
- Powdered Sugar: The foundation for your smooth, sweet glaze.
- Vanilla Extract: Enhances the flavor of the glaze, adding a touch of warmth and sweetness.
- Milk: Used to thin out the powdered sugar for a perfect drizzling consistency for your glaze.
Step-by-Step Guide: Crafting Your Easy Apple Danishes
Follow these straightforward steps to create your own batch of irresistible apple danishes. The process is designed to be quick and enjoyable, resulting in a bakery-quality treat right in your own kitchen.
- Prepare Your Oven: Begin by preheating your oven to 350°F (175°C). While the oven heats, lightly spray a baking sheet with nonstick spray to prevent sticking.
- Ready the Crescent Dough: Unroll both tubes of crescent roll dough. You’ll notice they are typically perforated into triangles. For this recipe, you’ll pair two triangles together to form eight rectangles. Carefully pinch together all the perforations on each rectangle to create a solid piece of dough.
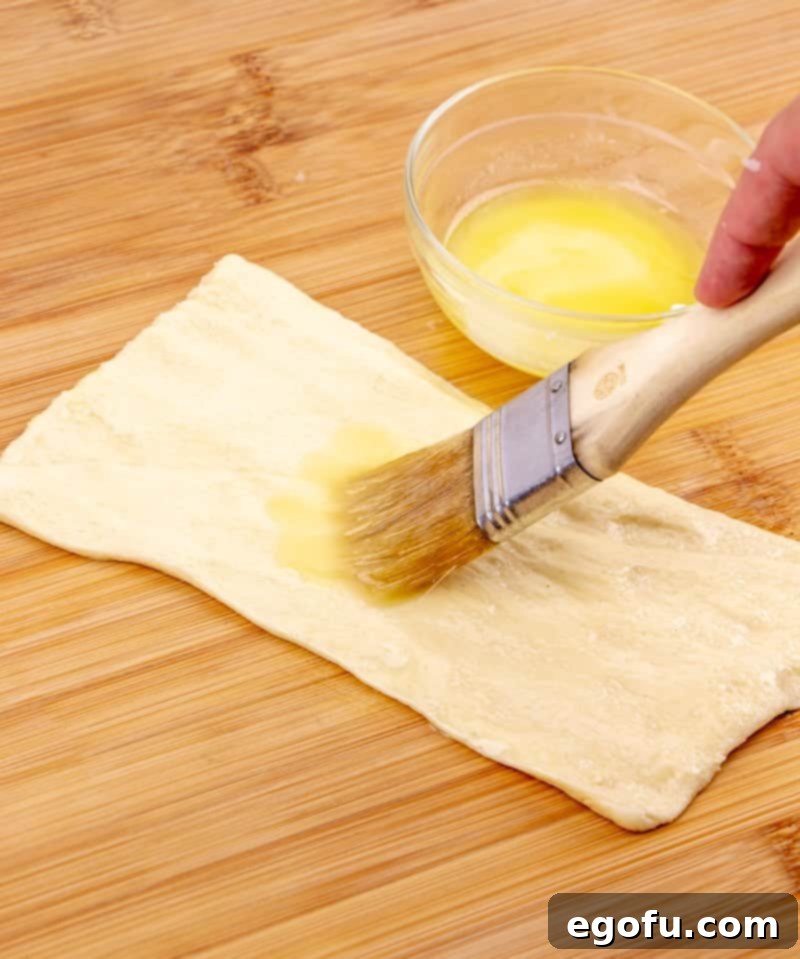
- Butter Up: Using a pastry brush or the back of a spoon, generously spread the melted butter evenly over the surface of each crescent roll rectangle. This layer of butter not only adds a rich flavor but also helps the cinnamon sugar adhere beautifully.
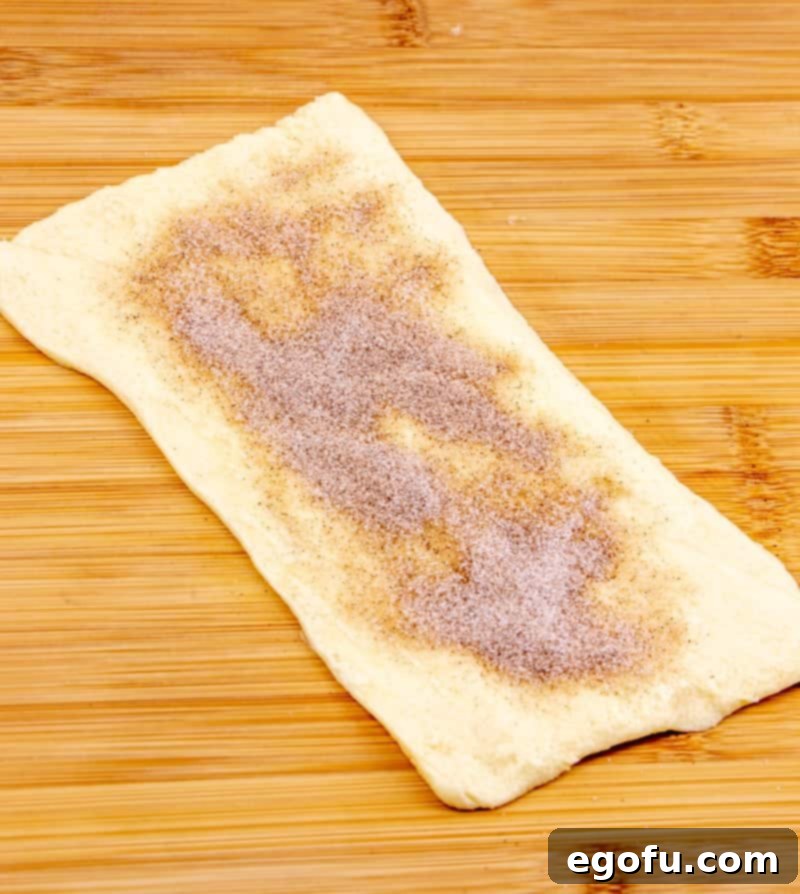
- Cinnamon Sugar Sprinkle: Now, sprinkle a generous amount of your cinnamon sugar mixture (about 2 tablespoons white sugar mixed with 1 teaspoon of cinnamon, or your homemade blend) over the buttered dough. Ensure an even coating for maximum flavor.
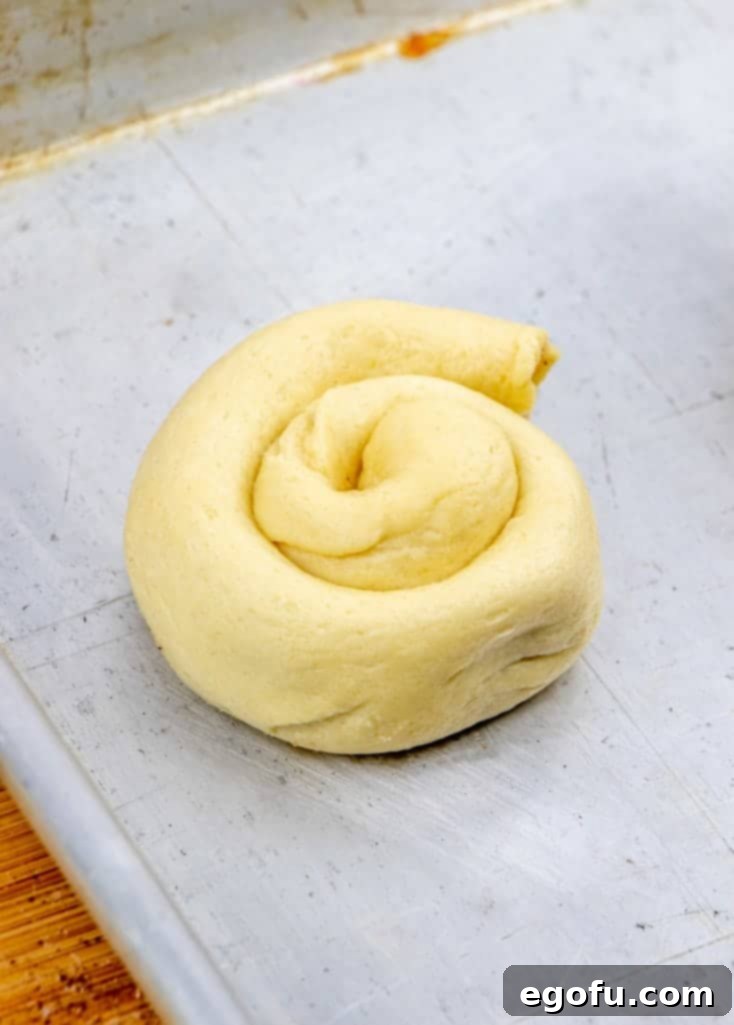
- Roll and Coil: Starting from the long side of each rectangle, carefully roll up the dough tightly. Once rolled, pinch the edges firmly to seal them. Now, gently coil each rolled piece into a spiral shape, resembling a snake or a cinnamon roll.
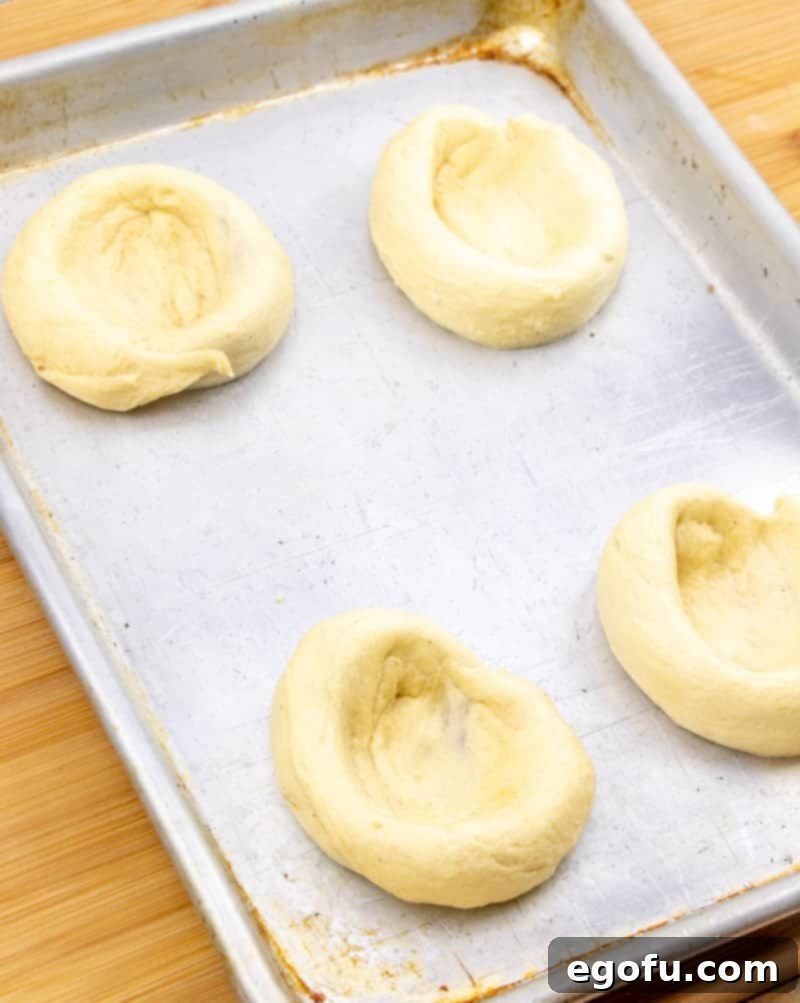
- Shape for Filling: Place the coiled dough onto your prepared cookie sheet. Using your fingers, gently spread out the center of each coil, creating a shallow “nest” or indentation. This hollow will perfectly hold your apple pie filling.
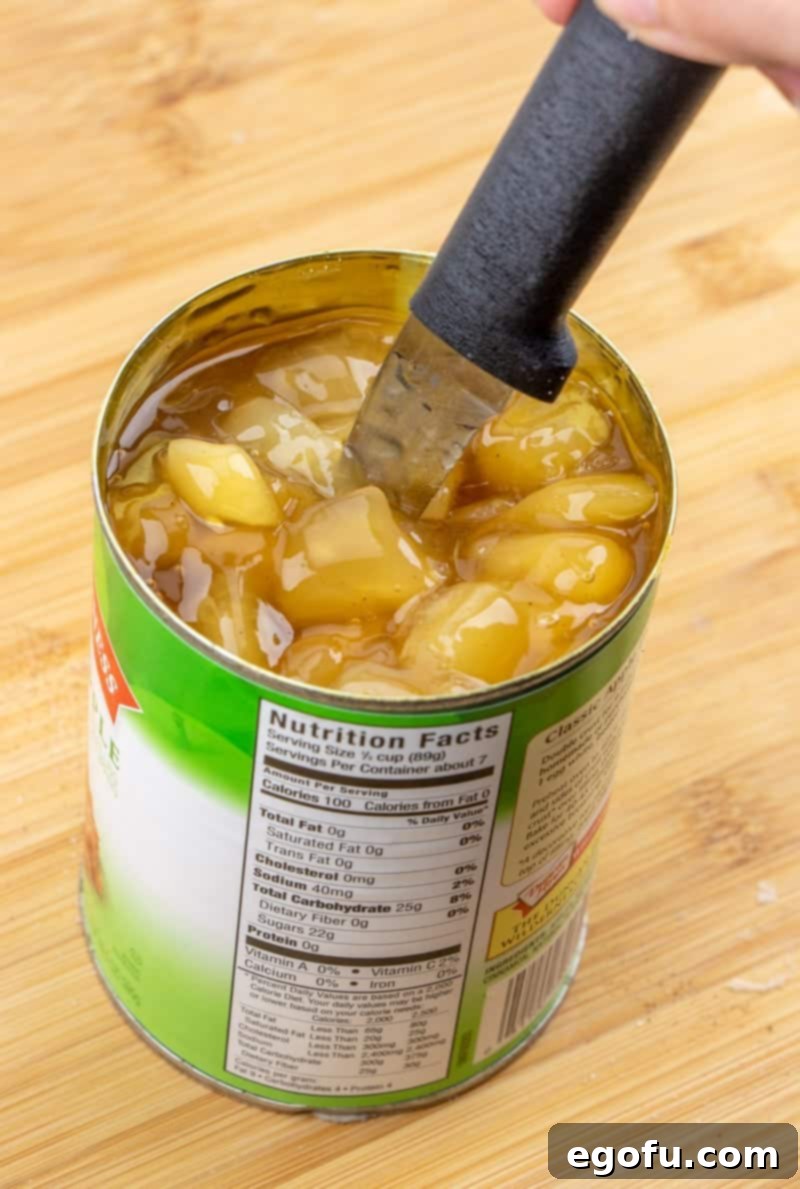
- Prepare the Apple Filling: Open your can of apple pie filling. The apple slices can sometimes be quite large, so use a knife to cut them into smaller, more manageable chunks while still in the can. This ensures an even distribution of apple in every bite.
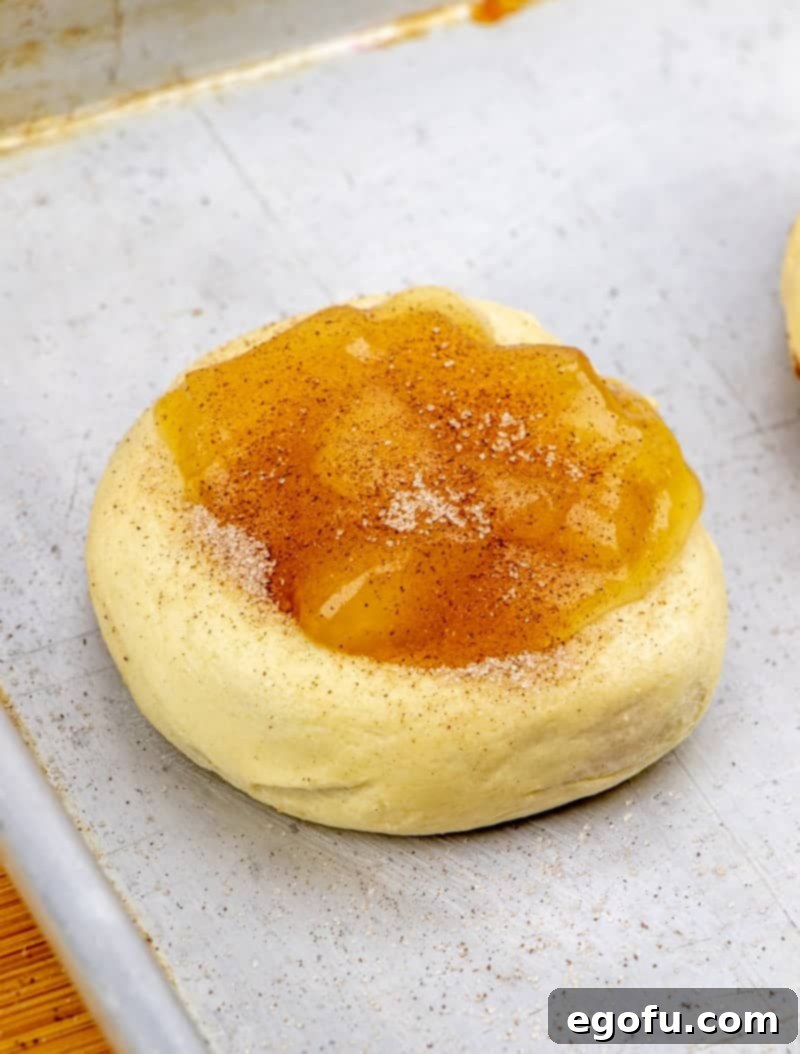
- Fill the Danishes: Spoon about 2-3 tablespoons of your prepared apple pie filling into the center of each crescent roll coil. Don’t overfill, as it might bubble out during baking.
- Final Cinnamon Sugar Dusting: For an extra layer of flavor and a beautiful caramelized crust, sprinkle a little more cinnamon sugar mixture over the tops of the apple filling.
- Bake to Golden Perfection: Place the baking sheet in your preheated oven and bake for 15-18 minutes. Keep an eye on them; they are ready when the crescent dough is beautifully golden brown and puffed up.
- Prepare the Glaze: While the danishes are baking, prepare your simple glaze. In a small bowl, combine the powdered sugar, vanilla extract, and milk. Stir vigorously with a whisk or spoon until the mixture is completely smooth and free of lumps. Adjust the milk gradually to achieve your desired drizzling consistency – aim for something not too thick, not too runny.
- Drizzle and Serve: Once the danishes are out of the oven, allow them to cool for just a few minutes, then generously drizzle the vanilla glaze over each warm pastry. These apple danishes are truly at their best when served warm, allowing the flavors to meld and the glaze to slightly melt. This recipe yields 8 delightful danishes.
Customizing Your Danish: Endless Flavor Possibilities
While apple danishes are a classic for a reason, this recipe serves as a fantastic foundation for culinary creativity. The simple crescent roll base and easy glaze pair beautifully with a wide array of fillings, allowing you to explore different flavor profiles and impress with minimal effort.
- Berry Bliss: Swap out the apple for canned cherry or strawberry pie filling. For these sweeter, tangier fruits, you might consider skipping the initial cinnamon sugar sprinkle on the dough, letting the natural fruit flavor shine. A cream cheese layer can also be added under the berries for a cheesecake-like danish!
- Peachy Keen: Canned peach pie filling creates a wonderfully summery danish. The soft, sweet peaches complement the flaky pastry perfectly, especially when served warm with a scoop of vanilla ice cream.
- Tropical Twist: If you’re feeling adventurous, pineapple pie filling can offer a bright and tangy contrast to the rich pastry. It’s an unexpected but delightful flavor combination.
- Lemon Zest: For those who love a tart and refreshing treat, lemon pie filling makes an excellent choice. The vibrant citrus notes will brighten up any breakfast or dessert table. Again, consider omitting the cinnamon sugar to let the lemon’s tang take center stage.
- Savory Adventures: While the base recipe is sweet, don’t forget that crescent rolls are incredibly versatile for savory applications too! Imagine a savory danish with cream cheese and herbs, or even a mini quiche-like filling.
Experimenting with different fillings is part of the fun. Just remember that if you’re only using one tube of crescent rolls, you can store any leftover pie filling in an airtight container in the fridge for up to a week, ready for your next batch of quick danishes!

Frequently Asked Questions About Easy Apple Danishes
How long do apple danishes last?
These danishes are best enjoyed fresh and warm. However, if stored properly in an airtight container at room temperature, they will remain fresh for 1-2 days. For longer storage, refrigerate them, where they will last for up to 4-5 days. Remember that the pastry might lose some of its crispness over time.
Can I prepare the danishes ahead of time?
Yes, you can do some prep work in advance! You can assemble the danishes (up to the point of adding the filling and before baking) and refrigerate them on a baking sheet covered with plastic wrap for a few hours. For best results, it’s ideal to bake them fresh. Alternatively, you can bake them, let them cool, and then freeze them for later, as detailed in our tips section.
What’s the best way to reheat them?
To bring your leftover danishes back to life, a preheated oven is your best friend. Warm them at 300°F (150°C) for about 5-10 minutes, or until heated through and the pastry is slightly crisp again. A toaster oven works well for individual danishes. You can also use an air fryer at 300°F (150°C) for 3-5 minutes. The microwave is an option for speed, but it may make the pastry softer rather than crisp.
Can I make my own apple pie filling?
Absolutely! If you prefer a completely homemade approach, you can definitely prepare your own apple pie filling from scratch. This allows you to control the sweetness and spice levels. Just be sure to cool the filling completely before adding it to the crescent roll dough to prevent the dough from getting soggy.
Serving Suggestions for Every Occasion
These Easy Apple Danishes are incredibly versatile and can grace your table for a variety of occasions. Whether it’s a quiet morning at home, a bustling holiday brunch, or a simple weeknight dessert, they are sure to be a crowd-pleaser.
- Breakfast Companion: Pair with a hot cup of coffee, a soothing tea, or a glass of fresh orange juice for a perfect start to your day.
- Brunch Star: Arrange them on a platter alongside fresh fruit, yogurt parfaits, and other brunch favorites. They add a touch of elegance without the extra effort.
- Dessert Delight: Serve them warm with a scoop of vanilla bean ice cream, a dollop of whipped cream, or a sprinkle of toasted pecans for an indulgent treat.
- Afternoon Treat: Enjoy a danish with a mid-afternoon pick-me-up, a lovely way to bridge the gap between lunch and dinner.
No matter how you serve them, the combination of flaky pastry, sweet apples, and delicate glaze makes for an unforgettable experience.
More Delightful Recipes to Explore
If you’ve enjoyed the simplicity and deliciousness of these Easy Apple Danishes, you’ll love exploring other quick and satisfying recipes that bring joy to your kitchen with minimal fuss. Here are some more ideas to inspire your next baking adventure:
- Pumpkin Danishes
- Easy Cheese Danishes
- Strawberry Cheese Danish
- Cherry Crumble Danishes
- Easy Apple Pie Cinnamon Rolls
- Puff Pastry Apple Pies
- Apple Dessert Pizza
- Apple Pie Dip
- Fried Apples
- Blueberry Cheesecake Crescent Rolls

Easy Apple Danishes
This recipe for Easy Apple Danishes is made with crescent rolls and topped with apple pie filling and drizzled with icing, offering a quick and delightful treat.
Prep Time: 10 minutes
Cook Time: 18 minutes
Total Time: 28 minutes
Servings: 8 danishes
Author: Brandie Skibinski
Ingredients
- 2 (8 ounce) tubes crescent rolls (8 crescent rolls per tube)
- 20 ounce can apple pie filling
- 2 Tablespoons salted butter, melted (unsalted can be used)
- 3 Tablespoons cinnamon sugar
- ½ cup powdered sugar
- 1 teaspoon vanilla extract
- 3-4 teaspoon milk
Instructions
- Preheat oven to 350 degrees (F).
- Separate all the crescent roll dough into eight rectangles (2 crescent roll triangles make one rectangle). Seal perforations firmly.
- Using a brush or spoon, spread melted butter all over crescent rolls.
- Sprinkle with cinnamon sugar mixture (2 tablespoons white sugar mixed with 1 teaspoon of cinnamon).
- Roll up from long side; pinch edges to seal. Holding one end, loosely coil each into a spiral.
- Place on a cookie sheet that has been sprayed with nonstick spray. Spread out the dough in the center to make room for the filling.
- Open can of apple pie filling and using a knife, cut apple slices into smaller chunks.
- Top each coil with about 2-3 tablespoons of apple pie filling.
- Sprinkle the tops with a bit more cinnamon sugar mixture.
- Bake at 350(F) for 15-18 minutes, or until golden brown.
- For the glaze, in a bowl, combine powdered sugar, vanilla and milk.
- Stir until smooth and drizzle over each warm danish.
Video
Notes
- Best served warm. This recipe is wonderful with any type of pie filling, such as peaches, strawberry, or cherry. You can skip the cinnamon sugar part for strawberry or cherry fillings.
- If you don’t need so many danishes, just use one tube of crescent rolls and save the leftover pie filling for another time. Store it in a container with a lid in the fridge for up to a week.
- To make cinnamon sugar, simply combine 1/2 cup of granulated sugar with 2 Tablespoons of ground cinnamon.
Course: Dessert
Cuisine: American
Nutrition
Calories: 175kcal | Carbohydrates: 25g | Protein: 1g | Fat: 8g | Sodium: 255mg | Sugar: 12g
Nutritional Disclaimer
The nutritional information provided is an estimate. It is not a substitute for professional dietary advice. If calorie count and other nutritional values are important to you, we recommend running the ingredients through a preferred online nutritional calculator, as values can vary depending on brands and specific preparation methods.
Did you make this recipe? Share your creations on Instagram @thecountrycook and mention us #thecountrycook!
Originally published: May 2011
Updated & republished: May 2019
