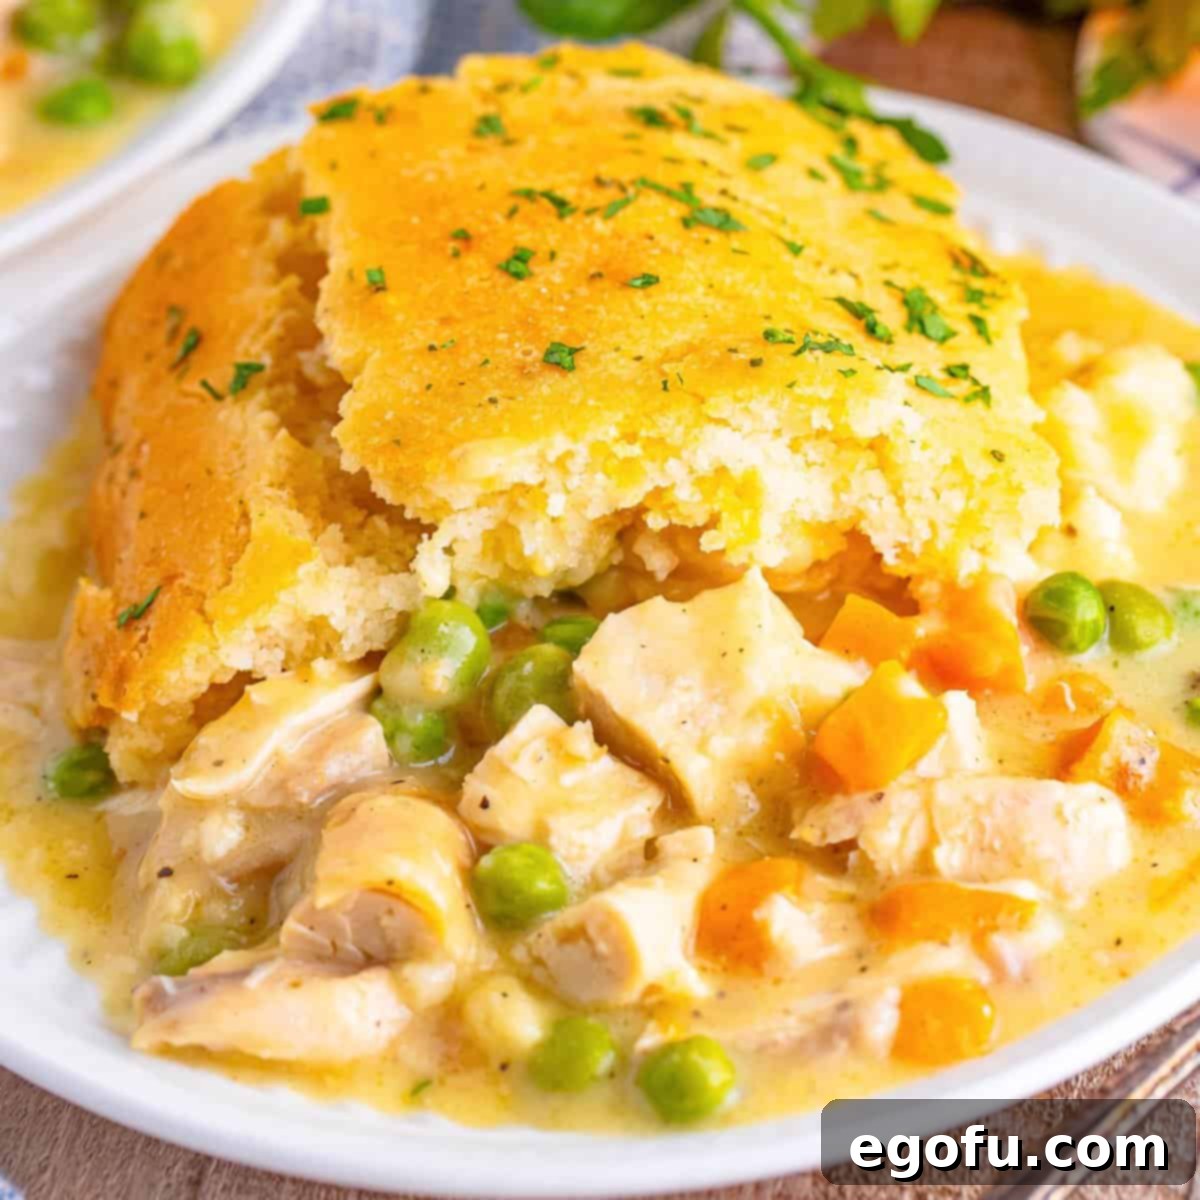
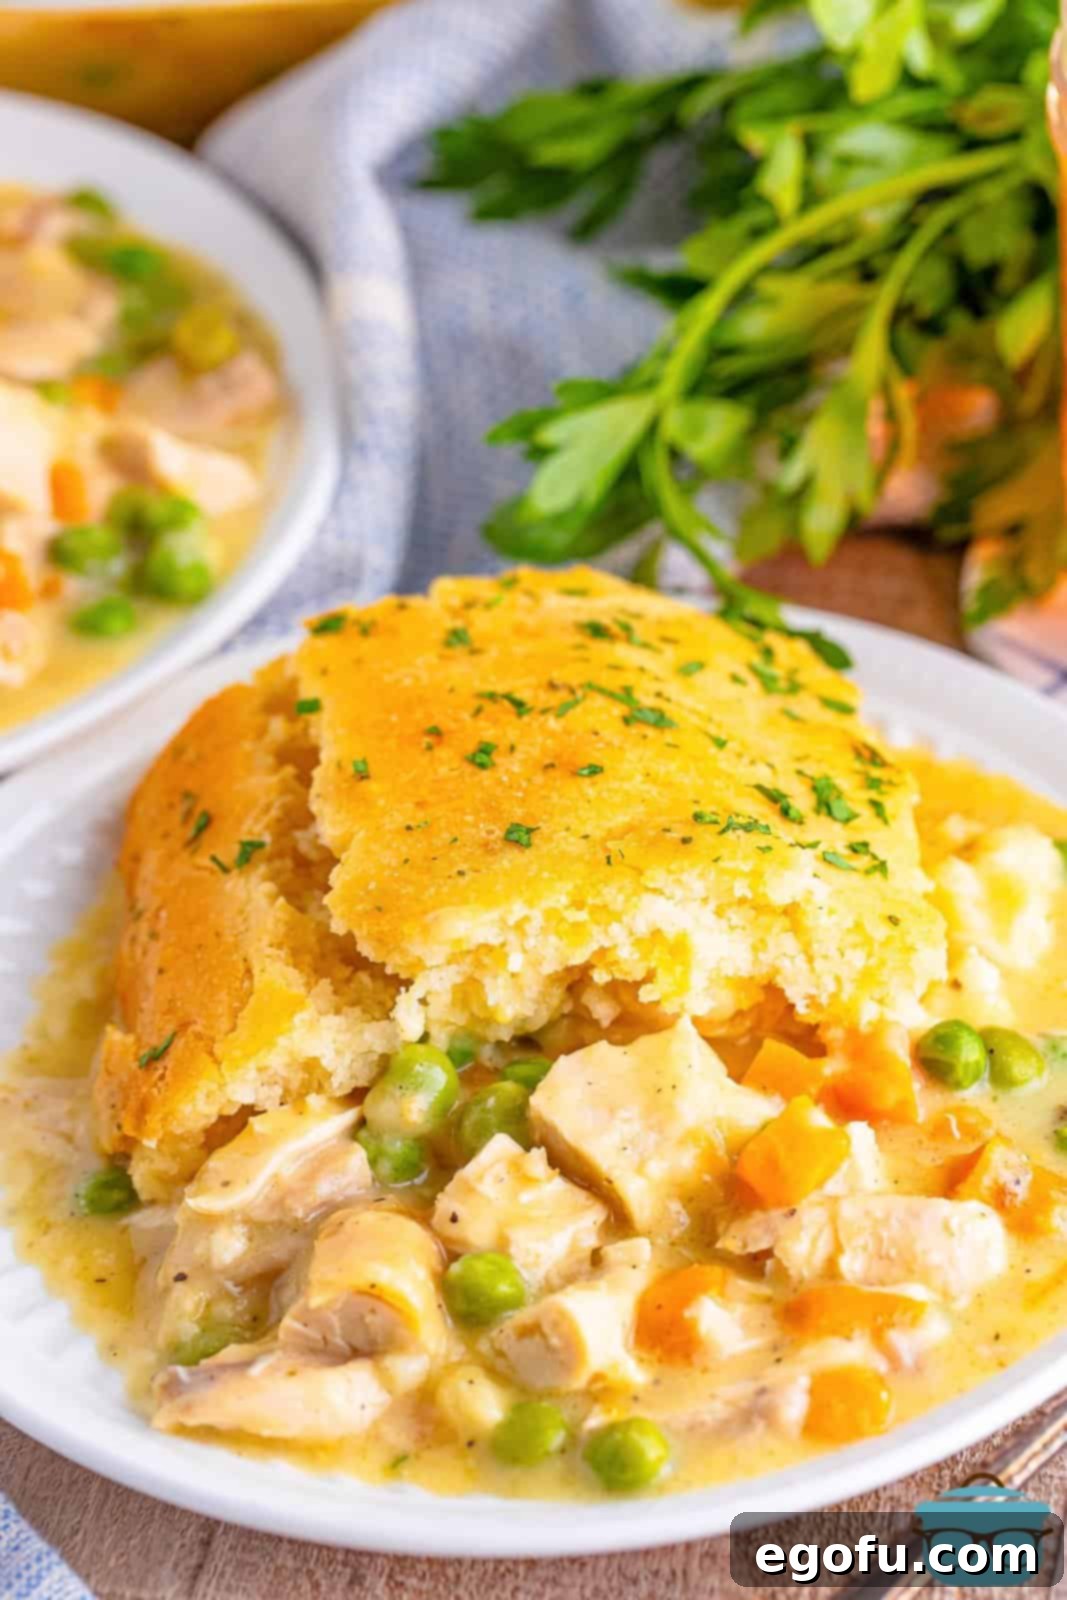
Welcome to your new favorite family dinner! This incredible **Chicken Cobbler** is not just an easy comfort meal; it’s a culinary revelation that will quickly become a cherished part of your regular dinner rotation. With its heartwarming blend of tender chicken, rich, savory gravy, and a golden, cheesy biscuit topping, this dish transforms simple ingredients into an unforgettable experience. Forget complicated recipes – this one promises minimal prep for maximum flavor, ensuring a stress-free yet utterly delicious meal every time.
THE VIRAL CHICKEN COBBLER: OUR ENHANCED VERSION
You’ve likely seen the buzz on social media platforms like TikTok, where the original chicken cobbler recipe took the internet by storm. Its appeal is undeniable: a delightful twist on the classic casserole, featuring succulent chicken, a creamy base, and a comforting biscuit crust. However, while the original concept was fantastic, we found it had room for improvement. Our mission was to elevate this viral sensation into something truly extraordinary – a dish that’s not just easy, but bursting with robust, satisfying flavor.
We embarked on a journey to perfect this beloved recipe, making a few strategic adjustments that take it from good to absolutely phenomenal. Firstly, we tackled the common feedback that the original version could be a bit bland. To combat this, we generously incorporated aromatic onion powder and garlic powder into the creamy chicken base. Additionally, instead of plain cream of chicken soup, we opted for a version enriched with herbs, infusing every bite with a deeper, more complex flavor profile. These simple seasoning upgrades make all the difference, transforming a simple chicken dish into a symphony of savory notes.
Our second major enhancement focuses on the star topping: the biscuits. While a buttery biscuit topping is inherently delicious, we discovered that adding a touch of shredded cheddar cheese directly into the biscuit mix before baking truly makes the flavor pop. The cheese melts into the biscuits, creating a rich, savory crust that perfectly complements the creamy chicken filling beneath. Furthermore, we refined the application of the garlic butter. Instead of mixing it directly into the biscuit dough, we saved this fragrant blend to brush over the biscuit topping *after* it’s baked. This method ensures that the garlic butter flavor is vibrant and fresh, providing a beautiful golden sheen and an irresistible aroma that fills your kitchen.
The result? A Chicken Cobbler that honors its viral roots while delivering an unparalleled depth of flavor and texture. This isn’t just a quick weeknight meal; it’s a culinary hug, perfect for chilly evenings, family gatherings, or simply when you need a little extra comfort. Get ready to dive into a dish that everyone will love!
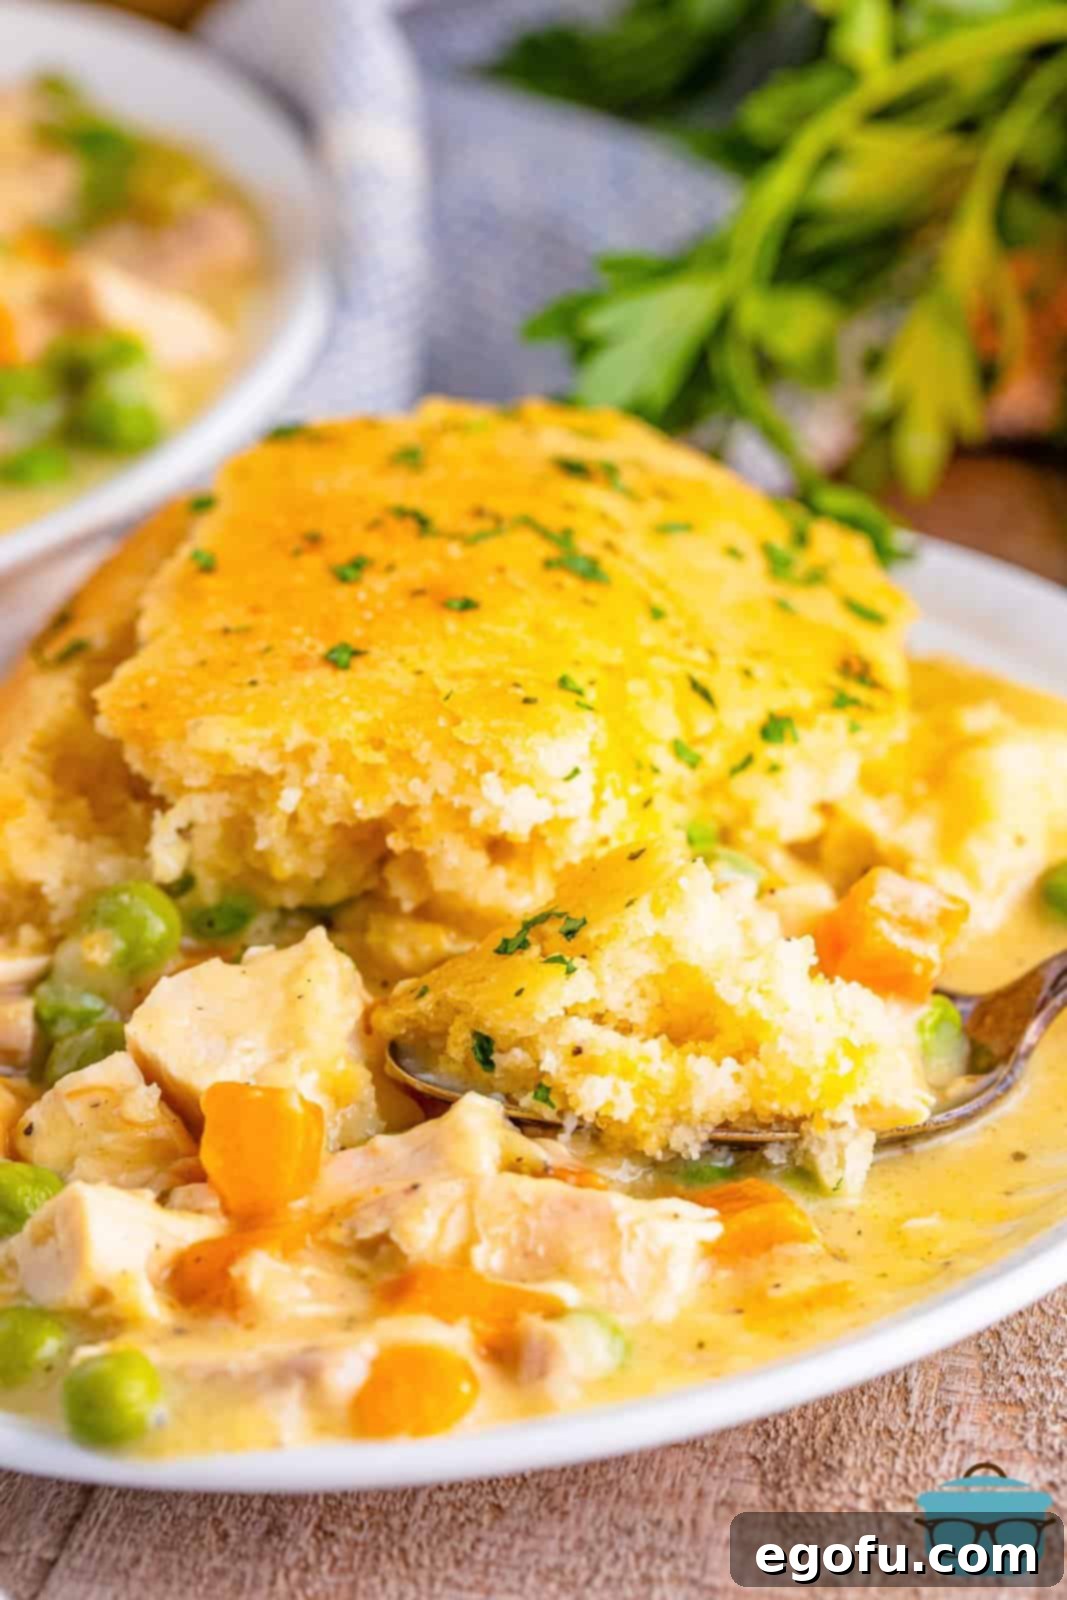

“I hadn’t known about the TikTok original version. I just stumbled upon your recipe. Glad I found yours, because it was delicious and flavorful. I do not feel the need to change it up or add anything else next time I make this. You made some great changes to the original recipe, now that I have seen the original viral video. This will be a go-to if I need to come up with something quick for dinner for guests.”
– Kay
FREQUENTLY ASKED QUESTIONS ABOUT CHICKEN COBBLER:
Yes, absolutely! While many cobblers are baked in ceramic or Pyrex dishes, a metal baking dish can certainly be used. It’s important to remember that metal conducts heat differently and often more efficiently than glass or ceramic. This means your chicken cobbler might cook slightly faster in a metal pan. Always make sure to generously coat your metal dish with cooking spray or butter to prevent sticking. Since I haven’t specifically tested this recipe with a metal pan, I recommend keeping a close eye on your cobbler, especially towards the end of the baking time, to prevent over-browning or drying out. The total cooking time should not be drastically different, but vigilance is key.
This recipe is wonderfully versatile when it comes to the protein. While we love the convenience and flavor of store-bought rotisserie chicken, feel free to use any cooked chicken you have on hand – whether it’s leftover grilled chicken, shredded chicken breasts, or even turkey! In fact, this cobbler makes an excellent post-Thanksgiving meal, perfect for utilizing those delicious turkey leftovers. For a different twist, you can even substitute ground beef. If you’re interested in trying it with ground beef, be sure to check out our dedicated Ground Beef Cobbler recipe for specific instructions and seasoning adjustments that will ensure a perfectly balanced and flavorful dish.
Your cobbler, your rules! This recipe is highly customizable to your vegetable preferences. If you’re a fan of potatoes, you can certainly add them. However, for best results, I strongly recommend parboiling (partially boiling) your potatoes before adding them to the casserole. This ensures they become tender enough during the baking process, especially if cut into larger chunks. Small diced potatoes might cook through without parboiling, but it’s a safer bet. Keep in mind that potatoes are notorious for soaking up liquids, so if you enjoy a very saucy cobbler, the potatoes will absorb some of that delicious gravy. For other quick additions, frozen mixed vegetables or broccoli florets work wonderfully and can be added directly from the freezer. And if you’re not keen on vegetables at all, feel free to omit them entirely – the cobbler will still be incredibly tasty!
While this recipe has been rigorously tested and perfected using Cheddar Bay Biscuit Mix, you can certainly experiment with other biscuit mixes. The key is to use a similar quantity as specified in our recipe to maintain the correct topping consistency. Be aware that using a different brand or type of biscuit mix may alter the final flavor profile and texture of the topping, as each mix has its unique blend of ingredients and seasonings. Unfortunately, I can’t provide specific instructions for every brand out there, so if you do try an alternative, you might need to make slight adjustments to milk quantity for the right dough consistency. If you give it a try with a different mix, please share your experience – we’d love to hear how it turns out for you!
Chicken Cobbler is truly a hearty and complete meal on its own, offering a perfect balance of protein, vegetables, and carbohydrates. However, if you’re looking to round out your dinner with some delicious side dishes, there are plenty of fantastic options that complement its rich flavors. Consider serving it alongside fresh, crisp green beans, simply steamed broccoli, glazed carrots, tender air-fried cauliflower, or a sweet and savory honey-glazed sweet potato dish. For a lighter contrast, a large, vibrant green salad with a zesty vinaigrette dressing would be an excellent choice, adding freshness and a touch of acidity to cut through the richness of the cobbler.
Storing your leftover Chicken Cobbler is straightforward. Once the dish has cooled completely to room temperature (this is crucial to prevent condensation and bacterial growth), transfer it to an airtight container. It will keep beautifully in the refrigerator for up to 3-4 days, making it perfect for meal prepping or quick lunches. Freezing leftovers is also an option, but be mindful that the texture of the biscuit topping might change slightly upon thawing and reheating, often becoming a bit softer. For the best quality, we do not recommend freezing the cobbler before it has been baked, as this can negatively impact the final texture of both the filling and the topping.
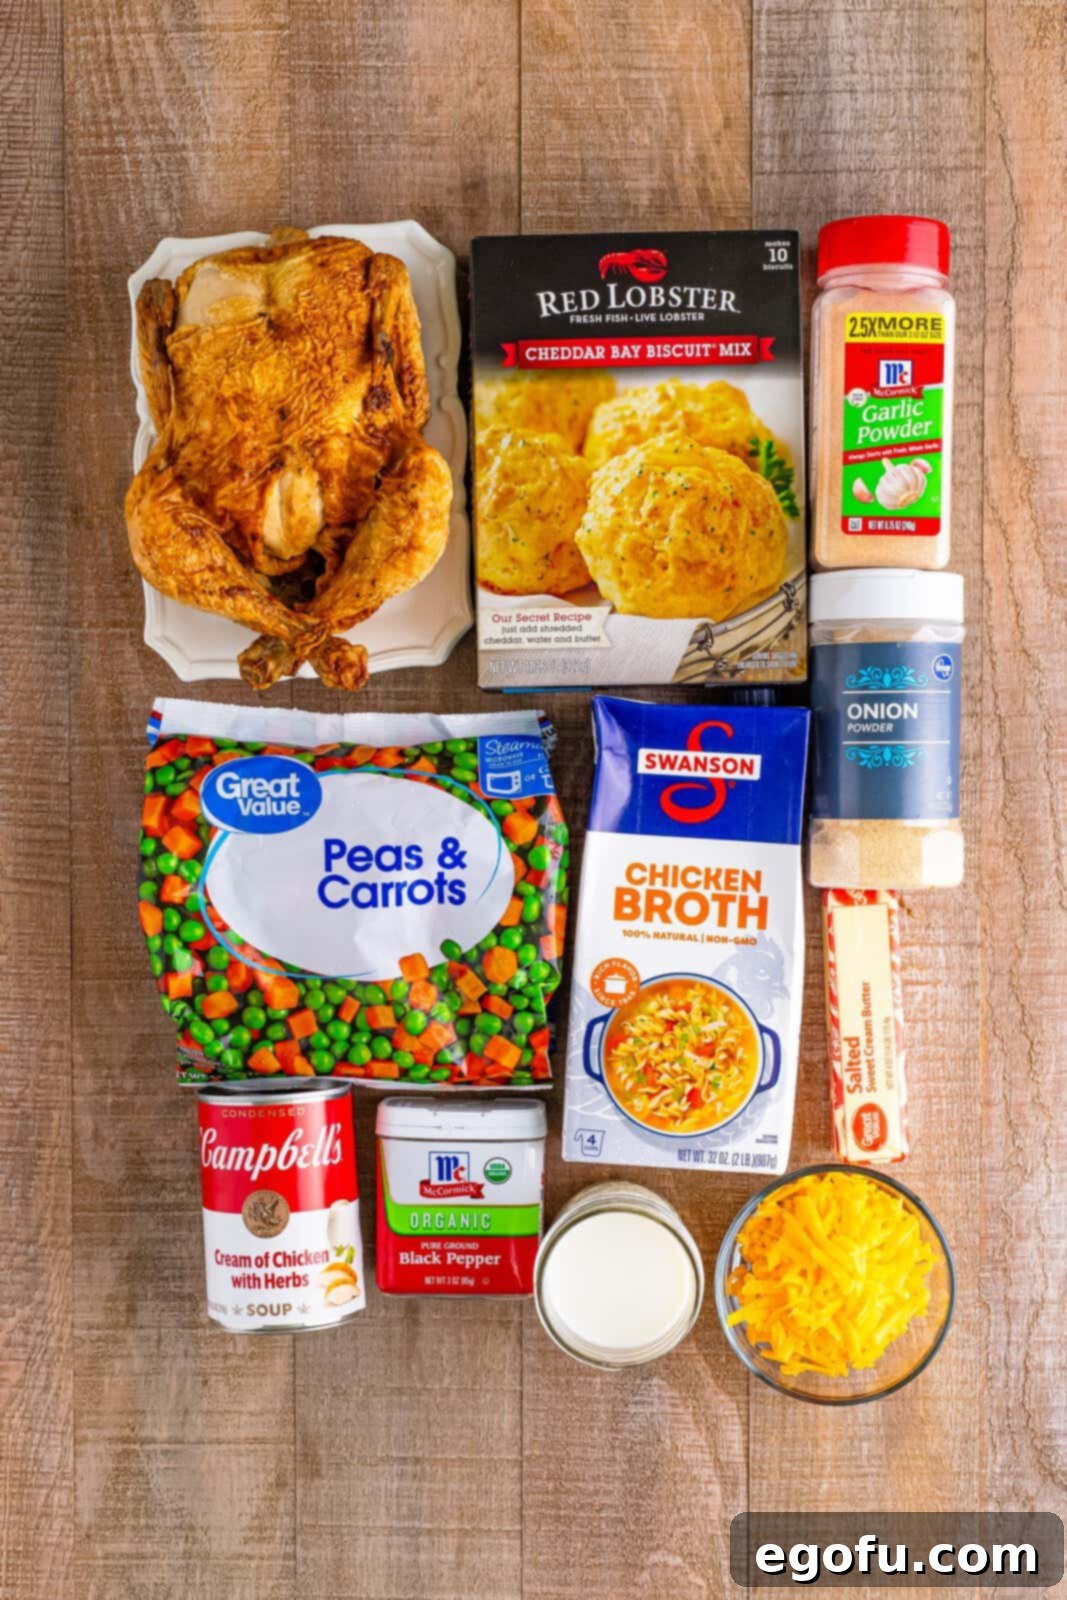
ESSENTIAL INGREDIENTS FOR OUR PERFECTED CHICKEN COBBLER:
Crafting the perfect Chicken Cobbler starts with selecting quality ingredients. Here’s a detailed look at what you’ll need and some helpful tips for each:
- Salted Butter: For this recipe, always opt for real salted butter. Margarine simply won’t provide the same rich flavor or desired texture, especially in the biscuit topping and the butter layer at the bottom of the dish.
- Rotisserie Chicken: This is our secret weapon for convenience! Using a pre-cooked rotisserie chicken is a huge time-saver and infuses the cobbler with fantastic, pre-seasoned flavor. A standard-sized rotisserie chicken works perfectly, but if you prefer a meatier cobbler, look for larger “family size” options available at stores like Sam’s Club or Costco. You’ll need to remove the meat from the bones and chop it into bite-sized pieces.
- Frozen Peas and Carrots: This classic combination adds a lovely sweetness and vibrant color to the cobbler. While we love peas and carrots, you have the flexibility to use other frozen mixed vegetables if you prefer, such as corn or green beans. Alternatively, if you or your family aren’t fond of vegetables, feel free to omit them entirely. We’ve only specifically tested this recipe with peas and carrots, so other vegetables might require slight adjustments in cooking time if they’re particularly dense.
- Cream of Chicken Soup with Herbs: This ingredient forms the creamy, flavorful base of our cobbler. The “with herbs” variety adds an extra layer of savory depth, enhancing the overall taste. If you can’t find the herbal version, regular cream of chicken soup will work perfectly well. For those who prefer a homemade touch, you can easily prepare your own using our Homemade Cream of Chicken Soup recipe for an even richer, more customizable flavor.
- Chicken Broth: The chicken broth helps create the ideal consistency for the creamy filling, ensuring it’s not too thick. For individuals mindful of their sodium intake or following a low-sodium diet, opting for low-sodium or no-sodium chicken broth is an excellent substitution without compromising flavor.
- Garlic Powder, Onion Powder, and Pepper: These seasonings are essential for boosting the flavor profile of the cobbler, transforming it from bland to wonderfully savory. Feel free to adjust the quantities to suit your personal taste, or even incorporate other chicken-friendly seasonings you enjoy, such as poultry seasoning, thyme, or paprika. Don’t skip the seasoning, as it truly makes a difference in the final dish!
- Cheddar Bay Biscuit Mix: This mix is the star of our cheesy biscuit topping. We specifically developed and tested this recipe using Cheddar Bay Biscuit Mix for its unique flavor and perfect texture. While other biscuit mixes could potentially work, we haven’t tested them. If you do decide to use a different brand, aim for a similar quantity and be prepared for potential variations in flavor and texture. We’d love to hear about your experience if you try an alternative!
- Shredded Cheddar Cheese: Adding shredded cheddar cheese to the biscuit topping is one of our key enhancements, providing an irresistible savory tang and gooey texture. For the best flavor and melt, we highly recommend freshly shredding your cheddar cheese from a block. However, if you’re pressed for time, pre-shredded cheese is a convenient alternative that will still yield delicious results.
HOW TO MAKE THE ULTIMATE CHICKEN COBBLER: A STEP-BY-STEP GUIDE
Making this delicious Chicken Cobbler is surprisingly straightforward. Follow these easy steps to create a hearty and flavorful meal that the whole family will adore:
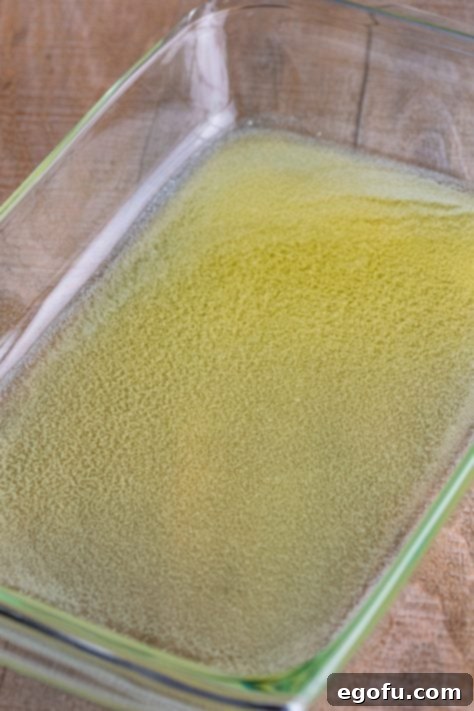
- Prepare Your Baking Dish: Begin by preheating your oven to 350° F (175° C). Take a 9×13-inch baking dish and pour the 4 tablespoons of melted salted butter evenly into the bottom. Gently tilt the dish from side to side to ensure the butter coats the entire base. Do not stir it into other layers.
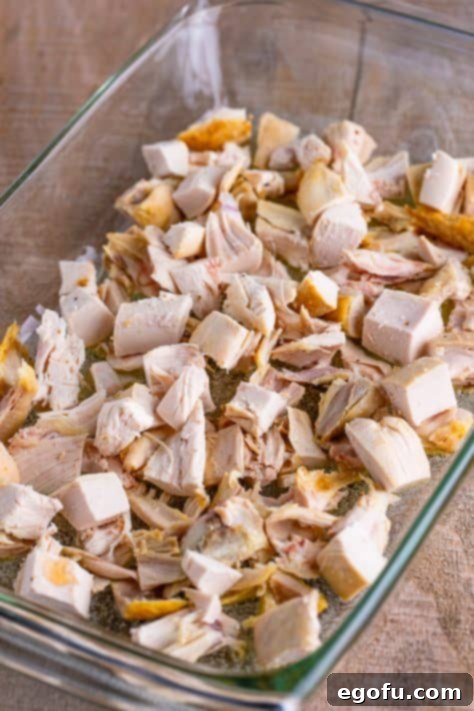
- Layer the Chicken: Evenly spread the chopped rotisserie chicken over the melted butter layer in the baking dish. It’s important not to stir the layers at this stage, as each component contributes to the unique structure of the cobbler.
- Add the Vegetables: Next, uniformly sprinkle the frozen peas and carrots (or your chosen mixed vegetables) directly over the chicken layer. Again, resist the urge to stir. These distinct layers are what make the cobbler so special.
- Whisk the Creamy Base: In a separate mixing bowl, whisk together the 10.5-ounce can of cream of chicken soup with herbs, 2 cups of chicken broth, 1 teaspoon of garlic powder, 1 teaspoon of onion powder, and ½ teaspoon of black pepper until thoroughly combined and smooth. These seasonings are key to a flavorful filling.
- Pour the Gravy: Carefully pour the whisked soup mixture over the chicken and vegetable layers in the baking dish. Ensure it spreads evenly, but still, do not stir. For convenience and to minimize dishwashing, rinse and dry this same bowl; you’ll use it for the biscuit topping next.
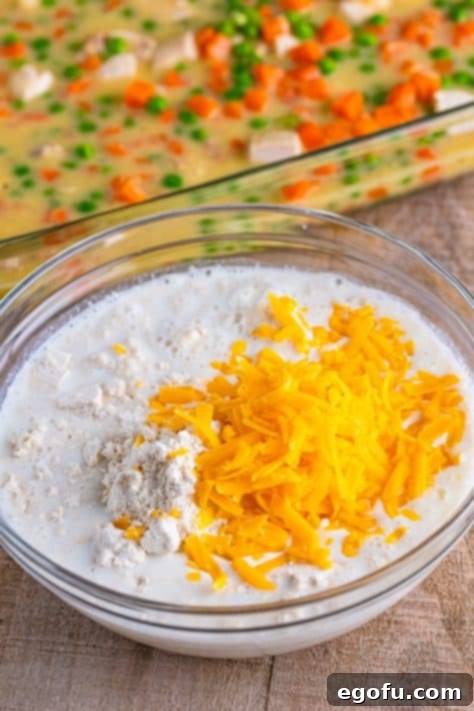
- Prepare the Biscuit Topping: In the now-clean bowl, combine the 11.36-ounce Cheddar Bay Biscuit Mix, 2 cups of milk, and ½ cup of shredded cheddar cheese. Stir until all ingredients are well combined and form a thick, cohesive dough. A crucial tip: remember to reserve the small seasoning packet that comes with the biscuit mix; we’ll be using that later for the butter topping.
- Top the Cobbler: Gently spread the biscuit mix layer as evenly as possible over the creamy chicken and vegetable layers in the baking dish. Be careful not to disturb the underlying layers. Again, do not stir.
- Bake to Golden Perfection: Place the uncovered baking dish into your preheated oven and bake for approximately 50-60 minutes. Baking times can vary depending on your specific oven, so keep an eye on it. You’re looking for the top to be beautifully golden brown and the filling underneath to be bubbly around the edges. If the topping browns too quickly, you can loosely tent it with aluminum foil.
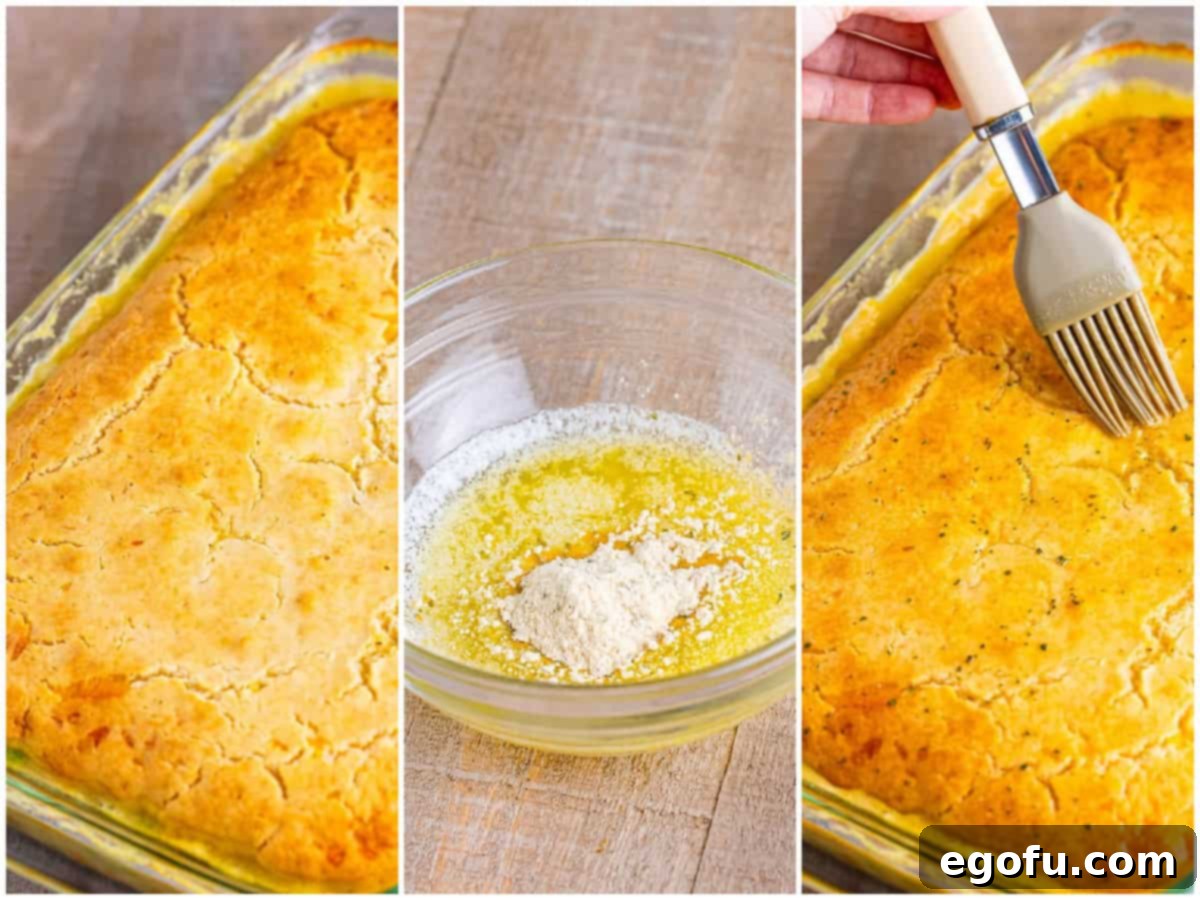
- Prepare the Garlic Butter Topping: While the cobbler is still hot, remove it from the oven. In a small bowl, melt the remaining 2 tablespoons of salted butter. Carefully open the reserved seasoning packet from the Cheddar Bay Biscuit Mix and stir its contents into the melted butter.
- Brush and Garnish: Using a pastry brush, generously spread this fragrant garlic butter mixture evenly over the golden biscuit topping of the hot cobbler. This step truly enhances the flavor and gives the crust an irresistible sheen. For an added touch of color (optional, but lovely!), you can sprinkle a little dried parsley on top. This is purely for visual appeal and doesn’t impact the flavor.
- Rest Before Serving: This is a vital step for a perfect cobbler! Allow the chicken cobbler to rest for at least 10 minutes after removing it from the oven. This resting period allows the filling to set and thicken slightly, preventing it from being too runny when served. When scooping, the filling will still be on the thinner side, so serve a portion of the biscuit and chicken, then spoon any remaining creamy filling from the dish over the top of each serving.



Following these steps will ensure you create a truly delicious and comforting Chicken Cobbler that’s perfect for any occasion. Enjoy the rich flavors and satisfying textures of this family favorite!
CRAVING MORE COMFORTING RECIPES?
- Ritz Cracker Chicken Casserole
- Chicken and Biscuits Casserole
- Cattle Drive Casserole
- One Pot Chicken and Stuffing
- Mini Chicken Pot Pies
- Neiman Marcus Chicken Casserole
- No Peek Chicken Casserole
- Chicken and Stuffing Casserole
- Shepherds Pie
- Chicken Noodle Casserole
- Malibu Chicken Casserole
- Chicken and Rice Casserole
- Crock Pot Mississippi Chicken
- Butter Swim Biscuits
- Creamy Chicken Bundles
- Swiss Chicken Casserole
- Chicken Pot Pie Bubble Up
- 30 Comforting Casseroles

Chicken Cobbler
Chicken Cobbler is an easy comfort meal that will definitely go into your regular dinner rotation! With simple ingredients and just a little bit of prep, this dinner is sure to be a family favorite!
Pin Recipe
Rate This Recipe
Prep Time: 15 minutes
Cook Time: 1 hour
Rest Time: 10 minutes
Total Time: 1 hour 25 minutes
Servings: 9 servings
Author: Brandie Skibinski
Ingredients
For the Cobbler
- 4 Tablespoons salted butter, melted
- 1 rotisserie chicken, meat removed and chopped (about 3-4 cups)
- 12 ounce bag frozen peas and carrots (or mixed vegetables)
- 10.5 ounce can cream of chicken soup with herbs (or regular cream of chicken)
- 2 cups chicken broth
- 1 teaspoon garlic powder
- 1 teaspoon onion powder
- ½ teaspoon pepper
- 11.36 ounce Cheddar Bay Biscuit Mix (reserve seasoning packet for later)
- 2 cups milk (2% or higher)
- ½ cup shredded cheddar cheese
For the Butter Topping
- 2 Tablespoons salted butter, melted
- 1 seasoning packet from box of biscuit mix (reserved from above)
Instructions
- Preheat the oven to 350° F. In a 9×13-inch baking dish, pour in the melted butter evenly into the bottom. You may need to tilt the baking dish a few ways to get it to spread out.

- Layer the chopped chicken evenly on top of the melted butter (do not stir.)

- Then evenly sprinkle the frozen peas and carrots on top of the chicken layer (do not stir).

- In a separate bowl, whisk together cream of chicken soup, chicken broth, garlic powder, onion powder and black pepper.

- Pour this mixture over the chicken and peas and carrot layers (do not stir.) At this point I rinse and dry that same bowl out so I don’t make more dirty dishes and continue with the next step.

- In that same bowl, stir together the biscuit mix with the milk and shredded cheese until combined well. (Do not add the seasoning packet from the biscuit mix, we’re going to use that for the topping later.)

- Pour this biscuit mix layer as evenly possible on top of the other layers in the baking dish (do not stir.)

- Bake uncovered for about 50-60 minutes until bubbly and top is golden brown. Note: oven times do vary so it could take longer (or shorter) in your oven. You want the crust to be golden brown. So cook until you get that light golden brown color.

- Remove from the oven and make butter topping. In a small bowl combine melted butter and the contents of the seasoning packet that came with the biscuit mix.

- Brush this evenly over the top of the cobbler. Note: I also sprinkled a little dried parsley on top to give it a bit of color but this is not necessary for flavor.

- Allow the cobbler to rest for at least 10 minutes. If you dig into it too soon after removing from the oven, it will be a bit too runny. Allowing it to rest for a few minutes will help to thicken up the filling a bit and will make it easier to serve. Note: this filling is still on the thin side so when you serve it, scoop up a serving then spoon any filling left behind on top.

Video
Notes
- For more details on substitutions or common questions, please refer to the “Frequently Asked Questions” and “Ingredients Needed” sections above.
- We prefer chopped chicken over shredded chicken in this recipe for a more satisfying texture. However, if you enjoy shredded chicken, feel free to shred the rotisserie chicken using two forks before adding it to the dish.
- Due to the slightly thinner consistency of the filling, we recommend serving individual portions in a plate with higher sides or a shallow bowl to best contain the delicious sauce.
- If you are managing your sodium intake, feel free to use low-sodium or no-sodium chicken broth and adjust other seasonings as needed.
- Leftovers should be stored in an airtight container in the refrigerator for up to 3-4 days. While freezing is possible, the biscuit topping’s texture may soften upon thawing. We do not advise freezing the cobbler before it has been baked.
Course: Main Course
Cuisine: American
Nutrition
Calories: 245kcal | Carbohydrates: 24g | Protein: 6g | Fat: 14g | Sodium: 779mg | Fiber: 2g | Sugar: 5g
Nutritional Disclaimer
“The Country Cook” is not a dietician or nutritionist, and any nutritional information shared is an estimate. If calorie count and other nutritional values are important to you, we recommend running the ingredients through whichever online nutritional calculator you prefer. Calories and other nutritional values can vary quite a bit depending on which brands were used.
Did you make this recipe? Share your creation on Instagram @thecountrycook and tag us #thecountrycook!
Recipe adapted from @yourbarefootneighbor
