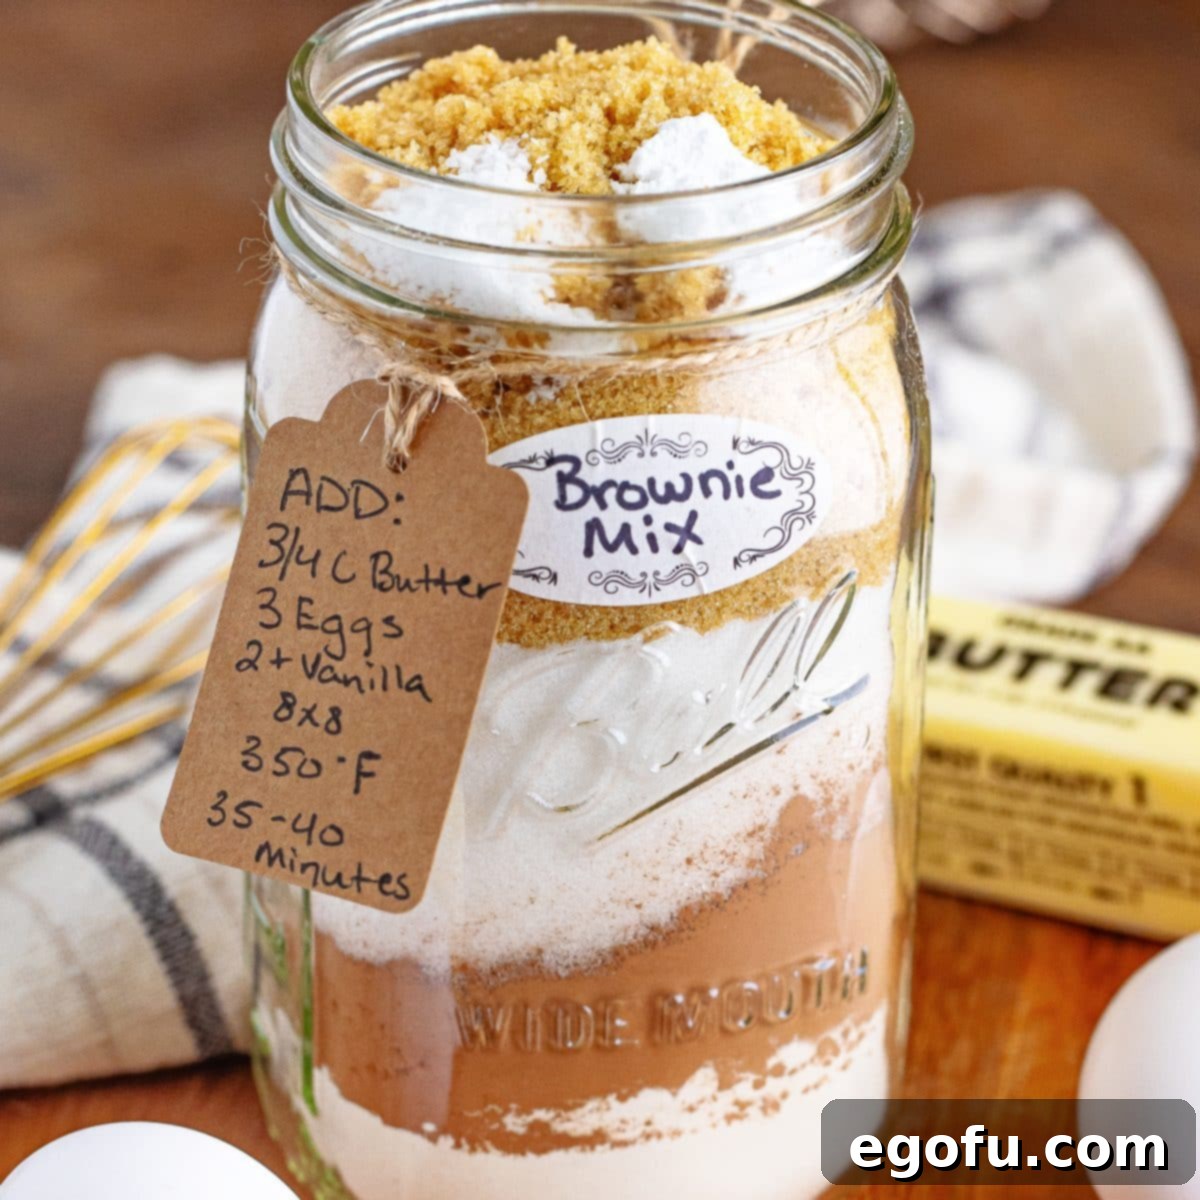
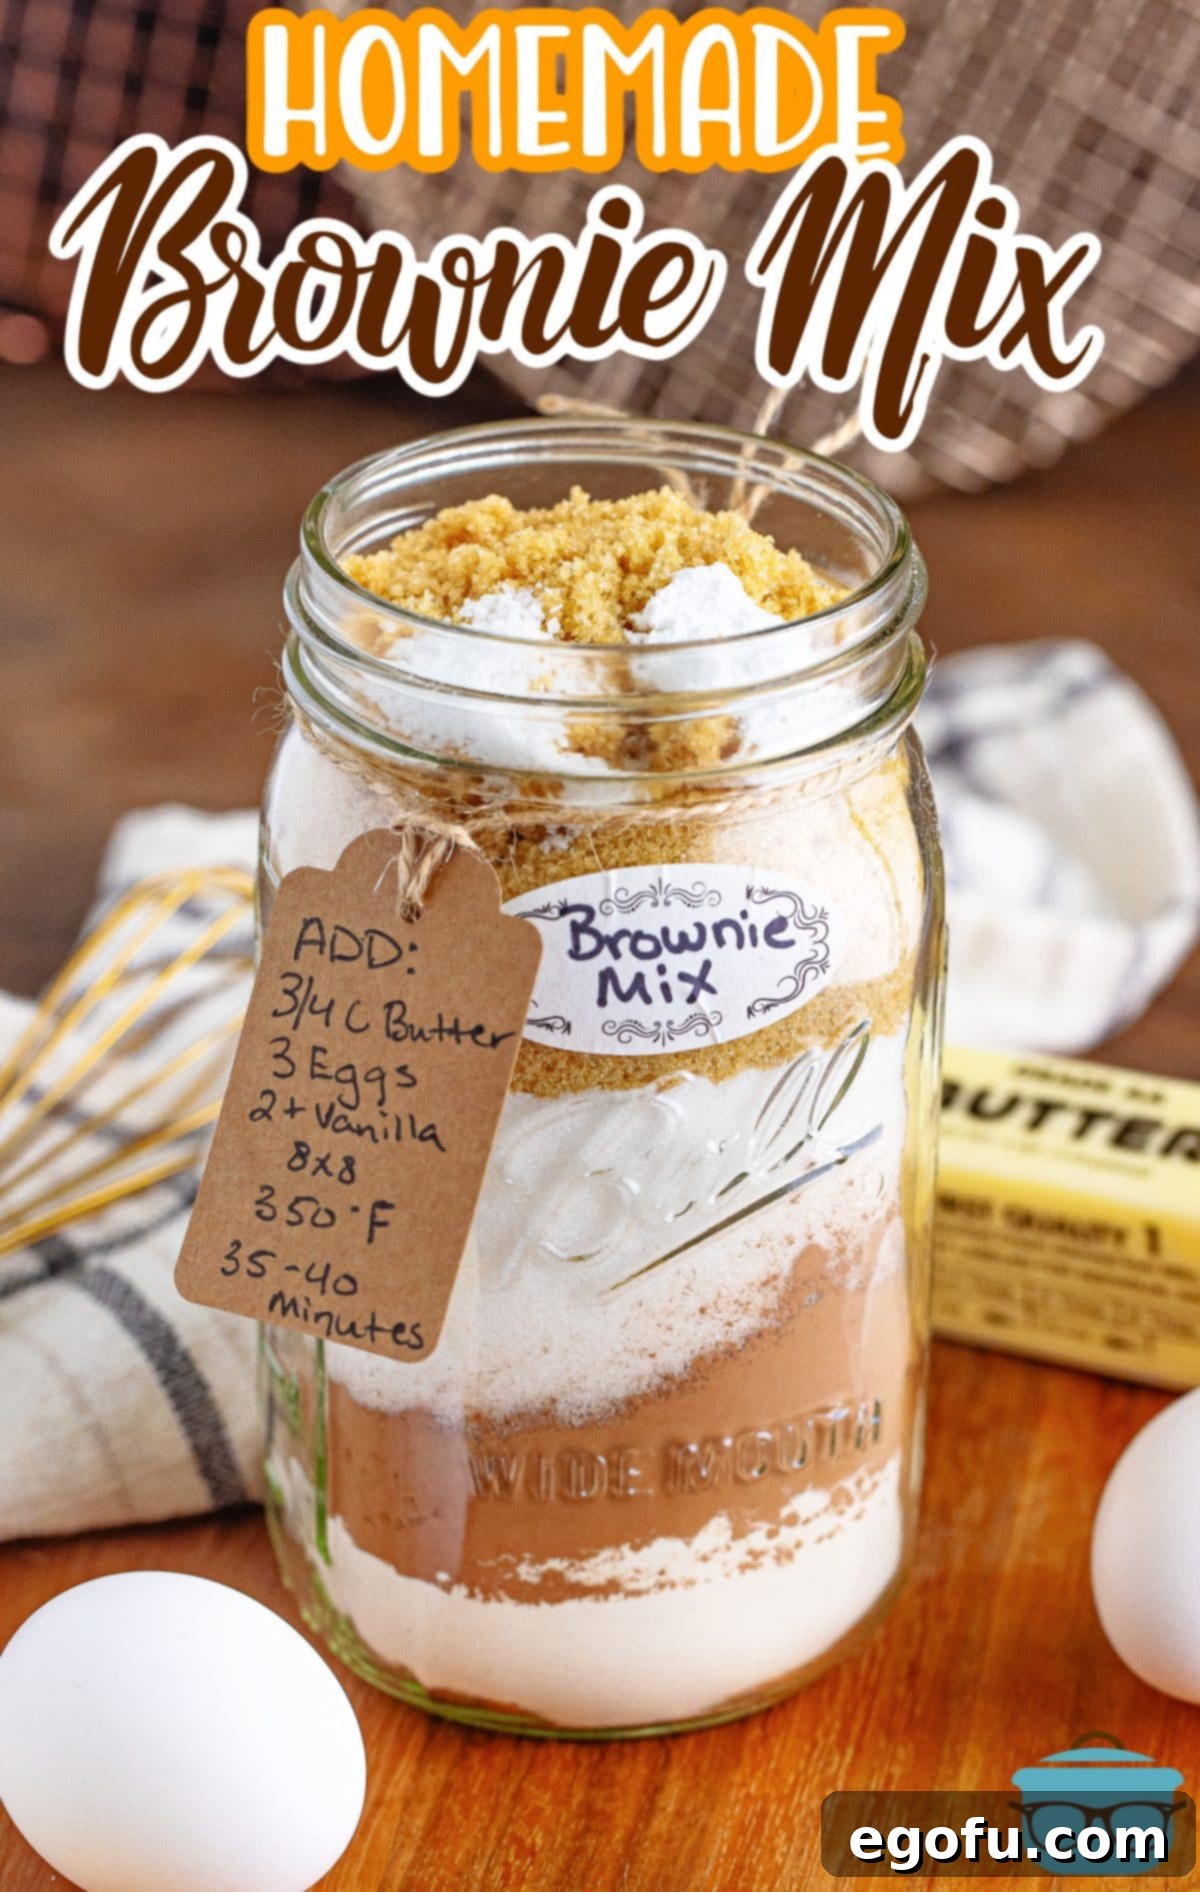
Welcome to the ultimate guide for crafting your very own Homemade Brownie Mix! Imagine being able to whip up a batch of rich, fudgy brownies at a moment’s notice, or presenting a beautifully layered jar of homemade goodness as a thoughtful gift. This isn’t just any brownie mix; it’s specifically designed to deliver delightfully thick, chewy, and intensely chocolatey brownies every single time. Forget the store-bought boxes filled with unpronounceable ingredients; with this simple recipe, you’ll have complete control over the quality and flavor, ensuring a genuinely special treat for yourself, your family, or your lucky recipients.
The Ultimate Homemade Brownie Mix: Your Go-To for Fudgy Perfection
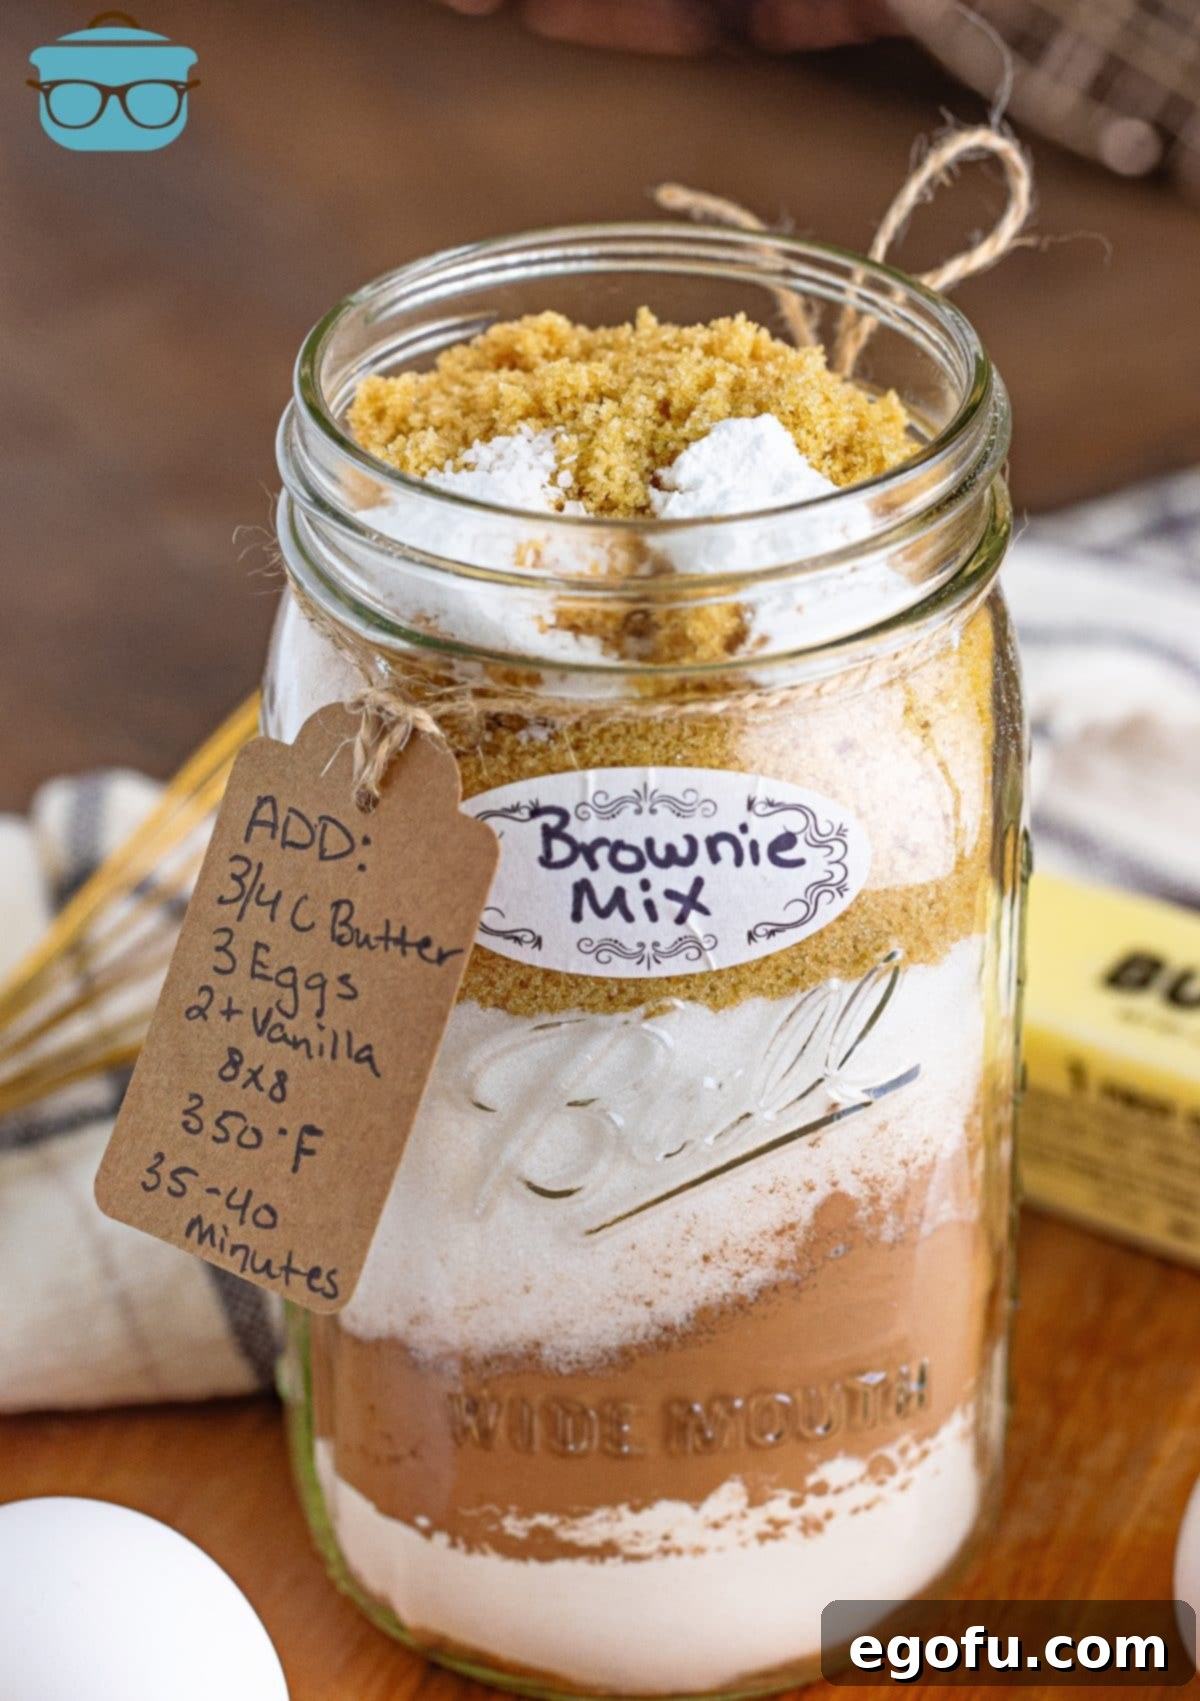
There’s an undeniable charm in homemade gifts, and this brownie mix jar tops the list for its simplicity and universal appeal. Who doesn’t appreciate the gift of delicious food, especially when it’s made with love? Presenting this mix in an attractive jar with a personalized tag and baking instructions transforms it into a heartwarming present for any occasion – be it holidays, birthdays, or just a sweet gesture to brighten someone’s day. It shows you’ve put thought and effort into their enjoyment, a sentiment often lost with mass-produced items.
Beyond gifting, having this easy-to-use brownie mix stocked in your pantry is a game-changer for spontaneous baking. Craving warm, gooey brownies after a long day? Unexpected guests dropping by? Your homemade mix is ready to transform into a decadent dessert with minimal fuss. While store-bought mixes offer convenience, they often fall short on flavor and texture compared to a homemade version. This recipe guarantees that deep, rich chocolate flavor and that coveted fudgy texture – a perfect balance of chewy edges and a moist, dense center that is truly irresistible. It’s not just a mix; it’s an invitation to a delightful baking experience, promising exceptional brownies every time.
Why Choose Homemade: Beyond the Box
Opting for a homemade brownie mix offers numerous advantages over its store-bought counterparts. Firstly, it provides unparalleled control over ingredients. You dictate what goes into your mix, allowing you to avoid artificial flavors, colors, and preservatives often found in commercial products. This makes it an excellent choice for those with dietary concerns or who simply prefer a cleaner, more natural approach to baking. Secondly, it’s often more cost-effective. Buying staple ingredients in bulk and assembling your own mixes can save money in the long run, especially if you’re a frequent baker or plan to make multiple gift jars.
Thirdly, the flavor profile is simply superior. By using high-quality cocoa powder and carefully selected sugars, this homemade mix creates brownies with a depth of chocolate flavor and a nuanced sweetness that boxed mixes can’t replicate. The inclusion of light brown sugar, in particular, is a secret weapon, contributing to a wonderfully moist and chewy texture with subtle caramel notes that enhance the overall experience. Lastly, there’s the sheer joy and satisfaction of creating something from scratch. The process of layering the ingredients, the anticipation of baking, and the reward of biting into a perfectly fudgy brownie made from your own mix is incredibly fulfilling. It transforms a simple dessert into a personal triumph, making every bite even more enjoyable.
Mastering the Perfect Fudgy Brownie from Your Mix
Understanding the science behind brownies helps explain why this particular mix consistently produces fudgy results. The key lies in the balance of fat, sugar, and flour, along with the egg content. Fudgy brownies typically have a higher fat-to-flour ratio and fewer leavening agents, resulting in a dense, moist, and almost melt-in-your-mouth texture. This recipe incorporates specific quantities of all-purpose flour, unsweetened cocoa powder, and a generous amount of both granulated and light brown sugar, which not only contribute to sweetness but also to moisture retention and chewiness. The light brown sugar is particularly crucial here, as its molasses content adds moisture and a distinct depth of flavor that separates truly great brownies from merely good ones.
When you add the wet ingredients (melted butter, eggs, and vanilla extract) to this precisely balanced dry mix, you’re creating a batter that’s primed for fudginess. The melted butter ensures a rich, dense crumb, while the standard three eggs provide just enough structure without making the brownies too cake-like. The minimal amount of baking powder allows for a slight lift, preventing the brownies from becoming too flat, but maintains that signature dense, chewy texture. By following the recommended baking time and the specific doneness test – where the toothpick comes out with moist crumbs, not liquid batter – you lock in the moisture and prevent overbaking, which is the nemesis of any truly fudgy brownie. This careful design ensures that your homemade brownies will always hit that sweet spot of chocolatey perfection.
Frequently Asked Questions: All Your Brownie Mix Queries Answered
Absolutely! This brownie mix serves as a fantastic blank canvas for your creative additions. At step 6 of the baking instructions, once your batter is smoothly combined, feel free to fold in your favorite mix-ins. Popular choices include chocolate chips (dark, milk, or white), chopped nuts (walnuts, pecans, almonds), pieces of candy bars, or even dried fruits like cherries or cranberries for a delightful twist. Experiment and make them truly your own!
While this mix is designed for fudgy brownies, you can easily adjust it to achieve a more cake-like texture. Simply add one extra large egg to your batter when you’re mixing in the wet ingredients. The additional egg will provide more structure and leavening, resulting in a lighter, more airy, and cake-like brownie. Adjust baking time slightly if needed, as cakier brownies may bake a bit faster.
Yes, you can certainly double the recipe to prepare more mix. If you’re creating the dry mix to store, it’s best to measure and layer the ingredients for two separate jars to ensure proper proportions and fit. If you wish to bake a double batch of brownies from two jars of mix at once, we recommend using a larger 9×13-inch baking dish instead of an 8×8-inch pan. Remember that baking times may vary slightly for a larger batch, so keep an eye on them towards the end.
Attractive gift tags and decorative string can usually be found at most large retail stores like Walmart or Target, especially in their craft or party supply sections. Craft stores such as Michael’s are also excellent sources for a wide variety of styles. For convenience, you can often find affordable options online, including this Amazon link for reference (please note this is an affiliate link). These small details truly elevate your homemade gift!
When properly stored in an airtight container, such as a sealed mason jar, in a cool, dark, and dry place (like a pantry cupboard), your homemade brownie mix will remain fresh and ready to use for up to 3 months. This shelf life allows ample time for gifting or for your own baking endeavors.
The delicious brownies baked from this homemade mix will stay fresh and moist at room temperature for up to 5 days. For best results, store them in an airtight container to prevent them from drying out. They’re usually devoured long before the 5-day mark, though!
Yes, absolutely! Brownies freeze exceptionally well. Once they have completely cooled, cut them into individual squares and wrap them tightly in plastic wrap, then place them in an airtight freezer-safe container or freezer bag. They will keep in the freezer for up to 3 months. Thaw them at room temperature or warm them slightly in the microwave for a fresh-baked taste.
Ingredients for Your Signature Brownie Mix: Crafting the Perfect Blend
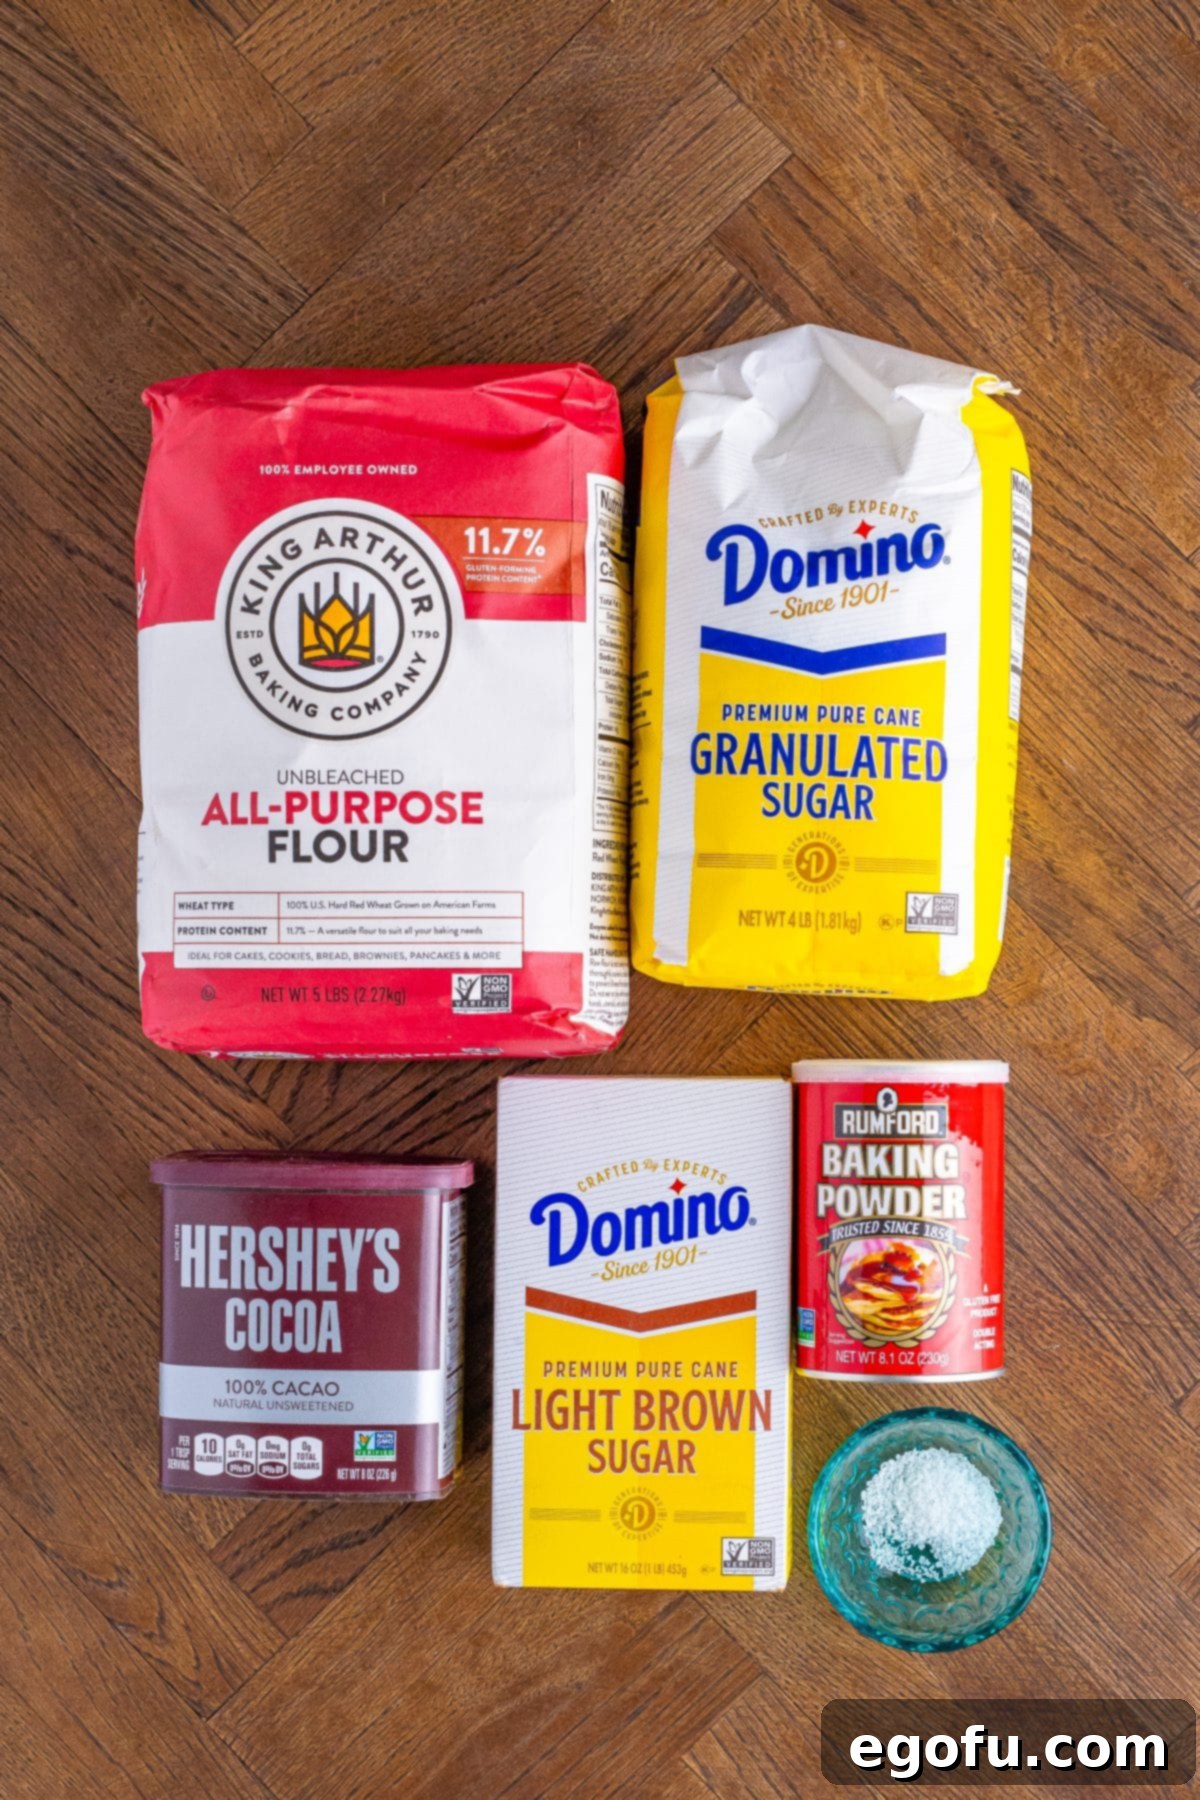
Creating this homemade brownie mix starts with a few basic pantry staples, each playing a crucial role in achieving the desired fudgy texture and rich flavor. The magic truly happens when these dry ingredients are combined in just the right proportions.
- All-purpose flour: This provides the primary structure for your brownies. Using all-purpose flour helps achieve that perfect balance between fudginess and a slight chew, ensuring the brownies aren’t too cakey or too crumbly.
- Unsweetened cocoa powder: The star of the show, delivering that intense chocolate flavor. High-quality unsweetened cocoa powder is essential for a deep, rich taste without added sweetness, allowing the sugars to do their job perfectly.
- Granulated sugar: Contributes to the sweetness and also helps achieve a moist, dense texture. It dissolves easily, creating a smooth batter. For those managing sugar intake, a 1:1 sugar substitute designed for baking, such as Splenda for baking, can be used as a direct replacement.
- Light brown sugar (packed): This ingredient is key to the brownies’ incredible depth of flavor and their characteristic moist, chewy texture. The molasses in brown sugar adds a subtle caramel note and retains moisture, making the brownies wonderfully soft. If you require a sugar-free option, Splenda also offers a brown sugar substitute that works well.
- Baking powder: A small amount of baking powder is included to provide just enough lift to the brownies, preventing them from being too dense, while still maintaining their desired fudginess. It’s a fine balance to ensure they don’t become cake-like.
- Salt: A pinch of salt is crucial for balancing the sweetness and enhancing all the other flavors in the mix, particularly the chocolate. It brightens the overall taste profile, making the brownies truly irresistible.
Assembling Your Brownie Mix Jar: A Step-by-Step Guide
The beauty of a homemade brownie mix, especially when intended as a gift, lies not only in its taste but also in its presentation. Layering the ingredients creates an attractive visual, making the jar look appealing and professional. Here’s how to assemble your mix:
- Choose a clean, dry 2-quart mason jar or any other similar jar with an airtight lid. The transparency of a glass jar is ideal for showcasing the layers.
- Carefully layer the ingredients one by one. Start with the all-purpose flour at the bottom, creating a clean base.
- Next, gently add the unsweetened cocoa powder. Its dark color will create a striking contrast with the lighter flour.
- Follow with the granulated sugar, tapping the jar gently to level the layer before adding the next ingredient.
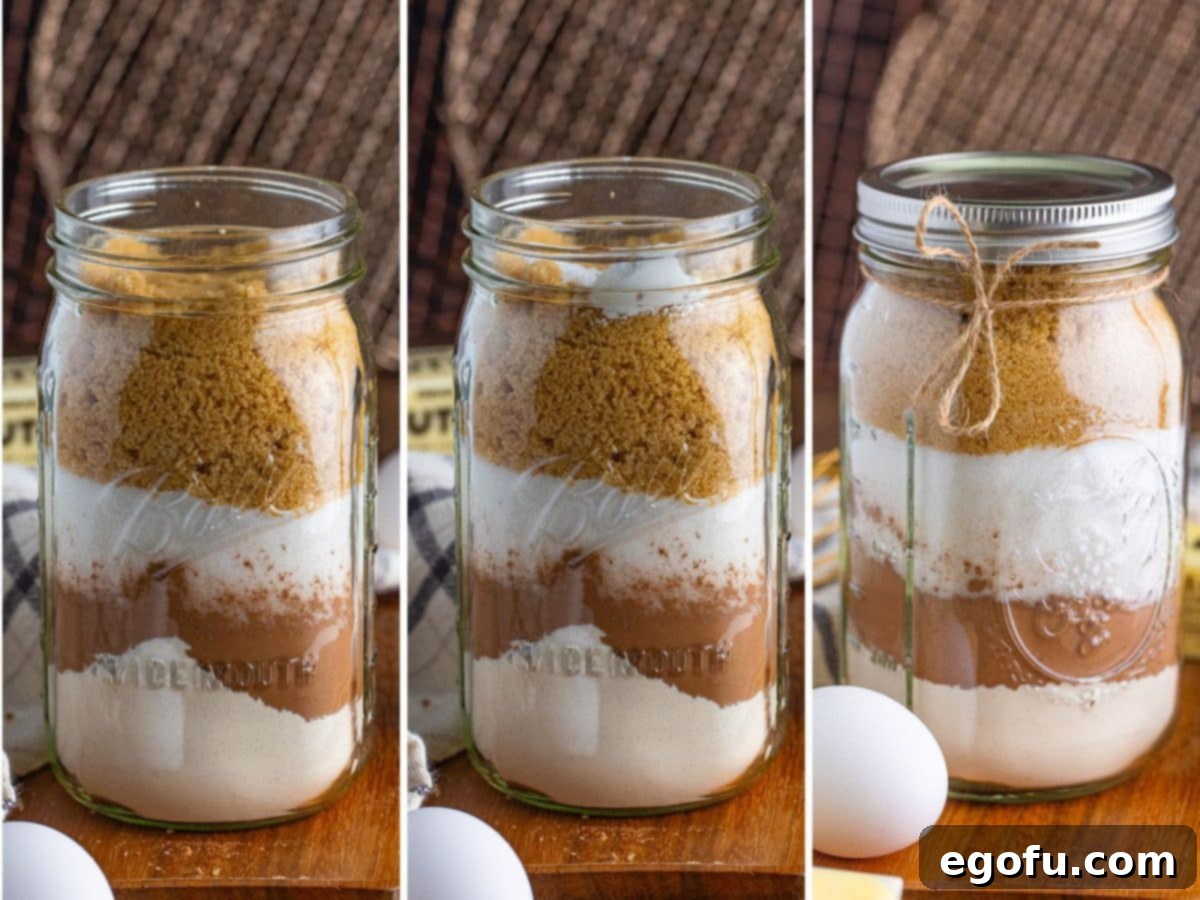
- Then, add the packed light brown sugar. Its slightly darker, clumpy texture will create another distinct layer. You may need to press this down lightly to ensure it forms an even layer.
- Finally, sprinkle the baking powder and salt over the brown sugar. These smaller quantities don’t necessarily need to form a perfect layer but should be evenly distributed on top.
- As you add each ingredient, you may need to compress them gently with the back of a spoon or your hand to ensure everything fits snugly into the 2-quart jar. This also helps prevent the layers from mixing during storage or transport.
- Once all ingredients are layered, secure the lid tightly. This prevents moisture and air from getting in, which helps maintain the freshness and quality of your mix for up to 3 months when stored in a cool, dark, and dry pantry.
For an extra touch, attach a pretty tag with the instructions on how to bake the brownies (provided below) and a decorative ribbon. This thoughtful presentation transforms a simple mix into a cherished homemade gift.
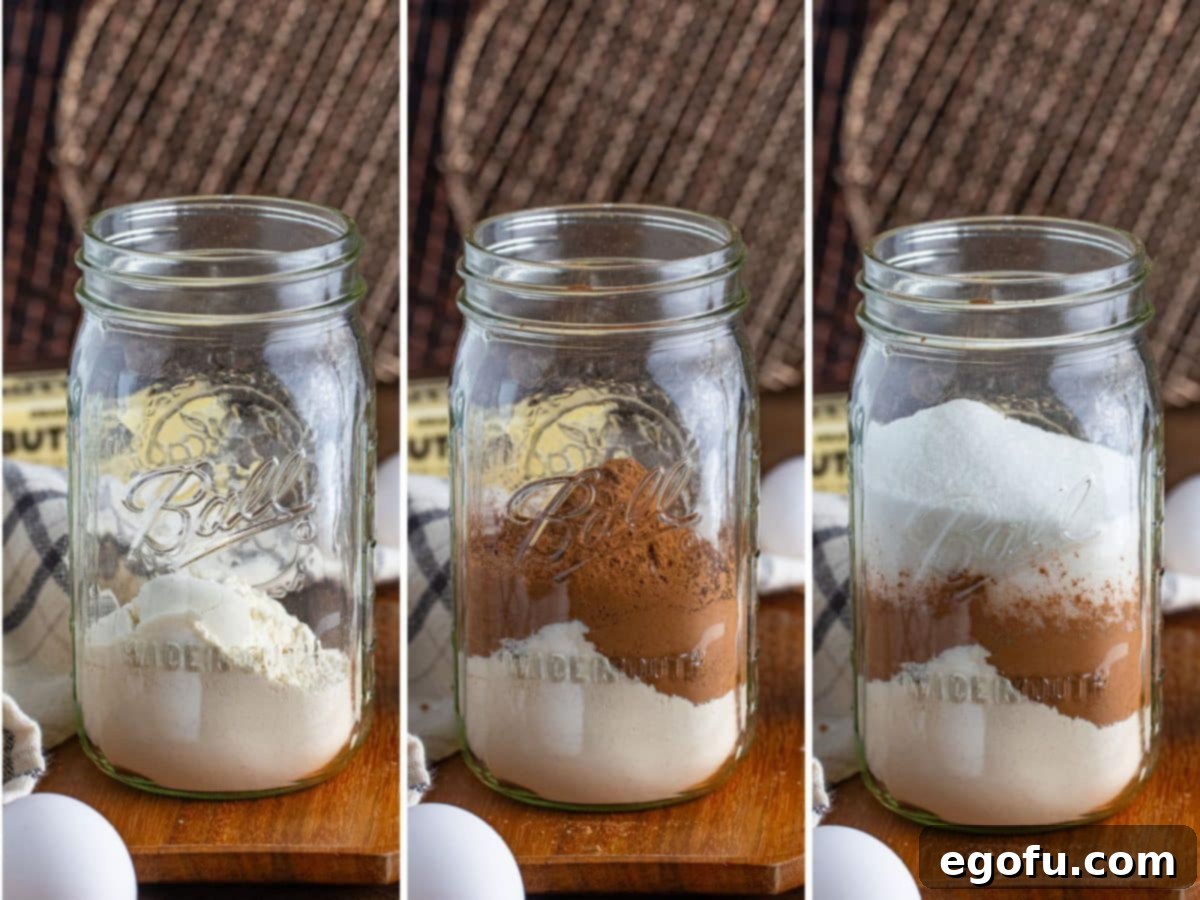
You may need to compress the ingredients a bit to fit. Place the top on and store for up to 3 months at room temperature.
Baking from Your Homemade Mix: Tips for Irresistible Brownies
Once your homemade brownie mix is ready, baking up a batch of glorious brownies is incredibly straightforward. The key to success lies in a few simple steps and understanding how to achieve that perfect fudgy texture. Follow these instructions carefully for the best results:
- Prepare Your Oven and Pan: Begin by preheating your oven to 350°F (175°C). This ensures the oven is at the correct temperature for even baking from the moment your brownies enter. Next, generously spray an 8×8-inch baking dish with nonstick baking spray. For extra easy removal and cleanup, you can also line the dish with parchment paper, leaving an overhang on two sides to create “handles.” Set the prepared pan aside.
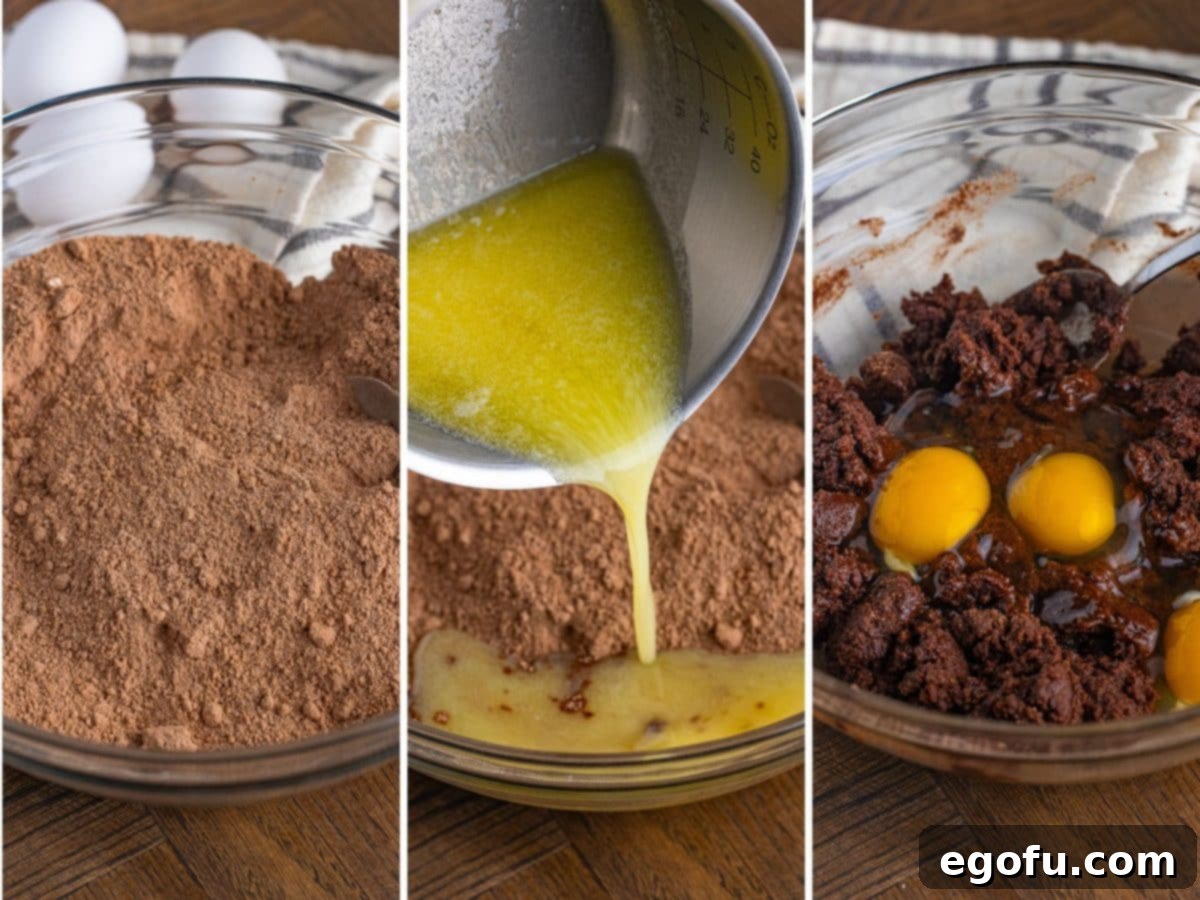
- Combine the Dry Mix: Pour the entire contents of your brownie mix jar into a large mixing bowl. The dry ingredients will likely be layered, so it’s essential to stir them thoroughly to ensure they are well combined and evenly distributed before adding any wet components. This guarantees a consistent flavor and texture throughout your brownies.
- Incorporate the Butter: Add ¾ cup of melted salted butter to the dry mix. Stir this in until the mixture is mostly moistened. The melted butter contributes significantly to the fudgy texture and rich taste of the brownies. Make sure there are no large pockets of dry mix remaining.
- Add Eggs and Vanilla: Crack 3 large eggs into the bowl, and add 2 teaspoons of vanilla extract. Vanilla enhances the chocolate flavor and adds a touch of aromatic sweetness. Mix all the ingredients together until the batter is smooth and uniform. Be careful not to overmix at this stage; mix just until no streaks of dry ingredients remain to ensure tender brownies.
Pour the batter into the prepared baking dish and smooth out the top. Bake for 35-40 minutes until a toothpick inserted into the center comes out mostly clean, you still want some moist crumbs and a little batter on the toothpick, but nothing wet. This ensures fudgy brownies.
- Bake to Perfection: Pour the luscious brownie batter into your prepared 8×8-inch baking dish. Use a spatula to spread it evenly and smooth out the top. Place the dish in your preheated oven and bake for 35-40 minutes. The baking time is crucial for achieving fudgy brownies. To check for doneness, insert a toothpick into the center of the brownies. For truly fudgy brownies, the toothpick should come out with moist crumbs attached, or even a little bit of wet batter, but no raw, liquid batter. If it comes out completely clean, your brownies might be on the cakier side or slightly overbaked. Trust your judgment here – a slightly underbaked brownie often leads to ultimate fudginess once cooled.
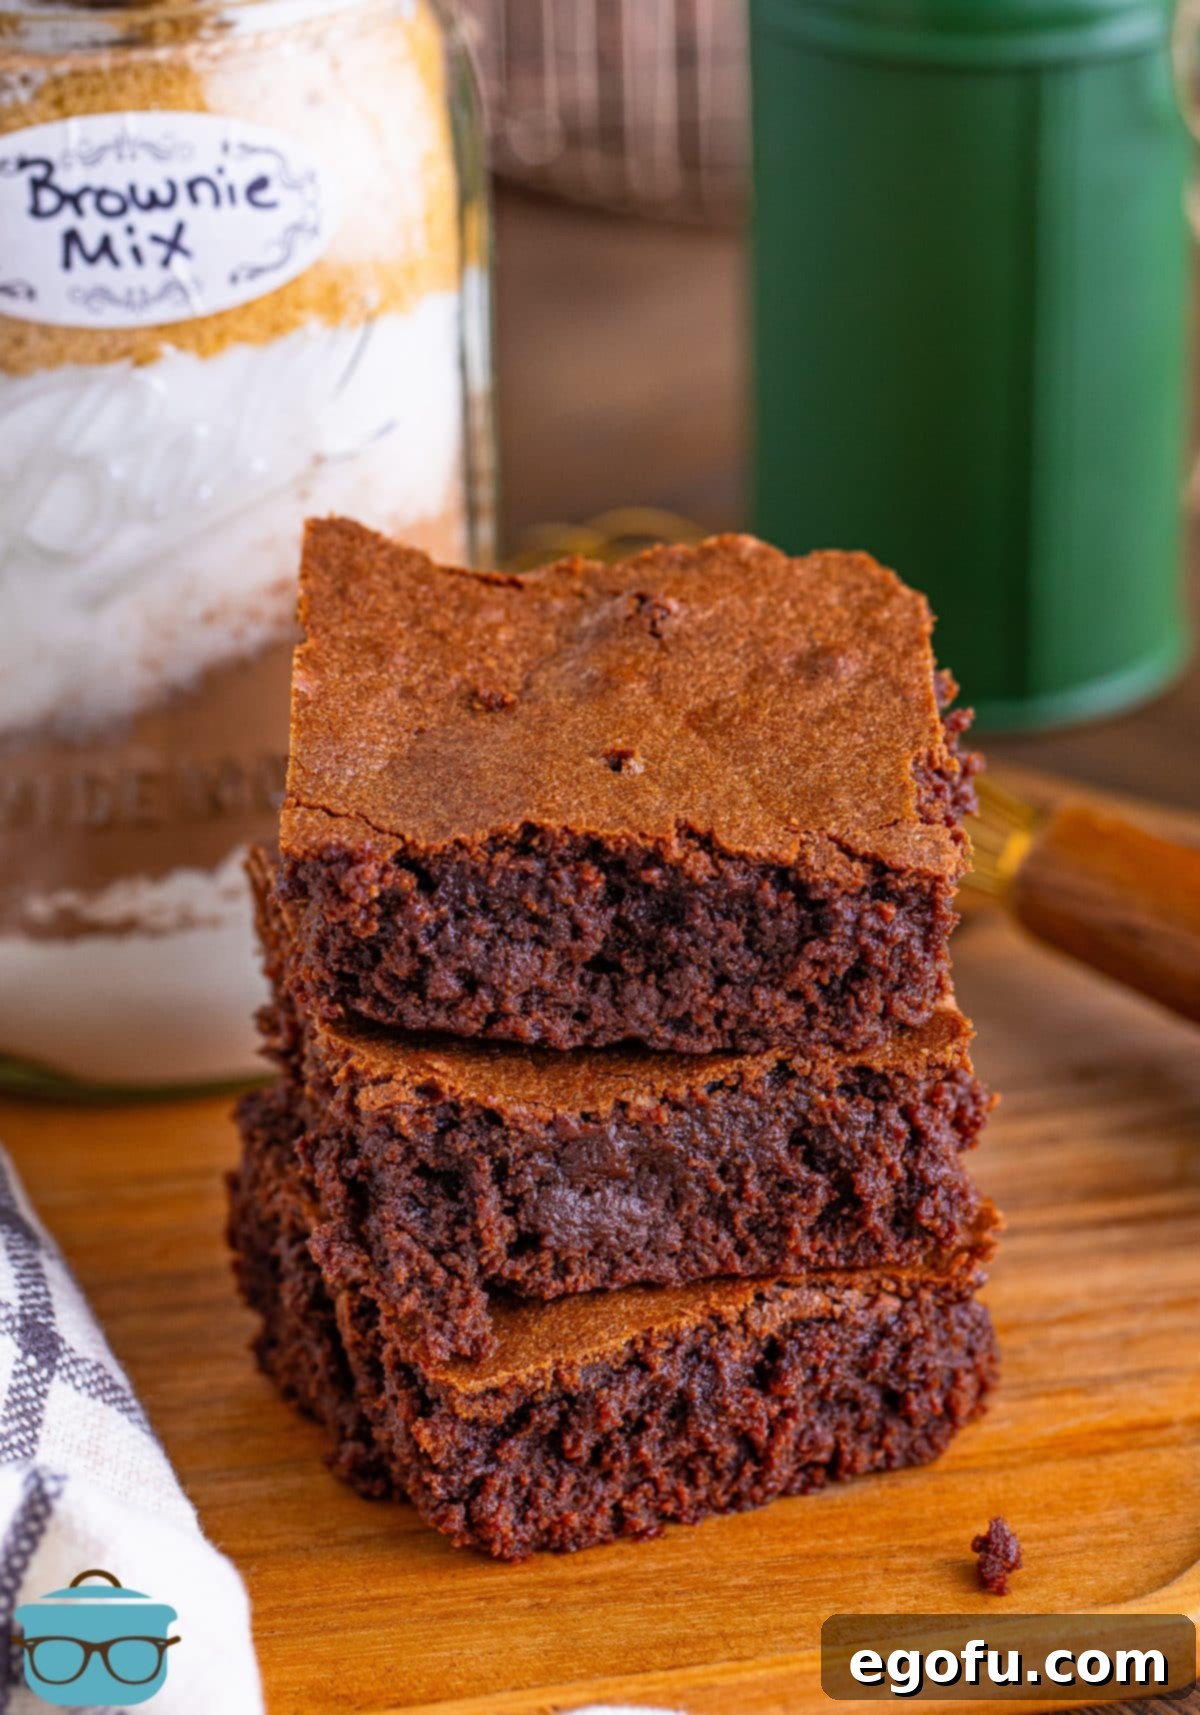
- Cool and Serve: Once baked, remove the brownies from the oven. This is perhaps the hardest step – resisting the urge to cut into them immediately! Allow the brownies to sit at room temperature in the baking dish until they are completely cool. This cooling process is vital as it allows the brownies to set, firm up, and become even more fudgy and easier to cut neatly. Attempting to cut them while warm will result in gooey, messy squares. Once cool, carefully lift them out (using your parchment paper handles if you lined the pan), cut into squares, and serve. Enjoy the rich, chocolatey goodness you created from your homemade mix!
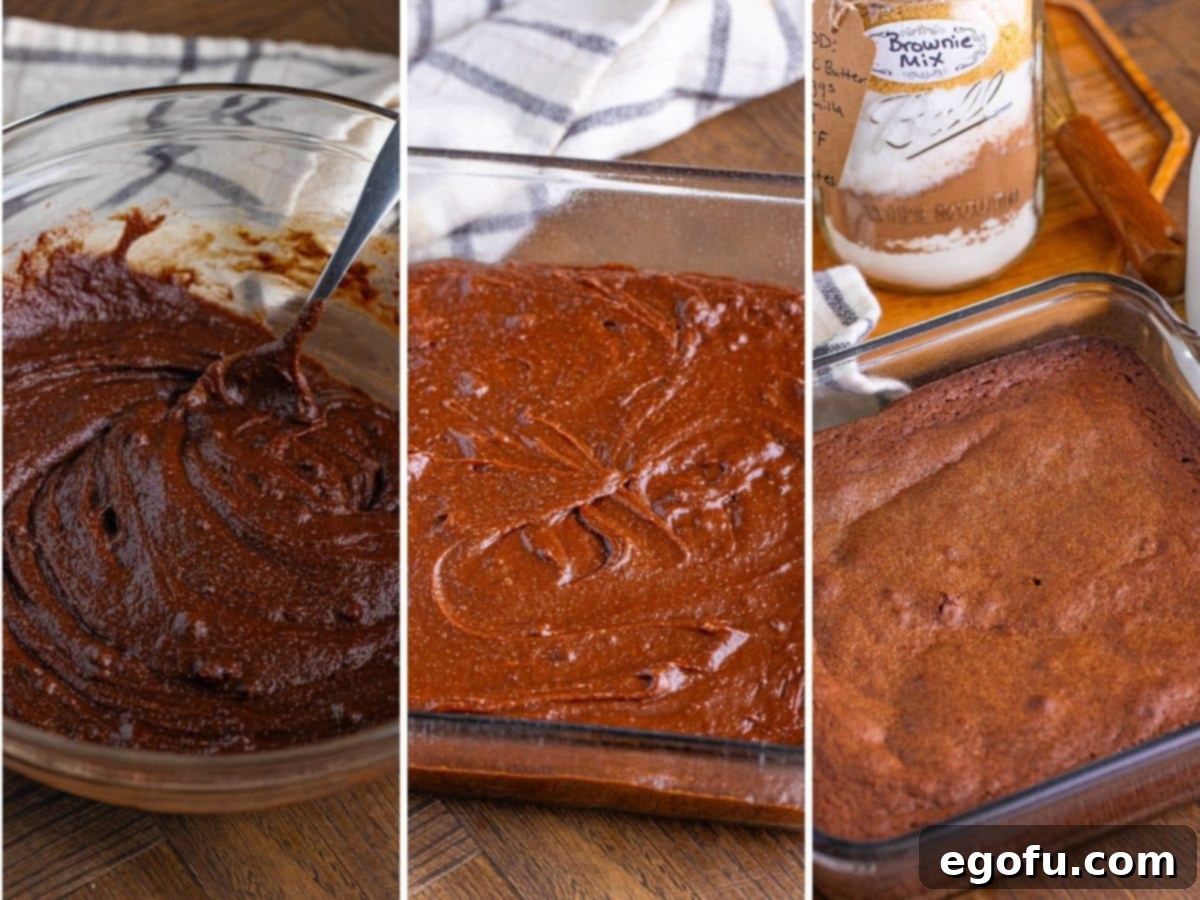
Allow to sit at room temperature until cool. Cut and serve.
Customize Your Brownies: Endless Possibilities
One of the most exciting aspects of making brownies from scratch, or from your homemade mix, is the opportunity to customize them to your heart’s desire. The base fudgy brownie recipe is perfect on its own, but it also serves as an excellent foundation for a myriad of flavor enhancements and mix-ins. Don’t be afraid to get creative and personalize your batch!
- Chocolate Varieties: While the mix provides a rich chocolate base, you can amplify the experience by folding in different types of chocolate chips or chunks. Dark chocolate chunks will intensify the bitterness, milk chocolate chips will add creaminess and sweetness, while white chocolate chips offer a delightful visual contrast and a complementary sweetness. Swirl in some melted chocolate before baking for an extra layer of decadence.
- Nutty Additions: For those who love a bit of crunch, toasted nuts are a fantastic choice. Walnuts, pecans, almonds, or even hazelnuts can be folded into the batter. Toasting them lightly beforehand brings out their natural oils and deepens their flavor.
- Candy Bar Mashup: Transform your brownies into an indulgent confection by adding chopped up candy bars. Think Snickers, Reese’s peanut butter cups, or even crushed Oreos for a playful twist. The candy will melt slightly during baking, creating pockets of gooey goodness.
- Fruity Undertones: For a sophisticated touch, consider adding dried fruits. Dried cherries, cranberries, or even chopped apricots can add a lovely tartness that cuts through the richness of the chocolate. A splash of orange zest can also brighten the flavor profile beautifully.
- Spices and Extracts: A pinch of cayenne pepper can add a subtle, intriguing heat to your chocolate brownies. A dash of peppermint extract can create a festive flavor, while a hint of espresso powder will deepen the chocolate flavor without making it taste like coffee.
- Swirls and Toppings: After pouring the batter into the pan, you can create beautiful swirls. Dollop spoonfuls of peanut butter, cream cheese mixture, or caramel sauce on top and gently swirl with a knife. After baking, a dusting of powdered sugar, a drizzle of ganache, or a scoop of vanilla ice cream can elevate your brownies to dessert heaven.
These are just a few ideas to get you started. The beauty of this homemade mix is that it provides a consistent, delicious base, allowing you to focus on the fun of customization and making each batch uniquely yours.
Gift It Forward: The Joy of a Homemade Brownie Mix
The act of giving a homemade gift is deeply personal and conveys a special kind of warmth. A jar of Homemade Brownie Mix is more than just ingredients; it’s a promise of future deliciousness and a thoughtful gesture that speaks volumes. It’s an ideal present for nearly any occasion, from holiday exchanges and teacher appreciation to housewarming gifts and expressions of gratitude. The effort you put into assembling the mix, even if minimal, shows you care enough to create something unique.
To truly elevate your gift, consider these presentation tips:
- Decorative Jars: Opt for attractive glass jars with tight-fitting lids. Mason jars are a classic choice, but any clear, clean jar will work beautifully.
- Layered Appeal: Ensure the dry ingredients are layered distinctly. The contrasting colors of flour, cocoa, and sugars create a visually appealing presentation that’s almost too pretty to mix!
- Personalized Tags: Attach a charming handwritten or printed tag. This tag should include the name of the mix (“Homemade Fudgy Brownie Mix”), a brief, heartfelt message, and most importantly, clear, step-by-step baking instructions. Don’t forget to list the additional wet ingredients needed (melted butter, eggs, vanilla extract) so the recipient knows exactly what to add.
- Ribbons and Embellishments: Tie a festive ribbon or a piece of twine around the neck of the jar. You can also add a small decorative ornament, a miniature whisk, or a cookie cutter for an extra touch.
- Themed Gifting: Pair the brownie mix with other baking essentials like a new spatula, a small baking dish, or a bag of gourmet chocolate chips for a complete baking kit.
This thoughtful gift is perfect for busy individuals who love homemade treats but might not have time to gather all the ingredients. It’s a convenient, delicious, and heartfelt present that brings joy with every bite.
Explore More Brownie Delights
If you’ve fallen in love with homemade brownies, there’s a whole world of variations to explore! Here are some other delightful brownie recipes that will surely tantalize your taste buds:
- Knock You Naked Brownies
- German Chocolate Brownies
- Butterfinger Brownies
- Peanut Butter Pie Brownies
- Lemon Brownies
- Strawberry Brownies
Discover Other Homemade Pantry Staples
Embrace the joy and convenience of making more of your pantry staples from scratch! Here are some other homemade ingredient mixes you might enjoy:
- Homemade Yellow Cake Mix
- Homemade Bisquick
- Homemade Apple Pie Spice
- Homemade Dry Onion Soup Mix
- Homemade Ranch Seasoning
- Homemade Pumpkin Pie Spice
- Homemade Everything But The Bagel Seasoning
- Homemade Cream of Mushroom Soup
- Homemade Cream of Chicken Soup
- Beau Monde Seasoning
- Taco Seasoning
- Homemade Ranch Dressing
- Homemade Velveeta
- Homemade Yellow Cake
- Homemade White Cake
- Homemade Funfetti Cake
Homemade Brownie Mix
Craft your own delicious homemade brownie mix with simple pantry ingredients for quick baking or thoughtful gifting. Makes delightfully thick and fudgy brownies!
Prep Time: 5 minutes
Cook Time: 35-40 minutes
Total Time: 40-45 minutes
Yields: 9 brownies
Author: Brandie Skibinski
Pin Recipe
Ingredients for the Mix (for one 2-quart jar):
- ¾ cup all-purpose flour
- ¾ cup unsweetened cocoa powder
- 1 cup granulated sugar
- 1 cup packed light brown sugar
- ½ teaspoon baking powder
- ½ teaspoon salt
To Make the Brownies (additional ingredients needed):
- ¾ cup salted butter, melted
- 3 large eggs
- 2 teaspoons vanilla extract
Instructions for Assembling the Brownie Mix:
- To create the mix, carefully layer the dry ingredients in a 2-quart mason jar (or similar jar with an airtight lid). Start with the all-purpose flour, followed by unsweetened cocoa powder, granulated sugar, packed light brown sugar, baking powder, and finally, salt.
- You may need to gently compress each layer a bit to ensure all ingredients fit well within the jar and to maintain distinct layers, especially if giving as a gift.
- Once layered, place the lid securely on the jar and store it in a cool, dark, and dry place at room temperature for up to 3 months.
Instructions to Bake Brownies from the Mix:
- Preheat your oven to 350°F (175°C). Lightly spray an 8×8-inch baking dish with nonstick baking spray and set aside.
- Pour the entire contents of the homemade brownie mix jar into a large mixing bowl. Stir well with a whisk to thoroughly combine all the dry ingredients.
- Add the ¾ cup of melted salted butter to the dry mix. Stir until the mixture is mostly moistened.
- Next, add the 3 large eggs and 2 teaspoons of vanilla extract. Mix everything together until the batter is smooth and well combined, being careful not to overmix.
- Pour the prepared batter into the 8×8-inch baking dish and use a spatula to spread it evenly and smooth out the top.
- Bake for 35-40 minutes. To test for fudginess, insert a toothpick into the center of the brownies. It should come out with moist crumbs and a little batter attached, but not completely wet. A clean toothpick indicates cakier brownies or potential overbaking.
- Allow the brownies to cool completely at room temperature in the baking dish before cutting and serving. This step is crucial for achieving that desired fudgy texture and clean cuts.
Notes:
- For detailed answers to common questions, including mix-ins and substitutions, please refer to the “Frequently Asked Questions” section above.
- This recipe yields one batch of brownies (9 servings) from one jar of mix, not 9 individual jars of mix.
- If you prefer cakier brownies, add one extra large egg to the batter during the mixing stage.
- For doubling the recipe to bake, use two jars of mix and a 9×13-inch baking dish.
Course: Dessert | Cuisine: American
Nutrition Information (Estimated Per Serving):
Calories: 392kcal | Carbohydrates: 59g | Protein: 5g | Fat: 18g | Sodium: 281mg | Fiber: 3g | Sugar: 46g
Nutritional Disclaimer: The nutritional information provided is an estimate. It is not calculated by a registered dietician or nutritionist. Values can vary based on specific brands of ingredients used and preparation methods. If precise calorie count and other nutritional values are important to you, we recommend running the ingredients through a trusted online nutritional calculator.
Did you make this recipe? Share your delightful creations on Instagram! Tag us @thecountrycook and use the hashtag #thecountrycook. We’d love to see your fudgy masterpieces!
