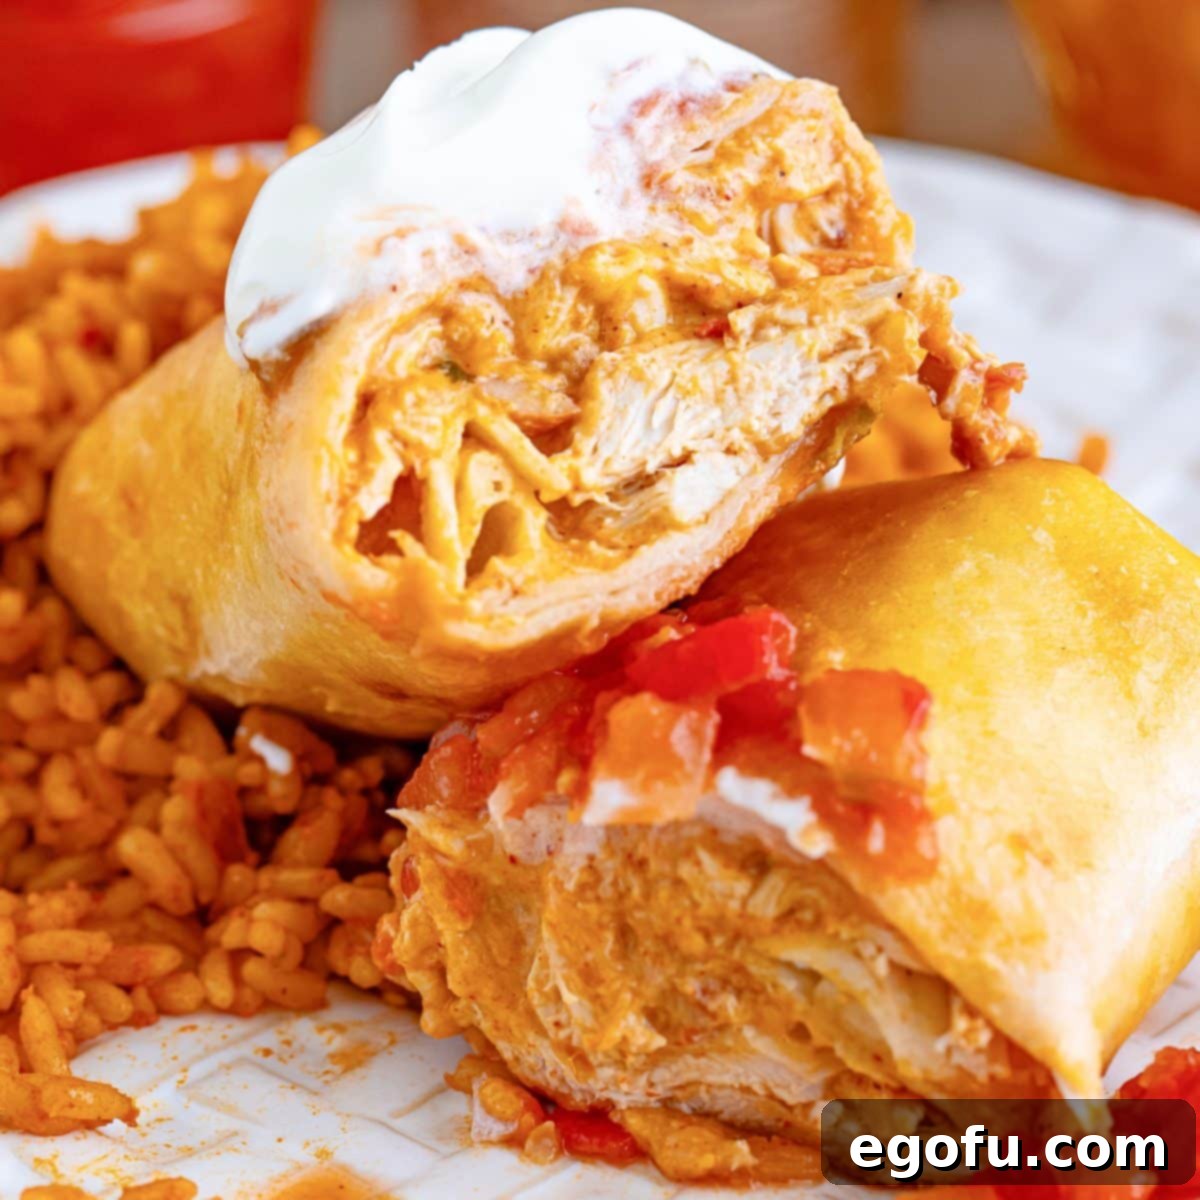
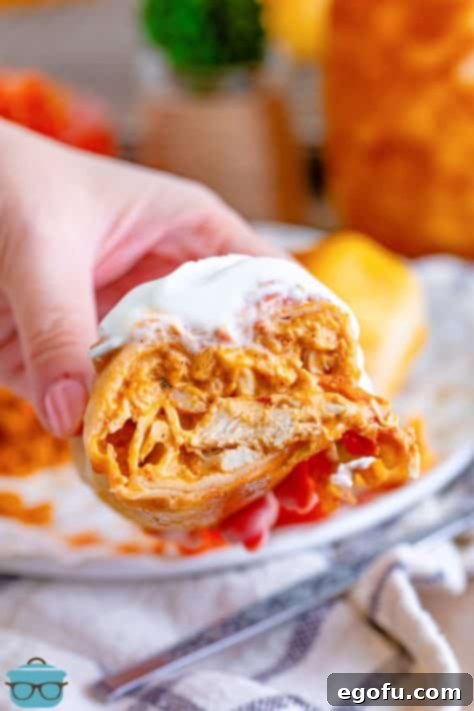
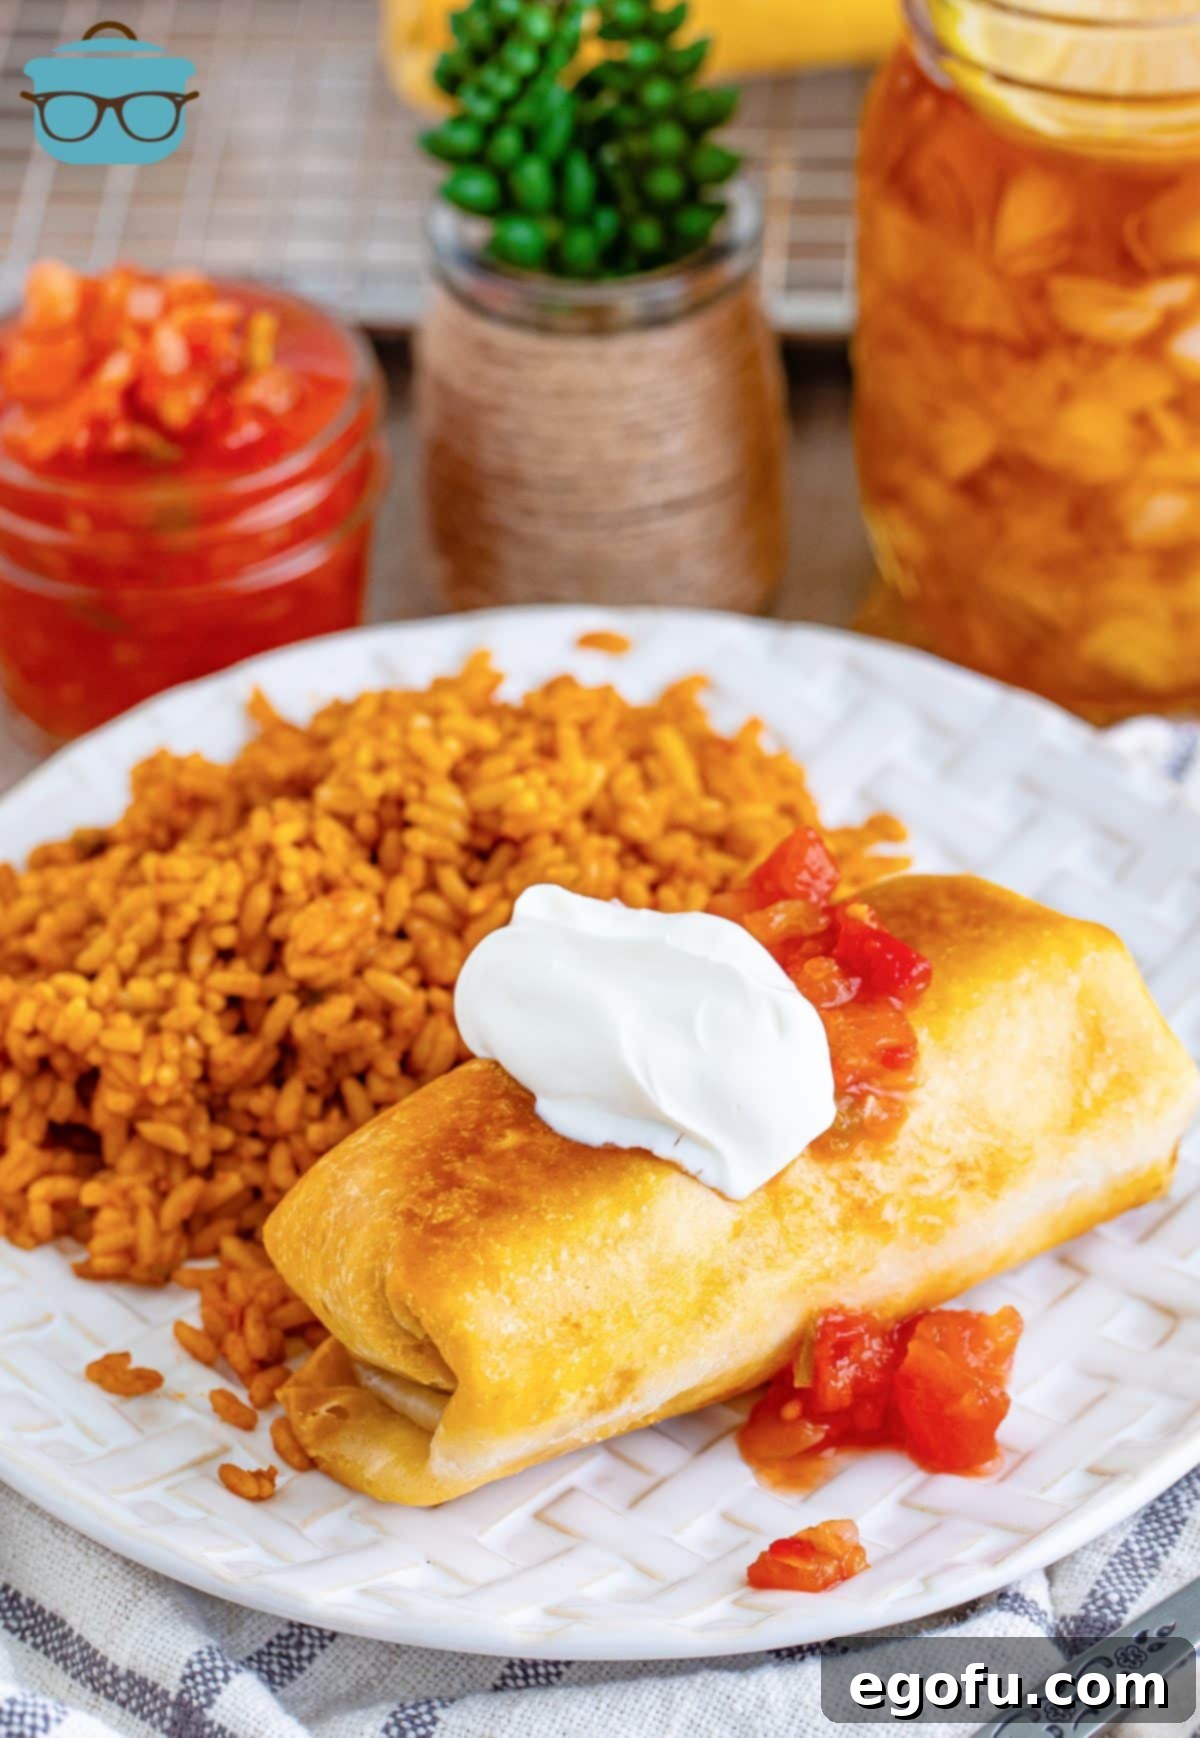
Experience the unparalleled joy of homemade Chicken Chimichangas – a delightful dish combining tender, seasoned chicken, creamy refried beans, and melted cheese, all encased in a gloriously crispy flour tortilla! Forget your local takeout; this recipe promises a restaurant-quality meal right in your own kitchen.
The Ultimate Crispy Chicken Chimichangas Recipe for Home Cooks
Chimichangas hold a special place in the hearts of many comfort food enthusiasts across the United States. While their exact origin is a topic of friendly debate among food historians, often attributed to ingenious chefs in the American Southwest rather than Mexico, their deliciousness is universally acknowledged. These deep-fried burritos offer an irresistible combination of textures and flavors: a golden, crunchy exterior giving way to a rich, savory filling. If you’ve ever craved that perfect balance of crispy and tender, then mastering homemade chicken chimichangas is your next culinary adventure.
For the authentic, traditional chimichanga experience—that deeply satisfying crispness and profound flavor—deep-frying in oil is truly the way to go. Don’t be intimidated; it’s often simpler and less messy than you might imagine, and the results are undeniably superior. However, we understand that not everyone is eager to deep-fry, so we also provide fantastic alternative methods like air frying or baking for a lighter, albeit slightly different, take on this beloved classic. But for that ultimate, truly restaurant-style perfection, a good ol’ fry is highly recommended.
Frequently Asked Questions About Homemade Chimichangas
Making chimichangas at home opens up a world of customization and flavor possibilities. Here, we address some of the most common questions to help you perfect your batch of crispy chicken chimichangas.
What delicious additions can I incorporate into my chimichanga filling?
The beauty of homemade chimichangas lies in their versatility. To introduce a gentle heat and vibrant flavor, consider adding a can of diced green chiles directly to the chicken and bean mixture. For a more substantial and authentic Southwestern touch, cooked Mexican rice can be mixed in with the chicken filling, making each bite even more satisfying. Beyond the filling, how you serve your chimichangas can elevate the experience. Many popular Mexican restaurants drench their chimichangas in a creamy queso dip, and you can easily replicate this at home. Our recipes for Crock Pot White Queso Dip or a quick Stovetop Queso Dip are perfect companions, or simply use your favorite store-bought brand for convenience. Other fantastic additions include a sprinkle of fresh cilantro, a dollop of guacamole, a spoonful of pico de gallo, or a drizzle of spicy crema. Don’t be afraid to experiment with your favorite Mexican-inspired ingredients!
What are the best side dishes to serve with Chicken Chimichangas?
Completing your chimichanga meal with the right side dishes transforms it into a full fiesta. Classic Mexican rice is an essential pairing; our simple 3-Ingredient Mexican Rice or flavorful Enchilada Rice recipes complement the rich flavors of the chimichangas perfectly. While our chimichanga filling already includes savory refried beans, serving an extra side of warm, creamy Refried Beans never hurts, especially if you’re a true bean lover. For a lighter touch, a fresh, crisp green salad with a zesty lime vinaigrette, grilled corn on the cob, or even some seasoned black beans can provide a refreshing contrast to the fried main course, balancing the richness beautifully.
Can I prepare these chimichangas in an Air Fryer for a healthier option?
Absolutely! The air fryer is a fantastic tool for achieving a crispy texture with less oil, making it a popular choice for those seeking a lighter chimichanga. While air-fried chimichangas won’t replicate the deep, rich crispness of their oil-fried counterparts exactly, they still deliver a wonderfully crunchy shell with significantly less fat. For the best results and specific instructions tailored for the appliance, we recommend following our dedicated recipe for Air Fryer Chicken Chimichangas. General tips for air frying include lightly brushing the tortillas with oil (or spraying with cooking spray) before air frying to encourage even browning and crisping. Additionally, remember to cook in batches to avoid overcrowding the air fryer basket, which can lead to steaming rather than crisping.
Is it possible to bake Chicken Chimichangas in the oven?
Yes, baking is another viable alternative to deep-frying, ideal for those who prefer to avoid excessive oil or simply don’t have an air fryer. This method also significantly reduces the amount of oil used. To bake your chimichangas, prepare the delicious chicken filling and assemble the tortillas as instructed in this recipe. Once rolled, place them seam-side down on a baking sheet. Lightly brush each chimichanga with oil (or spray with cooking spray) to help them brown. Bake in a preheated oven at 400°F (200°C) for approximately 25 minutes, or until they are golden brown and thoroughly heated through. Flipping them halfway through baking can help achieve more even browning on all sides. Please note that while baked chimichangas are incredibly flavorful, their texture will be less intensely crispy compared to traditional frying, offering a softer, yet still satisfying, exterior.
Can I use different types of meat for the chimichanga filling?
Definitely! This chicken chimichanga recipe is incredibly adaptable, and the seasoned filling works beautifully with various proteins. Instead of chicken, you could easily use seasoned ground beef for a classic beef chimichanga, tender shredded pork (carnitas style is amazing and highly recommended!), or even leftover pot roast for a hearty and flavorful twist. The key is to ensure that whatever meat you choose is fully cooked and shredded or diced appropriately to blend well with the other ingredients, allowing the flavors to meld together perfectly within the crispy tortilla shell.
What’s the best way to store leftover Chicken Chimichangas?
Leftover chimichangas are a fantastic treat for future meals! To store them properly and ensure maximum freshness, allow them to cool completely to room temperature before placing them in an airtight container. They will keep fresh in the refrigerator for up to 3 days. If you wish to enjoy them longer, chimichangas freeze exceptionally well. For best results, wrap each chimichanga individually in plastic wrap, then place them in a freezer-safe bag or container. They can be frozen for up to 3 months, making them an excellent meal prep option for busy weeknights or unexpected cravings.
What’s the optimal method for reheating leftover chimichangas to maintain crispness?
Reheating chimichangas without them becoming soggy is key to enjoying leftovers. The best method for restoring their delightful crispness is to reheat them in the oven. Preheat your oven to 350°F (175°C) and place the chimichangas on a wire rack set over a baking sheet. This setup allows air to circulate around all sides, preventing the bottom from steaming and becoming soft. Bake for about 15-20 minutes, or until thoroughly heated and crispy again. An air fryer also works wonderfully for reheating, quickly bringing back that desired crunch in about 5-8 minutes at 350°F (175°C). Avoid the microwave, as it will inevitably lead to a soggy chimichanga.
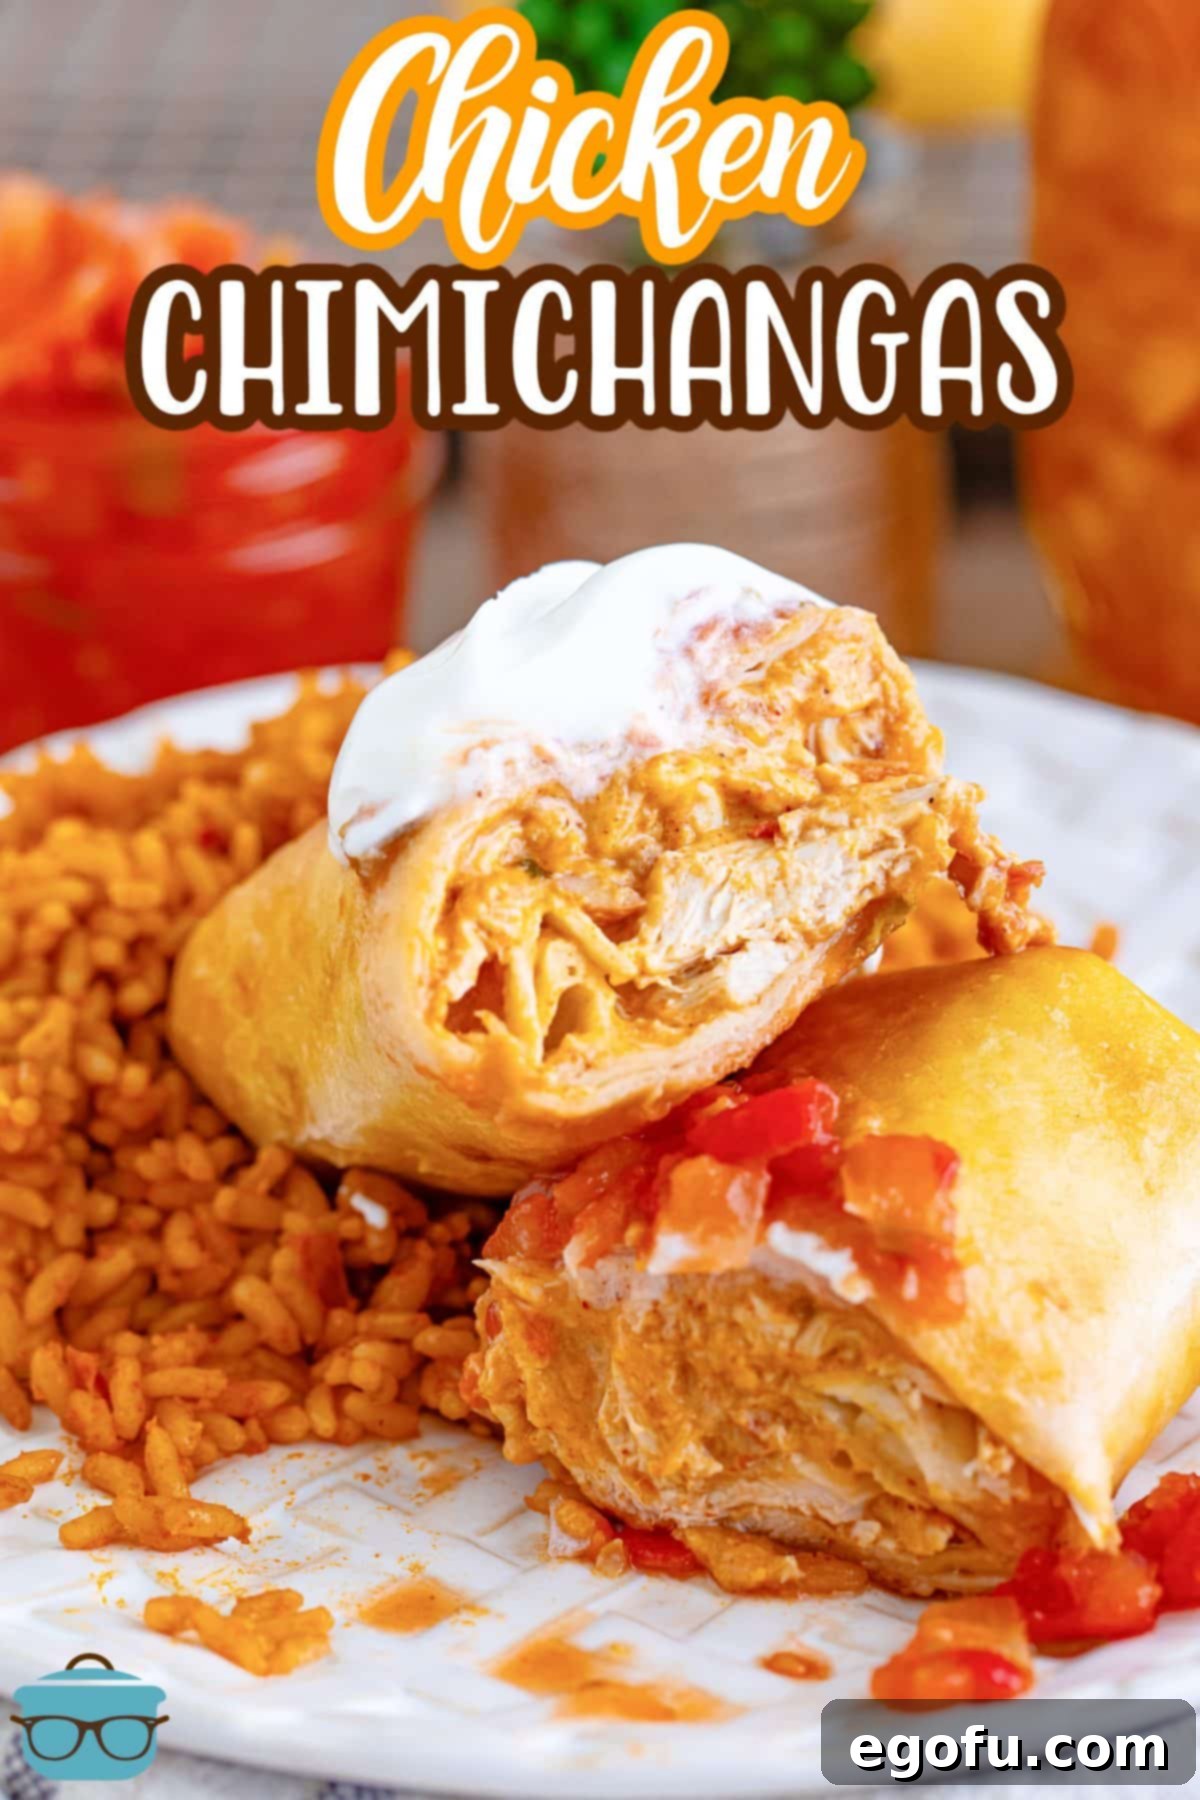
Crafting the Perfect Filling: Essential Ingredients for Flavorful Chicken Chimichangas
A truly exceptional chimichanga starts with a well-balanced and flavorful filling. Here’s a detailed look at the core ingredients you’ll need to create this culinary masterpiece, along with tips for preparation and potential substitutions to suit your taste and pantry.
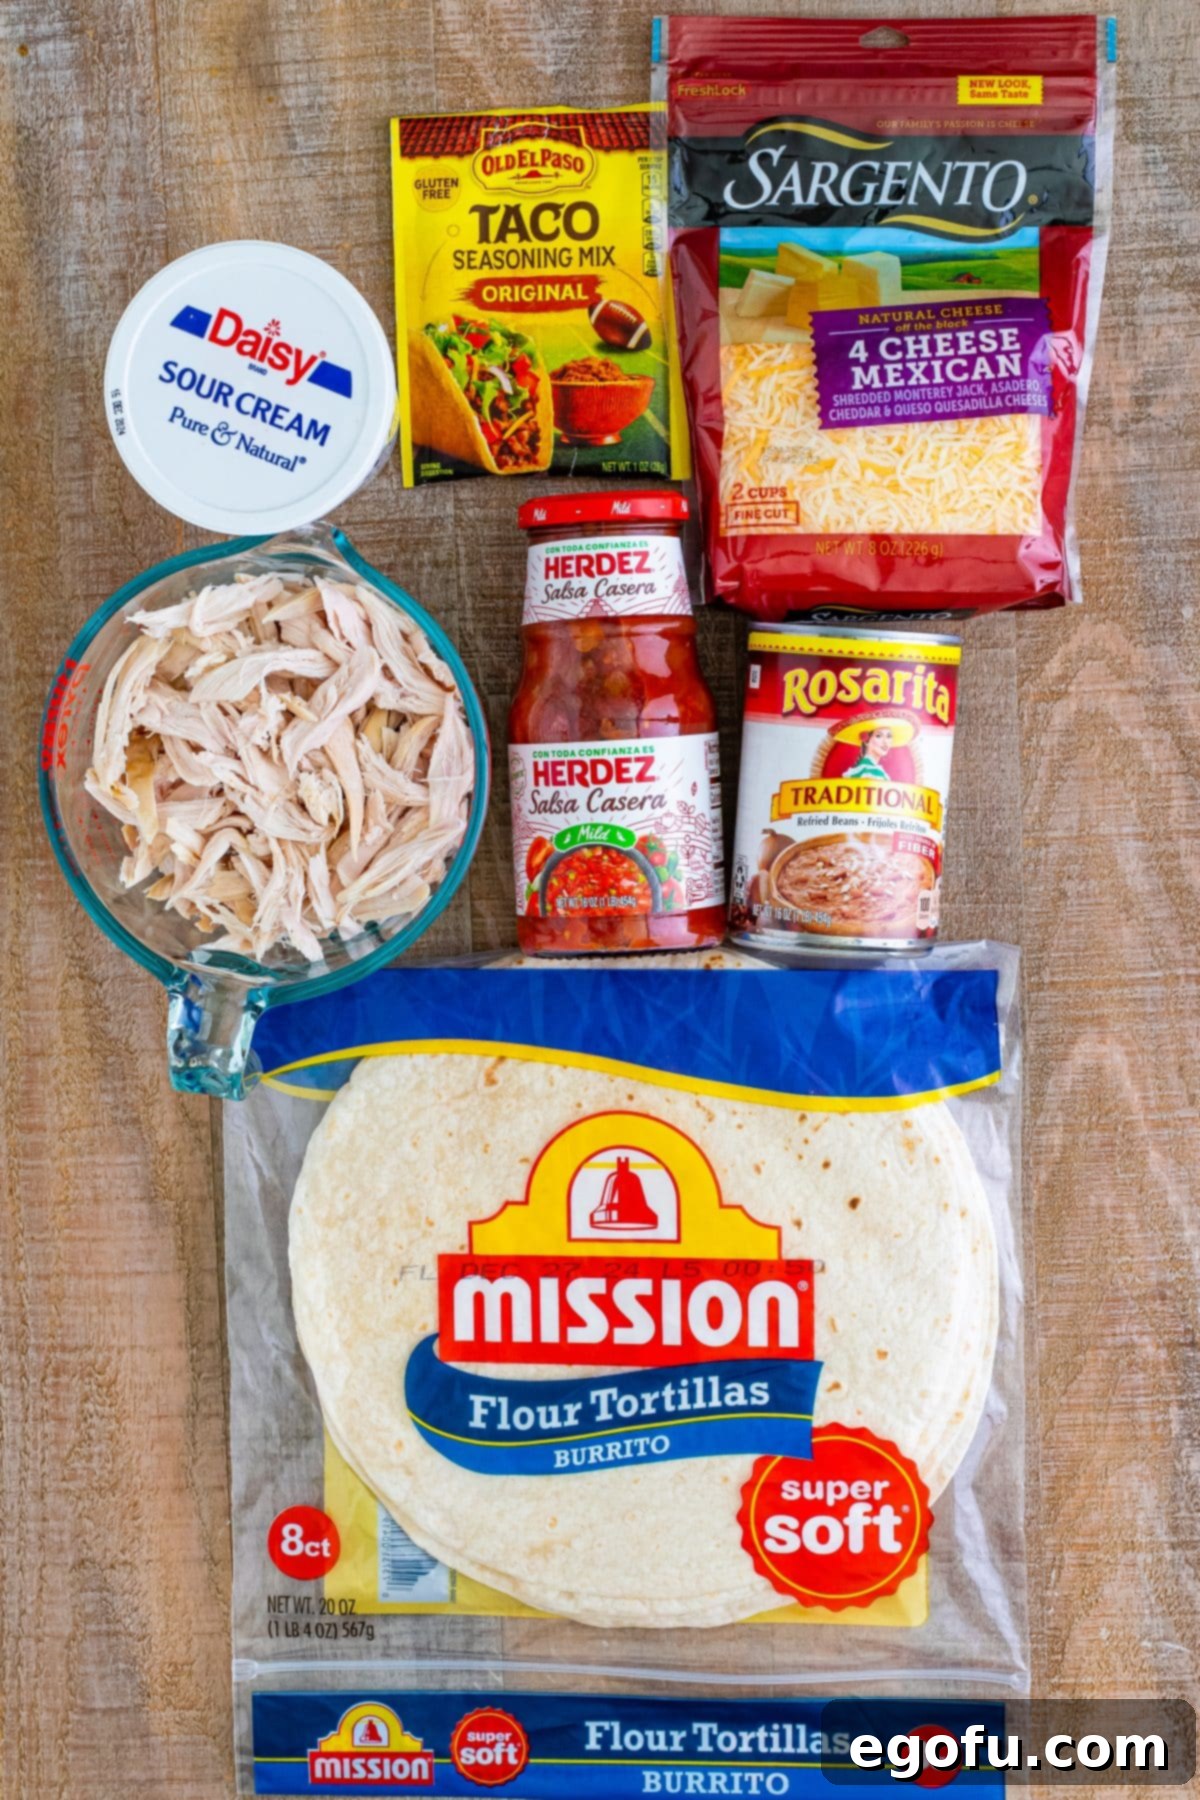
- Shredded Cooked Chicken: This forms the hearty base of your chimichanga. Using pre-cooked chicken makes the preparation incredibly quick and easy. A store-bought rotisserie chicken is a fantastic shortcut, offering flavorful, tender meat that’s ready to shred in minutes. Alternatively, you can boil chicken breasts until cooked through and easily shred them, or bake seasoned chicken breasts in the oven. For oven baking, season your chicken breasts generously with salt, pepper, garlic powder, and paprika, then bake at 400°F (200°C) for 20-22 minutes, or until an internal temperature of 165°F (74°C) is reached. For a slow-cooker method, our Crock Pot Shredded Chicken For Tacos recipe yields perfectly tender, shreddable chicken.
- Refried Beans: Creamy refried beans add a delightful texture and authentic Mexican flavor to the filling. A can of your favorite store-bought refried beans works perfectly for convenience. Look for traditional or vegetarian options. If you’re feeling adventurous and prefer a homemade touch, our Homemade Refried Beans recipe is a wonderful option. For those who aren’t keen on beans, they can certainly be omitted, though they contribute significantly to the chimichanga’s classic texture and richness.
- Shredded Mexican Blend Cheese: Cheese is non-negotiable for that irresistible gooey center that melts beautifully when fried. A Mexican blend cheese offers a good mix of meltability and flavor, typically including Monterey Jack, Cheddar, Asadero, and Queso Blanco. For those who enjoy a bit of heat, substituting Pepper Jack cheese will infuse your chimichangas with a pleasant spicy kick that complements the other flavors beautifully. Monterey Jack, pure cheddar, or a colby jack blend are also excellent choices if you prefer a single cheese variety.
- Taco Seasoning: This essential spice blend is key to imparting that classic, savory Tex-Mex flavor profile that defines so many beloved dishes. A store-bought packet of taco seasoning is convenient and readily available. However, making your own Homemade Taco Seasoning allows you to control the ingredients, sodium content, and adjust the spice level to your preference, often resulting in a fresher, more vibrant taste.
- Salsa: A good quality salsa adds moisture, tang, and another layer of depth to the filling, preventing it from being dry. Use your favorite jarred salsa – whether mild, medium, or hot – to match your desired spice level. Chunky or smooth, any variety will work well. Alternatively, whip up a batch of fresh Blender Salsa for an extra burst of freshness and flavor that truly elevates the dish.
- Sour Cream: Sour cream contributes a wonderful creaminess and a slight tang to the filling, binding all the ingredients together and adding essential moisture. If you’re not a fan of sour cream, softened cream cheese can be used as a delicious alternative, offering a richer, creamier texture. For a lighter or tangier option, plain Greek yogurt can also be a suitable substitute.
- Burrito Size Flour Tortillas: The indispensable foundation of your chimichanga! Opt for large, pliable burrito-sized flour tortillas (typically 10-12 inches) that are easy to roll without tearing. Most local grocery stores carry excellent options in various brands. If you’re looking for an impressive homemade touch and have extra time, making your own Homemade Flour Tortillas will take your chimichangas to an entirely new level of fresh deliciousness.
- Oil, for Frying: Essential for achieving that signature golden, crispy exterior. Peanut oil or canola oil are highly recommended due to their high smoke points and neutral flavors, which won’t overpower the chimichanga’s taste. Vegetable oil is another suitable option. Ensure you have enough oil (about 2-3 inches deep) in your skillet to submerge at least halfway up the chimichanga during frying for even browning.
Step-by-Step Guide: How to Master Homemade Chicken Chimichangas
Creating these crispy, flavor-packed chimichangas at home is a rewarding experience. Follow these detailed steps to ensure perfectly golden and delicious results every time.
1. Prepare the Irresistible Filling
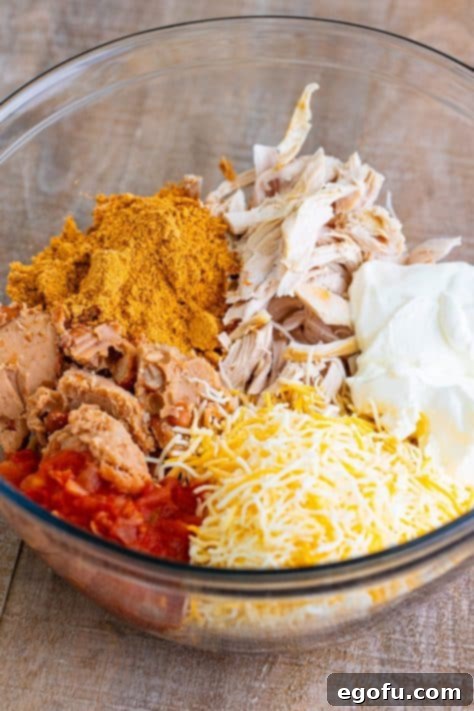
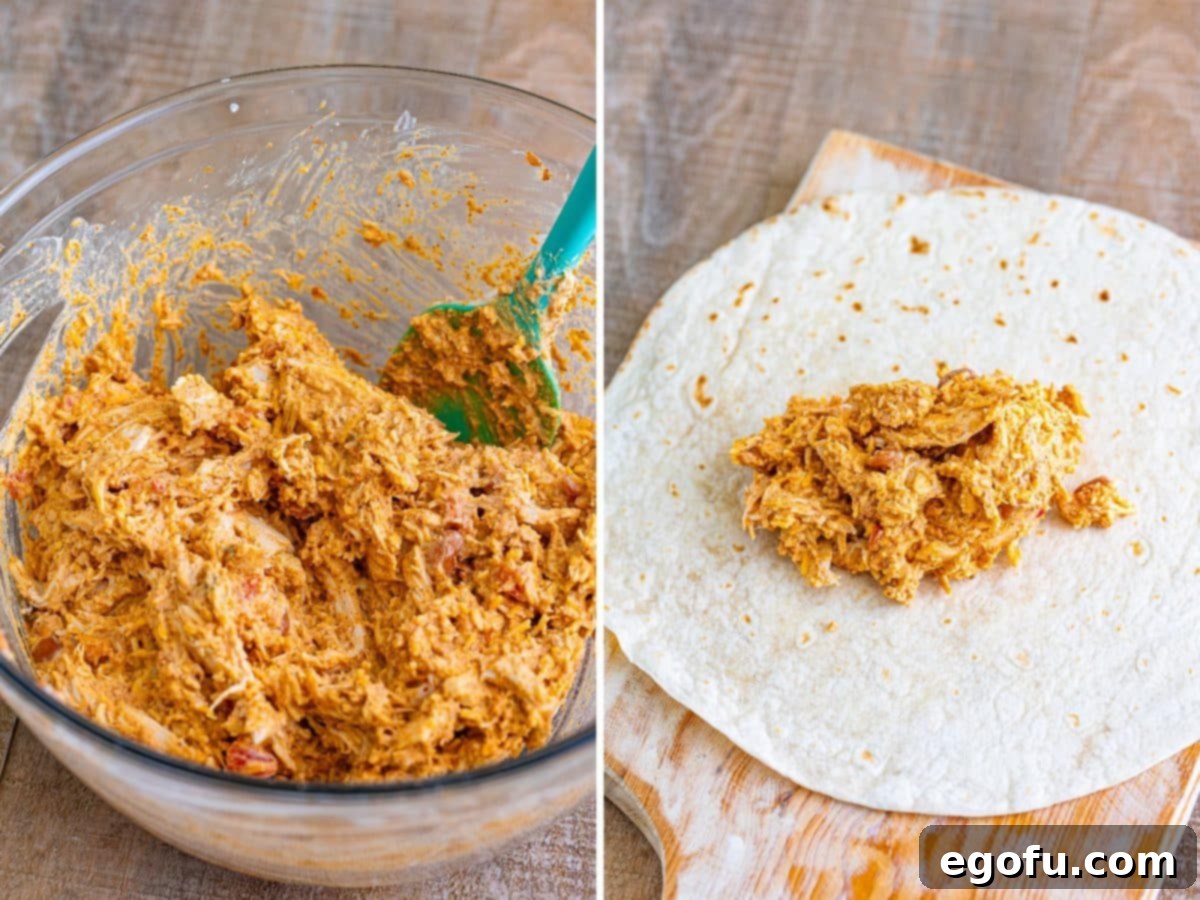
In a large mixing bowl, combine the shredded cooked chicken, refried beans, shredded Mexican blend cheese, taco seasoning, salsa, and sour cream. Stir thoroughly until all ingredients are well combined and the mixture is uniform. Ensure the filling is evenly moistened and the cheese is distributed throughout. This is the heart of your chimichanga, so take a moment to savor the aroma!
2. Assemble the Tortillas with Care
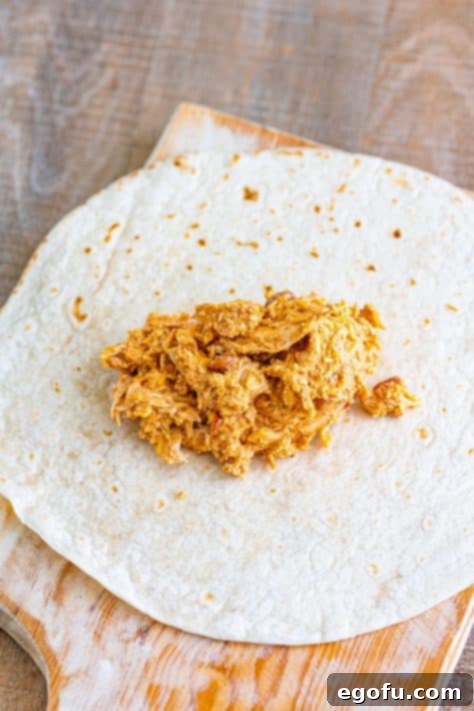
Lay out your burrito-sized flour tortillas on a clean, flat surface. Divide the prepared filling evenly among the 8 tortillas. Place the filling slightly off-center, in a line across the middle of each tortilla, leaving enough space on the sides for folding. Don’t overfill, as this can make rolling difficult and lead to burst chimichangas during frying. A good rule of thumb is about ½ to ¾ cup of filling per tortilla, depending on its size.
3. Master the Art of Folding
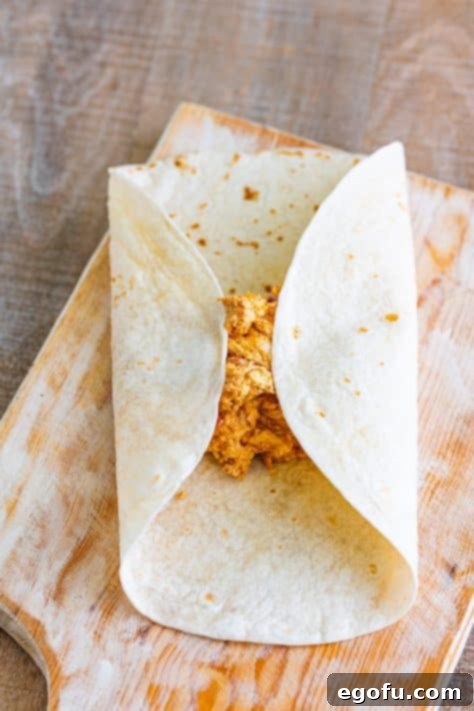
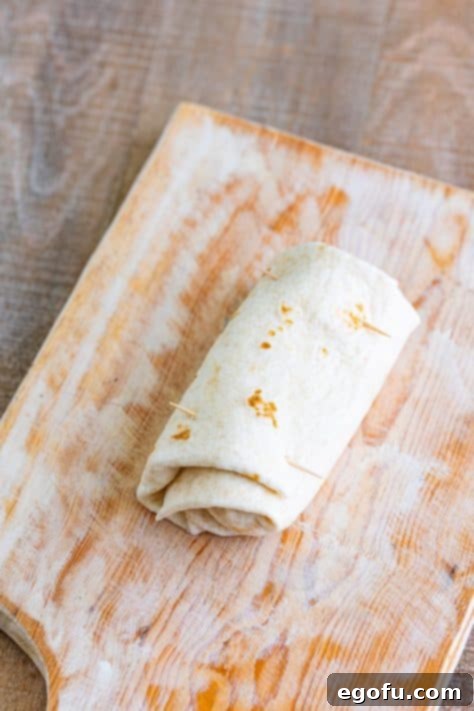
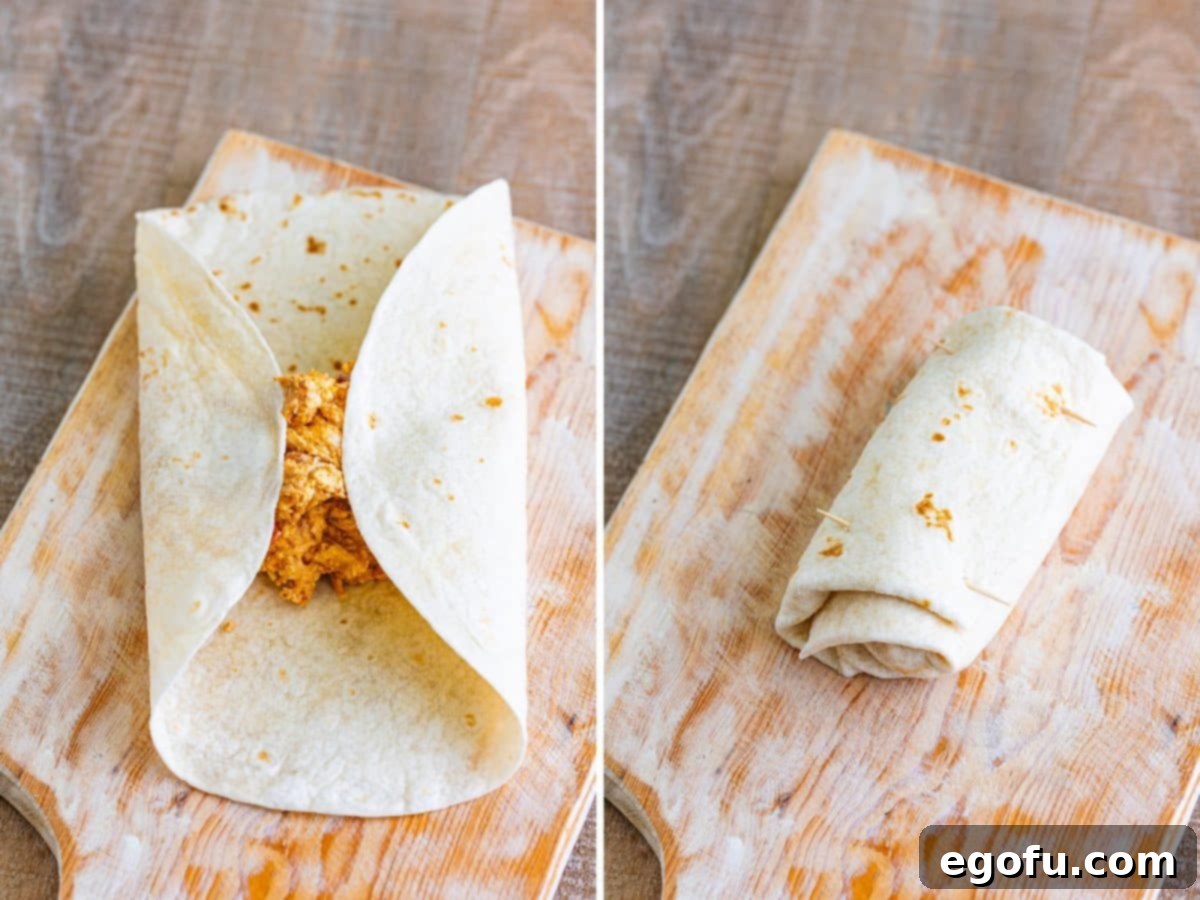
To create a secure “package” that holds all the delicious filling, first bring the two shorter sides of the tortilla (the ones parallel to the filling) over the middle of the filling, overlapping slightly. Then, starting from one of the longer sides, tightly roll the tortilla upwards, encasing the filling completely. Aim for a snug roll, but not so tight that the tortilla tears, to prevent the filling from escaping. A tight roll also helps create that satisfying crispy texture and ensures even cooking.
4. Secure and Prepare for Frying
Once each chimichanga is tightly rolled, secure it with two toothpicks—one on each end, inserted through the layers to hold the seam. This crucial step prevents the chimichanga from unraveling during frying, maintaining its shape and ensuring the filling stays intact. Repeat this process for all remaining tortillas. Now, they are ready for their golden transformation.
5. Heat the Frying Oil to the Perfect Temperature
In a heavy-bottomed skillet or Dutch oven, pour about 2-3 inches of your preferred frying oil (peanut or canola work best due to high smoke points). Heat the oil over medium-high heat until it reaches a consistent temperature of 350°F (175°C). Use a reliable kitchen thermometer to monitor the temperature; maintaining the correct heat is vital for perfectly crispy chimichangas that aren’t greasy or burnt. If the oil is too cold, the chimichangas will absorb too much oil; if too hot, they’ll burn before the filling is heated through.
6. Fry to Golden Perfection in Batches
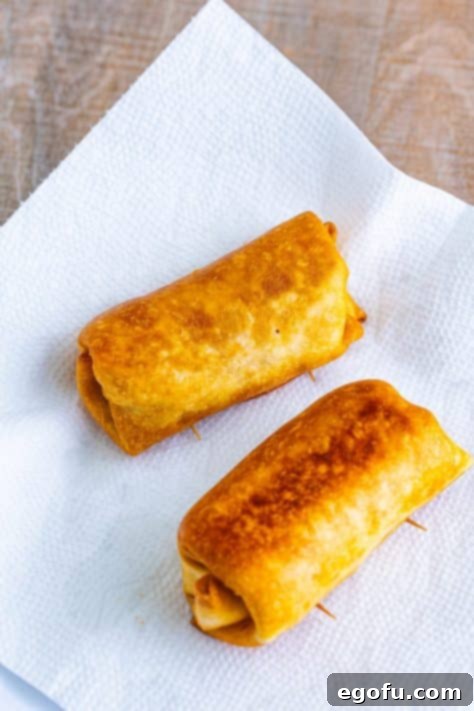
Carefully place the chimichangas into the hot oil, seam-side down first, ensuring not to overcrowd the pan. Fry them in batches to maintain the oil temperature and ensure even cooking. Cook until each side is beautifully golden brown and crispy, typically about 5 minutes total. You will need to flip them often with tongs to ensure even browning and to prevent any side from burning. Keep a close eye on the oil temperature, adjusting the heat as needed to keep it consistently around 350°F (175°C).
7. Drain and Maintain Crispness
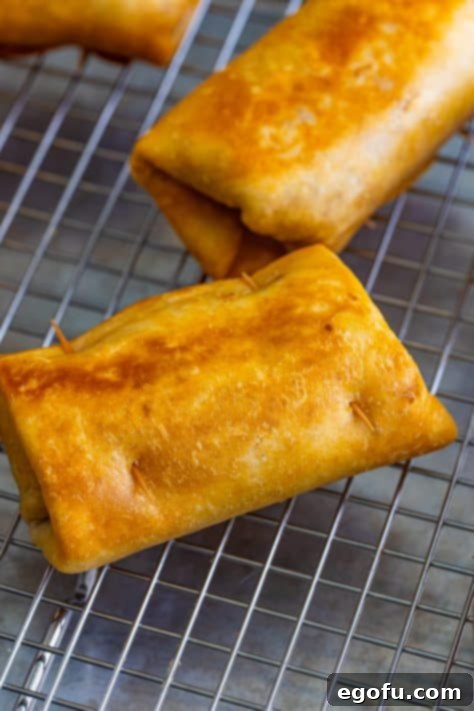
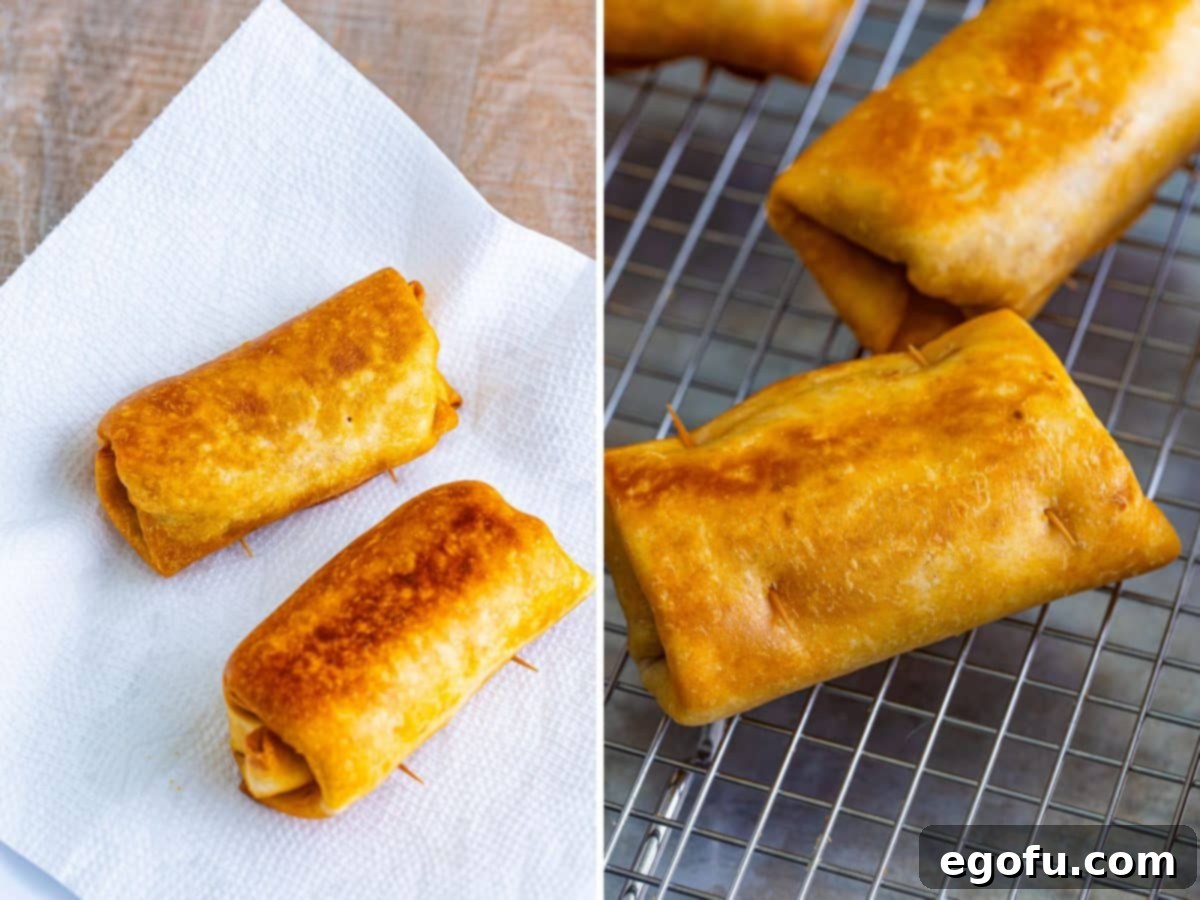
Once fried to perfection, carefully remove the chimichangas from the oil using tongs and place them on a paper towel-lined plate to absorb any excess oil. This immediate draining step helps prevent them from becoming greasy. For optimal crispness, immediately transfer them to a wire rack set over a baking sheet. This allows air to circulate underneath, preventing the bottom from steaming and becoming soft. If frying in multiple batches, you can keep the finished chimichangas warm in a low oven (around 200°F / 95°C) while you finish the rest.
8. Serve Immediately with Your Favorite Toppings
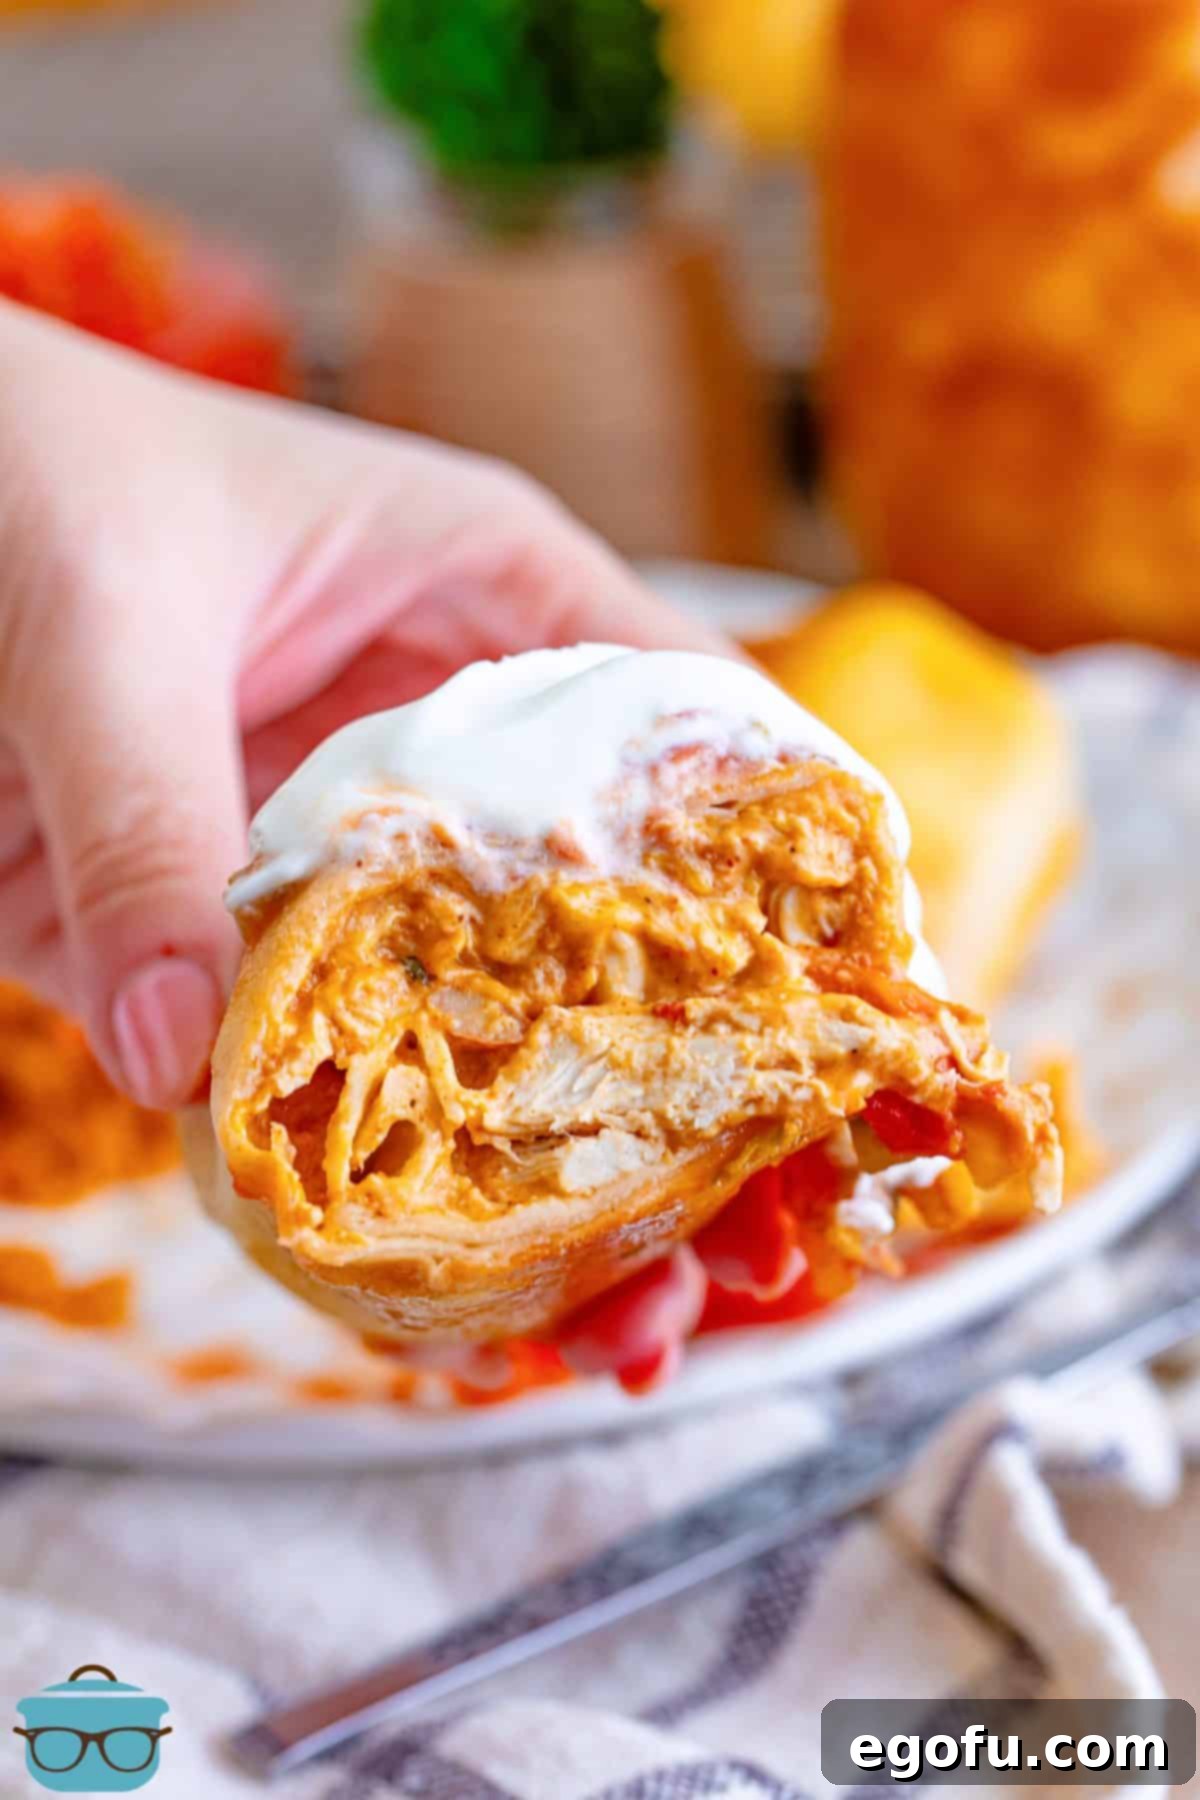
Before serving, remember to remove the toothpicks from each chimichanga! This is an important safety step. Serve your freshly fried, crispy chicken chimichangas immediately with a generous array of your favorite toppings. Think cool sour cream, fresh salsa, creamy guacamole, shredded lettuce, pico de gallo, or a drizzle of that irresistible queso dip. Each bite is a celebration of flavor and texture. Enjoy the fruits of your labor!
More Delicious Mexican-Inspired Recipes to Explore
If you loved making these Chicken Chimichangas, you’ll surely enjoy these other fantastic recipes from our collection, perfect for expanding your culinary repertoire and bringing more Tex-Mex flavors to your table:
- Air Fryer Chicken Chimichangas
- Ground Beef Enchiladas
- White Chicken Enchiladas
- Bisquick Chicken Enchilada Bake
- Chicken Enchilada Casserole
- Swiss Enchiladas
- Lazy Chicken Enchiladas
- Taco Bell Enchiritos
- Taco Bell Mexican Pizza
- Taco Bell Chili Cheese Burritos
- Crock Pot Birria Tacos
- Air Fryer Cheesecake Chimichangas
Chicken Chimichangas Recipe
These Chicken Chimichangas are made with a deliciously seasoned chicken, cheese and refried bean filling all wrapped in a crispy flour tortilla!
Prep Time: 20 minutes
Cook Time: 20 minutes
Total Time: 40 minutes
Yields: 8 servings
Author: Brandie Skibinski
Ingredients
- 4 cups shredded cooked chicken (I recommend using a store-bought rotisserie chicken for ease)
- 1 cup refried beans
- 2 cups shredded Mexican blend cheese
- 1 packet taco seasoning
- ½ cup salsa
- ½ cup sour cream
- 8 burrito size flour tortillas (10-12 inch)
- Oil, for frying (peanut or canola oil are preferred for their high smoke point)
Instructions
In a large bowl, mix the shredded cooked chicken, refried beans, shredded Mexican blend cheese, taco seasoning, salsa, and sour cream until thoroughly combined. Ensure the filling is uniform.

Divide the filling evenly among the 8 burrito size flour tortillas. Place the filling in the center of each tortilla, leaving enough space for folding.

Bring the two shorter sides of the tortilla over the middle of the filling, then tightly roll from one of the longer sides to form a neat, secure package.

Secure each rolled chimichanga with two toothpicks (one on each end) to prevent it from unraveling during frying. Repeat with all remaining tortillas.

Heat about 2-3 inches of oil in a heavy-bottomed skillet to 350°F (175°C). Use a kitchen thermometer to ensure accuracy.
Carefully place the chimichangas into the hot oil, frying in batches to avoid overcrowding the pan. Fry until golden brown and crispy on all sides, about 5 minutes total. Flip them often for even browning and monitor the oil temperature.

Place the finished chimichangas on a paper towel-lined plate to absorb excess oil, then immediately transfer them to a wire rack set over a sheet tray to keep them crispy.

Remove all toothpicks before serving. Serve immediately with your favorite toppings such as sour cream, salsa, or guacamole.

Video
Notes
- Please refer to the “Frequently Asked Questions” section and the detailed ingredient list above for helpful substitutions, preparation tips, and answers to common queries regarding this recipe.
Recipe Information
Course: Dinner, Main Course
Cuisine: American, Mexican
Nutrition Information (Estimated Per Serving)
- Calories: 434kcal
- Carbohydrates: 36g
- Protein: 31g
- Fat: 18g
- Sodium: 1008mg
- Fiber: 4g
- Sugar: 4g
Nutritional Disclaimer: The nutritional information provided is an estimate. As “The Country Cook” is not a dietician or nutritionist, and values can vary greatly based on specific brands and ingredient choices, we recommend consulting your preferred online nutritional calculator for accurate values if precise calorie counts and other nutritional data are important to you.
Did you make this delicious recipe?
Share your culinary creations on Instagram! Tag us @thecountrycook and use the hashtag #thecountrycook. We love seeing your fantastic dishes!
