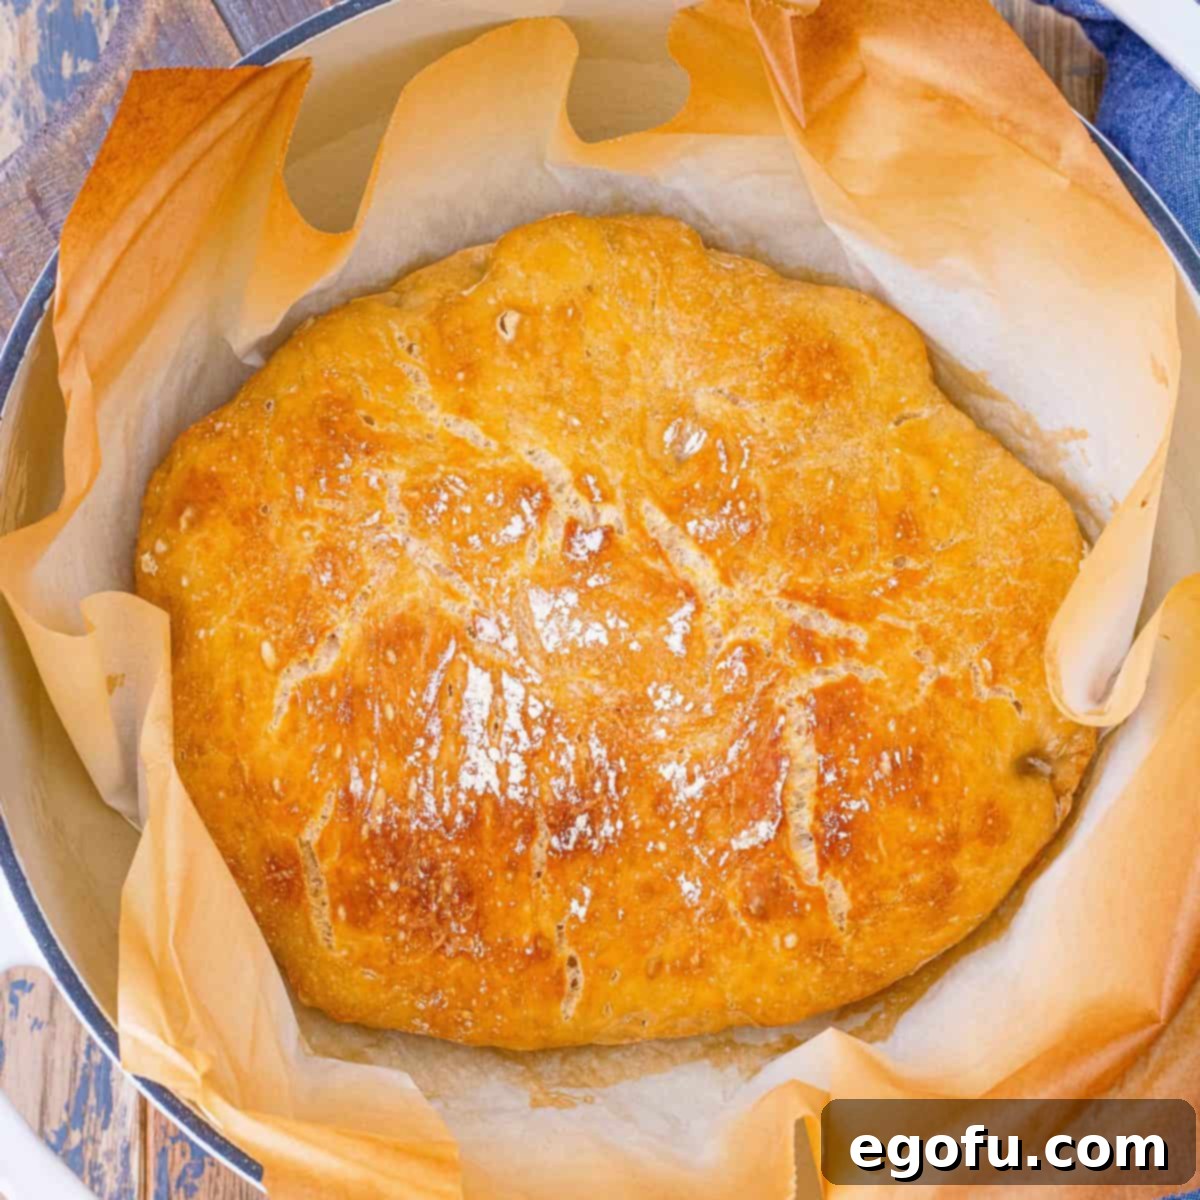
Welcome to the delightful world of homemade bread! There’s nothing quite like the aroma of freshly baked bread filling your kitchen, and with this incredible No-Knead Dutch Oven Bread recipe, achieving that dream is easier than you ever imagined. This isn’t just any bread; it’s a masterpiece of simplicity, delivering a tantalizingly crunchy crust and a wonderfully soft, airy interior. Whether you’re a seasoned baker or taking your very first steps into the art of bread making, this recipe promises success and pure culinary joy. Get ready to impress your family and friends with minimal effort!
The Ultimate Easy Bread Recipe: No-Knead Perfection
Imagine crafting a loaf of artisan-quality bread with just four basic ingredients and almost no hands-on effort. That’s the magic of this No-Knead Dutch Oven Bread. Forget the laborious kneading, the complicated techniques, and the countless hours spent in the kitchen. This recipe is specifically designed to be foolproof, making it the perfect starting point for anyone yearning to experience the immense satisfaction of baking their own bread from scratch. It’s an accessible way to enjoy wholesome, delicious bread that tastes like it came from a professional bakery.
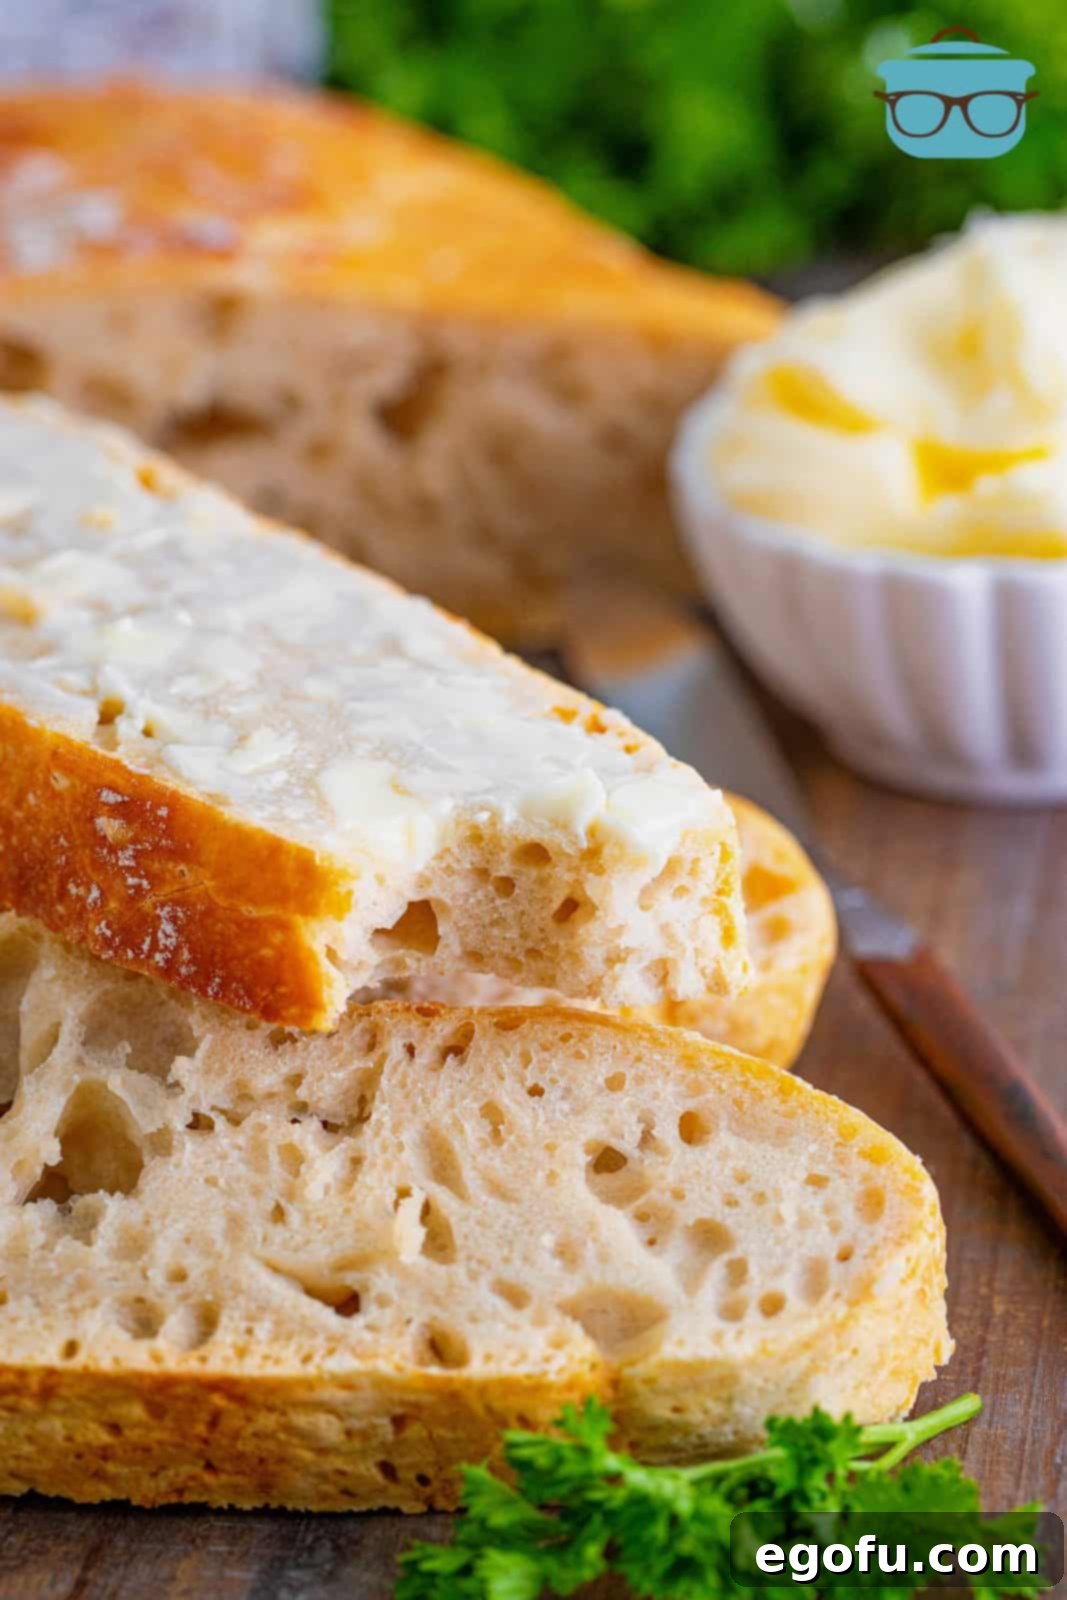
Beyond its ease, this bread is incredibly versatile. It pairs beautifully with hearty soups, robust chilis, and comforting stews, elevating any meal with its rustic charm. But don’t limit yourself; try slathering a warm slice with a generous dollop of butter, or use it to make the most divine sandwiches. Its robust texture holds up well to various toppings and spreads. This recipe truly embodies the spirit of simple, yet profound, homemade goodness that brings warmth and comfort to any occasion.

Frequently Asked Questions About No-Knead Dutch Oven Bread
The Dutch oven is the secret weapon behind that perfect, artisan-style crust and tender crumb in no-knead bread. Made from cast iron, these pots excel at retaining and distributing heat evenly, creating an incredibly stable baking environment. When the lid is on, the moisture from the dough is trapped inside, generating a steamy atmosphere. This initial burst of steam is crucial; it keeps the crust soft and pliable during the first stage of baking, allowing the dough to rise fully before setting. Once the lid is removed, the direct, intense heat crisps up the crust to a beautiful golden brown, while the interior remains wonderfully soft and chewy. It essentially mimics a professional steam-injected oven, making high-quality homemade bread achievable for everyone.
While not strictly mandatory, using parchment paper is highly recommended for baking bread in a Dutch oven. The dough for this no-knead recipe is quite wet and sticky, making it challenging to transfer directly into a scorching hot Dutch oven without disturbing its shape or risking burns. Parchment paper acts as a convenient sling, allowing you to easily lower the dough into the preheated pot. It’s also oven-safe and provides a reliable non-stick surface, ensuring your beautiful loaf doesn’t stick to the bottom. While you could try using aluminum foil, it often requires a non-stick coating or heavy greasing, and some bakers find it can cause the crust to brown too quickly or unevenly. For the best results, easiest handling, and consistent crust, parchment paper is truly your best friend.
The ideal water temperature for activating active dry yeast is between 100-110°F (38-43°C). This range is crucial because water that is too cold won’t properly activate the yeast, leading to a slow or non-existent rise in your bread. Conversely, water that is too hot can kill the yeast, rendering it inactive and resulting in a dense, flat loaf. Using a kitchen thermometer is the most reliable way to ensure your water is within this optimal temperature range. A properly activated yeast contributes to the dough’s airy texture and helps develop the bread’s characteristic flavor during the long fermentation process.
This particular no-knead dough requires a significant rise time, typically 12-18 hours, in a warm environment. The extended fermentation period is fundamental to the no-knead method. Since we’re skipping the traditional kneading process that develops gluten structure, time does the work for us. This long, slow rise allows the yeast ample time to break down starches, creating those delightful air pockets and developing complex flavors that are characteristic of artisan bread. This patient approach results in a superior texture and depth of flavor that quick-rise breads simply can’t match. Often, preparing the dough the night before allows it to rise overnight, making it ready to bake the next morning.
Dutch ovens come in various sizes, but for baking a standard loaf of no-knead bread like this, a 5 to 6-quart Dutch oven is generally considered the ideal and most versatile size. A 5.5-quart Dutch oven is a popular choice and works perfectly for this recipe, allowing enough space for the dough to expand and achieve a beautiful round shape without being too cramped or too spread out. If your Dutch oven is too small, the bread might rise excessively and hit the lid; if it’s too large, the dough might spread out too much, resulting in a flatter loaf and potentially less effective steam retention. The right size ensures optimal heat distribution and steam capture for that perfect crust.
Homemade no-knead bread is undeniably best enjoyed on the day it’s baked, when the crust is at its crispiest and the interior is most tender. However, if you have leftovers, you can store the bread in an airtight container or a clean paper bag placed inside a plastic bag at room temperature for up to 2 days. To extend its life further, this bread freezes beautifully. Once completely cool, wrap the loaf tightly in plastic wrap, then again in aluminum foil, and place it in a large freezer bag. It will keep well for up to 3 months. When ready to enjoy, simply let it defrost at room temperature, or for a refresh, you can lightly toast slices or warm the whole loaf in the oven.
While this recipe specifically calls for all-purpose flour, which provides a good balance of protein for structure and tenderness, you can experiment with other flours. Bread flour, with its higher protein content, will result in a chewier bread with a more robust structure. You can also try incorporating a small amount of whole wheat flour (e.g., replacing 1/4 to 1/2 cup of all-purpose flour) for a nuttier flavor and added fiber. Keep in mind that different flours absorb water differently, so you might need to slightly adjust the amount of water to achieve the characteristic “shaggy, wet dough” consistency. Always start with the recipe’s specified flour and adjust once you’re comfortable with the basic technique.
Before mixing your yeast with the flour, you can “proof” it to ensure it’s active. This step isn’t strictly necessary if you know your yeast is fresh, but it’s a good habit if your yeast is older or if you want to guarantee a good rise. To proof, combine the active dry yeast with about a quarter cup of the warm water and a pinch of sugar (which feeds the yeast). Let it sit for 5-10 minutes. If the mixture becomes foamy and bubbly, your yeast is active and ready to use. If it remains flat, your yeast is likely expired or dead, and you’ll need to get new yeast before proceeding with the recipe.
Scoring, or making shallow cuts on the top of your dough just before baking, is a common practice in artisan bread baking, and it can certainly be applied to this no-knead Dutch oven bread. The primary purpose of scoring is to create controlled “vents” that allow the dough to expand predictably as it bakes, preventing uncontrolled tearing and ensuring a beautiful, even rise. It also adds a decorative touch. You can use a very sharp knife, a razor blade (lame), or even sharp kitchen shears to make one or two simple slashes, or a more intricate design, on the top of your dough just before placing it into the hot Dutch oven. Scoring isn’t essential for a delicious loaf, but it can enhance its appearance and contribute to a better oven spring.

Simple Ingredients for Extraordinary Bread
One of the most remarkable aspects of this No-Knead Dutch Oven Bread is its reliance on just four humble ingredients. These basic pantry staples come together through the magic of time and temperature to create something truly extraordinary. You don’t need fancy additives or complex mixtures; the quality of these core components shines through in the final loaf. It’s a testament to how simple ingredients, handled correctly, can produce profound culinary results.
- All-purpose flour
- Kosher salt
- Active dry yeast
- Water

How to Make No-Knead Dutch Oven Bread: Step-by-Step Guide
Baking this artisan-style bread is surprisingly straightforward. Follow these simple steps to create a beautiful, crusty loaf right in your own kitchen.
In a large bowl, combine the all-purpose flour, kosher salt, and active dry yeast. Use a sturdy spoon or spatula to stir these dry ingredients together thoroughly, ensuring an even distribution of the salt and yeast throughout the flour. This initial mix is important for consistent flavor and rise.

Next, pour in the warm water (remember to keep it between 100-110°F). Stir vigorously until all the flour is incorporated and a shaggy, wet dough forms. Don’t worry if it looks messy and sticky – that’s exactly what we’re aiming for! Make sure to scrape the sides and bottom of the bowl to ensure no dry pockets of flour remain. The consistency should be loose and somewhat unruly, not a smooth, elastic ball like kneaded dough.

Once mixed, cover the bowl tightly with plastic wrap. Place the bowl in a warm spot in your kitchen and let it rest for a generous 12 to 18 hours. This long fermentation period is key to developing the bread’s signature flavor, texture, and open crumb. During this time, the yeast will work its magic, slowly producing gases that create air pockets and build the dough’s structure without any manual kneading.
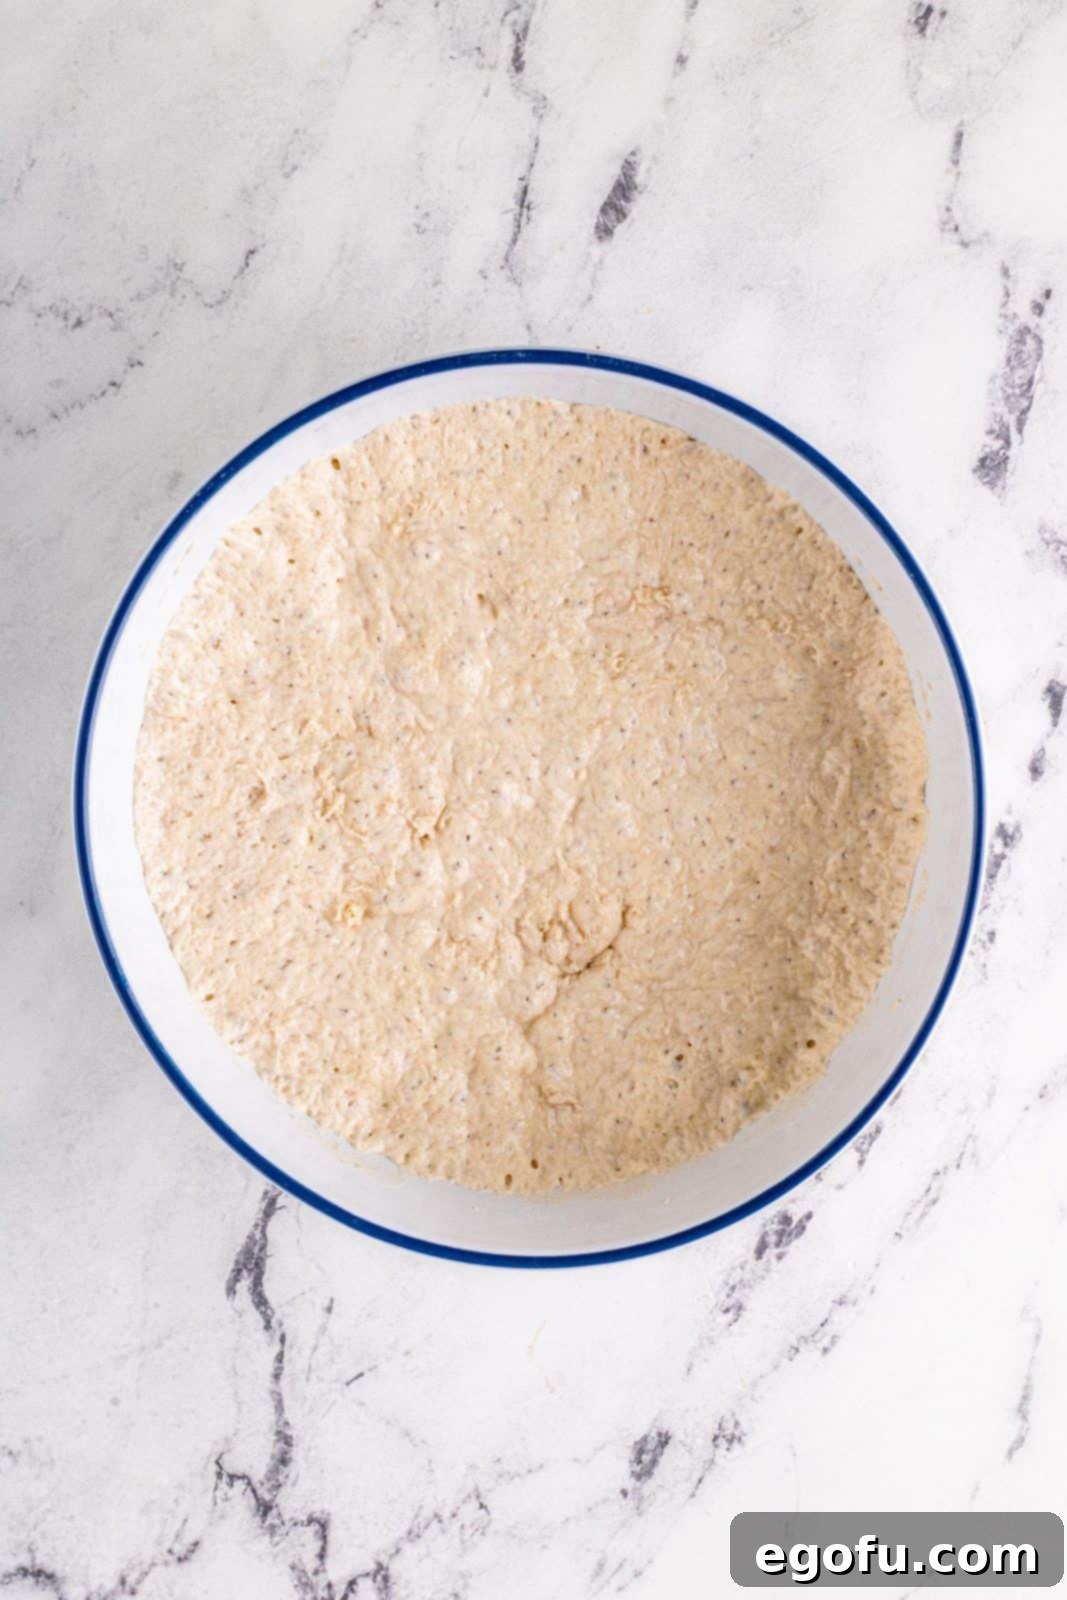
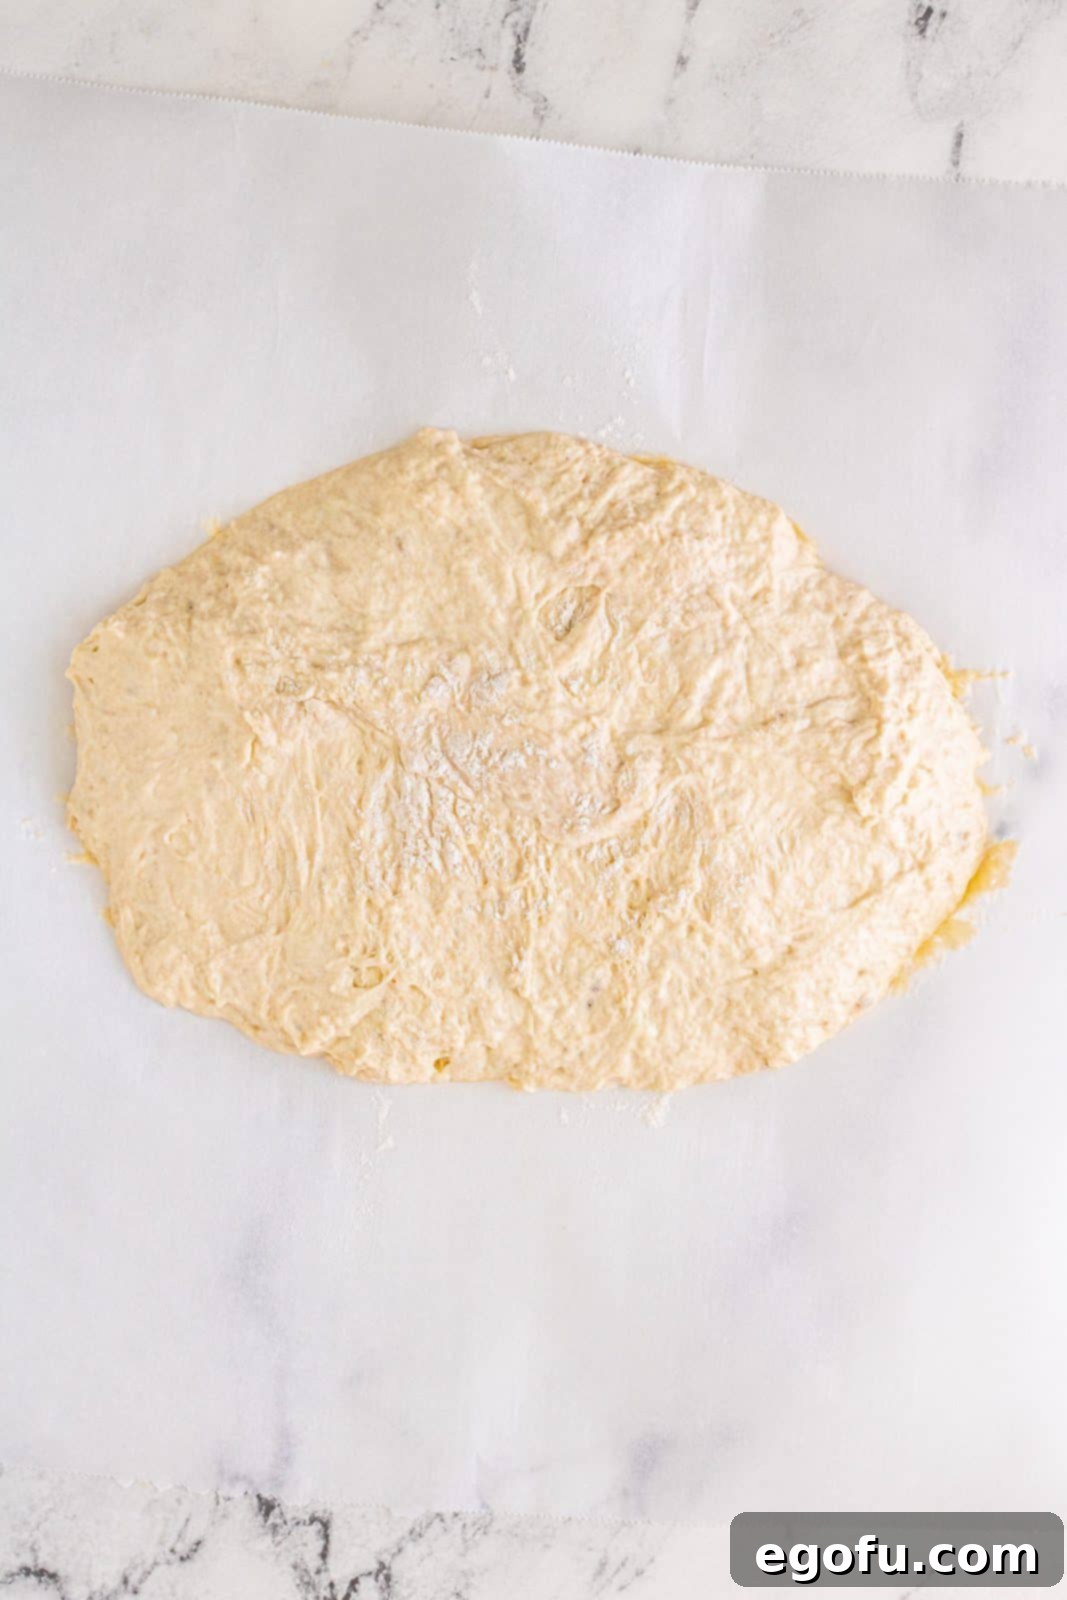
When your dough is ready (it should be bubbly and expanded), preheat your oven to 450°F (232°C). Crucially, place your empty Dutch oven with its lid into the oven as it preheats. Allow it to heat up for at least 20-30 minutes; the pot needs to be incredibly hot to create the initial burst of steam and a crispy crust. While the Dutch oven heats, lightly dust a large piece of parchment paper with flour. Gently transfer the risen dough onto the center of the floured parchment paper. Lightly dust the top of the dough with a little more flour and, as best you can, gently form it into a round ball or a pleasing round formation. Handle the dough minimally to preserve the delicate air bubbles.
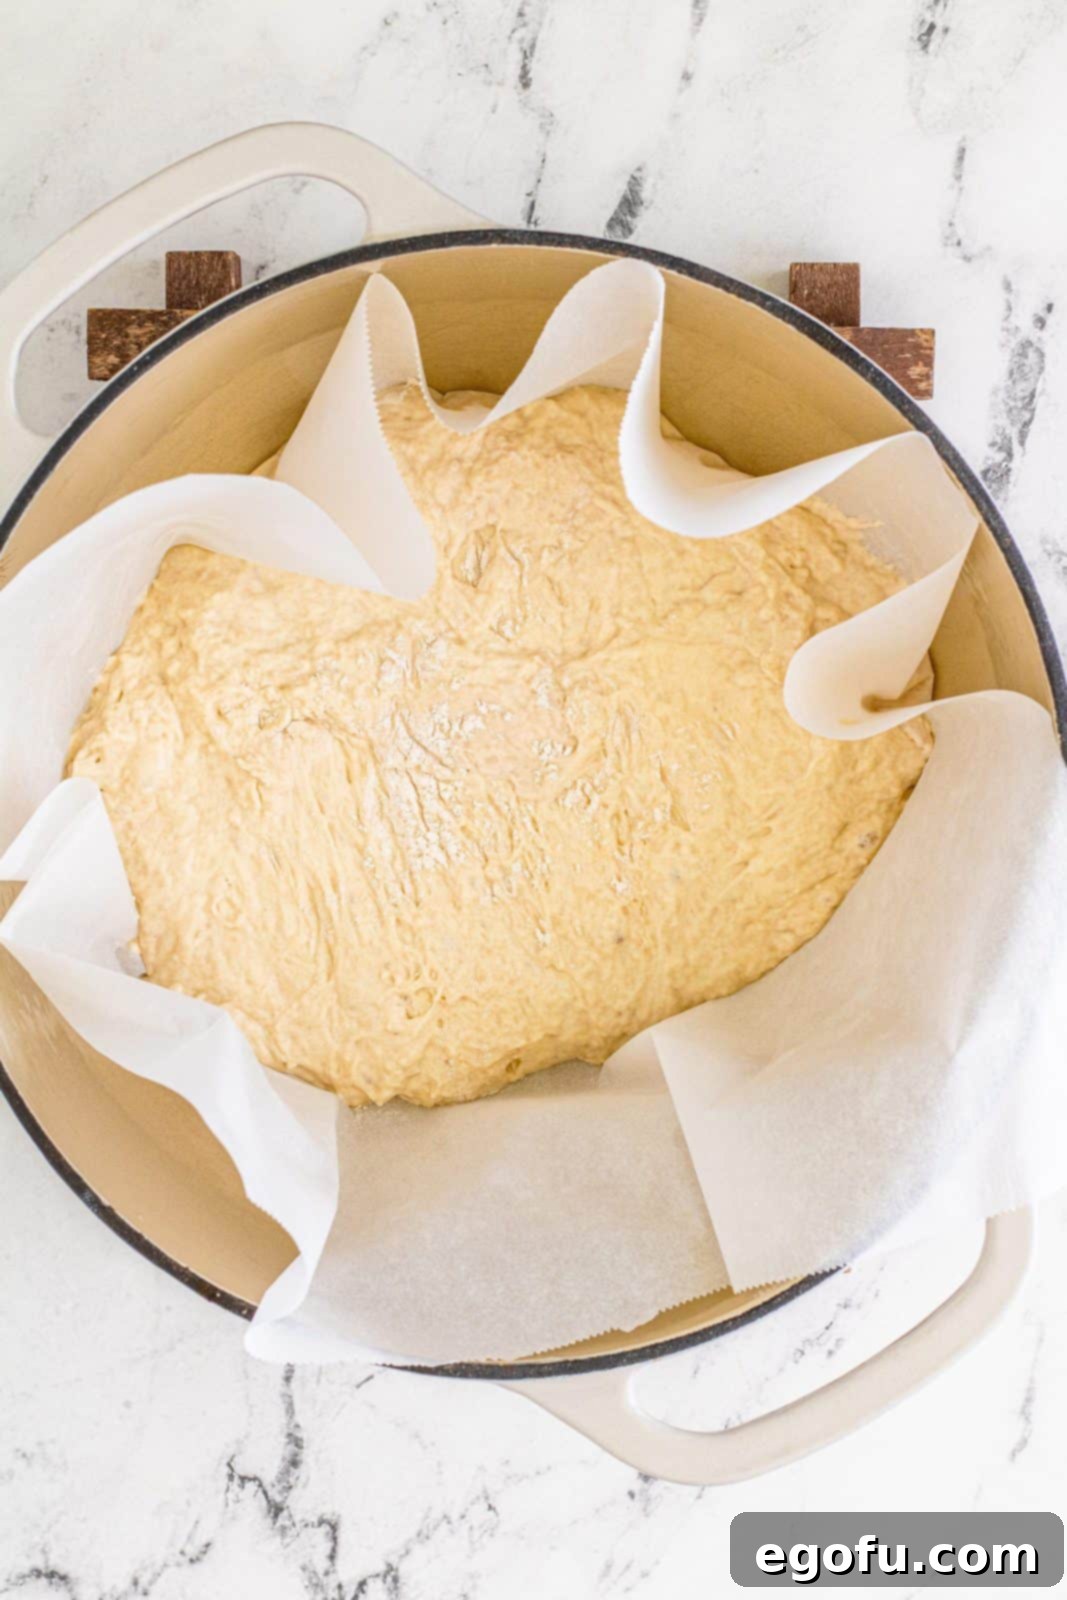
Carefully remove the blazing hot Dutch oven from the oven (use thick oven mitts!). Using the parchment paper as a sling, gently lower the dough into the pot. Be extremely cautious as the pot will be very hot. Cover the Dutch oven with its lid and return it to the oven. Bake for 30 minutes. This covered baking period creates the essential steam that allows the bread to achieve maximum rise and a tender internal texture.
After 30 minutes, carefully remove the lid from the Dutch oven and continue to bake for an additional 10-15 minutes, or until the crust is a deep golden brown and sounds hollow when tapped on the bottom. The uncovered baking phase is where the crust develops its beautiful color and signature crunch. Once baked, carefully lift the bread out of the Dutch oven using the parchment paper and transfer it to a wire rack. Remove the parchment paper.
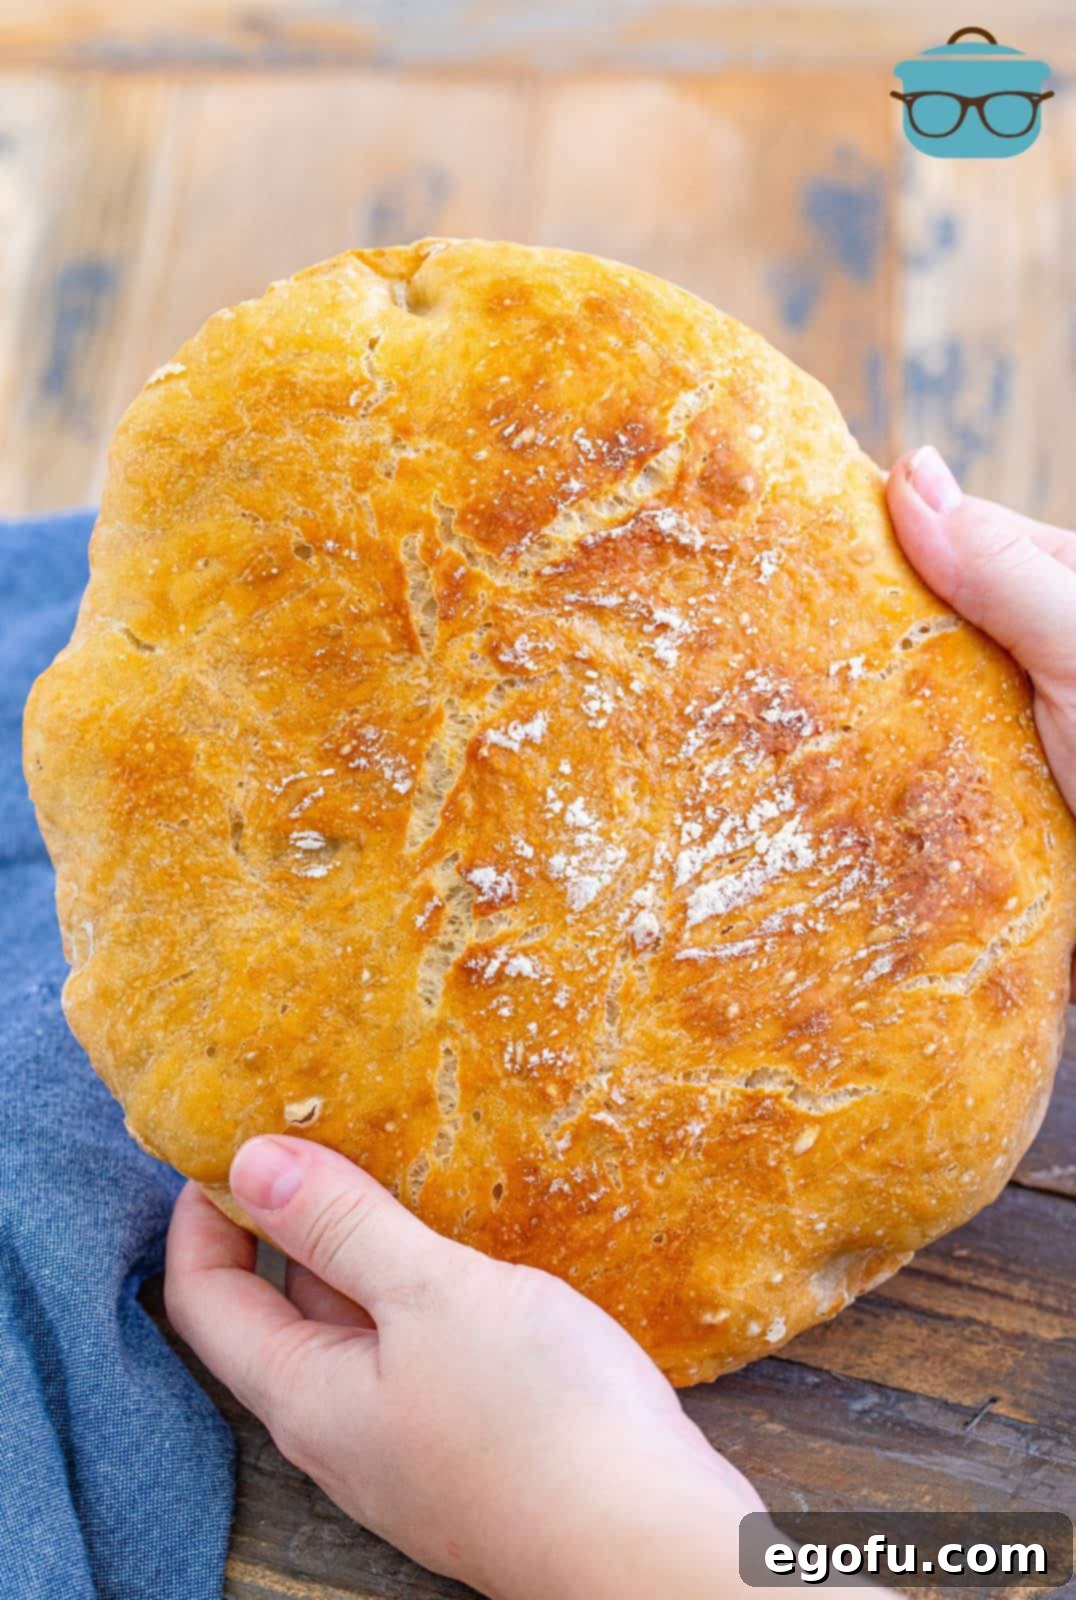
Allow the bread to cool completely on the wire rack before attempting to slice it. This cooling period is crucial; it allows the internal structure of the bread to set properly, preventing a gummy texture and ensuring clean, beautiful slices. Once cooled, slice with a serrated knife and enjoy your magnificent homemade No-Knead Dutch Oven Bread!
Want More Delicious Bread Recipes?
If you’ve fallen in love with homemade bread after trying this No-Knead Dutch Oven Bread, you’re in luck! There’s a whole world of delightful bread recipes waiting to be explored. From fluffy rolls to quick breads, we have something for every craving and skill level. Dive into these other fantastic bread creations:
- English Muffin Bread
- Potato Rolls
- Cheesecake Factory Brown Bread
- Easy Yeast Roll Biscuits
- Dinner Rolls
- Butter Swim Biscuits
- Hot Cross Buns
- Cowboy Bread
- Irish Soda Bread
- Irish Brown Bread
- Honey Wheat Rolls
- Zucchini Bread
- Brioche Buns
- Easy French Bread
- Homemade White Bread
- Easy Beer Bread
- Easy Garlic Bread
- Cornbread Muffins
- Sweet Cornbread

No-Knead Dutch Oven Bread Recipe
Crunchy on the outside and soft on the inside, this No-Knead Dutch Oven Bread is a perfectly easy bread for any occasion.
Recipe Details:
- Prep Time: 5 minutes
- Cook Time: 1 hour 5 minutes
- Rise Time: 18 hours
- Total Time: 19 hours 10 minutes
- Servings: 8
- Author: Brandie Skibinski
Print Recipe | Pin Recipe
Ingredients
- 3 cups all-purpose flour, plus more for dusting
- 1 ½ teaspoons kosher salt
- 2 ¼ teaspoons active dry yeast
- 1 ½ cups water, heated to 100-110°F (38-43°C)
Instructions
- In a large bowl, stir together the flour, salt, and yeast until well combined.
- Add the warm water and stir until a shaggy, wet dough forms. Ensure all flour is incorporated from the bottom and sides of the bowl.
- Cover the bowl tightly with plastic wrap and let it sit in a warm spot for 12-18 hours to rise.
- After the rise, preheat your oven to 450°F (232°C). Place your empty Dutch oven with its lid into the oven as it preheats, letting it heat for 20-30 minutes until very hot.
- Lightly dust a large piece of parchment paper with flour. Carefully transfer the risen dough onto the center of the paper and lightly dust the top with more flour. Gently form it into a round ball.
- Carefully lower the dough, using the parchment paper as a sling, into the hot Dutch oven. Cover with the lid and bake for 30 minutes.
- Uncover the Dutch oven and continue baking for an additional 10-15 minutes, or until the bread is golden brown and sounds hollow when tapped.
- Remove the bread from the Dutch oven using the parchment paper and transfer it to a wire rack. Remove the parchment paper and let the bread cool completely before slicing.
Video Tutorial
Notes
- This bread can be frozen for longer storage. See storage tips in the FAQ section above.
- Ensure the dough rises in a consistently warm environment for at least 12 hours, or even longer (up to 18 hours), for optimal flavor and texture. Many find it convenient to mix the dough before bed to bake the next day.
- The long rise time is essential as this recipe does not involve kneading, allowing gluten to develop naturally over time.
- A 5 to 6-quart Dutch oven is ideal for this recipe; a 5.5-quart was used here.
Course: Breads
Cuisine: American
Nutrition Information (Estimated Per Serving)
- Calories: 182kcal
- Carbohydrates: 37g
- Protein: 6g
- Fat: 1g
- Sodium: 439mg
- Fiber: 2g
- Sugar: 1g
Nutritional Disclaimer
“The Country Cook” is not a dietician or nutritionist, and any nutritional information shared is an estimate. If calorie count and other nutritional values are important to you, we recommend running the ingredients through whichever online nutritional calculator you prefer. Calories and other nutritional values can vary quite a bit depending on which brands were used.
Did you make this recipe? Share it on Instagram @thecountrycook and mention us #thecountrycook!
