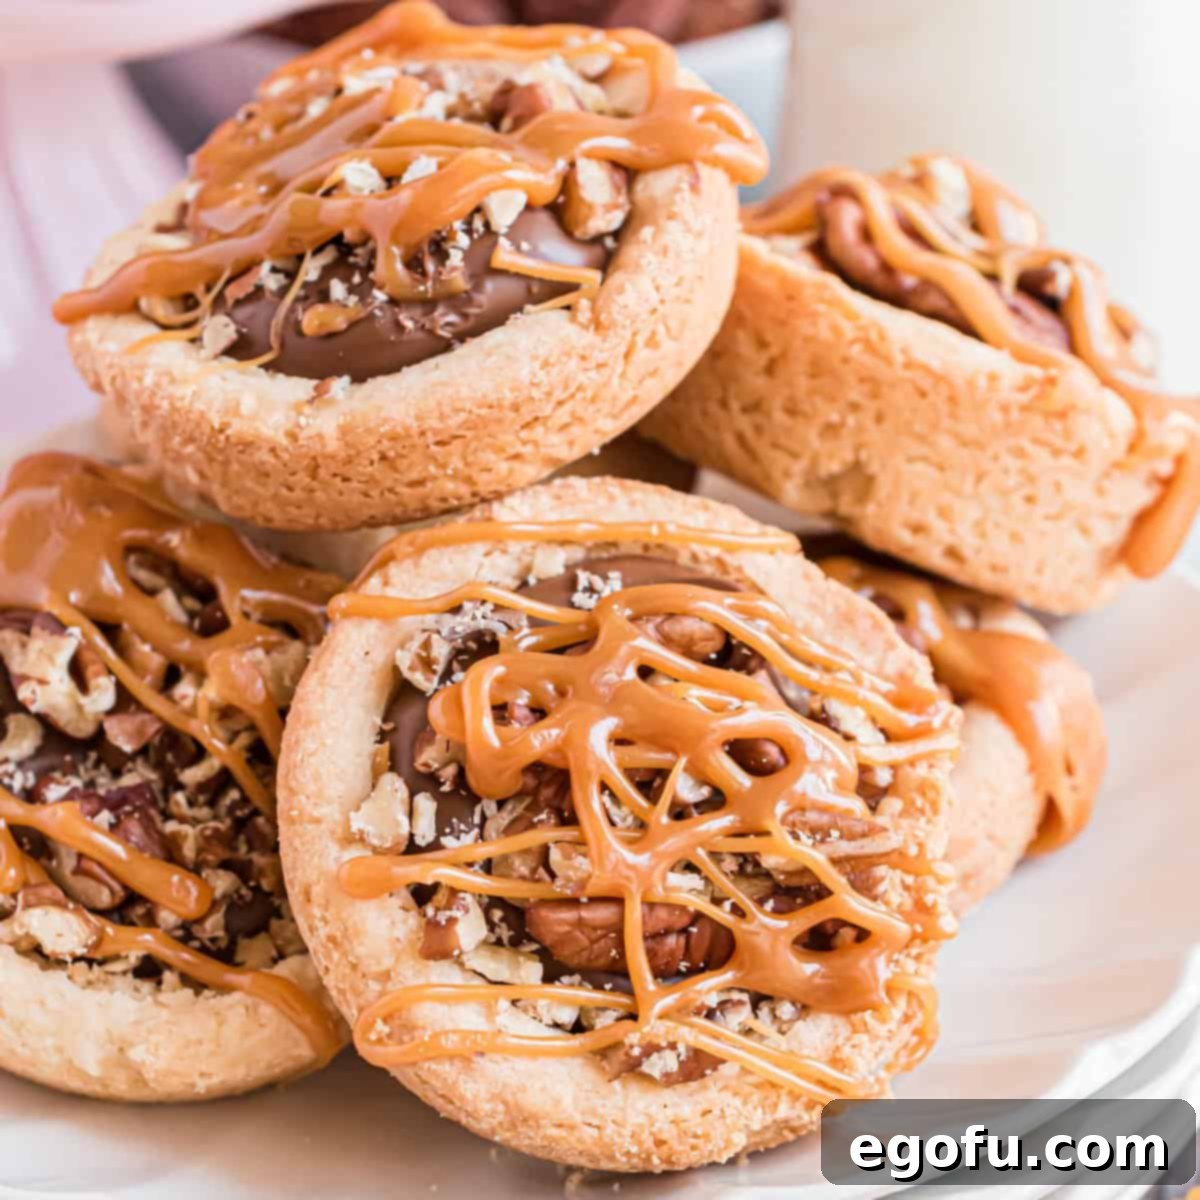
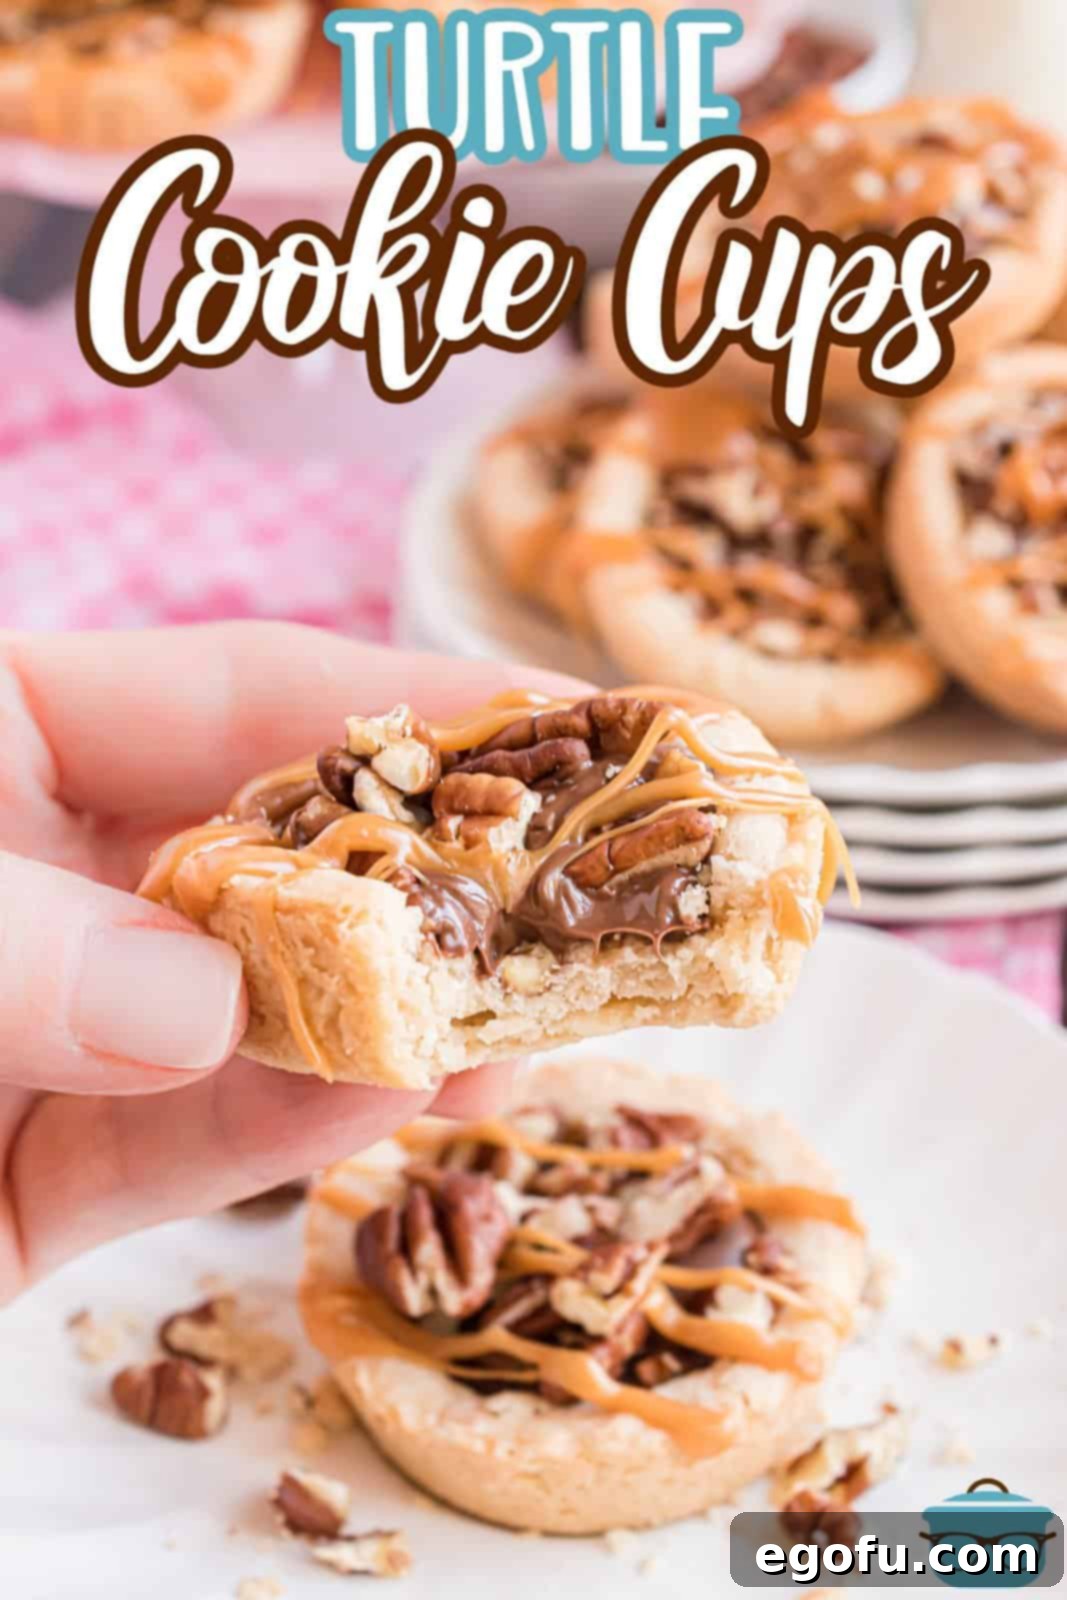
Indulge in the perfect blend of sweet, salty, and crunchy with these irresistible Turtle Cookie Cups! Ready in about half an hour, these delightful handheld treats capture the classic charm of turtle candies in a soft, chewy sugar cookie base. They’re not just easy to make, but they’re also guaranteed to be a crowd-pleaser for any occasion or simply as a well-deserved personal indulgence.
Easy Homemade Turtle Cookie Cups: The Ultimate Sweet & Salty Treat
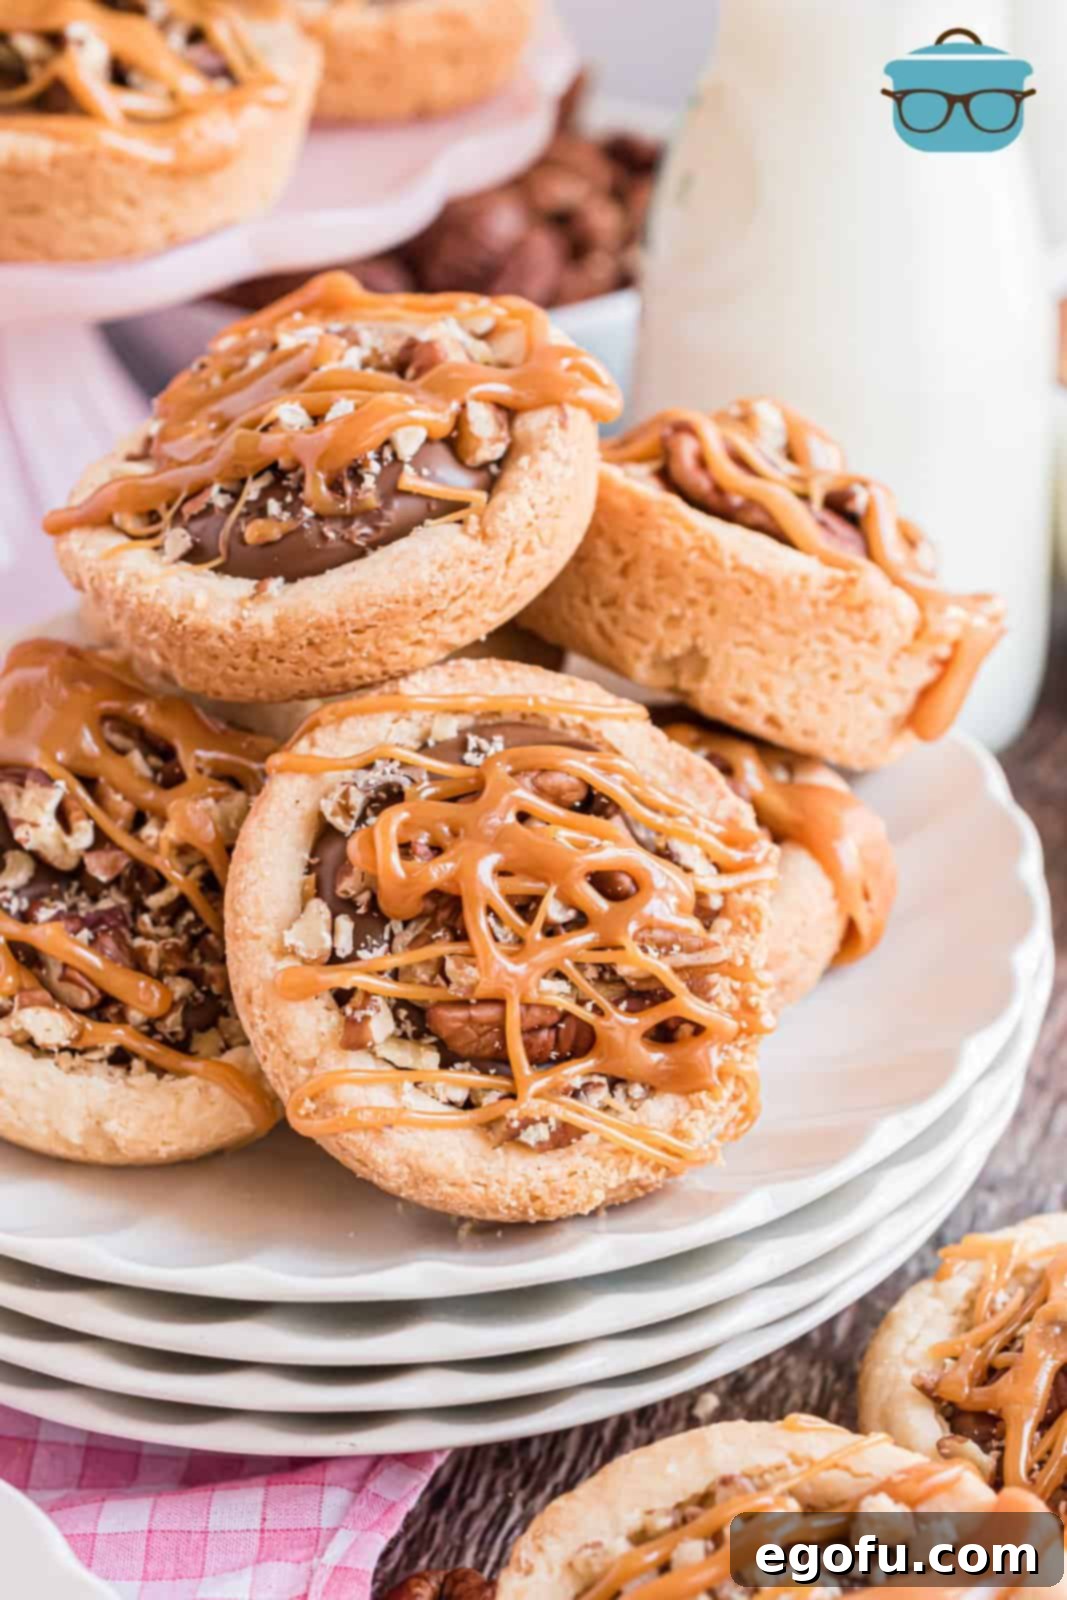
Are you searching for a dessert that delivers on flavor, texture, and pure indulgence without demanding hours in the kitchen? Look no further than these spectacular Turtle Cookie Cups! Imagine a tender, buttery sugar cookie baked into a perfect cup, generously filled with luscious melted chocolate, a gooey caramel drizzle, and a sprinkle of crunchy pecans. Each bite is a harmonious symphony of sweet and salty notes, finished with a satisfying crunch that will leave you craving more. This recipe reimagines the beloved turtle candy into an approachable, bakeable format, making it ideal for seasoned bakers and beginners alike.
Why You’ll Fall in Love with This Turtle Cookie Cup Recipe
There are countless reasons why these Turtle Cookie Cups will become your new go-to dessert. First and foremost, they embody the irresistible flavor profile of classic turtle candies: the rich sweetness of chocolate and caramel perfectly balanced by the earthy crunch of pecans and a touch of salt. This combination is a time-honored favorite for a reason!
Beyond the incredible taste, these cookie cups offer an unmatched ease of preparation. Whether you choose to whip up your sugar cookie dough from scratch or opt for the convenience of store-bought dough, the assembly process is straightforward and fun. They are perfect for last-minute dessert cravings, potlucks, parties, or thoughtful homemade gifts. Their individual cup form makes them effortlessly portable and mess-free, an ideal treat for gatherings where finger foods are appreciated. Plus, the visual appeal of these miniature desserts, with their glistening caramel and scattered nuts, makes them a showstopper on any dessert table.
The Timeless Appeal of Turtle Candy Meets Sugar Cookie
The concept of “turtle candy” dates back over a century, famed for its distinct combination of pecans, caramel, and chocolate, arranged to resemble a turtle’s shell. It’s a classic for a reason – the blend of textures and flavors is simply divine. By infusing this beloved profile into a soft, golden sugar cookie cup, we’ve created a dessert that pays homage to the original while offering a delightful new experience. The cookie provides a comforting, chewy base, transforming the familiar turtle flavors into an even more substantial and satisfying treat. This is more than just a cookie; it’s a miniature dessert masterpiece, capturing all the indulgence in one perfect bite.
Frequently Asked Questions for Perfect Cookie Cups
Baking can sometimes raise questions, and we’re here to help you achieve absolute perfection with your Turtle Cookie Cups. Here are some common queries and detailed answers to ensure your baking experience is smooth and successful:
How do I know when the cookie dough is perfectly mixed?
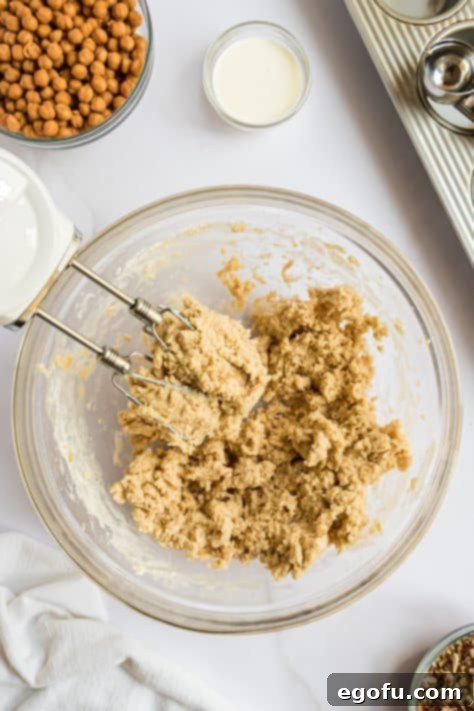
The key to tender, non-stiff cookies lies in not overmixing the dough. You’ll know your dough is ready when the ingredients are just combined and it still holds its shape when you gently squeeze a small portion. The mixture might appear a little crumbly, and that’s perfectly normal. Overmixing develops the gluten in the flour, leading to a tough, chewy cookie instead of the desired soft texture. While an electric mixer speeds up the process, you can absolutely mix this dough by hand; it might just require a bit more elbow grease and patience.
Can I use store-bought cookie dough for this recipe?
Absolutely, and it’s a fantastic time-saver! If you’re short on time or simply prefer not to make dough from scratch, store-bought sugar cookie dough works wonderfully. This makes the recipe even quicker and easier, allowing you to enjoy these delectable treats with minimal fuss. Simply follow the shaping and baking instructions as outlined for homemade dough.
Are there other cookie dough flavors I can use?
Yes, feel free to get creative! While sugar cookie dough provides a classic base, these Turtle Cookie Cups are incredibly versatile. Snickerdoodle dough would add a warm, cinnamon spice note that pairs beautifully with chocolate and caramel. Chocolate chip cookie dough could create a double-chocolate experience, enhancing the richness. Don’t hesitate to experiment with your favorite cookie dough varieties to find your perfect combination.
Why did my cookie cups crumble after baking?
Crumbling is usually a sign that the cookies were removed from the muffin pan before they had enough time to set properly. It’s crucial to allow them to cool in the muffin pan for 5-10 minutes after baking. This crucial cooling period allows the cookies to firm up and makes them much easier to remove without breaking. Another common culprit for dry, crumbly cookies is using too much flour. Always measure your flour correctly using the spoon-and-level method (see ingredient tips below) to avoid this issue.
What’s the best way to store leftover Turtle Cookie Cups?
These cookie cups store beautifully! Keep them at room temperature in an airtight container for 5 to 7 days. If you plan to stack them in layers, place a piece of wax paper or parchment paper between each layer to prevent sticking. For longer storage, these cookie cups freeze exceptionally well. Arrange them in a single layer in a freezer-safe container or bag, again using wax paper between layers if stacking. Frozen cookie cups will maintain their deliciousness for up to 3 months. Simply thaw at room temperature when ready to enjoy.
Can I reheat these cookie cups for a fresh-baked experience?
Absolutely! Reheating these cookie cups can bring back that wonderfully gooey, fresh-baked warmth. A quick 10-15 second burst in the microwave is usually all it takes to soften the cookie slightly and make the chocolate and caramel filling delightfully melted and gooey again. Be careful not to overheat, as this can dry out the cookie.
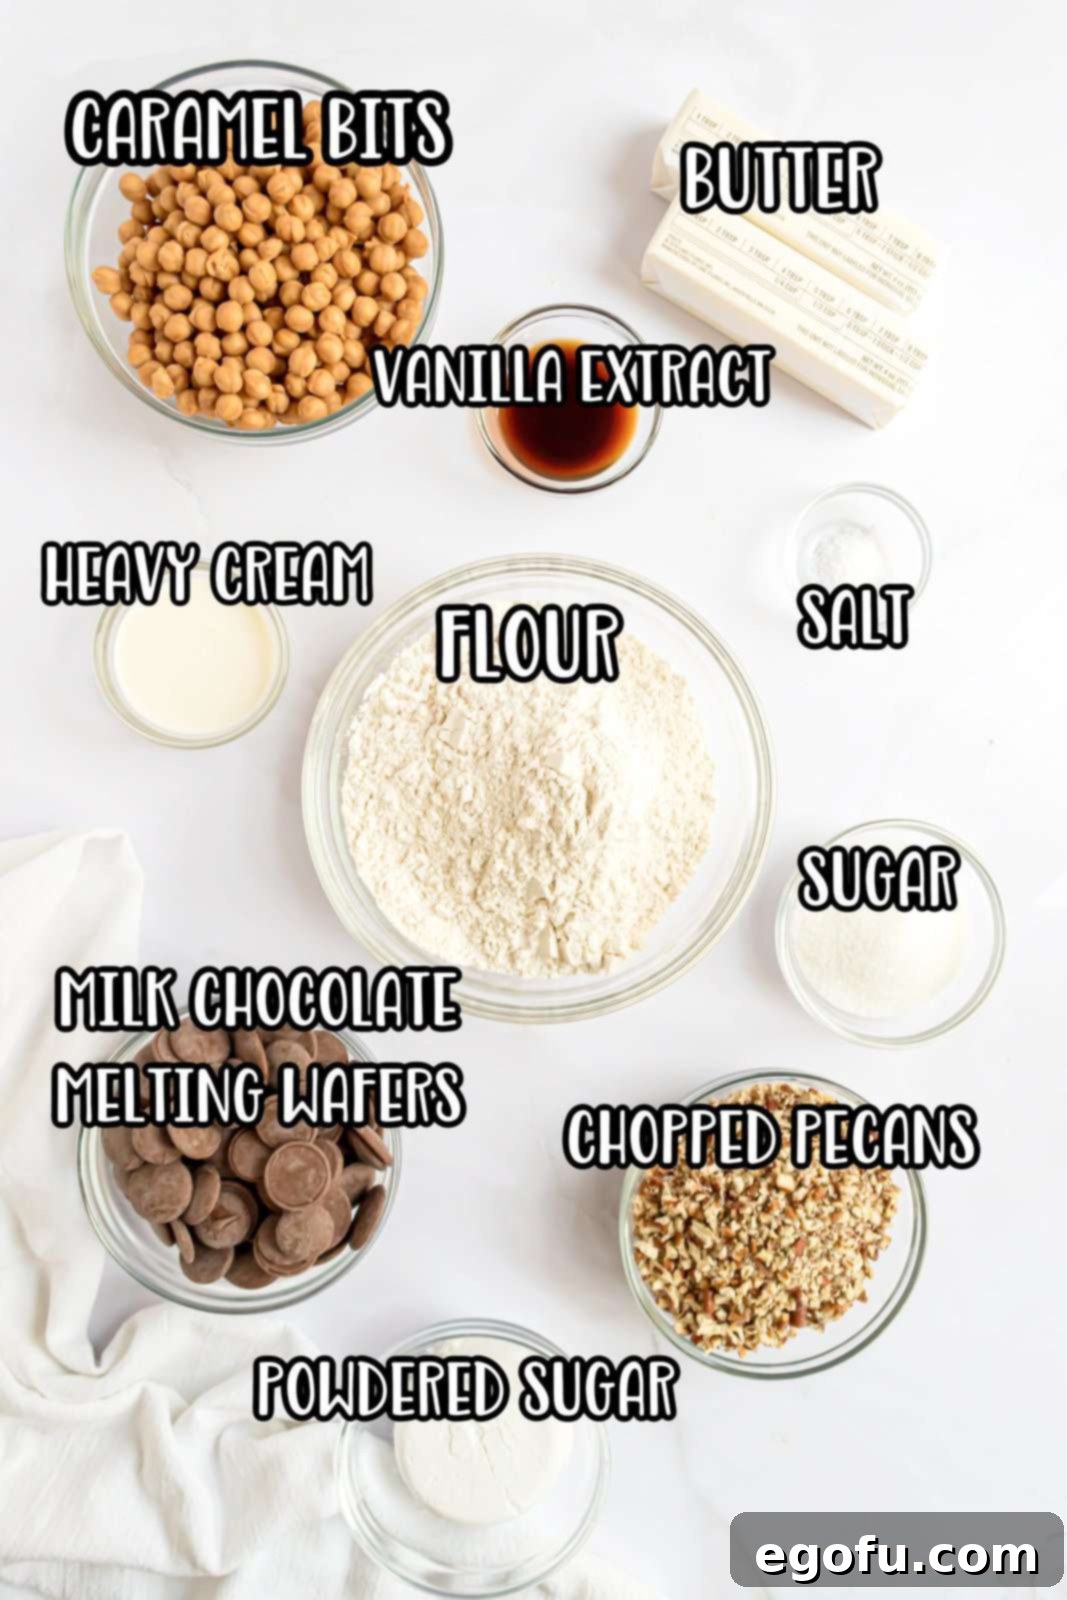
Essential Ingredients for Unforgettable Turtle Cookie Cups
Creating these sensational cookie cups starts with quality ingredients. Here’s a detailed look at what you’ll need and some crucial tips for each to ensure your treats turn out perfect every time.
For the Cookie Base:
- Unsalted Butter: Always use softened, room-temperature butter – not melted. Softened butter creams beautifully with sugar, incorporating air for a light, tender cookie. If you only have salted butter, omit the additional salt called for in the recipe to maintain the right flavor balance.
- Granulated and Powdered Sugars: The combination of both sugars is key to the texture of these cookie cups. Granulated sugar provides crispness, while powdered sugar contributes to a softer, more tender crumb and helps the cookies hold their cup shape without becoming dry or crumbly. Resisting the urge to add more flour to achieve shape is crucial, as it leads to dry cookies.
- All-Purpose Flour: Proper flour measurement is paramount for cookie success. Do not scoop flour directly from the bag with your measuring cup, as this compacts the flour and results in too much being used, leading to dry, dense, and crumbly cookies. Instead, gently fluff the flour in its bag or container with a spoon. Then, spoon the flour lightly into your measuring cup until it’s overflowing. Finally, use the straight edge of a butter knife or a flat spatula to level off the excess flour. This “spoon and level” method ensures accurate measurement.
- Kosher Salt: Salt is a flavor enhancer that beautifully balances the sweetness in desserts. Kosher salt has a larger flake and a cleaner taste. If you don’t have kosher salt, regular table salt can be used; just be aware that it’s finer and more potent, so you might use slightly less (about 3/4 of the amount specified).
For the Decadent Filling:
- Milk Chocolate Chips or Chocolate Melting Wafers: For the chocolate layer, you can use either milk chocolate chips or melting wafers. Melting wafers (often found in the cake decorating aisle or craft stores like Michael’s) tend to melt more smoothly and consistently due to their composition. However, good quality milk chocolate chips also work wonderfully. The goal is a smooth, pourable chocolate that sets nicely.
- Caramel Bits: These small, ready-to-melt caramels are incredibly convenient. If you can’t find caramel bits, you can use individually wrapped Kraft caramels. Simply unwrap the desired amount and heat them with the heavy cream as directed in the recipe instructions.
- Heavy Cream: Essential for creating a smooth, rich caramel drizzle. When combined with caramel bits, it forms a sauce that sets to a pleasing, slightly firm but still gooey consistency on the cookies. If you prefer a softer, runnier caramel, or a quicker option, a good quality store-bought caramel sauce can be used, though it might run off the cookies more easily than the homemade mixture.
- Chopped Pecans: The signature nutty crunch of turtle candies. Ensure they are finely chopped for easy topping. If pecans aren’t your preference, feel free to substitute with another nut you enjoy, such as walnuts or almonds, or omit them entirely for a nut-free version.
- Flaky Sea Salt (Optional): A pinch of flaky sea salt sprinkled over the finished cookie cups elevates the flavors, enhancing the sweet and salty dynamic and adding a gourmet touch.
Step-by-Step Guide: Crafting Your Own Turtle Cookie Cups
Follow these detailed instructions to create beautifully formed and irresistibly delicious Turtle Cookie Cups in your own kitchen.
- Prepare Your Oven and Muffin Pan: Begin by preheating your oven to 350°F (175°C). Next, lightly spray a regular-sized 12-cup muffin pan with nonstick baking spray. For an alternative, you can grease the wells with butter and then dust them lightly with flour for easy removal and to prevent sticking. Set the prepared pan aside.
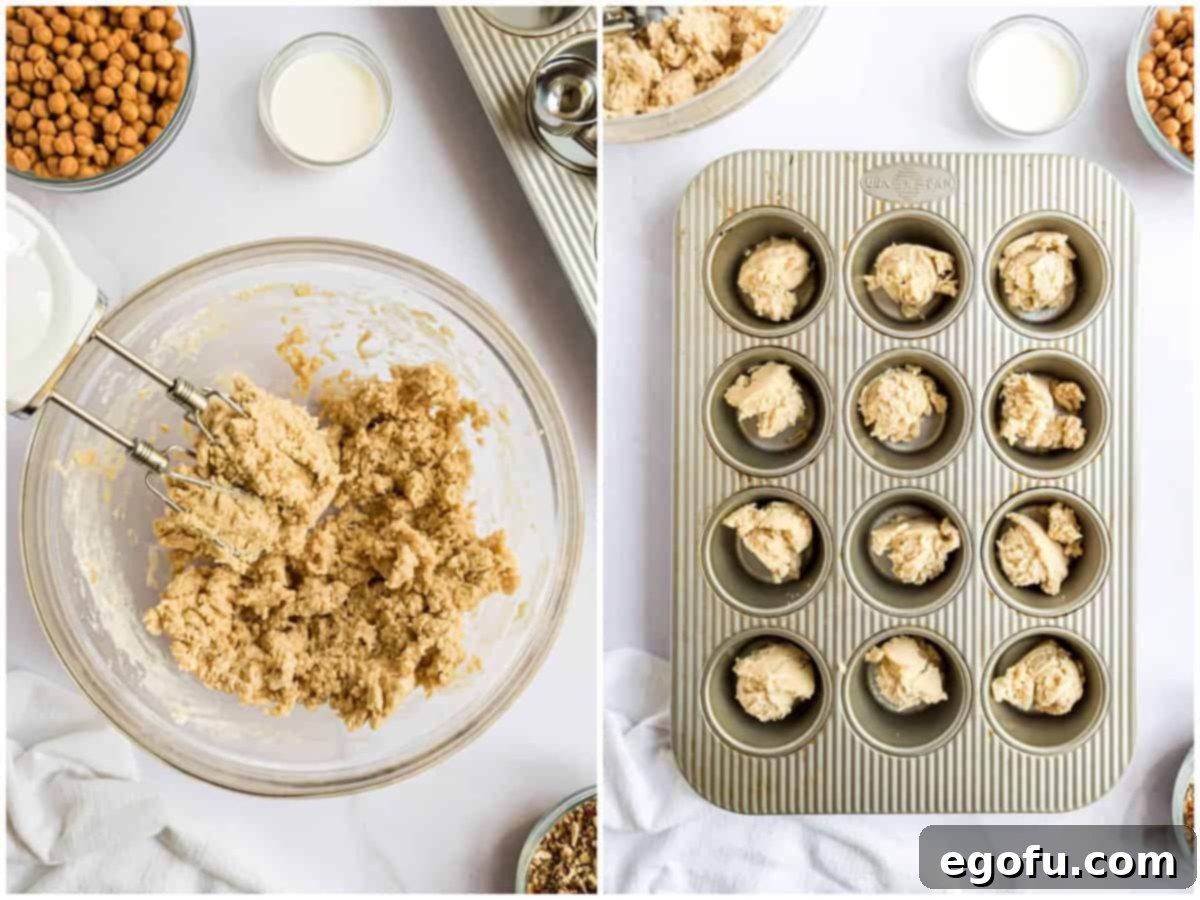
- Cream Wet Ingredients: In a large mixing bowl, combine the softened unsalted butter, granulated sugar, powdered sugar, and vanilla extract. Using an electric hand mixer, beat these ingredients together on medium speed for about 1-2 minutes until the mixture is light, fluffy, and well combined. Scrape down the sides of the bowl as needed to ensure everything is incorporated.
- Incorporate Dry Ingredients: Add the all-purpose flour and kosher salt to the creamed mixture. Mix on low speed just until the flour is barely combined and no dry streaks remain. It’s important not to overmix the dough at this stage, as overworking the flour can lead to tough cookies. The dough may still look a little crumbly, but should come together when pressed.
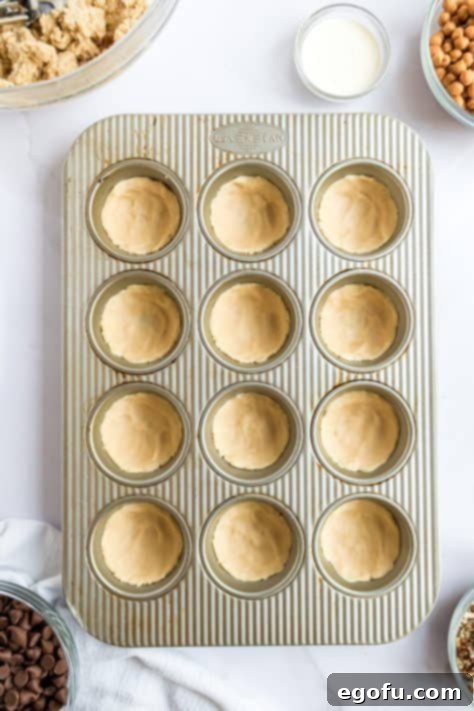
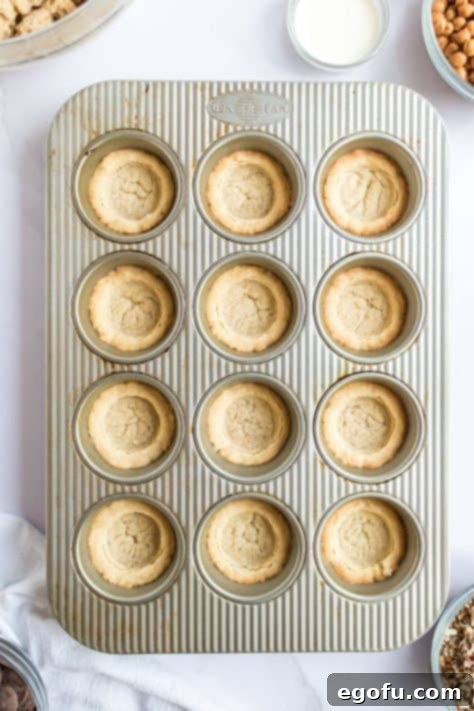
- Form the Cookie Cups: Using a spring-loaded cookie scoop (approximately 2 tablespoons in size) or a regular spoon, scoop out about 2 tablespoons of dough for each muffin well. Place the dough into the center of each well. Then, use your fingers, a small measuring spoon, or the bottom of a shot glass to press the dough evenly into the bottom and about halfway up the sides of each muffin well, forming a cup shape.
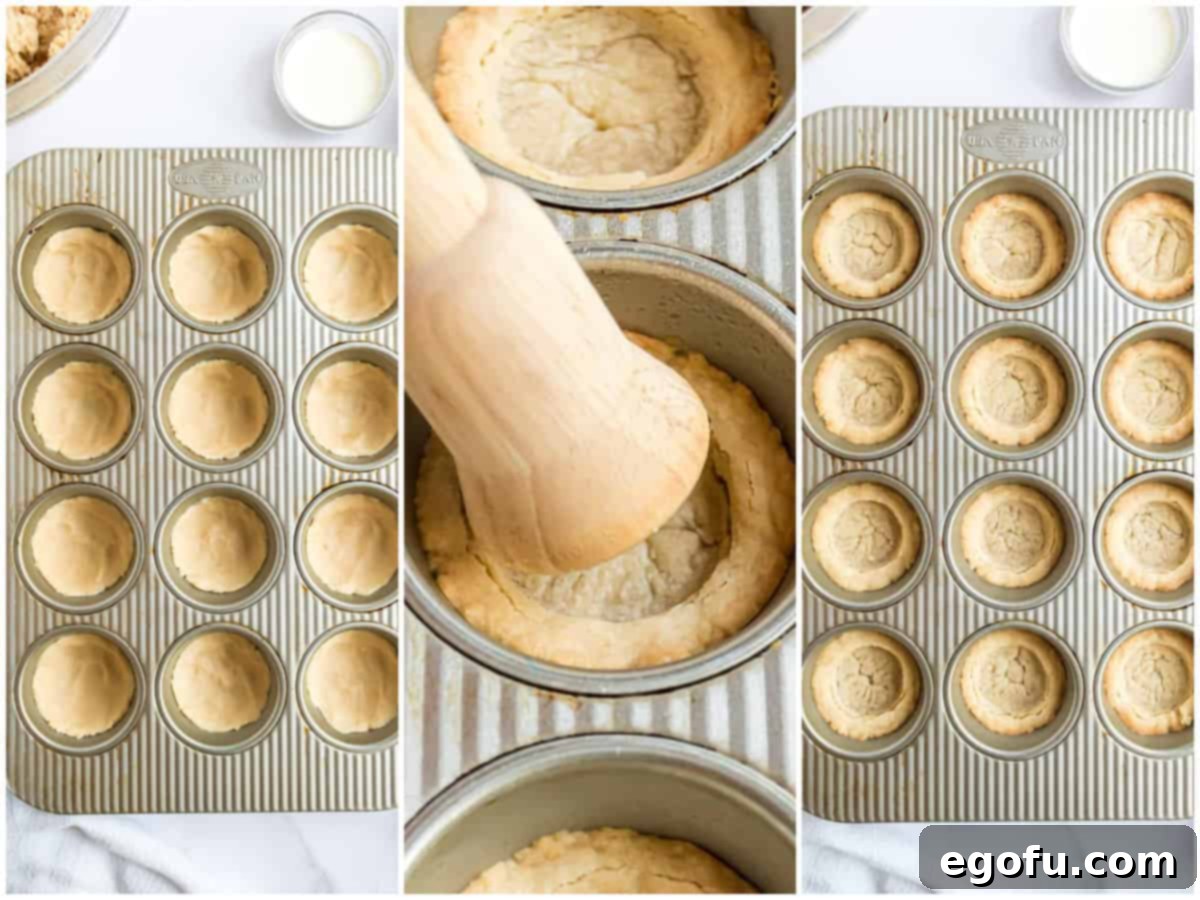
- Bake to Golden Perfection: Place the muffin pan in the preheated oven and bake for 14-16 minutes, or until the edges of the cookie cups are lightly golden brown and the centers are just set. Keep a close eye on them to prevent overbaking.
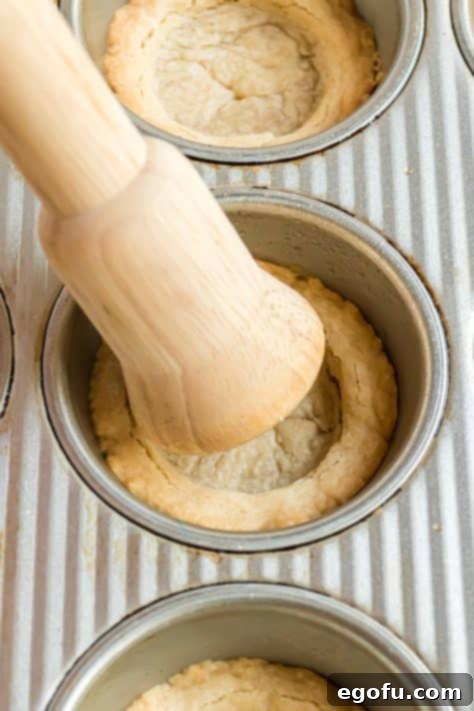
- Create the Indentation: Immediately after removing the muffin pan from the oven, very lightly press the centers of the hot cookies down again to reinforce the cup shape and create a deeper indentation for the filling. The back of a spice jar, a drink muddler, or a small shot glass works perfectly for this task.
- Cool the Cookie Cups: Allow the cookie cups to cool in the muffin pan for about 5-10 minutes. This critical cooling period allows them to firm up, making them much easier to remove without breaking. After this initial cooling, carefully use a butter knife or small offset spatula to gently lift each cookie cup out of its well. Transfer them to a wire cooling rack to cool completely.
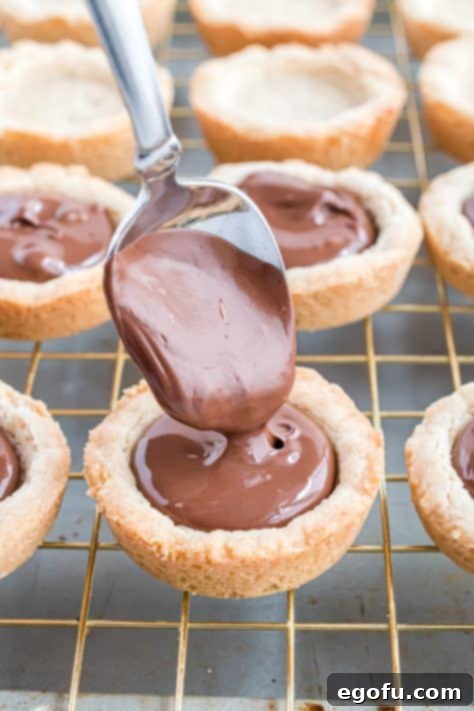
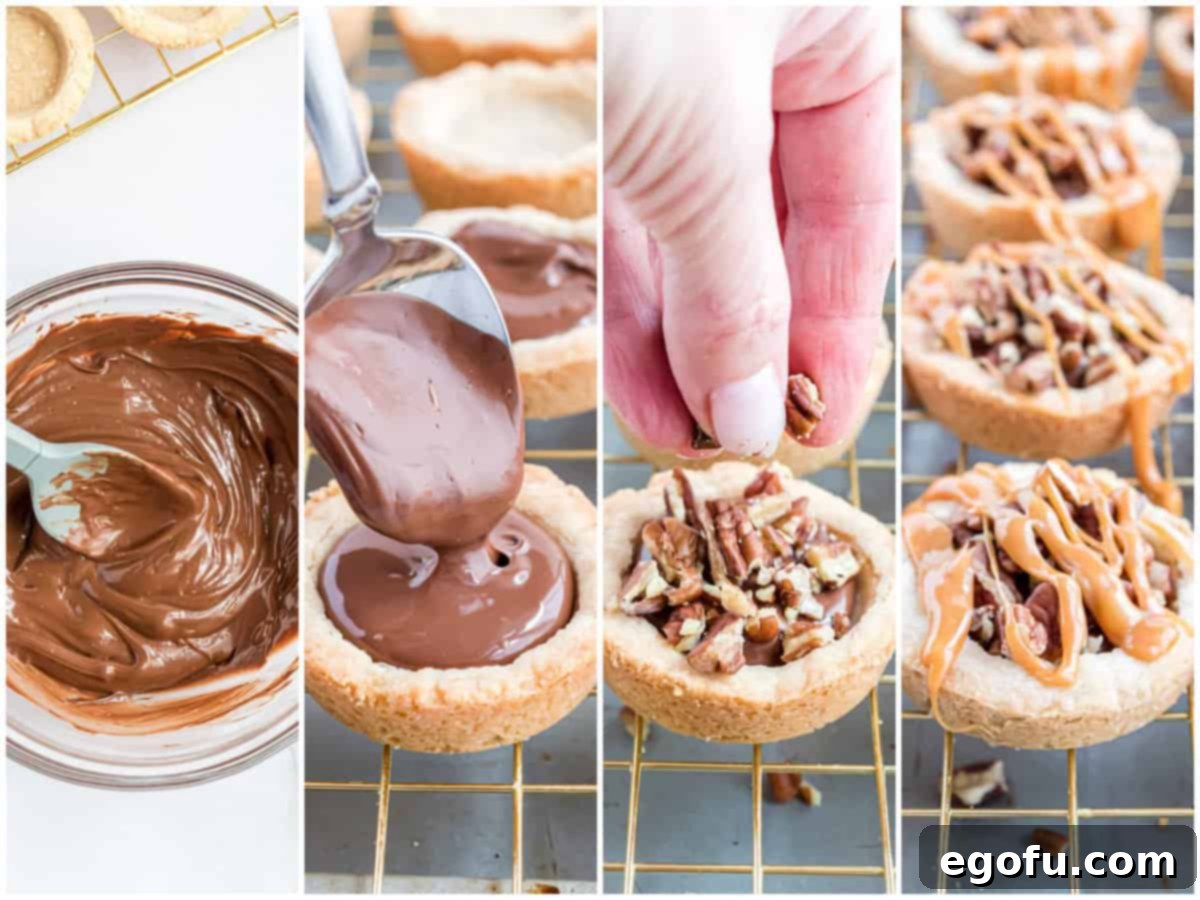
- Melt the Chocolate: While the cookie cups cool, place the milk chocolate chips or melting wafers in a microwave-safe bowl. Heat in the microwave for 30 seconds, then stir thoroughly. Return to the microwave for another 20 seconds, then stir again. If the chocolate is not yet completely smooth and melted, continue heating in 10-15 second intervals, stirring well after each, until it reaches a silky-smooth consistency. Remember, chocolate often doesn’t look melted until you start stirring it!
- Fill with Chocolate and Pecans: Once the cookie cups are completely cool, spoon about 1 tablespoon of the melted chocolate into each cup, spreading it gently to coat the bottom. Immediately sprinkle about 1 tablespoon of chopped pecans over the melted chocolate in each cup. Lightly press the nuts down to help them adhere to the chocolate.
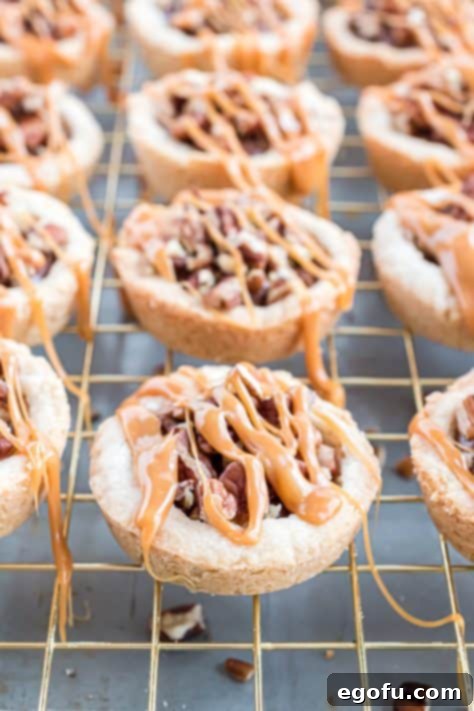
- Prepare and Drizzle Caramel: In a separate microwave-safe bowl, combine the caramel bits and heavy cream. Heat these using the same method as the chocolate: start with 30 seconds, stir, then 20 seconds, stir, and continue in 10-15 second intervals until the caramel is completely melted and smooth. Once melted, drizzle the warm, gooey caramel generously over the pecans in each cookie cup.
- Serve and Enjoy: Allow the chocolate and caramel to set slightly at room temperature, or chill briefly to speed up the process if desired. Once set, these Turtle Cookie Cups are ready to be savored! For an extra touch of gourmet flavor, sprinkle a tiny pinch of flaky sea salt over the caramel before serving.

Tips for Success and Creative Variations
To ensure your Turtle Cookie Cups are always a resounding success and to inspire some creative twists, here are some additional tips:
- Dough Handling: If your cookie dough is too sticky to work with, chill it in the refrigerator for 15-30 minutes. This will make it much easier to handle and press into the muffin wells. Remember the “squeeze test” for readiness: if it holds its shape, it’s good to go!
- Perfect Cup Shape: Don’t be afraid to press the dough firmly into the muffin wells. The goal is to create a well-defined cup that can hold plenty of delicious filling. The immediate indentation after baking is also crucial for maintaining this shape as they cool.
- Flavor Customization:
- Nut Swaps: Not a pecan fan? Try walnuts, almonds, or even a mix of different nuts for varied texture and flavor. Lightly toasting nuts before adding them can also enhance their flavor.
- Chocolate Choices: Experiment with dark chocolate, semi-sweet, or even white chocolate for different flavor profiles. A mix of chocolates can also be delightful.
- Spice It Up: A tiny pinch of cinnamon or nutmeg in your sugar cookie dough can add a subtle warmth that complements the caramel and chocolate beautifully.
- Greasing the Muffin Pan: While baking spray is convenient, some bakers prefer greasing with butter and flouring the pan, which can sometimes result in a slightly crispier edge and easier release. Be mindful that butter and flour can cause faster browning, so adjust your baking time slightly and monitor closely. You can also use butter wrappers to grease the tin effectively.
- Caramel Consistency: If your caramel seems too thick after melting, add a tiny bit more heavy cream (half a teaspoon at a time) and stir until it reaches your desired drizzling consistency. If it’s too thin, let it sit for a few minutes to cool and thicken slightly.
Serving Suggestions for Any Occasion
These Turtle Cookie Cups are versatile treats that can be enjoyed in many ways. Serve them as a sophisticated dessert at dinner parties, a fun snack for casual gatherings, or a delightful addition to holiday cookie platters. They pair wonderfully with a cup of coffee or tea, or alongside a scoop of vanilla bean ice cream for an extra indulgent experience. Packaged in a decorative box, they also make a thoughtful homemade gift for friends, family, or teachers.
Turtle Cookie Cups
Print
Pin
Ingredients
For the cookie
- 1 cup unsalted butter, softened to room temperature
- ¼ cup granulated sugar
- ⅓ cup powdered sugar
- 2 teaspoons vanilla extract
- 2 ¼ cups all-purpose flour
- ¼ teaspoon kosher salt
For the filling
- 1 cup milk chocolate chips
- ¾ cup caramel bits
- 1 Tablespoon heavy cream (see notes)
- ¾ cup chopped pecans
- flaky sea salt (optional)
Instructions
- Preheat oven to 350℉. Spray a regular-sized muffin pan with nonstick baking spray. Set aside.
- In a large mixing bowl, with an electric hand mixer, mix the butter, granulated sugar, powdered sugar, and vanilla extract together for approximately 1- 2 minutes.
- Next, add in the flour and mix just until combined. The mixture may still be a little crumbly. Do not over mix or the dough may become tough.

- Using a spring loaded cookie scoop or a Tablespoon, add about 2 Tablespoons of dough to each muffin well. Press into the bottom and about halfway up the sides.

- Bake for 14-16 minutes or until lightly browned.
- Immediately after baking, very lightly press the centers of the cookies down. The bottom of a spice jar, a drink muddler or a shot glass can be used to do this. This creates a small indentation for the chocolate filling to go into.

- Let the cookies cool for about 5-10 minutes in the muffin pan.

- Next, carefully remove them by using a butter knife to help lift them out of the wells. Transfer to a cooling rack to finish cooling.
- In a microwave-safe bowl, heat the chocolate chips for 30 seconds, then stir. Return to the microwave for 20 seconds, then stir. If the chocolate isn’t smooth, continue heating for 10-15 second intervals until completely melted. Note: sometimes the chocolate won’t initially look melted when you pull it out of the microwave but once you stir it, you’ll know if it has actually melted or not.

- Spoon about 1 Tablespoon of the melted chocolate into each cookie cup.

- Then top with about 1 Tablespoon of the pecans. Press down lightly on the nuts.

- In a microwave safe bowl, heat the caramel bits with the heavy cream using the same melting method as the chocolate chips from above. Drizzle the caramel over the pecans. Then enjoy!

Notes
- Please refer to the FAQs and ingredient list above for other substitutions or for the answers to the most common questions regarding this recipe.
- Leftover cookies should be stored at room temperature in an airtight container for up to 5-7 days or in the freezer for up to 3 months, with wax paper between layers.
- When greasing the muffin tin, you can use butter wrappers to easily wipe the butter around. While non-stick spray is convenient, using butter and flour can sometimes lead to a crispier cookie edge, but also quicker browning, so monitor closely.
Nutrition
Carbohydrates: 24g |
Protein: 2g |
Fat: 13g |
Sodium: 49mg |
Fiber: 1g |
Sugar: 13g
Nutritional Disclaimer
“The Country Cook” is not a dietician or nutritionist, and any nutritional information shared is an estimate. If calorie count and other nutritional values are important to you, we recommend running the ingredients through whichever online nutritional calculator you prefer. Calories and other nutritional values can vary quite a bit depending on which brands were used.
Craving More Irresistible Recipes?
- Turtle Poke Cake
- Turtle Brownies
- Turtle Magic Bars
- Pretzel Rolo Turtles
- S’mores Cookie Cups
Whether you’re an experienced baker or just starting your culinary journey, these Turtle Cookie Cups are a recipe that promises delicious results with minimal fuss. Dive into the delightful world of sweet, salty, and crunchy bliss, and watch as these cookie cups become an instant favorite in your home. Happy baking!
