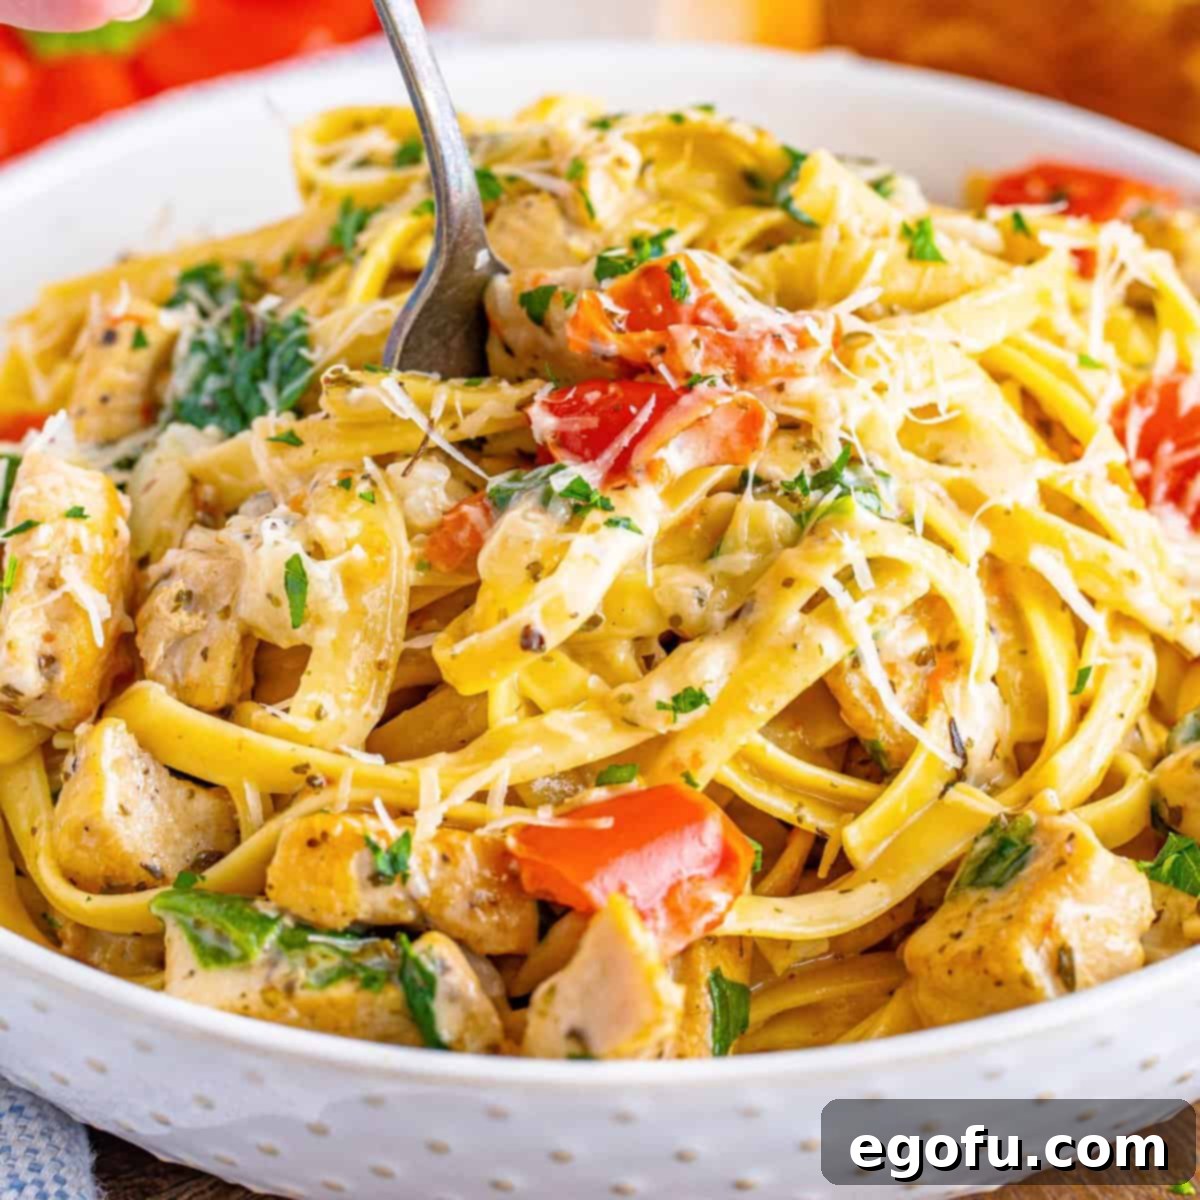
Craving a rich, comforting, and incredibly quick dinner that tastes like it simmered all day? Look no further than this **Instant Pot Creamy Garlic Chicken Pasta**! This delectable one-pot wonder is designed for busy weeknights, delivering a bursting-with-flavor meal that’s ready to devour in under 30 minutes, including the time it takes for your Instant Pot to come to pressure. Imagine tender, juicy chicken, al dente fettuccine, vibrant red bell peppers, and fresh spinach all bathed in a luscious, garlicky cream sauce – all cooked to perfection with minimal effort. This recipe isn’t just easy; it’s a game-changer for anyone seeking a gourmet meal without the lengthy cooking time or pile of dirty dishes. It’s a guaranteed family favorite that will have everyone asking for seconds!
Unlock Effortless Deliciousness with Your Instant Pot
The Instant Pot has revolutionized home cooking, transforming complex recipes into simple, hands-off processes, and this Creamy Garlic Chicken Pasta is a prime example. If you’re searching for an incredibly easy and remarkably delicious meal that practically cooks itself, then this is the dish you’ve been dreaming of. This vibrant and intensely flavorful pasta creation features succulent, bite-sized chicken pieces, aromatic garlic, sweet red bell pepper, nutrient-rich spinach, and perfectly cooked fettuccine pasta, all immersed in a velvety, rich cream sauce. Utilizing just a handful of straightforward ingredients and the incredible efficiency of your beloved Instant Pot pressure cooker, you can present a meal that rivals your favorite Italian restaurant, all from the comfort of your own kitchen and in record time. Say goodbye to endless stirring and multiple pots – your Instant Pot handles the magic, leaving you free to relax and enjoy the enticing aromas filling your home.
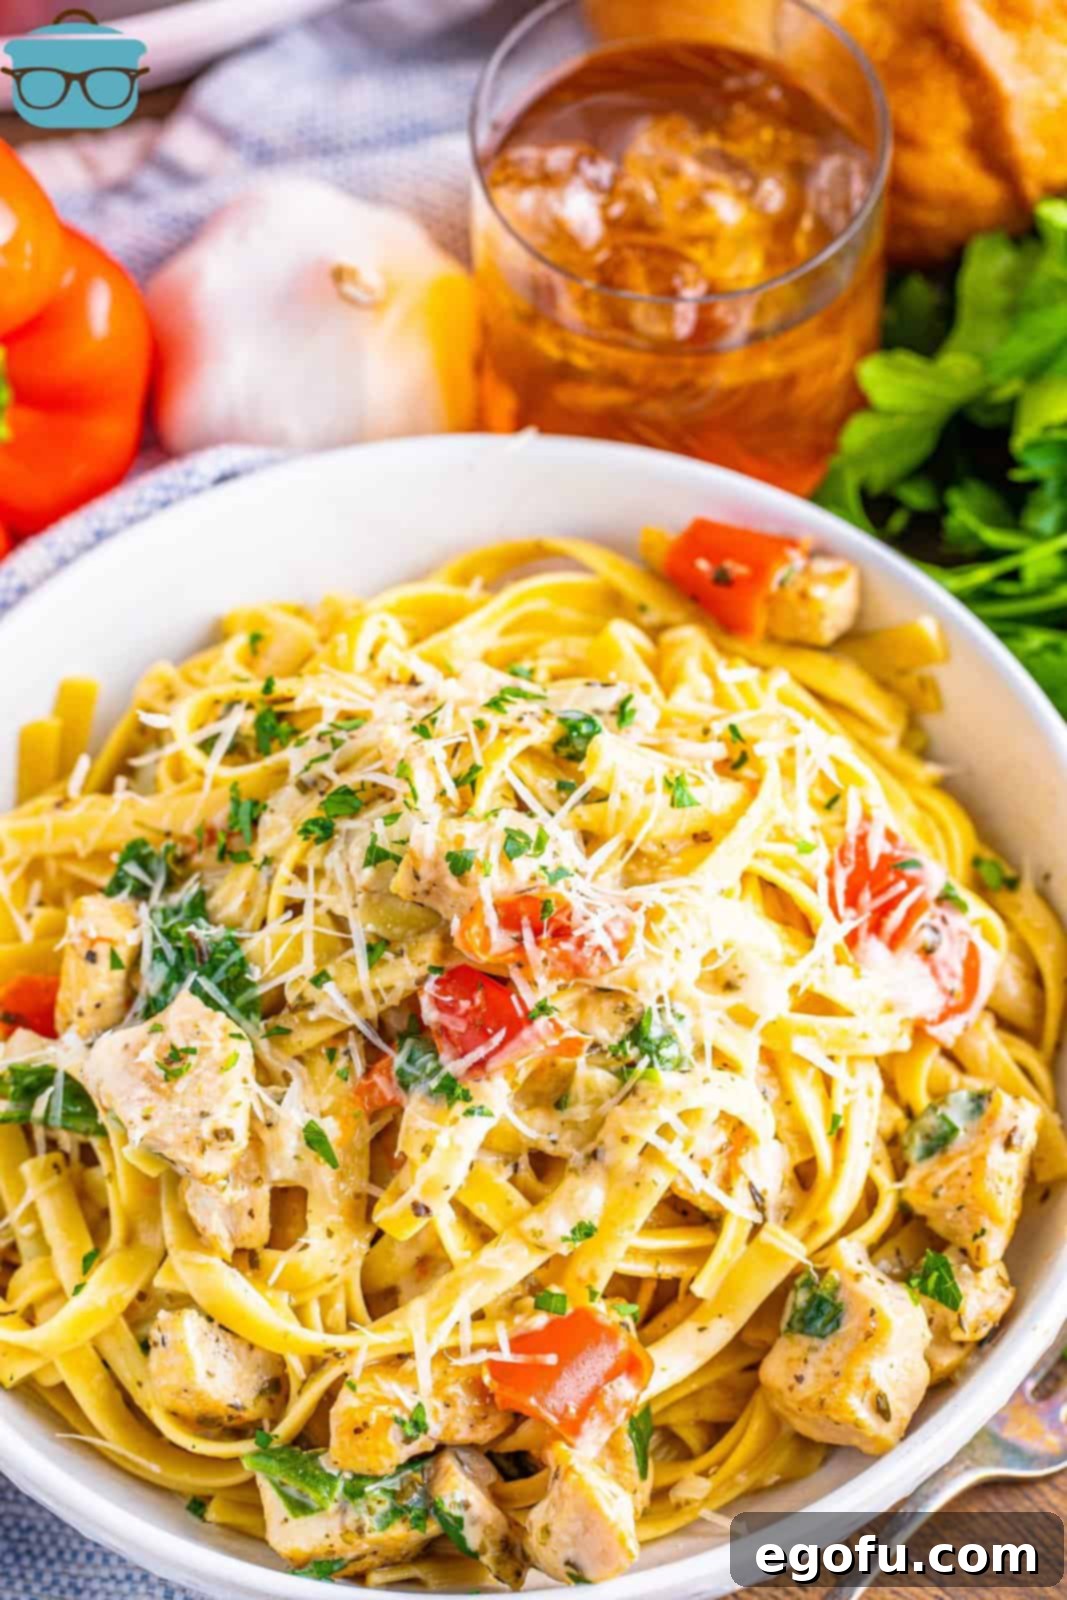
Why This Instant Pot Creamy Garlic Chicken Pasta Will Become Your Go-To Recipe
This isn’t just another pasta dish; it’s a culinary triumph born from convenience and flavor. Here’s why this Instant Pot Creamy Garlic Chicken Pasta will quickly earn a permanent spot in your weekly meal rotation:
- **Unbeatable Speed:** From prep to plate, this meal is ready in under 30 minutes. That includes the time your Instant Pot needs to come to pressure, making it an ideal choice for frantic weeknights or when unexpected hunger strikes.
- **One-Pot Wonder:** Say goodbye to a sink full of dishes! Everything, from browning the chicken to cooking the pasta and building the sauce, happens in a single pot. This drastically cuts down on cleanup time, giving you more moments to savor your delicious creation.
- **Incredible Flavor Depth:** The Instant Pot’s pressure cooking method locks in moisture and infuses every ingredient with rich, intense flavors. The garlic, Italian seasonings, tender chicken, and creamy sauce meld together beautifully, creating a symphony of taste that’s both comforting and gourmet.
- **Effortless Execution:** Even if you’re new to Instant Pot cooking, this recipe is incredibly straightforward. With simple steps and minimal hands-on time, you’ll feel like a culinary pro without the stress.
- **Customizable & Versatile:** This recipe is a fantastic base for customization. Easily swap proteins, add different vegetables, or adjust the seasoning to suit your family’s preferences. It’s perfect for using up ingredients you already have on hand.
- **Family-Friendly Appeal:** Pasta and chicken are universal favorites, and when combined with a creamy, savory sauce, it creates a meal that appeals to even the pickiest eaters. It’s wholesome, hearty, and satisfying for all ages.
Prepare to be amazed by how easily you can achieve such delicious results. This Creamy Garlic Chicken Pasta isn’t just a meal; it’s a solution for delightful, stress-free dining any night of the week.
Frequently Asked Questions About Instant Pot Creamy Garlic Chicken Pasta
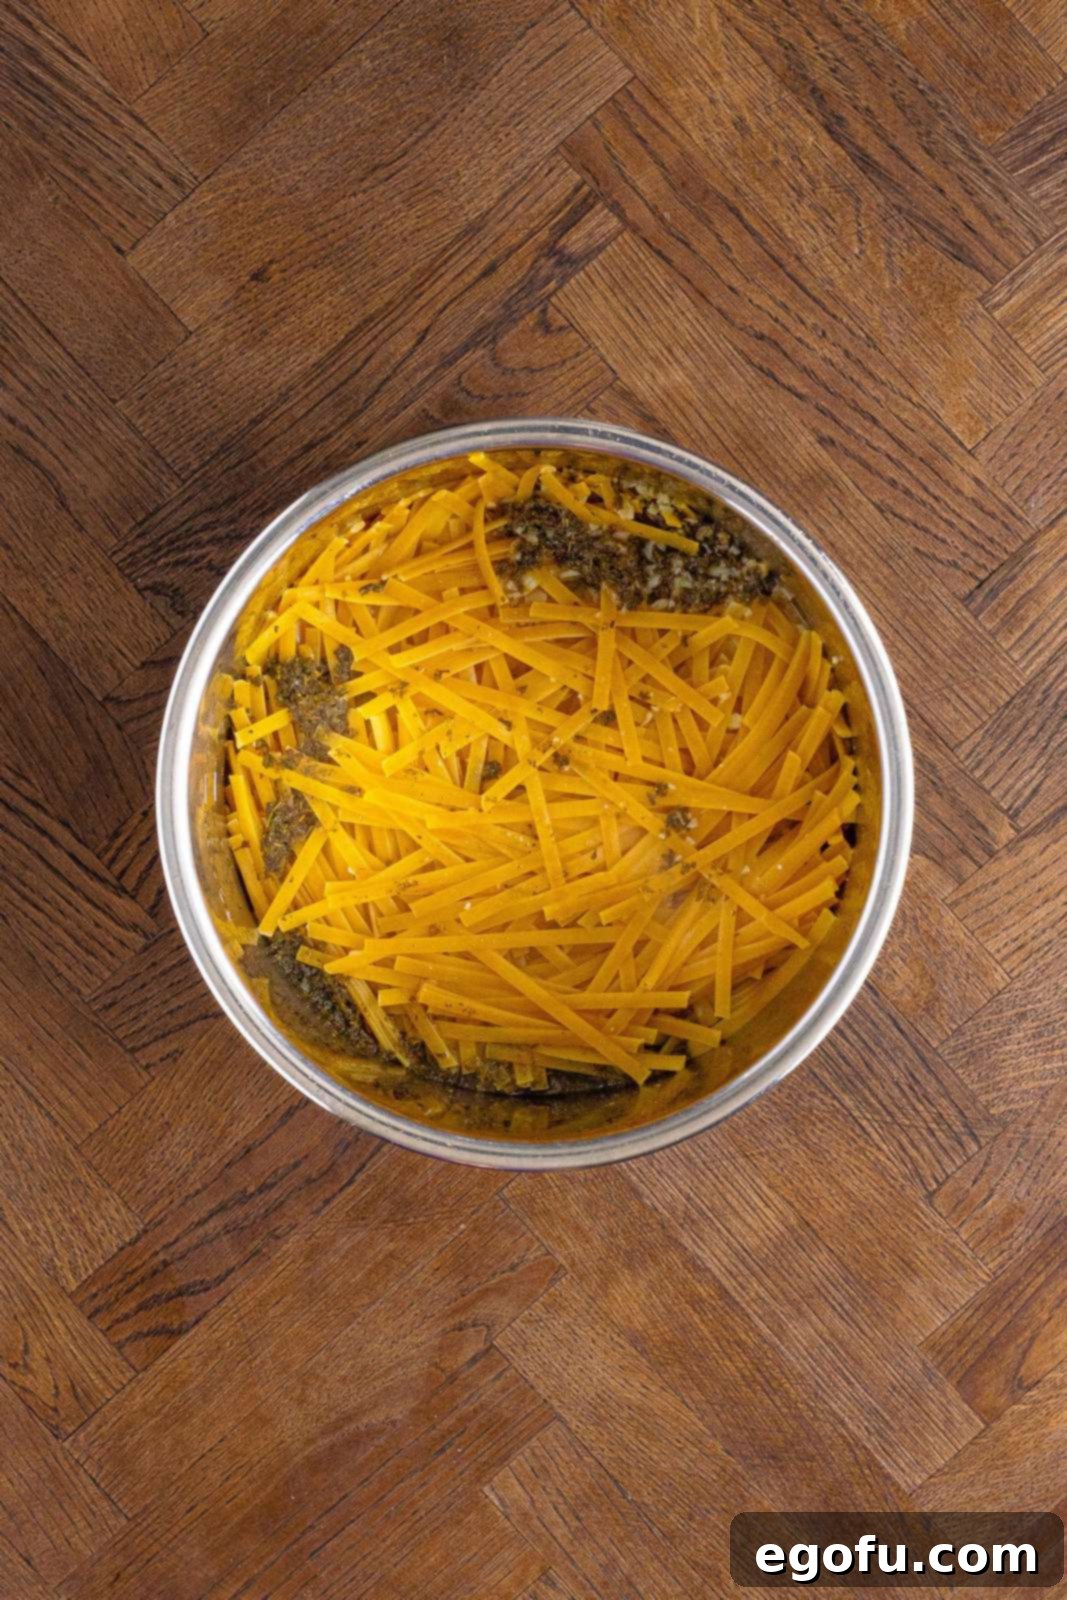
It’s a common concern when cooking pasta in a pressure cooker without continuous stirring, but fear not – the Instant Pot is incredibly efficient, and with a few simple tricks, you can achieve perfectly separated, al dente noodles every time! The absolute key to preventing a clumpy mess is to ensure you **break the fettuccine in half** and then **fan it out** as you layer it into the pot. Think of it like a delicate fan or crisscross pattern rather than just dumping it in a pile. This strategic arrangement allows the hot steam and cooking liquid to circulate freely around each strand of pasta, ensuring even cooking and preventing the noodles from fusing into a solid block. If you simply toss the pasta in haphazardly, you significantly increase the risk of it sticking. Proper fanning is a small step that makes a huge difference in the final texture of your dish.
While this delicious creamy chicken pasta recipe has a quick “cook time” of just 5 minutes under pressure, it’s crucial to remember that this 20-minute total estimate (from the original recipe description) does not factor in the time your Instant Pot needs to build up to full pressure. This “pre-heating” phase, often called the “come to pressure” time, can vary. Generally, for a recipe like this with a moderate amount of liquid and contents, it takes approximately **10 to 15 minutes** for your pot to reach optimal pressure before the actual cooking countdown begins. Several factors influence this, including the volume and initial temperature of the liquid (using warm broth can speed it up slightly), the density of the food inside, and even your elevation. Don’t be alarmed if it takes a bit longer on some days; this is a normal part of the pressure cooking process and contributes to the magic of the Instant Pot!
Absolutely! While the Instant Pot streamlines the process into a single pot, you can certainly adapt this delightful Creamy Garlic Chicken Pasta recipe for the stovetop. It will require a couple more pots but the delicious result is well worth the effort. Here’s how to do it:
- **Cook the Pasta Separately:** First, bring a large pot of salted water to a boil and cook your fettuccine pasta according to package directions until it’s al dente. Drain well and set aside. You might want to reserve about half a cup of pasta water before draining, just in case you need to adjust the sauce consistency later.
- **Sauté Aromatics and Chicken:** In a large skillet or Dutch oven, heat a little olive oil over medium-high heat. Add your finely diced onion and large-diced red bell pepper. Sauté for about 3-5 minutes until they begin to soften and become fragrant. Remove them from the pan and set aside.
- **Brown the Chicken:** Add a bit more olive oil to the same skillet if needed. Season your bite-sized chicken breast chunks with salt and pepper. Add the chicken to the hot skillet and cook, stirring occasionally, until it’s beautifully browned on all sides. Remember, you’re browning for flavor and texture, not necessarily cooking it all the way through at this stage.
- **Build the Sauce:** Once the chicken is browned, return the sautéed onions and bell peppers to the skillet. Stir in the minced garlic, Italian seasoning, and dried oregano. Cook for just 30 seconds until the garlic is fragrant, being careful not to burn it.
- **Simmer to Perfection:** Pour in the chicken broth and heavy cream. Stir everything together. Bring the mixture to a gentle simmer, then reduce the heat to low, cover the skillet, and let it cook for about 8-10 minutes, or until the chicken is thoroughly cooked through and the sauce has slightly thickened.
- **Combine and Serve:** Finally, add the cooked pasta and fresh spinach to the skillet. Stir vigorously to combine all the ingredients, ensuring the pasta is well coated and the spinach begins to wilt from the residual heat. Once the spinach has softened, stir in the freshly grated Parmesan cheese until it’s melted and fully incorporated into the sauce. Taste and adjust seasonings as needed. Serve immediately, perhaps with a sprinkle of fresh parsley and extra Parmesan.
This rich and flavorful pasta dish is wonderfully satisfying on its own, but pairing it with the right side dishes can elevate your meal into a truly complete and balanced experience. We highly recommend serving this pasta with:
- **Fresh, Hot Garlic Bread or Cheesy Breadsticks:** A crusty loaf of garlic bread is the quintessential accompaniment to any pasta dish. Its savory, buttery garlic flavor perfectly complements the creamy sauce, and it’s ideal for soaking up every last drop of that deliciousness. You can easily make your own or grab a ready-to-bake option from the store.
- **A Crisp Green Salad:** A light, refreshing green salad offers a fantastic contrast to the richness of the pasta. Opt for a simple garden salad with mixed greens, cherry tomatoes, cucumbers, and your favorite vinaigrette dressing. It adds a welcome freshness and a healthy balance to the meal. You can easily assemble a fresh salad or pick up a convenient pre-bagged salad mix.
- **Roasted or Steamed Vegetables:** To boost your veggie intake, consider serving a side of roasted asparagus, broccoli florets, or green beans. A simple drizzle of olive oil, salt, and pepper, then roasted until tender-crisp, makes for a delightful and healthy addition.
- **Caprese Salad Skewers:** For a touch of elegance, small skewers with cherry tomatoes, fresh mozzarella balls (bocconcini), and basil leaves, drizzled with balsamic glaze, offer a lovely fresh element.
Choose one or two of these sides, and you’ll have a restaurant-worthy meal that’s both hearty and well-rounded.
Storing your delicious Creamy Garlic Chicken Pasta correctly ensures you can enjoy it for days to come. Any leftover pasta should be transferred to an **airtight container** and refrigerated promptly. It will stay fresh and flavorful in the refrigerator for up to **3-4 days**. We do **not recommend freezing** this dish, as dairy-based sauces tend to separate and become grainy upon thawing and reheating, significantly affecting the texture.
When it comes to reheating, you have a couple of options, but our preference is the stovetop:
- **Stovetop Reheating (Recommended):** For the best results, reheat your leftovers gently on the stovetop over medium-low heat. Place the pasta in a skillet or saucepan and add a small splash of **heavy cream** or **chicken broth** (about 1-2 tablespoons per serving). This extra liquid helps to rehydrate the pasta and loosen the sauce, which often thickens considerably as it cools. Stir frequently until heated through. This method allows you to easily adjust the sauce consistency and prevents the pasta from drying out or becoming rubbery.
- **Microwave Reheating:** If you’re short on time, the microwave can work. Place a single serving in a microwave-safe bowl, add a tablespoon of heavy cream or broth, and heat in 1-minute intervals, stirring in between, until warmed through. Be careful not to overheat, as this can make the chicken tough and the sauce oily.
Always stir well after reheating to re-emulsify the sauce and distribute the flavors. A little extra fresh Parmesan or parsley as a garnish can also help revive the dish!
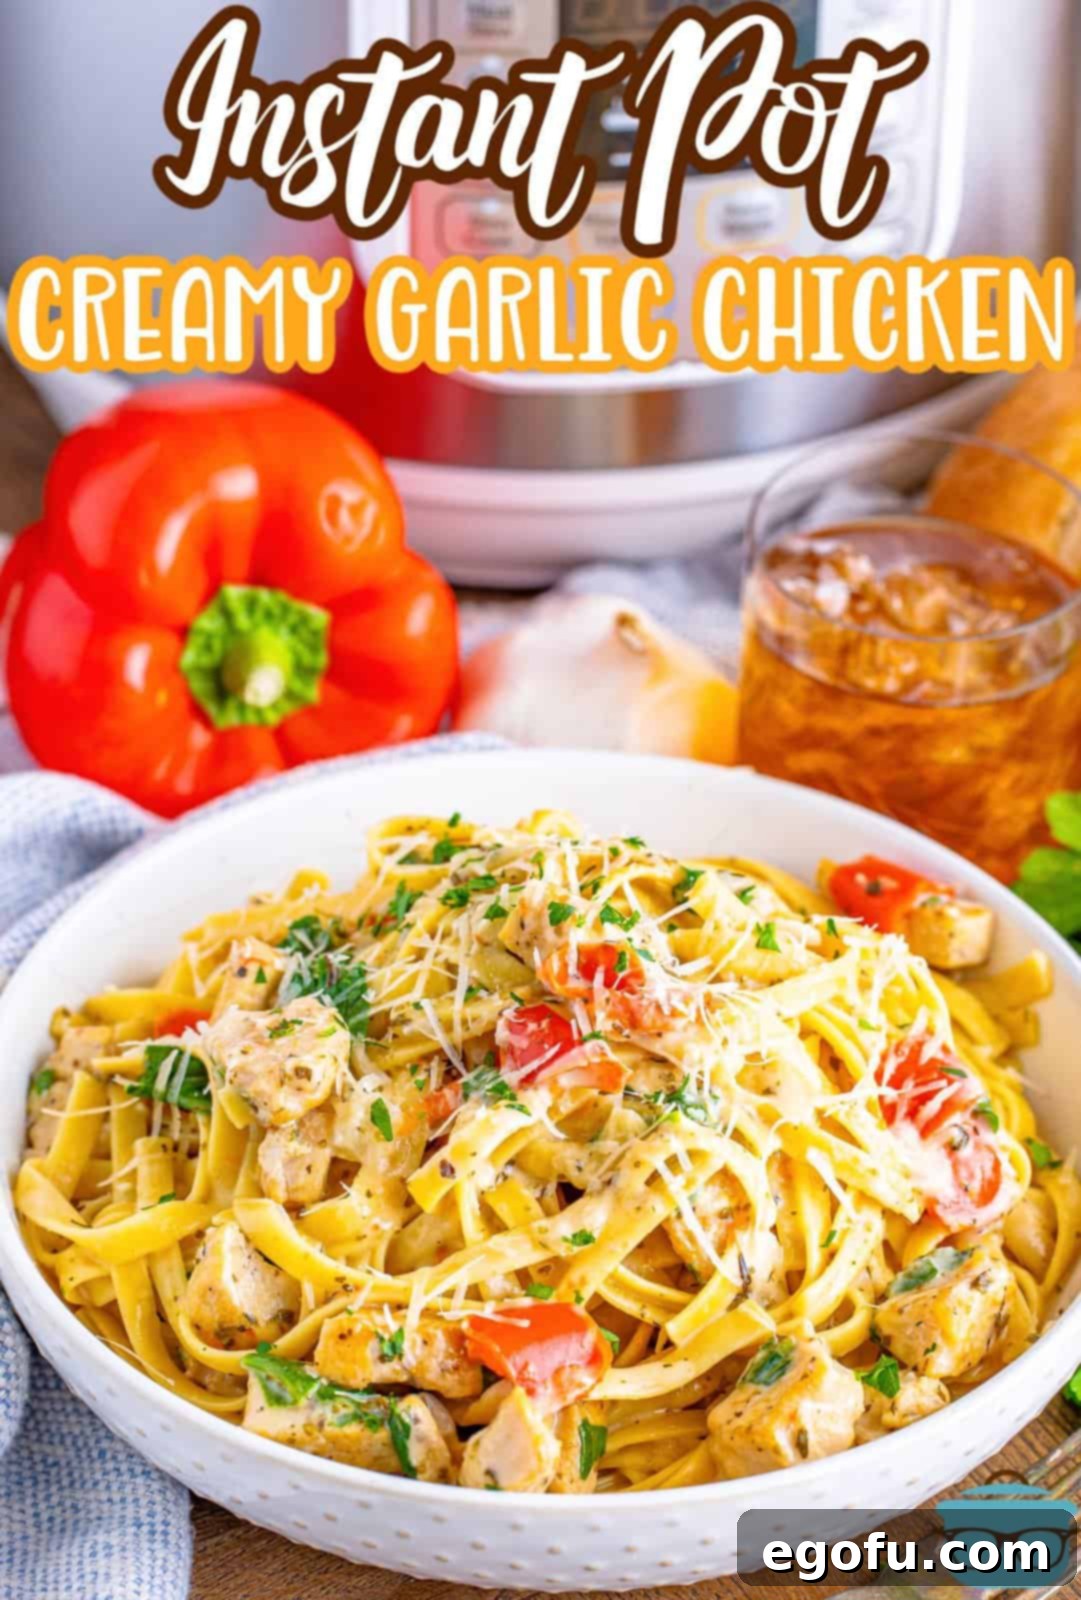
Key Ingredients for Your Instant Pot Creamy Garlic Chicken Pasta
Crafting this incredible dish requires a selection of fresh, high-quality ingredients that harmonize to create its signature creamy, savory profile. Here’s a closer look at what you’ll need and some helpful tips for each component:
- Chicken Breast: We recommend using boneless, skinless chicken breast cut into bite-sized chunks for even cooking and easy eating. However, you can absolutely substitute boneless, skinless chicken thighs for a richer flavor and even more tender texture. If you’re looking for a different protein, ground beef, ground chicken, or ground turkey could potentially work, though the cooking times and method for browning might need slight adjustments (these haven’t been tested specifically with this Instant Pot method). For a vegetarian option, you can omit the chicken entirely or add plant-based protein alternatives like chickpeas or firm tofu at the end.
- Olive Oil: A good quality extra virgin olive oil is preferred for its flavor, especially during the initial sautéing stages. However, any neutral cooking oil you prefer, such as avocado oil or canola oil, will work equally well. Just ensure it doesn’t have an overpowering flavor that would clash with the delicate creamy sauce.
- Red Bell Pepper: The red bell pepper adds a beautiful pop of color, a hint of sweetness, and a subtle crunch that complements the dish. While red is our favorite for its vibrant hue and mellow flavor, feel free to use green bell pepper for a more robust, slightly bitter taste, or yellow/orange bell peppers for a sweeter profile. If you’re not a fan of peppers, you can easily omit them or replace them with other quick-cooking vegetables like diced zucchini or mushrooms (add these later with the garlic).
- Garlic: This is a “garlic chicken pasta” after all, so don’t skimp! Freshly minced garlic offers the most pungent and authentic flavor, truly making the dish shine. Aim for four cloves, but feel free to add more if you’re a garlic enthusiast! In a pinch, jarred minced garlic can be used, but be aware that its flavor might be slightly milder.
- Fettuccine Pasta: The broad, flat strands of fettuccine are perfect for clinging to the creamy sauce. It’s crucial to break the pasta in half before adding it to the Instant Pot and fan it out evenly to prevent sticking and ensure uniform cooking. Spaghetti or linguine are excellent substitutes, requiring the same fanning technique. While other pasta shapes like penne or rotini might work, they haven’t been extensively tested with this specific Instant Pot pressure cooking time, so adjust cooking time carefully if you experiment.
- Chicken Broth: This liquid forms the base of our savory sauce and provides the necessary liquid for the pasta to cook under pressure. For those mindful of sodium intake, feel free to use low-sodium or no-sodium chicken broth, adjusting the salt content later to your preference. Vegetable broth can be used as a vegetarian alternative.
- Heavy Cream: This ingredient is non-negotiable for achieving that incredibly rich, velvety, and luxurious sauce. It must be heavy cream (or heavy whipping cream) due to its high-fat content, which prevents it from curdling under heat and provides the desired thickness. Milk or half-and-half are simply not rich or thick enough and may separate, leading to a thinner, less satisfying sauce.
- Chopped Fresh Spinach: Spinach adds a wonderful boost of nutrients, a touch of earthy flavor, and a beautiful green contrast. It wilts down quickly into the hot pasta, adding volume without overwhelming the dish. If spinach isn’t your preference, you can leave it out entirely or consider other tender greens like chopped kale (add earlier to allow for softening) or arugula (stir in at the very end off heat).
- Freshly Grated Parmesan Cheese: Finishing the dish with a generous amount of freshly grated Parmesan cheese adds a salty, nutty, and umami depth that is simply irresistible. Freshly grated is always superior to pre-shredded varieties, which often contain anti-caking agents that can affect melting. Use as much or as little as you like! For a different flavor profile, you could also experiment with a blend of Parmesan and mozzarella or Pecorino Romano for a sharper taste.
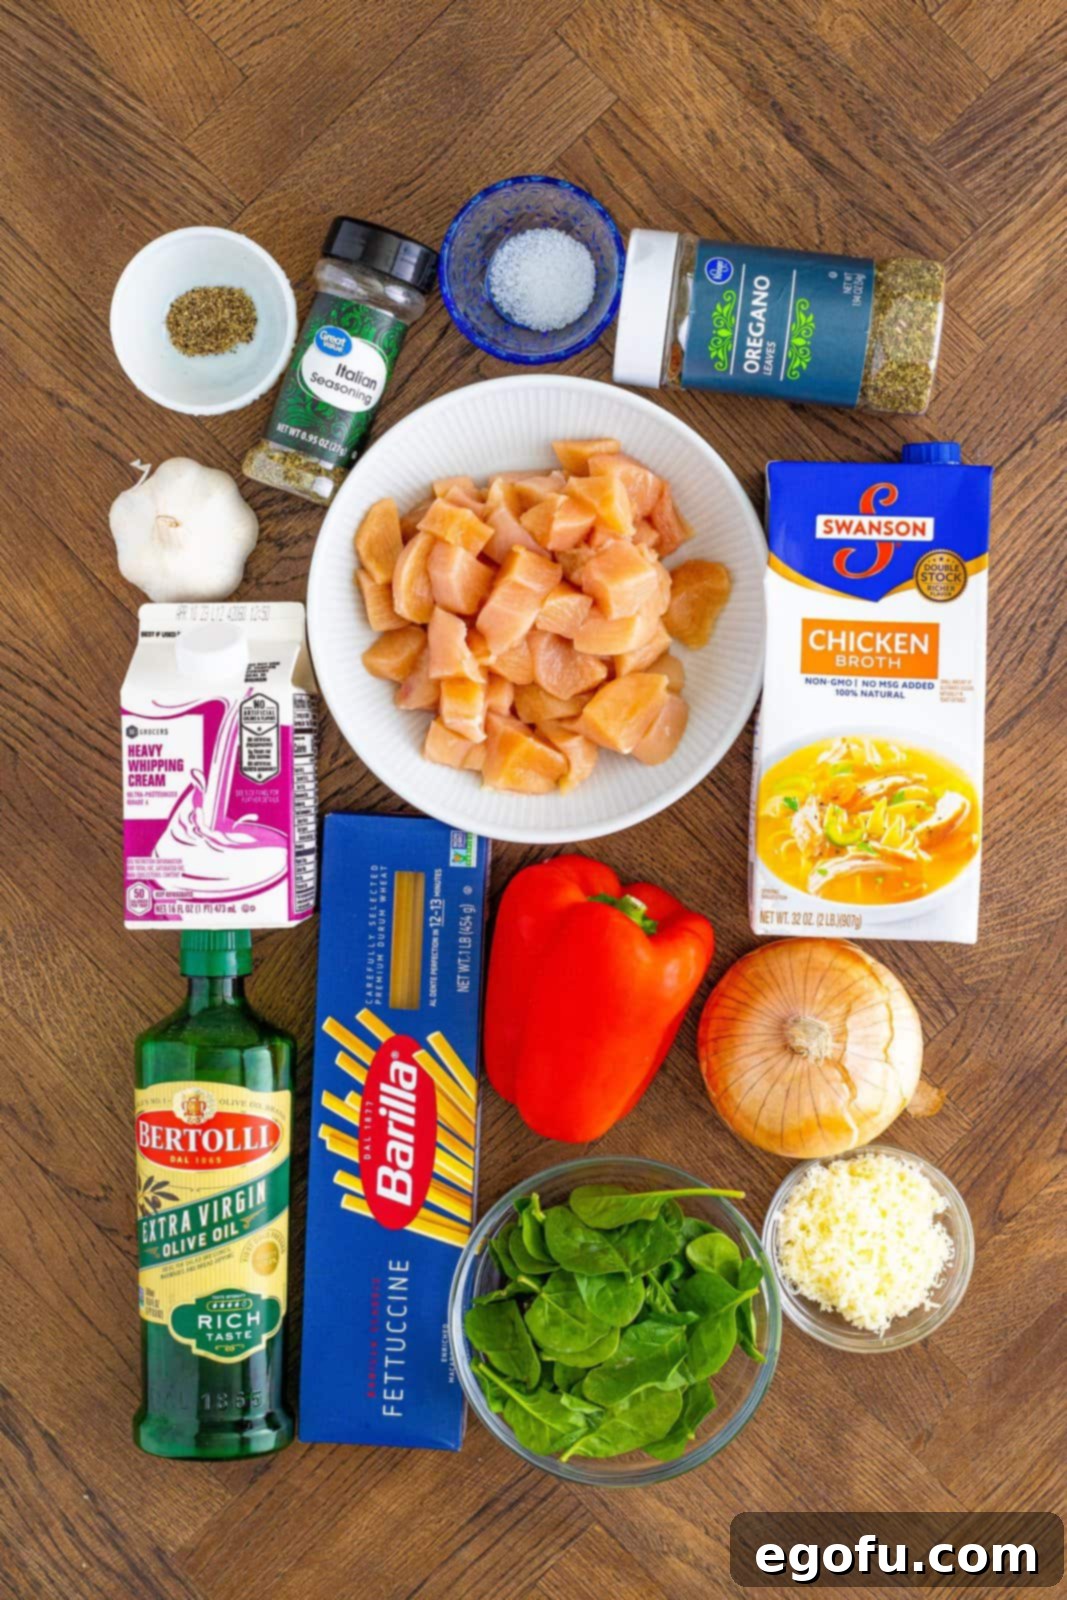
Crafting Your Instant Pot Creamy Garlic Chicken Pasta: A Step-by-Step Guide
Follow these detailed instructions to create a truly irresistible one-pot meal that will impress with its flavor and convenience. Remember to always refer to your Instant Pot’s specific model instructions for safe operation.
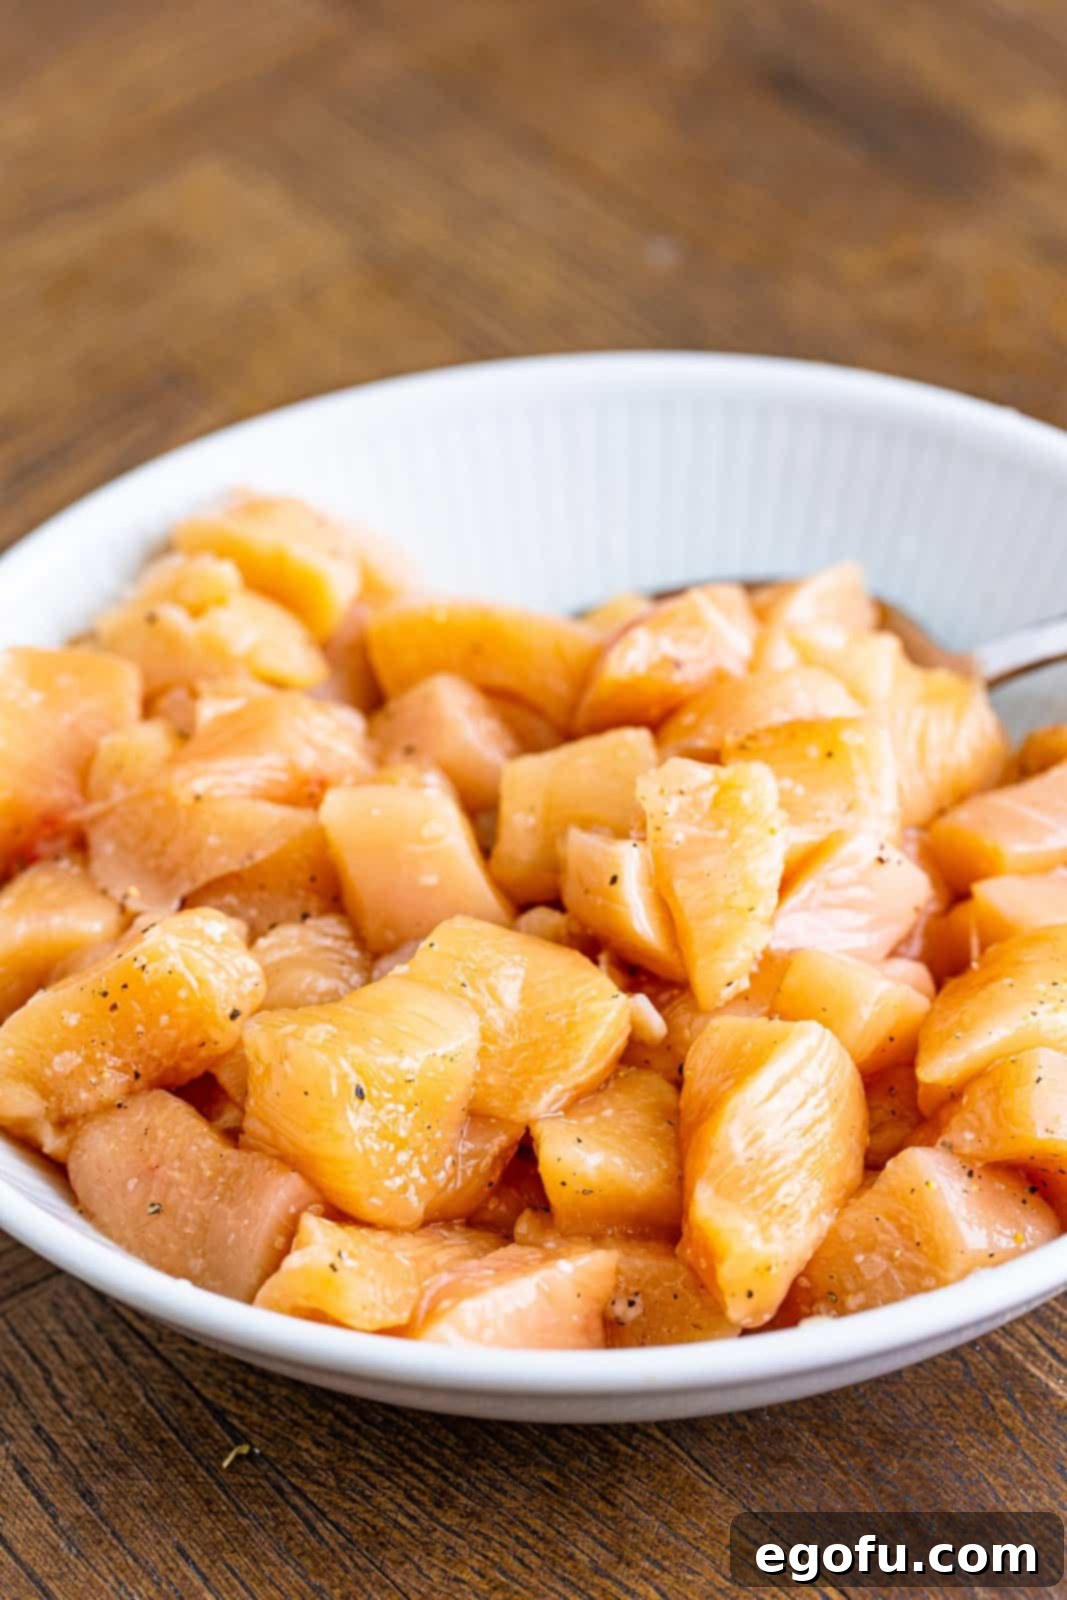
- Begin by preparing your chicken. Cut the chicken breast into uniform bite-sized chunks, roughly 1-inch pieces, to ensure even cooking. Season these chicken pieces generously with salt and freshly ground black pepper on all sides. Set your Instant Pot to the “Sauté” mode on its normal or medium setting. Allow the pot to heat up for a few minutes until it indicates “Hot” or “On.”
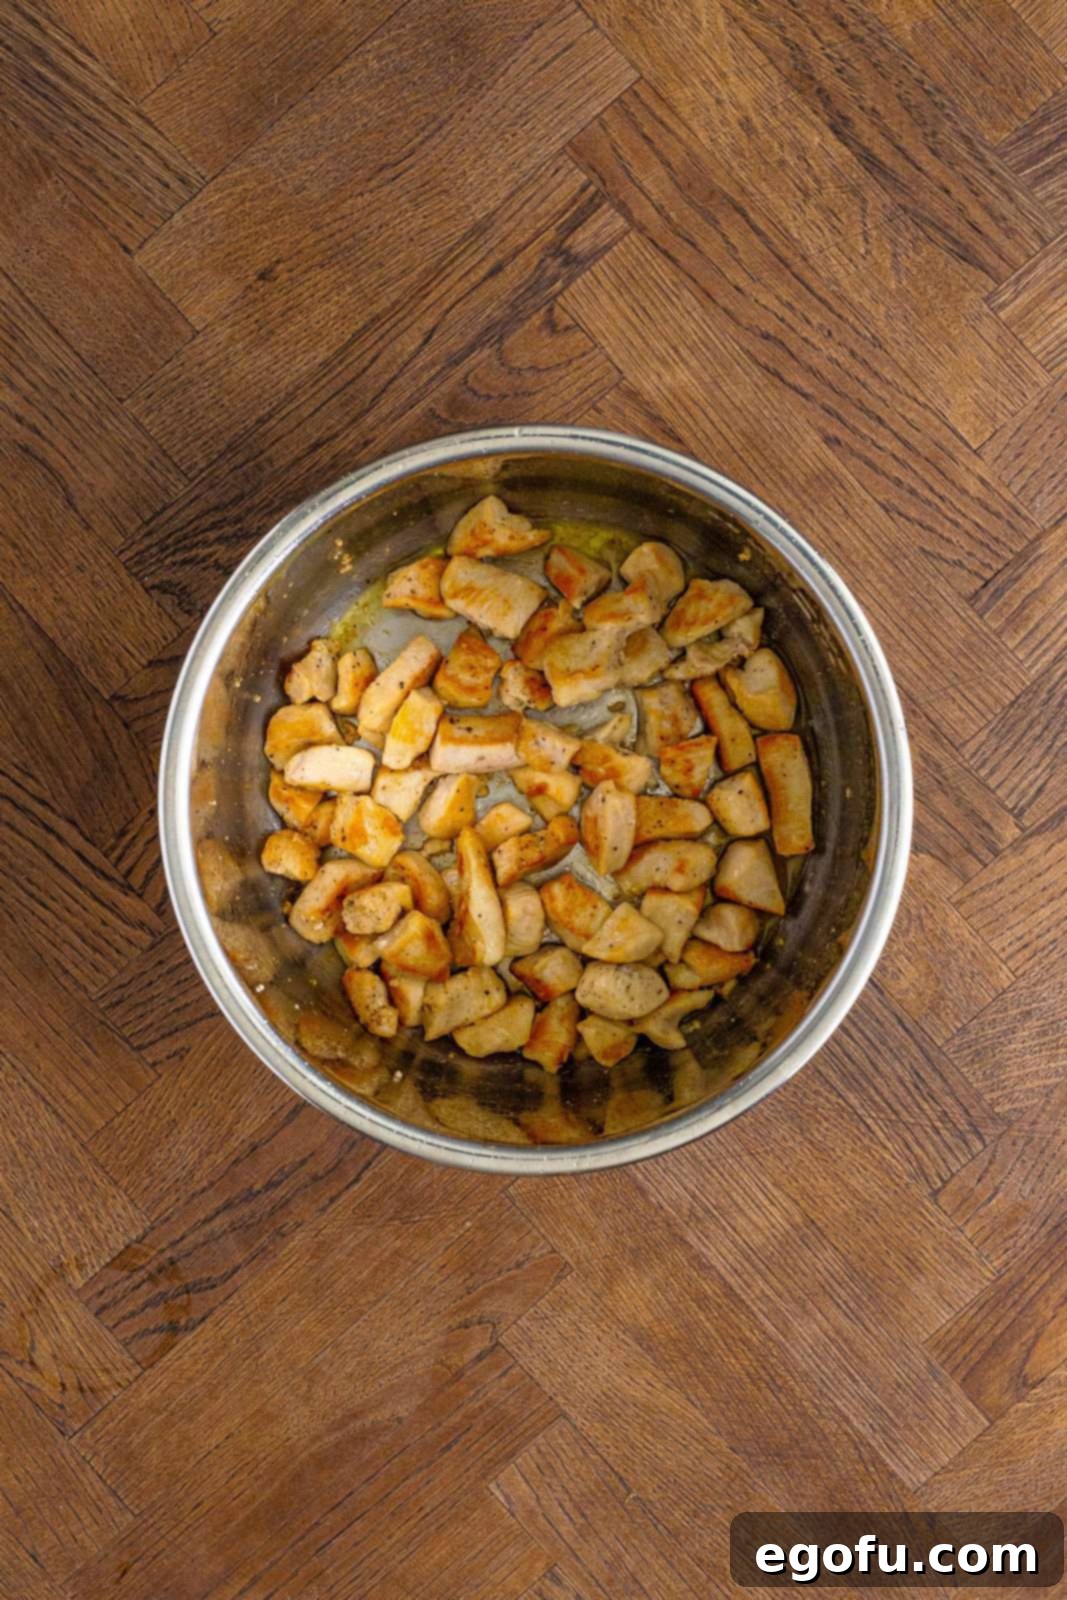
 Once the Instant Pot is hot, add the olive oil to the inner pot. Let it heat for about a minute until it shimmers. Carefully add the seasoned chicken chunks to the hot oil. Brown the chicken on all sides, cooking for about 2-3 minutes per side, until it develops a nice golden crust. This step is crucial for building flavor and adds depth to your finished dish. Depending on the size of your Instant Pot, you may need to do this in batches to avoid overcrowding, which can steam the chicken instead of browning it. Remove the browned chicken and set aside, leaving any delicious browned bits at the bottom of the pot.
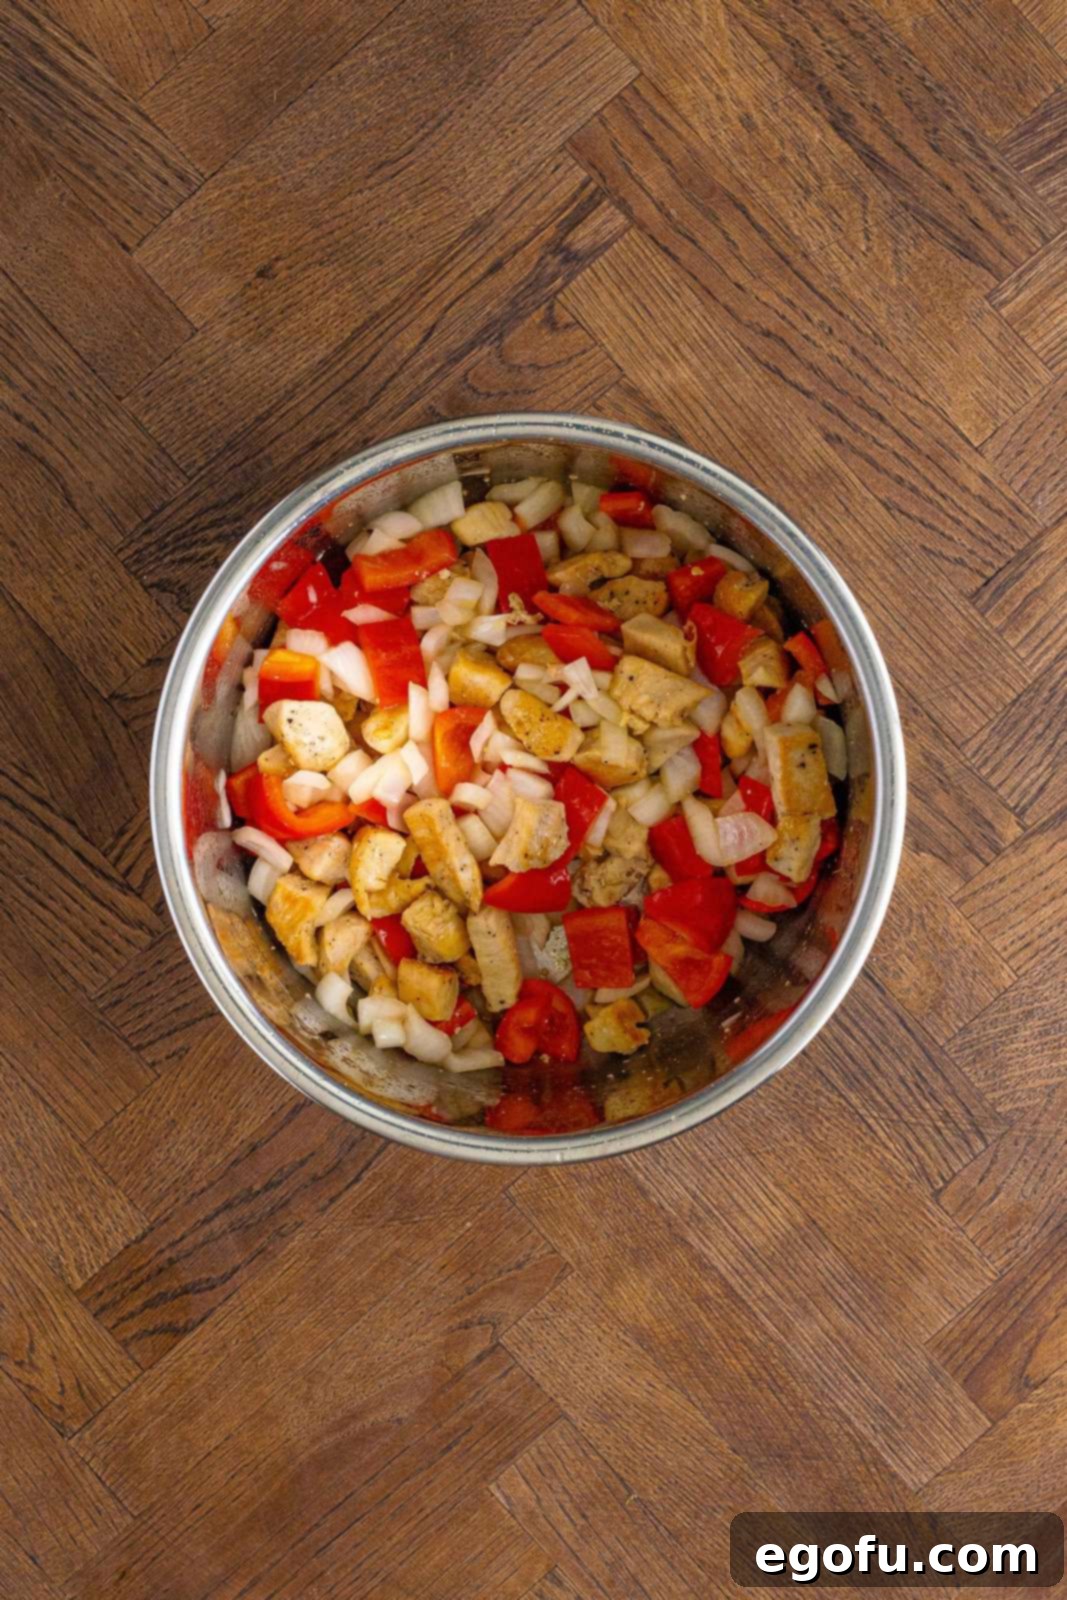
 Add the finely diced onion and large-diced red bell pepper to the same pot, using the residual oil and browned bits (fond) from the chicken. Sauté for another minute or two, stirring frequently, until the vegetables begin to soften slightly and become fragrant. This step extracts more flavor from the aromatics.
 Press the “Cancel” button on your Instant Pot to turn off the Sauté setting. This prevents any further browning and helps to prevent the “Burn” notice during pressure cooking.
- Now it’s time to layer in the remaining ingredients. Add the minced garlic, Italian seasoning, and dried oregano to the pot. Stir briefly, about 30 seconds, just until the garlic becomes fragrant. Return the browned chicken to the pot. Next, break the fettuccine pasta in half and arrange it in a fanned-out or crisscross pattern over the chicken and vegetables. This technique is vital for preventing the pasta from sticking together and ensures even cooking. Pour the chicken broth carefully over the fettuccine, making sure the pasta is mostly submerged in the liquid. Do not stir at this point; simply gently press down on the pasta if needed to ensure it’s mostly covered by the broth.
 Secure the lid on your Instant Pot, ensuring it’s properly sealed. Make sure the steam release valve is set to the “Sealing” position (if your model has this manual setting).
- Select the “Pressure Cook” (or “Manual”) setting and set the cooking time to **5 minutes** on “High Pressure.” The Instant Pot will now take some time to build pressure – typically about 10-15 minutes, depending on the volume and temperature of the ingredients. Once pressure is reached, the 5-minute cooking countdown will begin.
- Once the cooking cycle is complete, perform a **Quick Release** of the pressure. Carefully turn the steam release valve to the “Venting” position (or press the Quick Release button) to rapidly release the steam. Stand clear of the valve as hot steam will escape. This process usually takes a couple of minutes until the float valve drops.
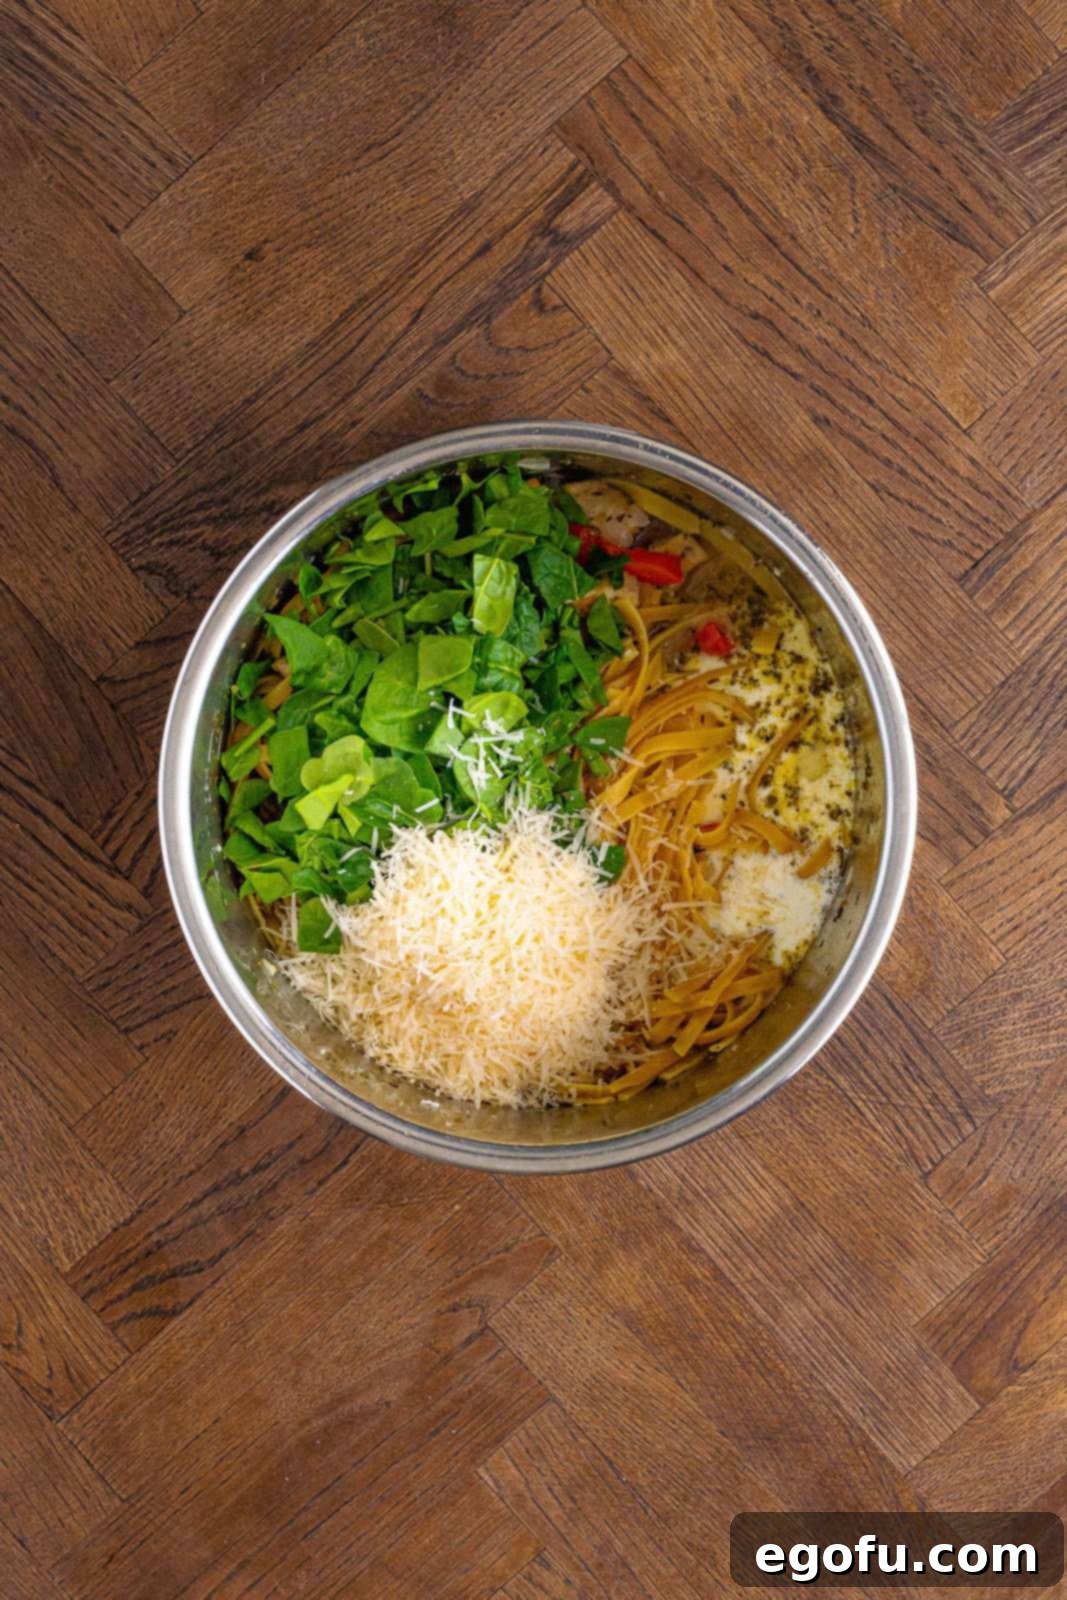
- Once all pressure has been released and the float valve has dropped, carefully open the Instant Pot lid. Give everything a good, thorough stir to combine the cooked pasta, chicken, and vegetables, and to incorporate any liquid at the bottom. The sauce might look a bit thin at this stage, but don’t worry, it will thicken as you add the dairy. Now, add the heavy cream, fresh spinach, and the freshly grated Parmesan cheese.
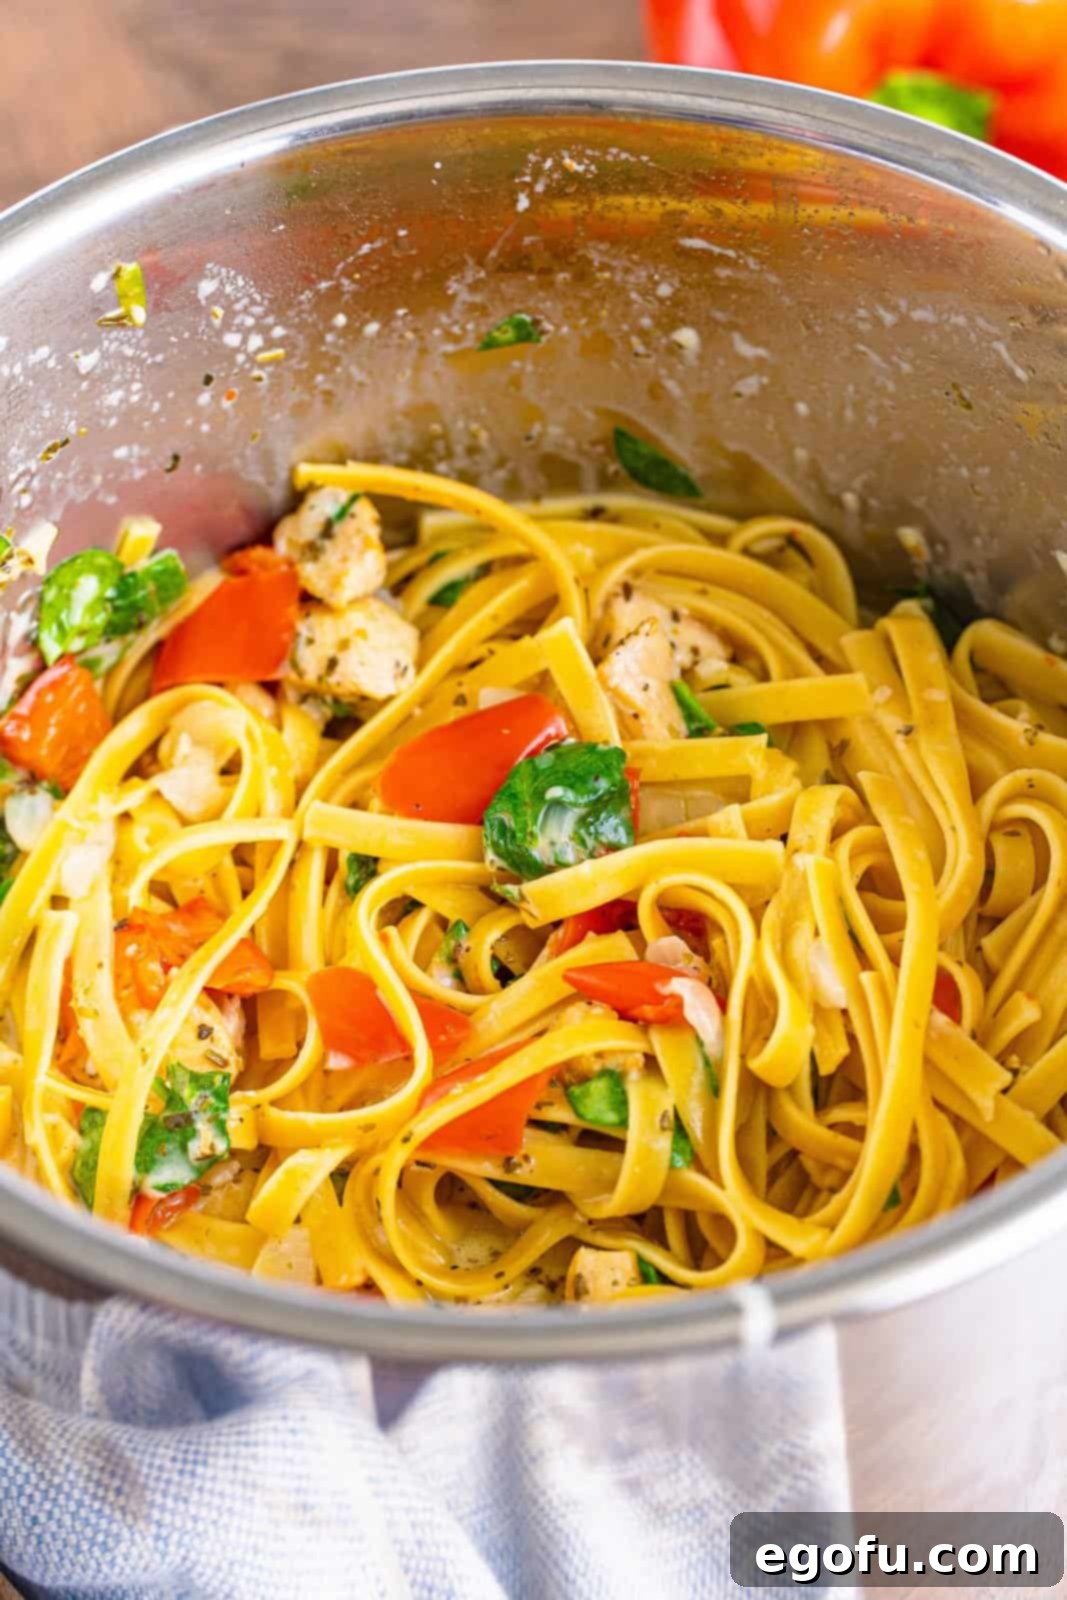
 Place the lid back loosely on the Instant Pot (no need to seal or set to pressure) for about 3-5 minutes. The residual heat from the pot will gently wilt the spinach and allow the Parmesan cheese to melt beautifully into the creamy sauce, further thickening it to perfection.
 Remove the lid, give the pasta a final stir, and taste for seasoning. Adjust with additional salt and pepper as desired to achieve your perfect flavor balance.
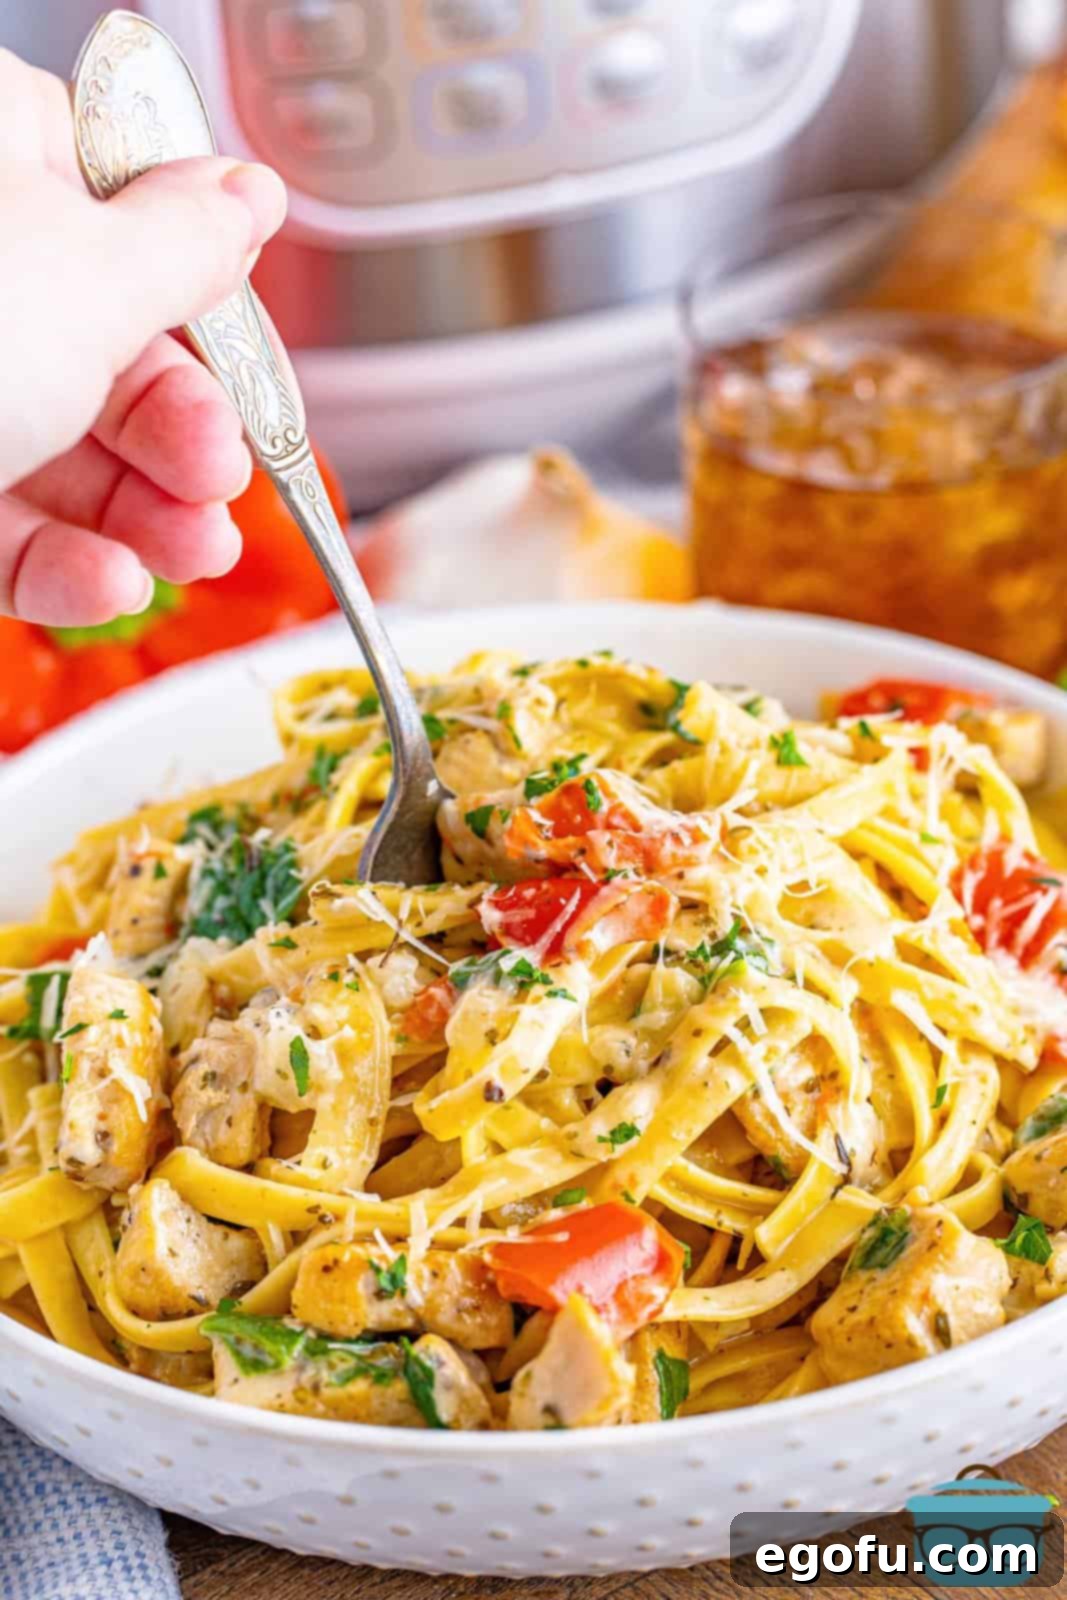
 Serve your piping hot Instant Pot Creamy Garlic Chicken Pasta immediately. You’ll notice some of the rich, creamy sauce may settle at the bottom of the pot, even after stirring. Don’t let it go to waste! Be sure to spoon some of that luscious sauce generously over each plated serving of fettuccine. For an extra touch of elegance and flavor, garnish with freshly chopped flat-leaf parsley and a sprinkle of more freshly grated Parmesan cheese (both optional, but highly recommended!). Enjoy your homemade, gourmet-level meal!
Expert Tips for Instant Pot Creamy Garlic Chicken Pasta Perfection
Achieving a truly exceptional creamy garlic chicken pasta in your Instant Pot is simple when you keep these expert tips in mind:
- **Don’t Skip the Browning:** While it might seem like an extra step, browning the chicken before pressure cooking adds a crucial layer of flavor (the Maillard reaction) that significantly enhances the overall taste of your dish. Those browned bits (fond) at the bottom of the pot are pure flavor gold.
- **Fan Out Your Pasta:** This cannot be stressed enough! Breaking the fettuccine in half and fanning it out in the pot is the secret to perfectly cooked, non-clumpy pasta. It ensures even exposure to the cooking liquid and steam.
- **Layer Ingredients Carefully:** To prevent the “Burn” notice and ensure optimal cooking, add ingredients in the order specified. Avoid stirring after adding the pasta and broth until after the pressure cooking cycle is complete.
- **Quick Release is Key:** For pasta dishes, a quick release of pressure is generally preferred to prevent overcooking and achieve that ideal al dente texture.
- **Heavy Cream is Essential:** Do not substitute heavy cream with milk or half-and-half. The fat content in heavy cream is necessary for a stable, rich, and creamy sauce that won’t curdle under the heat.
- **Taste and Adjust Seasoning:** Always taste your dish at the end and adjust salt and pepper to your preference. Broths can vary in sodium content, so a final seasoning check is important.
- **Don’t Overlook Garnish:** A sprinkle of fresh parsley and extra Parmesan cheese not only adds visual appeal but also a burst of fresh flavor that brightens the entire dish.
- **Sauce Consistency Adjustment:** If your sauce seems too thick after adding the cream and cheese, you can thin it slightly with a splash more chicken broth or even a touch of pasta water (if using the stovetop method). If it’s too thin, let it sit for a few extra minutes with the lid on, or gently simmer on sauté mode for a minute or two (stirring constantly) to reduce it slightly.
Delicious Variations to Customize Your Pasta
This Instant Pot Creamy Garlic Chicken Pasta is a fantastic base recipe, but it’s also wonderfully adaptable! Feel free to get creative and customize it to your taste or what you have on hand:
- **Protein Swaps:**
- **Shrimp:** Add raw shrimp during the last minute of pressure cooking, or stir in cooked shrimp after the pressure release for a Creamy Garlic Shrimp Pasta.
- **Sausage:** Replace chicken with browned Italian sausage (sweet or spicy) for a bolder flavor profile.
- **Vegetarian Options:** Omit the chicken entirely for a delightful Creamy Garlic Pasta, or add chickpeas or white beans along with the broth for plant-based protein.
- **Vegetable Boosts:**
- **Mushrooms:** Sauté sliced mushrooms along with the bell peppers for an earthy depth.
- **Sun-Dried Tomatoes:** Stir in a quarter cup of chopped sun-dried tomatoes (oil-packed, drained) with the cream for a burst of concentrated tomato flavor.
- **Peas:** Frozen peas can be stirred in with the spinach and cream; they will warm through quickly.
- **Broccoli:** Add small broccoli florets at the same time as the pasta for added nutrients and color.
- **Cheese Alternatives:**
- While Parmesan is classic, experiment with other cheeses like fresh mozzarella (shredded or small balls) or even a touch of cream cheese (added with heavy cream) for an extra velvety texture.
- **Spice It Up:**
- Add a pinch of red pepper flakes along with the garlic for a subtle kick that warms the palate.
- **Herbaceous Notes:**
- Beyond Italian seasoning and oregano, consider fresh basil or thyme. Stir in fresh herbs at the very end for maximum aroma and flavor.
Beyond Garlic Bread: More Perfect Pairings
While garlic bread and a green salad are classic accompaniments, here are a few more ideas to complete your Instant Pot Creamy Garlic Chicken Pasta meal:
- **Roasted Asparagus or Broccolini:** Lightly toss asparagus spears or broccolini with olive oil, salt, and pepper, then roast until tender-crisp. Their slightly bitter notes provide a lovely contrast to the creamy pasta.
- **Steamed Green Beans with Lemon:** Simple, fresh steamed green beans finished with a squeeze of lemon juice add brightness and a touch of acidity.
- **Bruschetta:** Toasted baguette slices topped with fresh diced tomatoes, basil, garlic, and a drizzle of balsamic glaze make for an elegant appetizer or side.
- **Simple Tomato and Cucumber Salad:** A quick salad featuring sliced tomatoes, cucumbers, red onion, and a light vinaigrette offers a refreshing counterpoint.
- **Warm Crusty Artisan Bread:** If you prefer something less garlicky than garlic bread, a warm, crusty loaf of artisan bread is perfect for dipping into the rich sauce.
CRAVING MORE INSTANT POT RECIPES?
If you’ve loved the convenience and flavor of this Instant Pot Creamy Garlic Chicken Pasta, you’re in for a treat! The Instant Pot is a versatile kitchen powerhouse, and there’s a whole world of quick, easy, and delicious recipes waiting for you to explore. From comforting stews to hearty pasta dishes and succulent chicken meals, your pressure cooker can do it all. Dive into these other fantastic Instant Pot recipes to expand your culinary repertoire:
- Instant Pot Sausage Mac and Cheese
- Instant Pot Crack Chicken
- Instant Pot Chicken Scampi
- Instant Pot Pot Roast
- Instant Pot Meatballs
- Instant Pot Spaghetti and Meatballs
- Instant Pot American Goulash
- Instant Pot BBQ Chicken
- Instant Pot Mac & Cheese
- Instant Pot Shredded Chicken
- Instant Pot Meatloaf
- Instant Pot Chicken Noodle Soup
- Instant Pot Cubed Steak and Gravy
- Instant Pot Smothered Pork Chops
- Instant Pot Beef Stew
- Garlic Parmesan Fettuccine Alfredo
- Creamy Ham Fettuccine Casserole
- Copycat Olive Garden Chicken Alfredo
- Creamy Lemon Chicken Skillet

Instant Pot Creamy Garlic Chicken Pasta
Print
Pin
Rate
Ingredients
- 1 pound chicken breast, cut into bite-sized chunks
- salt and pepper, to taste
- 2 Tablespoons olive oil
- 1 medium onion, finely diced
- 1 red bell pepper, large diced
- 4 cloves garlic, minced
- 1 Tablespoon Italian seasoning
- 1 teaspoon dried oregano
- 1 pound fettuccine pasta, broke in half
- 3 ½ cups chicken broth
- ½ cup heavy cream
- 1 ½ cups chopped fresh spinach (optional)
- ¾ cup freshly grated Parmesan cheese
- Optional garnish: freshly chopped flat leaf parsley and more grated Parmesan
Instructions
- Set the instant pot to sauté mode. Season the chicken with salt and pepper.
- Once hot, add the olive oil to the pot (allow it to heat for a minute) then add in the chicken. Brown the chicken on both sides (this may have to be done in batches).
- Once browned, add onions and bell pepper to the pot and saute for another minute.
- Cancel the sauté setting.
- Then add in the garlic, Italian seasoning, oregano and fettuccine. Make sure the fettuccine is fanned out so it cooks as evenly as possible. Pour the chicken broth over the fettuccine.
- Close the instant pot, set the valve to the seal position (if your instant pot has a seal position.)
- Pressure cook on “high” for 5 minutes. It may take about 10 minutes for it to come to pressure.
- When done, quickly release the pressure by turning the valve to vent position. It may take a couple of minutes to fully release the pressure.
- Open the instant pot. Stir everything well then add the heavy cream, spinach and parmesan cheese.
- Put the lid back on the instant pot for a few minutes to allow the spinach to soften and the cheese to melt.
- Open the instant pot, mix well and add salt and pepper, to taste.
- Then serve. Some of the sauce will settle to the bottom of the pot even after stirring. Just spoon some of that sauce all over the plated fettuccine. Then top with some freshly chopped parsley and more freshly grated Parmesan cheese (optional).
Notes
- Please refer to my FAQ’s and ingredient list above for other substitutions or for the answers to the most common questions.
- It’s really important to fan out the fettuccine noodles. This not only helps them cook more evenly but also helps to keep them from sticking together.
- Any color bell pepper can be used. I like the color that the red pepper gives. You could even use a combination of peppers.
- I like to get the chicken a darker golden brown but this is personal preference. When browning, we’re not cooking all the way through, just giving it color. The chicken will finish cooking in the instant pot.
- I prefer fresh garlic but the jarred garlic will work in a pinch.
- Feel free to trade out the ground beef for ground turkey or chicken, or the fettuccini for other larger pasta choices.
- Leftovers should be stored in the fridge in an airtight container for up to 4 days.
Nutrition
Nutritional Disclaimer
“The Country Cook” is not a dietician or nutritionist, and any nutritional information shared is an estimate. If calorie count and other nutritional values are important to you, we recommend running the ingredients through whichever online nutritional calculator you prefer. Calories and other nutritional values can vary quite a bit depending on which brands were used.
