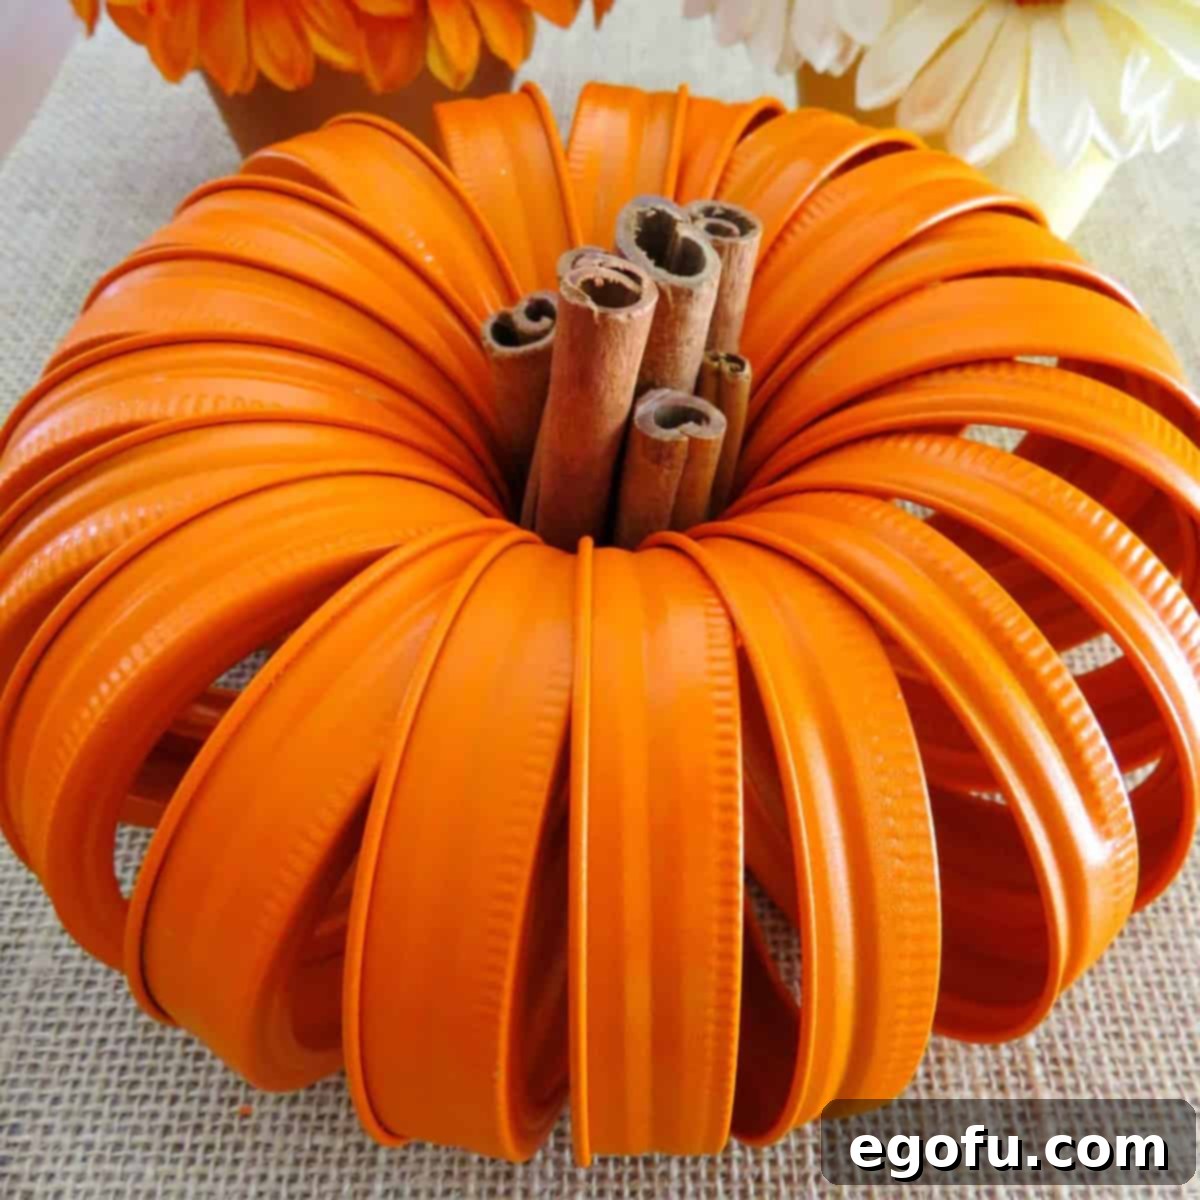
As the leaves begin to turn vibrant hues of red, orange, and gold, there’s a certain magic in the air that beckons us to embrace the cozy warmth of autumn. What better way to welcome this enchanting season than by infusing your home with charming, handmade fall decor? While store shelves are brimming with seasonal items, there’s a unique satisfaction in crafting your own pieces, especially when they’re as simple, affordable, and utterly adorable as these DIY Mason Jar Lid Pumpkins. With their rustic appeal and a fragrant cinnamon stick stem, these little pumpkins are not just decorations; they’re an invitation to creativity and a celebration of fall.
DIY Mason Jar Lid Pumpkins: The Ultimate Fall Centerpiece
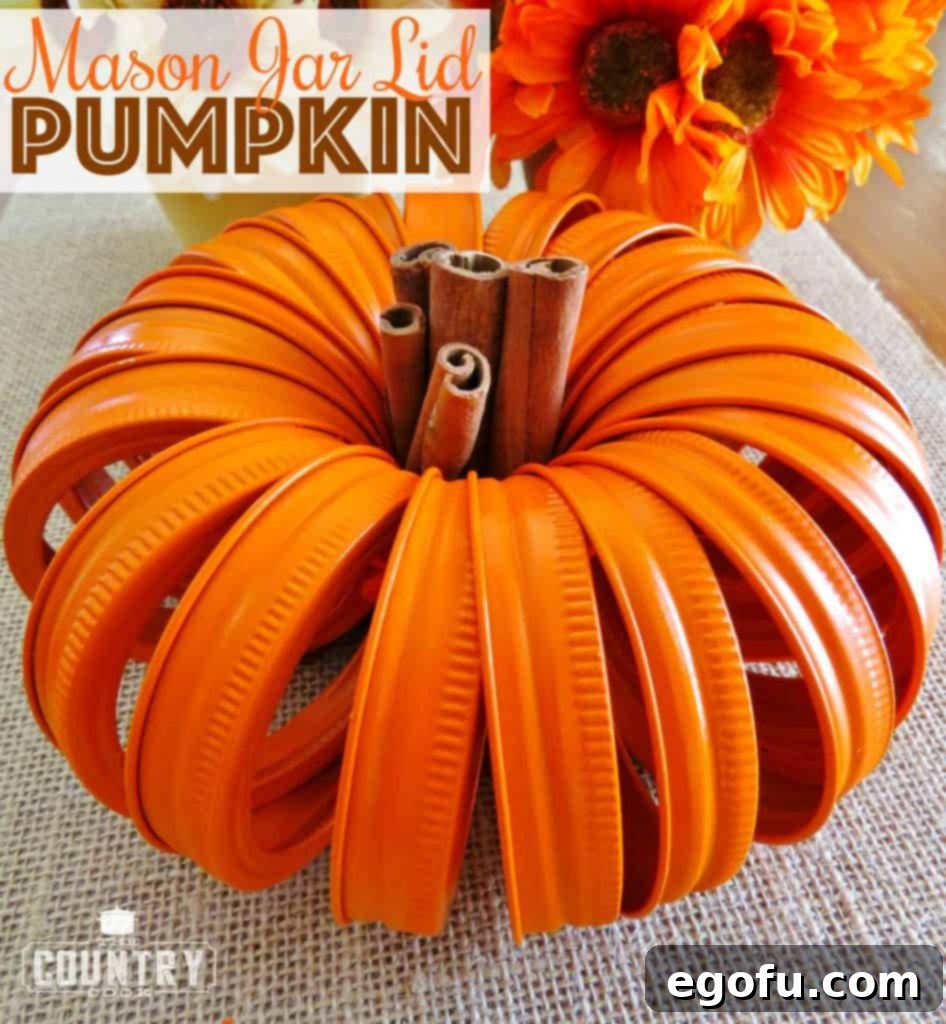
Imagine a whimsical pumpkin patch adorning your dining table, mantelpiece, or entryway. These Mason Jar Lid Pumpkins deliver exactly that touch of rustic elegance, transforming ordinary canning bands into delightful autumnal accents. This craft stands out as one of the most beloved projects among DIY enthusiasts for its sheer simplicity and stunning results. Over the years, I’ve crafted countless variations of these charming pumpkins, and each autumn, I eagerly unbox them, sometimes refreshing them with new cinnamon sticks to revive their comforting aroma. They truly embody the spirit of fall, making them a centerpiece that’s both visually appealing and incredibly easy to achieve.
Why Craft Mason Jar Lid Pumpkins? A Timeless Fall Favorite
There’s something inherently gratifying about creating beautiful home decor from unexpected materials, and mason jar lids fit this bill perfectly. This craft isn’t just a fleeting trend; it’s a timeless tradition that brings joy year after year. The process itself is wonderfully meditative, allowing you to immerse yourself in the creative flow as you watch simple metal bands transform into adorable pumpkins. Beyond their aesthetic appeal, these pumpkins are incredibly versatile. They can be nestled amongst faux leaves, grouped with flickering candles, or even given as thoughtful, handmade gifts to friends and family. Their charm lies in their simplicity, making them an accessible project for crafters of all skill levels, from beginners to seasoned DIYers looking for a quick and rewarding project.
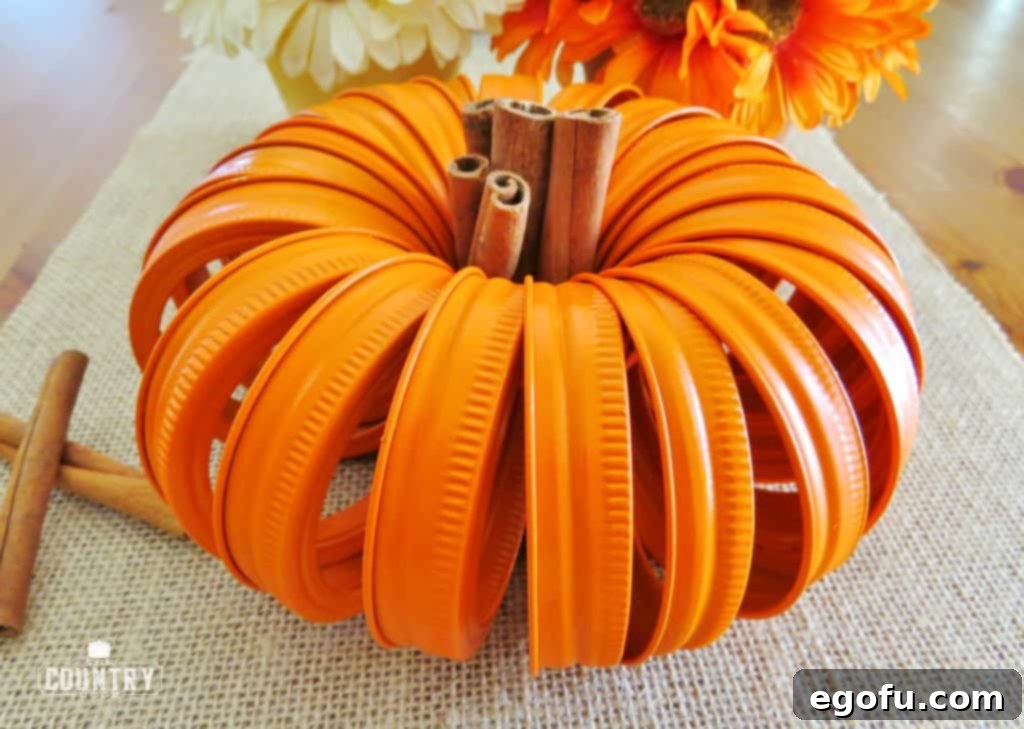
Affordable Autumn Decor: Crafting on a Budget
One of the biggest advantages of this craft is its incredible affordability. Mason jar lid bands are relatively inexpensive to purchase, especially when bought in bulk. If you’re an avid canner or know someone who is, you might even have a stash of old, unused bands lying around, making this project practically free. For those without a ready supply, keep an eye out at thrift stores, yard sales, or even online marketplaces, where you can often find large quantities of mason jar lids for a steal. Repurposing these items not only saves money but also contributes to sustainable crafting, giving new life to materials that might otherwise go to waste. This budget-friendly aspect makes it an ideal project for anyone looking to decorate their home for fall without breaking the bank.
Gathering Your Materials: What You’ll Need
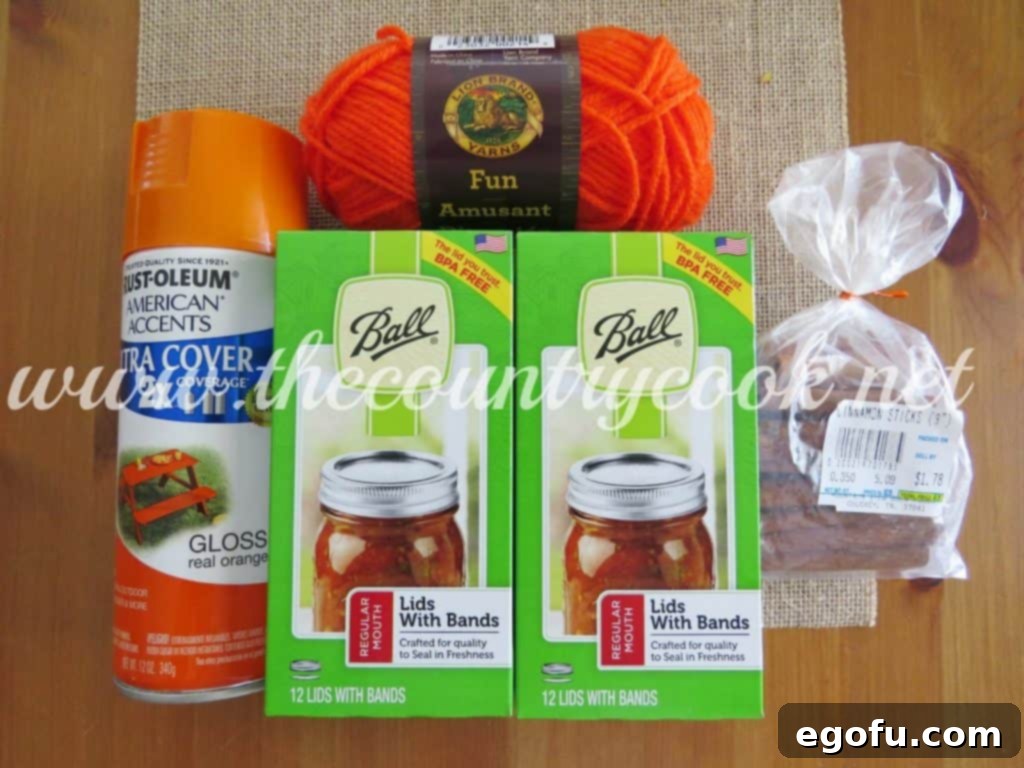
Preparing your supplies is the first exciting step in any craft project. For these mason jar lid pumpkins, the list is wonderfully short and sweet, ensuring you can gather everything you need with ease. Most items are readily available at craft stores, hardware stores, or even your local supermarket.
- Mason Jar Lid Bands: These are the metal rings that screw onto mason jars. You’ll need about 18-24 bands for one medium-sized pumpkin, depending on how full you want it to appear. Both regular and wide-mouth bands work beautifully; using a mix can create interesting textures and sizes.
- Orange Spray Paint: A single can of high-quality orange spray paint should be sufficient for several pumpkins. Consider different finishes like matte, satin, or glossy to achieve varied looks. Rust-Oleum or Krylon brands typically offer good coverage and adhesion.
- Orange Yarn: A small skein of orange yarn is all you need. The yarn serves as the binding element and will be mostly hidden, but choose a sturdy, non-stretchy type for the best results. You can also experiment with natural twine or jute for a more rustic aesthetic.
- Cinnamon Sticks: These act as the charming, aromatic stem of your pumpkin. Look for 4-inch to 6-inch cinnamon sticks, preferably with a slightly irregular, natural shape. The warmth of the cinnamon scent adds an extra sensory layer to your fall decor. You’ll likely need 4-6 sticks per pumpkin, depending on their individual thickness.
- Optional but Recommended: Newspaper or craft paper (for protecting your work surface), a protective mask (especially if sensitive to fumes), and scissors.
Step-by-Step Guide to Creating Your Mason Jar Lid Pumpkins
Ready to bring your mason jar lid pumpkins to life? Follow these detailed instructions to create stunning fall decor with ease.
Step 1: Prepare Your Workspace and Materials
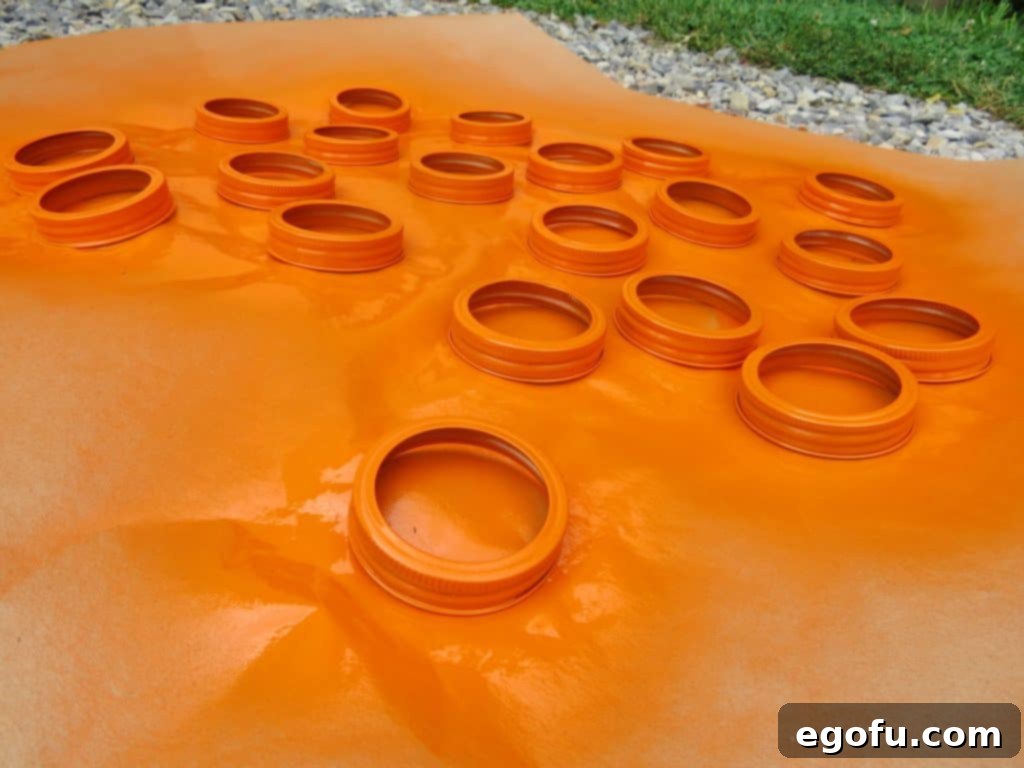
Safety and cleanliness are paramount when working with spray paint. Choose a well-ventilated area, ideally outdoors on a calm, dry day. Avoid windy conditions, which can cause overspray, or rainy weather, which can prevent proper drying and adhesion. Lay down a generous amount of newspaper, an old sheet, or craft paper to protect your working surface from paint droplets. If you are sensitive to chemical fumes or have respiratory issues, wearing a protective mask is highly recommended during the spray painting process. Organize your mason jar lid bands on the prepared surface, ensuring each band is separated by several inches to allow for even paint application from all angles.
Step 2: The Art of Spray Painting Your Lids
Now for the fun part – adding that vibrant pumpkin color! Shake your can of orange spray paint vigorously for about a minute to ensure the pigment is well mixed. Hold the can approximately 8-10 inches from the lids and apply several light, even coats rather than one thick layer. This technique prevents drips and allows for a smoother, more professional finish. Begin by painting one side of all your bands. Allow this first coat to dry for a few hours, or according to the paint manufacturer’s instructions. Once dry to the touch, carefully flip each band over and spray paint the other side, paying close attention to coating the edges thoroughly. Ensuring complete coverage is key to achieving that rich, uniform pumpkin hue. For optimal durability and a flawless finish, let the newly painted lids dry completely overnight. Patience here ensures your pumpkins will look fantastic for many seasons to come.
Step 3: The Crucial Step of Assembly: Stringing Your Lids Together
Once your painted lids are perfectly dry, it’s time to bring them together to form the pumpkin shape. This step is critical for the final appearance, so attention to detail truly pays off. First, gather all your mason jar bands and ensure they are all facing the same direction. Mason jar bands have a slight groove or lip on one side; make sure this groove is consistent across all bands (e.g., all grooves facing upwards or all facing downwards). This seemingly small detail is incredibly important for the pumpkin to fan out beautifully and evenly, creating that classic round shape. If the bands are misaligned, your pumpkin may look lopsided or irregular.
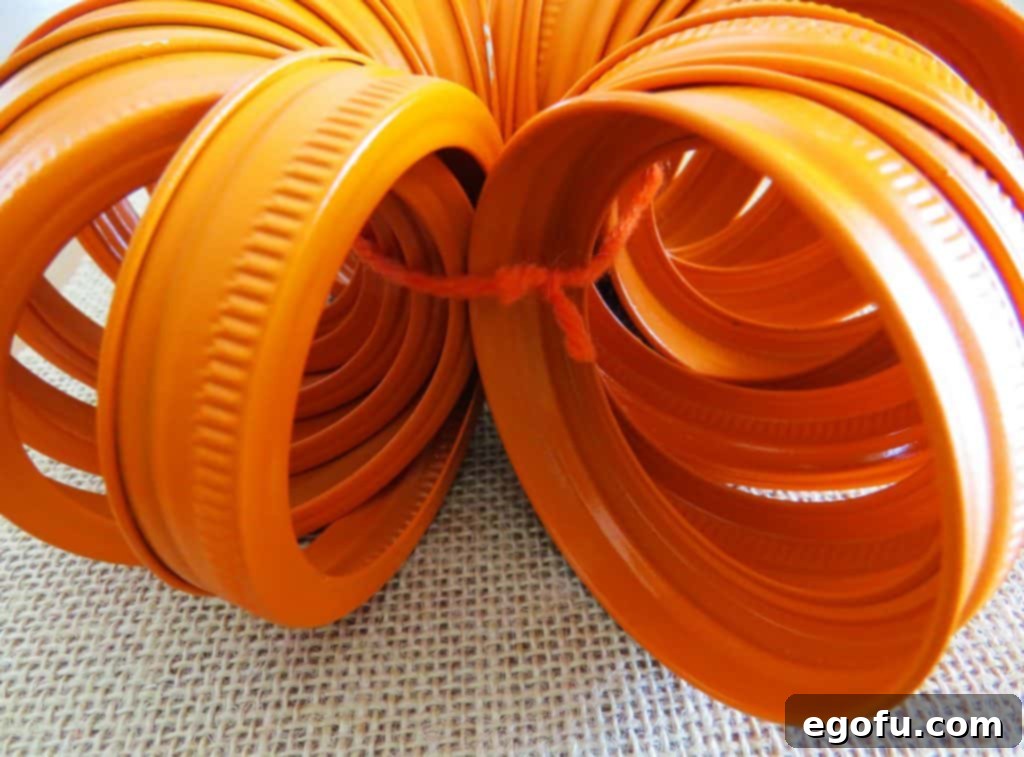
Next, take a piece of orange yarn, about 18-24 inches long (you can always trim excess). Thread the yarn through the center of all the aligned bands. This can be a bit tricky with multiple bands, so take your time. Once the yarn is through, pull it as tightly as you possibly can. You want a really snug, taut string to hold the structure together firmly. This might be the perfect moment to enlist an extra pair of hands! Having someone hold the bands compressed while you pull the yarn tight and tie a knot can make this step much easier. My son often helps by pressing down on the string to keep it in place while I secure a tight double knot. A secure, tight knot is another vital detail that ensures your pumpkin holds its shape properly when you fan out the lids. Once tied, trim off any excess string close to the knot.
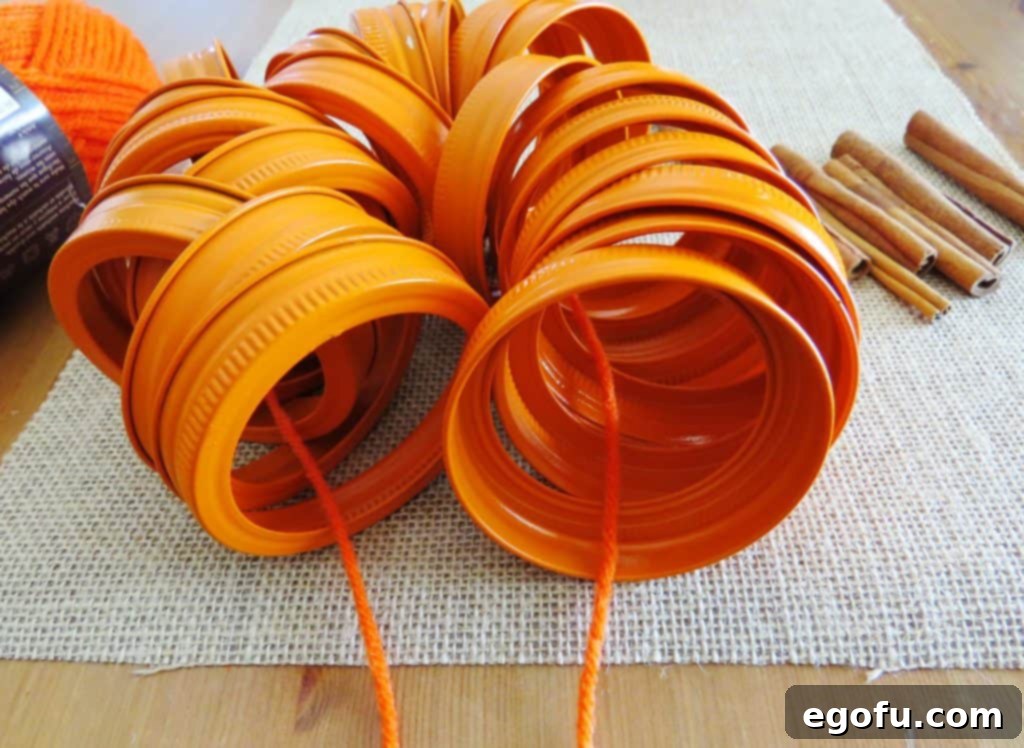
The tighter the yarn is pulled, the more compact and symmetrical your pumpkin will be. Don’t be afraid to really pull! A loose tie will result in a floppy pumpkin that doesn’t hold its form well. If you’re using twine instead of yarn, ensure it’s strong enough to withstand the tension. A simple square knot or surgeon’s knot works best for security.
Step 4: Fanning Out and Shaping Your Pumpkin
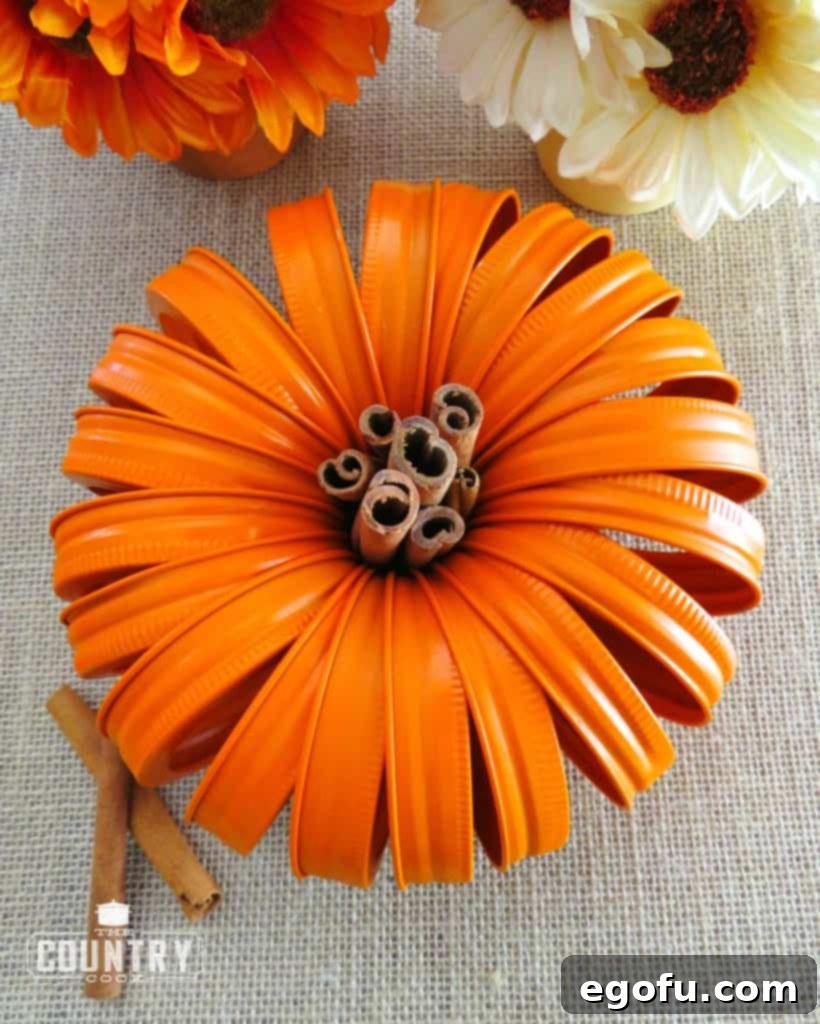
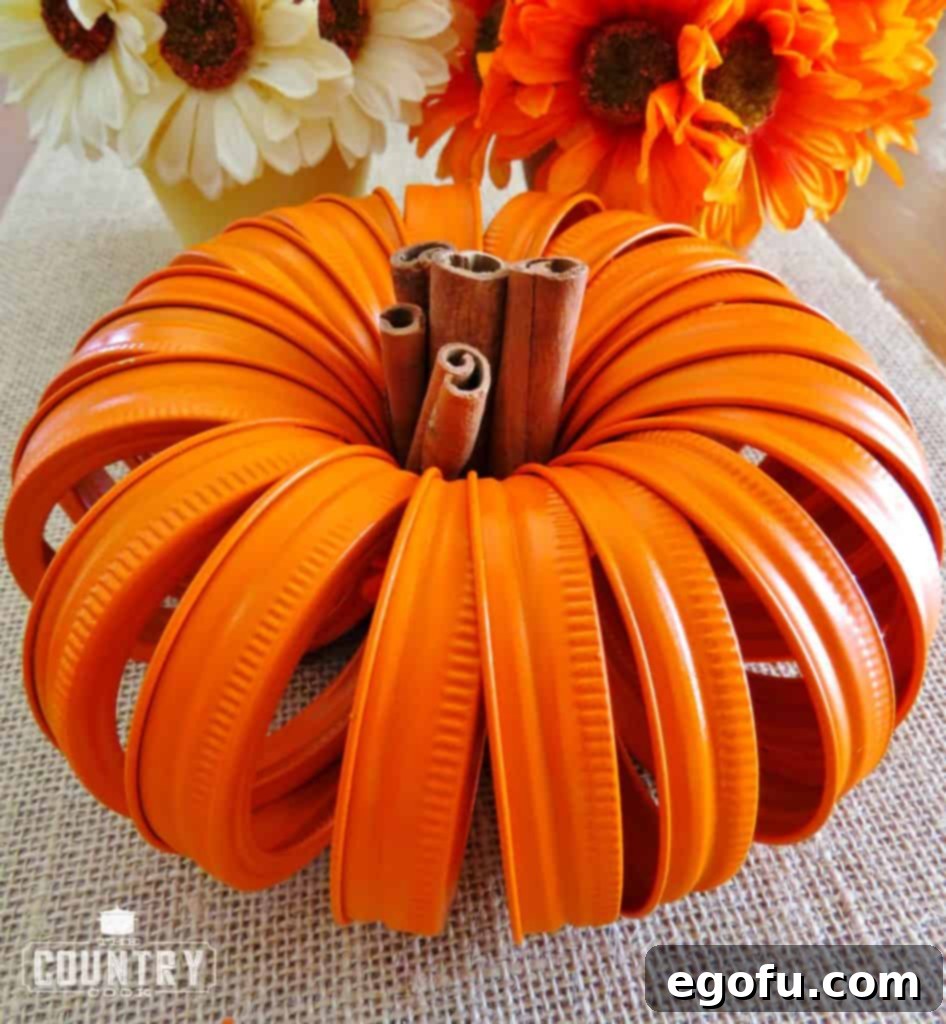
With the lids securely tied, the exciting transformation begins! Gently start separating the lid bands, fanning them out around the central knot. Work slowly and evenly, adjusting each band until they are spaced symmetrically, creating a lovely, rounded pumpkin silhouette. This step is quite intuitive; just continue to adjust until you are happy with the shape and fullness of your pumpkin. The tightly bound center allows the bands to arc outwards, mimicking the natural segments of a pumpkin.
Step 5: Adding the Natural Stem: Cinnamon Sticks
The final touch that truly brings these pumpkins to life is the stem. Take your chosen cinnamon sticks and arrange them in the open center of your fanned-out lids. You may need anywhere from 4 to 6 cinnamon sticks, depending on their individual thickness, to create a robust and realistic-looking stem. Simply pop them into the center, adjusting them until they stand upright and fill the void effectively. Not only do they provide the perfect textural contrast, but they also release a subtle, delightful autumn aroma, adding a sensory layer to your decor. If your cinnamon sticks are too loose, a tiny dab of hot glue can help secure them in place, though typically the tight arrangement of the lids holds them well. For an alternative, small natural twigs or even a tightly rolled piece of brown felt can serve as a charming stem.
Customize Your Pumpkins: Creative Ideas
While classic orange is always a winner, don’t shy away from experimenting with different colors and embellishments to match your personal style or existing home decor. Consider painting some lids in creamy whites, muted greens, or even metallics like gold or copper for a sophisticated autumn palette. You can also add decorative elements such as a small bow made from burlap twine or raffia around the cinnamon stick stem, or glue on tiny faux fall leaves for added texture. For a distressed, vintage look, lightly sand the edges of the painted lids once dry. Grouping pumpkins of various sizes and colors creates a dynamic and inviting display that truly captures the essence of a fall harvest.
Displaying Your Handmade Fall Decorations
Once your Mason Jar Lid Pumpkins are complete, the fun continues with styling them in your home. These versatile pieces are perfect for a variety of settings. Arrange them as a centerpiece on your dining table, perhaps on a rustic charger or wooden slice, surrounded by candles, small gourds, and scattered autumn leaves. They look equally stunning nestled on a mantelpiece alongside framed family photos or perched on an entryway table to welcome guests. For a popular farmhouse aesthetic, incorporate them into a tiered tray display with other seasonal knick-knacks. Their understated charm allows them to blend seamlessly with existing decor while adding a heartfelt, handmade touch.
Troubleshooting Common Questions
- Lids not fanning evenly? This usually indicates that the bands weren’t aligned correctly before tying, or the yarn wasn’t pulled tight enough. Gently untie, re-align all grooves to face the same direction, and re-tie the yarn as tightly as possible.
- Paint chipping? Ensure you applied several light coats rather than one thick one, and allowed ample drying time between coats and overnight. For added durability, you can apply a clear matte or glossy sealant spray after the orange paint has fully cured.
- Cinnamon sticks not standing upright? If the central opening is too wide, or the sticks are very thin, they might wobble. Try adding more cinnamon sticks to fill the space, or use a tiny drop of hot glue at the base to secure them to each other or the inner rim of the lids.
Mason Jar Lid Pumpkins Craft Summary
Mason Jar Lid Pumpkins
Transform ordinary mason jar lid bands into the cutest fall centerpiece with this easy and affordable DIY project. Just a few simple materials and a little creative spirit will yield charming, fragrant pumpkins perfect for your autumn home decor.
- Course: Crafts, Fall Decor, Home Decor
- Skill Level: Beginner
- Prep Time: Approximately 1 Hour (actual hands-on time, excluding paint drying)
- Drying Time: Overnight (essential for paint curing)
- Total Time: 1 Hour (plus overnight drying)
- Yield: 1 Pumpkin (materials listed for one; easily adjustable for more)
- Author: Brandie Skibinski
Ingredients
- 20 mason jar lid bands (standard size recommended for one pumpkin)
- 1 can orange spray paint (matte or glossy, your choice)
- Orange yarn (a small skein will suffice)
- 4-5 (4-inch to 6-inch) cinnamon sticks (for the stem)
- Optional: Newspaper or craft paper, protective mask, scissors, hot glue gun (for securing stems if needed).
Instructions
- Prepare Your Space: Lay out newspaper or craft paper in a well-ventilated area, preferably outdoors on a dry, non-windy day. Arrange your mason jar bands a few inches apart. Consider wearing a protective mask.
- Spray Paint: Apply several light, even coats of orange spray paint to one side of the bands. Allow to dry completely for a few hours. Flip the bands and repeat the process on the other side, ensuring full coverage, including the edges. Allow to dry completely overnight.
- Align Bands: Once the lids are fully dry, align all mason jar bands so that their inner grooves or lips are facing the same direction. This alignment is crucial for the pumpkin’s shape.
- Tie Together: Thread a piece of orange yarn (about 18-24 inches) through the center of all the aligned bands. Pull the yarn as tightly as possible to compress the bands, then tie a very secure double knot. Trim any excess yarn.
- Shape the Pumpkin: Gently separate and fan out the tied lid bands, arranging them evenly to form a beautiful, rounded pumpkin shape.
- Add the Stem: Insert 4-5 cinnamon sticks into the central opening to create the pumpkin stem. Adjust them as needed for stability and aesthetics. Your delightful Mason Jar Lid Pumpkin is now ready to display!
There’s immense satisfaction in crafting something beautiful with your own hands, especially when it costs so little and brings so much seasonal cheer. These Mason Jar Lid Pumpkins are more than just a craft; they’re a testament to how simple materials can be transformed into enchanting decor with a touch of creativity. So, gather your supplies, put on some cozy fall music, and embark on this delightful DIY journey. Your home will thank you for the charming, fragrant addition, and you’ll love the sense of accomplishment that comes with creating your very own fall masterpiece!
