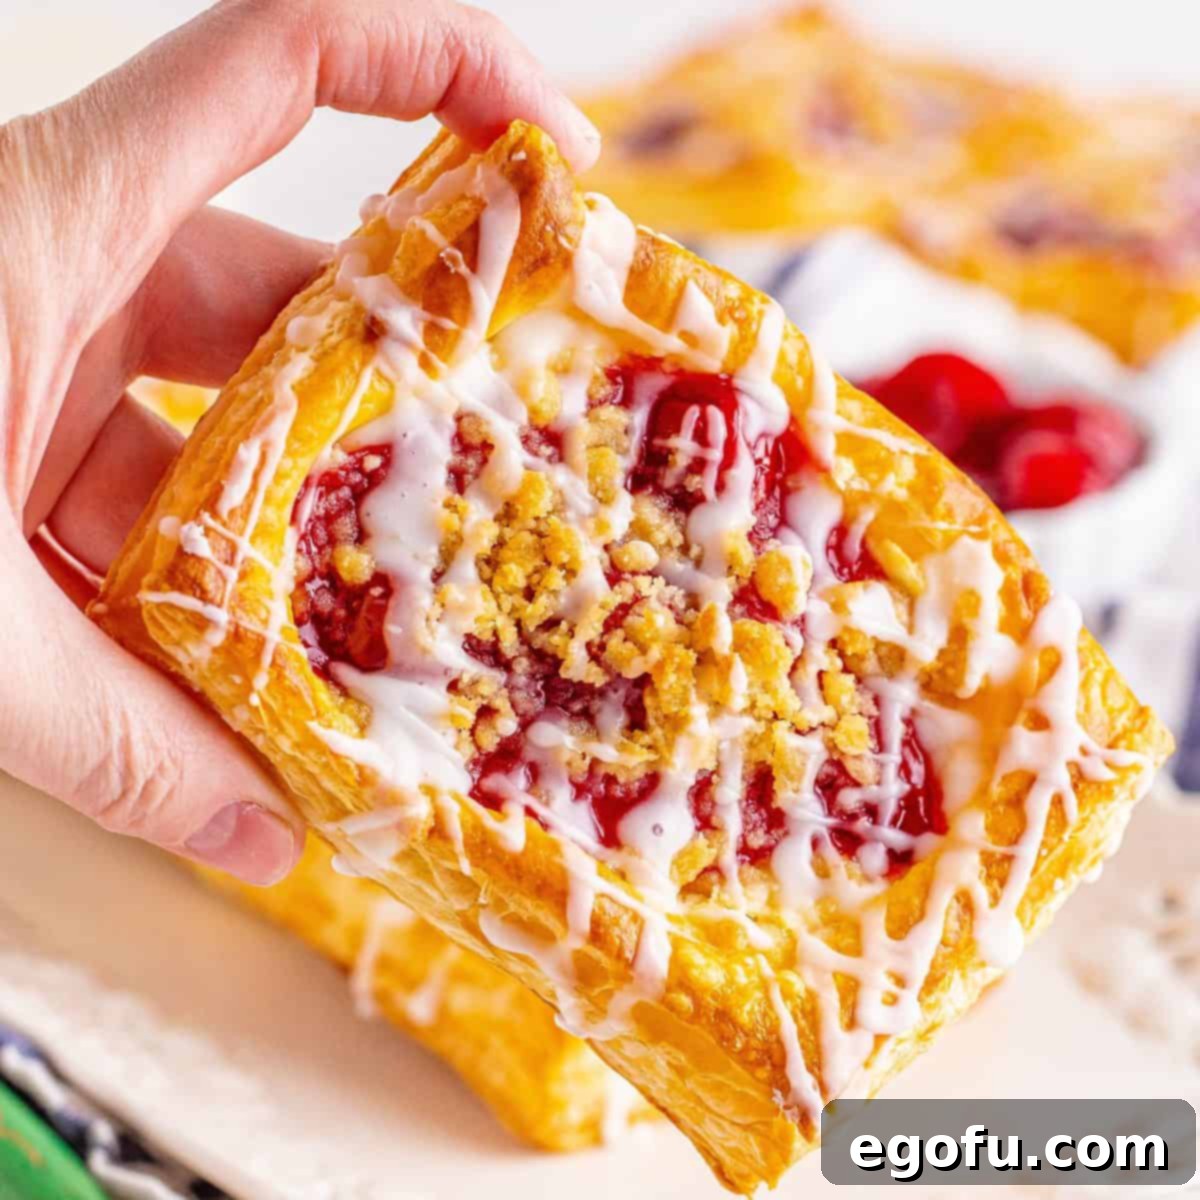
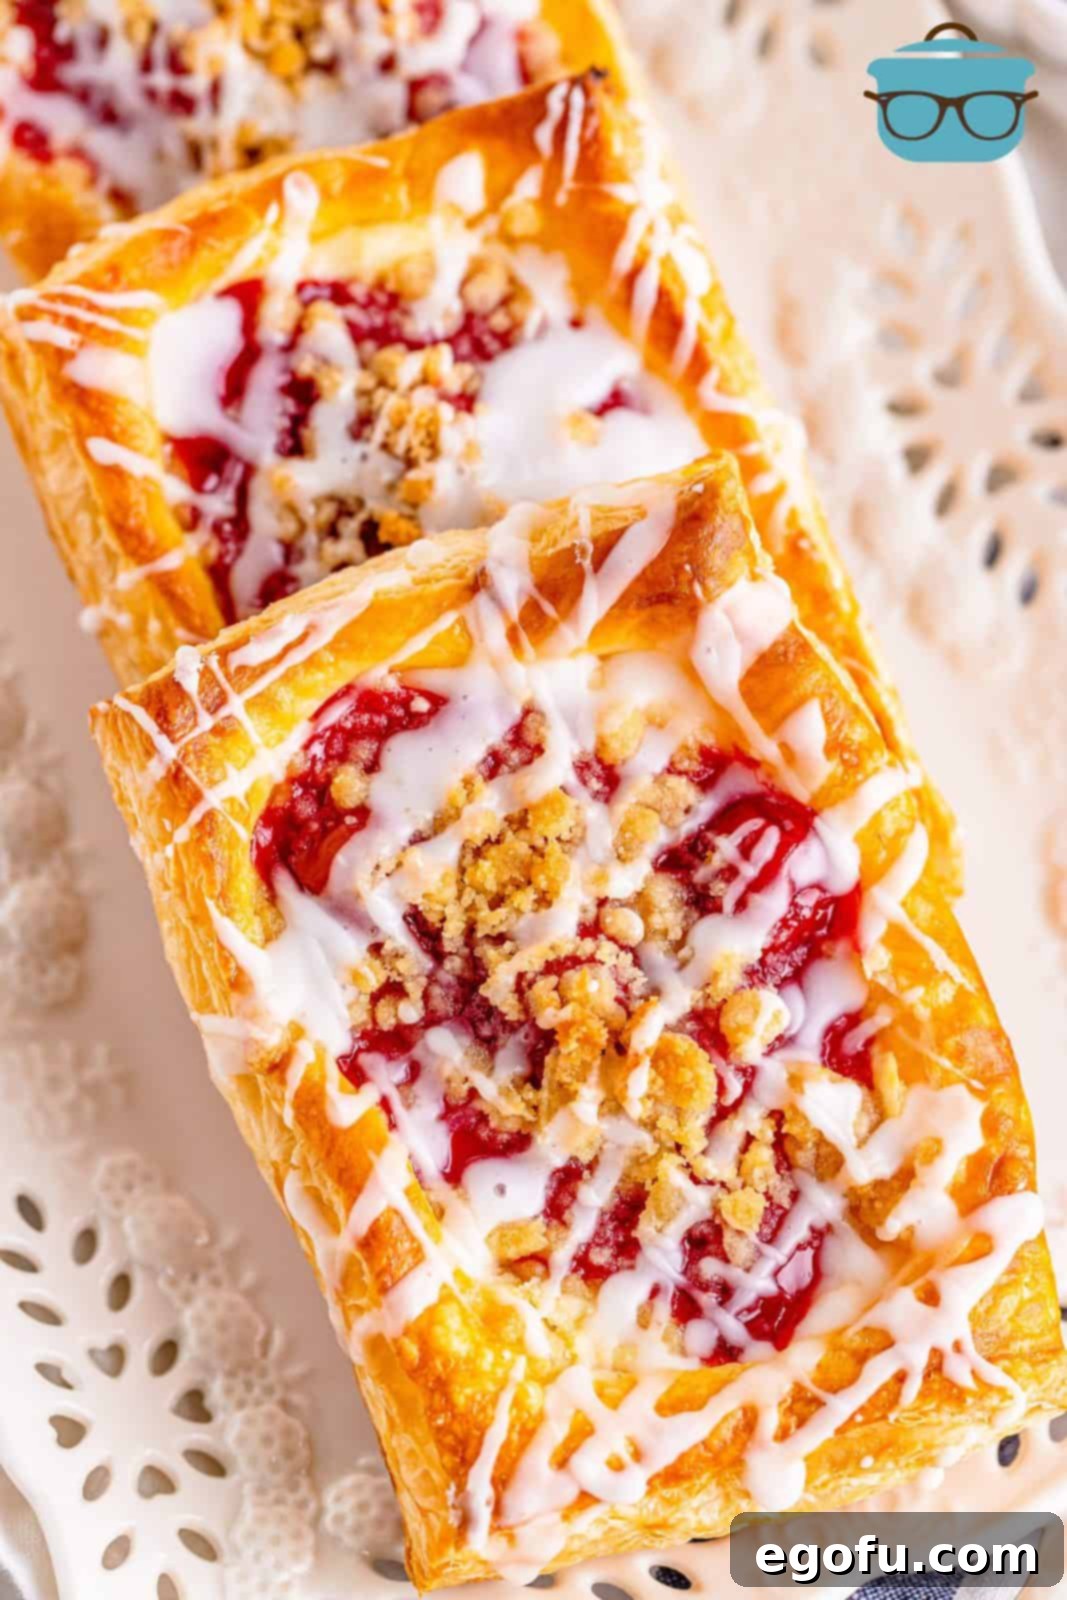
Welcome to a culinary journey that promises to delight your senses and satisfy your sweet cravings! These easy Cherry Crumble Danishes are more than just a breakfast pastry or a simple dessert; they are a symphony of textures and flavors. Imagine golden, flaky puff pastry cradling a rich, tangy cream cheese filling, topped with luscious cherry pie filling, and crowned with a sweet, buttery crumble. Each bite offers a delightful contrast – the crispness of the pastry, the creamy smoothness of the cheese, the burst of fruity cherries, and the satisfying crunch of the crumble. This recipe is designed to be straightforward, making it accessible even for novice bakers, yet impressive enough for any brunch table or special occasion. Get ready to transform your morning routine or elevate your dessert spread with these irresistible homemade danishes that are sure to please everyone, even the most discerning palates.
A DELICIOUSLY SIMPLE CHERRY DANISH RECIPE
As a true enthusiast of all things breakfast, my affection for both sweet and savory morning treats runs deep. This recipe for easy Cherry Crumble Danishes has quickly climbed to the top of my favorites list, blurring the lines between a delightful breakfast and an indulgent dessert. What makes these danishes truly exceptional is the thoughtful layering of flavors and textures. It begins with a creamy, slightly tangy cream cheese base, providing a luxurious foundation. This is then generously topped with a vibrant, sweet cherry pie filling, offering a juicy burst of fruitiness. The crowning glory is a homemade crumble, adding a wonderful textural contrast and a hint of buttery sweetness. All these delectable components are nestled within a golden, airy puff pastry, which bakes up with an irresistible crunch. You might be surprised at how quickly these come together, making them perfect for a spontaneous baking session or a planned treat. If you’re looking to add a touch of elegance and incredible flavor to your breakfast or dessert repertoire, this Cherry Crumble Danish recipe is an absolute must-try. It’s an experience for your taste buds, transforming simple ingredients into something truly extraordinary.
FREQUENTLY ASKED QUESTIONS (FAQ’S) ABOUT CHERRY CRUMBLE DANISHES
The origins of Danish pastries are quite fascinating and a bit of a linguistic puzzle. In Denmark, these delightful pastries are actually known as “wienerbrød,” which directly translates to “Viennese bread.” This name suggests a connection to Vienna, Austria. However, when you travel to Austria, you’ll find similar pastries referred to as “Plundergebäck,” meaning “Danish pastries.” Historical accounts are somewhat conflicting, but the generally accepted story points to Austrian bakers who, during a bakers’ strike in Denmark in 1840, were brought in as replacement workers. They introduced their traditional techniques for making laminated dough, which Danish bakers later adapted and refined, incorporating more butter and eggs. This cultural exchange led to the creation of the pastry we now recognize as the Danish, with each country attributing its origin to the other.
Absolutely! While cherry holds a special place in my heart as a personal favorite, these danishes are incredibly versatile and welcome a variety of fruit fillings. Feel free to experiment with any of your beloved fruit pie fillings. Popular alternatives include sweet and tangy blueberry, comforting apple, bright lemon, or juicy peach. Each fruit will lend its unique flavor profile to the danish, allowing you to customize this recipe to your liking. When choosing a different filling, consider the consistency; thicker fillings tend to work best to prevent them from spreading too much during baking. If your chosen filling is particularly watery, you might want to drain off some excess liquid before adding it to the pastry.
No, the crumble topping is entirely optional, though highly recommended for an added layer of flavor and texture. It truly elevates these danishes by providing a delightful crunch that contrasts beautifully with the soft cream cheese and juicy fruit filling. The buttery, sweet crumble adds a rustic charm and enhances the overall indulgence. However, if you’re not a fan of crumbles, or simply prefer a lighter touch, you can certainly omit it. Alternatively, you could finish the danishes with a dusting of powdered sugar after they cool, or a simple lemon glaze for a different kind of sweetness. The base danish with its cream cheese and cherry filling is delicious on its own, so feel free to personalize it to your taste.
For this specific Cherry Crumble Danish recipe, I have found that puff pastry yields the best results, creating that signature light, airy, and incredibly flaky texture that is synonymous with a true danish. Its layers provide an unparalleled crispness and rise that other doughs simply can’t replicate in the same way. While I haven’t personally tested this exact recipe with other doughs, I have successfully made other danish-style pastries using crescent roll dough sheets. If you choose to use crescent roll dough, be aware that the baking time and temperature will likely need to be adjusted, as crescent rolls tend to bake faster and may result in a softer, less flaky texture. Experimentation is key if you decide to venture beyond puff pastry, starting with slightly lower temperatures and shorter baking times to prevent burning.
While Danish pastry and puff pastry share many similarities and belong to the broader category of laminated doughs (doughs that are folded multiple times with butter to create many layers), they are not exactly the same. The key difference lies in the leavening agent. Puff pastry relies solely on steam to create its characteristic rise. As the water in the butter and dough heats up during baking, it turns into steam, which then forces the layers apart, resulting in an incredibly light and airy structure. Danish pastry, on the other hand, is a yeast-leavened dough that also incorporates butter layers. The yeast provides a primary rise, giving the dough a slightly breadier, softer texture than pure puff pastry, while the butter layers still contribute to flakiness. So, while both offer a delightful flaky experience, Danish pastry tends to be a bit richer and more tender due to the yeast.
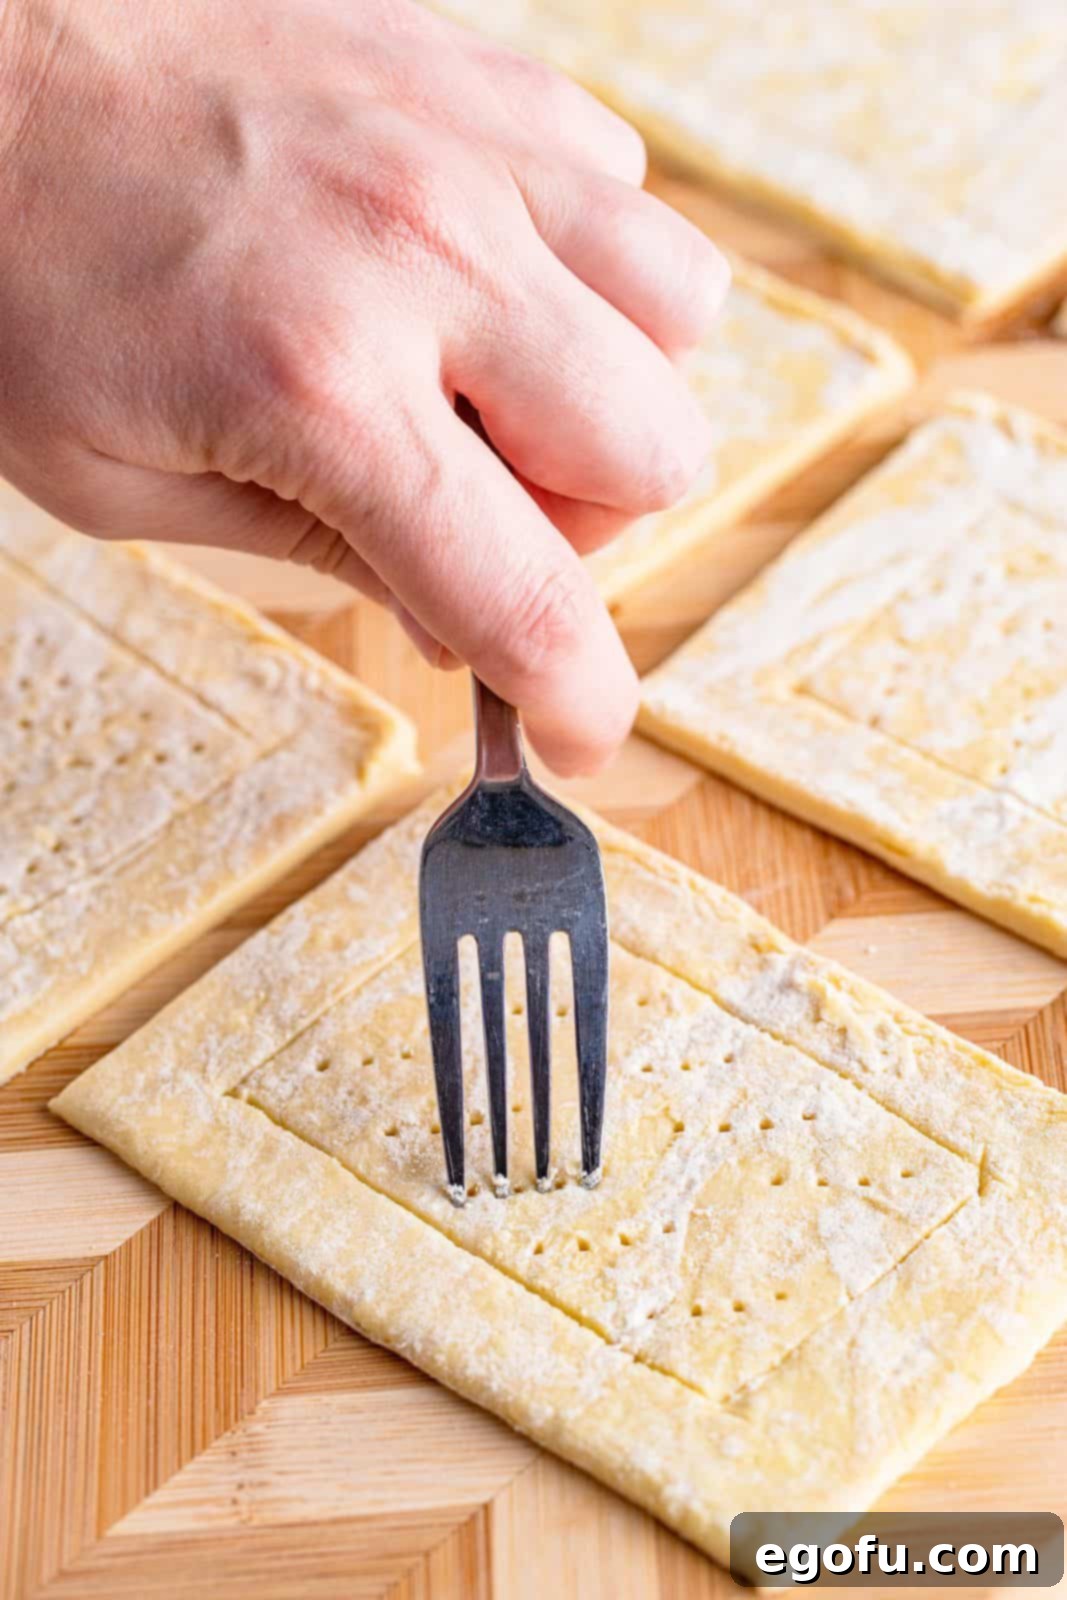
Scoring and poking the puff pastry are crucial steps that serve important functional and aesthetic purposes. When you score the border of the pastry, you’re essentially creating a visual frame and guiding the puff pastry’s rise. The outer border will puff up beautifully, creating a defined edge, while the scored inner rectangle helps to contain the filling. Poking holes with a fork in the center of that inner rectangle is equally important. Puff pastry naturally wants to rise dramatically due to the steam created between its layers. If you don’t poke holes in the center where the filling will go, that area would puff up excessively, pushing the filling off or causing an uneven bake. The holes allow steam to escape from the center, preventing it from rising too high and creating a stable, shallow well for your delicious cream cheese and cherry filling to comfortably sit without overflowing. This ensures a perfectly baked danish with an appealing presentation.
Proper storage is key to enjoying your delicious Cherry Crumble Danishes for as long as possible. Once cooled completely, place any leftover danishes in an airtight container. They will keep beautifully in the refrigerator for up to 5 days, maintaining their freshness and flavor. For longer storage, these danishes also freeze exceptionally well. To freeze, arrange the cooled and glazed danishes in a single layer on a baking sheet and flash freeze them for about an hour until solid. This prevents them from sticking together. Then, transfer the frozen danishes to a freezer-safe container or a heavy-duty freezer bag, separating layers with parchment paper to avoid sticking. They can be stored in the freezer for up to 3 months. To enjoy from frozen, you can thaw them in the refrigerator overnight and then warm them gently in a toaster oven or microwave, or simply warm directly from frozen in a preheated oven until heated through for that freshly baked taste.

ESSENTIAL INGREDIENTS FOR YOUR HOMEMADE CHERRY CRUMBLE DANISHES
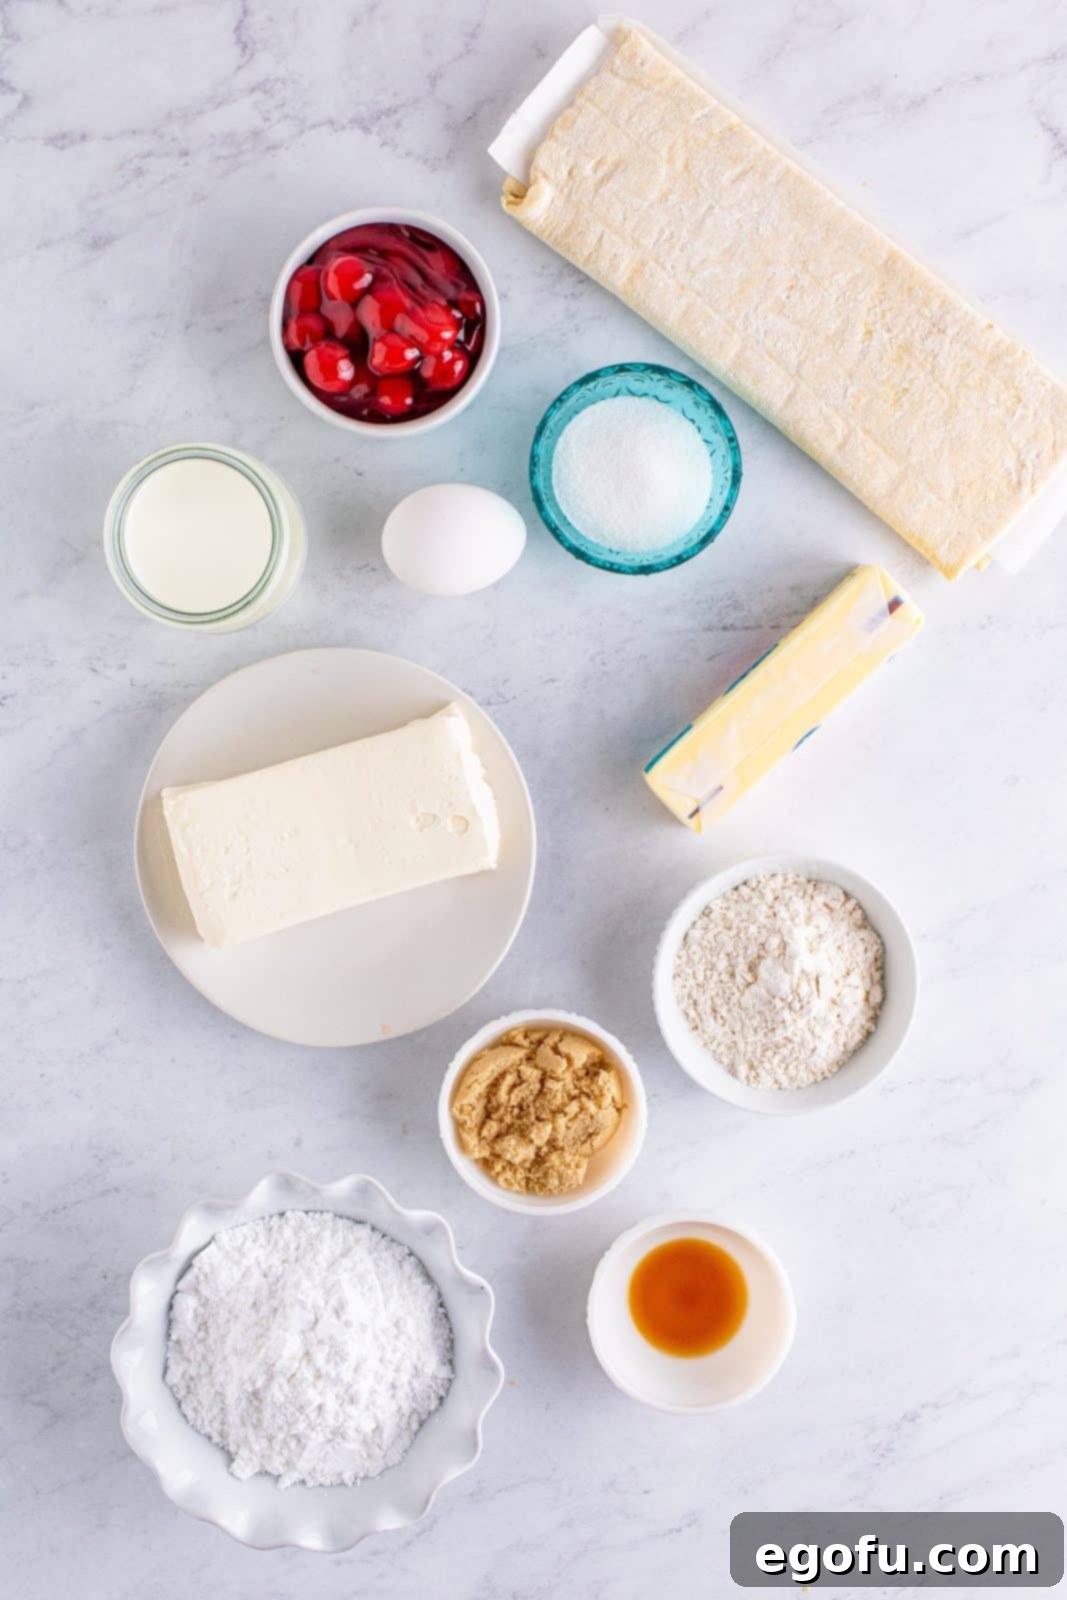
Crafting these delightful danishes requires a selection of fresh, high-quality ingredients that work together to create a symphony of flavors and textures. From the creamy filling to the sweet crumble and the flaky pastry, each component plays a vital role. Here’s what you’ll need to gather to bring these irresistible treats to life:
- Cream cheese (softened for easy mixing)
- Granulated sugar
- Vanilla extract (pure for the best flavor)
- Light brown sugar (for the rich crumble)
- Salted butter (melted for the crumble, softened for other uses if needed)
- All-purpose flour
- Puff pastry sheets (thawed, preferably all-butter for superior taste and flakiness)
- Cherry pie filling (canned or homemade, your preference)
- Large egg (for the egg wash)
- Water (for the egg wash)
- Powdered sugar (for the sweet glaze)
- Whole milk (for the glaze, adjust for desired consistency)
HOW TO BAKE PERFECT CHERRY CRUMBLE DANISHES: A STEP-BY-STEP GUIDE
Get ready to create bakery-quality danishes right in your own kitchen! This detailed guide will walk you through each step, ensuring a delicious and visually appealing result. Follow these instructions carefully for flaky pastry, creamy filling, and a delightful crumble topping.
Step 1: Prepare Your Workspace and Oven. Begin by preheating your oven to a precise 400°F (200°C). This high temperature is essential for the puff pastry to achieve its maximum rise and flakiness. While the oven heats, prepare two large baking sheets by lining them with parchment paper. Parchment paper is crucial here as it prevents sticking and makes cleanup a breeze. Set these prepared sheets aside, ready for your danishes.
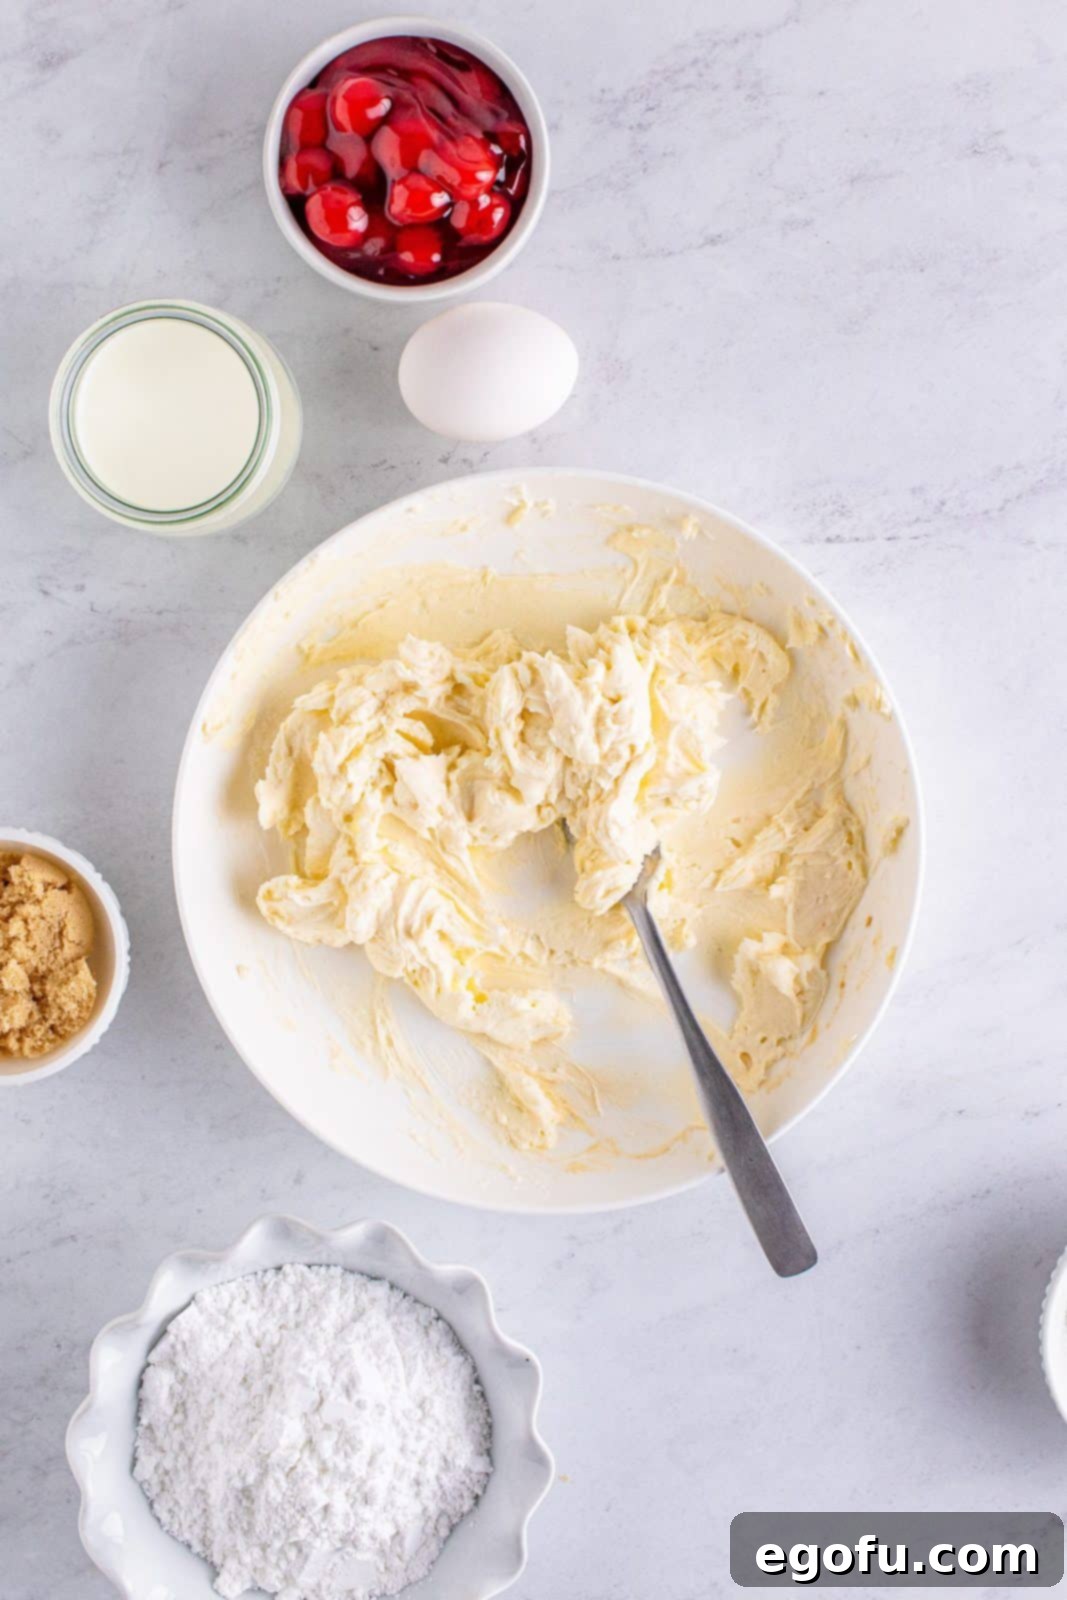
Step 2: Craft the Cream Cheese Filling. In a medium-sized mixing bowl, combine the softened cream cheese, granulated sugar, and vanilla extract. Ensure your cream cheese is at room temperature; this is vital for achieving a smooth, lump-free filling. Using a fork, or a handheld electric mixer for extra creaminess, mash and mix all the ingredients together until they are thoroughly combined and the mixture is light and fluffy. Once smooth, set this delightful cream cheese filling aside.
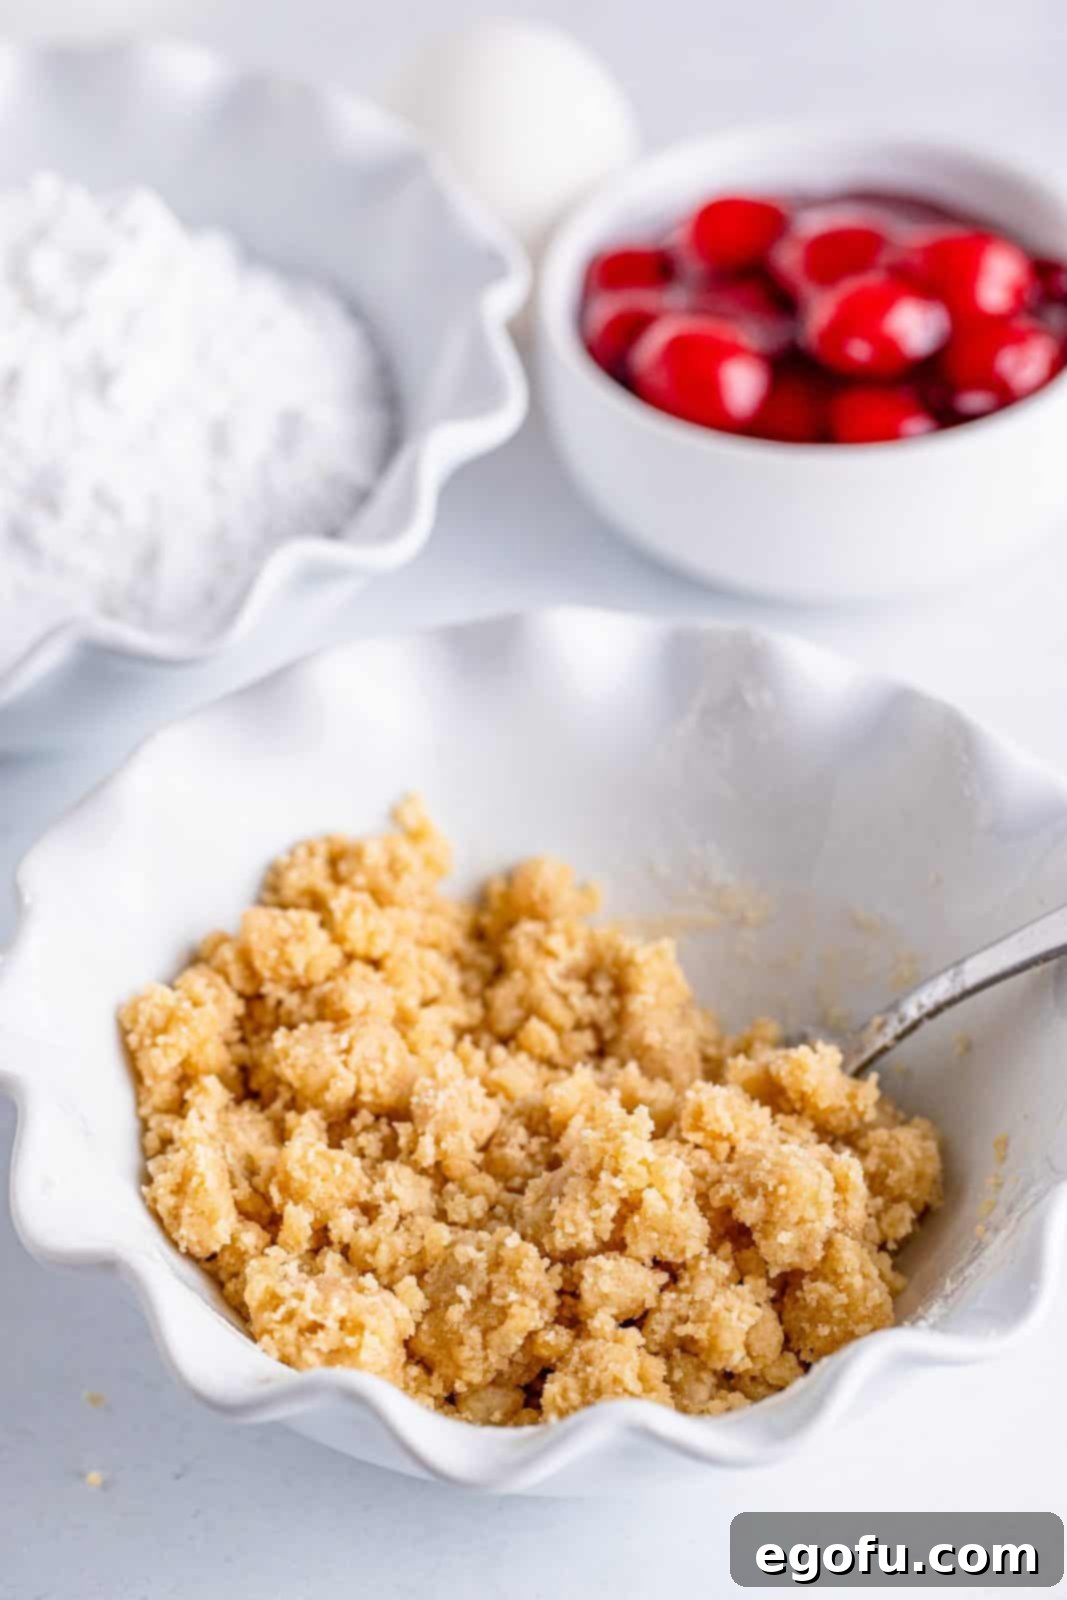
Step 3: Assemble the Irresistible Crumble Topping. In a separate bowl, begin making your crumble. First, combine the light brown sugar with the melted salted butter. Mix these together thoroughly until the sugar is fully moistened and incorporated into the butter. Next, add the all-purpose flour to this mixture. Using a fork, gently stir and toss the ingredients together. Continue mixing until all the flour is moistened, and the mixture resembles coarse crumbs. Avoid overmixing; you want distinct crumbles, not a paste. Set this tempting crumble topping aside.
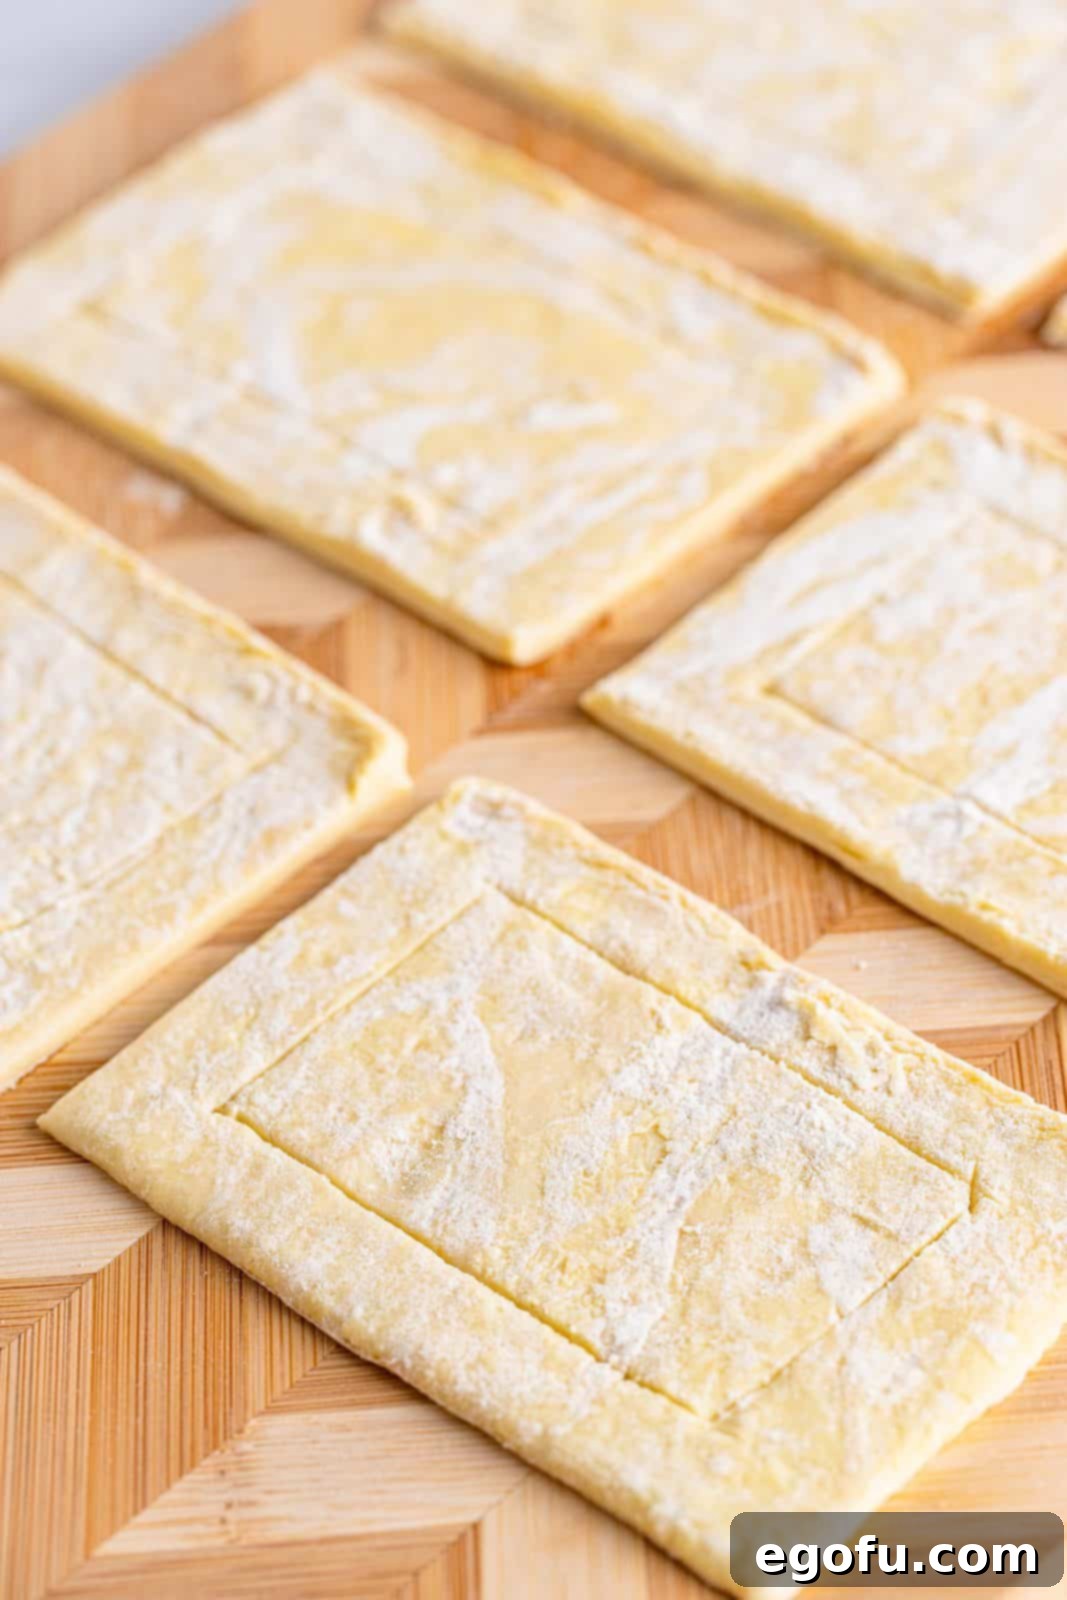
Step 4: Prepare the Puff Pastry. Carefully unroll one sheet of thawed puff pastry onto a clean, lightly floured work surface. If your pastry feels a bit sticky, a very light dusting of flour will prevent it from adhering. The standard puff pastry sheet usually has natural folds. Use these folds as guides to cut the pastry into three equal rectangular strips. Once you have three strips, cut each of these strips in half across their width, resulting in six smaller, roughly equal rectangles from one sheet. You will repeat this process with the second sheet of puff pastry.
Step 5: Score and Poke the Pastry. This step is crucial for the danish’s structure and appearance. Take each pastry rectangle and, using a small, sharp paring knife, gently score a border around the edges. Make this score approximately ½ inch to ¾ inch from the outer edge, creating a smaller inner rectangle. Be careful not to cut all the way through the dough – you only want to score the top layers. Next, with a fork, poke several holes evenly within the *center* of the smaller, scored rectangle. This prevents the center from puffing up too much, ensuring a perfect well for your filling. Carefully transfer these prepared puff pastry pieces to one of your parchment-lined baking sheets, ensuring they are not touching each other to allow for even baking and expansion. Repeat this process with the remaining puff pastry sheet.
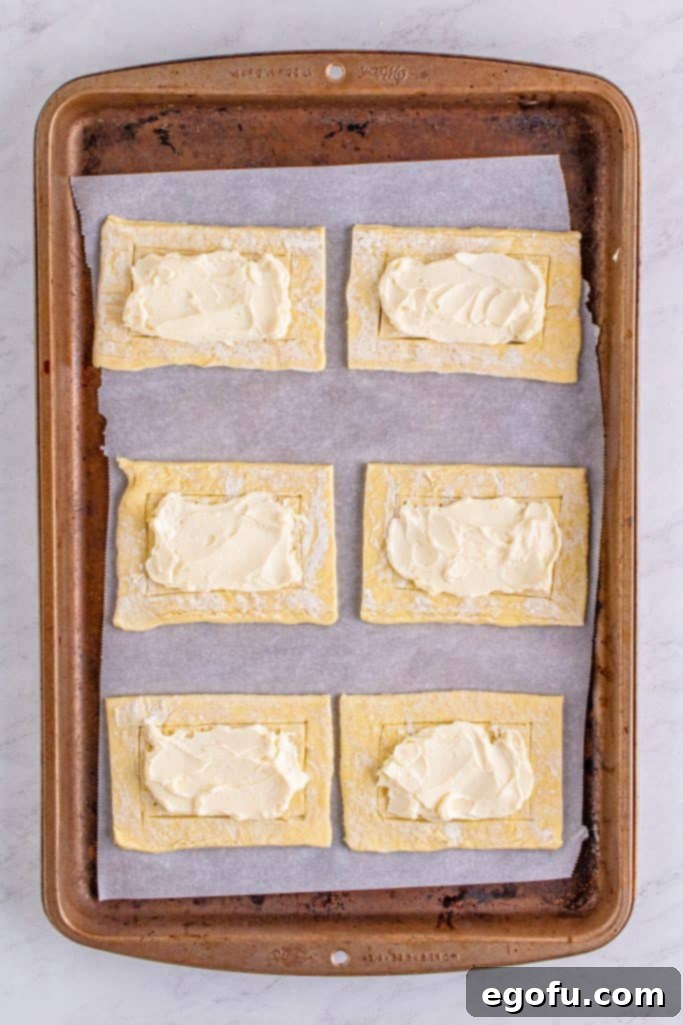
Step 6: Fill with Cream Cheese. Now it’s time to add the delicious cream cheese filling. Evenly distribute the prepared cream cheese mixture into the center of each scored puff pastry piece. Use about one tablespoon of filling per pastry. Gently spread the filling within the boundaries of the inner rectangle you scored, making sure to leave the outer border of the puff pastry exposed. This exposed border will puff up nicely, creating a beautiful golden frame for your filling.
Step 7: Add the Cherry Pie Filling. On top of the cream cheese layer, add approximately 2-3 tablespoons of your cherry pie filling to each danish. Again, be mindful to keep the cherry filling within the scored border, just like with the cream cheese. I always try to ensure each danish gets at least four or five whole cherries for a generous fruity bite. The vibrant red of the cherries will provide a beautiful contrast against the creamy white filling and golden pastry.
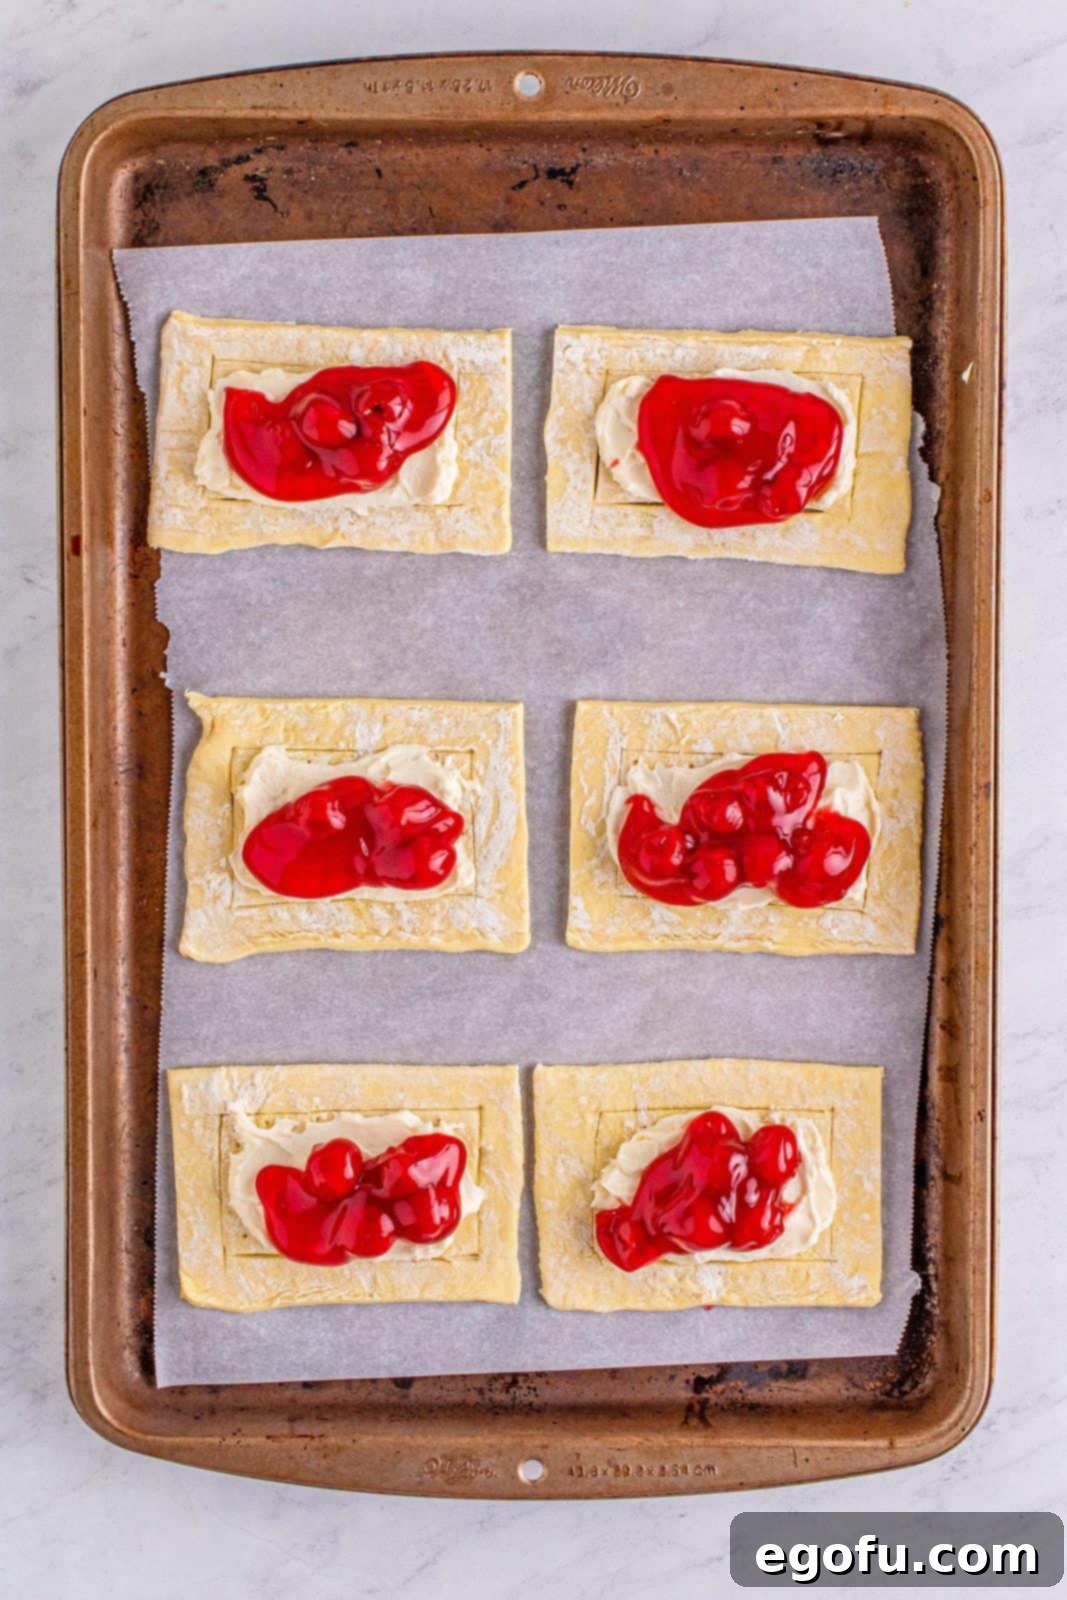
Step 8: Sprinkle the Crumble. Generously sprinkle the prepared crumble topping over the cherry pie filling on each danish. Ensure an even distribution, covering the cherries to add that delightful buttery crunch that truly makes these danishes special. The crumble will brown beautifully in the oven, adding another layer of texture and flavor.
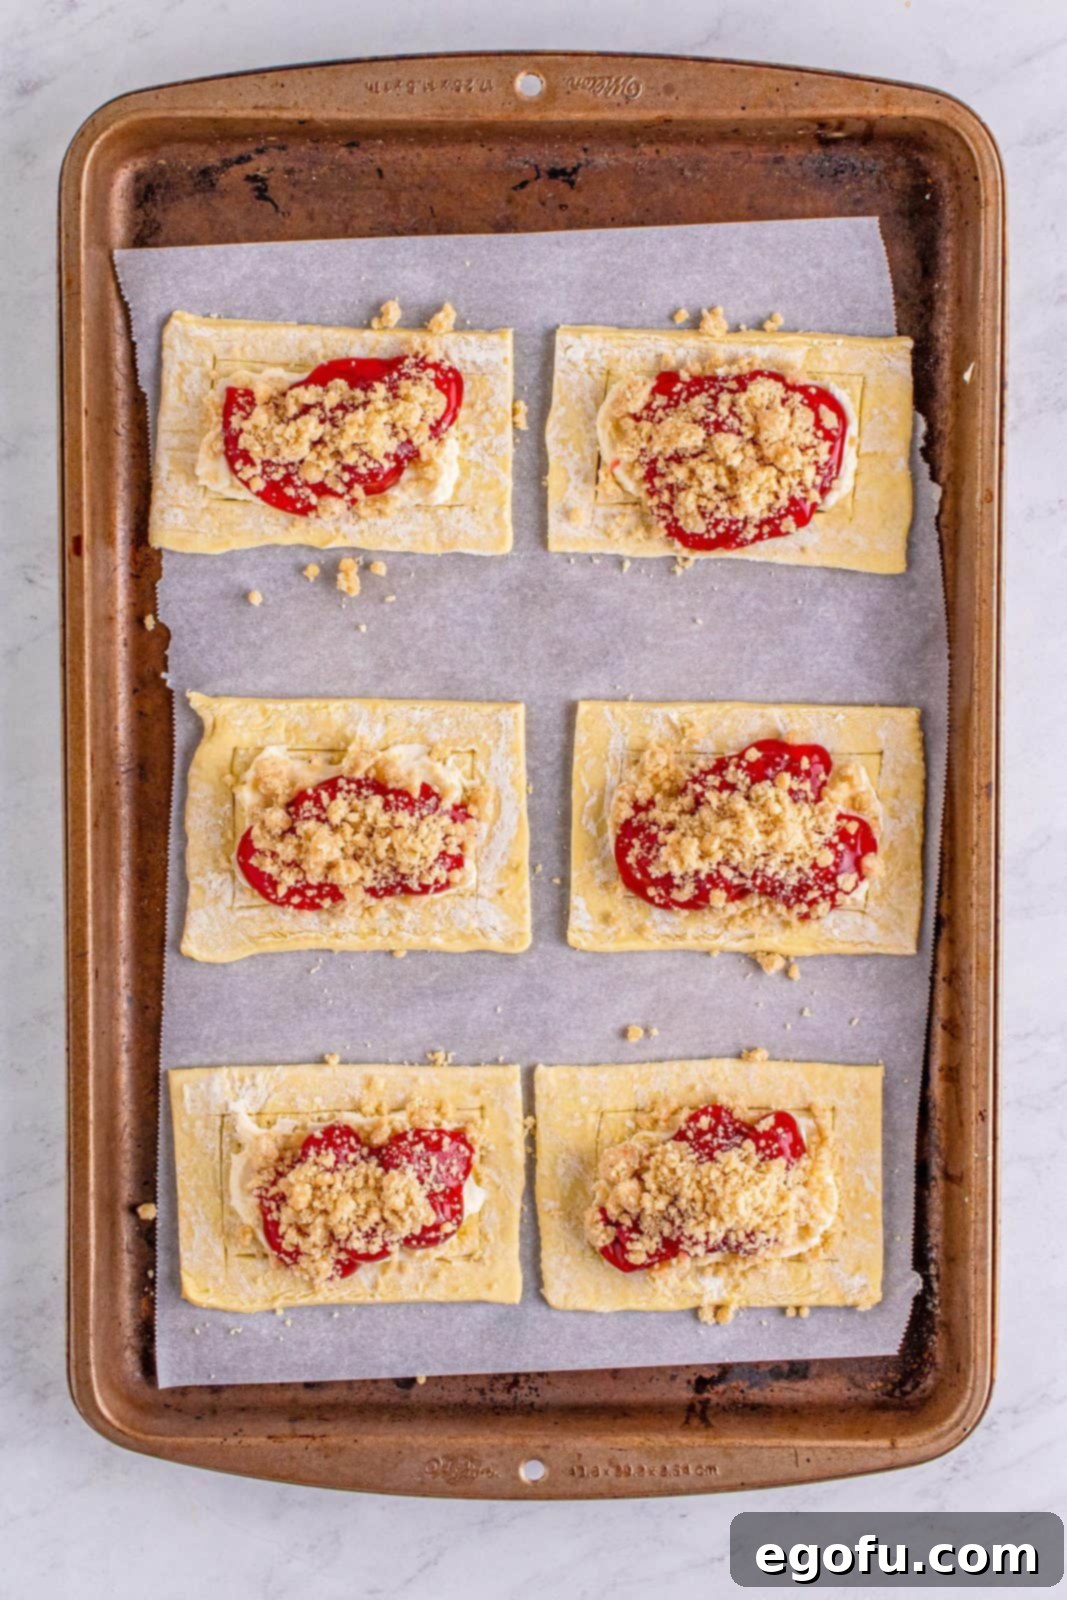
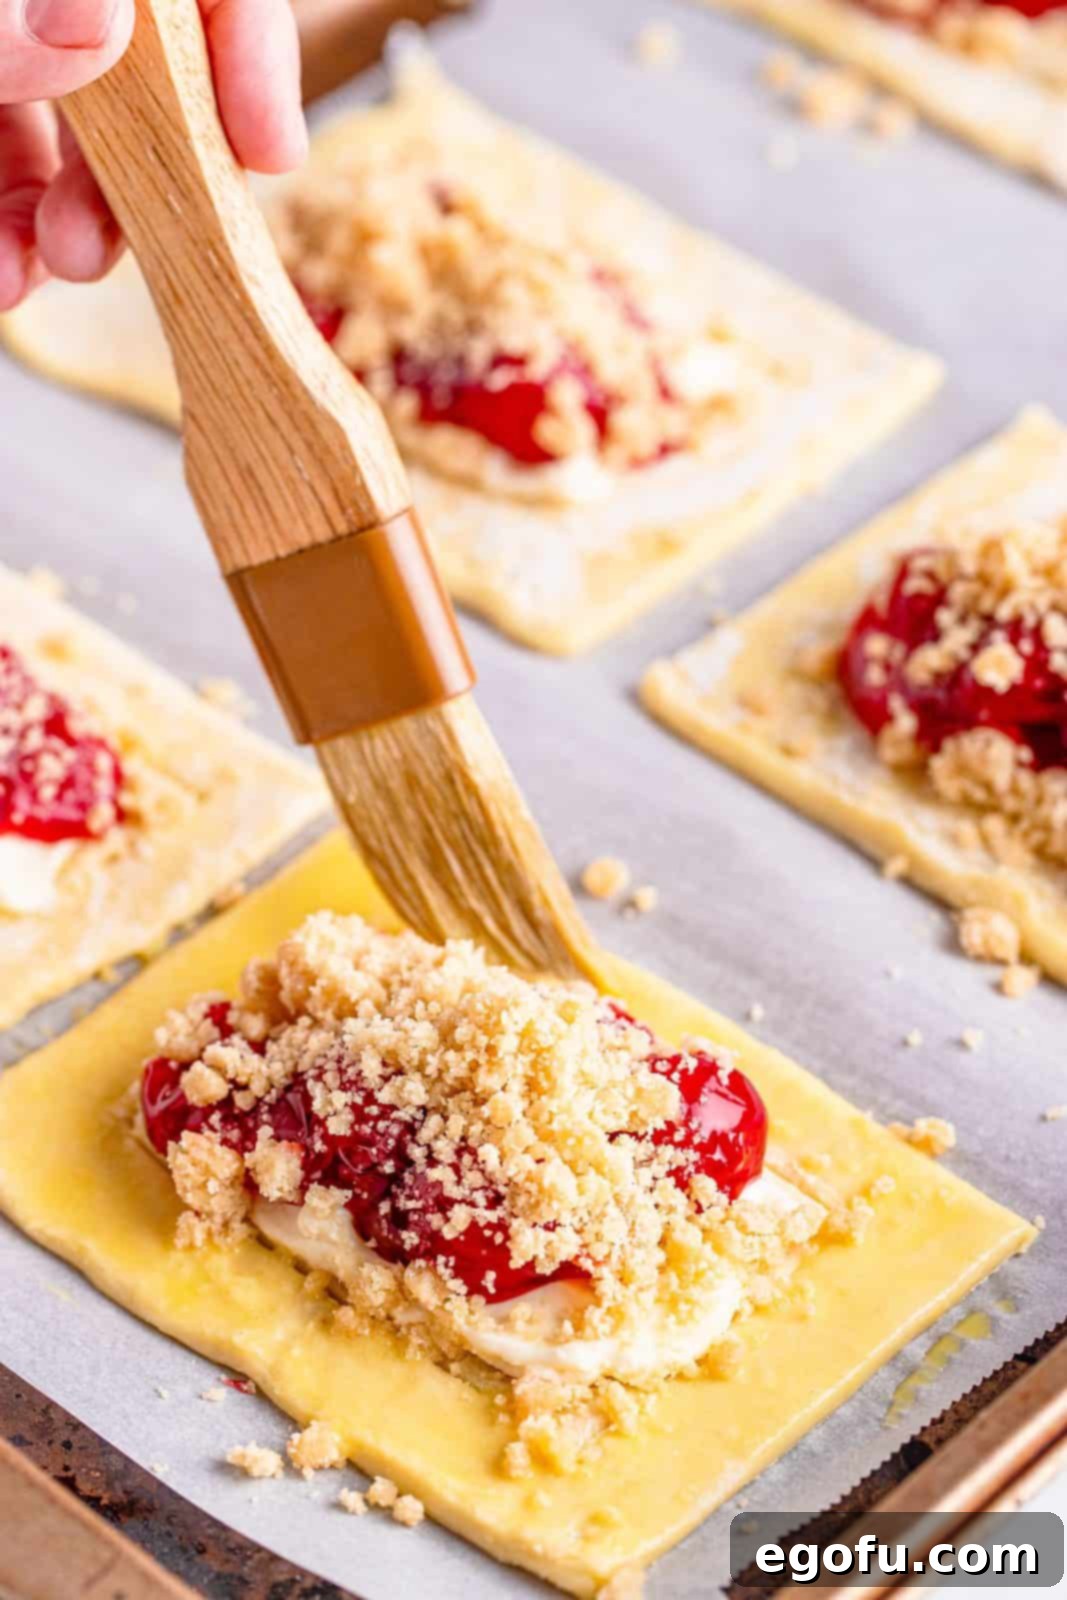
Step 9: Apply the Egg Wash. In a small bowl, whisk together one large egg with a small splash of water to create an egg wash. This mixture will give your danishes a beautiful, glossy, golden-brown finish when baked. Using a pastry brush, carefully brush the outer, exposed border of the puff pastry on each danish. Avoid brushing the filling or crumble, focusing only on the pastry edges. This egg wash is key for achieving that appealing, professional bakery look.
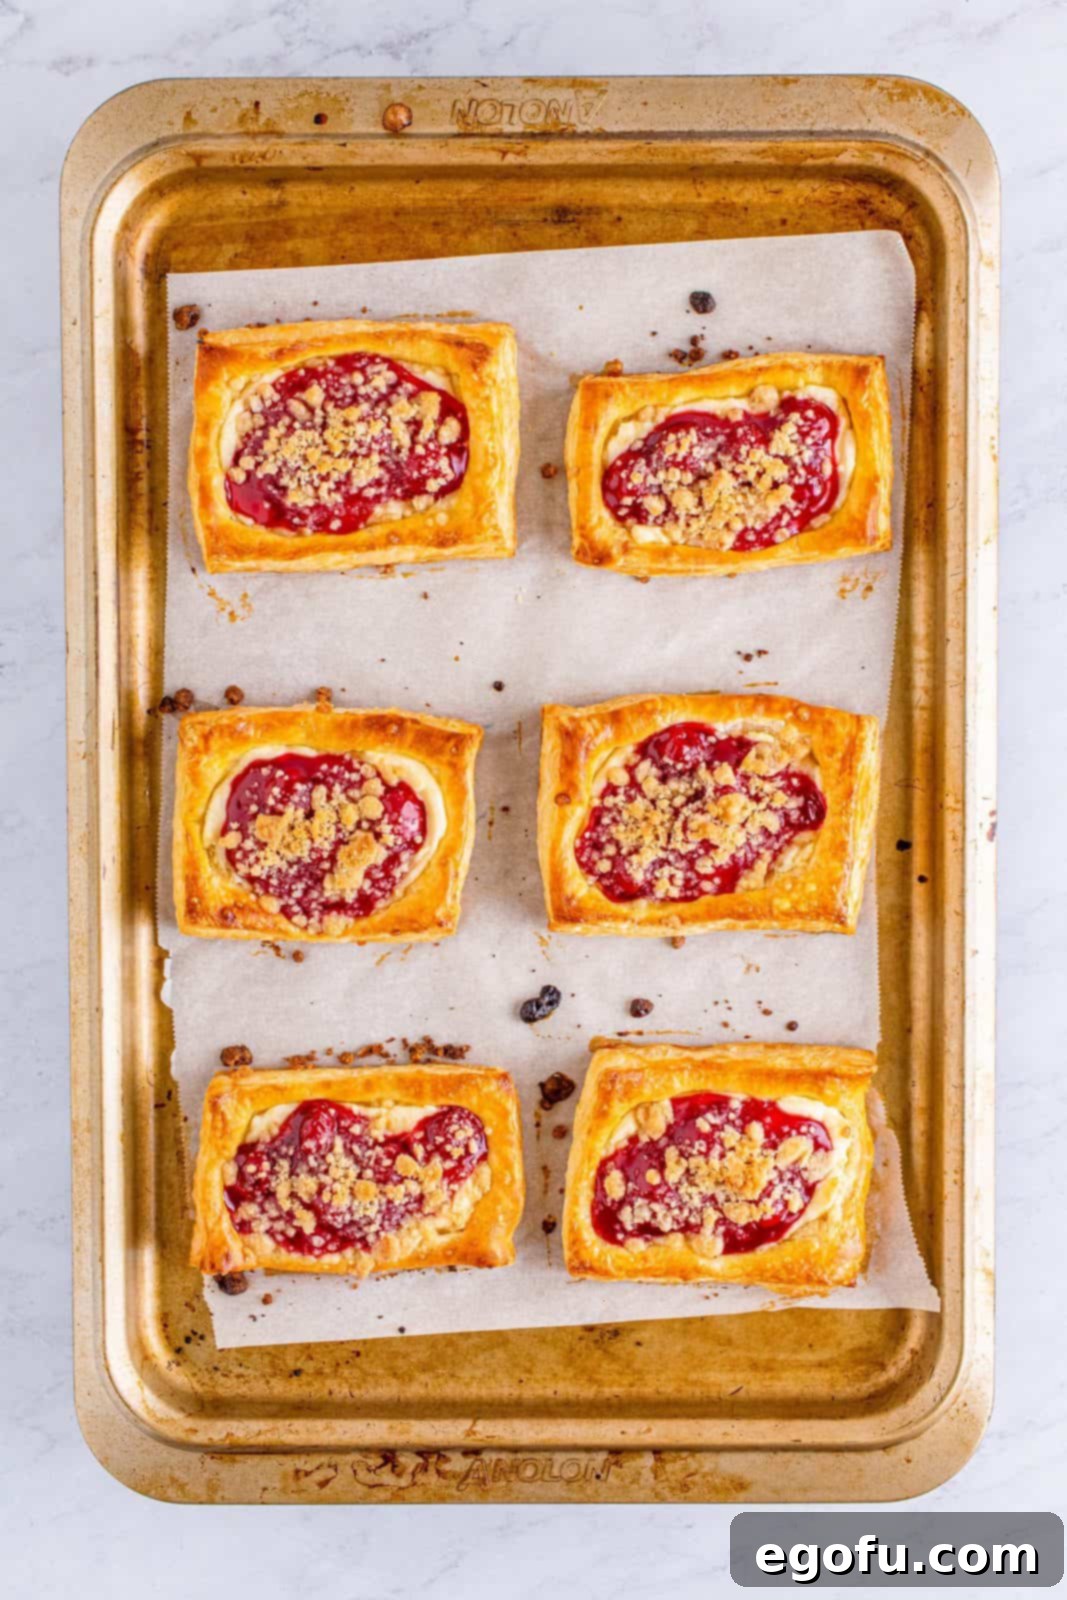
Step 10: Bake to Golden Perfection. Carefully transfer the baking sheets with your danishes to the preheated 400°F (200°C) oven. Bake for approximately 13-15 minutes. Keep a close eye on them during the last few minutes. They are ready when the puff pastry edges are beautifully puffed up and golden brown, and the crumble topping is lightly toasted. Baking times can vary slightly depending on your oven, so trust your eyes! Once baked, carefully transfer the hot pastries from the baking sheets to a wire rack to cool slightly. Allowing them to cool on a rack prevents the bottoms from becoming soggy.
Step 11: Prepare the Simple Glaze. While your danishes are cooling on the wire rack, prepare the optional but highly recommended glaze. In a small bowl, whisk together the powdered sugar and 1 tablespoon of whole milk. Continue whisking until the mixture is completely smooth and free of lumps. You’re aiming for a glaze that is thick enough to coat the back of a spoon but still pourable. If it’s too thick, add another half-tablespoon of milk at a time until you reach your desired consistency. If it becomes too thin, simply whisk in a little more powdered sugar.
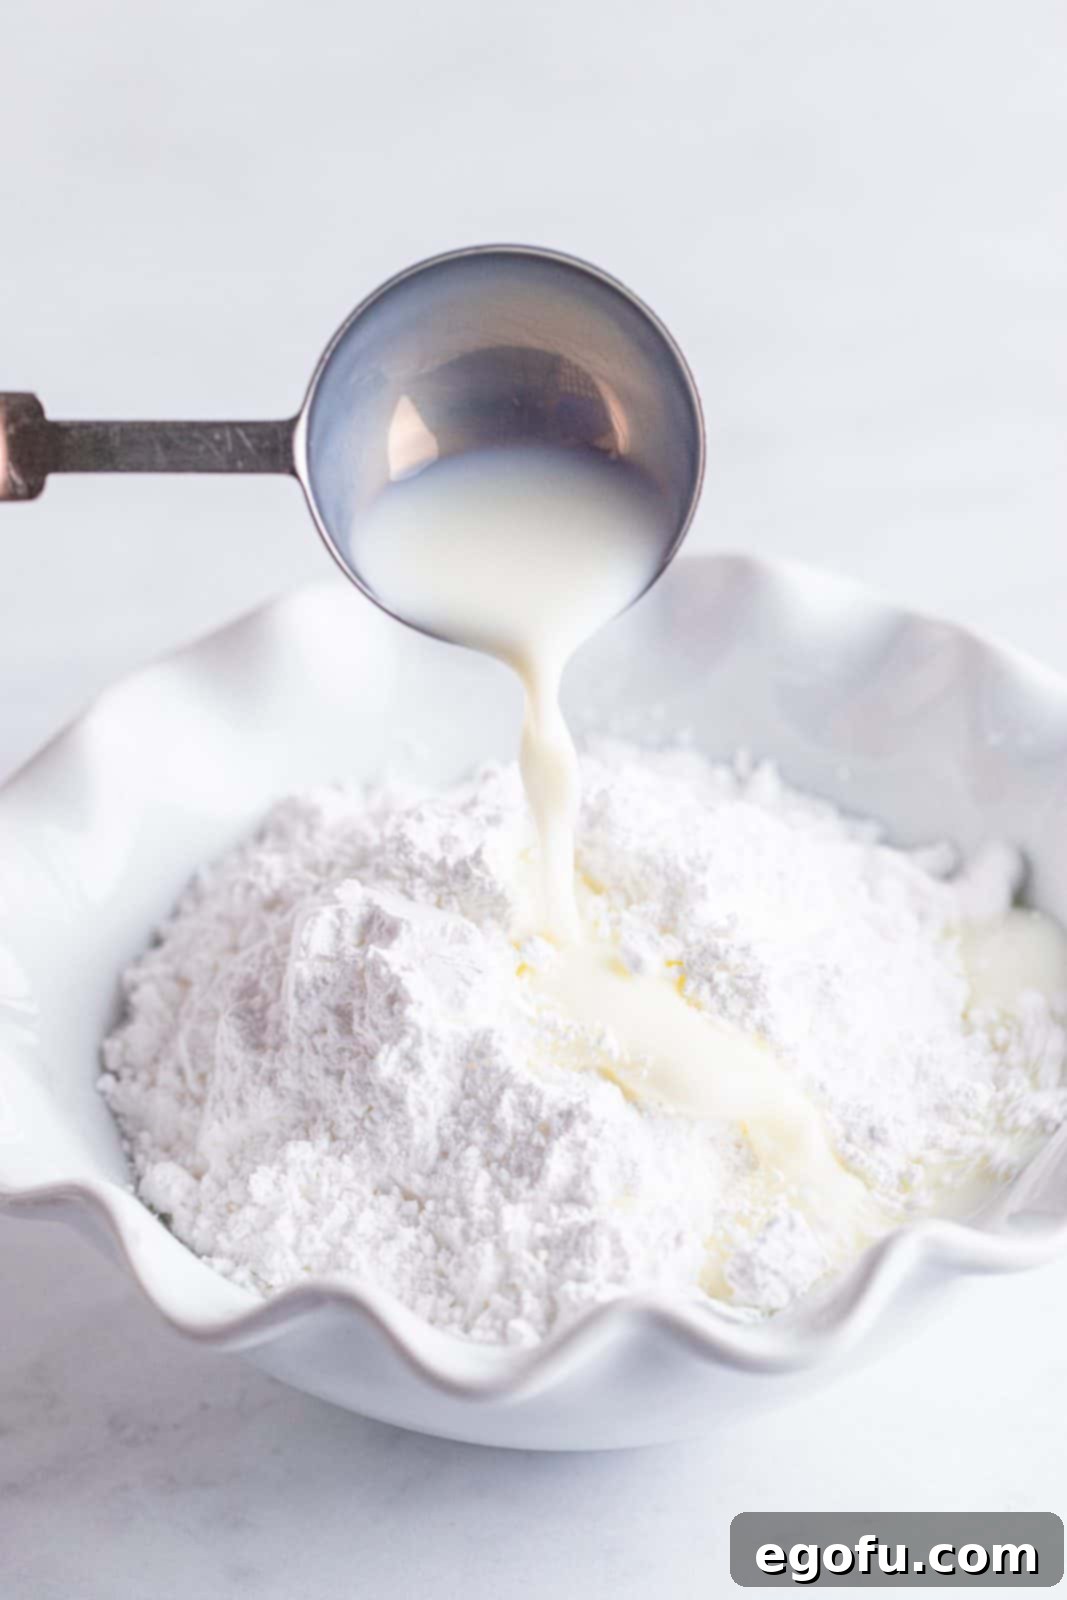
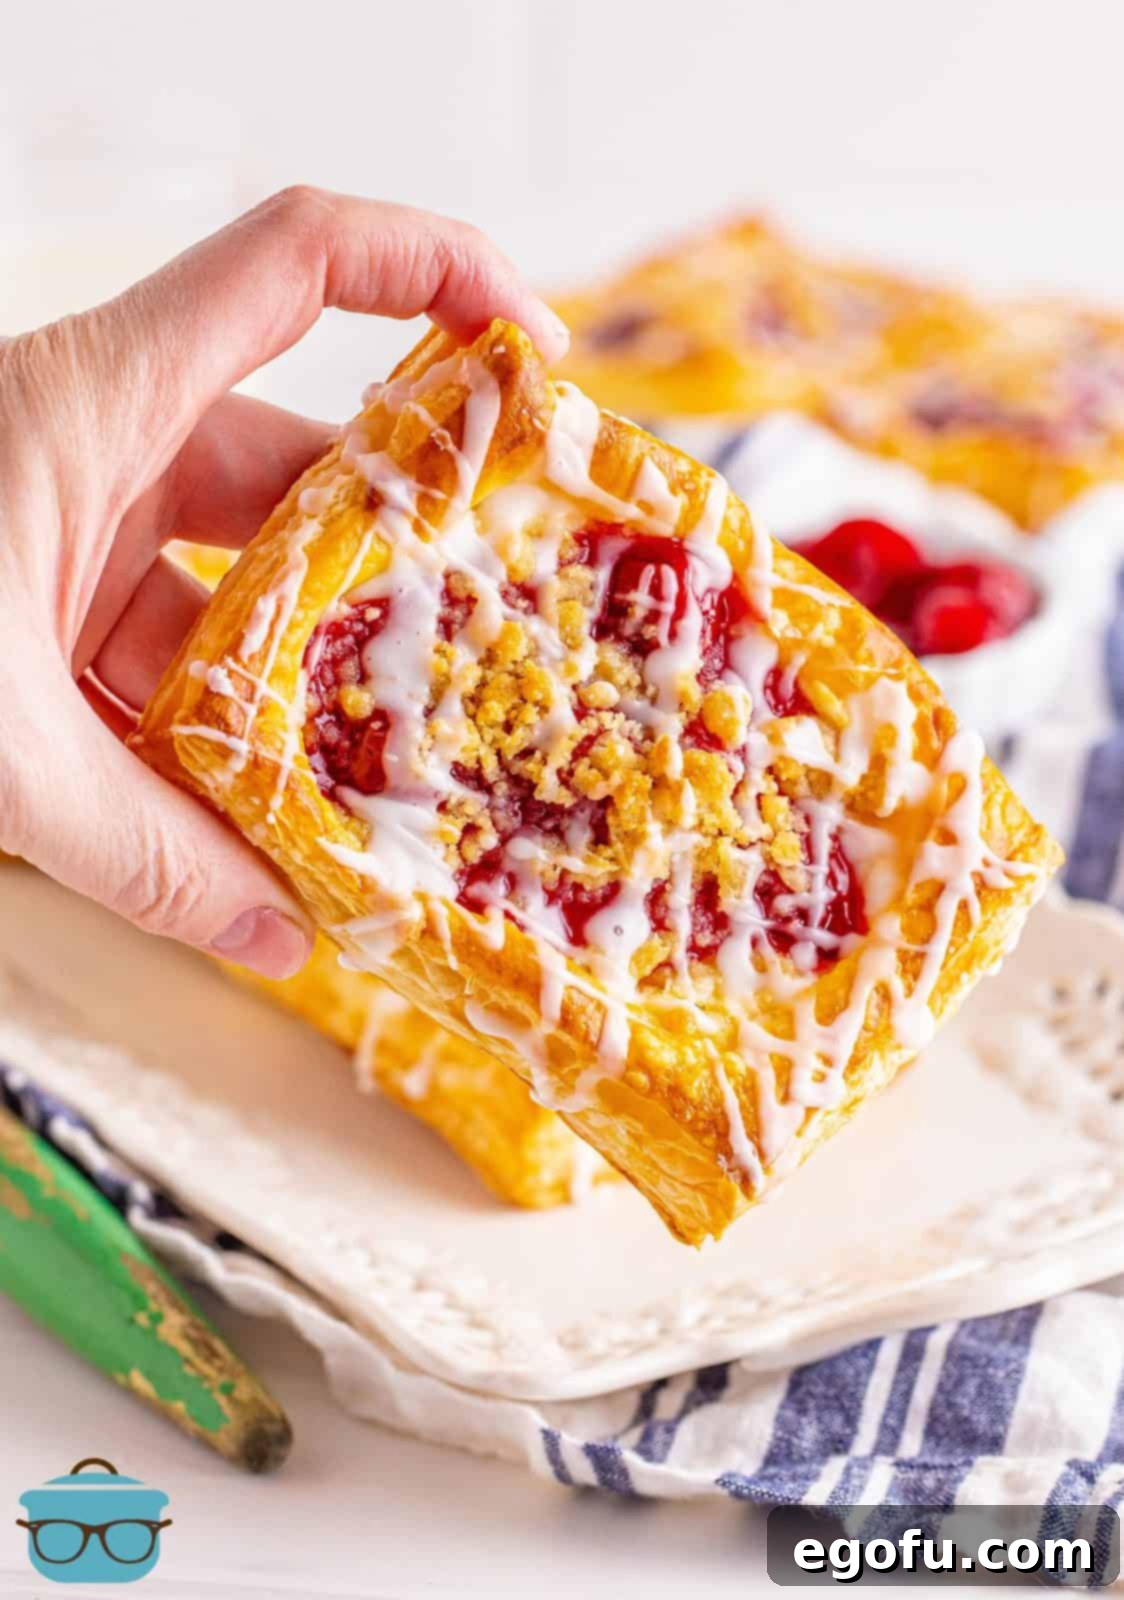
Step 12: Drizzle and Serve! Once the danishes have cooled slightly but are still warm, evenly drizzle the prepared glaze over each one. The warmth of the danish will help the glaze set beautifully. Serve these delectable Cherry Crumble Danishes immediately to enjoy them at their peak freshness and flakiness. The combination of warm pastry, sweet filling, crunchy crumble, and smooth glaze is truly divine. If you prefer them cooler, you can also allow them to cool completely before serving, but there’s something magical about a warm, freshly glazed danish.
EXPLORE MORE DELICIOUS RECIPES
If you loved these Cherry Crumble Danishes, you’re in for a treat! We have a whole collection of delightful recipes featuring flaky pastries, seasonal fruits, and comforting crumbles. Discover your next favorite sweet indulgence with these other fantastic options:
- Pumpkin Danishes
- Easy Apple Danishes
- Easy Cheese Danishes
- Strawberry Cheese Danish
- Strawberry Crumble
- Cherry Pie Bars
- Easy Cherry Cobbler
- Cherry Turnovers

Cherry Crumble Danishes
Print Recipe
Pin Recipe
Rate This Recipe
20 minutes
15 minutes
35 minutes
12
Brandie Skibinski
Ingredients
For the cream cheese filling:
- 8 ounces (one block) cream cheese, softened
- 2 tablespoons granulated sugar
- 1 teaspoon vanilla extract
For the crumble topping:
- 3 tablespoons light brown sugar, packed
- 2 tablespoons salted butter, melted
- ⅓ cup all-purpose flour
For assembly:
- 2 sheets puff pastry, thawed
- 1 ½ cups cherry pie filling
- 1 large egg
- Splash of water
For the glaze:
- 1 cup powdered sugar
- 1-2 tablespoons whole milk
Instructions
- Preheat the oven to 400°F. Line two sheet trays with parchment paper, set aside.
- For the cream cheese filling, place the cream cheese, sugar, and vanilla in a bowl, mash everything together with a fork to combine, set aside.
- For the crumble topping, mix together the brown sugar and butter in a medium-sized bowl until combined. Add in the flour and using a fork, stir it together until all of the flour is moistened and the mixture is crumbly, set aside.
- Place one sheet of puff pastry on a clean work surface. Cut along the folds of the pastry so you have 3 pieces. Cut these pieces in half so you now have 6 rectangles.
- Score each pastry about ½ inch to ¾ inch around the border of the rectangle with a paring knife. Poke a few holes with a fork into the pastry but just in the center of the smaller rectangle you scored. Place these on one of the prepared sheet trays, not touching. Repeat with the other puff pastry sheet.
- Evenly distribute the cream cheese filling into the center of the pastries and smooth it out making sure you do not go into the outer border of the pastry. It will be about a tablespoon of the filling per pastry.
- Top with the cherry pie filling, again keeping inside the border.
- Add the crumble over the cherries.
- In a small bowl whisk together the egg and splash of water. With a pastry brush, brush the outer border of the exposed puff pastry with the egg wash.
- Bake for 13-15 minutes until golden brown and the edges are puffed. Transfer the pastries to a wire rack to cool.
- While the pastries are cooling, make the glaze by whisking together the powdered sugar and milk until smooth. You want the glaze to be thick yet pourable, start with 1 tablespoon of milk and add up to another tablespoon to your desired consistency.
- Drizzle the glaze evenly over the pastries. Serve immediately or let cool completely.
Notes
- Change up your filling to any of your favorite fruits.
- The glaze is optional; they are great plain or with powdered sugar.
- These can be frozen; see my tips in the FAQ section above for detailed instructions.
Breakfast, Dessert
American
Nutrition
Carbohydrates: 45g |
Protein: 5g |
Fat: 24g |
Sodium: 175mg |
Fiber: 1g |
Sugar: 16g
Nutritional Disclaimer
“The Country Cook” is not a dietician or nutritionist, and any nutritional information shared is an estimate. If calorie count and other nutritional values are important to you, we recommend running the ingredients through whichever online nutritional calculator you prefer. Calories and other nutritional values can vary quite a bit depending on which brands were used.
Did you make this recipe?
Share it on Instagram @thecountrycook and mention us #thecountrycook!
