Cherry Pie Bites use simple ingredients like cherry pie filling and crescent rolls to make an easy, tasty dessert! Topped with an easy icing.
Easy Cherry Pie Bites: Your Go-To Quick & Delicious Dessert
Craving a delightful dessert that’s both effortless to prepare and incredibly satisfying? Look no further than these Easy Cherry Pie Bites! Inspired by beloved family favorites like our Easy Apple Danishes, Crescent Roll Cheese Danishes, and Cinna-Minis, this recipe harnesses the magic of store-bought crescent rolls to create a dessert that tastes gourmet but comes together in a flash. It’s the perfect solution for those busy weeknights when a sweet tooth strikes, or when you need a crowd-pleasing treat without spending hours in the kitchen. Even better, these bites are so simple that older kids can often whip them up with minimal supervision, making it a fantastic baking project for the whole family.

The Versatility of Pie Fillings: Explore Delicious Variations
While classic cherry pie filling holds a special place in our hearts for these bites, the true beauty of this recipe lies in its incredible adaptability. You can easily customize these treats to suit your family’s preferences or seasonal availability. Imagine the possibilities:
- Apple Pie Filling: A timeless choice, especially delightful with a sprinkle of cinnamon before baking.
- Blueberry Pie Filling: Offers a burst of juicy, sweet-tart flavor, perfect for summer gatherings.
- Strawberry Pie Filling: Bright and vibrant, these make for a cheerful and fruity bite.
- Lemon Pie Filling: For a zesty and refreshing twist, ideal for those who prefer a less sweet dessert.
- Chocolate Pie Filling: Transform them into a rich, decadent chocolate pastry – a chocolate lover’s dream!
- Peach Pie Filling: Sweet and fragrant, reminiscent of a warm summer day.
- Mixed Berry Filling: Combine strawberries, blueberries, and raspberries for a complex fruit explosion.
Don’t be afraid to get creative! A little zest of lemon or orange can brighten up any fruit filling, or a pinch of nutmeg can add warmth to apple or peach variations. These pie bites are truly a canvas for your culinary imagination, ensuring a new taste experience every time you bake them.

Simple Ingredients for Irresistible Bites
The magic of these Cherry Pie Bites starts with a short and sweet ingredient list. You likely have most of these on hand, making a spontaneous baking session entirely possible!
Ingredients List:
- Cherry Pie Filling: One standard can (around 21 ounces) is all you need for that classic fruit flavor.
- Crescent Roll Dough: Two (8-ounce) tubes of refrigerated crescent roll dough provide the perfect flaky, buttery base.
- Powdered Sugar: The foundation for our quick and easy glaze.
- Milk: Used to thin the powdered sugar into a smooth, drizzly icing.
- Nonstick Cooking Spray: Essential for preparing your muffin tin and ensuring easy release.
These minimal ingredients highlight the genius of this recipe, proving that you don’t need a lengthy shopping list to create something truly delicious.

How to Make Cherry Pie Bites: A Step-by-Step Guide
Creating these delightful Cherry Pie Bites is surprisingly straightforward. Follow these simple steps for a perfect batch every time:
Step 1: Preheat and Prepare
Begin by preheating your oven to 375°F (190°C). This ensures your oven is at the correct temperature for even baking. Next, take a regular 12-cup muffin tin and generously spray each cup with nonstick cooking spray. This step is crucial for preventing the crescent rolls from sticking and making removal a breeze.
Carefully unroll the crescent roll dough. You’ll find it separated into individual triangles. Gently place one triangle into each muffin cup, positioning the widest part of the dough at the bottom of the cup. Allow the narrower ends to extend up the sides and slightly over the rim. Don’t worry if it’s not perfectly neat; the dough will puff up during baking. If you only have one muffin tin, you might need to bake these in two batches.

Step 2: Fill with Cherry Goodness
Now for the star of the show: the cherry pie filling! Using a spoon, generously scoop the pie filling into the center of each crescent roll dough piece. Aim for about 3 to 4 heaping tablespoons per cup. Don’t be shy with the filling; a bountiful amount ensures a satisfyingly fruity bite. It’s completely fine if a little bit of the filling seeps out during baking – in fact, seeing that delicious, bubbling pie filling is part of the charm! Ensure the filling is mostly contained within the dough-lined cup.

Step 3: Fold and Enclose
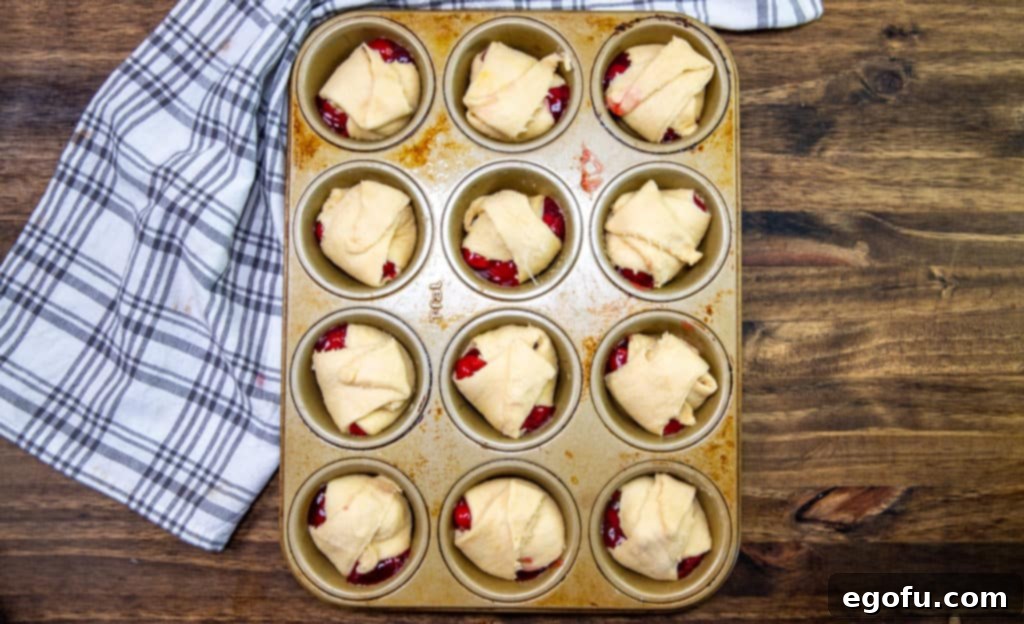
Once the filling is in place, it’s time to gently fold the crescent roll dough around it. Each crescent roll triangle naturally has three corners. Carefully pull these corners in towards the center, attempting to partially enclose the pie filling. The goal isn’t to create a perfectly sealed parcel; leaving small open gaps is absolutely fine and contributes to the rustic, homemade appeal of these bites. The dough will expand and puff up considerably in the oven, further encasing the filling.

Step 4: Bake to Golden Perfection
Place the muffin tin into your preheated oven and bake for approximately 13-14 minutes. Baking times can vary slightly depending on your oven, so keep an eye on them. The most important thing is to ensure the crescent rolls are cooked all the way through. You don’t want to bite into a doughy, underbaked center. Look for a lovely, tan-brown color on the tops and edges, and the bites should feel fairly firm to the touch when gently pressed. If they still seem pale or soft, bake for an additional minute or two.

Step 5: Prepare the Easy Glaze
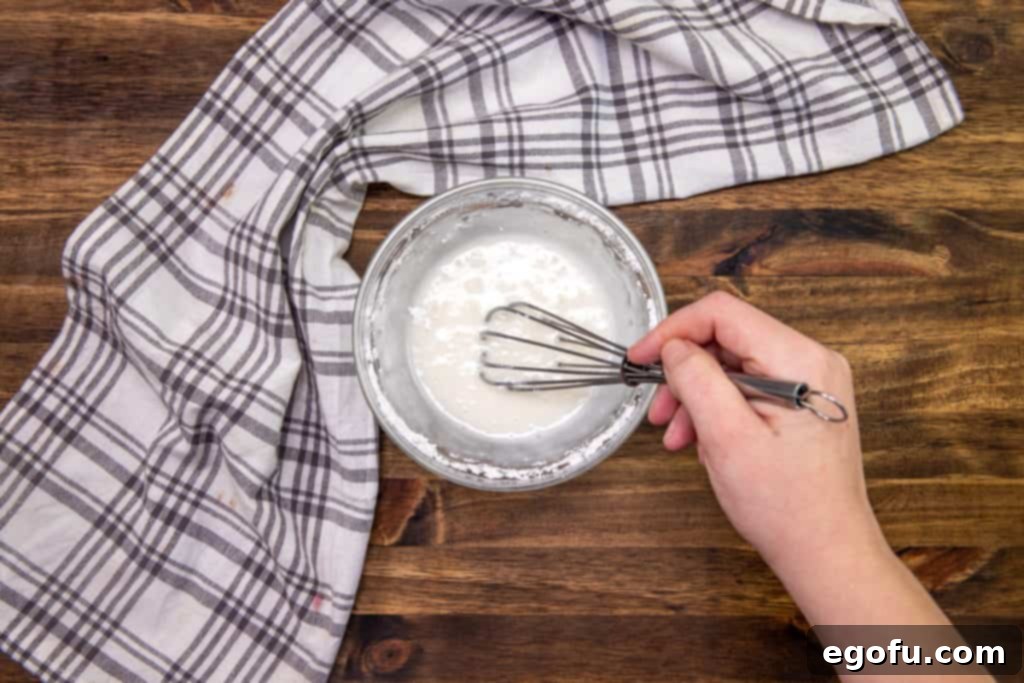
While your Cherry Pie Bites are baking or cooling slightly, prepare the simple icing. In a small bowl, combine the powdered sugar and 1 tablespoon of milk. Whisk them together until a smooth, thick glaze forms. If the glaze is too thick to drizzle easily, add the remaining tablespoon of milk, a tiny bit at a time, until you reach your desired consistency. Some prefer a very thick, opaque glaze, while others like a thinner, more translucent drizzle.

Step 6: Drizzle and Serve
Once the pie bites are out of the oven, let them cool for a few minutes. You can either drizzle the glaze over them while they are still in the muffin tin, or carefully transfer them to a wire cooling rack placed over wax paper or parchment paper to catch any drips. Using a spoon, generously drizzle the prepared glaze over the warm bites. The warmth of the bites will help the glaze set slightly, creating a beautiful finish. These are best enjoyed warm, allowing the flaky crust and warm fruit filling to truly shine.

Now, it’s time to dig in and enjoy your homemade Cherry Pie Bites!

Serving and Storage Tips
These Cherry Pie Bites are undoubtedly at their best when served warm, shortly after baking and glazing. The flaky crust, warm fruit filling, and slightly melted icing create an irresistible combination. For an extra special treat, consider serving them with a scoop of vanilla ice cream, a dollop of whipped cream, or a dusting of powdered sugar. They are perfect for dessert, a sweet snack, or even a delightful brunch item.
Should you have any leftovers (though it’s unlikely!), store them in an airtight container at room temperature for up to 2-3 days. If you prefer, you can refrigerate them for up to 5 days. To reheat, simply pop them in the microwave for a few seconds or in a warm oven for a few minutes until heated through. The glaze might soften a bit, but the flavor will still be fantastic. Freezing is also an option; place cooled bites in a freezer-safe bag or container for up to 1 month. Thaw at room temperature and reheat as desired.
Frequently Asked Questions (FAQ)
Can I make these ahead of time?
You can prepare the pie bites and bake them a few hours in advance. Store them at room temperature and drizzle with glaze just before serving for the freshest look and taste.
What if I don’t have a muffin tin?
While a muffin tin helps them hold their shape beautifully, you can also bake these on a parchment-lined baking sheet. The bites might spread a little more, but they will still be delicious.
Can I use homemade pie filling?
Absolutely! If you have a favorite homemade pie filling recipe, it will work wonderfully here. Just make sure it’s thick enough not to be too watery.
How many bites does this recipe yield?
This recipe typically yields 16 delicious cherry pie bites, making it perfect for sharing or enjoying over a few days.
More Delicious Dessert Recipes to Try
If you loved these Easy Cherry Pie Bites, you might be craving more sweet sensations! Here are some other fantastic recipes to explore:
- Cherry Cheesecake Dip
- Mini Pie Bites
- Cherry Hand Pies
- Cherry Cheesecake Bars
- Air Fryer Cheesecake Chimichangas
- Cherry Dump Cake
- Cherry Cheesecake Cobbler
- Cherry Pie Bars
- Easy Cherry Cobbler
Easy Cherry Pie Bites Recipe Card
Cherry Pie Bites use simple ingredients like cherry pie filling and crescent rolls to make an easy, tasty dessert! Topped with an easy icing.

Prep Time: 15 minutes
Cook Time: 14 minutes
Total Time: 29 minutes
Servings: 16 bites
Author: Brandie Skibinski
Ingredients
- 1 (21 ounce) can cherry pie filling
- 2 (8 ounce) tubes crescent roll dough
- 1 cup powdered sugar
- 1-2 tablespoons milk
Instructions
- Preheat oven to 375°F (190°C). Spray a regular 12-cup muffin tin with nonstick cooking spray.
- Unroll individual crescent roll dough pieces and lay one into each muffin cup. Place the widest part of the dough at the bottom of the cup, allowing the narrower ends to extend up the sides.
- Scoop 3-4 heaping tablespoons of cherry pie filling into each crescent roll dough piece. Be generous with the filling.
- Start folding the three corners of the dough around the filling as best you can, partially enclosing it.
- Bake for about 13-14 minutes, or until the crescent rolls are golden brown and cooked through. They should feel firm to the touch.
- In a bowl, whisk together the powdered sugar and 1-2 tablespoons of milk until it is smooth and reaches your desired consistency for drizzling.
- With a spoon, drizzle the prepared glaze over the warm cherry pie bites.
Video Tutorial
Notes
- Ensure the rolls are cooked all the way through to avoid a doughy texture. They should have nice, tan-brown tops and feel firm.
- For best results, serve these cherry pie bites warm.
Course: Dessert
Cuisine: American
Nutrition Facts (Estimated Per Serving)
Calories: 84kcal | Carbohydrates: 19g | Sodium: 34mg | Sugar: 7g
Nutritional Disclaimer
“The Country Cook” is not a dietician or nutritionist, and any nutritional information shared is an estimate. If calorie count and other nutritional values are important to you, we recommend running the ingredients through whichever online nutritional calculator you prefer. Calories and other nutritional values can vary quite a bit depending on which brands were used.
Did you make this recipe?
Share it on Instagram @thecountrycook and mention us #thecountrycook!
