Welcome to a world where baking is not just simple, but incredibly fun and delicious! These Sweetened Condensed Milk Cookies, bursting with bright colors and irresistible flavor, are the perfect charming treat for any occasion. Whether you’re a seasoned baker or just starting, this recipe promises delightful results with minimal effort.
Effortless Elegance: Bright & Colorful Cookies in Just 30 Minutes
Prepare to elevate your cookie game with a recipe that’s as sweet as it is simple. If you thought baking couldn’t get any easier or more delectable, think again! Today, we’re unveiling the secret to creating the most mouth-watering Sweetened Condensed Milk Cookies. With a humble list of just 8 core ingredients and an impressive prep time of approximately 20 minutes, this recipe is guaranteed to become a cherished staple in your kitchen. These charming cookies can be crafted in various sizes, each promising to melt delightfully in your mouth. Imagine tiny, bite-sized mini cookies, perfect for snacking or sharing, that are so easy to make you’ll find it hard to stop at just one!

Why You’ll Absolutely Love These Sweetened Condensed Milk Cookies
These aren’t just any cookies; they’re a celebration of simplicity and flavor. Here’s why this recipe will quickly become one of your favorites:
- Unbelievably Easy: With only eight essential ingredients, you likely have most of them in your pantry right now. The straightforward process means less fuss and more enjoyment.
- Speedy Preparation: From start to finish, you can have a batch of these glorious cookies ready in about 30 minutes, making them perfect for last-minute treats or impromptu gatherings.
- Melt-in-Your-Mouth Texture: The magic of sweetened condensed milk creates cookies that are wonderfully tender, moist, and practically dissolve on your tongue. It’s a texture that’s truly addictive.
- Versatile & Customizable: Whether you prefer mini bites or standard-sized cookies, this dough handles both beautifully. Plus, the addition of colorful sprinkles makes them perfect for any holiday, party, or simply to brighten your day.
- Kid-Friendly Fun: This recipe is simple enough for even beginner bakers to help with, turning baking into a fun family activity. Kids will love adding the sprinkles and enjoying the colorful results.
- Perfect Balance of Sweetness: They offer a delicate sweetness that’s not overpowering, allowing the subtle vanilla notes to shine. For those who crave an extra sugary kick, the optional vanilla icing is an absolute game-changer.
- Stunning Presentation: With their vibrant sprinkles, these cookies are as lovely to look at as they are to eat, making them a fantastic addition to any dessert platter or a thoughtful homemade gift.
Essential Ingredients for Your Sweet Treat Adventure
Crafting these delightful cookies requires a few simple, high-quality ingredients. Each plays a crucial role in achieving that perfect taste and texture:
- Salted Butter: Ensure your butter is at room temperature for optimal creaming with the condensed milk. The salt helps balance the sweetness and enhances the flavor profile.
- Sweetened Condensed Milk: This is the star ingredient! It provides the unique tenderness, moistness, and distinctive sweet flavor that makes these cookies so special.
- Powdered Sugar: Contributes to the cookies’ delicate texture and sweetness, dissolving easily into the dough.
- Vanilla Extract: A touch of pure vanilla enhances all the other flavors, giving the cookies a classic, comforting aroma and taste.
- Salt: A pinch of salt is vital for balancing the sweetness and bringing out the depth of flavor in your cookies.
- All-Purpose Flour: The structural backbone of your cookies. Proper measurement is key to prevent a stiff dough.
- Rainbow Nonpareils (Optional): These add a burst of color and a slight textural crunch, making the cookies visually appealing and extra festive.
- Vanilla Icing (Optional): For an extra layer of sweetness and a beautiful finish. Made simply with powdered sugar, milk, and a touch of vanilla.

Step-by-Step Guide: How to Make Sweetened Condensed Milk Cookies
Follow these simple instructions to create your own batch of irresistible cookies:
- Prepare Your Workspace: Begin by preheating your oven to 350°F (175°C). Line two large baking sheets with parchment paper; this prevents sticking and ensures even baking, then set them aside.
- Cream the Wet Ingredients: In a large mixing bowl, using either a handheld electric mixer or a stand mixer fitted with a paddle attachment, combine the softened salted butter and the sweetened condensed milk. Beat them together until the mixture is beautifully smooth and creamy.
- Add the Sweeteners and Flavor: Incorporate the powdered sugar, vanilla extract, and salt into the butter and condensed milk mixture. Continue mixing until all these ingredients are thoroughly combined and no lumps of powdered sugar remain.
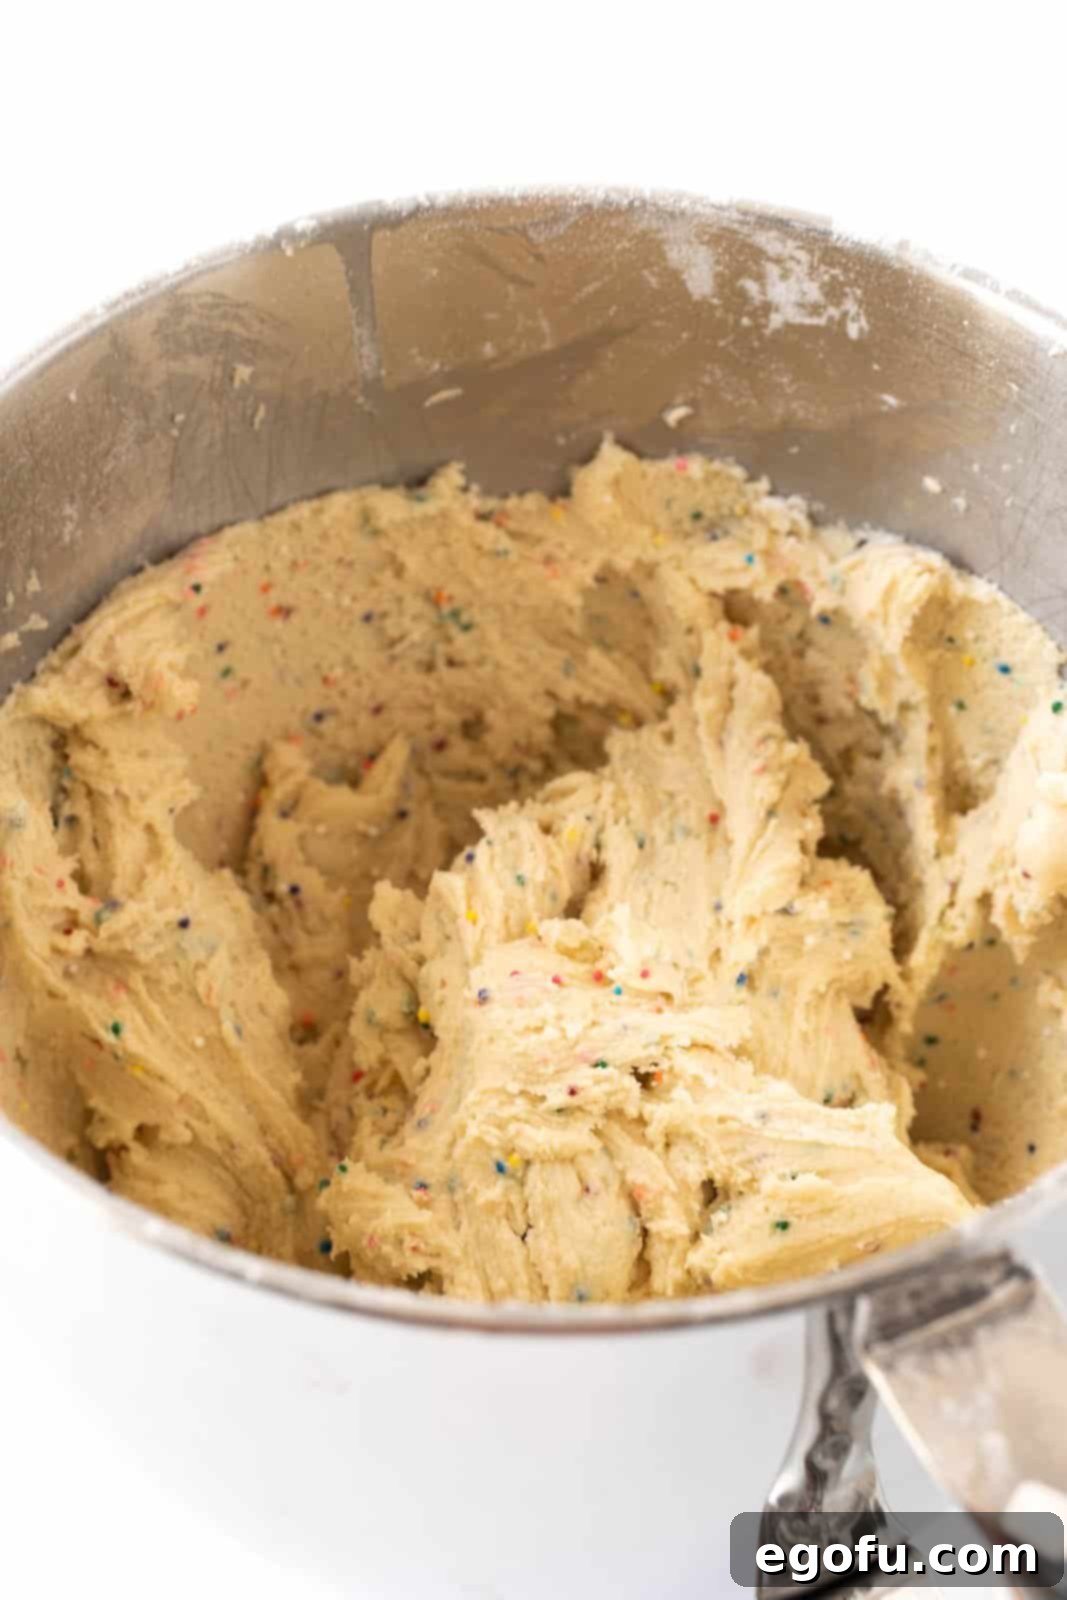
- Gradually Add Flour: Begin adding the all-purpose flour, one cup at a time, mixing completely after each addition until just combined. Be careful not to overmix at this stage. As you go, use a rubber spatula to scrape down the sides of the bowl to ensure all ingredients are evenly incorporated.
- Fold in the Sprinkles: Gently mix in the rainbow nonpareils. Again, avoid overmixing; stir just enough until the sprinkles are evenly distributed throughout the cookie dough.
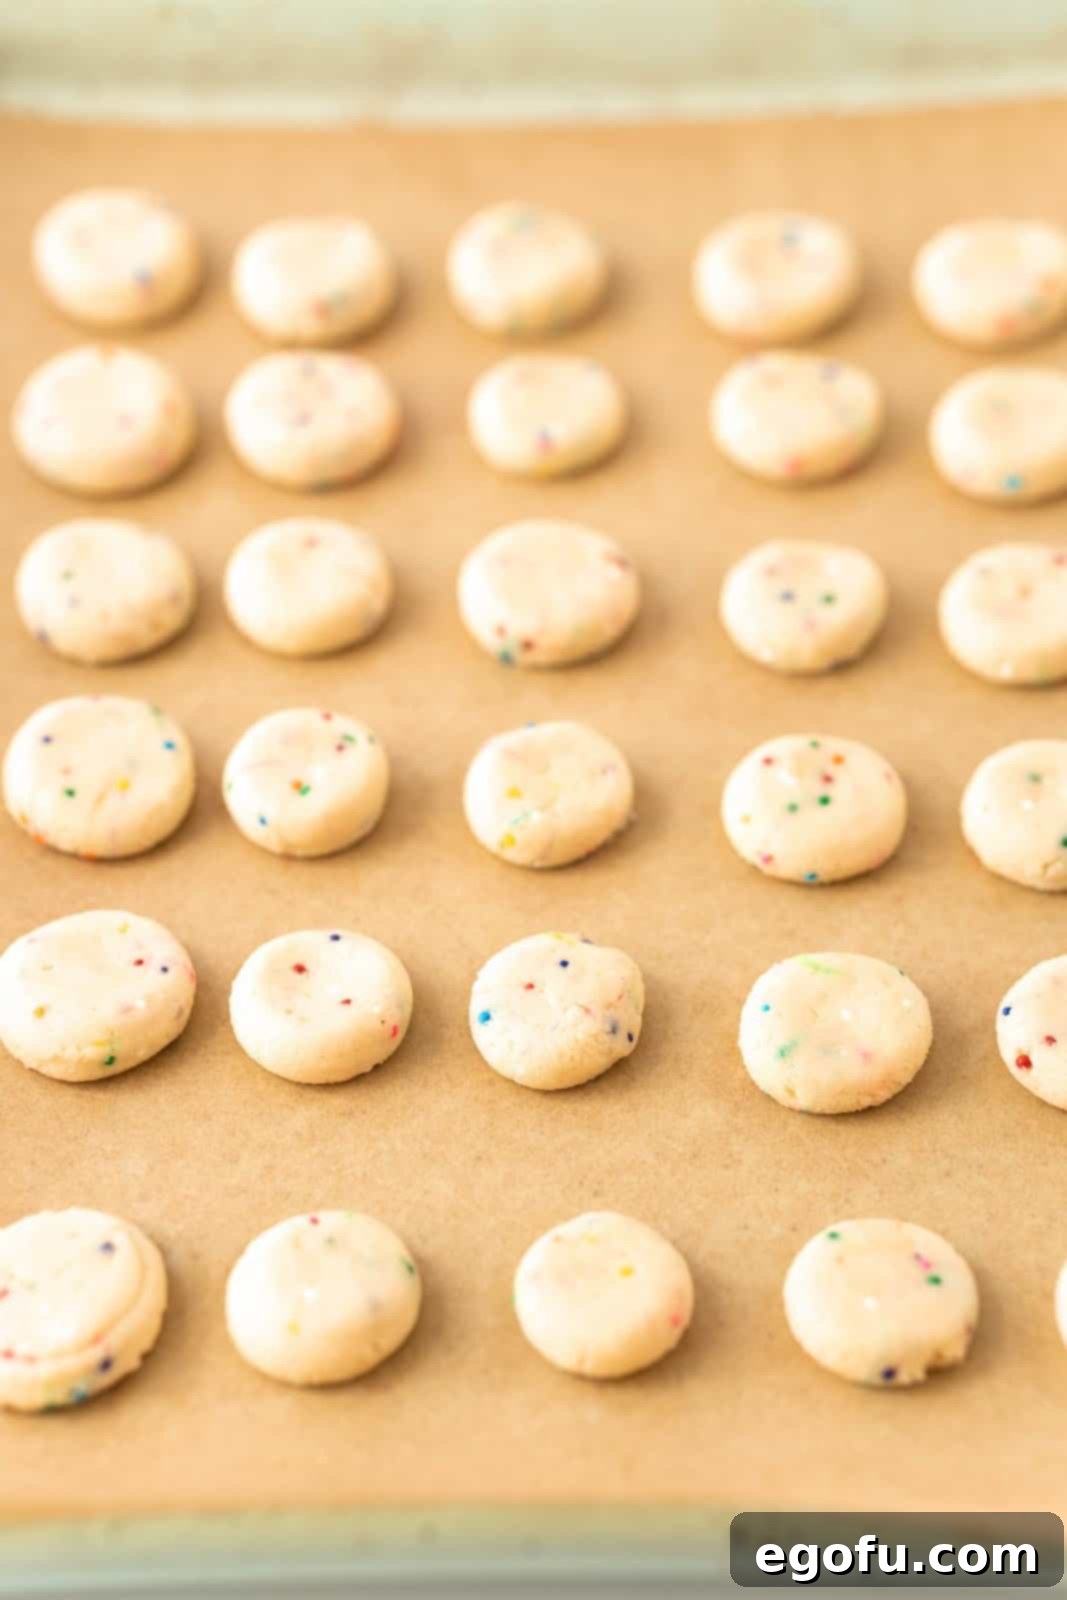
- Form Mini Cookies (Piped Method): For charming mini cookies, transfer the prepared dough into a piping bag fitted with a Wilton 1A round tip. Pipe small dollops, roughly 1 teaspoon in size, onto the parchment-lined baking sheets, spacing them about 1 inch apart. Once piped, gently press down on each dollop with your finger to flatten it slightly.
- Form Regular-Sized Cookies (Scoop Method): If you prefer regular-sized cookies, use a medium cookie scoop to portion out the dough into uniform balls. You can either drop these directly onto the parchment paper or lightly roll them between your palms before placing them on the sheet. For a flatter, more uniform cookie, you can optionally press them down gently with the bottom of a glass before baking.
- Optional Sprinkles Topping: At this stage, you can add a few extra rainbow nonpareils on top of each cookie before baking for an even more vibrant and colorful finish. This step is entirely optional but highly recommended for visual appeal.
- Bake to Perfection: Bake one sheet of cookies at a time to ensure optimal and even baking. Regular-sized cookies will typically bake for 8 to 10 minutes, while the mini cookies will be ready in a shorter time, about 6 to 8 minutes. The edges should be lightly golden, and the centers set.
- Cool and Repeat: Once baked, carefully transfer the cookies to a wire rack to cool completely. Repeat the baking process with the remaining dough.
- Prepare Optional Icing: If desired, make the vanilla icing while the cookies cool. In a small bowl, whisk together 1½ cups of powdered sugar, 3 tablespoons of milk, and ½ teaspoon of vanilla extract until smooth and creamy. Once the cookies are cooled, dip them into the icing for an extra layer of sweetness and a beautiful finish. Then, enjoy your delightful creation!
Tips for Achieving Perfectly Tender Cookies
While this recipe is straightforward, a few key tips will ensure your Sweetened Condensed Milk Cookies turn out absolutely perfect every time:
- Butter at Room Temperature is Crucial: Always use softened butter, not melted, for creaming. Butter that’s too cold won’t combine properly with the condensed milk, leading to a lumpy mixture and a denser cookie. If you forget to take it out, you can leave it on the counter overnight, or use the hot glass trick: fill a tall glass with boiling water, let it sit for five minutes, pour out the water, and invert the warm glass over your stick of butter for about fifteen minutes.
- Mastering Flour Measurement: One of the most common baking mistakes is improper flour measurement. Do not scoop your measuring cup directly into the flour bag, as this compacts the flour, leading to too much being used. Instead, use a spoon to lightly scoop flour into your measuring cup, then level it off with a straight edge like a butter knife. This “spoon and level” method prevents your dough from becoming stiff and ensures a perfectly tender cookie.
- Don’t Overmix the Dough: Once you add the flour, mix only until just combined. Overmixing develops the gluten in the flour, which can result in tough, chewy cookies instead of the desired tender ones. The same goes for sprinkles; mix them in gently until just distributed.
- Even Baking is Key: Bake one sheet of cookies at a time. This allows for better air circulation in the oven and more even heat distribution, ensuring all your cookies bake consistently and beautifully. Rotate the pan halfway through baking if your oven has hot spots.
- Cooling on a Wire Rack: Transferring cookies to a wire rack immediately after baking allows air to circulate around them, preventing the bottoms from becoming soggy and helping them cool evenly.
- Dough Consistency: If your dough feels too stiff to pipe, it’s likely due to too much flour (see tip above) or butter that wasn’t soft enough. Don’t worry, you don’t *have* to pipe them! You can simply roll them by hand into balls and flatten them, or scoop them with a spoon.

Creative Variations & Serving Suggestions
These Sweetened Condensed Milk Cookies are fantastic on their own, but they also offer a canvas for creativity!
- Seasonal Sprinkles: Customize your cookies for any holiday! Use red and green for Christmas, pastels for Easter, orange and black for Halloween, or patriotic colors for the Fourth of July.
- Flavor Extracts: Experiment with different extracts. A touch of almond extract can add a delightful nutty note, or lemon extract for a bright, citrusy twist.
- Chocolate Drizzle: Instead of dipping, drizzle cooled cookies with melted white, milk, or dark chocolate for an elegant touch.
- Nutty Crunch: Fold in finely chopped pecans, walnuts, or almonds into the dough for added texture and flavor.
- Zesty Flavor: Add some citrus zest (lemon, orange, or lime) to the dough for a fresh, aromatic cookie.
- Pairing Perfection: Serve these cookies with a warm cup of coffee, tea, or a glass of cold milk. They’re also a fantastic addition to a dessert platter for parties or potlucks.
Storage & Freezing Instructions
Ensuring your delicious cookies stay fresh is easy:
- Room Temperature: Baked cookies, without icing, can be stored in an airtight container at room temperature for up to one week.
- Refrigeration: Any cookies that have been dipped in icing should be stored in the refrigerator due to the fresh milk content in the icing. Place them in an airtight container once the icing has set.
- Freezing Dough: You can prepare the cookie dough in advance and freeze it. Wrap it tightly in plastic wrap and then in aluminum foil for up to 2-3 months. Thaw in the refrigerator before baking.
- Freezing Baked Cookies: For longer storage, baked cookies can be frozen for up to 3 months. Arrange cooled cookies in a single layer on a baking sheet to freeze solid, then transfer them to an airtight freezer-safe container or bag, separating layers with parchment paper. Thaw at room temperature before serving.
Common Questions About Sweetened Condensed Milk Cookies
Here are answers to some frequently asked questions to help you bake with confidence:
What kind of cookies are these? These cookies strike a delightful balance, offering the best characteristics of both sugar cookies and shortbread. They are light and possess a delicate sweetness, leaning towards a tender, crumbly texture without being overly rich. If you desire a greater depth of sweetness, we highly recommend dipping them in the optional vanilla icing.
How many cookies does this recipe yield? The quantity of cookies you’ll get from this recipe can vary significantly based on the size you choose to make. If you opt for the adorable mini cookies, you can expect to bake around 280 delightful bites. For those who prefer a more substantial treat, making full-sized cookies will yield approximately 48 delicious cookies from this recipe.
Why is my cookie dough stiff? A stiff dough, particularly if you plan to pipe it, usually stems from one of two common issues. Either too much flour was incorporated into the mixture, or your butter wasn’t adequately softened to room temperature. Remember, proper flour measurement (spooned and leveled) and soft butter are key. If your dough is too stiff, don’t worry—you can still form the cookies by hand, rolling them into balls rather than piping.
What’s the best way to soften butter? Never use the microwave to soften butter, as it often melts unevenly. The ideal method is to remove your butter from the refrigerator and let it sit at room temperature for several hours or even overnight. If you’re short on time, try this old trick: boil water in a tall glass, let it sit for five minutes, then pour the water out. Invert the warm glass over your stick of butter on the counter for about fifteen minutes. This creates a warm, steamy environment that will soften the butter perfectly.
How do I properly measure flour? Accurate flour measurement is critical for cookie texture. Avoid simply dunking your measuring cup into the flour bag, as this compacts the flour and results in using too much. Instead, use a spoon to lightly scoop the flour into your measuring cup until it overflows, then use a flat edge (like a butter knife or the back of a spoon) to level off the excess. This ensures you have the correct amount, preventing dense or stiff cookies.
What role does sweetened condensed milk play in these cookies? Sweetened condensed milk is a secret weapon in baking! In these cookies, it contributes significantly to their tenderness, moistness, and, of course, a delightful depth of sweet flavor. It helps create that signature melt-in-your-mouth texture.
Do cookies made with sweetened condensed milk require refrigeration? No, these delicious little bites of goodness do not typically need to be refrigerated. You can safely store them in an airtight container at room temperature for up to a week. However, if you choose to add the optional icing, any leftover iced cookies (or the icing itself) should be stored in the refrigerator due to the fresh milk content in the icing.
How should I store leftover cookies? Leftover cookies (un-iced) can be stored in an airtight container at room temperature for up to seven days, maintaining their freshness and soft texture. For longer storage, these cookies freeze beautifully for up to three months. Simply place them in a freezer-safe, airtight container, optionally layering them with parchment paper to prevent sticking, and thaw at room temperature when ready to enjoy.

Craving More Delicious Cookie Recipes?
If you’ve enjoyed these delightful cookies, be sure to explore more of our fantastic baking creations:
- Chocolate Drizzled Shortbread Cookies
- Raspberry Thumbprint Cookies
- Sprinkle Cookies
- Copycat Lofthouse Cookies
- Butter Pecan Cookies
- Mrs. Fields Chocolate Chip Cookies
- Chocolate Chunk Cookies

Sweetened Condensed Milk Cookies
Print
Pin
Rate
20 minutes
10 minutes
30 minutes
48 servings
Brandie Skibinski
Ingredients
- ½ cup (1 stick) salted butter, room temperature
- 14 ounce can sweetened condensed milk
- ½ cup powdered sugar
- 1 teaspoon vanilla extract
- 1 teaspoon salt
- 3 cups all-purpose flour, spooned and leveled
- ¼ cup rainbow nonpareils (more for topping, optional)
Optional icing:
- 1 ½ cups powdered sugar
- 3 Tablespoons milk
- ½ teaspoon vanilla extract
Instructions
- Preheat the oven to 350°F and line two large baking sheets with parchment paper and set aside.
- In a large bowl with a handheld electric mixer or stand mixer fitted with a paddle attachment, cream together the butter and sweetened condensed milk until smooth.
- Mix in the powdered sugar, vanilla extract and salt until fully incorporated.
- Add in the flour (1 cup at a time), mixing completely after each addition. Scrape down the sides of the bowl as needed.
- Mix in the sprinkles (don’t over mix – just until sprinkles are incorporated into the batter).
- For mini cookies, transfer the dough to a piping bag fitted with a Wilton 1A tip and pipe teaspoon-size dollops on the parchment about 1-inch apart, then press down with your finger to flatten.
- For regular sized cookies, use a medium cookie scoop to portion out the dough into balls, either dropping directly onto the parchment or rolling between your palms beforehand. Optional: use a glass to press down the cookies before baking.
- Note: at this point I will add some extra sprinkles on top of the cookies to make them more colorful but this is optional.
- Bake one sheet at a time for even baking. Regular sized cookies bake for 8 to 10 minutes and the mini cookies bake for 6 to 8 minutes.
- Transfer cookies to a wire rack and bake off the remaining dough. Allow cookies to cool.
- Optional: Whisk together the powdered sugar, milk and vanilla extract until smooth. Then enjoy!
Notes
- Be sure to measure flour properly (spooned and leveled) or you’ll end up with dough that’s too stiff to pipe when making the mini cookies. This is super important for the ideal cookie texture.
- Depending on which size cookie you choose to make, you could end up with 48 regular sized cookies to 280 mini cookies.
- Make sure you use room temperature, soft butter (not melted) for this cookie dough to ensure a smooth, well-combined batter.
- Store un-iced cookies at room temperature for up to a week. Icing, however, must be refrigerated.
Dessert
American
Nutrition
Carbohydrates: 13g |
Protein: 2g |
Fat: 3g |
Sodium: 74mg |
Fiber: 0.2g |
Sugar: 7g
Nutritional Disclaimer
“The Country Cook” is not a dietician or nutritionist, and any nutritional information shared is an estimate. If calorie count and other nutritional values are important to you, we recommend running the ingredients through whichever online nutritional calculator you prefer. Calories and other nutritional values can vary quite a bit depending on which brands were used.
Did you make this recipe?
Share it on Instagram @thecountrycook and mention us #thecountrycook!
