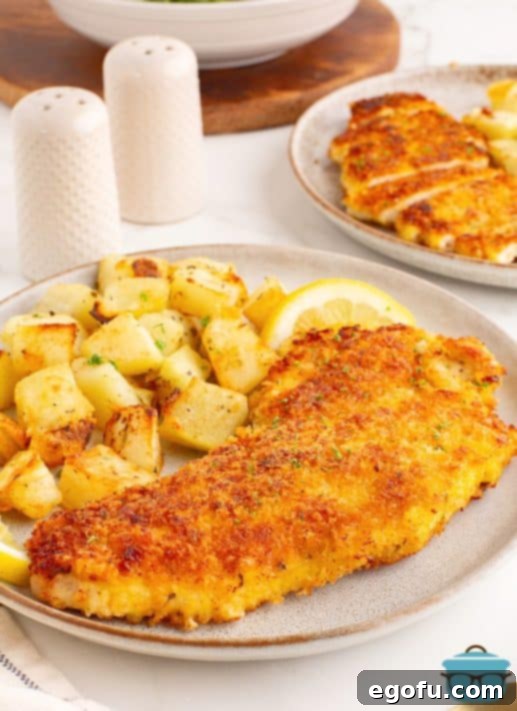
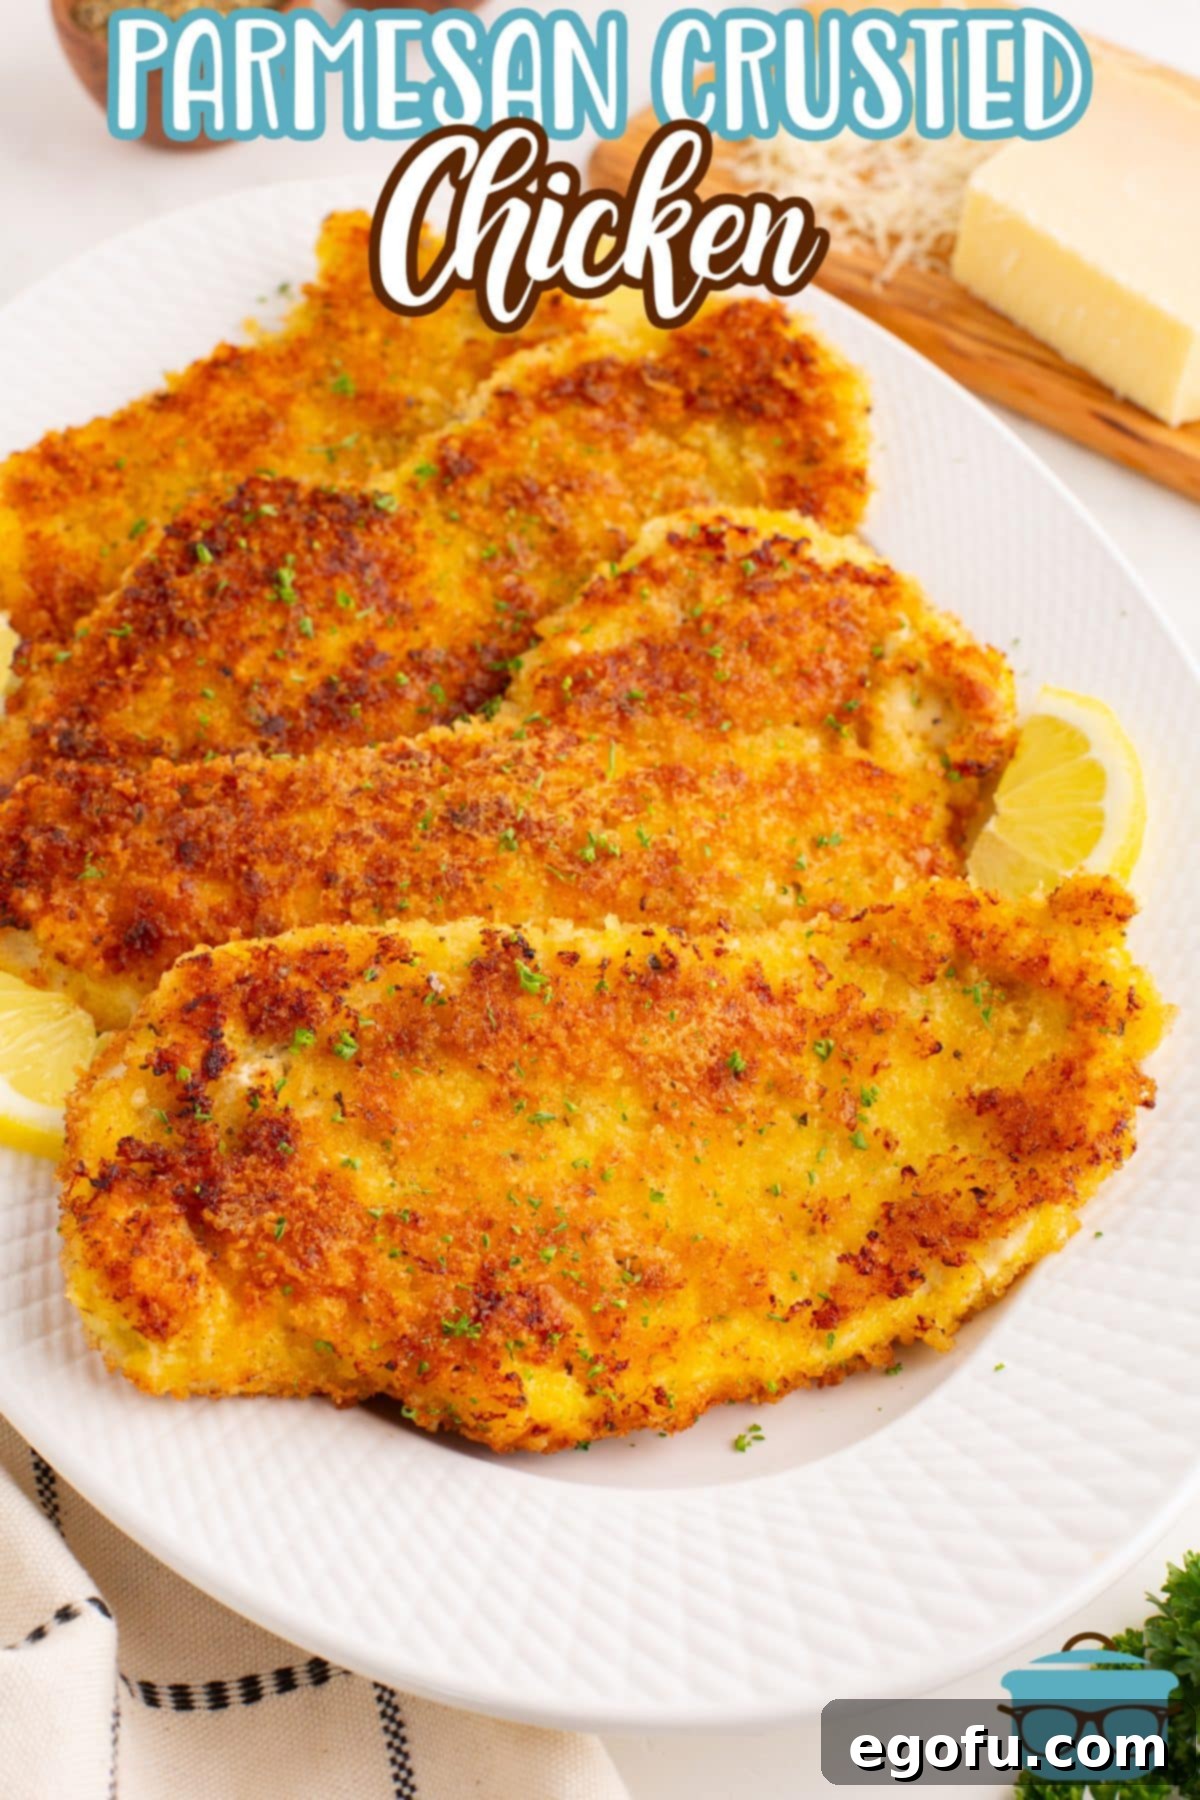
Welcome to your new favorite weeknight dinner! This **Parmesan Crusted Chicken** recipe delivers a deliciously crispy, golden-brown exterior with tender, juicy chicken inside. The secret lies in its simple yet incredibly flavorful panko and Parmesan breading, making it a dish that’s both impressive and surprisingly easy to prepare. Say goodbye to boring chicken dinners and hello to a meal that the whole family will adore, ready in under half an hour!
Quick & Delicious: Parmesan Crusted Chicken in Under 30 Minutes
In the perpetual quest for quick, satisfying, and family-friendly meals, chicken often takes center stage. But let’s be honest, even the most versatile ingredient can sometimes lead to culinary fatigue. That’s where this sensational Parmesan Crusted Chicken recipe steps in to revitalize your dinner rotation! This dish, often simply referred to as chicken cutlets in some regions, transcends the ordinary, transforming humble chicken breasts into an extraordinary culinary experience. Its inherent versatility means it pairs beautifully with almost any side dish you can imagine, making meal planning a breeze. The best part? It all comes together with minimal fuss and maximum flavor, proving that gourmet taste doesn’t require hours of intricate preparation in the kitchen.
We completely understand the daily challenge of putting a delicious and exciting meal on the table, especially when your evenings are packed and time is a precious commodity. This recipe is specifically designed to be your ultimate go-to solution for those busy evenings when you crave something special but need it fast. With just a few simple steps and readily available ingredients, you can effortlessly create a wholesome, homemade meal that tastes like it came from your favorite restaurant but carries all the comforting warmth of home cooking. The vibrant, nutty flavors of Parmesan cheese, combined with the satisfying, airy crunch of panko breadcrumbs, create a texture and taste profile that will undoubtedly have everyone at the table asking for seconds. It’s a guaranteed crowd-pleaser that emphatically proves that healthy, intensely flavorful eating can indeed be both quick and incredibly easy.
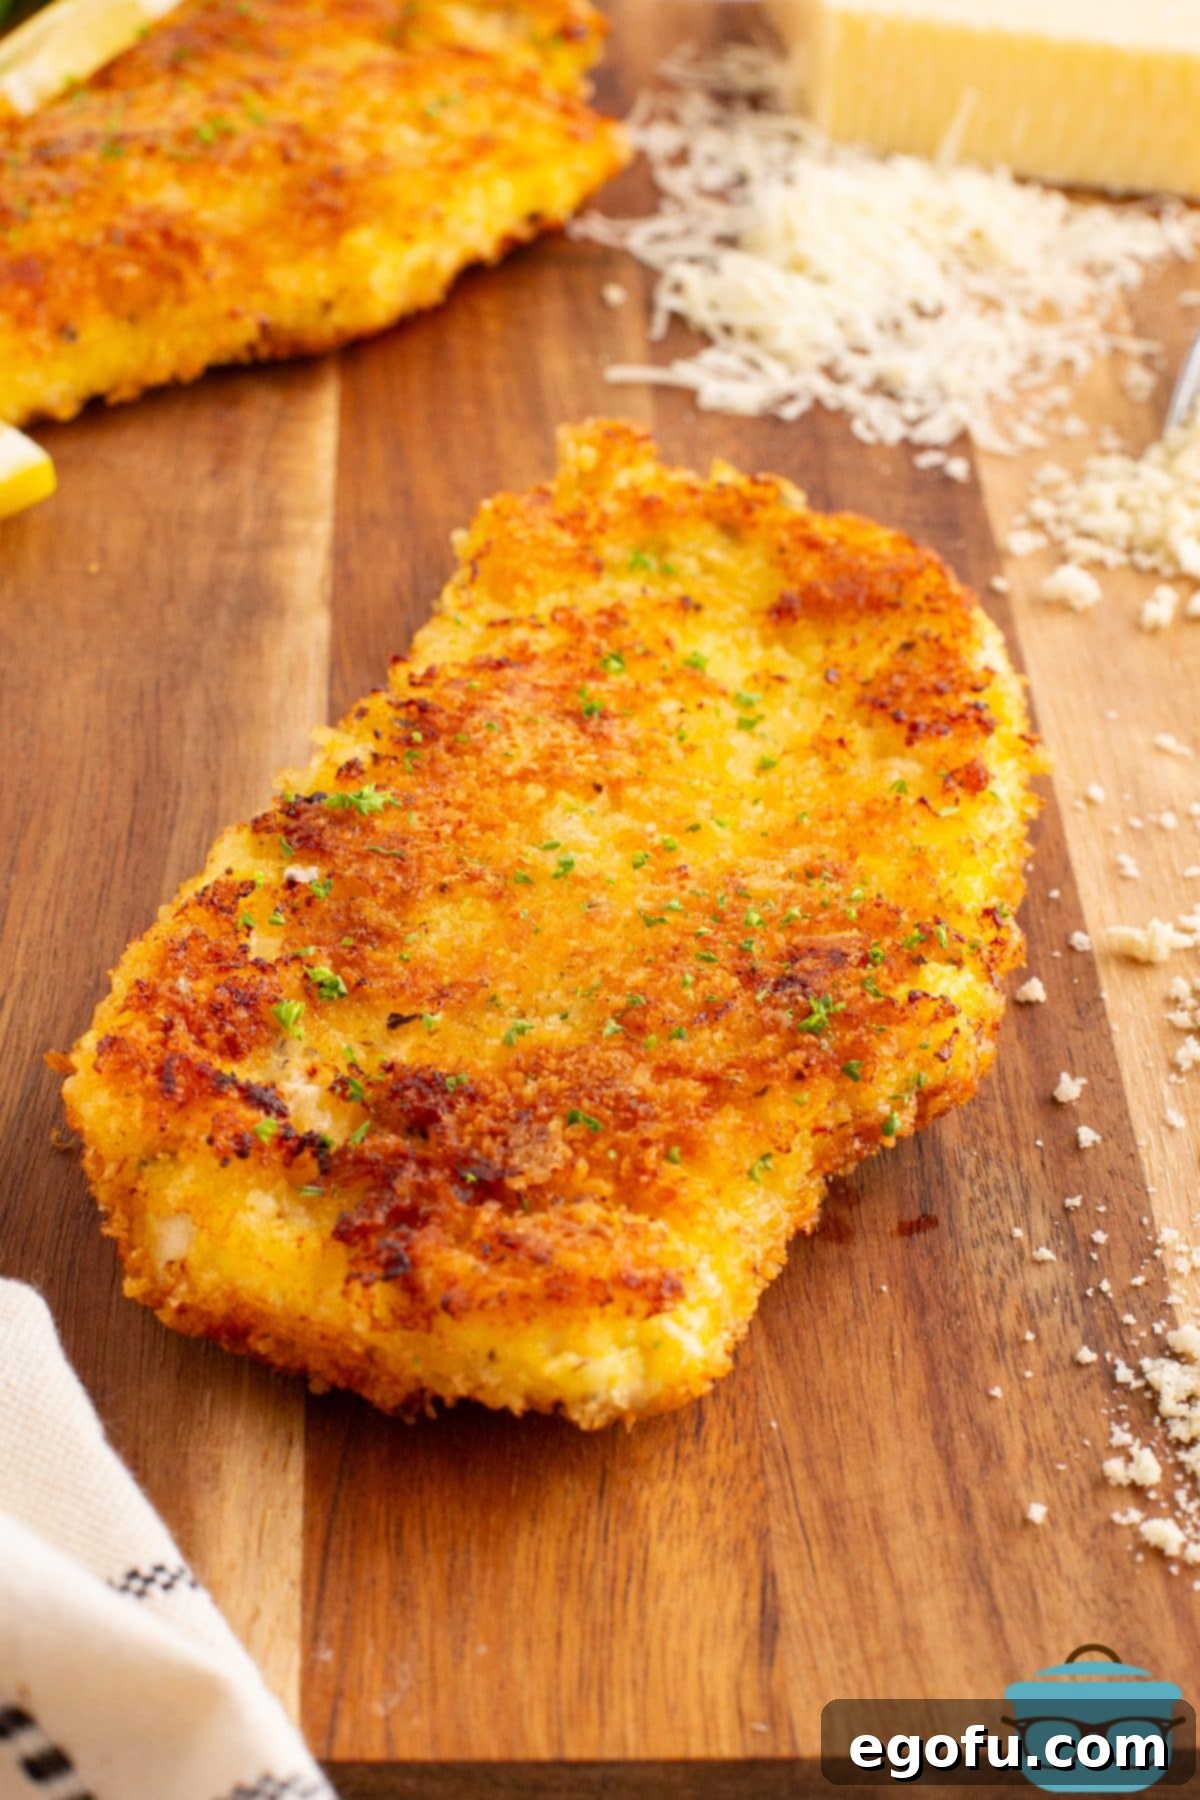
Why You’ll Adore This Crispy Parmesan Chicken Recipe
Beyond its remarkable speed and comforting simplicity, there are numerous compelling reasons why this Parmesan Crusted Chicken will quickly become a cherished and frequently revisited recipe in your culinary repertoire:
- Unrivaled Crispy Texture: The masterful combination of light, airy panko breadcrumbs and finely shredded Parmesan cheese works in harmony to create an incredibly crunchy, golden crust. This delectable exterior not only provides a satisfying bite but also expertly seals in the chicken’s natural juices, ensuring every mouthful is succulent and tender. Every bite offers a delightful symphony of textures that truly sets this dish apart.
- Explosion of Savory Flavor: Far from being just a textural element, the breading itself is a powerhouse of taste. Generously infused with aromatic garlic powder and a classic Italian seasoning blend, it’s packed with savory, herbaceous notes that elevate the humble chicken breast to entirely new culinary heights. The nutty, salty essence of the Parmesan cheese adds yet another layer of irresistible umami, ensuring a rich and complex flavor profile that tantalizes the palate.
- The Ultimate Weeknight Warrior: Forget about elaborate and time-consuming preparations that leave you exhausted. This recipe is ingeniously engineered for maximum efficiency, allowing you to have a wholesome, deeply flavorful, and entirely homemade meal on the table in approximately 25 minutes from the moment you start preparation to the very first bite. It is the quintessential solution for those notoriously busy weeknights when you desperately crave something truly special without having to commit to an extensive amount of time in the kitchen.
- Universal Family-Friendly Appeal: Picky eaters, rejoice! The universally adored flavors and the profoundly satisfying crunch of this chicken dish make it an instant hit with children and adults alike. It serves as an excellent and approachable gateway to introduce exciting variety into your family’s meal routine without venturing into intimidating or unfamiliar culinary territory. It’s a dish that brings smiles to everyone’s faces.
- Incredibly Versatile for Endless Meals: This isn’t merely a one-off main course; it’s a remarkably versatile culinary foundation upon which countless other meal ideas can be built. Serve it elegantly whole with a chosen side, artfully slice it over a fresh, vibrant salad for a lighter meal, snugly tuck it into warm sandwiches or wraps, or even chop it up and toss it with pasta for a quick and satisfying dinner. Its remarkable adaptability makes week-long meal planning an absolute breeze and inspires creativity in the kitchen.
- Minimal Cleanup, Maximum Enjoyment: With its streamlined dredging process and efficient pan-frying method, you won’t be left with an overwhelming mountain of dishes to tackle after dinner. The simplicity of the steps inherently leads to simple and quick cleanup, thereby allowing you significantly more time to truly savor your delicious homemade meal and considerably less time spent scrubbing pots and pans.
Frequently Asked Questions About Crispy Parmesan Crusted Chicken
This flavorful and crispy chicken dish is exceptionally versatile and pairs wonderfully with an extensive array of sides, catering to various tastes and preferences. For a deeply comforting and satisfying meal, consider classic potato preparations such as rustic Diced Potatoes, hearty Home Fries, our signature Southern Fried Potatoes, delightfully fluffy Creamy Mashed Potatoes, elegant Scalloped Potatoes, rich and savory Twice Baked Potatoes, or even simple yet perfect Grilled Baked Potatoes. Any potato dish you enjoy would be an excellent accompaniment to this crispy chicken. If you lean towards healthier options, a fresh, vibrant side salad with a light vinaigrette, perfectly roasted asparagus spears, crisp steamed green beans, or sweet glazed carrots would beautifully complement the richness of the chicken. For a more indulgent and crowd-pleasing touch, serve it alongside a creamy pasta dish like our renowned Slow Cooker Macaroni and Cheese, comforting Cafeteria Noodles, or even just simple buttered egg noodles. The ultimate goal is to select sides that offer a pleasing contrasting texture or a fresh, balancing counterpoint to the crispy, savory profile of the chicken.
Certainly! Boneless, skinless chicken thighs make a truly fantastic substitute for chicken breasts in this recipe, offering a slightly richer, more robust flavor profile and often a naturally more tender and forgiving texture. When opting to use chicken thighs, you will need to make a couple of minor but important adjustments to ensure optimal results. First, it is crucial to ensure they are pounded to a uniform thickness, ideally about 1/4 to 1/3 inch, just as you would with chicken breasts. This critical step guarantees even cooking throughout and helps in achieving a consistently crispy crust. Second, it’s important to remember that chicken thighs typically require a marginally longer cooking time compared to breasts due to their slightly different composition. Therefore, always prioritize food safety and use a reliable meat thermometer to ensure the internal temperature of the thickest part of the chicken reaches a safe 165°F (74°C) before you remove them from the heat and enjoy. This diligent approach will prevent any risk of undercooking while simultaneously allowing the flavorful crust to achieve its perfect golden hue and irresistible crunch.
While the traditional pan-frying method is undeniably superior for yielding the absolute crispiest, most beautifully golden-brown results, perfectly matching the visual appeal seen in our accompanying photos, you can absolutely bake these chicken cutlets for a convenient and slightly lighter alternative. Just be aware that the textural outcome will be inherently different; the baked version will be less intensely crispy than its pan-fried counterpart, though it will still be incredibly flavorful and satisfying. To achieve excellent baked results: Begin by preheating your oven to a robust 400°F (200°C). Arrange the prepared and coated chicken cutlets in a single layer on a rimmed baking sheet, ideally lined with parchment paper for effortless cleanup and to prevent sticking. Lightly spray both sides of the chicken with a fine mist of vegetable or olive oil cooking spray. Bake for approximately 15-20 minutes, or until the internal temperature of the chicken registers a safe 165°F (74°C) and the crust achieves a pleasant golden color. Flipping the cutlets halfway through the baking process can significantly help promote more even browning and a slightly crispier finish on both sides.
Yes, absolutely! The air fryer presents another excellent and increasingly popular option for cooking Parmesan Crusted Chicken. This method offers a convenient, typically healthier approach, and still delivers a very respectable level of crispiness, even if it doesn’t quite replicate the exact deep-fried crunch of traditional oil frying. To prepare in an air fryer: Follow all the preparation steps as directed, including pounding the chicken thin and completing the full breading process. Lightly spray the interior of your air fryer basket with olive oil spray or another cooking spray to prevent any sticking. Carefully place the coated chicken breasts in a single layer within the basket, being vigilant not to overcrowd it (it’s best to cook in batches if necessary to ensure proper air circulation). Spray the tops of the chicken cutlets with an additional light mist of olive oil spray. Air fry at 400°F (200°C) for approximately 12-15 minutes. It’s crucial to flip the cutlets halfway through the cooking time and spray them again with olive oil spray to promote even browning and maximum crispness. Continue cooking until the internal temperature reaches 165°F (74°C) and the crust is beautifully golden and crisp. Always remember to adjust cooking times based on the specific model and power of your air fryer, as well as the precise thickness of your chicken cutlets.
Preventing the delicate Parmesan breading from burning is paramount for achieving a perfectly cooked and visually appealing Parmesan Crusted Chicken. The single most important step in this regard is to ensure that your chicken breasts are pounded to a uniform and consistent thickness, ideally around 1/4 inch thick. If the chicken piece is too thick in certain areas, the breading, which cooks faster, will brown and potentially scorch or burn long before the thicker parts of the chicken have a chance to cook through completely to a safe temperature. Uniform thickness guarantees that both the chicken and its crust cook evenly and simultaneously. Additionally, maintaining a consistent medium heat during the pan-frying process (not too high) is absolutely crucial. This controlled heat allows the chicken to cook through gradually and thoroughly while the crust crisps up beautifully to a golden hue without prematurely scorching. Before adding the chicken, make sure your oil is adequately preheated – it should be hot enough to sizzle gently when a tiny test sprinkle of breadcrumbs is added, but never smoking vigorously. If, at any point during cooking, you observe the crust browning too rapidly, don’t hesitate to slightly reduce the heat on your stovetop.
Leftover Parmesan Crusted Chicken is a delightful treat and can be safely stored in an airtight container in the refrigerator for up to 3 to 5 days. For those looking for longer-term meal solutions, you can efficiently freeze the cooked chicken for up to 3 months. When it comes to reheating, it is highly advisable to avoid the microwave, as its uneven heating can quickly render the crispy crust soggy and unappetizing. For the absolute best results, aiming to restore that wonderful crispiness, we recommend reheating your chicken in either an oven or an air fryer. To reheat in the oven: Preheat your oven to 350°F (175°C) and place the chicken cutlets on a baking sheet. Bake for approximately 10-15 minutes, or until they are thoroughly heated through and the crust has regained its desirable crispness. If using an air fryer: Preheat it to 375°F (190°C) and reheat for about 5-8 minutes, making sure to flip the chicken halfway through the cooking time. This careful reheating process will bring back that delightful crunch, making your leftovers almost as good as when they were freshly made!
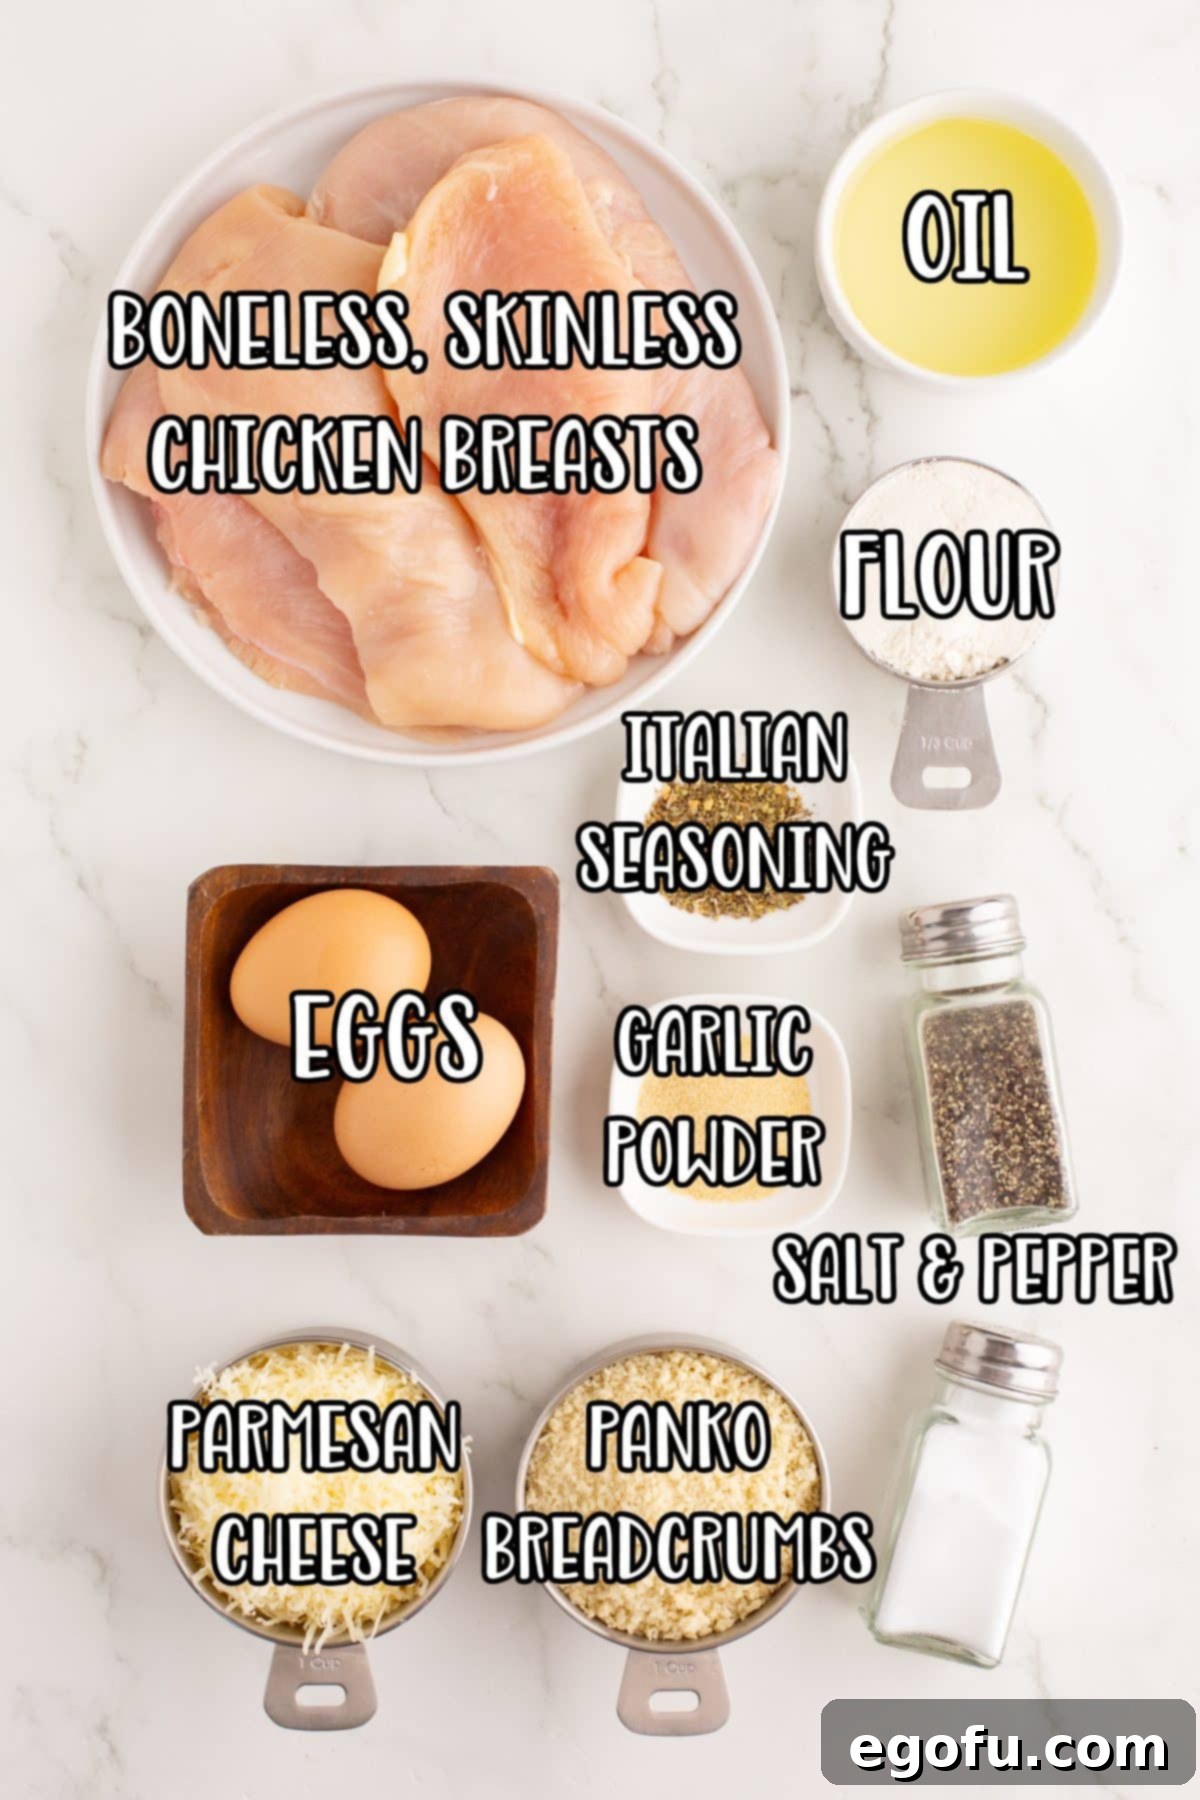
Essential Ingredients for Perfect Parmesan Crusted Chicken
Crafting this incredible dish starts with understanding the unique role each ingredient plays in creating the ultimate crispy, flavorful, and tender Parmesan Crusted Chicken. Here’s a detailed look at what you’ll need to achieve culinary perfection:
- Boneless, Skinless Chicken Breasts: These form the vital foundation of our dish. For optimal cooking consistency and to achieve that desirable crispiness, it is absolutely crucial to use thinner chicken pieces. If your chicken breasts are naturally thick, it is highly recommended to either carefully slice them horizontally into two thinner cutlets or, alternatively, to pound them down uniformly to an approximate thickness of ¼ inch. This essential preparation step ensures that the chicken cooks quickly and evenly, which is key to preventing the delicate coating from prematurely burning before the chicken itself is thoroughly cooked through. While you might occasionally encounter “thick-cut” chicken breasts marketed at the grocery store, for the specific requirements of this recipe, remember that thinner is always better!
- Salt and Pepper: These fundamental seasonings are far more than mere additions; they are vital for directly flavoring the raw chicken breast. While the breading mixture will contribute significant saltiness from the Parmesan cheese and other expertly chosen spices, a light but deliberate seasoning on the chicken itself ensures that every single layer of the dish, from the succulent interior to the crispy exterior, is seasoned to absolute perfection. Skipping this foundational step would mean missing out on a depth of flavor.
- All-Purpose Flour: A small but mighty amount of all-purpose flour is an indispensable component in the initial stage of the classic dredging process. Its primary function is to create a very thin, dry, and slightly textured base that allows the subsequent egg wash to adhere smoothly and evenly to the chicken. In essence, it acts as a crucial “glue” or primer layer for the ultimate breading mixture. Both standard all-purpose flour and self-rising flour will work equally well for this particular purpose, providing just the right surface texture for the next coating step.
- Large Eggs: Whisked eggs perform the essential role of forming the sticky, cohesive bridge between the flour and the dry breading mixture. They are absolutely critical for creating a robust and cohesive crust that will steadfastly adhere to the chicken and, crucially, will not fall off during the cooking process. For optimal coverage and adherence, lightly whisk the eggs until the yolks and whites are fully and thoroughly combined, exhibiting a slightly frothy, uniform consistency.
- Finely Shredded Parmesan Cheese: This is unequivocally where a significant portion of both the profound flavor and the exquisite crispiness of this dish originates. Finely shredded or grated Parmesan cheese, when subjected to heat, melts ever so slightly and then crisps beautifully, creating an incredibly rich, intensely savory, and wonderfully textured crust. For the most superior results, we wholeheartedly recommend using freshly grated Parmesan cheese, as it consistently offers a more nuanced, authentic flavor and a more desirable texture compared to the often drier and less flavorful pre-shredded varieties. If authentic Parmesan isn’t readily available, other hard, dry-aged cheeses such as Pecorino Romano would serve as excellent and flavorful substitutes, providing a similar salty and sharp profile.
- Panko Breadcrumbs: The undisputed superstar ingredient responsible for that signature, unparalleled crunch! Panko breadcrumbs are a unique type of Japanese-style breadcrumb, specifically distinguished by their larger, flakier, and more irregular texture when compared to traditional, finer breadcrumbs. This distinct characteristic is precisely what results in an exceptionally crispy, remarkably light, and satisfyingly airy coating that stands up beautifully to frying. While standard traditional breadcrumbs can certainly be used as an alternative, panko truly delivers that signature extra-crisp texture that makes this particular dish shine so brilliantly.
- Garlic Powder: This provides a wonderful, deeply aromatic depth to the breading mixture, significantly enhancing the overall savory profile of both the chicken and the cheese. It is critically important to use garlic powder in this recipe, rather than fresh minced garlic. Fresh garlic, due to its inherent moisture content and natural sugars, would inevitably burn and develop a bitter, unpleasant taste during the relatively longer pan-frying process, compromising the entire dish’s flavor.
- Italian Seasoning: A meticulously crafted blend of dried herbs that flawlessly complements the rich Parmesan cheese and introduces a classic, wonderfully herbaceous flavor to the crispy crust. Most high-quality Italian seasoning blends typically encompass a harmonious combination of essential herbs such as oregano, basil, thyme, and rosemary. If, by chance, you do not have a pre-mixed Italian seasoning readily on hand, you can effortlessly create your own by thoughtfully combining ¼ teaspoon each of dried oregano, dried basil, dried marjoram, and dried thyme.
- High Smoke Point Vegetable Oil: This specific type of oil is absolutely essential for the pan-frying process to achieve that coveted, beautifully golden-brown, and intensely crispy crust. Oils characterized by a high smoke point, such as vegetable oil, canola oil, or peanut oil, are ideally suited for this cooking method as they can readily withstand medium-high heat without breaking down, smoking, or burning. This attribute is paramount for preventing the development of undesirable off-flavors and for ensuring a perfectly cooked, golden crust. It is strongly advised to avoid oils with significantly lower smoke points, such as extra virgin olive oil, for frying, as they tend to burn easily and quickly, imparting a bitter taste to your dish.
Step-by-Step Guide: Crafting the Perfect Parmesan Crusted Chicken
Follow these meticulously detailed instructions to effortlessly create restaurant-quality Parmesan Crusted Chicken right in the comfort of your own kitchen. Paying close attention to each step and prioritizing precision in preparation will consistently ensure a wonderfully crispy, profoundly flavorful, and perfectly cooked result every single time.
1. Prepare the Chicken Cutlets
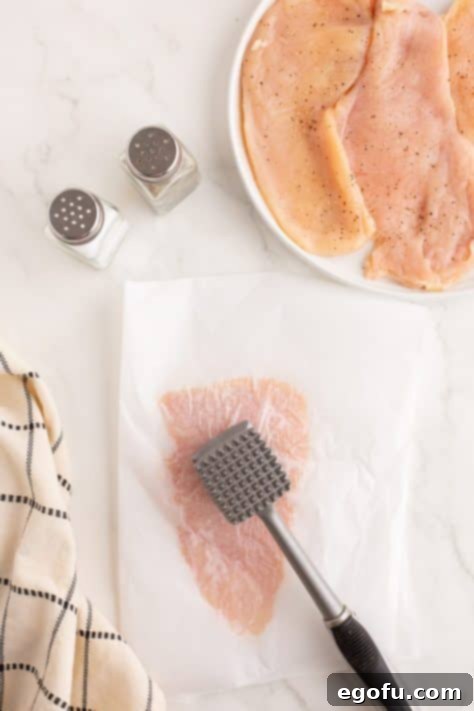
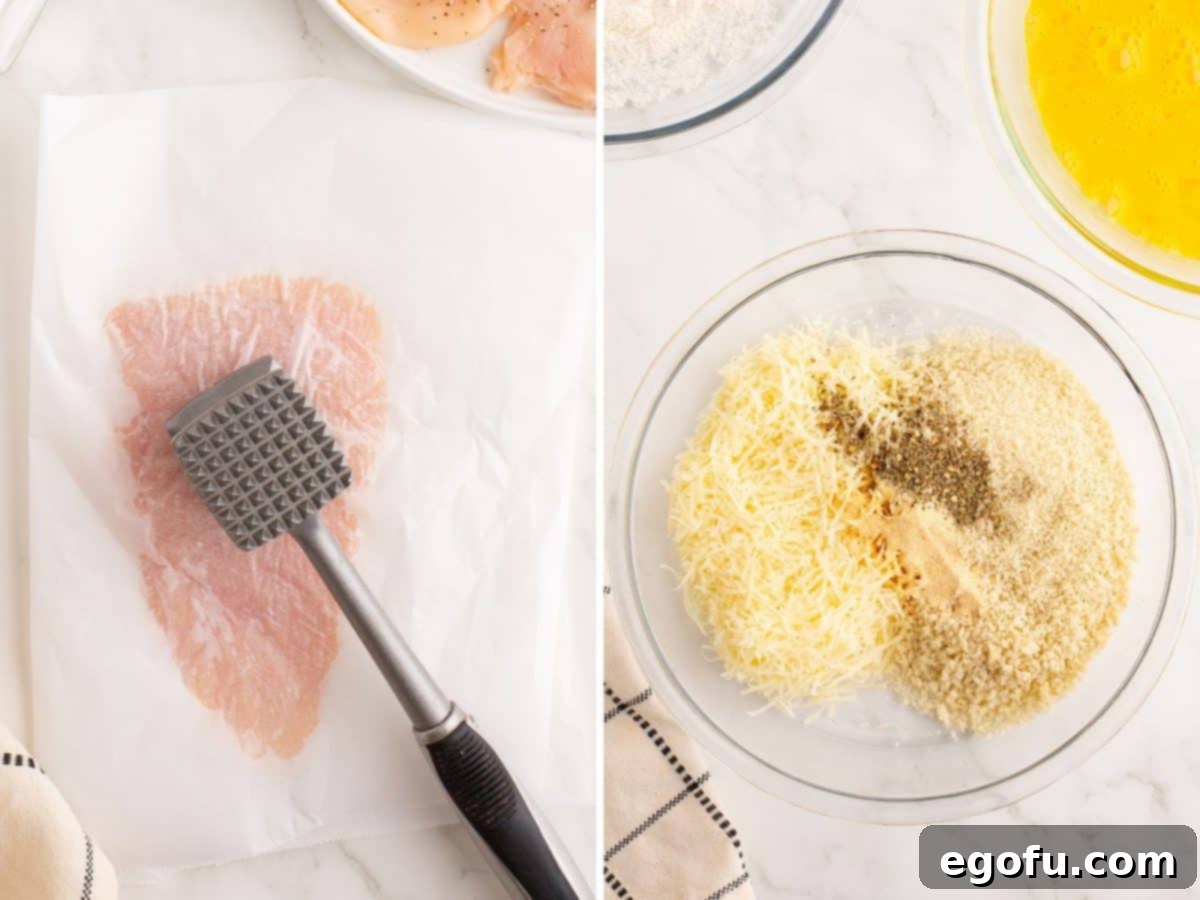
Begin your culinary journey by meticulously preparing your boneless, skinless chicken breasts. If you find that your chicken breasts are notably thick (as is often the case), it is an essential step to flatten them into uniform cutlets. To do this effectively, place one chicken breast half onto a generously sized piece of parchment paper, approximately 12×12 inches, or directly onto a clean, sturdy cutting board. For added protection and ease, either fold the paper over the chicken or cover it with an additional sheet of plastic wrap or parchment paper. Now, employing a kitchen mallet or a rolling pin, pound the chicken firmly and evenly until it achieves an approximate and consistent thickness of ¼ inch across the entire piece. This crucial preparatory step is paramount for ensuring that the chicken cooks both quickly and uniformly, which is key to preventing the delicate breading from prematurely burning before the chicken inside is fully and safely cooked through. Once each piece is flattened to perfection, generously season both sides of the chicken cutlets with a good sprinkle of salt and freshly ground black pepper. Set these seasoned cutlets aside while you proceed to prepare your efficient dredging station.
2. Set Up Your Dredging Station
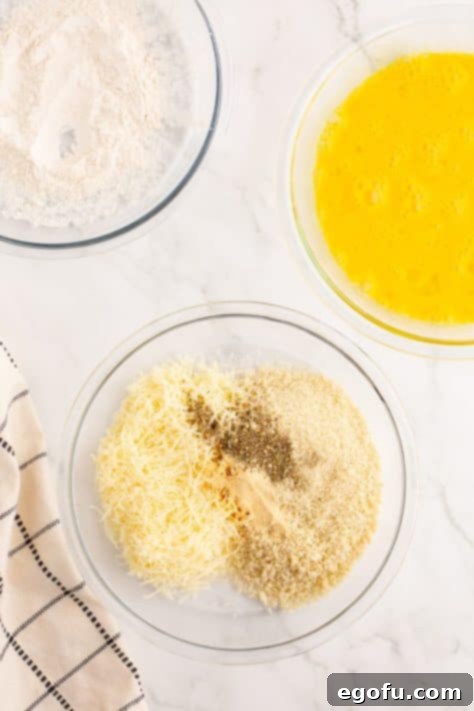
To meticulously achieve that perfectly coated, golden-brown crust, you will need to organize three shallow bowls or pie plates. This assembly line approach is not only efficient but also remarkably tidy, streamlining the entire breading process:
- In the first designated bowl, carefully place the measured all-purpose flour, spreading it evenly.
- In the second bowl, vigorously whisk the two large eggs until the yolks and whites are fully and homogeneously combined, exhibiting a slightly frothy and uniform texture.
- In the third and final bowl, combine the finely shredded Parmesan cheese, the panko breadcrumbs, the garlic powder, and the Italian seasoning. Utilize a fork or a small whisk to thoroughly mix these dry ingredients together, ensuring an even distribution of all the savory and aromatic flavors throughout the mixture.
3. Preheat and Master the Coating Process
Before you even begin the coating process, it is wise to preheat your oven to a gentle 200°F (95°C). This strategically serves as a dedicated warming station, specifically designed to keep your freshly cooked chicken cutlets deliciously hot and perfectly crispy while you diligently finish frying the remaining pieces. Next, pour and heat 2 tablespoons of a high smoke point vegetable oil in a large, heavy-bottomed skillet over a medium heat. You want the oil to be noticeably shimmering, indicating it’s hot enough, but crucially, it should not be smoking. Now, with your station set, it’s time to meticulously coat your chicken. Take one seasoned chicken cutlet and proceed with the following precise steps:
- First, gently but thoroughly dredge the chicken cutlet in the flour, ensuring it is lightly coated on all sides. Then, gently shake off any discernible excess flour. This thin, dry layer is absolutely vital as it creates the perfect surface for the egg wash to adhere seamlessly.
- Next, carefully dip the floured chicken into the beaten egg mixture, making sure to turn it gracefully to ensure the entire breast is completely coated. Allow any excess egg to drip off naturally before proceeding.
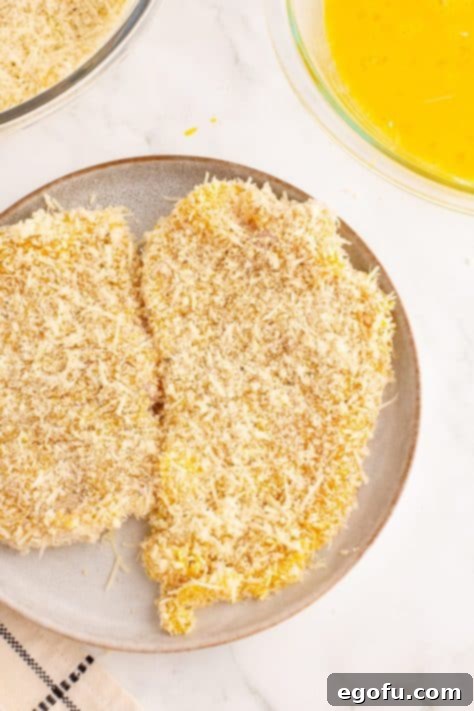
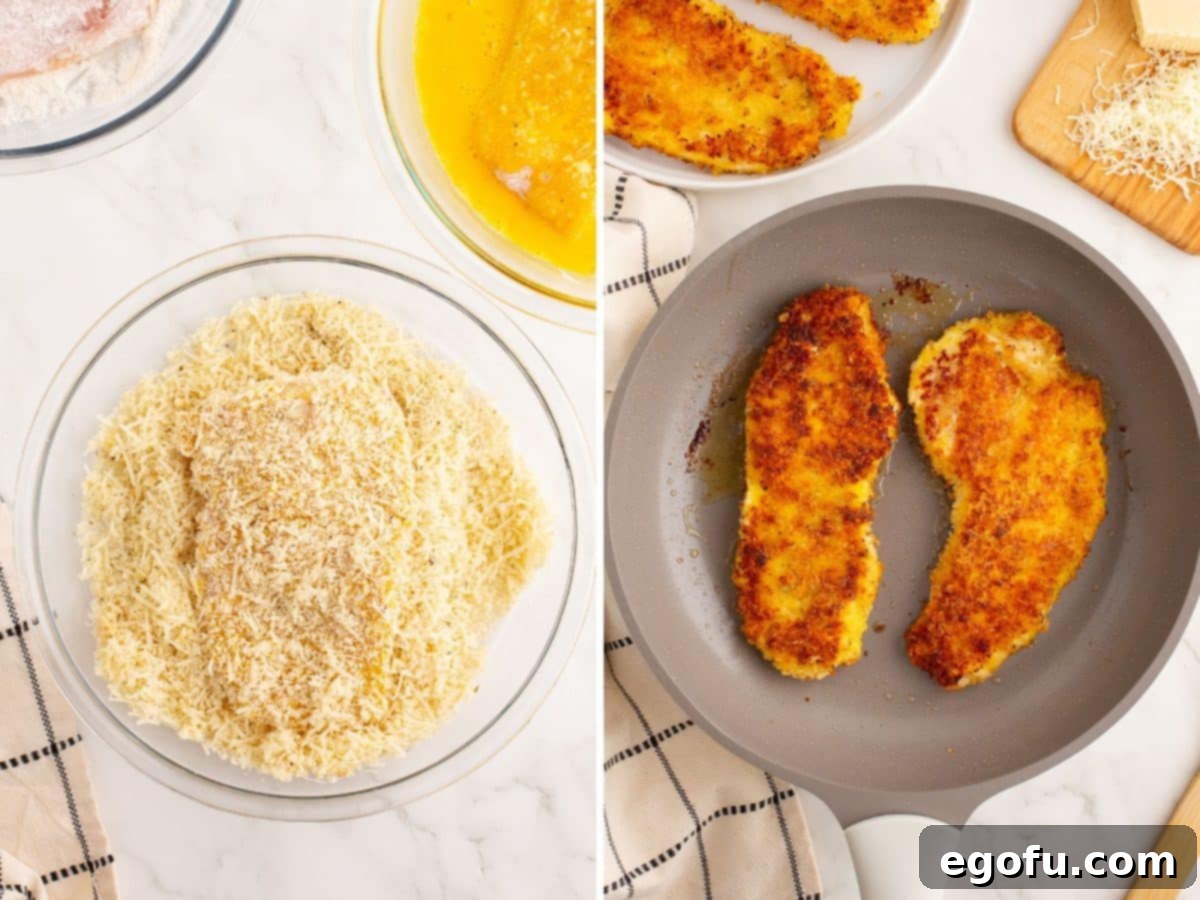
- Finally, transfer the egg-coated chicken to the Parmesan-panko mixture. This is where you apply a little pressure; firmly press the mixture onto both sides of the chicken, ensuring a thick, even, and robust coating. The more firmly and evenly you press, the better and more securely the delicious crust will adhere during cooking.
4. Pan-Fry to Golden Perfection
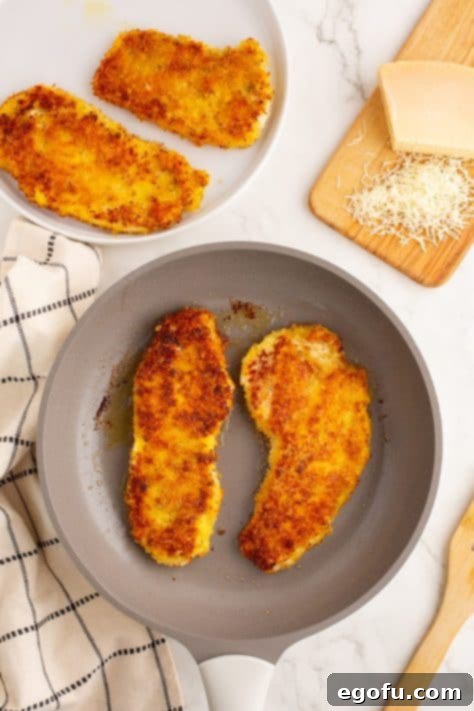
With your skillet and oil perfectly heated, carefully place two coated chicken breasts into the preheated skillet. It is critically important to resist the urge to overcrowd the pan, as doing so will inevitably lower the oil temperature significantly, leading to the chicken steaming rather than truly frying, which results in an undesirable soggy crust. Ensure each cutlet has ample space to cook properly. Cook for approximately 3-4 minutes per side, or until the chicken achieves a beautiful, deep golden-brown hue and the internal temperature registers a safe 165°F (74°C) when checked with an instant-read thermometer. The crust, at this point, should be exceptionally crisp and wonderfully aromatic. Once cooked to perfection, carefully remove the breasts from the skillet and transfer them to a rimmed baking sheet placed in your 200°F (95°C) preheated oven to keep them warm and maintain their crispness. Add the remaining 2 tablespoons of vegetable oil to the pan (or slightly more if the pan appears too dry) and meticulously repeat the entire coating and cooking steps with the final two chicken cutlets, ensuring that each batch receives the same careful attention for a consistently perfect, crispy crust.
5. Serve and Garnish with Finesse
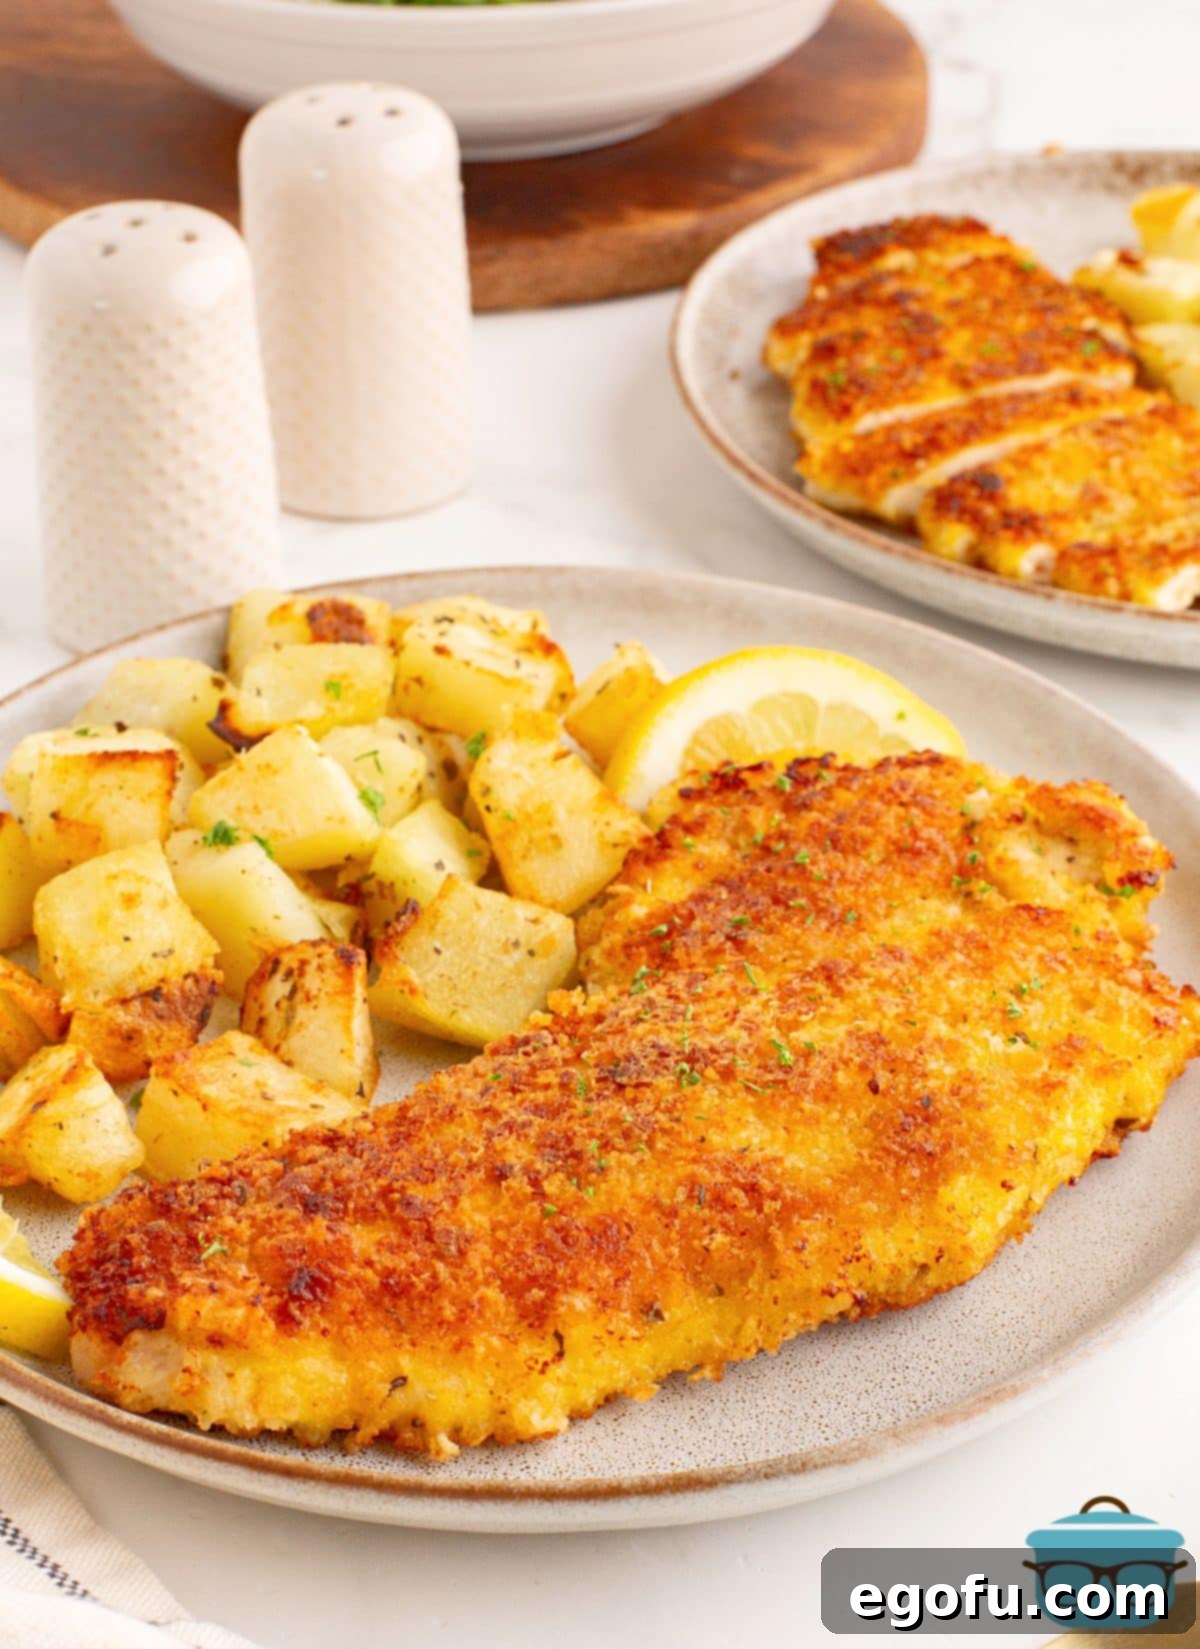
Once all the chicken cutlets have been cooked to perfection and are kept warm in the oven, carefully remove them from their warming station and the pan. Artfully arrange them on your chosen serving platter. For an elevated touch of freshness, vibrant color, and an irresistible burst of flavor, consider garnishing the dish with a generous sprinkle of freshly chopped parsley and a few bright lemon wedges. A thoughtful squeeze of fresh lemon juice just before serving provides a delightful tang that beautifully cuts through the richness of the cheese and truly brightens all the savory flavors. Serve this exquisite dish immediately with your carefully chosen side dishes and immerse yourself in the irresistible crunch and savory taste of your magnificently homemade Parmesan Crusted Chicken! It’s a meal that promises to impress both visually and gastronomically.
Pro Tips for Success and Troubleshooting Your Parmesan Crusted Chicken
While this recipe for Parmesan Crusted Chicken is designed to be wonderfully straightforward and accessible, incorporating a few expert tips can dramatically enhance your results, ensuring your dish is perfect every single time you make it. These insights will help you avoid common pitfalls and achieve consistently tender, juicy chicken with an impeccably crispy crust:
- Pound it Thin, and Crucially, Evenly: This foundational tip cannot be emphasized enough. Uneven chicken thickness stands as the number one culprit behind burnt crusts and disappointingly undercooked centers. Your goal should be to achieve a remarkably consistent ¼ inch thickness across the entirety of each chicken cutlet. This meticulous preparation guarantees that both the chicken and its delicate breading cook uniformly and simultaneously, leading to optimal texture and flavor.
- Press the Breading Firmly for Adherence: When you are diligently dredging the chicken in the flavorful panko-Parmesan mixture, it’s vital to do more than just a quick dip. Take a moment to gently but firmly press the breading onto both sides of the chicken. This deliberate action creates a robust, secure crust that adheres exceptionally well and, crucially, will not prematurely fall off in the pan during the cooking process. A well-adhered crust ensures maximum crispiness and flavor in every bite.
- Never Overcrowd the Pan: Frying in carefully managed batches is an absolutely essential technique for success. Overcrowding your skillet will inevitably lead to a significant drop in the oil’s temperature, which then causes the chicken to essentially steam rather than truly fry. The unfortunate result is often a disappointingly soggy and less flavorful crust. Always ensure each cutlet has ample space to breathe and cook unhindered, allowing it to achieve that beautiful, desirable golden crispness.
- Diligently Monitor Oil Temperature: Maintaining a consistent medium heat is the critical key to pan-frying perfection. If the oil is excessively hot, the breading will rapidly burn and scorch long before the chicken has had adequate time to cook through completely. Conversely, if the oil is not hot enough, the chicken will regrettably absorb too much oil, resulting in a greasy and heavy final product. A reliable indicator of the correct temperature is when a tiny sprinkle of breadcrumbs immediately sizzles upon contact with the hot oil. If you notice the crust browning too quickly, gracefully reduce the heat on your stovetop immediately.
- Embrace Your Meat Thermometer: For absolute certainty that your chicken is cooked perfectly and safely to an internal temperature of 165°F (74°C), an instant-read meat thermometer is your invaluable culinary best friend. This simple tool effectively prevents both the risks of undercooking and the disappointment of overcooking, consistently ensuring beautifully juicy and tender chicken every single time, guaranteeing peace of mind.
- Allow the Chicken to Briefly Rest: While you’ll be transferring the freshly cooked cutlets to a warm oven, allowing them to gently rest for just a minute or two after they come out of the skillet and before serving is a small but impactful step. This brief resting period permits the internal juices within the chicken to redistribute evenly throughout the meat, resulting in significantly more tender, moist, and flavorful chicken.
Craving More Delicious Chicken Recipes?
If you’ve thoroughly enjoyed the delightful simplicity and incredible flavor of this Parmesan Crusted Chicken, then you are most definitely in for a treat! We offer an expansive and mouth-watering selection of other exceptional chicken dishes that are perfectly suited for any and every occasion. From incredibly quick and easy weeknight meals to impressively elegant weekend dinners, our curated collection is designed to inspire your inner chef. Explore these beloved favorites and considerably expand your ultimate chicken recipe repertoire:
- Classic Comfort: Chicken Fried Chicken
- Taste of Europe: Authentic Chicken Schnitzel
- Italian Favorite: Hearty Homemade Chicken Parmesan
- Effortless Elegance: Easy Crock Pot Chicken Parmesan
- Convenient & Delicious: Sheet Pan Chicken Parmesan
- Tropical Twist: Flavorful Malibu Chicken
- Restaurant Quality at Home: Longhorn Steakhouse Copycat Parmesan Chicken
- Inspired Dining: Cheesecake Factory Chicken Costoletta Inspired Recipe
- Healthy Indulgence: Low Carb Parmesan Chicken with Creamy Bacon Sauce
- Perfect for Two: Sheet Pan Garlic Parmesan Chicken
- Southern Comfort: Chicken Fried Steak with Sawmill Gravy
- Creative & Zesty: Chicken Piccata Meatballs
- Slow Cooker Magic: Crock Pot Garlic Parmesan Chicken
- The Ultimate Classic: The Best Southern Fried Chicken
- Kid-Friendly Favorite: Cornflake Chicken Nuggets
- Spice Lover’s Delight: Fiery Nashville Hot Chicken
Parmesan Crusted Chicken Recipe
Print Recipe
Pin Recipe
Ingredients
- 2 boneless, skinless chicken breasts cut in half horizontally and pounded thin
- salt and pepper to taste
- ⅓ cup all-purpose flour
- 2 large eggs
- 1 cup finely shredded Parmesan cheese
- 1 cup panko breadcrumbs
- 1 teaspoon garlic powder
- 1 teaspoon Italian seasoning
- 4 Tablespoons vegetable oil (or other high smoke point oil like canola or peanut oil)
Instructions
- Prepare Chicken: Place each boneless, skinless chicken breast half on a large piece of parchment paper (about 12×12 inches) or a cutting board. Fold the paper in half to cover the chicken. Using a kitchen mallet or rolling pin, pound the chicken until it is about ¼ inch thick. This ensures even cooking. Season both sides of the flattened chicken with salt and pepper. Set aside.

- Set Up Dredging Station: Prepare three shallow bowls or pie plates. In the first, place the ⅓ cup of flour. In the second, whisk the 2 eggs until well combined. In the third, mix together the 1 cup of finely shredded Parmesan cheese, 1 cup of panko breadcrumbs, 1 teaspoon of garlic powder, and 1 teaspoon of Italian seasoning.

- Preheat Oven & Skillet: Preheat your oven to 200°F (95°C) to keep cooked chicken warm. Heat 2 tablespoons of vegetable oil in a large skillet over medium heat until shimmering.
- Coat Chicken: Take one seasoned chicken cutlet. First, lightly coat it with flour, shaking off any excess. Next, dip it into the beaten egg mixture, ensuring it’s fully coated, then let excess egg drip off. Finally, dredge the chicken in the Parmesan-panko mixture, pressing firmly on both sides to help the coating adhere well.

- Cook Chicken: Place two coated chicken breasts at a time into the preheated skillet. Cook for 3-4 minutes per side, or until golden brown and the internal temperature reaches 165°F (74°C). Remove cooked breasts and transfer them to the 200°F oven to keep warm. Add another 2 Tablespoons of oil to the pan (or more if needed) and repeat the coating and cooking steps with the remaining two chicken cutlets.

- Serve: Remove the cooked cutlets from the oven. Garnish with chopped fresh parsley and lemon wedges if desired for a burst of freshness. Serve immediately with your favorite side dishes.

Notes
- For more detailed information on substitutions, alternative cooking methods (baking, air frying), and frequently asked questions, please refer to the comprehensive FAQ section and ingredient descriptions above in the main article.
Nutrition
Nutritional Disclaimer
Please note: The nutritional information provided is an estimate based on standard ingredient values. It may vary significantly depending on specific brands used, precise preparation methods, and exact serving sizes. If accurate and precise nutritional values are critically important for your dietary needs or health goals, we strongly recommend using a trusted online nutritional calculator with the exact brands and quantities of ingredients you personally utilize in your kitchen.
Did you make this recipe?Share your culinary creations on Instagram! Tag us @thecountrycook and use the hashtag #thecountrycook so we can see your delicious dishes!

