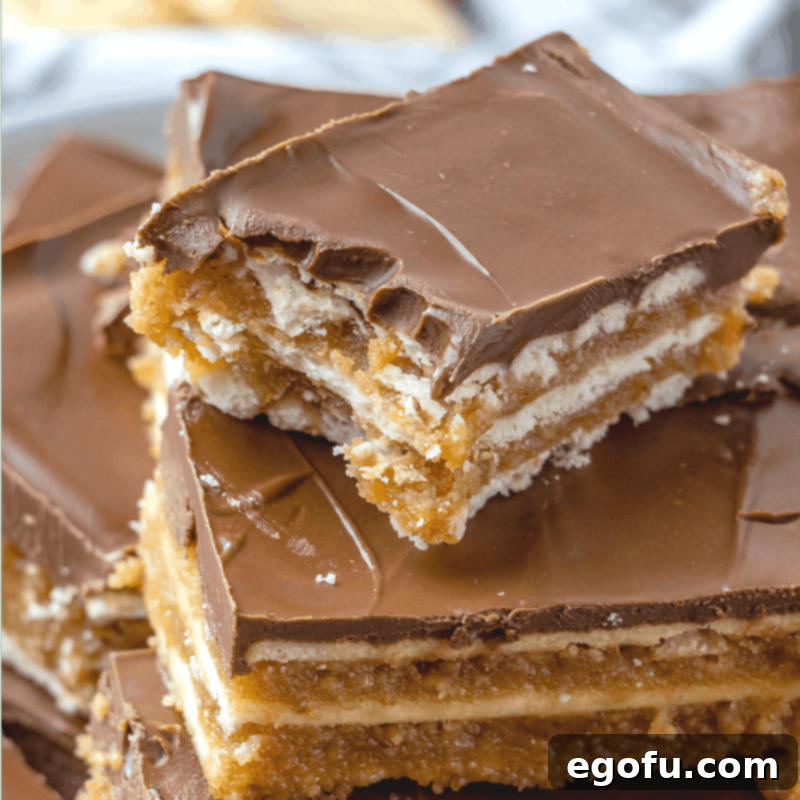
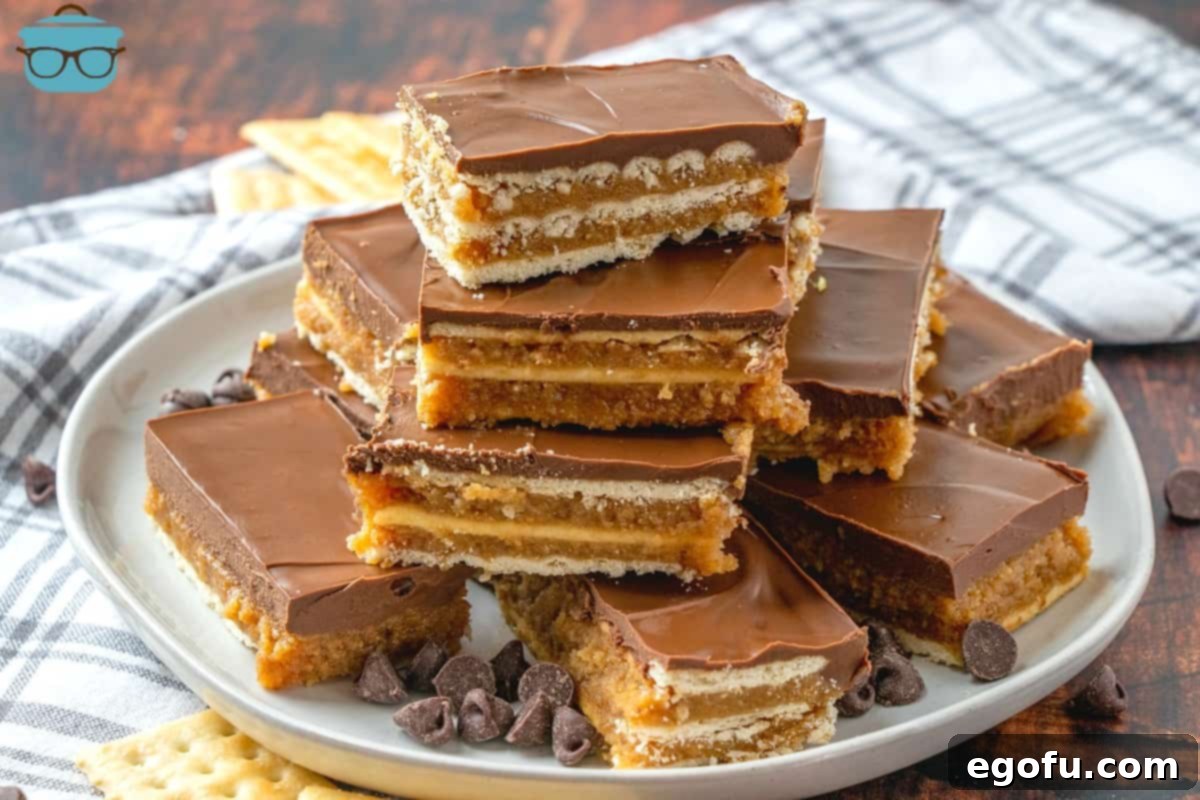
This no-bake dessert recipe for Homemade Kit Kat Bars is a family favorite! Layers of crackers, graham crackers, chocolate and peanut butter.
Irresistible No-Bake Homemade Kit Kat Bars: The Ultimate Crowd-Pleasing Dessert
Step into a world of nostalgic flavors and effortless baking with our incredible recipe for Homemade Kit Kat Bars! Forget the oven – this no-bake sensation combines crunchy cracker layers, a sweet, buttery graham cracker mixture, and a decadent peanut butter chocolate topping into an irresistible treat that will have everyone reaching for more. Perfect for potlucks, family gatherings, or simply satisfying that sweet craving, these bars are a true testament to how simple ingredients can create extraordinary dessert magic. Prepare to delight your taste buds with this easy-to-follow recipe that brings together classic comfort with a delightful homemade twist.
Why You’ll Love These Easy No-Bake Bars
This recipe isn’t just a dessert; it’s an experience. Here’s why these Homemade Kit Kat Bars will quickly become a cherished part of your recipe collection:
- Effortless Preparation: Say goodbye to complex baking steps. With no oven required, these bars are a dream to whip up, making them ideal for busy schedules or hot summer days. The minimal cooking involved means less time in the kitchen and more time enjoying your delicious creation.
- Nostalgic Flavor Profile: While not an exact replica of the classic candy bar, these bars capture the essence of a Kit Kat with their delightful crunch and rich chocolate layers, enhanced by the creamy goodness of peanut butter. It’s a familiar comfort with a homemade twist that evokes fond memories of childhood treats.
- Crowd-Pleaser: One 9×13 inch pan yields a generous amount, making this recipe perfect for feeding a crowd. They’re guaranteed to be a hit at any gathering, from casual barbecues to festive holiday parties, and are often the first dessert to disappear from the table.
- Irresistible Texture: The combination of crispy crackers, a chewy graham cracker base, and a smooth chocolate-peanut butter ganache creates a multi-layered textural masterpiece that’s incredibly satisfying with every bite. Each layer contributes to a unique mouthfeel that keeps you coming back for more.
- Customizable Goodness: Easily adapt the chocolate type, add sprinkles, or experiment with different nuts to make these bars uniquely yours. This versatility allows you to tailor the recipe to your personal preferences or seasonal themes.
- Make-Ahead Friendly: These bars need time to chill and set, making them an excellent make-ahead dessert. Prepare them the day before your event, and you’ll have one less thing to worry about, ensuring a stress-free hosting experience.
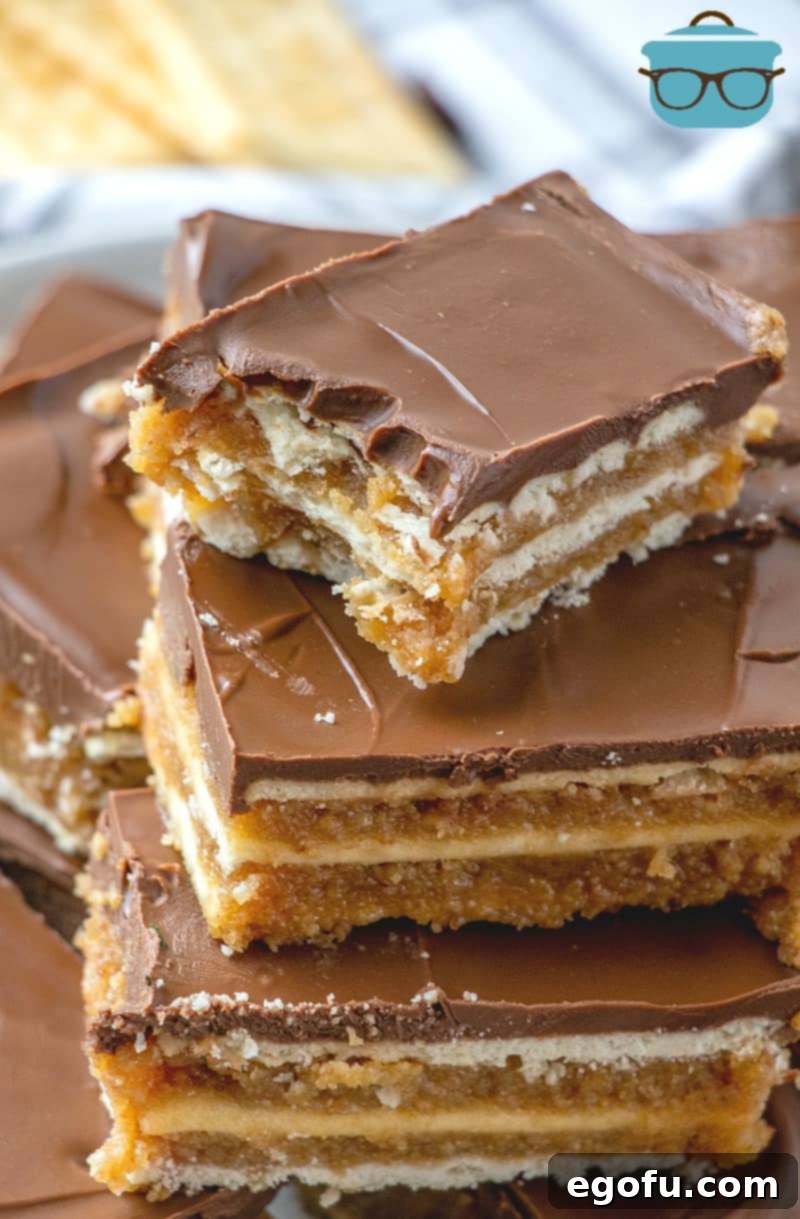
The Inspiration Behind These Homemade Kit Kat Bars
When I was growing up, layered no-bake bars were the undisputed stars of every potluck and family get-together. They were synonymous with ease and deliciousness, always disappearing fast from the dessert table. This recipe draws its inspiration from that cherished era, reimagining the beloved idea of a classic Kit Kat bar with a delightful homemade twist. While they don’t feature the thin, airy wafers of a traditional Kit Kat, they brilliantly embody the same spirit of a multi-layered, crunchy, chocolate-coated treat designed for ultimate enjoyment.
Our rendition cleverly substitutes delicate wafers with hearty crackers, which provide a robust and satisfying snap. This intentional choice perfectly complements the creamy, rich peanut butter and chocolate layers. The result is a unique combination that not only offers profound textural complexity but also a depth of flavor that genuinely sets these bars apart. Think of them as a more rustic, indulgent, and deeply satisfying cousin to the factory-made candy bar – all the fun of breaking off a piece, but with a wonderfully unique flavor profile that’s truly homemade and bursting with character.
Essential Ingredients for Your No-Bake Masterpiece
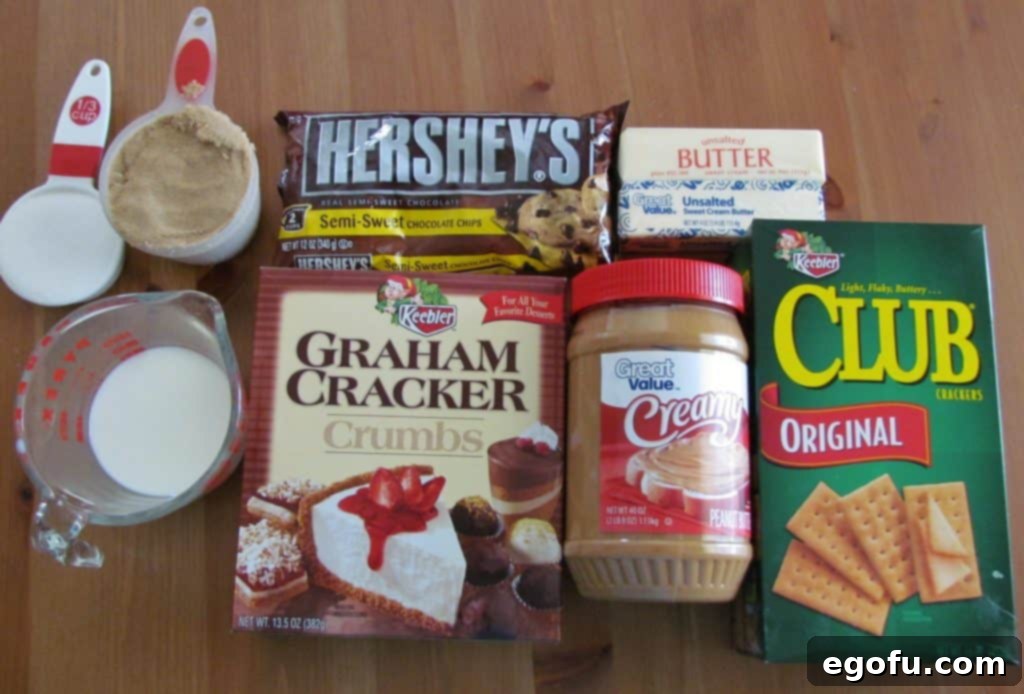
Crafting these delectable no-bake bars requires a few simple, yet crucial, ingredients that are likely already staples in your pantry. Let’s take a closer look at each component and its role in creating this irresistible dessert:
- Club Crackers: These form the crunchy foundation of our bars. Club crackers are preferred over regular saltines because their slightly richer, butterier flavor and sturdier texture hold up exceptionally well within the layers, preventing them from becoming soggy. They provide the perfect counterpoint to the sweet fillings.
- Salted Butter: A critical ingredient for the luscious caramel-like graham cracker layer. The butter adds richness, helps to bind the sugars and crumbs together, and contributes to the overall melt-in-your-mouth texture. If you only have unsalted butter, a small pinch of salt added to the mixture will help balance the sweetness.
- Light Brown Sugar & Granulated Sugar: This classic combination of sugars is essential for creating the deeply flavored, chewy, and caramelized foundation of the graham cracker layer. Brown sugar adds moisture and a subtle molasses note, while granulated sugar ensures the right level of sweetness and texture.
- Graham Cracker Crumbs: These crumbs are indispensable for building a substantial, flavorful, and slightly chewy layer that beautifully complements the crisp crackers. You can easily purchase pre-crushed graham cracker crumbs, or simply crush whole graham crackers yourself using a food processor or by placing them in a Ziploc bag and crushing with a rolling pin.
- Milk: Just a half-cup of milk is incorporated into the butter and sugar mixture, helping it to melt smoothly and achieve a pourable consistency. This ensures an even and consistent spread across the delicate cracker layers. Any type of milk, whether dairy or a non-dairy alternative, will work perfectly.
- Creamy Peanut Butter: The undeniable star of the show for the top layer! Creamy peanut butter delivers that signature nutty, smooth texture and irresistible flavor that pairs perfectly with chocolate. While creamy is recommended for a silky-smooth topping, feel free to use crunchy peanut butter if you desire an extra textural element and burst of peanut goodness.
- Semi-Sweet Chocolate Chips: These chips melt down with the peanut butter to create a luscious, glossy, and intensely flavorful topping. Semi-sweet chocolate chips offer a balanced sweetness that prevents the bars from being overly cloying. However, for a sweeter profile, milk chocolate chips are a great alternative, or for a deeper, more robust cocoa flavor, dark chocolate chips can be used.
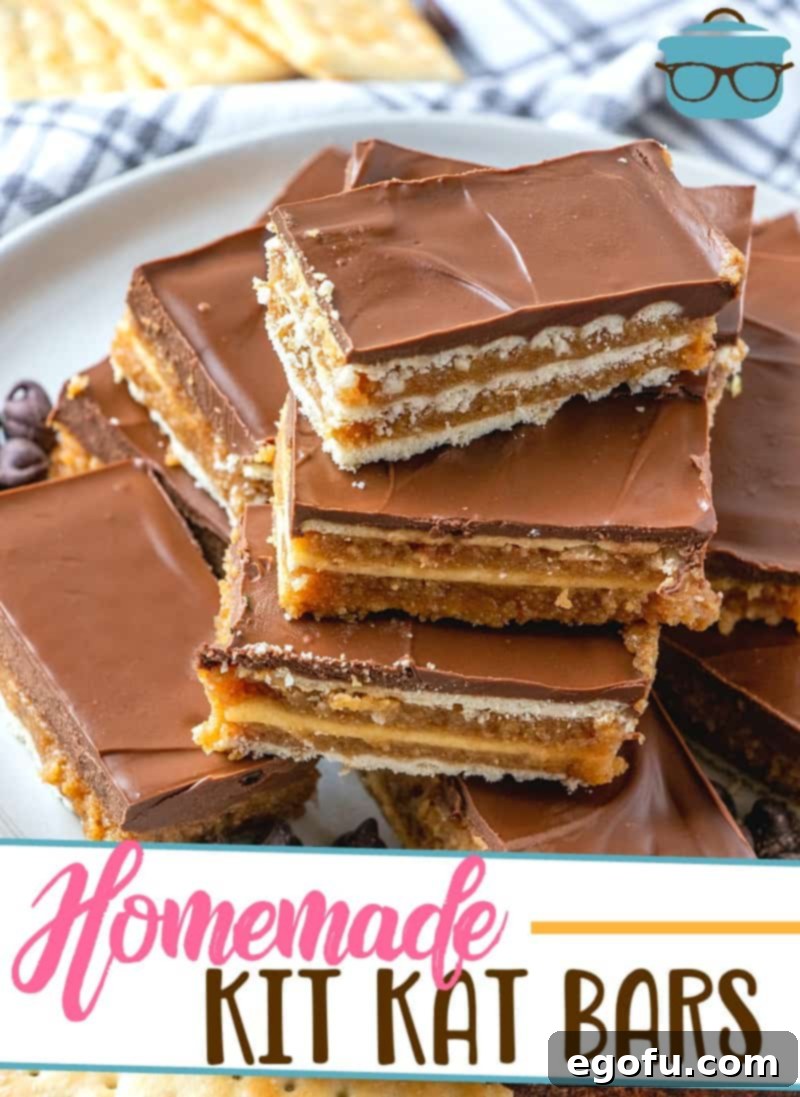
Pro Tips for Perfecting Your Homemade Kit Kat Bars
Achieving bakery-worthy results with these remarkably simple no-bake bars is well within your reach, especially if you pay attention to these helpful tips and tricks:
- Cracker Choice Matters Significantly: While regular saltine crackers are technically an option, we strongly advocate for using Club crackers. Their slightly richer, subtly buttery flavor and more robust structure provide a superior foundation, ensuring a more satisfying crunch that resists softening too quickly. If saltines are your only option, ensure they are as fresh as possible for maximum crispness.
- Customize Your Chocolate Experience: Feel free to venture beyond semi-sweet chocolate chips. Experiment with dark chocolate for a more sophisticated, less sweet bar that highlights the cocoa notes. Alternatively, opt for milk chocolate to create a creamier, sweeter profile that often appeals greatly to children and those with a sweet tooth. Even white chocolate could offer an interesting visual and flavor contrast, especially if swirled with dark chocolate.
- Chilling is Absolutely Non-Negotiable: This step is arguably the most crucial for the success of your bars. It requires patience! Allow your bars ample time to cool and firm up in the refrigerator, ideally for at least 1 to 2 hours, but even longer (3-4 hours or overnight) will yield even better results. Rushing this chilling process will inevitably lead to messy, crumbly slices, as the layers will not have adequately set. A well-chilled bar slices cleanly, holds its intricate layers beautifully, and offers the best textural contrast.
- Precision Slicing for Professional Presentation: Once your bars are thoroughly chilled, employ a sharp, warm knife for the cleanest possible cuts. A simple trick is to run your knife under hot water for a few seconds and wipe it dry between each slice. This warms the blade, allowing it to glide through the chocolate topping without dragging or cracking. Given the richness of these bars, we highly recommend cutting them into smaller squares than you might initially envision – aiming for approximately 24-30 pieces from a 9×13 inch pan. This ensures everyone can indulge in a delightful, perfectly portioned treat without feeling overwhelmed.
- Ensure Even Spreading for Uniform Layers: When spreading the warm butter and graham cracker mixture, work swiftly and meticulously to distribute it as evenly as possible over the cracker layers. An offset spatula or the back of a large spoon can be invaluable tools for achieving a smooth and consistent layer from edge to edge. Even layers are key to ensuring that every single bite delivers the perfect balance of flavors and textures.
- Optimal Storage and Extended Shelf Life: Any leftover Homemade Kit Kat Bars should be stored in an airtight container in the refrigerator. They will maintain their freshness and texture for up to 5-7 days. For longer preservation, these bars can also be frozen for up to 1-2 months. If freezing, wrap individual bars tightly in plastic wrap before placing them in a freezer-safe container or bag to prevent freezer burn. Thaw them gradually in the refrigerator before serving to preserve their texture.
- The Marvel of Make-Ahead: These bars are an absolute dream for party planning or special events. Since they require significant chilling time, they are an ideal make-ahead dessert. You can comfortably prepare them a day or even two in advance, allowing them ample time to set perfectly, meaning one less thing to stress about on the day of your gathering.
Step-by-Step Guide: How to Make Homemade Kit Kat Bars
Let’s get started on creating these irresistible treats! Follow these detailed instructions for a smooth and enjoyable dessert-making process, ensuring each layer is perfectly crafted.
Ingredients You’ll Need: (For the full recipe, see the recipe card below)
- 72 Club Crackers
- 1 cup Salted Butter (2 sticks)
- 1 cup Light Brown Sugar, firmly packed
- ⅓ cup Granulated Sugar
- 2 cups Graham Cracker Crumbs
- ½ cup Milk
- ⅔ cup Creamy Peanut Butter
- 1 cup Semi-Sweet Chocolate Chips
Detailed Instructions:
-
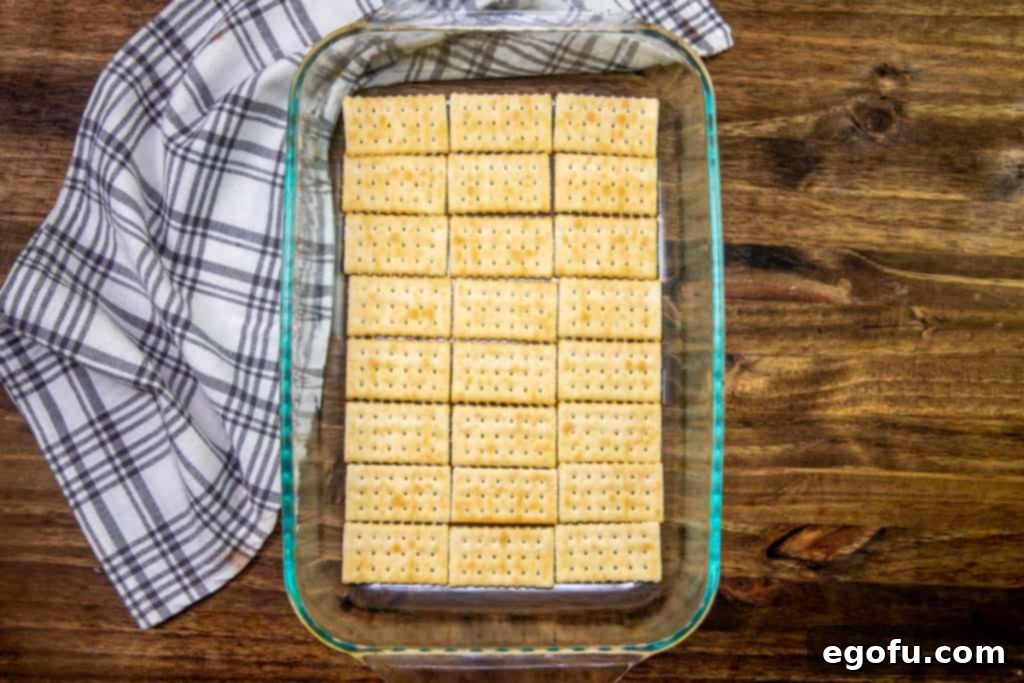
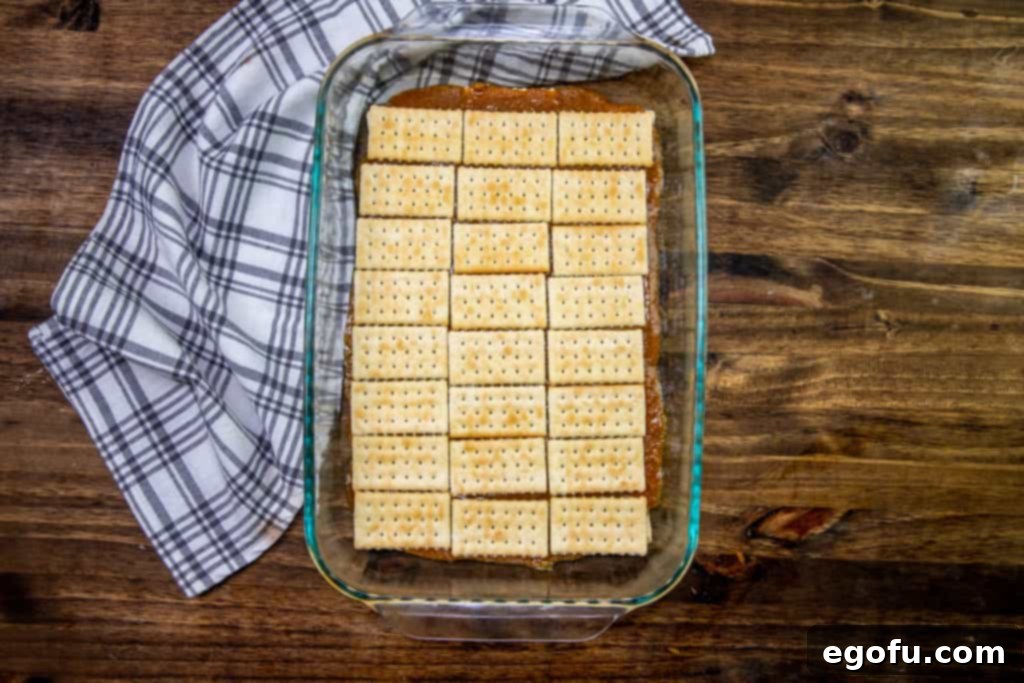
Prepare Your Baking Dish: Line an ungreased 9×13-inch baking dish with a single, even layer of Club crackers. Arrange them closely together to cover the bottom of the pan completely, ensuring there are no large gaps. This forms the essential first crunchy layer of your bars.

A perfectly lined baking dish with Club crackers, ready for the next layer. -
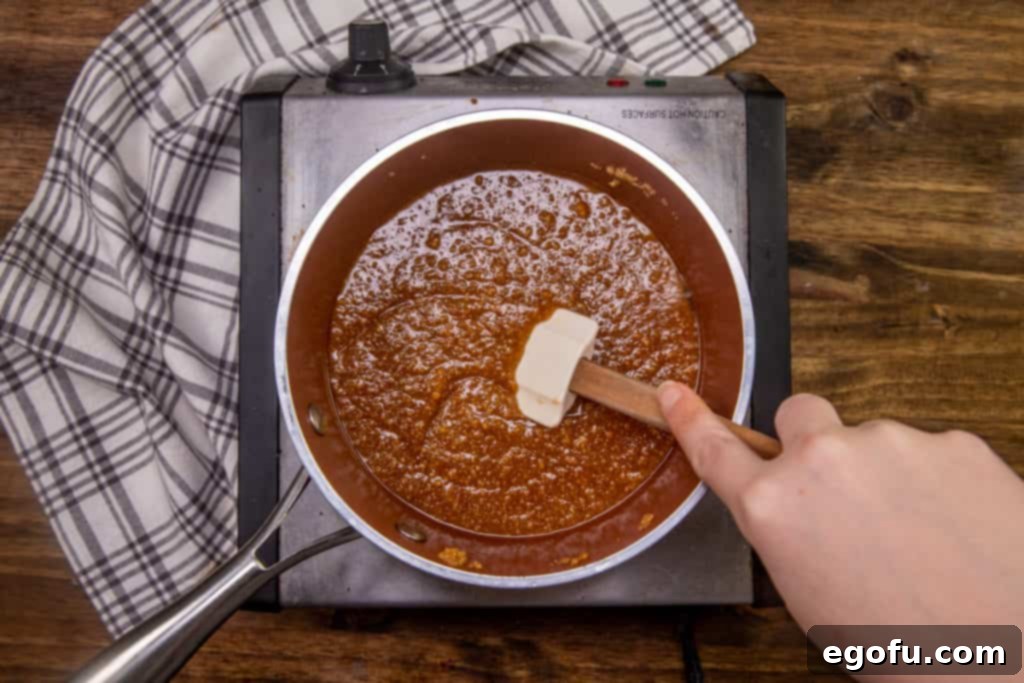
Melt the Butter and Sugars: In a large, heavy-bottomed saucepan, combine the 1 cup of salted butter, 1 cup of light brown sugar, and ⅓ cup of granulated sugar. Place the saucepan over low to medium heat. Stir constantly with a whisk or spoon until the butter is completely melted and both sugars have dissolved, creating a smooth, golden mixture. It should be gently bubbling, but be vigilant not to let it boil vigorously or scorch at the bottom.

The butter and sugar mixture melting beautifully on the stovetop. - Add Graham Cracker Crumbs and Milk: Remove the saucepan from the heat immediately. Stir in the 2 cups of graham cracker crumbs and ½ cup of milk. Continue stirring vigorously until all ingredients are thoroughly combined and incorporated, creating a thick, uniform, and slightly sticky mixture. Ensure there are no dry spots of graham cracker crumbs remaining. This mixture should be spreadable but not overly liquid.
-
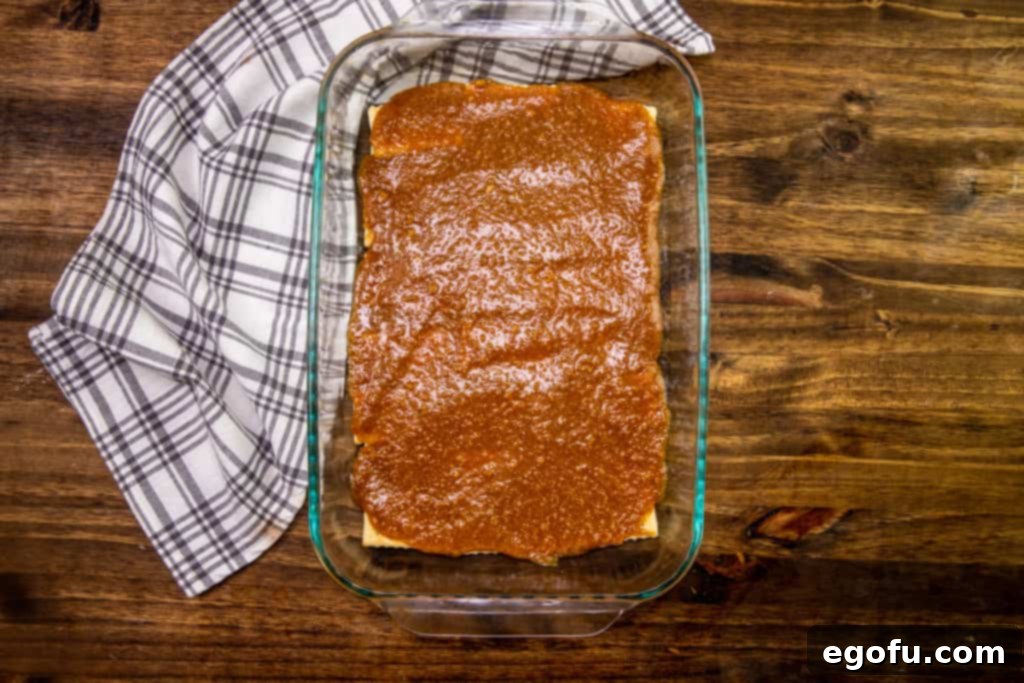
First Graham Cracker Layer: Carefully spread half of the warm butter and graham cracker mixture evenly over the initial layer of crackers in your baking dish. Work quickly, as the mixture will thicken as it cools. Use an offset spatula or the back of a spoon to ensure a smooth and consistent layer from edge to edge of the pan. Even layers are key to a beautiful final product.

The first layer of the sweet graham cracker mixture spread over the crackers. -
Second Cracker Layer: Place another complete layer of Club crackers directly on top of the first graham cracker mixture. Make sure to cover the entire surface as neatly as possible, preparing for the next layer of filling.

Adding the second layer of crunchy Club crackers. - Second Graham Cracker Layer & Final Cracker Layer: Spread the remaining half of the butter and graham cracker mixture evenly over the second layer of crackers. Once this second filling layer is complete, add a final, third layer of Club crackers on top. This completes your multi-layered base structure.
-
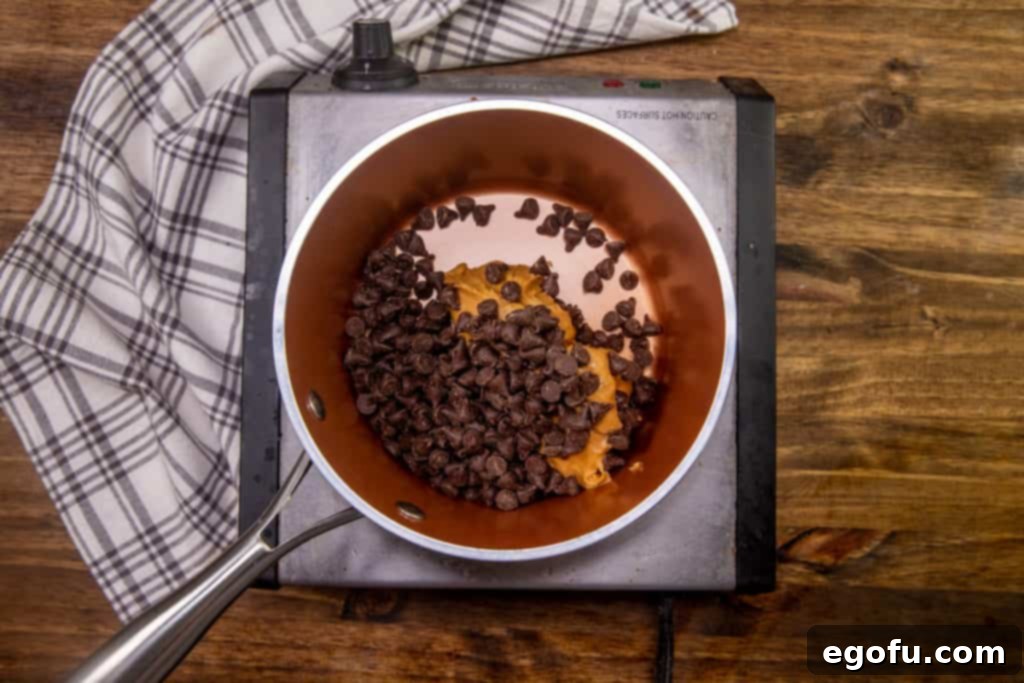
Prepare the Chocolate Peanut Butter Topping: In a separate small saucepan, combine the ⅔ cup of creamy peanut butter and 1 cup of semi-sweet chocolate chips. Melt this mixture over medium-low heat, stirring constantly with a rubber spatula or spoon. Continue stirring until the chocolate chips are completely melted and the peanut butter and chocolate are smoothly blended into a luscious, glossy, and uniform ganache. Remove from heat immediately once perfectly smooth to prevent scorching.

Melting the peanut butter and chocolate chips into a smooth, luscious topping. -
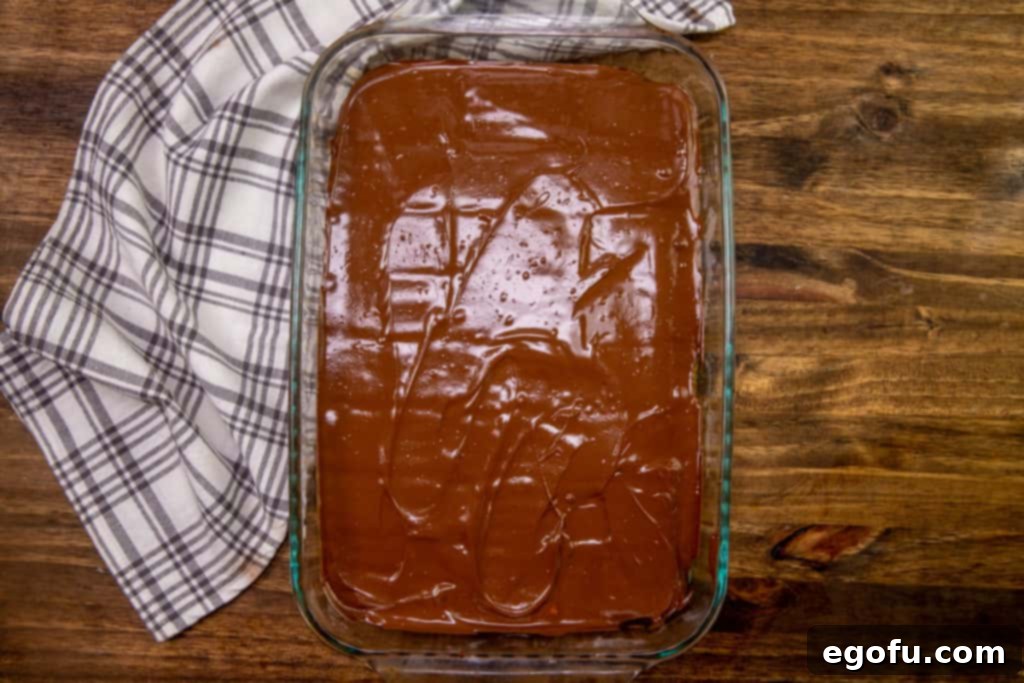
Apply the Topping: Spread the warm chocolate peanut butter mixture evenly over the final layer of crackers. Use an offset spatula to smooth the topping across the entire surface, ensuring it is beautifully and uniformly covered for a professional-looking finish.

The final layer of smooth peanut butter chocolate spread over the bars. -
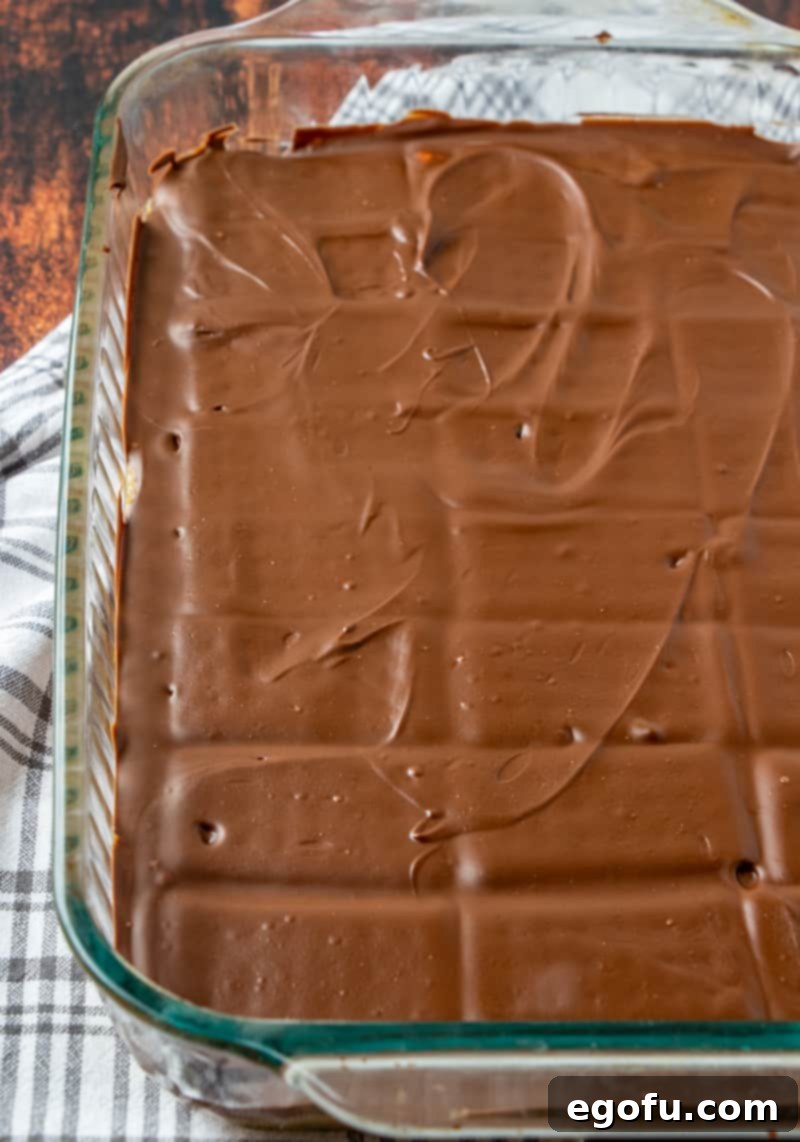
Chill and Set: Cover the baking dish tightly with plastic wrap, ensuring the plastic doesn’t touch the chocolate topping if possible to prevent sticking. Place the covered dish in the refrigerator for at least 1 to 2 hours, or until the entire dessert, especially the top chocolate layer, is completely cooled and firm to the touch. This extended chilling time is absolutely essential for the bars to set properly and allow for clean, precise slicing later.

The homemade Kit Kat bars chilling in the refrigerator, firming up beautifully. -
Slice and Serve: Once completely chilled and firm, remove the plastic wrap from the baking dish. Using a sharp knife that has been warmed under hot water (and wiped dry), carefully slice the bars into small, manageable squares. Depending on your preferred size, you should be able to get approximately 24-30 delicious pieces from one 9×13 inch pan. Arrange them on a platter and serve this delightful no-bake treat!

Perfectly sliced homemade Kit Kat bars, ready to be devoured.
Customization Ideas for Your No-Bake Kit Kat Bars
These no-bake Kit Kat bars are absolutely fantastic on their own, but they also serve as a wonderful canvas for culinary creativity! Don’t hesitate to get adventurous and personalize them to your liking:
- Add a Nutty Crunch: For an extra layer of texture and flavor, sprinkle chopped peanuts, pecans, walnuts, or even almonds over the still-wet chocolate topping just before placing the bars in the refrigerator to chill. The nuts will adhere beautifully and add a delightful crunch.
- A Sophisticated Touch of Salt: A light sprinkle of flaky sea salt (like Maldon) on the still-liquid chocolate peanut butter topping beautifully enhances and intensifies both the chocolate and peanut butter flavors, creating a desirable sweet-and-salty contrast.
- Explore Extract Variations: Infuse your chocolate-peanut butter topping with different flavors. Add a teaspoon of pure vanilla extract for a classic boost, almond extract for a subtle nutty essence, or even a touch of peppermint extract for a festive, refreshing twist.
- Create Swirls of Delight: For an attractive visual appeal, drizzle melted white chocolate (or another contrasting chocolate) over the dark chocolate-peanut butter topping. Then, use a toothpick or a skewer to gently swirl the chocolates together, creating beautiful marble patterns before chilling.
- Indulge in Coconut Craze: If you’re a devoted fan of coconut, consider adding a generous layer of toasted shredded coconut on top of the peanut butter-chocolate layer before the bars set. The toasted coconut adds a fragrant chewiness and tropical hint.
- Sweet Candy Mix-ins: For a fun, playful, and colorful treat, chop up your favorite mini candies – such as mini M&M’s, Reese’s Pieces, or even crushed Oreos – and sprinkle them liberally over the wet chocolate topping. This is especially great for parties or children’s events.
Frequently Asked Questions About Homemade Kit Kat Bars
- Can I use crunchy peanut butter instead of creamy?
- Absolutely! If you love extra texture and a more pronounced peanut flavor, crunchy peanut butter works wonderfully and adds another delightful layer of crispness and nuttiness to the bars. It’s a great way to customize the recipe.
- How long do these bars last, and how should I store them?
- When stored in an airtight container in the refrigerator, these bars will maintain their freshness and optimal texture for up to 5-7 days. To prevent them from drying out or absorbing other flavors, ensure the container is sealed tightly.
- Can I freeze homemade Kit Kat bars for longer storage?
- Yes, you certainly can! For extended storage, wrap individual bars tightly in plastic wrap first, then place them in a freezer-safe bag or an airtight container. They can be frozen for up to 1-2 months. When you’re ready to enjoy them, simply thaw them in the refrigerator overnight before serving to ensure the best texture.
- Are these bars gluten-free?
- As the recipe is written with standard club crackers and graham crackers, it is not gluten-free. However, you can easily adapt the recipe to be gluten-free by substituting these components with readily available gluten-free versions of crackers and graham cracker crumbs. Always double-check ingredient labels to ensure they meet your dietary needs.
- My chocolate peanut butter topping became too thick to spread. What should I do?
- If your chocolate peanut butter topping cools down too much or becomes too thick to spread smoothly, you can gently reheat it. Place the saucepan back over very low heat and stir constantly for a minute or two until it reaches a more fluid, spreadable consistency. Be very careful not to overheat it, which can cause the chocolate to seize or burn.
Craving More Easy Dessert Recipes?
If you loved creating and enjoying these delightful no-bake Kit Kat bars, then you’re in for a fantastic treat! We have a treasure trove of other incredible dessert creations that are just as easy to make and equally satisfying. Dive into our collection and discover your next family favorite:
- Homemade 100 Grand Bars
- Homemade Twix Bars
- Snickers Bars
- Snickers Salad
- Snickers Poke Cake
- No Bake Twix Pie
- Peanut Butter Cookie Bars
- Peanut Butter Rice Krispies Treats
- Chocolate Chip Peanut Butter Fudge
- Chocolate Chip Caramel Butter Bars
- Grandma’s No Bake Peanut Butter Bars
- Twix Cookies
- Scotcheroos
- Lazy Chocolate Chip Cookie Bars
- Brown Sugar Pop Tart Bars
Originally published: September 2012
Updated photos & republished: May 2020
Homemade Kit Kat Bars
This no-bake dessert recipe for Homemade Kit Kat Bars is a family favorite! Layers of crackers, graham crackers, chocolate and peanut butter. It’s an easy, crowd-pleasing treat perfect for any occasion.
Cook Time: 5 minutes
Total Time: 20 minutes (plus chilling time)
Author: Brandie Skibinski
Pin Recipe
Ingredients
- 72 Club crackers
- 1 cup salted butter (2 sticks)
- 1 cup light brown sugar, firmly packed
- ⅓ cup granulated sugar
- 2 cups graham cracker crumbs
- ½ cup milk
- ⅔ cup creamy peanut butter
- 1 cup semi-sweet chocolate chips
Instructions
- Line an ungreased 9×13-inch baking dish with a single layer of Club crackers.
- In a large saucepan, over low to medium heat, melt butter and both sugars gently, stirring constantly until smooth. Do not boil.
- Stir in graham cracker crumbs and milk. Stir well until all ingredients are combined and uniform.
- Remove from heat and carefully spread half the butter mixture evenly over the cracker layer. Spread it as evenly as possible.
- Layer with another complete layer of Club crackers.
- Spread the remaining half of the butter mixture on top of the second cracker layer.
- Add a final, third layer of Club crackers on top.
- In a separate small saucepan, combine peanut butter and chocolate chips. Melt over medium-low heat, stirring constantly until completely melted and smoothly blended.
- Spread the melted chocolate peanut butter mixture evenly over the top layer of crackers.
- Cover the baking dish tightly with plastic wrap and refrigerate for at least 1 to 2 hours, or until the top chocolate layer is completely cooled and firm.
- Once thoroughly cooled and set, slice into small squares and serve.
Video
Notes
- Crunchy peanut butter can be used for added texture.
- These bars are quite rich, so we suggest cutting them into smaller squares (yielding about 24-30 pieces) for ideal portion sizes.
- Store leftovers in an airtight container in the refrigerator for up to 5-7 days.
Cuisine: American
Nutrition
Calories: 276kcal | Carbohydrates: 28g | Protein: 3g | Fat: 17g | Sodium: 231mg | Fiber: 1g | Sugar: 17g
Nutritional Disclaimer
“The Country Cook” is not a dietician or nutritionist, and any nutritional information shared is an estimate. If calorie count and other nutritional values are important to you, we recommend running the ingredients through whichever online nutritional calculator you prefer. Calories and other nutritional values can vary quite a bit depending on which brands were used.
Did you make this recipe?
Share it on Instagram @thecountrycook and mention us #thecountrycook!
