Irresistible Strawberry Jelly Filled Biscuit Donuts: Your Quick & Easy Homemade Treat
Imagine warm, fluffy donuts, bursting with sweet strawberry jelly and topped with a delicate glaze, all made from scratch in under 30 minutes. Sounds like a dream, right? This incredibly simple recipe for Strawberry Jelly Filled Biscuit Donuts turns that dream into a delicious reality. Perfect for a fun breakfast, a delightful brunch, or a quick dessert, these treats are guaranteed to be a hit with everyone who tries them. Forget the complicated yeast and proofing times; with the magic of canned biscuits, homemade donuts have never been so accessible and enjoyable.

The Unbeatable Charm of Canned Biscuit Donuts
Canned biscuits are a true kitchen marvel, offering incredible versatility that extends far beyond their traditional role. When fried, these humble biscuits undergo a remarkable transformation. They puff up beautifully, developing a light, airy, and wonderfully fluffy interior with a crisp, golden-brown exterior that’s remarkably similar to traditional donuts. This simple frying technique elevates the flavor profile, creating a comforting, familiar taste that evokes nostalgic memories of classic bakeries.
The real beauty of using canned biscuits for donuts lies in their unparalleled convenience. There’s no need for elaborate dough preparation, lengthy kneading, or time-consuming proofing. You simply open a can, shape, fry, and then fill and glaze. This shortcut makes homemade donuts an achievable indulgence even on the busiest mornings or when a sudden sweet craving strikes. It’s an ideal solution for busy parents, aspiring home bakers, or anyone looking for a quick yet satisfying culinary project that yields impressive results with minimal effort. Whether you choose to fill them with a classic strawberry jelly or explore other exciting flavors, these biscuit donuts promise a homemade taste experience that’s both fun to make and delightful to eat.
Why You’ll Love This Super Easy Donut Recipe
This recipe isn’t just easy; it’s a game-changer for anyone who loves donuts but shies away from complex baking projects. The speed at which these delicious treats come together is truly astounding. In less than half an hour, you can go from cracking open a can of biscuits to enjoying freshly made, warm, jelly-filled donuts. This makes them perfect for spontaneous weekend breakfasts, impromptu dessert cravings, or even as a unique addition to a brunch spread where you want to impress without spending hours in the kitchen.
Beyond the speed, the simplicity of the ingredients and steps makes this recipe foolproof. You don’t need any special baking skills or advanced equipment. The process involves basic kitchen techniques – heating oil, gentle shaping, quick frying, and simple glazing. This approach allows even novice cooks to achieve professional-looking and tasting results. The ability to customize the filling and glaze also adds to its appeal, allowing you to tailor each batch to your specific preferences or seasonal ingredients. Once you experience the joy of biting into a warm, fluffy biscuit donut filled with sweet jelly, you’ll find yourself reaching for this recipe again and again.
Frequently Asked Questions About Biscuit Donuts
Choosing the Best Canned Biscuits for Donuts
While most varieties of canned biscuits can be used for frying, for the absolute best results, we highly recommend using Pillsbury homestyle buttermilk biscuits. These biscuits tend to be thicker and denser, which allows them to puff up beautifully and maintain their shape when fried, resulting in a wonderfully fluffy and consistent donut texture. It’s crucial to avoid “flaky layer” or “grands” style biscuits, as their layered structure can cause them to separate and become unevenly cooked or overly crispy during frying, losing that desired soft, donut-like quality. The goal is a uniform rise and a soft interior, which traditional homestyle biscuits deliver perfectly.
Flavor Variations: Beyond Strawberry Jelly
Absolutely not! While strawberry jelly is a classic and undeniably delicious choice, the beauty of these homemade donuts lies in their versatility. Feel free to unleash your creativity and experiment with any flavor of jelly, jam, or preserves your heart desires. Popular alternatives include vibrant blueberry, tangy raspberry, rich grape, sweet apricot, or even exotic lingonberry. For a zesty twist, consider lemon curd or an orange marmalade. Beyond fruit fillings, you could also explore options like rich chocolate hazelnut spread (Nutella), creamy peanut butter, or even a spiced apple butter for a seasonal treat. The possibilities are truly endless, allowing you to customize each batch to suit different tastes and occasions.
Essential Tools: Piping Bags & Alternatives
A piping bag fitted with a bismark tip or a cream piping nozzle is ideal for cleanly and efficiently filling these donuts. The bismark tip is specifically designed for inserting into pastries and delivering filling evenly. However, if you don’t have a dedicated piping bag and tip on hand, there’s no need to run to the store. A simple gallon-sized zip-top bag can serve as an excellent substitute. Simply spoon your chosen jelly into one corner of the bag, snip off a small corner (about 1/4 to 1/2 inch) to create an opening, and use it just as you would a piping bag. For more precise filling, you can even insert a small, clean pastry tip into the snipped corner of the zip-top bag before filling it.
Reheating Your Homemade Donuts in an Air Fryer
Yes, absolutely! The air fryer is a fantastic tool for reheating leftover donuts, bringing them back to a warm, soft, and slightly crispy state. To reheat, preheat your air fryer to 360°F (180°C). Place the donuts in a single layer in the air fryer basket, ensuring they are not overcrowded. Air fry for about 3-4 minutes, checking frequently to ensure they don’t overcook or burn. A crucial tip: keep a close eye on the glaze, as it can melt and drip off as the donuts reheat. For best results, consider reheating unglazed donuts and then applying a fresh glaze, or reheating at a slightly lower temperature for shorter bursts to minimize glaze melting.
Crafting the Perfect Donut Glaze
Creating a delicious donut glaze is incredibly simple, requiring just a couple of basic ingredients you likely already have in your pantry. The foundation of most glazes is powdered sugar, also known as confectioners’ sugar. To this, you’ll add a small amount of liquid, typically milk, heavy cream, or even water. The heavy cream will result in a richer, creamier glaze, while milk or water will yield a slightly lighter consistency. Whisk these ingredients together until completely smooth and free of lumps. You can adjust the consistency by adding more liquid for a thinner glaze or more powdered sugar for a thicker one. For an extra touch of flavor and a beautiful pink hue, a tablespoon of strawberry jelly is incorporated into our glaze, making it perfectly complement the filling.
Can Canned Biscuit Donuts Be Made Entirely in an Air Fryer?
Yes, it is certainly possible to make biscuit donuts in an air fryer from scratch, but it’s important to note that their texture will differ somewhat from those that are traditionally deep-fried. Air-fried donuts tend to be slightly chewier and less crispy on the exterior, resembling more of a baked donut texture rather than a classic fried one. However, they are still wonderfully delicious and a fantastic option for a lighter version of this treat. For detailed instructions and specific timings on how to prepare canned biscuit donuts entirely in the air fryer, you can refer to this air fryer biscuit donut recipe. It provides all the necessary guidance to achieve great results using this alternative cooking method.
Storing Leftover Biscuit Donuts
We strongly recommend enjoying these delicious strawberry jelly-filled biscuit donuts on the same day they are made. They are truly at their peak when fresh, with the perfect balance of fluffy interior, crisp exterior, and vibrant filling. Due to the filling and glaze, storing them can unfortunately lead to sogginess, as moisture migrates and affects the texture. If you absolutely must store leftovers, place them in an airtight container and refrigerate for no more than one day. This will help minimize spoilage and moisture absorption, though they still won’t be as perfect as fresh. We do not recommend freezing these donuts, as the texture of both the biscuit and the jelly filling can degrade significantly upon thawing, resulting in a less than desirable experience. Enjoy them while they’re fresh for the best possible taste!

Simple Ingredients for Delicious Homemade Donuts
Crafting these delightful Strawberry Jelly Filled Biscuit Donuts requires only a handful of readily available ingredients. You’ll be amazed at how such simple components can transform into such an indulgent treat.
- Vegetable Oil: Essential for deep frying the biscuits to golden perfection. Choose a neutral-flavored oil with a high smoke point.
- Refrigerated Biscuits: The star of our recipe! An 8-count can of homestyle buttermilk biscuits works best for that classic donut texture.
- Strawberry Jelly, Jam, or Preserves: The sweet, fruity heart of our donuts. Choose your favorite consistency and flavor.
- Powdered Sugar: The base for our smooth, sweet glaze. Also known as confectioners’ sugar.
- Heavy Cream or Water: Used to thin the powdered sugar into a pourable glaze. Heavy cream adds richness, while water keeps it light.
Step-by-Step Guide: How to Make Strawberry Jelly Filled Biscuit Donuts
Get ready to transform simple canned biscuits into glorious, homemade donuts. Follow these easy steps to create a treat that will impress everyone.
1. Preparing Your Workstation for Frying
Before you begin frying, it’s essential to set up your drainage station. Line a large baking sheet with several layers of paper towels. This will absorb excess oil from the freshly fried donuts. Place a wire cooling rack directly over the paper towels. This setup allows air to circulate around the donuts, preventing them from becoming soggy as they cool and drain. Having this ready beforehand ensures a smooth process once the frying begins.
2. Heating the Oil to Perfection
Pour the vegetable oil into a medium-sized, heavy-bottomed pot or a Dutch oven. Ensure the oil is deep enough to fully submerge the biscuits, typically about 2-3 inches. Place the pot over medium heat. It’s crucial to heat the oil gradually and maintain a consistent temperature. The ideal temperature for frying donuts is between 350°F and 375°F (175°C – 190°C). If you have a kitchen thermometer, use it for accuracy. If not, you can test the oil by dropping a small piece of biscuit dough into it; if it sizzles gently and rises to the surface within a few seconds, the oil is ready. Avoid overheating the oil, which can cause the donuts to burn on the outside and remain raw inside.
3. Shaping the Biscuits for Donut Frying
Carefully open your can of refrigerated biscuits. Using your hands, gently stretch and shape each biscuit. The goal is to transform the round biscuit into an oval or slightly egg-like shape. Work around the edges, stretching them gently to create a slightly elongated form. Aim for a relatively uniform thickness and size across all biscuits to ensure even cooking. This gentle shaping prevents tearing and helps the biscuits puff up beautifully into a donut-like shape once fried.
4. Frying the Biscuits to Golden Brown
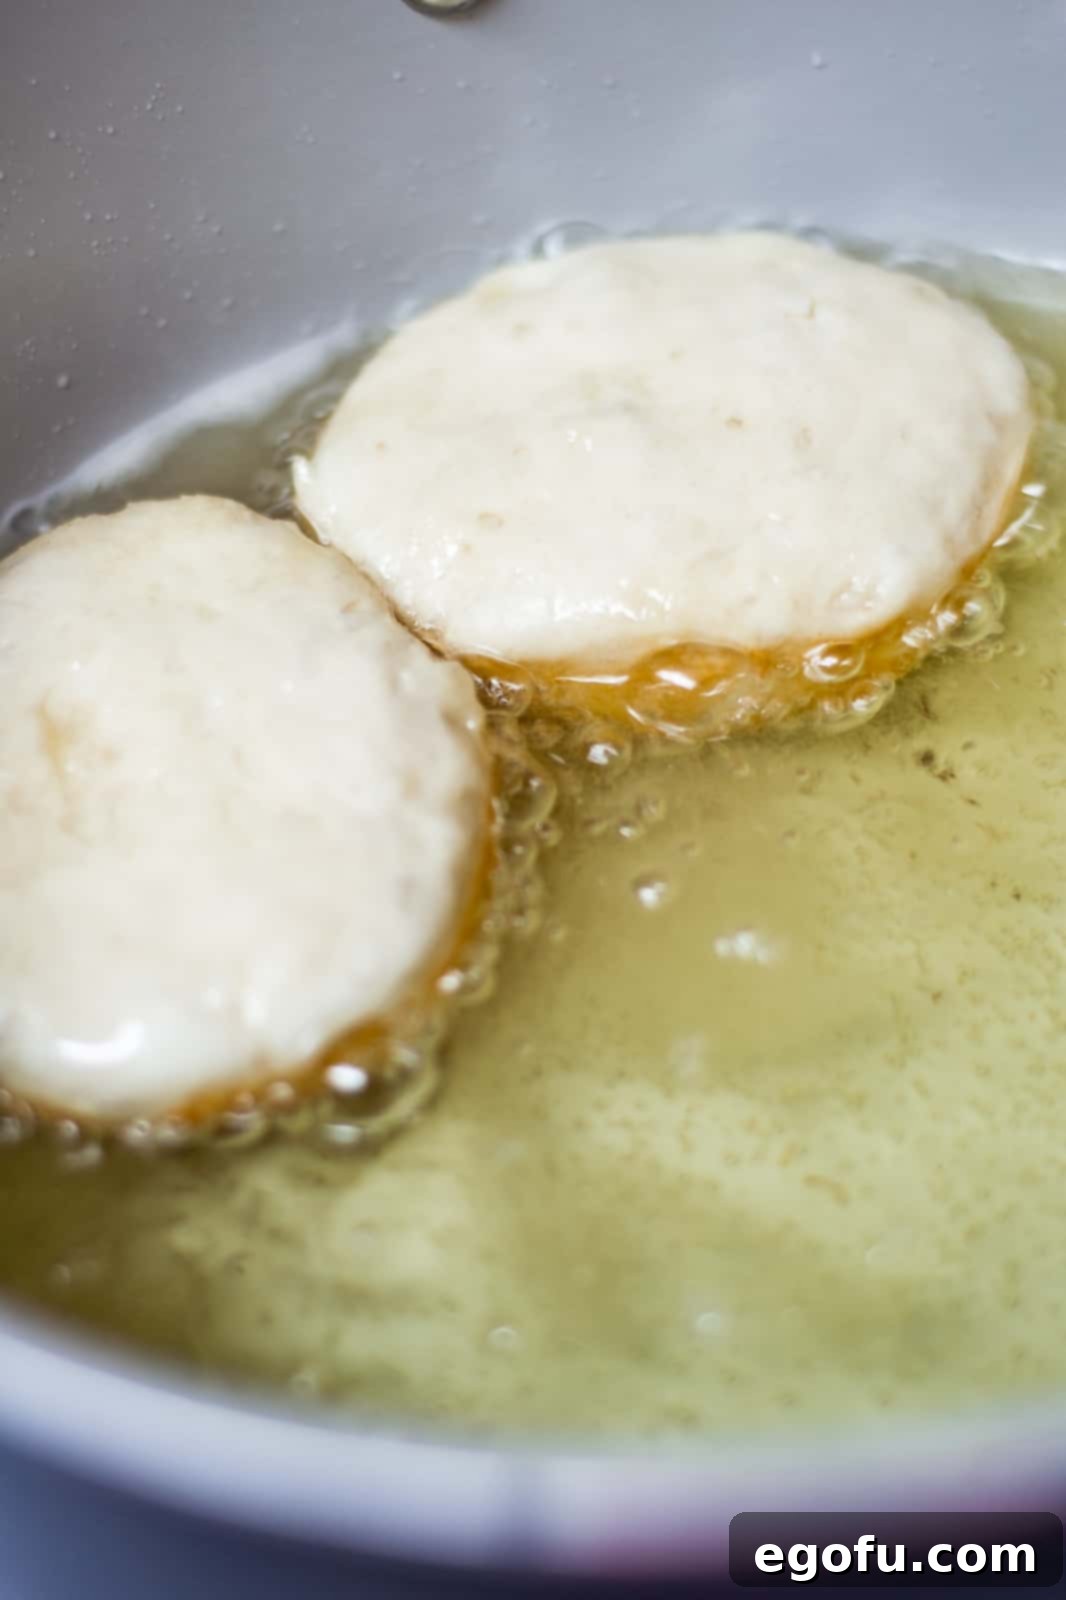
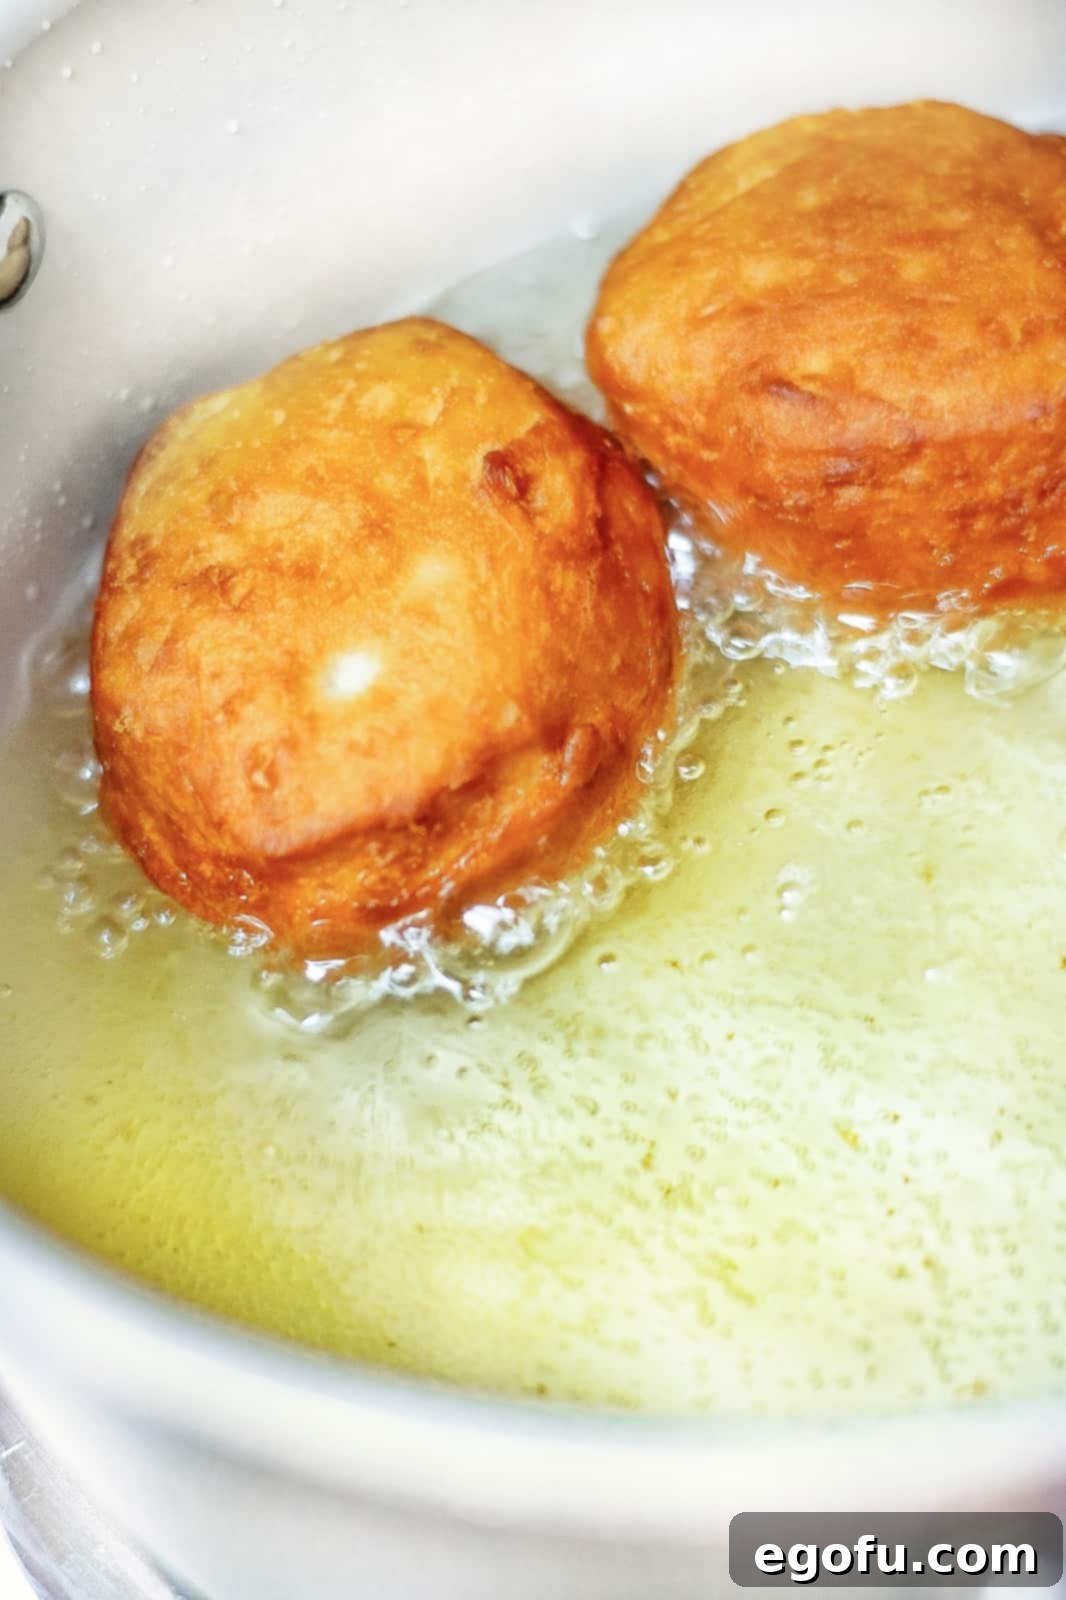
Once the oil is at the correct temperature, carefully lower 2-3 shaped biscuits into the hot oil. It’s important not to overcrowd the pot, as this can lower the oil temperature and result in greasy donuts. Allow the biscuits to fry for approximately 2-3 minutes on the first side. You’ll see them quickly expand and develop a beautiful golden-brown color on the underside. Using a pair of tongs, gently flip each biscuit over to cook the uncooked side. Fry for another 2-3 minutes until both sides are a rich golden brown and the donuts appear puffed and cooked through. The color is your best indicator of doneness.
5. Draining and Cooling the Fried Donuts
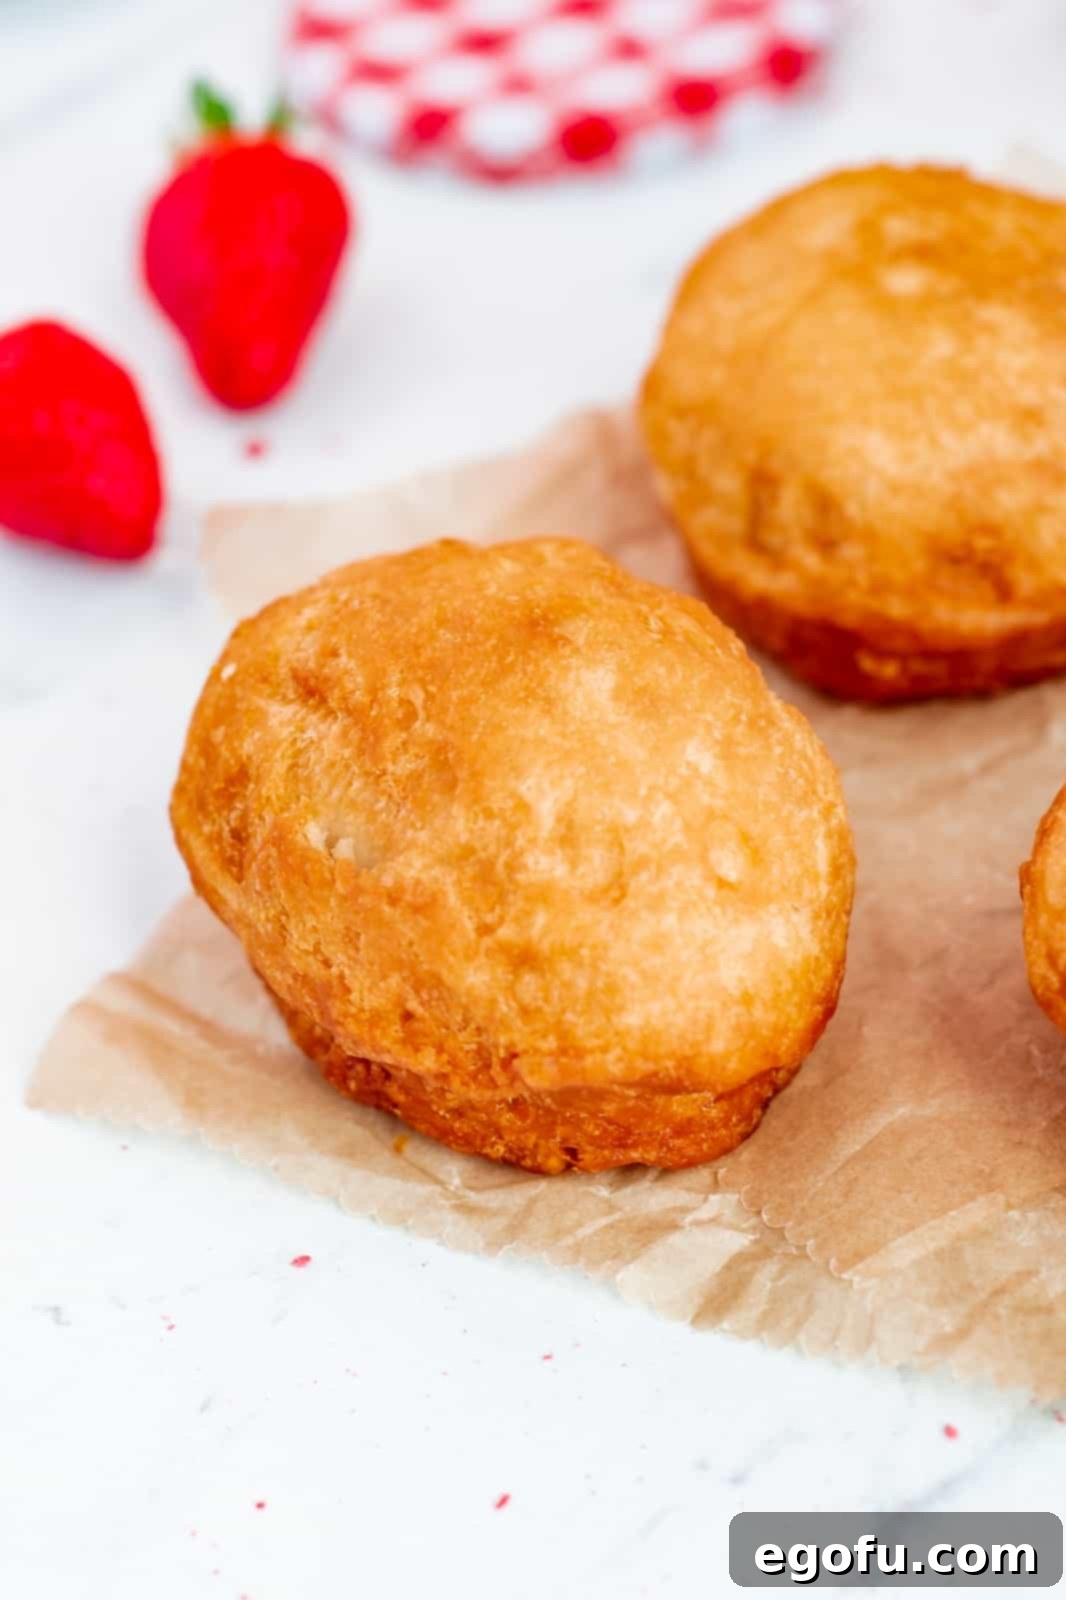
Once your biscuits are beautifully golden brown and fully cooked, use tongs or a large slotted spoon to carefully remove them from the hot oil. Gently shake off any excess oil over the pot before transferring them to the prepared cooling rack. This allows any remaining oil to drain away, ensuring your donuts are light and not greasy. Continue frying the remaining biscuits in batches of 2-3 until all your delicious donuts are finished. It’s crucial to let the fried donuts cool completely on the rack before proceeding to the filling and glazing steps. Attempting to fill or glaze warm donuts will result in melted glaze and a less appealing texture.
6. Filling Your Donuts with Sweet Jelly
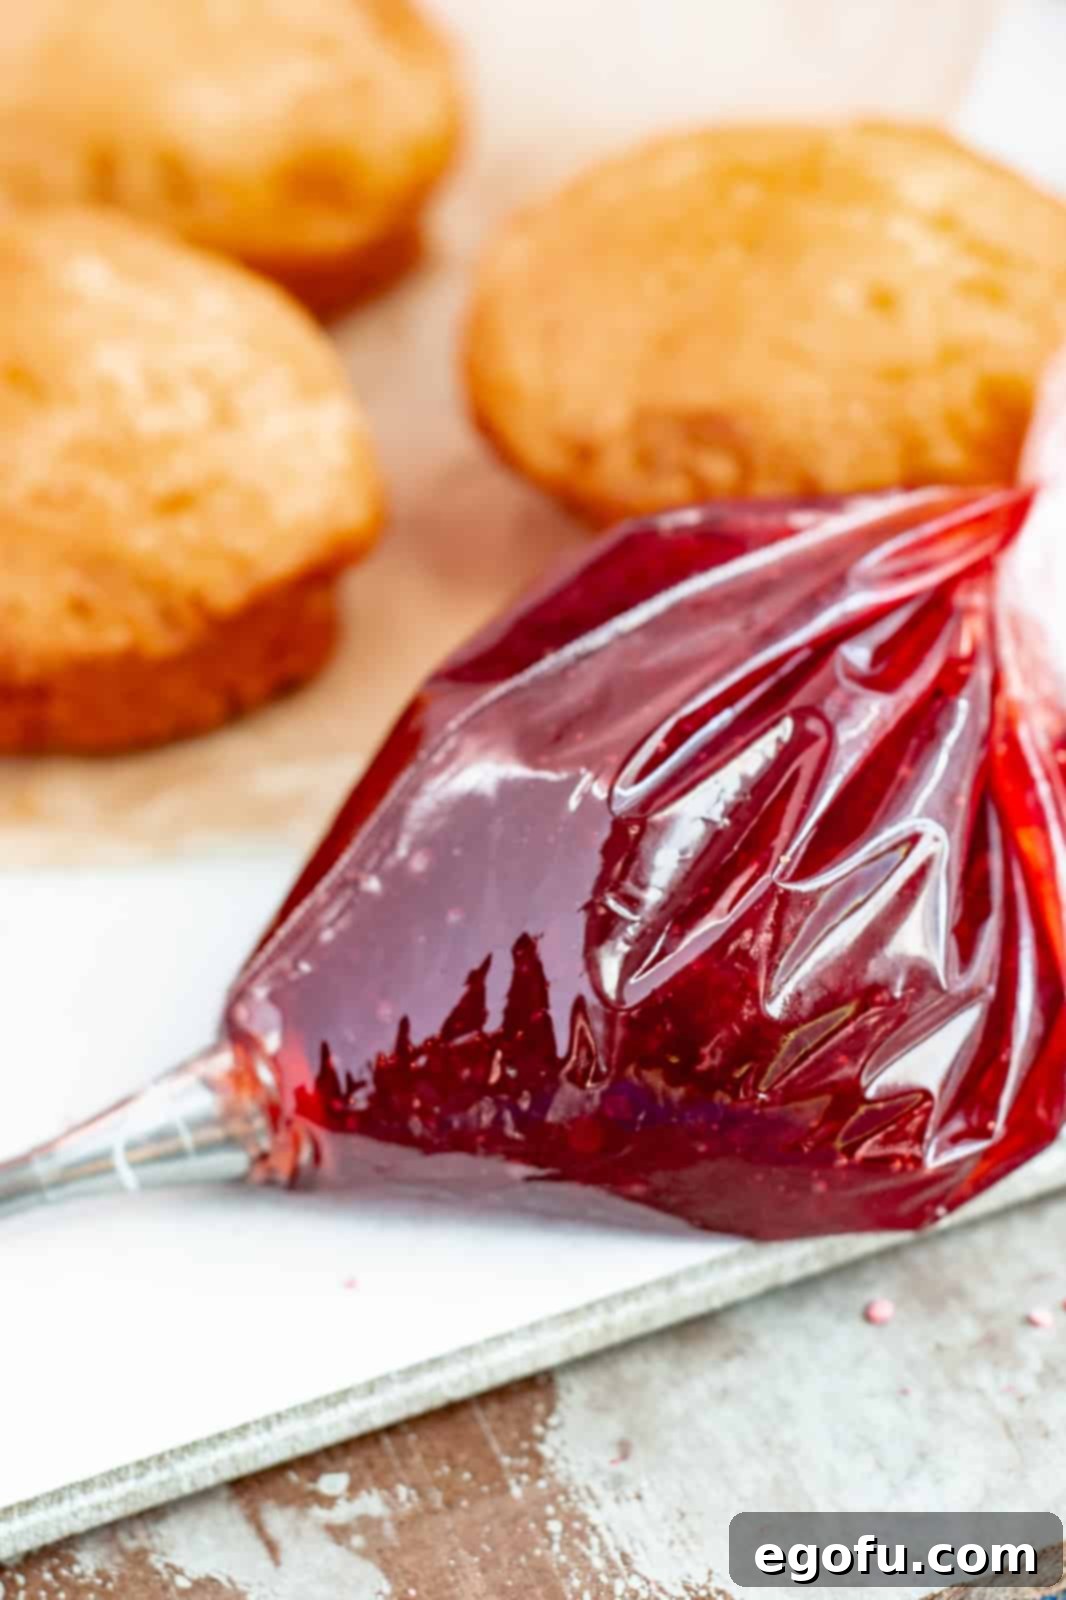
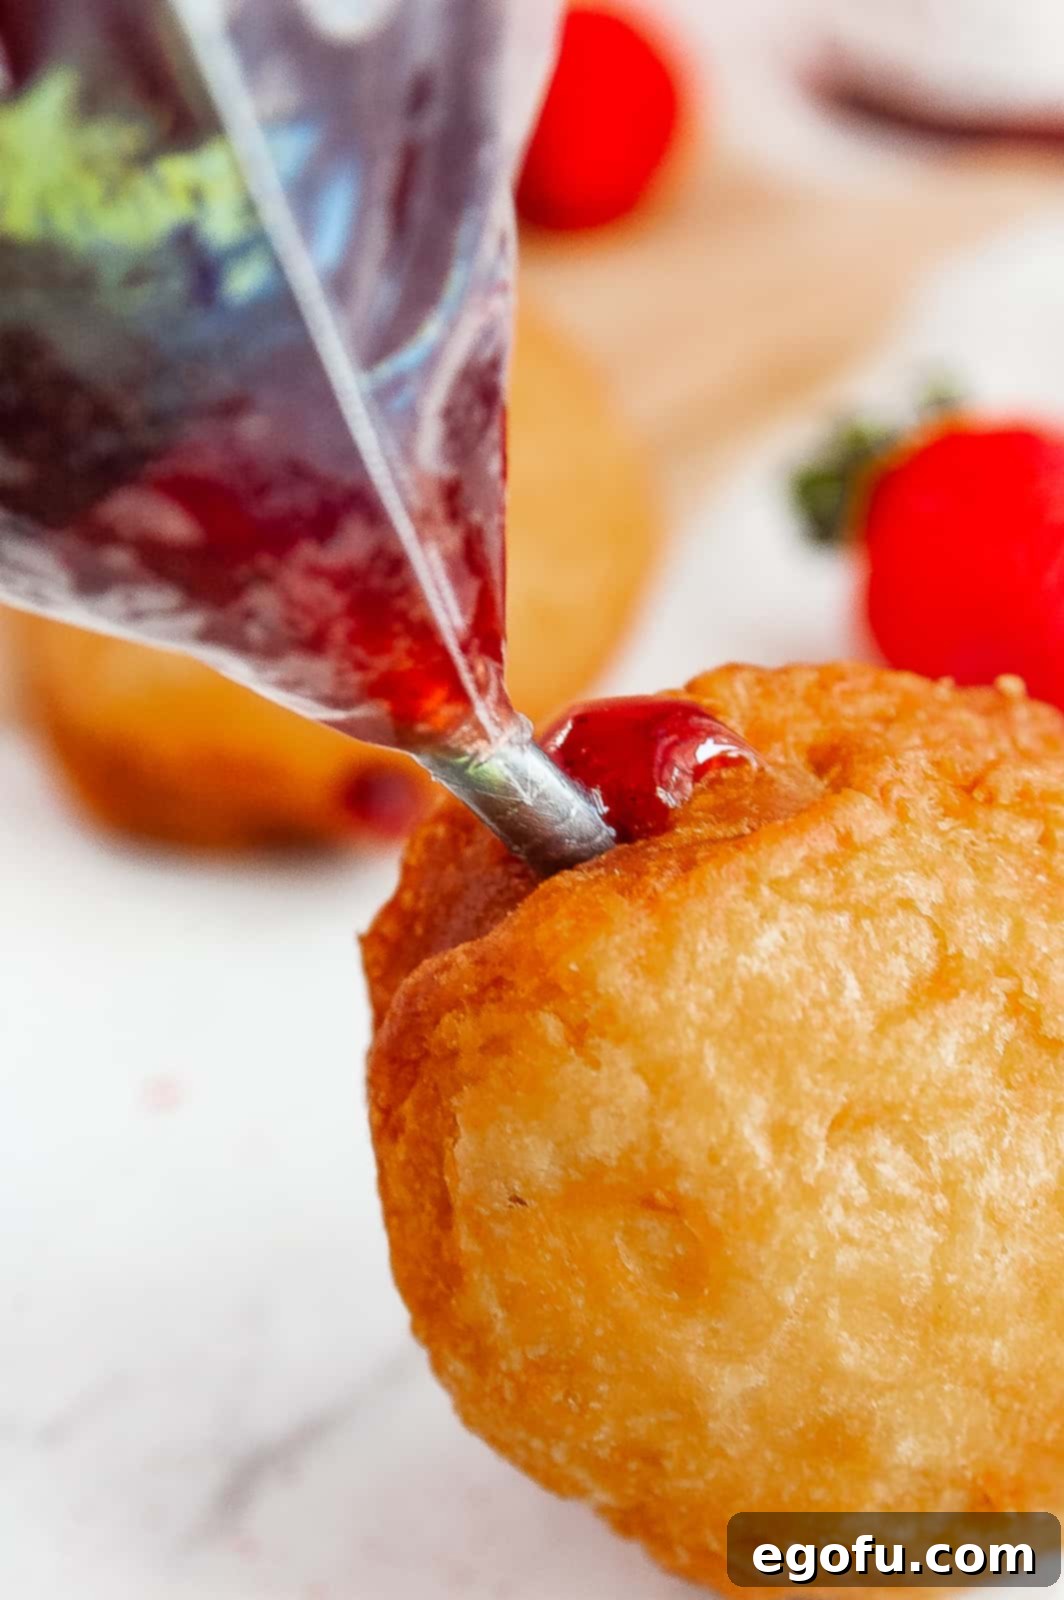
Once the donuts have completely cooled, it’s time for the fun part: filling them! If you have a piping bag, fit it with a bismark tip or a cream piping nozzle. Scoop your strawberry jelly (or preferred filling) into the piping bag. If you’re using a zip-top bag, fill one corner with jelly and snip a small hole. Insert the tip of your piping bag (or the snip of your zip-top bag) into one edge of each donut. Gently squeeze the bag to fill the donut with jelly. You’ll feel the donut slightly plump up as it fills. Be careful not to overfill, as the jelly might burst out. Aim for a generous but controlled amount in each donut.
7. Crafting the Silky Smooth Glaze
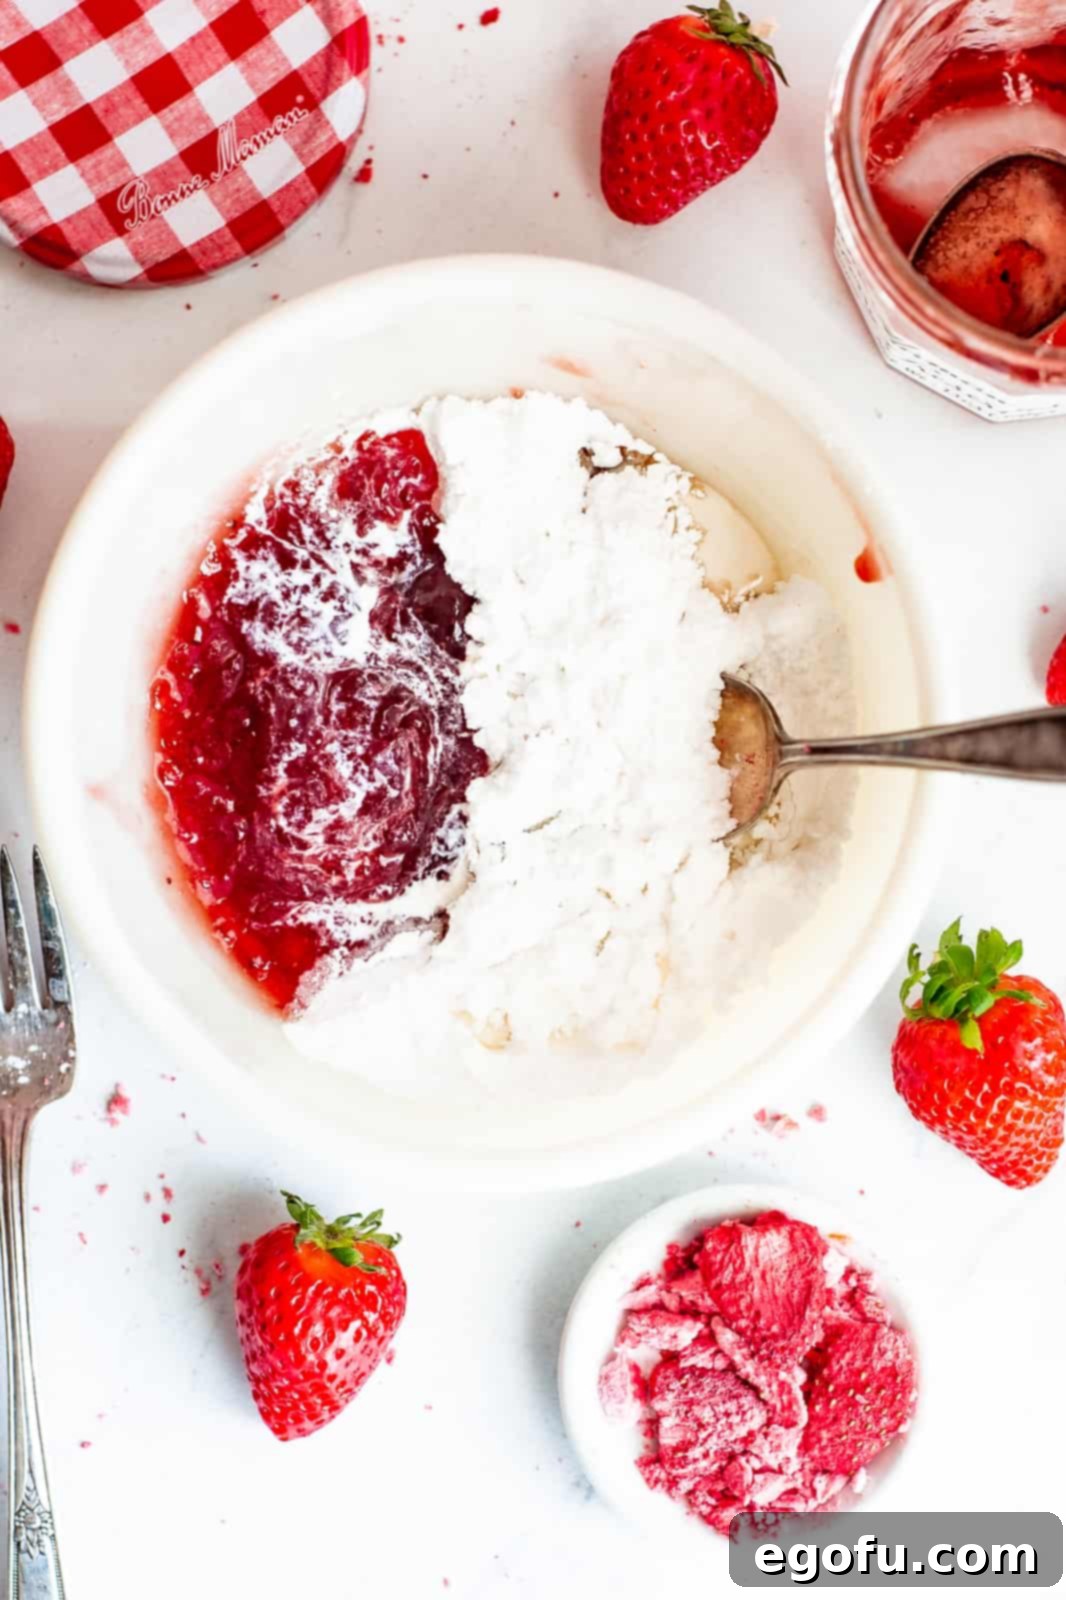
Now, let’s prepare the irresistible glaze. Sift the powdered sugar into a medium-sized mixing bowl. Sifting is an important step as it removes any lumps, ensuring a perfectly smooth glaze. Add one tablespoon of strawberry jelly (this adds a lovely flavor and a hint of pink color) and 1-2 tablespoons of heavy cream (or water) to the powdered sugar. Begin with one tablespoon of liquid and whisk everything together vigorously until the mixture is completely smooth and reaches your desired consistency. If the glaze is too thick, add more cream or water a tiny bit at a time until it’s pourable but still opaque enough to coat the donuts. If it’s too thin, sift in a little more powdered sugar.
8. Glazing for that Perfect Finish
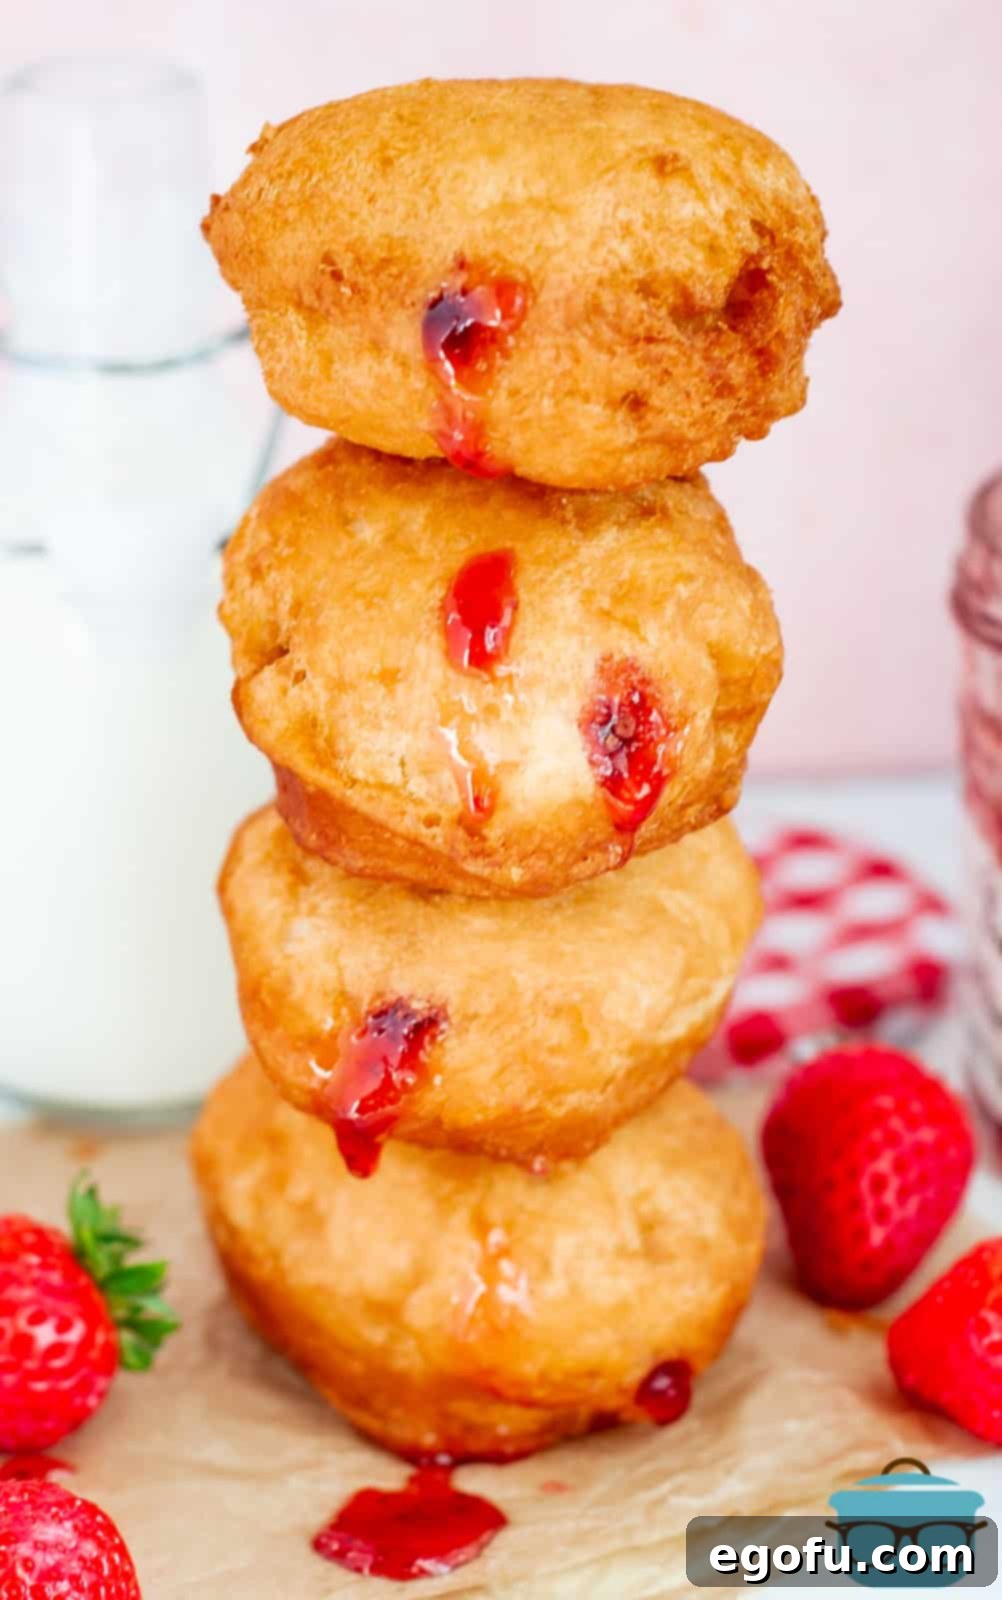
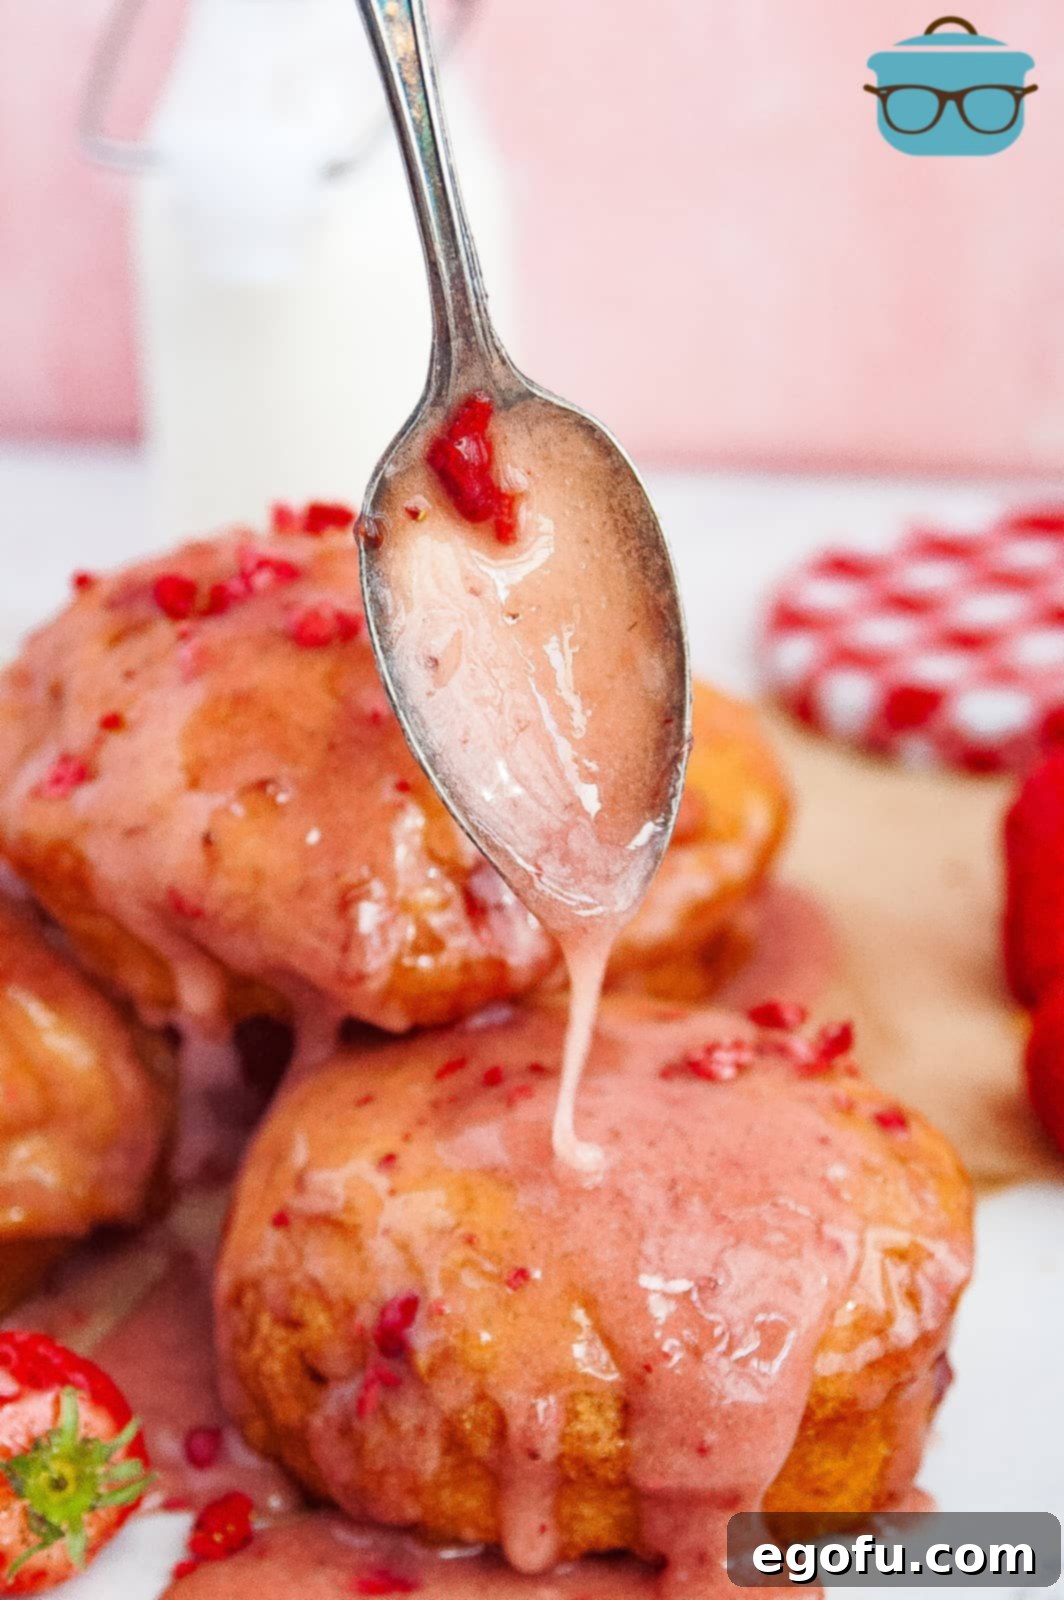
Once your glaze is ready and your donuts are filled, it’s time for the final touch. Take one filled donut and carefully dunk one of its flat sides into the glaze. Ensure it’s evenly coated. Lift the donut from the glaze and allow any excess glaze to drip off back into the bowl. This helps prevent thick, messy drips and ensures a neat, attractive finish. Repeat this process with each of the remaining donuts, glazing them one by one until they are all beautifully coated. Place the glazed, filled donuts back onto the cooling rack, making sure they are spaced apart to allow the glaze to set properly without sticking.
9. The Final Touch: Serve and Enjoy!
Allow the glazed donuts to sit on the cooling rack for a few minutes, giving the glaze time to firm up slightly. Once the glaze is no longer sticky to the touch, your Strawberry Jelly Filled Biscuit Donuts are ready to be served! These are truly best enjoyed fresh and slightly warm or at room temperature, capturing the perfect balance of fluffy biscuit, sweet jelly, and smooth glaze. Get ready for a chorus of delighted “Mmmms”!
More Delicious Donut Recipes to Explore
If you’ve fallen in love with the ease and deliciousness of these homemade biscuit donuts, you’re in for a treat! There are so many other fantastic donut recipes to discover, each offering a unique flavor and baking experience. Whether you prefer fried, baked, or air-fried, there’s a donut out there for every craving. Don’t stop at strawberry jelly; explore new flavors and techniques to expand your home bakery repertoire.
- Air Fryer Biscuit Donuts
- Baked Pumpkin Donuts
- 2-Ingredient Baked Red Velvet Donuts
- Apple Cider Donut Holes
- Baked Apple Cider Donuts

Strawberry Jelly Filled Biscuit Donuts
Print
Pin
Rate
5 minutes
15 minutes
20 minutes
8
Brandie Skibinski
Prevent your screen from going dark
Ingredients
- 2 cups vegetable oil
- 16.3 ounce can refrigerated biscuits
- 12 ounces strawberry jelly jam, or preserves
- 1 cup powdered sugar
- 1 tablespoon strawberry jelly jam, or preserves
- 1-2 tablespoons heavy cream or water
Instructions
- Line a baking sheet with paper towels, then place a cooling rack over the paper towels. Set aside.
- Heat the oil in a medium pot over medium heat.
- Using your hands and working around the edges, gently shape each biscuit into an oval or egg shape.
- Carefully lower 2-3 formed biscuits into the hot oil and allow to fry for 2-3 minutes.
- When the underside of each biscuit is golden brown, use a pair of tongs to gently flip them over and fry the uncooked sides until golden brown (again, 2-3 minutes).
- Use a pair of tongs or a large slotted spoon to remove the biscuits from the hot oil, then place them on the prepared cooling rack to drain and cool. Continue working in batches of 2-3 biscuits until all of your donuts are finished frying.
- To make the glaze, sift the powdered sugar into a medium sized bowl. Add the additional tablespoon of jelly and the heavy cream to the powdered sugar, then whisk together until smooth.
- When the donuts have cooled completely, fit a piping bag with a bismark tip or cream piping nozzle, and fill the bag with the strawberry jelly.
- Insert the piping tip into one edge of each donut and squeeze gently to fill the donuts with jelly.
- Dunk one flat side of a donut into the glaze, then allow any excess glaze to drain off. Repeat until each donut is glazed.
- Return the glazed, filled donuts to the cooling rack. Allow the glaze to firm slightly, then serve.
Video
Notes
- Make sure to use an 8 count can of biscuits.
- We like to use the buttermilk kind, but any kind can be used.
- These can be filled with any of your favorite flavors.
Breakfast, Dessert
American
Nutrition
Nutritional Disclaimer
“The Country Cook” is not a dietician or nutritionist, and any nutritional information shared is an estimate. If calorie count and other nutritional values are important to you, we recommend running the ingredients through whichever online nutritional calculator you prefer. Calories and other nutritional values can vary quite a bit depending on which brands were used.
