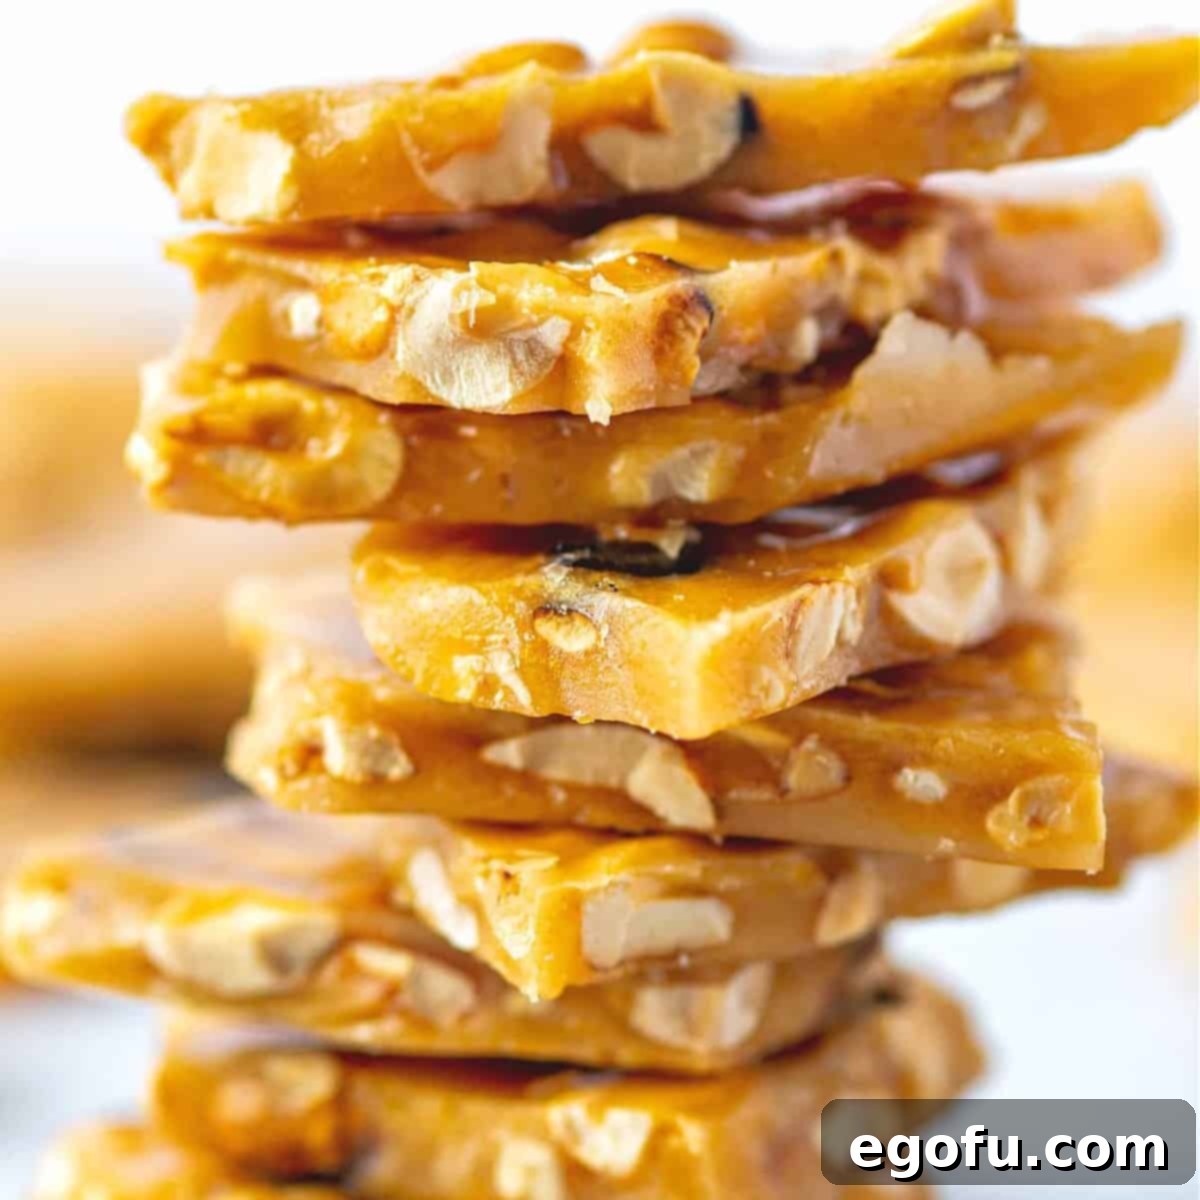
Welcome to the ultimate guide for creating the most delightful and crisp homemade peanut brittle! This classic confectionery, renowned for its irresistible crunch, buttery flavor, and abundance of roasted peanuts, isn’t just a treat; it’s a heartfelt gift that brings warmth and joy to any occasion. Forget the store-bought versions – nothing compares to the fresh, artisanal quality of brittle made right in your own kitchen. Whether you’re aiming to impress loved ones with a thoughtful present or simply indulge in a nostalgic candy-making experience, this foolproof recipe promises delicious results every single time. Prepare to embark on a sweet adventure that culminates in golden, shimmering shards of peanut perfection, a true testament to the timeless appeal of homemade sweets.
Mastering the Art of Homemade Peanut Brittle
Peanut brittle stands out as one of those cherished homemade gifts that consistently brings smiles. It’s a delightful surprise, often something we don’t think to make for ourselves, which makes receiving a batch of homemade brittle all the more special. This recipe has been refined over time to ensure success, delivering a crisp, buttery, and utterly delicious candy with every attempt. While candy making might seem intimidating at first, with a few key tools and a dash of patience, you’ll be creating professional-quality brittle in no time. This comprehensive guide will walk you through each step, ensuring you gain confidence and skill in crafting this beloved treat, transforming simple ingredients into a confectionery masterpiece.
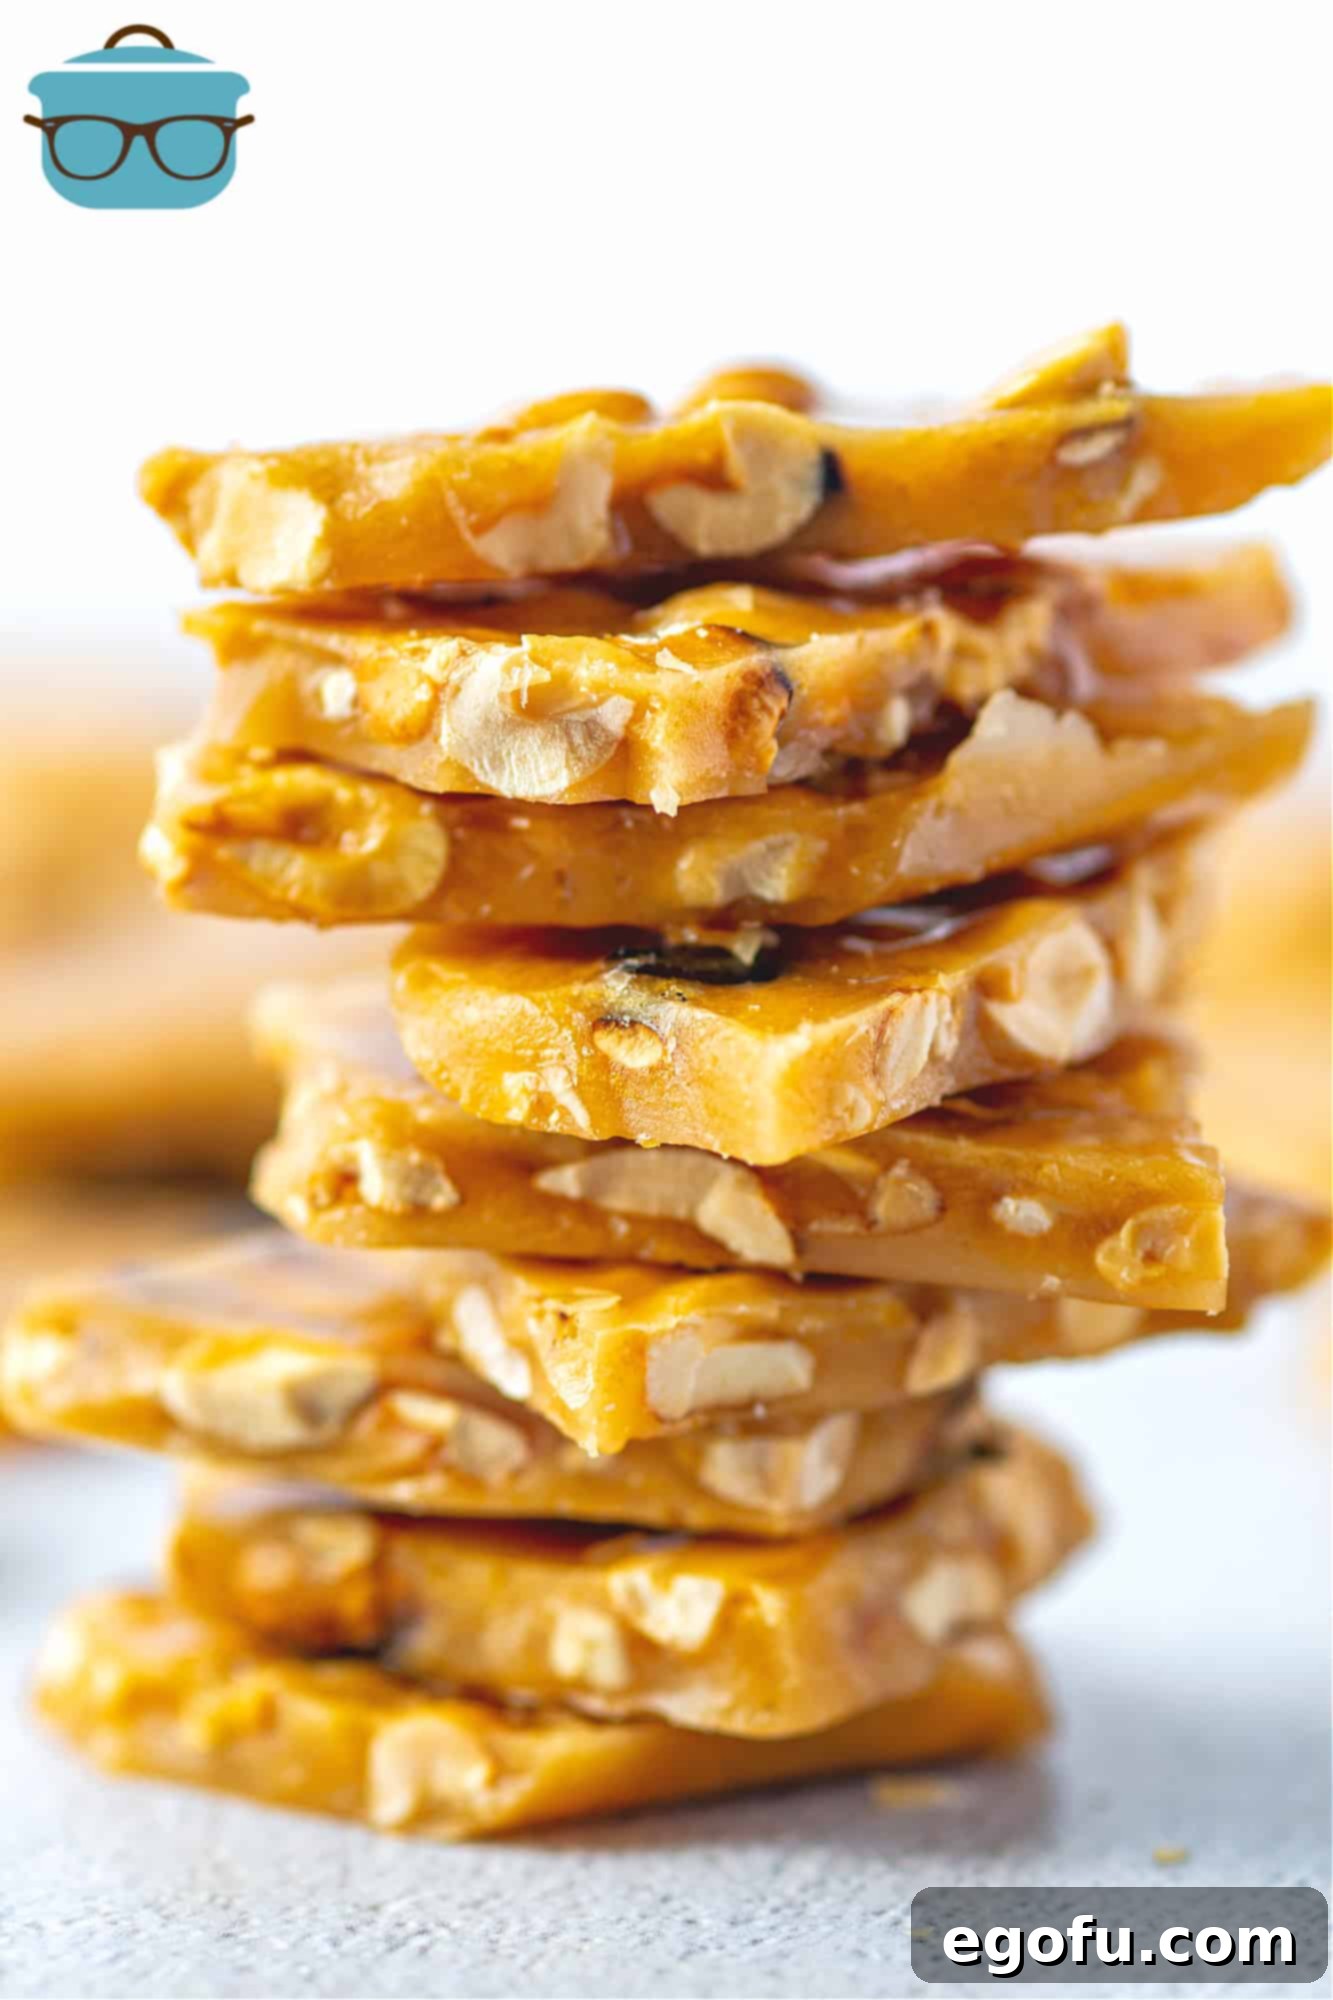
Frequently Asked Questions for Perfect Peanut Brittle
While this recipe is straightforward, I highly recommend it for individuals who are already comfortable using a candy thermometer. Candy making requires precision, and a thermometer is your most reliable tool for achieving the correct sugar stages. If you’re a novice baker attempting this for the first first time, or new to using a candy thermometer, please understand that it might take a couple of attempts to perfect the technique. The most crucial advice is to be patient, focused, and never leave your pot unattended. Many aspiring candy makers have achieved perfect results on their first try by following the instructions carefully and diligently monitoring the temperature. Don’t be discouraged by initial challenges; the reward of homemade peanut brittle is well worth the effort!
For consistent and successful candy making, especially brittle, using a reliable candy thermometer is absolutely essential, particularly if you are not an experienced confectioner. Relying solely on visual cues can be misleading and often results in wasted ingredients and a less-than-perfect outcome. The mixture must reach the “hard crack” stage, which occurs precisely at 300°F (150°C). At this temperature, the sugar syrup, when dropped into cold water, will immediately form brittle, hard threads that snap easily. Without a thermometer, it’s nearly impossible to confirm this critical stage. Experienced candy makers might have an intuitive sense for when it’s ready, but for most of us, a candy thermometer is the only sure-fire way to guarantee your brittle will set properly and achieve its characteristic crisp texture. Therefore, if you do not plan to use a candy thermometer, this recipe is not recommended for you.
There are several common reasons why peanut brittle might not achieve its desired hard, snappy texture:
- Insufficient Cooking Time/Temperature: Peanut brittle fundamentally relies on the sugar mixture reaching the precise “hard crack” stage, which is around 300°F (150°C). If the mixture is removed from the heat too soon or if the temperature never quite reaches this point, the sugar crystals won’t align correctly, and the candy will remain soft and chewy, rather than brittle.
- Improper Heat Setting: It’s vital to cook the sugar mixture over a consistent medium heat. Too low, and it will take excessively long to reach the hard crack stage, potentially causing other issues. Too high, and the sugar can burn before reaching the desired temperature, imparting a bitter taste. A steady medium heat allows for gradual and even cooking.
- Mixture Too Thick: If the prepared peanut brittle is spread too thickly on the baking sheet, it will retain heat longer and cool unevenly, preventing it from hardening uniformly. Always ensure you use a large enough pan (as specified in the recipe) to spread the mixture as thinly as possible, allowing for rapid and complete cooling.
- High Humidity: Environmental humidity is a significant enemy of candy making. Sugar is hygroscopic, meaning it absorbs moisture from the air. High humidity can drastically impede the hardening process, causing the brittle to remain sticky or soft, even if cooked to the correct temperature. Ideally, make peanut brittle on a dry day.
If your brittle hasn’t hardened, you might be able to salvage it by gently reheating the mixture over low heat, adding a touch of water if it’s too solid, and then carefully cooking it back up to the hard crack stage (300°F) with your candy thermometer. However, if it has already cooled and slightly hardened into a chewy mass, it may be difficult to fully correct its texture.
Preventing sugar from burning is crucial for delicious brittle. Here are key strategies:
- Constant Monitoring and Stirring: Never turn your back on boiling sugar. Stirring constantly with a wooden spoon or a heatproof spatula helps to distribute heat evenly and prevents sugar crystals from sticking to the bottom and scorching. Pay close attention to the color, which should progress from clear to a light golden, then to a rich amber.
- Use a Heavy-Bottomed Pan: A good quality, heavy-bottomed saucepan is indispensable. Its thick base distributes heat much more evenly than thinner pans, significantly reducing hot spots where sugar is prone to burning.
- Medium Heat Setting: Maintain a consistent medium heat throughout the cooking process. High heat accelerates cooking but dramatically increases the risk of burning, especially once the mixture thickens.
- Clean Sides of the Pan: As the sugar mixture boils, crystals can form on the sides of the pan. These can act as nucleation points, causing the entire batch to crystallize or burn. Use a wet pastry brush to gently wash down the sides of the pan with water, dissolving any stray crystals.
- Quick Response: If you notice the sugar starting to brown too quickly or smell even a hint of burning, immediately remove the pan from the heat while continuing to stir vigorously. Sometimes, removing it from the heat for a few moments can prevent further burning while you adjust your stovetop temperature.
Baking soda (sodium bicarbonate) is a deceptively simple yet critically important ingredient in peanut brittle, responsible for its signature light, airy, and delicate crispness. When baking soda is added to the extremely hot sugar mixture, it reacts rapidly with the acidic components present (such as the corn syrup). This chemical reaction releases tiny bubbles of carbon dioxide gas. These gases become trapped within the molten sugar, creating a myriad of small air pockets throughout the candy. As the brittle cools and hardens, these air pockets give it a porous, less dense structure, making it much easier to bite into and break apart, rather than being rock-hard and chewy. It essentially “aerates” the candy, contributing to that satisfying crunch.
Proper storage is key to maintaining the freshness and crispness of your homemade peanut brittle. Once the brittle has completely cooled and hardened, break it into irregular pieces of your desired size. Store these pieces in an airtight container at room temperature. It’s crucial that the container is truly airtight to protect the candy from moisture in the air, which can cause it to become sticky or soft over time. To prevent the pieces from sticking together, especially in warmer climates, you can layer them with sheets of wax paper or parchment paper. Stored correctly, homemade peanut brittle will remain deliciously crisp for up to two weeks. Avoid refrigerating brittle, as the condensation can introduce moisture and degrade its texture.

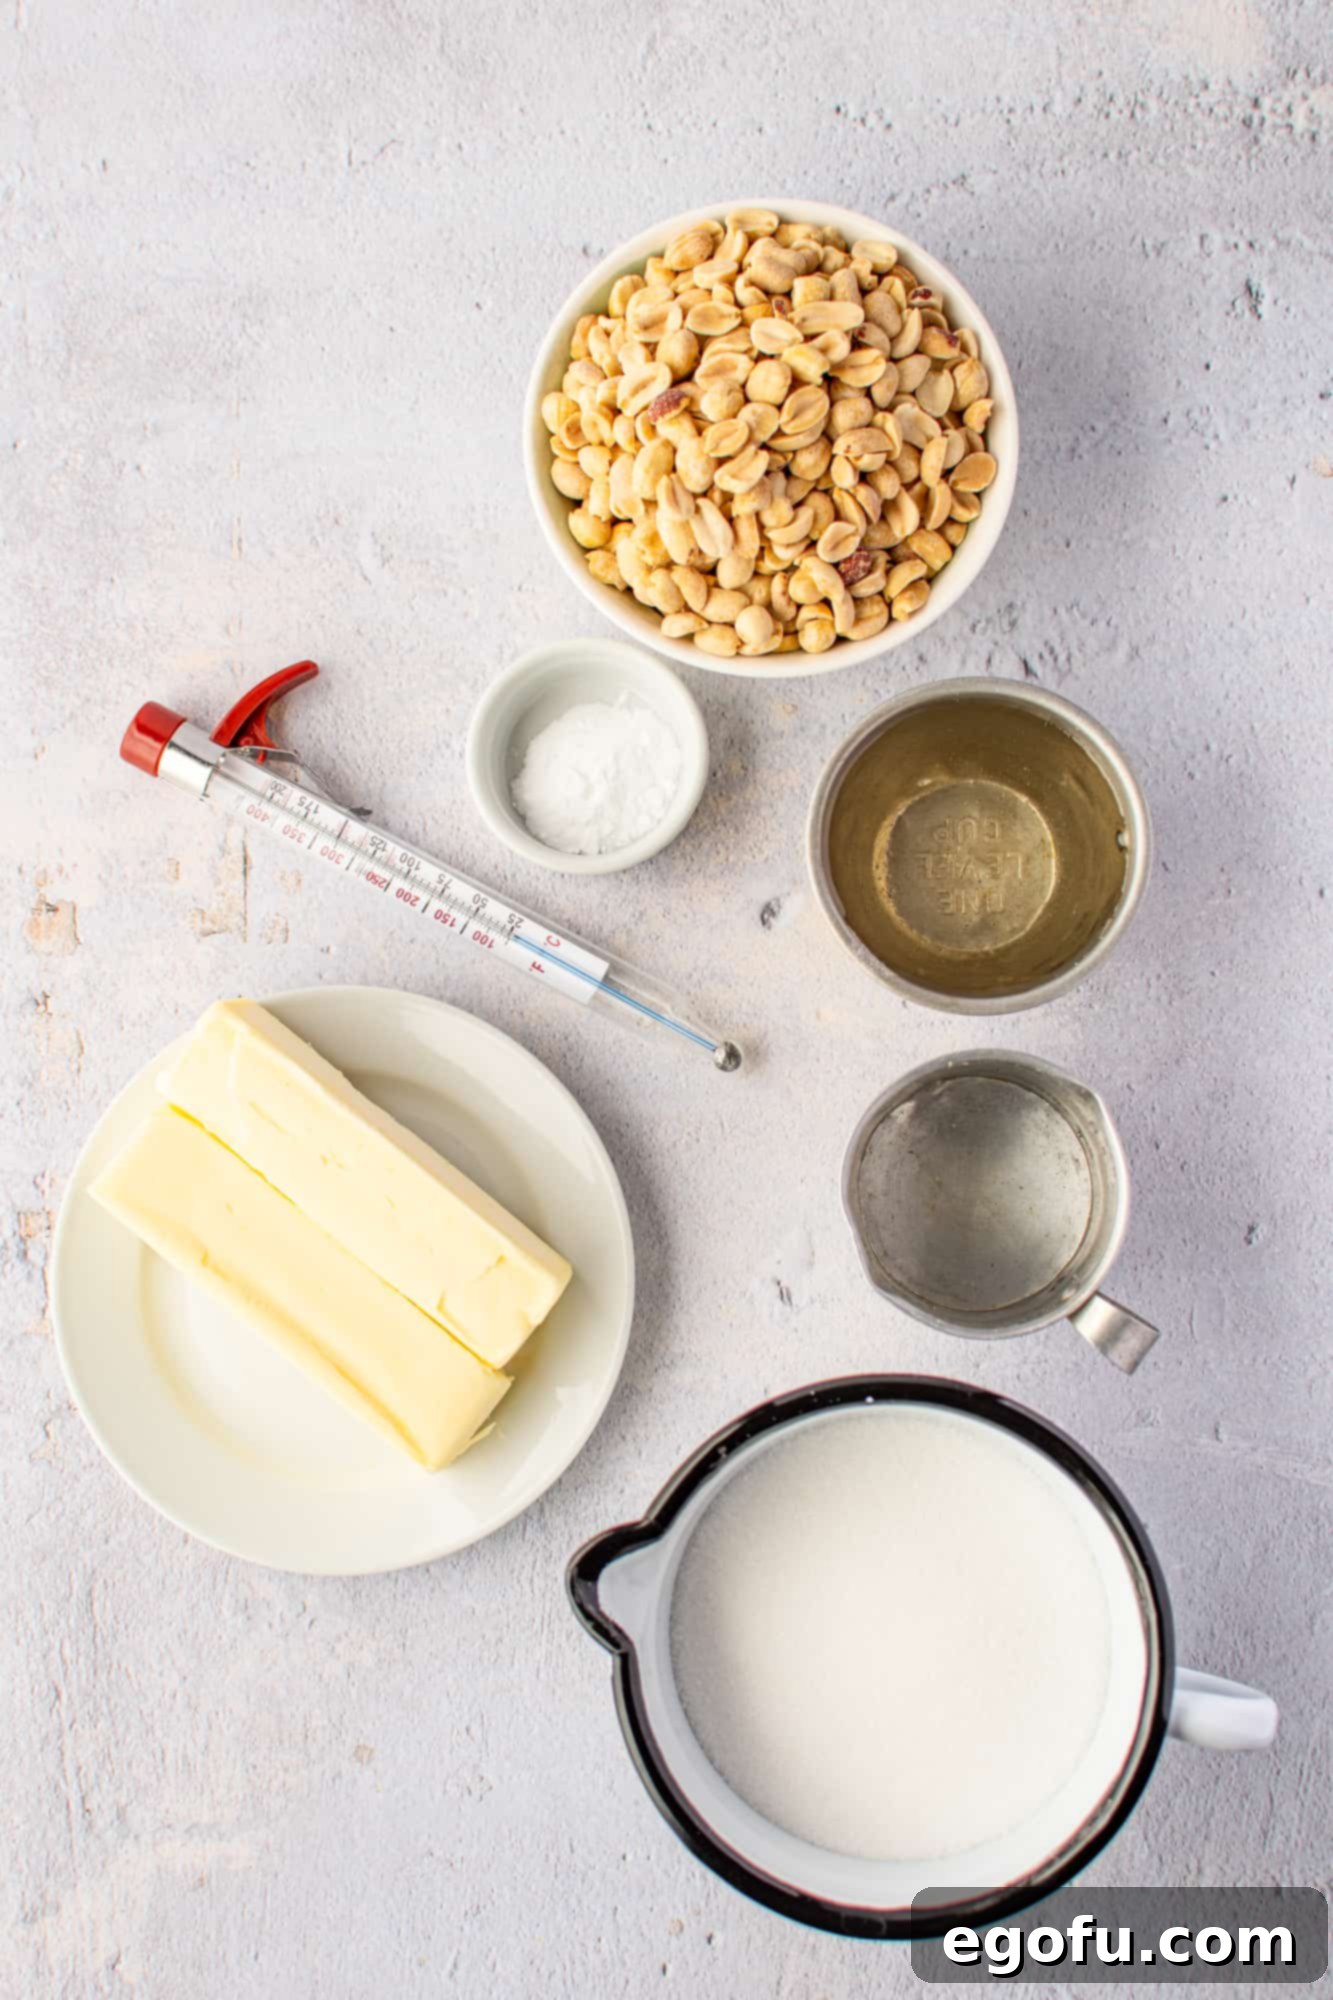
Essential Ingredients for Your Perfect Peanut Brittle
Crafting perfect peanut brittle starts with understanding the role of each ingredient. Quality matters, and careful selection will ensure the best possible outcome for your crunchy, buttery treat.
- Granulated Sugar: This is the backbone of your brittle, providing the necessary sweetness and structure. There are no shortcuts here; using real granulated sugar is essential for achieving the hard crack stage and the characteristic brittle texture. Sugar substitutes will not behave in the same way and will not yield the desired results.
- Light Corn Syrup: Corn syrup is not high-fructose corn syrup, and it serves a critical purpose in candy making. It acts as an invert sugar, preventing the granulated sugar from crystallizing too quickly and creating a smooth, clear, and stable syrup. Do not substitute corn syrup with other liquid sweeteners, as they will alter the texture and consistency of the brittle.
- Salt: A small amount of salt is vital to balance the intense sweetness of the sugar and corn syrup. It enhances the overall flavor profile, adding a subtle savory note that makes the brittle even more addictive. Without salt, the candy can taste one-dimensional.
- Unsalted Butter: Butter contributes richness, a beautiful golden color, and a creamy mouthfeel that contrasts with the brittle’s crispness. Unsalted butter is preferred as it allows you to control the exact amount of salt in the recipe. If you only have salted butter on hand, simply omit the ¼ teaspoon of added salt from the recipe.
- Unsalted, Dry Roasted Peanuts: The star of the show! Dry roasted peanuts offer a deeper, nuttier flavor and superior crunch compared to raw peanuts. While you *could* technically use raw peanuts, some individuals find them harder to digest, and they don’t contribute the same depth of flavor. If you opt for salted roasted peanuts, be mindful of the added salt in the recipe and adjust accordingly to prevent your brittle from becoming overly salty.
- Baking Soda: As discussed in the FAQs, baking soda is essential for creating the light, airy, and delicate texture of perfect peanut brittle. Ensure your baking soda is fresh and active for the best fizzing and aeration results. Expired baking soda will not produce the desired effect, resulting in dense, hard brittle.
- Water: Water helps to dissolve the sugar and corn syrup initially, allowing the mixture to heat evenly and slowly. It evaporates as the mixture boils, leaving behind concentrated sugar syrup ready to reach the hard crack stage.
How to Make Homemade Peanut Brittle: A Step-by-Step Guide
Crafting this classic candy is a rewarding process that requires attention and precision. Follow these detailed steps to achieve perfect, crispy peanut brittle every time.
- Prepare Your Workspace: Begin by lining a large cookie sheet (approximately 13×18 inches or similar size to ensure thin spreading) with parchment paper. This parchment paper is crucial for easy removal of the brittle. Lightly spray the parchment paper with a nonstick cooking spray. Peanut brittle is incredibly sticky, and this extra step ensures a smooth release from the pan, saving you considerable effort later. Have all your ingredients measured and ready, as the process moves quickly once the sugar starts cooking.
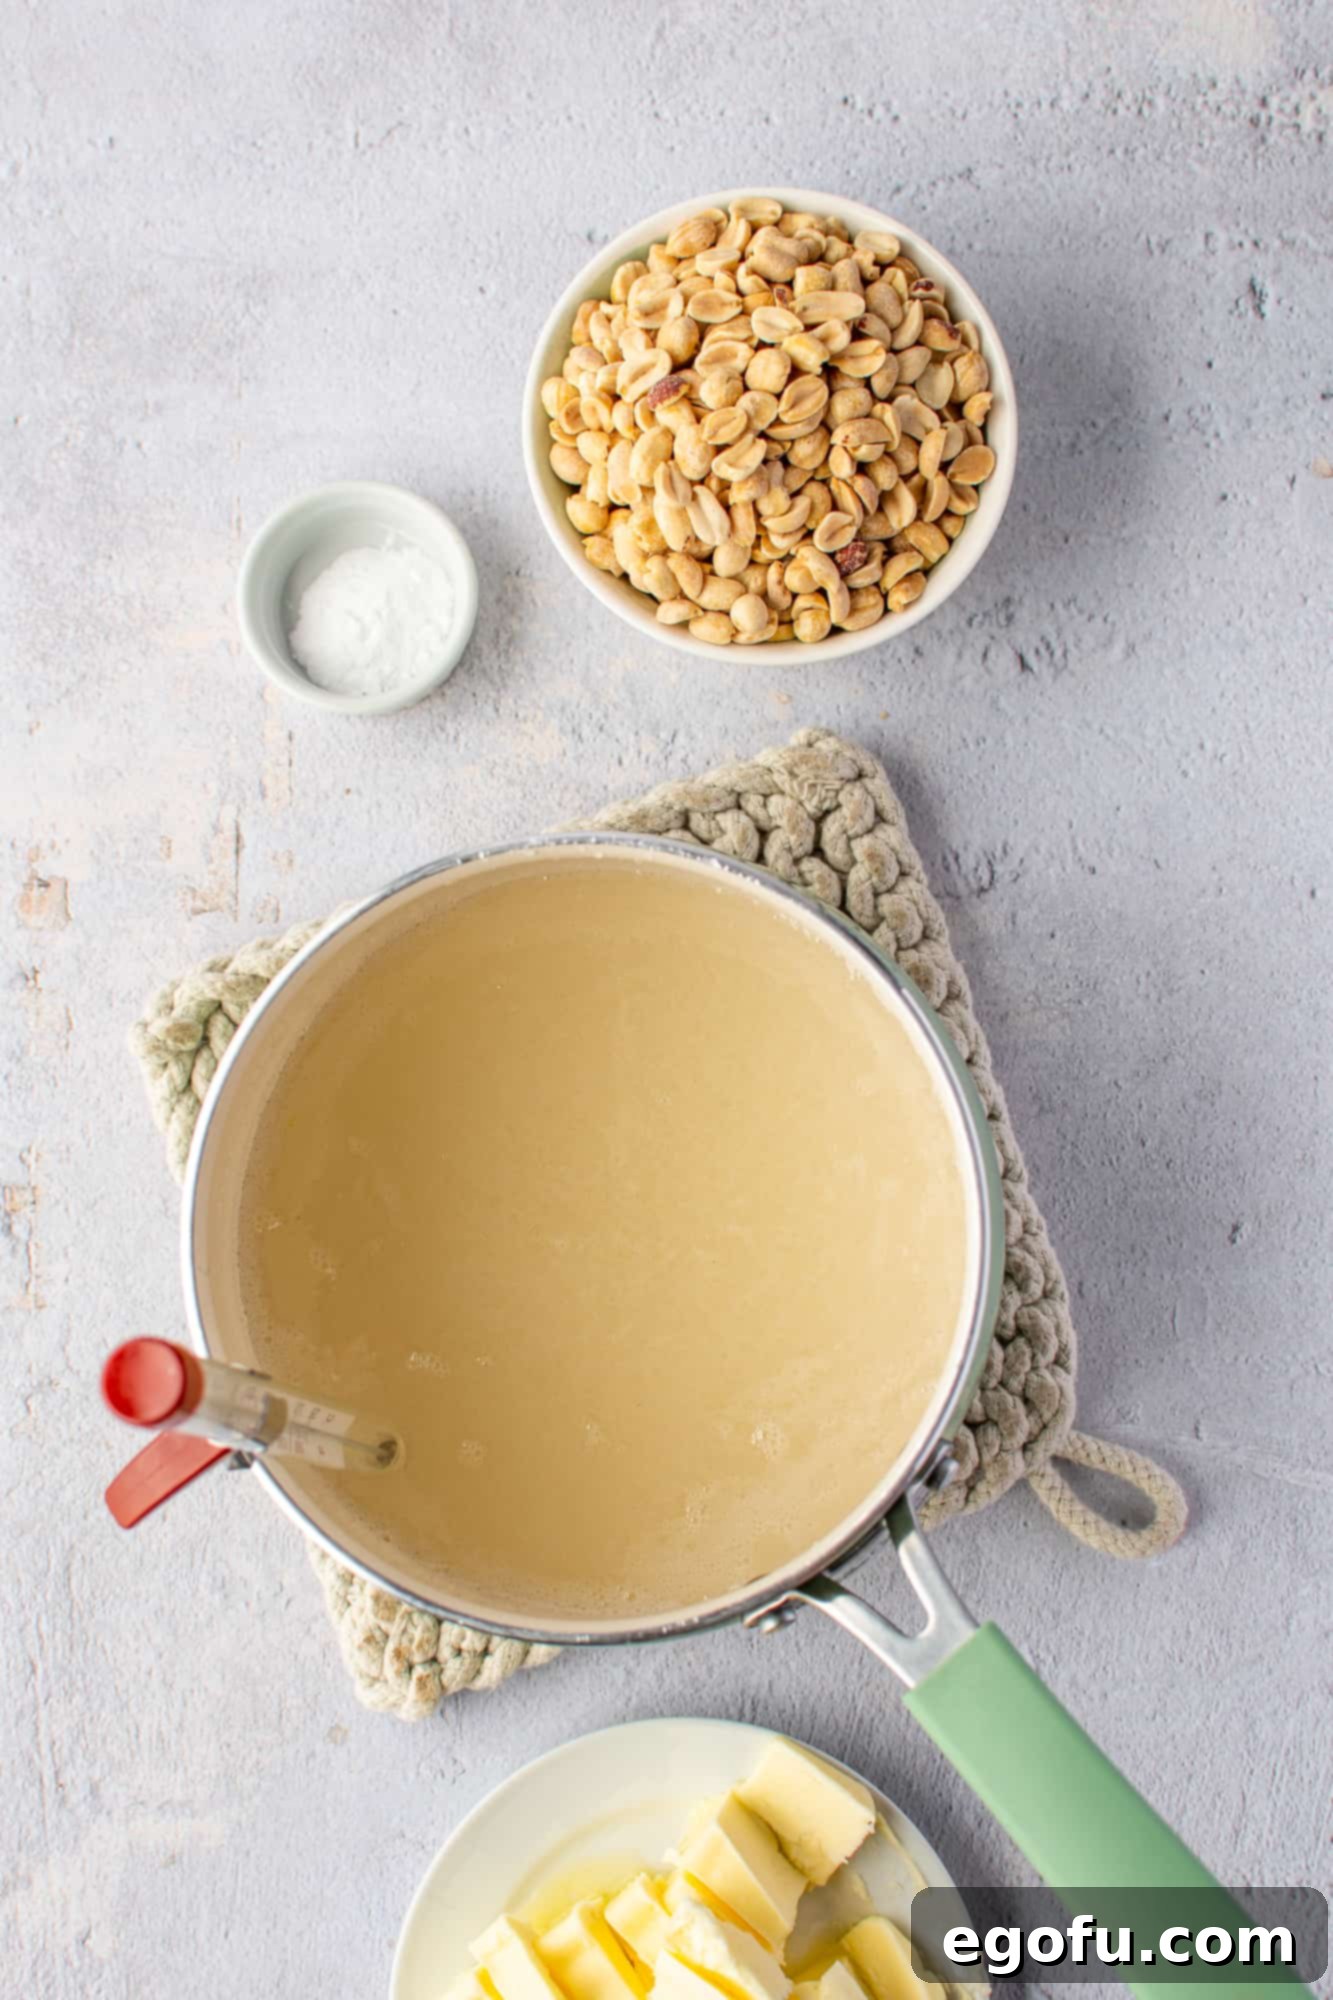
- Combine and Begin Boiling the Syrup: In a sturdy, medium-sized, heavy-bottomed saucepan, combine the 2 cups of granulated sugar, 1 cup of light corn syrup, ½ cup of water, and ¼ teaspoon of salt. Stir these ingredients thoroughly until the sugar is moistened and well combined. Place the saucepan over medium heat and bring the mixture to a rolling boil, stirring occasionally to ensure even heating and prevent sugar crystals from adhering to the sides of the pan. Clip your candy thermometer securely to the inside of the saucepan, making absolutely certain that the tip of the thermometer does not touch the bottom of the pan, as this will give an inaccurate temperature reading.
- Introduce the Butter: Continue to boil the sugar mixture. After about 6 to 7 minutes, or once the syrup has started boiling vigorously and the sugar is fully dissolved (the mixture will appear clear and bubbly), carefully add the 1 cup (2 sticks) of sliced unsalted butter to the saucepan. Stir gently but continuously with your heatproof spatula or wooden spoon until the butter is completely melted and thoroughly incorporated into the boiling sugar mixture. The mixture will become beautifully golden and smell wonderfully buttery.
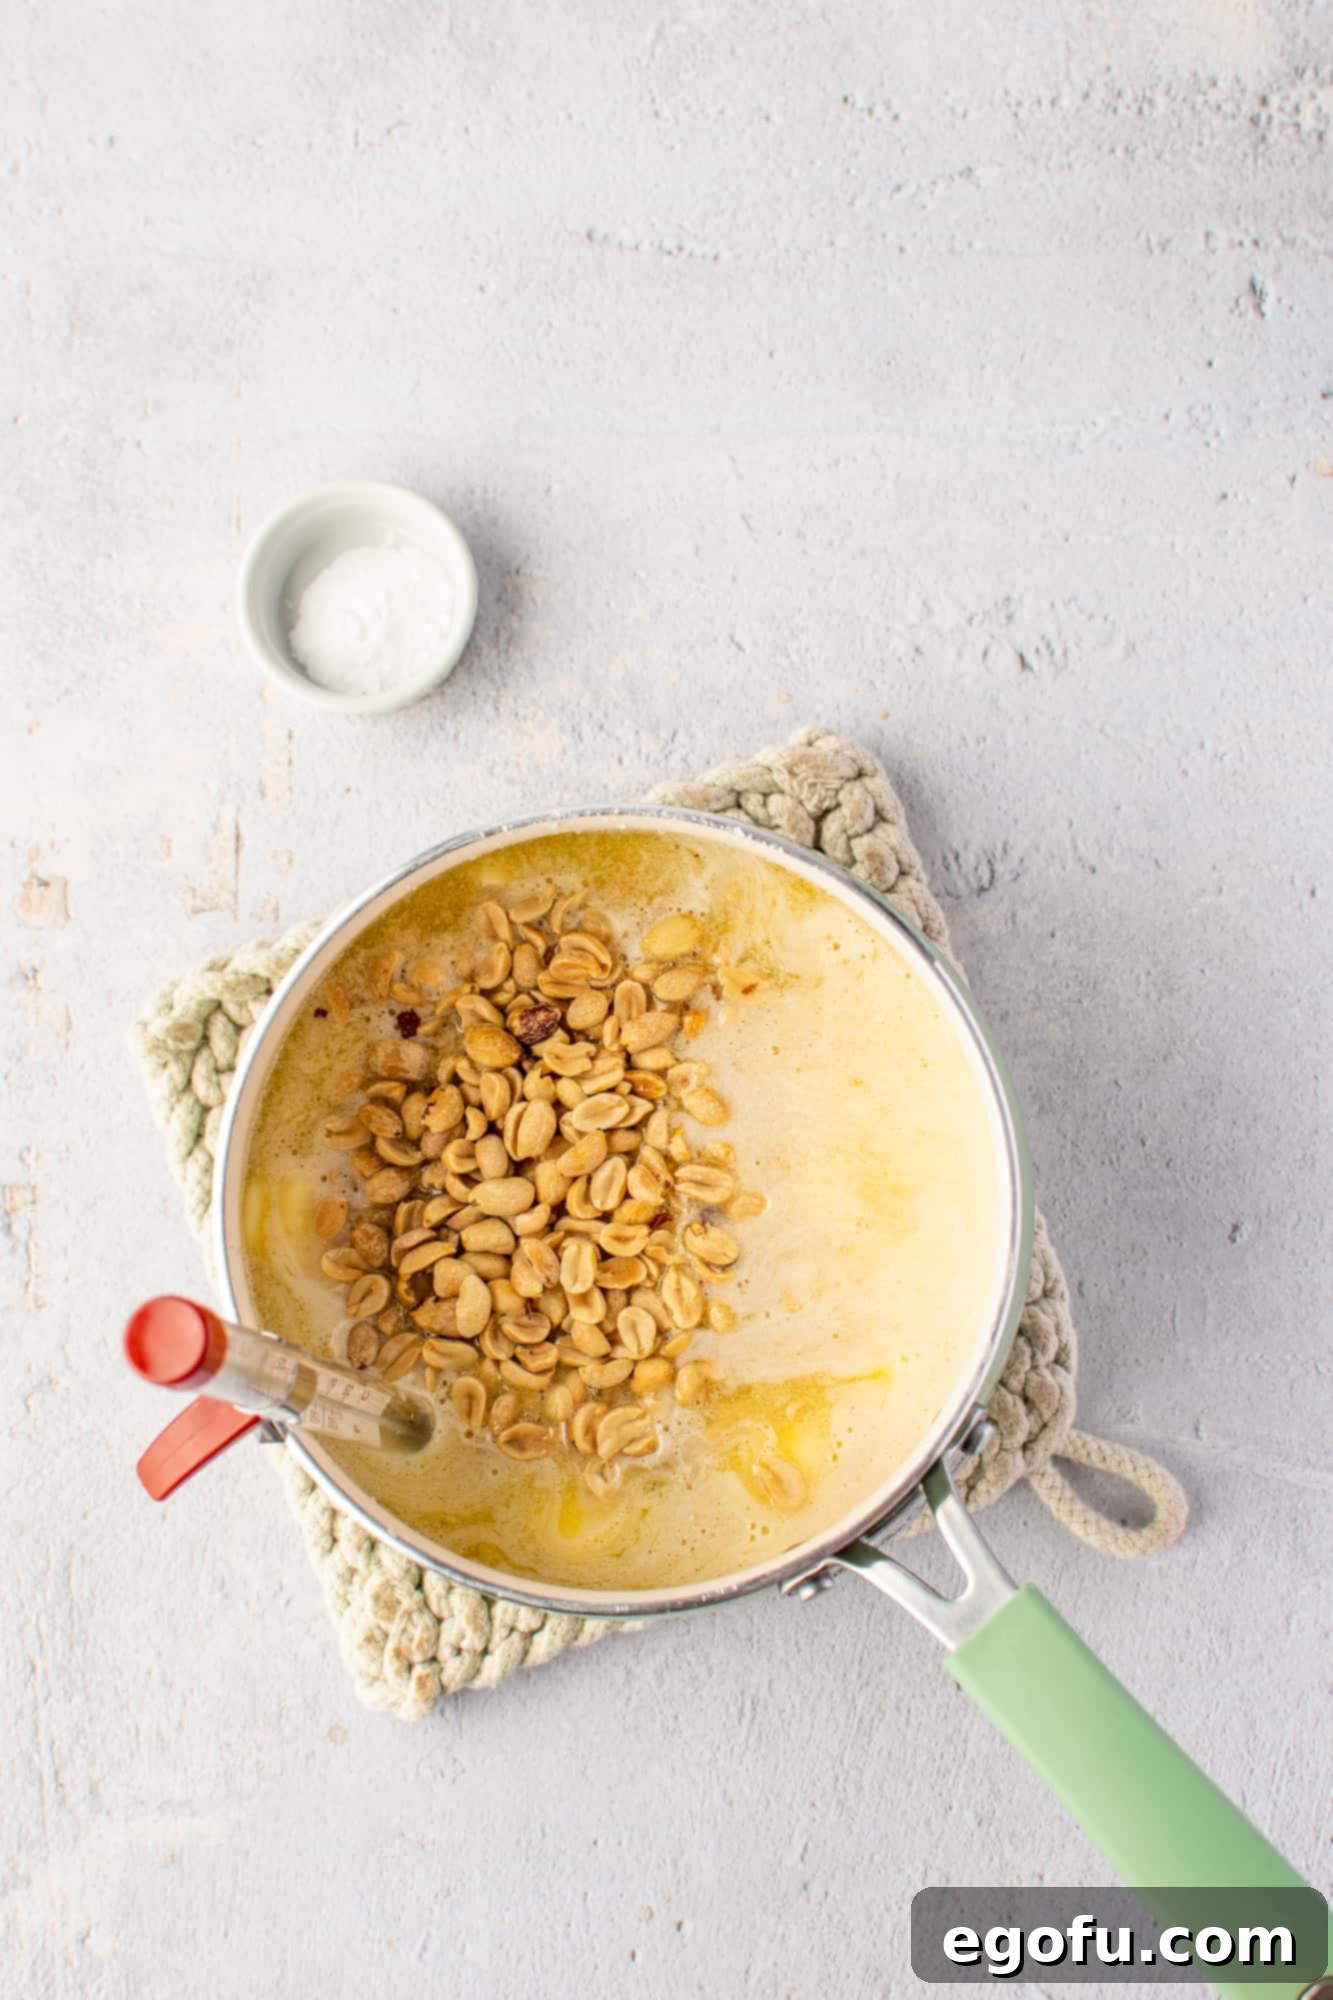
- Add the Peanuts at 280°F: Allow the butter-infused sugar mixture to return to a rolling boil. Continue to cook, stirring occasionally, until your candy thermometer registers 280°F (approximately 138°C). At this point, the syrup will have thickened considerably and taken on a richer, more amber hue. Once 280°F is reached, stir in the 2 ¼ cups of unsalted, dry roasted peanuts. Ensure the peanuts are evenly distributed throughout the syrup. This early addition allows the peanuts to heat up and become fully coated in the sugar, integrating perfectly into the brittle.
- Reach the Hard Crack Stage (300°F): Continue boiling the mixture with the peanuts, stirring constantly to prevent sticking and burning. This is the final and most critical stage. Watch your candy thermometer closely. The syrup will continue to darken to a deeper golden-brown color. Once the thermometer precisely reads 300°F (150°C), which is known as the “hard crack” stage, immediately remove the saucepan from the heat. The difference between 290°F and 300°F can be significant for the final texture, so be vigilant!
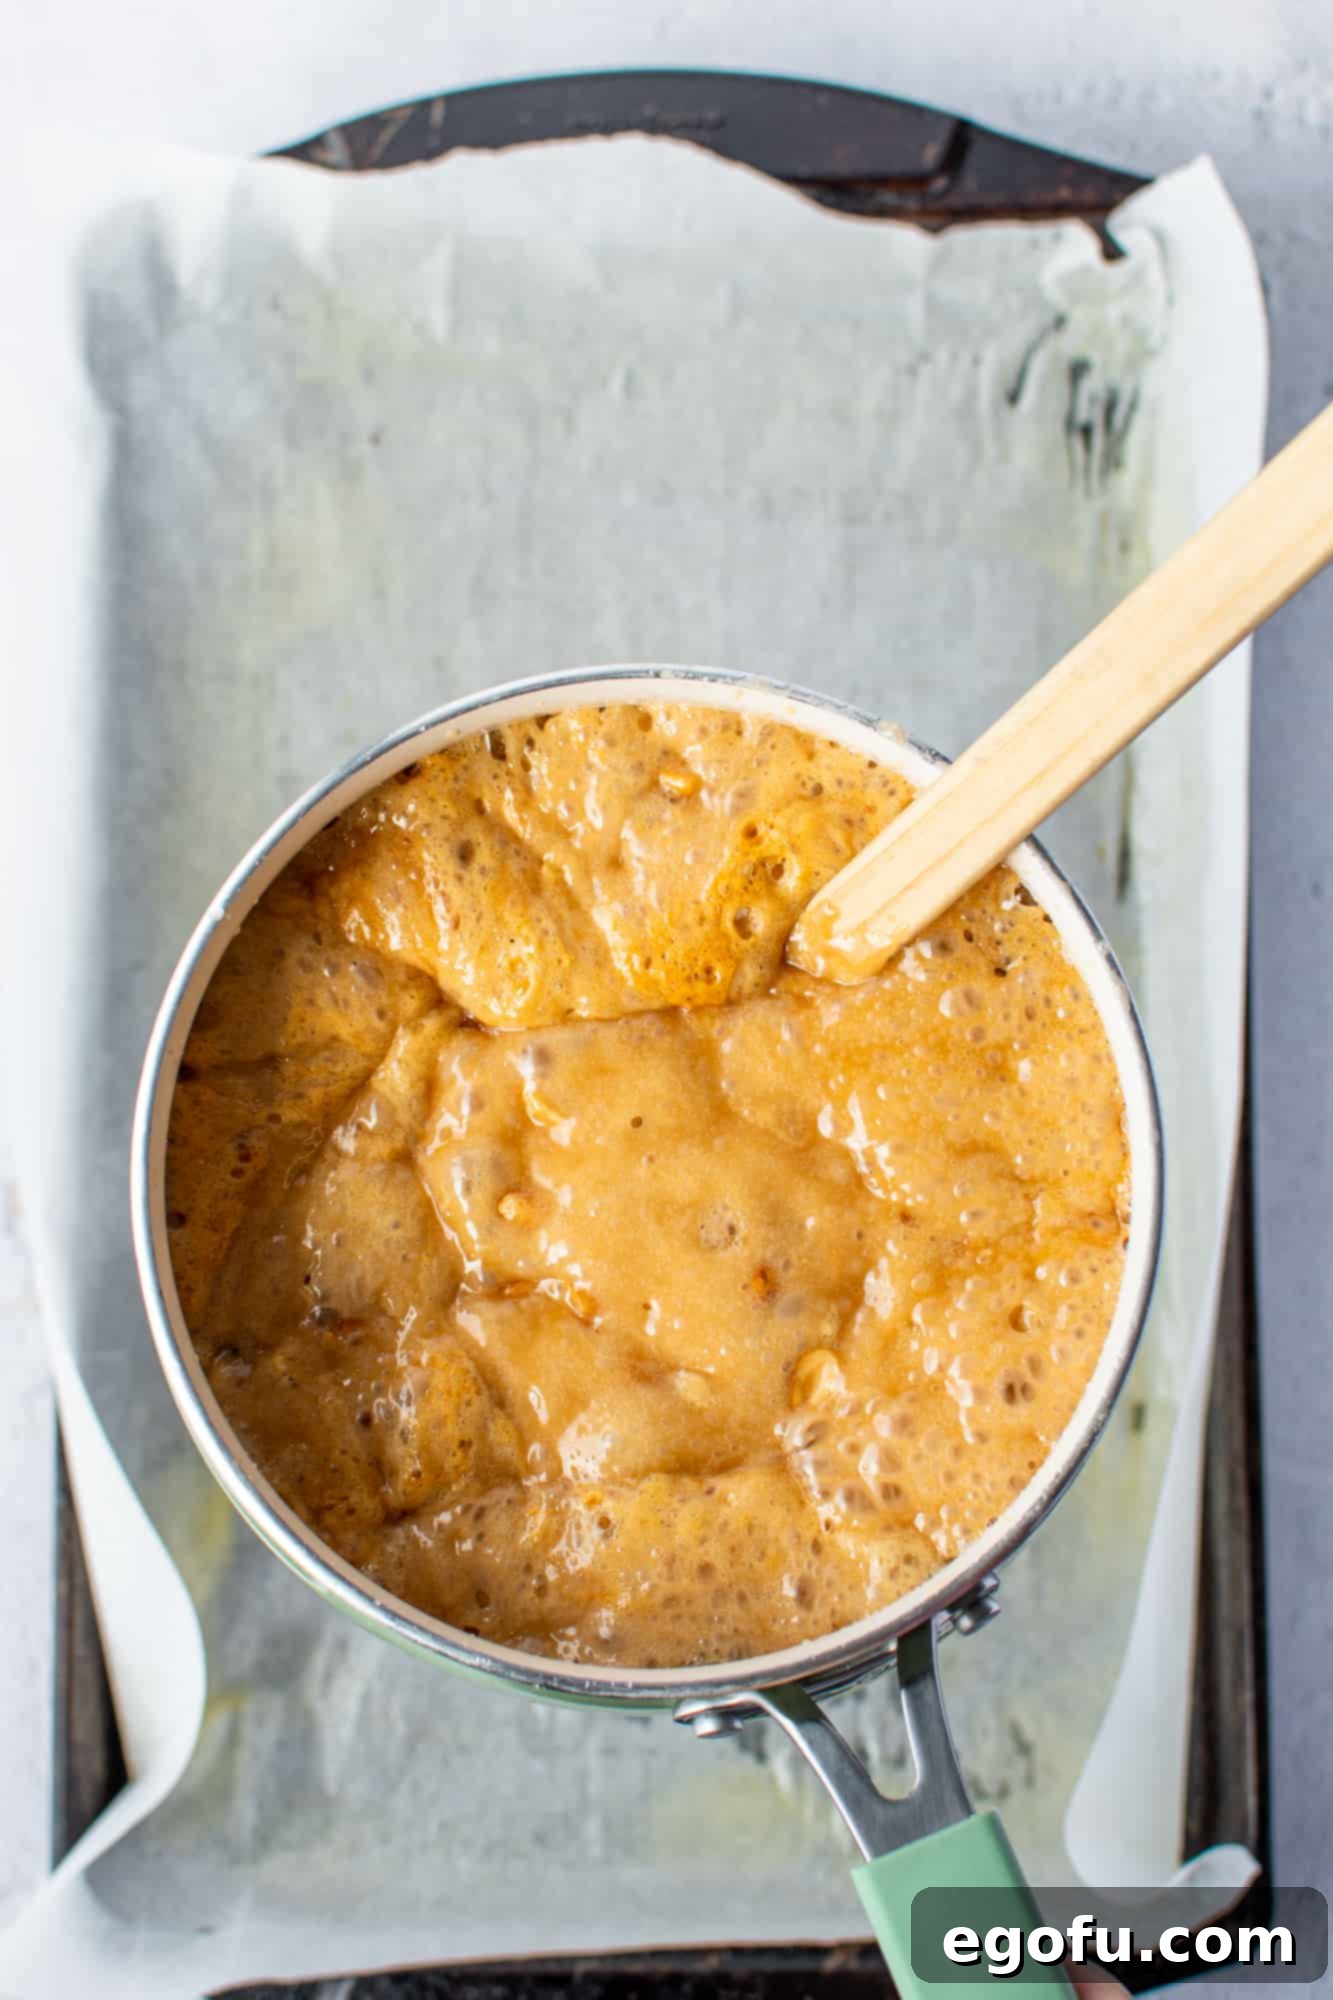
- Incorporate the Baking Soda: As soon as you remove the pot from the heat, swiftly stir in the 1 teaspoon of baking soda. You will observe an immediate and dramatic reaction: the mixture will become lighter in color, foam up, and get wonderfully fizzy. This aeration is crucial for creating the light, delicate, and characteristic texture of brittle. Stir only until the baking soda is fully incorporated, about 10-15 seconds; over-stirring can deflate the air pockets.
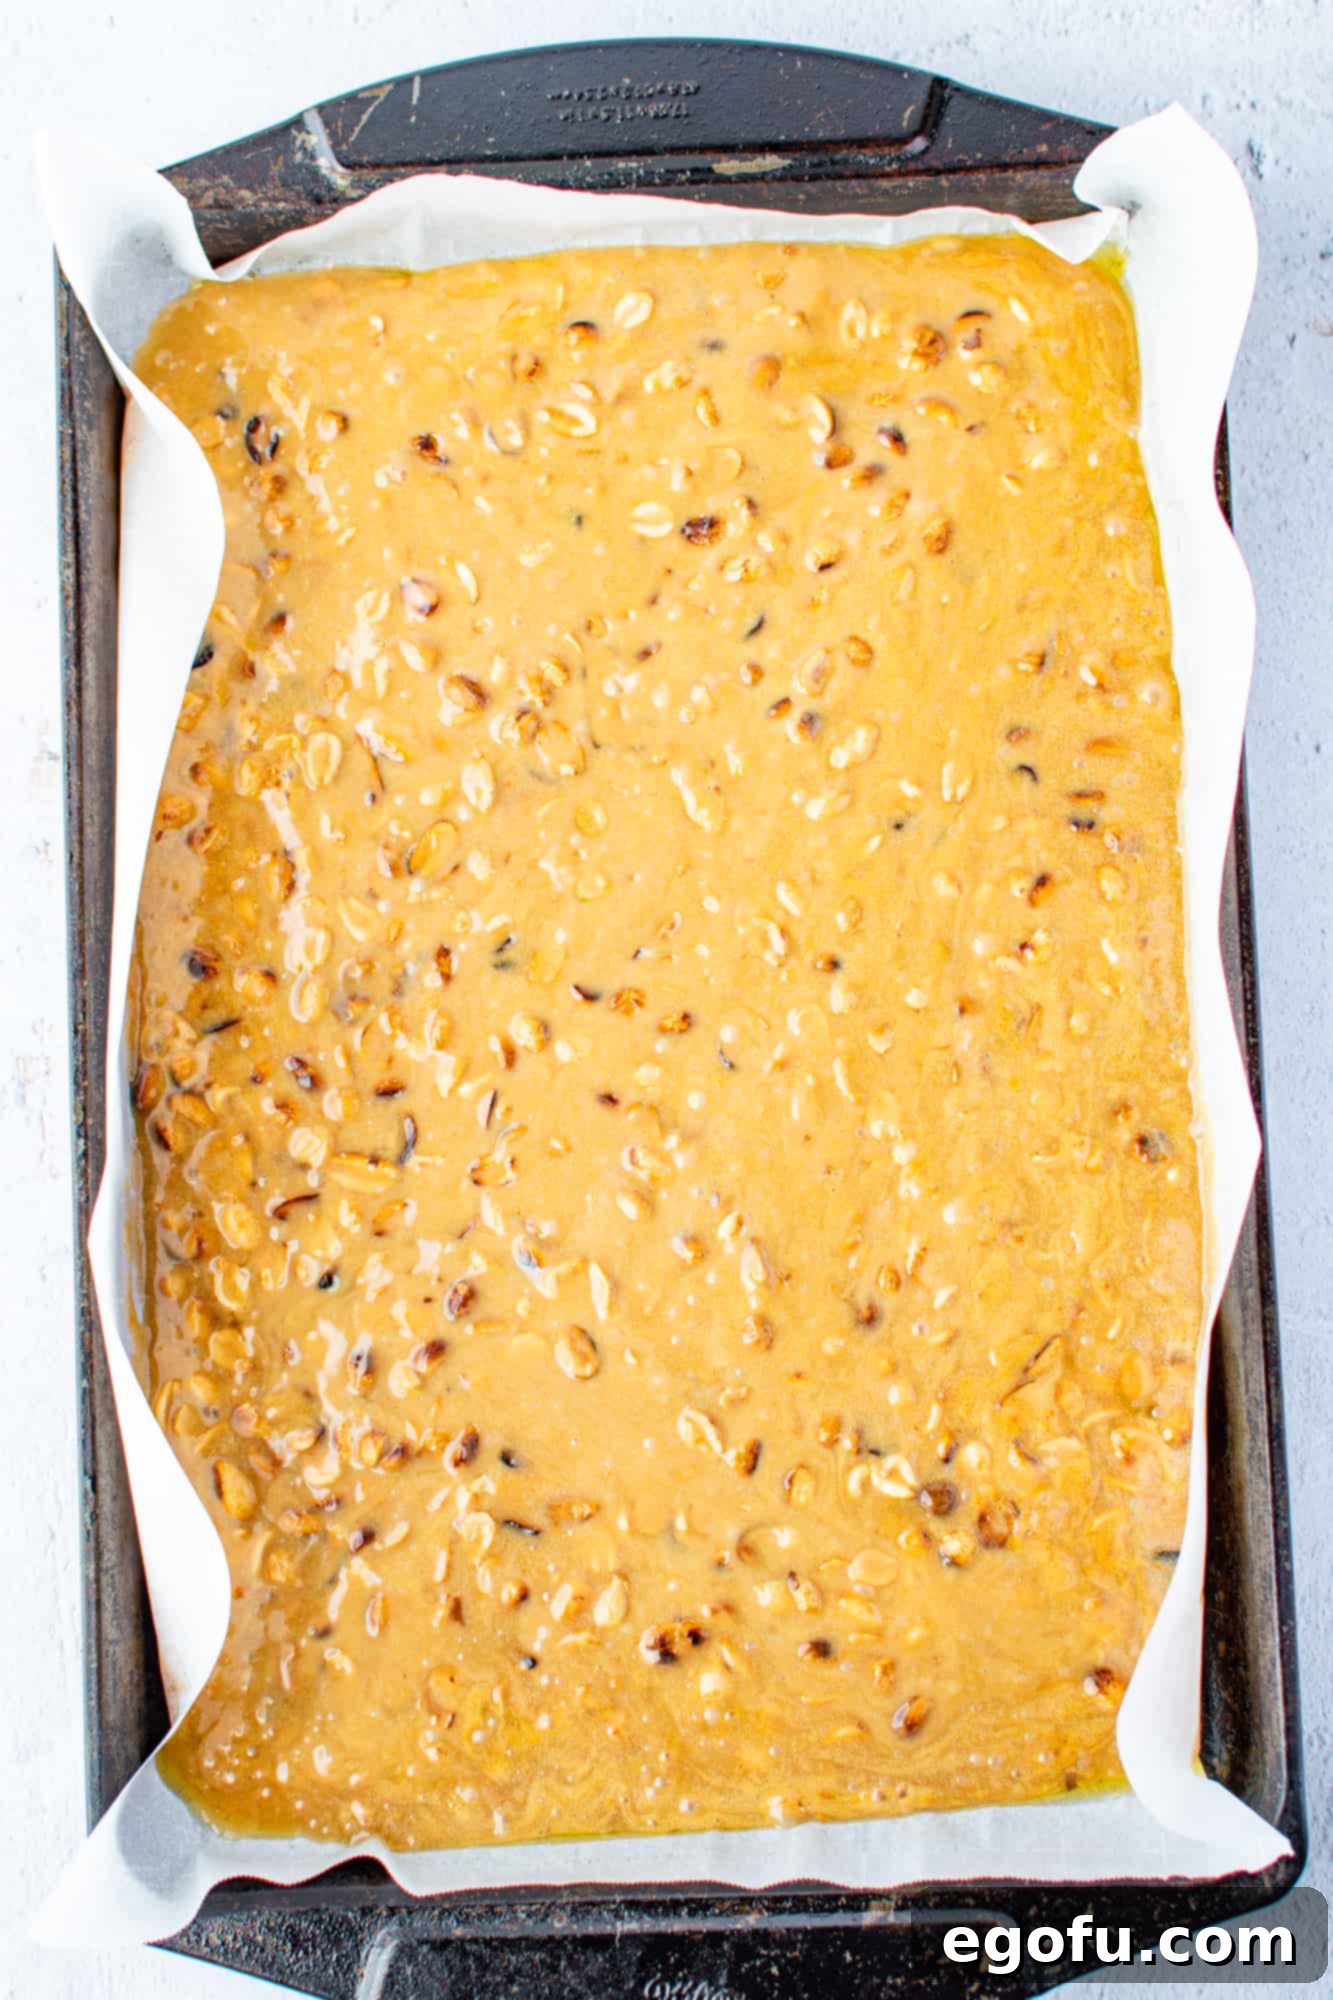
- Pour and Spread Immediately: Without delay, pour the hot, aerated peanut brittle mixture onto your prepared cookie sheet. Work quickly but carefully. Using your heatproof spatula or the back of a lightly greased spoon, spread the mixture as thinly and evenly as possible across the parchment paper. The thinner the brittle, the crisper it will be. Speed is key here, as the mixture will begin to set very rapidly. Aim for an even thickness throughout for consistent cooling and texture.
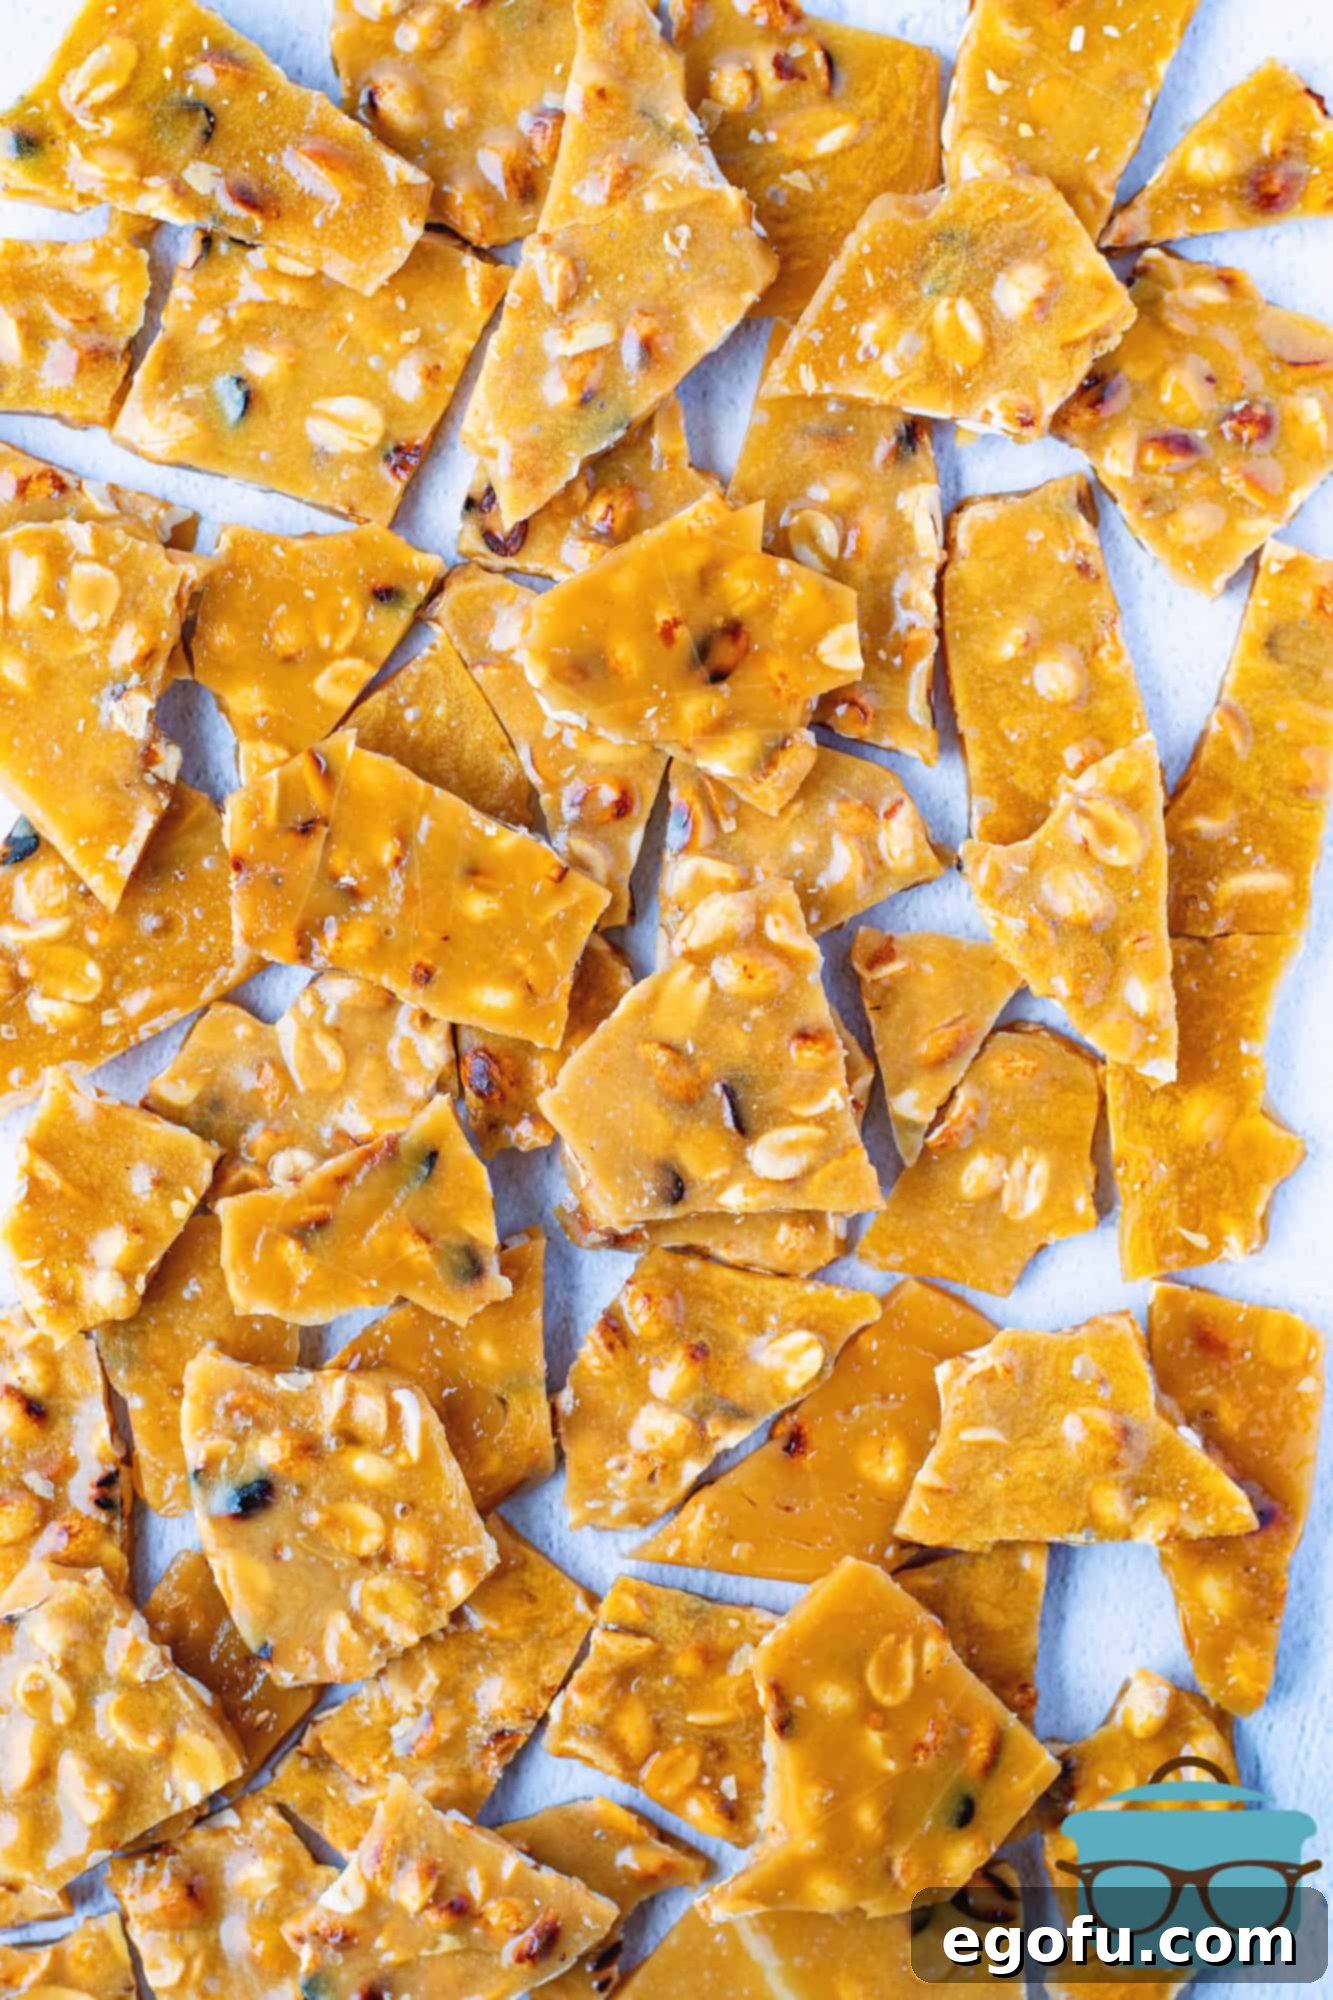
- Cool and Break: Allow the peanut brittle to cool completely at room temperature. This can take anywhere from 1 to 2 hours, or even longer depending on the thickness and ambient humidity. Do not try to rush the cooling process by placing it in the refrigerator, as this can introduce moisture and cause the brittle to become sticky. Once it is thoroughly cool and hard to the touch, simply lift the parchment paper and break the large sheet of brittle into desired irregular pieces. Store your beautiful homemade peanut brittle in an airtight container at room temperature to maintain its crispness. Enjoy!

Craving More Sweet Treats?
If you’ve fallen in love with homemade candy and festive desserts, you’re in luck! Explore these other irresistible recipes perfect for holidays, gifts, or simply a sweet indulgence:
- Candied Pecans
- White Chocolate Peanut Clusters
- Christmas Crack
- Reindeer Chow (Muddy Buddies)
- Butterscotch Haystacks
- Rice Krispies Christmas Wreaths
- Santa Hat Mini Cheesecakes
- Crock Pot Candy
- Sweet Holiday Chex Mix
- Christmas Jell-O Poke Cake
- Christmas Crack (yes, it’s that good, it deserves two mentions!)
- Ultimate Christmas Recipe Roundup

Homemade Peanut Brittle
Print
Pin
5
30
2
2 35
18
Brandie Skibinski
Ingredients
- 2 cups granulated sugar
- 1 cup light corn syrup
- ½ cup water
- ¼ teaspoon salt
- 1 cup (2 sticks) unsalted butter, sliced
- 2 ¼ cups unsalted, dry roasted peanuts
- 1 teaspoon baking soda
Instructions
- Line a large cookie sheet (13×18-inch is ideal) with parchment paper, ensuring it covers the entire surface. Lightly spray the parchment paper with nonstick cooking spray. This crucial preparation step prevents the highly sticky brittle from adhering to the pan and makes for easy removal later.
- In a medium, heavy-bottomed saucepan, combine the 2 cups granulated sugar, 1 cup light corn syrup, 1/2 cup water, and 1/4 teaspoon salt. Stir until the sugar is dissolved and the mixture is uniform. Place the saucepan over medium heat and bring the mixture to a full boil, stirring occasionally. Attach a candy thermometer to the side of the saucepan, ensuring the tip is submerged in the syrup but not touching the bottom of the pan.
- Once the sugar mixture reaches a vigorous boil (typically after about 6 to 7 minutes), add the 1 cup (2 sticks) unsalted butter, sliced. Stir continuously until the butter is completely melted and smoothly incorporated into the bubbling syrup. The mixture will take on a lovely golden hue and a rich aroma.
- Continue boiling the mixture, allowing the temperature to rise. When the candy thermometer reaches 280°F, stir in the 2 1/4 cups unsalted, dry roasted peanuts. Stir well to ensure the peanuts are evenly coated in the thickening, caramelizing syrup.
- Keep boiling and stirring the mixture until the candy thermometer precisely reads 300°F. This is the critical “hard crack” stage, where the sugar will become extremely hot and brittle upon cooling. Do not exceed this temperature to prevent burning.
- Immediately remove the saucepan from the heat. Quickly stir in the 1 teaspoon baking soda. The mixture will react by fizzing and expanding, becoming noticeably lighter in color and texture. Stir just enough to fully incorporate the baking soda, about 10-15 seconds, and avoid over-stirring.
- Without delay, pour the hot, aerated mixture onto the prepared cookie sheet. Using a heatproof spatula or a lightly greased metal spoon, quickly spread the brittle as thinly and evenly as possible across the parchment paper. Speed is essential here, as the candy sets very quickly.
- Allow the peanut brittle to cool completely at room temperature until it is hard and firm to the touch. This typically takes 1-2 hours. Once cooled, break the candy into irregular pieces. Store your homemade peanut brittle in an airtight container at room temperature to maintain its crispness for up to two weeks.
Video
Notes for Success
- Read FAQs Before Starting: It is highly recommended to review the Frequently Asked Questions section above before you begin. Understanding common pitfalls and key techniques will greatly increase your chances of success and help troubleshoot any issues.
- The Candy Thermometer is Non-Negotiable: I cannot emphasize enough the importance of using a reliable candy thermometer. Achieving the exact “hard crack” stage (300°F / 150°C) is fundamental for brittle to set properly. Without it, even experienced cooks can struggle.
- Low Humidity Environment: For the best results, make peanut brittle on a day with low humidity. High moisture in the air can prevent the brittle from fully hardening, making it sticky or chewy.
- Pan Size Matters: Using the correct size cookie sheet (approx. 13×18 inches) is vital. If your pan is too small, the brittle mixture will spread too thickly, prolonging cooling time and potentially hindering proper hardening. The thinner the spread, the crisper the brittle.
- Flavor Variation: If you prefer a more pronounced salty flavor, feel free to use salted peanuts instead of unsalted. Adjust the added ¼ teaspoon of salt in the recipe if you do, tasting as you go to achieve your desired balance.
- Safety First: Boiling sugar is extremely hot. Always exercise caution and avoid direct contact with the molten syrup. Keep children and pets away from the cooking area.
Candy, Dessert, Holiday Treat
American, Classic
Nutrition
Nutritional Disclaimer
“The Country Cook” is not a dietician or nutritionist, and any nutritional information shared is an estimate. If calorie count and other nutritional values are important to you, we recommend running the ingredients through whichever online nutritional calculator you prefer. Calories and other nutritional values can vary quite a bit depending on which brands were used.
Did you make this recipe?
Share your delicious creation on Instagram @thecountrycook and mention us using #thecountrycook! We love seeing your culinary masterpieces!
