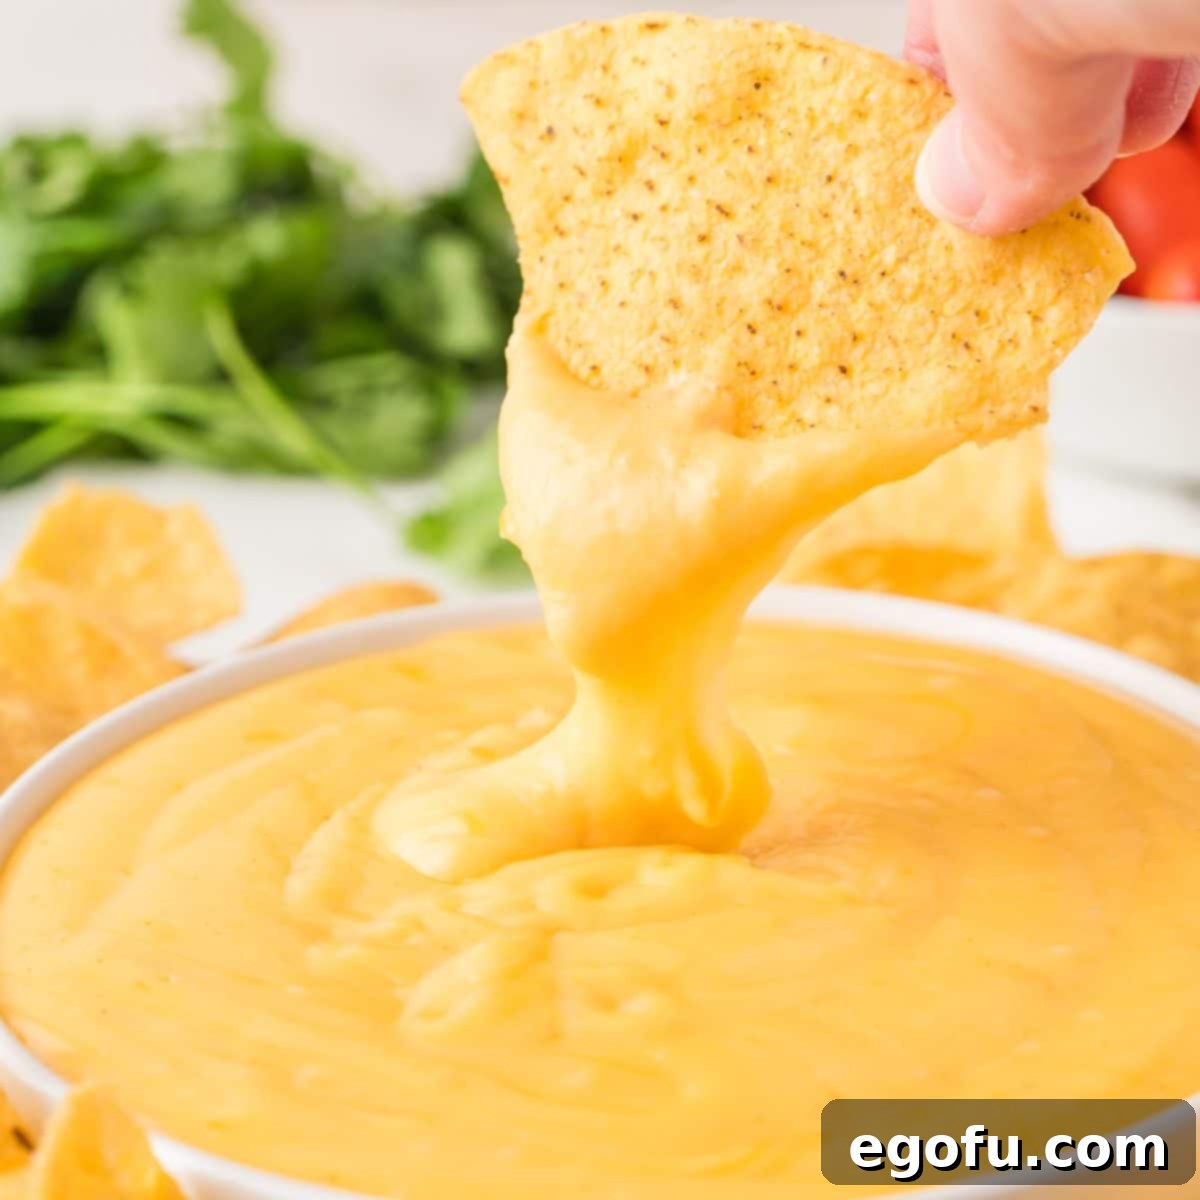
Crafting the perfect Nacho Cheese Sauce at home is simpler than you think! With just a few staple ingredients and a mere 10 minutes of prep time, you can whip up a rich, creamy, and irresistibly delicious cheese dip that will elevate any snack or meal.
Ultimate Homemade Nacho Cheese Sauce: Your Go-To Dip for Everything!
There’s nothing quite like a luscious, warm, and perfectly gooey homemade Nacho Cheese Sauce to transform an ordinary gathering into a memorable feast. Forget the bland, overly processed versions from the store; this recipe delivers a fresh, vibrant flavor and a velvety smooth texture that’s simply unmatched. Whether you’re building an epic plate of loaded nachos, smothering a mountain of crispy french fries, or adding a decadent touch to your baked potatoes, this versatile cheese dip is a culinary game-changer. It’s also fantastic for dipping fresh vegetables like crisp cauliflower florets, crunchy broccoli, or sweet carrot sticks, making it a surprisingly adaptable addition to your spread.
This isn’t just a recipe; it’s a guide to creating a truly exceptional homemade cheese dip without needing a pantry full of exotic ingredients or spending hours in the kitchen. Incredibly quick to prepare, it’s an ideal choice when you need a crowd-pleasing appetizer or side dish in a flash. Get ready to impress your family and friends with a cheese sauce so good, they’ll think you spent all day perfecting it!

Why Homemade Nacho Cheese Sauce is Always Best
When it comes to cheese sauce, homemade consistently triumphs over store-bought options, and for good reason. Crafting your own means you have complete control over the ingredients, ensuring a fresher product free from the artificial flavors, colors, and preservatives often found in commercial varieties. This results in a purer, more authentic cheese flavor that simply can’t be replicated. Furthermore, the texture of a homemade sauce is typically smoother and more luxurious, melting beautifully and coating whatever it accompanies with a satisfying creaminess.
Beyond taste and texture, there’s a certain pride and satisfaction in serving something made from scratch. It allows for endless customization – you can adjust the spice level, experiment with different cheese blends, or incorporate unique seasonings to match your personal preference or specific dish. Plus, it’s often more cost-effective in the long run than repeatedly buying pre-made dips. Embrace the simplicity and superior quality of homemade, and you’ll never look back!
Frequently Asked Questions for Perfect Cheese Sauce
Keeping your homemade cheese sauce perfectly warm and dippable is key to a great serving experience. Since it lacks the stabilizers found in commercial products, it will naturally thicken as it cools. My favorite method is to serve the Nacho Cheese Sauce in a mini crock pot. Set your crock pot to the “warm” or “low” setting. This gentle heat prevents it from thickening too quickly or forming a skin, maintaining that desirable gooey consistency throughout your meal or party. If you don’t have a mini crock pot, a double boiler setup on the stovetop over very low heat can also work, but requires more monitoring to avoid scorching and ensure even heating.
It’s entirely natural for homemade Nacho Cheese Sauce to thicken faster than the shelf-stable varieties you find in stores. This is because our recipe uses real dairy and natural ingredients, without the additives, emulsifiers, and preservatives that store-bought sauces contain to maintain their consistency. As the sauce cools, the fats and proteins in the cheese and milk solidify, leading to a thicker texture. The best way to combat this is by keeping it warm, as mentioned above. If it does thicken while serving, a quick whisk with a splash of warm milk (or even water for minor adjustments) can bring it back to its ideal consistency without compromising flavor.
Reheating cheese sauce requires a gentle approach to prevent it from breaking or becoming grainy. The key is slow and low heat. If using a microwave, reheat in short bursts (15-30 seconds) on a reduced power setting (e.g., 50-70% power), stirring thoroughly after each interval. Continue this process until it reaches your desired warmth and consistency. On the stovetop, reheat in a heavy-bottomed saucepan over very low heat, stirring constantly until smooth and heated through. You might need to add a tablespoon or two of milk or cream while reheating to restore its original smooth, velvety texture. Avoid high heat, which can cause the cheese to seize and the sauce to separate into an oily, curdled mess.
Absolutely! While medium cheddar provides a classic, rich flavor, experimenting with other cheeses can add exciting dimensions to your sauce. For a delicious twist, try using half cheddar and half pepper Jack cheese – this introduces a wonderful hint of spice and a unique flavor profile. Other excellent options include:
- Sharp Cheddar: For a more pronounced and robust cheese taste.
- Monterey Jack: Offers exceptional meltiness and a milder flavor, allowing other spices to shine.
- Colby or Colby Jack: A mild, creamy choice that blends well.
- White Cheddar: For a sophisticated look and sharp, clean flavor.
- Gruyere or Swiss: Can add a nutty, complex flavor for a more gourmet dip (use in combination with cheddar).
Always remember to use freshly shredded cheese for the best melting results and smoothest texture, as pre-shredded varieties often contain anti-caking agents that hinder proper melting.
Using freshly shredded cheese is a game-changer for homemade cheese sauce. Pre-shredded varieties often contain anti-caking agents like cellulose or potato starch, which can prevent the cheese from melting smoothly and result in a grainy or clumpy sauce. For effortless shredding, I highly recommend a quality box grater or a rotary cheese grater. My specific Cheese Grater (paid affiliate link) is a favorite because it locks securely onto the counter, preventing any frustrating sliding while you work, making it super easy to use. For even easier shredding, try chilling your block of cheese in the freezer for about 15-20 minutes before grating – this makes it firmer and less prone to crumbling. Not only is fresh cheese better for melting, but it also offers superior, unadulterated flavor.
The beauty of homemade sauce is its adaptability! Beyond the optional pinch of cayenne pepper for a subtle warmth, you can easily customize the heat and flavor to your liking. For more kick, increase the cayenne, stir in a dash of your favorite hot sauce, or add a pinch of chili powder or smoked paprika. If you love jalapeños, incorporate finely diced fresh or pickled jalapeños, and even a touch of their briny juice. Diced green chiles (canned) are another fantastic mild addition that provides a lovely Southwestern flavor. To make it a heartier dip, consider topping with seasoned ground beef or chorizo, crumbled bacon, a dollop of fresh pico de gallo, or diced tomatoes. For an earthy depth, a little cumin goes a long way. Fresh cilantro or sliced green onions can be stirred in just before serving for a burst of freshness and color.
The possibilities are truly endless with this homemade cheese sauce! Beyond its namesake nachos and classic pairings like warm soft pretzels, crispy french fries, and golden tater tots, get creative and transform various dishes:
- Baked Potatoes: Drizzle generously over a fluffy baked potato for a rich and satisfying side or light meal.
- Vegetables: Transform simple steamed or roasted vegetables like broccoli, cauliflower, asparagus, or even green beans into a gourmet side by pouring this warm sauce over them.
- Chili Cheese: Add it to a bowl of chili for an instant chili cheese experience, perfect for a hearty comfort food.
- Hot Dogs & Burgers: Top hot dogs, bratwursts, or burgers for a delightful cheesy finish.
- Tacos & Burritos: Use it as a rich sauce inside tacos, burritos, quesadillas, or chimichangas.
- Pasta: Stir it into cooked pasta for a quick and easy mac and cheese alternative or a cheesy pasta bake.
- Breakfast: Drizzle over scrambled eggs, breakfast burritos, or omelets for a cheesy morning boost.
- Sandwiches: Elevate a simple grilled cheese or a Philly cheesesteak sandwich.
It’s not just a dip; it’s a luxurious topping that elevates almost anything you can imagine!
A grainy or lumpy cheese sauce is a common issue, but entirely preventable. It typically occurs when the cheese is overcooked or melted at too high a temperature. High heat causes the milk proteins and fats in the cheese to separate, resulting in a broken, grainy texture. To avoid this, always melt your cheese over the lowest possible heat setting and stir continuously until fully incorporated. Using freshly shredded cheese is also crucial, as pre-shredded varieties often contain starches that can lead to a less smooth melt. If your sauce does become grainy, try whisking in a small amount of warm milk, a tablespoon of cream cheese, or even a tiny pinch of baking soda off the heat to try and re-emulsify it back together. Patience is key in this stage!
Properly stored, leftover homemade cheese sauce can be enjoyed for a few days. Once cooled, transfer the sauce to an airtight container and store it in the refrigerator for up to 3-4 days. When you’re ready to use it again, refer to our reheating tips above, employing low and slow heat to ensure it comes back to life smoothly. You may find that adding a little extra milk or cream while reheating helps to thin it out and restore its original smooth consistency, especially if it has thickened considerably in the fridge.
While you can technically attempt to freeze homemade cheese sauce, it’s generally not recommended for optimal results. Dairy products, especially those without stabilizers, tend to separate when thawed and reheated after freezing. The fat and water components can break apart, leading to a curdled or grainy texture that is difficult to fully emulsify back together. Since this recipe is free from additives and preservatives, the probability of separation is higher. If you do choose to freeze it, store it in an airtight, freezer-safe container for up to 1-2 months. Thaw slowly in the refrigerator overnight, then reheat gently on the stovetop or in the microwave, whisking vigorously and adding a splash of milk to try and bring it back together. Be aware that the texture may not be as perfectly smooth as when freshly made, but it will still be flavorful.
No, canning or preserving homemade Nacho Cheese Sauce for shelf-stable storage is not recommended and is considered unsafe by food safety experts. Recipes high in dairy are low-acid foods, which require pressure canning to be safely preserved. However, the high fat content and delicate nature of dairy products make them unsuitable for home canning, as proper heat penetration for sterilization is difficult to achieve without compromising the product’s quality and safety. The risk of botulism and spoilage is too high for home canning dairy-based products. Therefore, canning this recipe is strongly advised against. For longer storage, freezing is the only viable (though imperfect) option, as discussed in the previous question. Always prioritize food safety and enjoy this delicious sauce fresh or refrigerated for a few days!
Making this cheese sauce is quite straightforward and doesn’t require specialized kitchen gadgets. Here’s a quick list of what you’ll need to get started:
- Medium Saucepan: A heavy-bottomed saucepan is ideal for melting butter, cooking the roux, and gently simmering the sauce without scorching.
- Whisk: An absolute essential for smoothly incorporating ingredients, preventing lumps, and achieving that velvety consistency.
- Measuring Cups and Spoons: For accurate ingredient quantities, ensuring consistent results every time.
- Cheese Grater: A sturdy box grater or a comfortable rotary grater for freshly shredding cheese (this step is highly recommended for the best texture!).
- Rubber Spatula: Useful for scraping down the sides of the pan and ensuring all ingredients are well-mixed.
- Mini Crock Pot (Optional but Recommended): For keeping the sauce warm and perfectly dippable during serving at parties or gatherings.
With these basic tools, you’ll be making creamy, irresistible nacho cheese sauce like a seasoned chef!

Ingredients for the Best Homemade Nacho Cheese Sauce
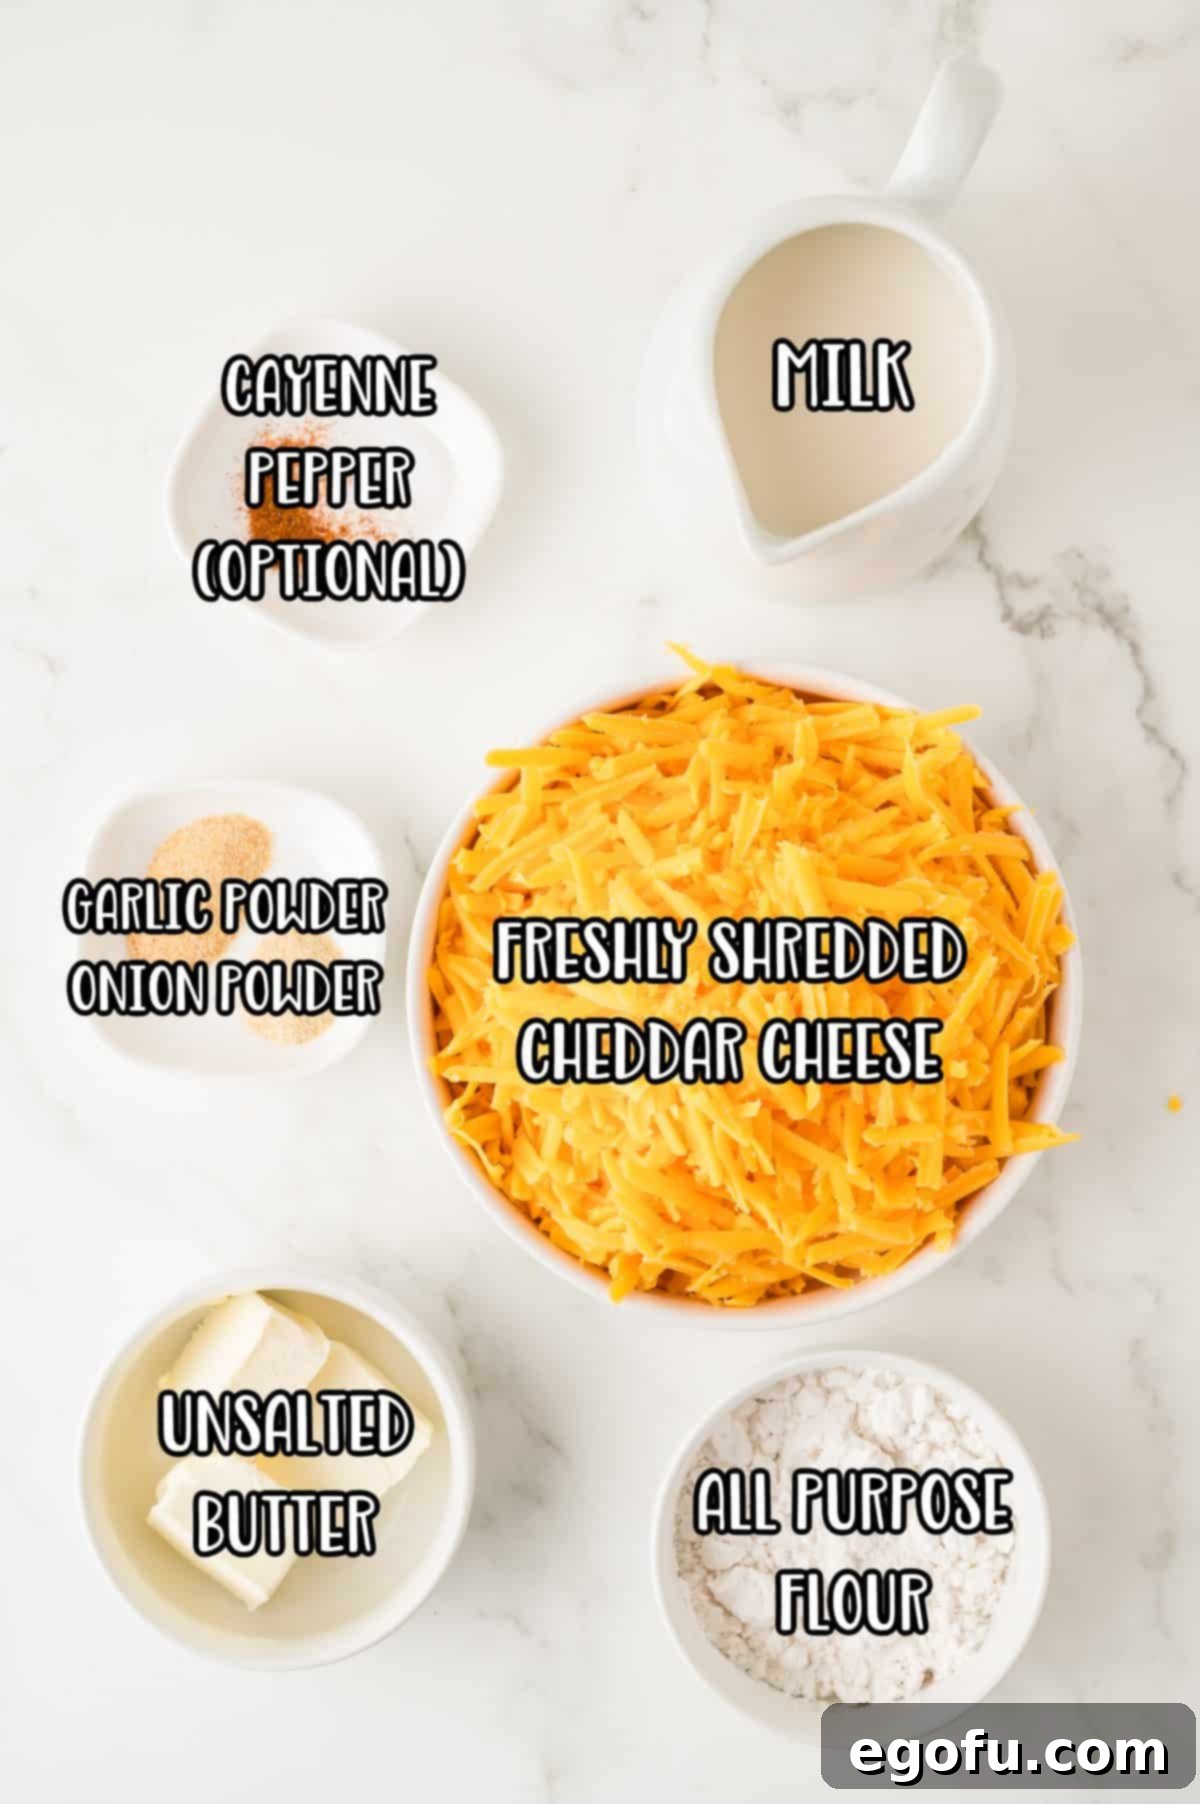
Creating a truly spectacular Nacho Cheese Sauce starts with selecting the right ingredients. Each component plays a vital role in achieving that rich flavor and luxurious, velvety texture we all crave. Here’s a detailed look at what you’ll need to make this crowd-pleasing dip:
- Unsalted Butter (3 Tablespoons): Butter forms the base of our roux, which is essential for thickening the sauce. While unsalted butter allows you to precisely control the total salt content, salted butter works perfectly fine too. The amount of salt in typical salted butter is minimal and usually won’t noticeably alter the recipe. However, if you are very sensitive to salt or prefer to add it strictly to taste, you can simply omit any additional salt listed in the recipe. Crucially, avoid using margarine or butter substitutes (like Country Crock, etc.) as they have a different fat and water content, which can prevent the sauce from coming together properly and achieving the desired creamy consistency.
- All-Purpose Flour (3 Tablespoons): This is the other half of our roux, combining with the butter to create a thickening agent. It ensures your sauce is smooth, substantial, and not watery, providing the perfect body for the cheese.
- Whole Milk (1 ¼ cups): For the ultimate creamy, rich cheese sauce, whole milk is highly recommended. Its higher fat content contributes significantly to the luxurious mouthfeel and helps create a more stable emulsion with the cheese. While lower-fat milk can be used, it might result in a slightly thinner sauce and a less indulgent flavor profile.
- Medium Cheddar Cheese, Freshly Shredded (8 ounce block): This is the star of the show! Medium cheddar offers a perfect balance of sharp flavor and excellent melting properties. You can also opt for sharp cheddar if you prefer a more intense cheese taste, or even a blend with Monterey Jack for extra creaminess. The most important tip here is to use freshly shredded cheese. Pre-shredded cheeses often contain anti-caking agents like cellulose or potato starch, which can make them resistant to smooth melting and lead to a grainy or clumpy sauce. A quick shred from a block ensures a silky-smooth finish. (See our FAQ section above for a recommended cheese grater for easy shredding!)
- Garlic Powder (½ teaspoon): Adds a foundational savory depth that complements the cheese beautifully without overpowering it, providing a warm, aromatic note.
- Onion Powder (¼ teaspoon): Enhances the savory profile, giving the sauce a subtle, well-rounded flavor that pairs wonderfully with the garlic and cheese.
- Cayenne Pepper (pinch, optional): This is your secret weapon for a touch of warmth! A small pinch adds a gentle heat that awakens the other flavors without making the sauce overtly spicy. Feel free to adjust this amount to your preference – add more for a bolder kick or omit if you prefer no heat at all.
- Salt (to taste): Essential for balancing and enhancing all the flavors in the sauce. Start with a small amount and adjust as needed, especially if you’re using salted butter or other salty additions like hot sauce or pickled jalapeño juice.
How to Make the Creamiest Homemade Nacho Cheese Sauce
Making this irresistible cheese sauce is a breeze, coming together in just a few simple steps. The key is to work gently and patiently, especially when melting the cheese, to ensure a perfectly smooth and luscious result every time. Follow these straightforward instructions for a flawless dip:

Nacho Cheese Sauce
Print
Pin
Rate
Ingredients
- 3 Tablespoons unsalted butter (salted butter is fine)
- 3 Tablespoons all purpose flour
- 1 ¼ cup whole milk
- 8 ounce block medium cheddar cheese, freshly shredded (or sharp cheddar)
- ½ teaspoon garlic powder
- ¼ teaspoon onion powder
- pinch cayenne pepper (optional, adjust to taste)
- salt, to taste
Instructions
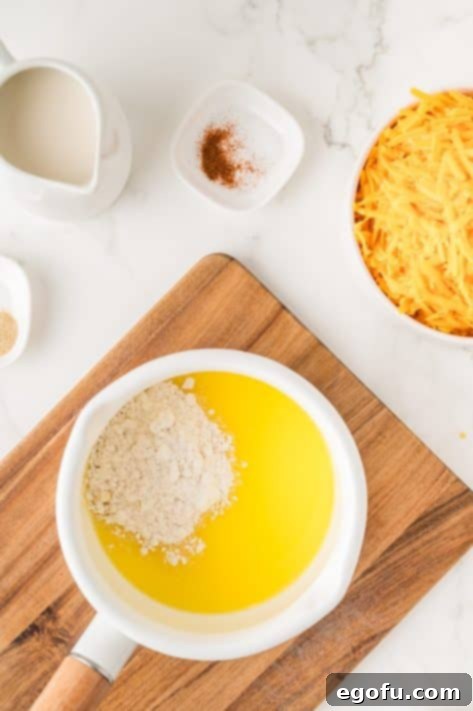
- In a medium saucepan, melt 3 Tablespoons unsalted butter over medium-low heat. Once melted, whisk in 3 Tablespoons all-purpose flour until it’s fully incorporated with the butter, creating a smooth roux. Continue whisking gently for about 1-2 minutes until it begins to bubble and cook out the raw flour taste, but do not let it brown excessively.

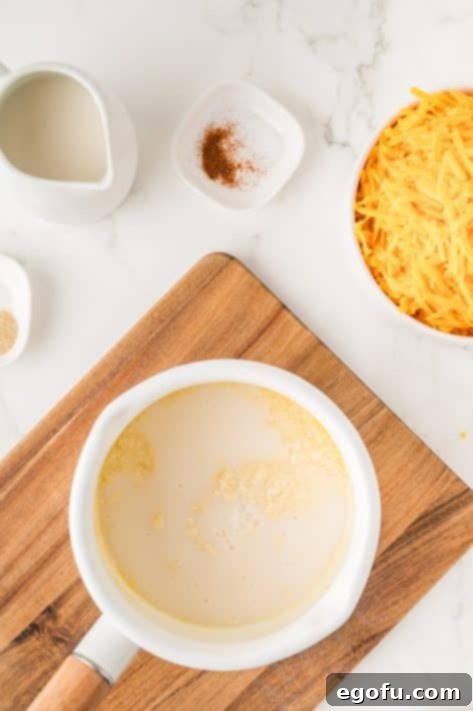
- Gradually and slowly whisk in 1 ¼ cup whole milk into the roux. Continue whisking constantly to prevent lumps as the sauce heats and begins to thicken. This process usually takes about 4-5 minutes. The sauce should become smooth and lightly coat the back of a spoon, indicating it’s ready for the cheese.

- Reduce the heat to the lowest setting to prevent scorching. Add in the 8 ounce block medium cheddar cheese, shredded, ½ teaspoon garlic powder, ¼ teaspoon onion powder, and a pinch of cayenne pepper (if using). Stir gently but continuously until all the cheese is completely melted and smoothly combined into the sauce. Season with salt, to taste. Do not allow the sauce to boil once the cheese is added, as this can cause it to become grainy or separate.

- Once silky smooth and thoroughly heated through, carefully pour your homemade Nacho Cheese Sauce into your favorite dip bowl. Serve immediately with a generous pile of crispy tortilla chips, warm soft pretzels, or any of your preferred dippables, and enjoy the ultimate creamy deliciousness!

Notes for Success and Expert Tips
- Embrace Freshness: Remember, this is a homemade sauce without the artificial preservatives or additives found in shelf-stable nacho sauces. It will naturally thicken as it cools. Your best strategy is to keep it warm while serving (a mini crock pot is excellent for this) and/or have a little extra warm milk on hand to whisk in if it becomes too thick when reheating.
- Yield & Servings: This recipe typically yields about 2 cups of rich cheese sauce. The serving size is estimated based on 2 ounces per serving. If you opt for smaller portions (e.g., 1 ounce), you can effectively increase the number of servings.
- Customization is Key: Don’t hesitate to adjust spices or add-ins to match your personal taste. Explore different cheese combinations for unique flavor profiles and heat levels. This recipe is a fantastic base for your culinary creativity!
- Troubleshooting Grainy Sauce: If your sauce ever becomes grainy, it’s usually due to too high heat during the cheese melting phase. Remove it from the heat and try whisking in a small amount of warm milk or cream cheese to help re-emulsify it. Patience and gentle heat are your allies.
- For more in-depth answers to common questions, ingredient substitutions, and comprehensive tips, please refer to our detailed FAQ section and ingredient breakdown above!
Nutrition Information (Estimated Per Serving)
Nutritional Disclaimer
“The Country Cook” is not a dietician or nutritionist, and any nutritional information shared is an estimate. If calorie count and other nutritional values are important to you, we recommend running the ingredients through whichever online nutritional calculator you prefer. Calories and other nutritional values can vary quite a bit depending on which brands were used, and any optional additions or substitutions made to the recipe.
More Delicious Recipes to Satisfy Your Cravings
If you loved making this easy Nacho Cheese Sauce, you’re sure to enjoy these other fantastic recipes from our kitchen. Perfect for entertaining, game nights, or simply treating yourself to something special!
- Sheet Pan Nachos: The perfect way to serve a crowd with minimal fuss.
- Tachos (Tater Tot Nachos): A fun and crispy twist on classic nachos, incredibly popular for game days.
- Homemade Velveeta: For those who crave that specific processed cheese texture, made better and fresher at home.
- Homemade Honey Mustard: A versatile dressing and dip that pairs well with chicken, salads, and more.
- Homemade Whipped Butter: Elevate your bread game with this light and airy spread.
- Arby’s Beef and Cheddar (Copycat): Recreate a fast-food favorite with all the delicious flavors in your own kitchen.
- Navajo Tacos: A unique and flavorful taco experience featuring soft, pillowy fry bread.
- Walking Tacos: Portable and perfect for parties or events where you need a meal on the go.
- Taco Pizza: Two beloved favorites combined into one incredibly satisfying and easy-to-make dish.
- Taco Stuffed Shells: An inventive weeknight dinner idea that brings a fun twist to pasta night.
