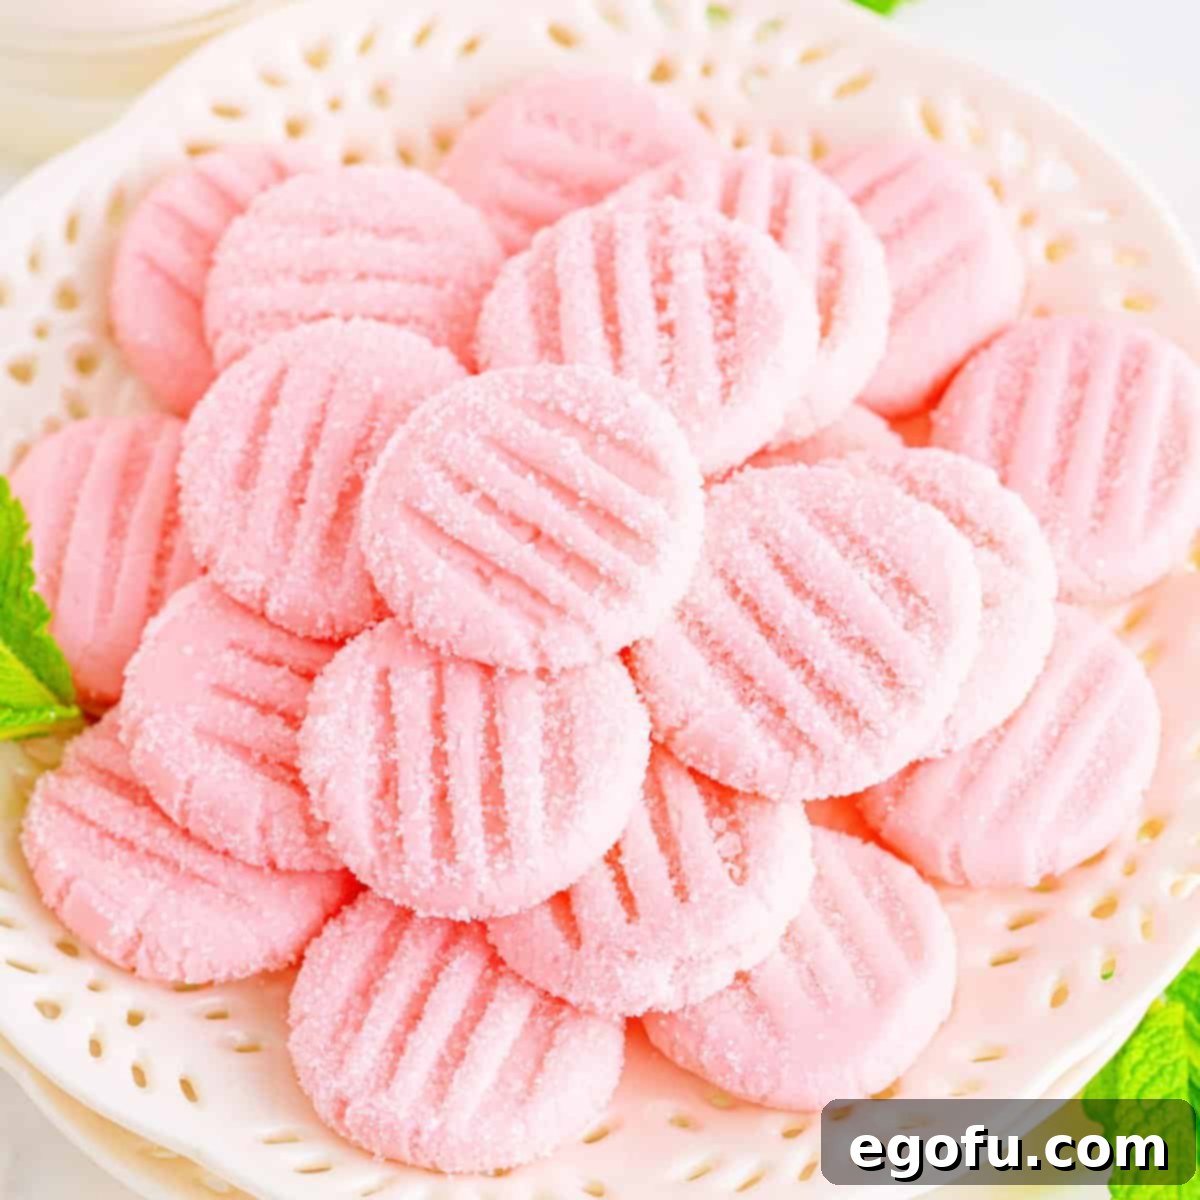
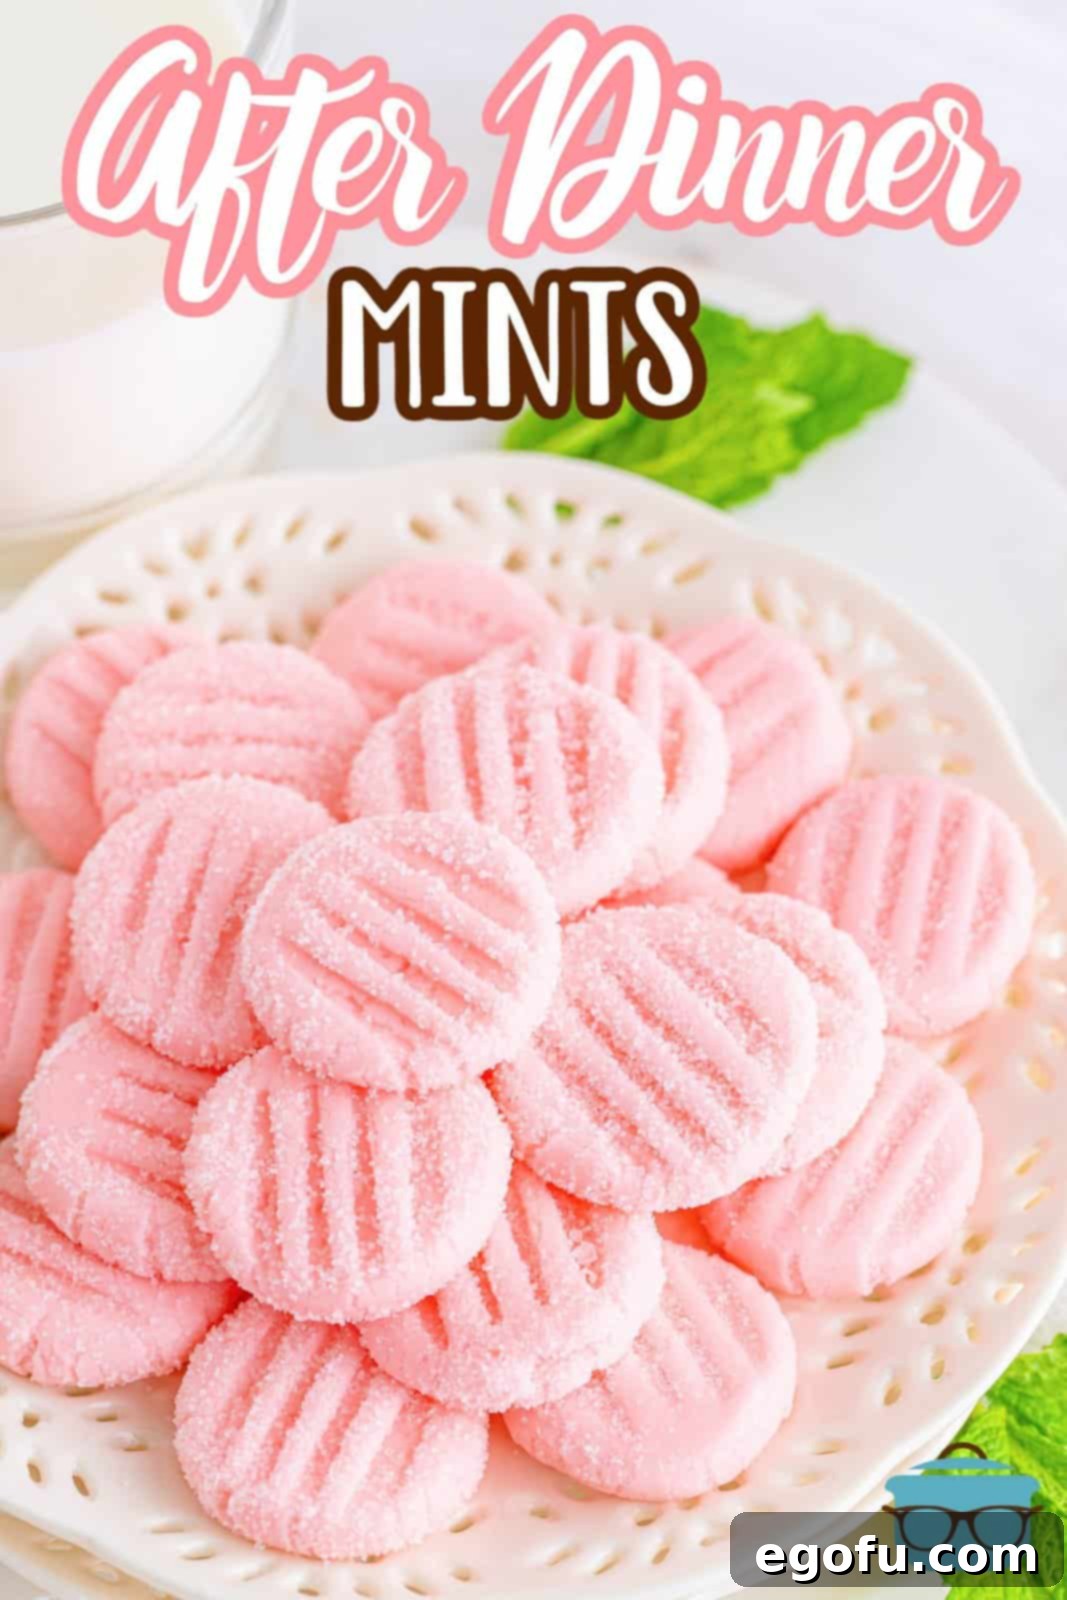
Welcome to the delightful world of homemade confections! This Homemade After Dinner Mints recipe offers a delicious, no-bake solution for a sweet, refreshing treat. Whipping up in mere minutes, these creamy, minty delights are the perfect after-meal indulgence or a thoughtful, charming gift.
Crafting the Perfect Creamy, Minty After-Dinner Treat
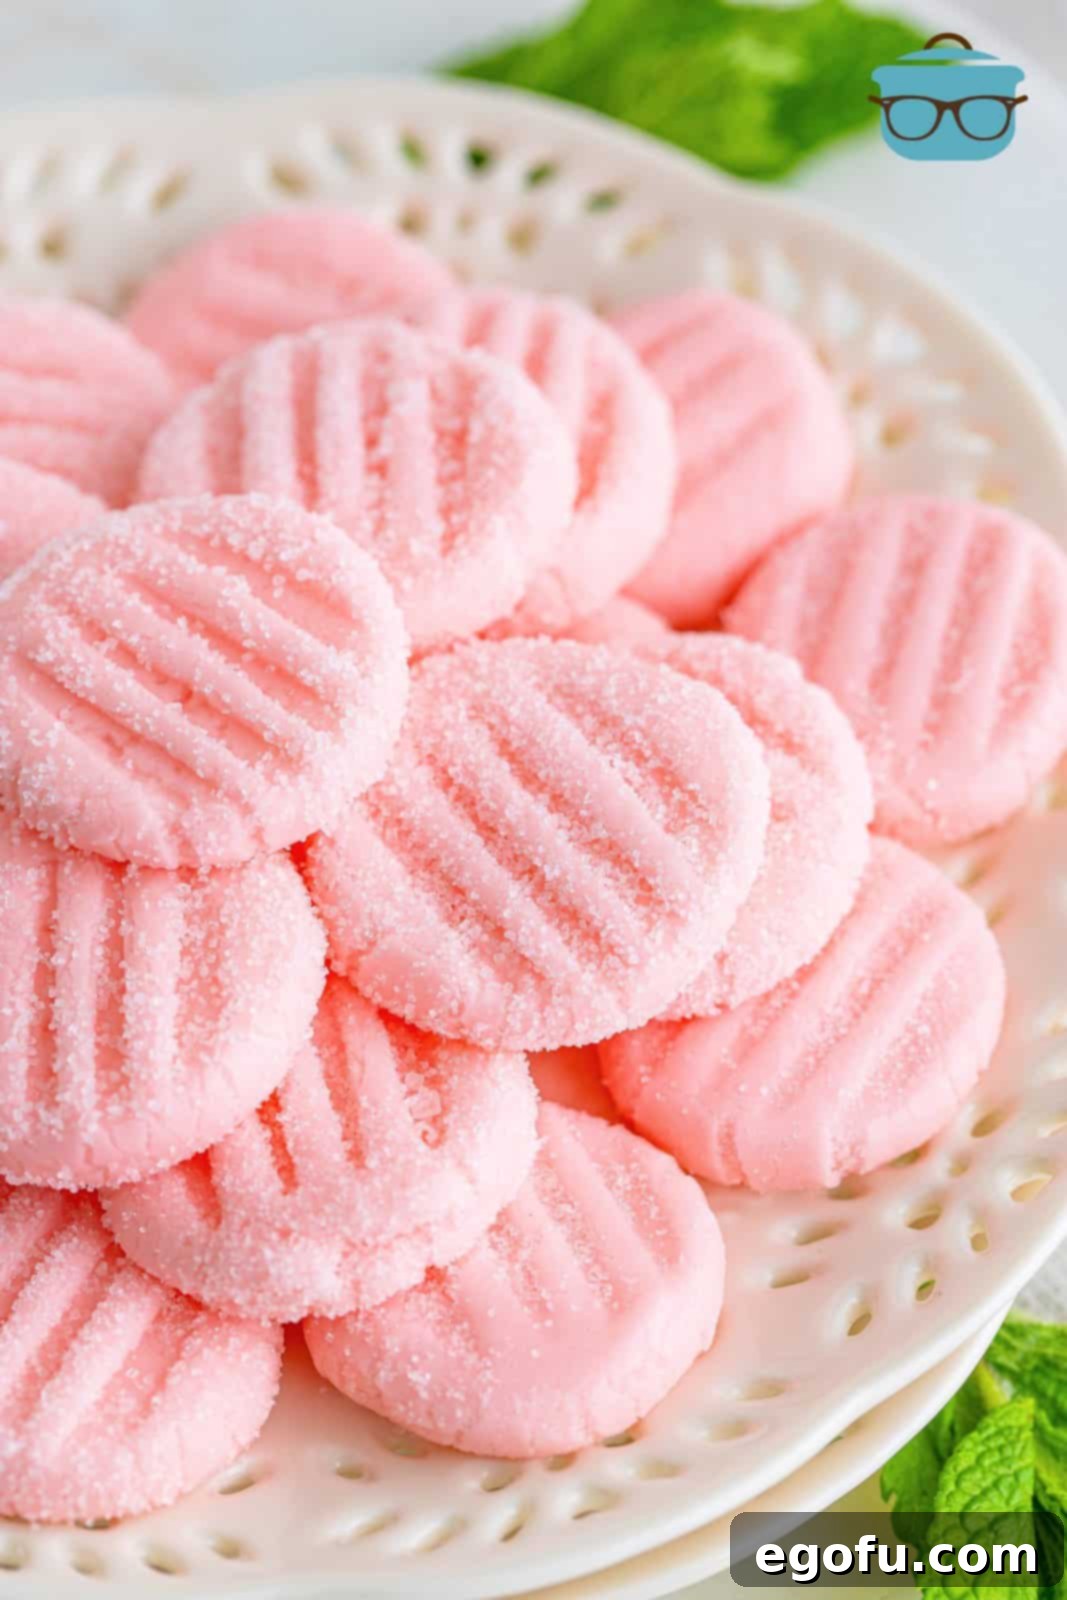
Imagine a small, melt-in-your-mouth mint that perfectly cleanses the palate after a wonderful meal. These homemade after-dinner mints are precisely that – a simple yet sophisticated sweet treat. Beyond their refreshing taste, they possess a unique charm that makes them an ideal gift for any occasion. They are remarkably easy to prepare, requiring no baking whatsoever, and can be completely finished and ready to enjoy or gift within an hour. I absolutely adore presenting these as tokens of appreciation or friendship. Their delicate appearance and exquisite flavor often come as a delightful surprise, as many people are unaware that such beautiful confections can be so easily crafted at home.
The beauty of these cream cheese mints lies in their versatility. You can customize them with various colors and flavors, making them suitable for holidays, birthdays, or just a simple gesture of kindness. When I give these as gifts, I usually present them in an elegant tin or a small decorative bag, often accompanied by a printed copy of the recipe. This allows the recipient to not only savor the mints but also recreate the magic in their own kitchen. These mints aren’t just a dessert; they’re an experience, a little moment of joy that embodies the thoughtfulness of homemade goodness. Their soft, creamy texture and subtle mint flavor are truly irresistible, offering a refreshing end to any gathering or a quiet evening at home.
Frequently Asked Questions About Homemade After Dinner Mints
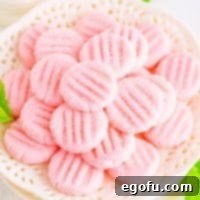
This recipe is quite generous! If you maintain a consistent, bite-sized portion, similar to the mints shown in our photos (approximately one teaspoon of mixture per mint), you will yield an impressive 7 dozen mints. This quantity makes them perfect for large gatherings, holiday platters, or for dividing into multiple gift batches. The exact number can vary slightly based on how large or small you roll each individual mint, so feel free to adjust to your preference – just remember that smaller mints often melt faster and offer a more delicate experience.
Yes, absolutely! These cream cheese mints freeze exceptionally well, making them an excellent candidate for advance preparation or for extending their shelf life. To freeze them properly and prevent sticking, I recommend a process called “flash freezing.” Simply arrange the finished, sugar-coated mints in a single layer on a parchment paper-lined baking tray and place the tray in the freezer for about 30 minutes to an hour, or until they are firm. Once firm, transfer the mints to a freezer-safe airtight container or a heavy-duty freezer bag. This flash-freezing step ensures they won’t clump together. Stored this way, they will maintain their quality for up to 3 months. When you’re ready to enjoy them, simply take out the desired amount and let them thaw in the refrigerator for a short period before serving.
Due to the presence of cream cheese in the mixture, refrigeration is indeed essential for these homemade after-dinner mints. Cream cheese is a dairy product and can spoil if left at room temperature for extended periods. Keeping them refrigerated helps maintain their freshness, texture, and most importantly, their safety. Store them in an airtight container in the refrigerator to prevent them from drying out or absorbing other odors. However, if you’re serving them at a party or presenting them as a gift, they can safely sit out at room temperature for a few hours (typically up to 2-3 hours, depending on room temperature) without any harm. For longer display times, consider placing their serving platter over a bowl of ice to keep them cool and firm.
Absolutely! The beauty of making these mints yourself is the freedom to customize them. While a classic pastel green or pink is common for mints, you are by no means limited. You don’t even need to add food coloring if you prefer a natural, creamy white look. These are incredibly fun to color for various holidays or special events. Think vibrant red and green for Christmas, soft pastels for Easter or a spring celebration, orange and black for Halloween, or even team colors for a game-day treat. You can use liquid, gel, or natural food colorings. Gel food coloring often provides more vibrant colors with fewer drops. Feel free to experiment with blending colors to create unique hues that perfectly match your theme or personal preference.
These homemade after-dinner mints offer a delightful sensory experience. The outer layer, coated in granulated sugar, provides an ever-so-slight, pleasant crunch that gives way to an incredibly soft, smooth, and creamy interior. They literally melt in your mouth! The mint taste is light, refreshing, and perfectly balanced – it’s present enough to be invigorating but never overpowering or harsh. This delicate flavor profile makes them incredibly easy and enjoyable to eat, appealing even to those who might be sensitive to strong mint flavors. The combination of textures and the gentle minty coolness makes them a truly satisfying treat.
Achieving the perfect consistency for your mint dough is key. If your mixture feels too sticky, it likely needs more powdered sugar. Add it gradually, a quarter cup at a time, until the dough is firm enough to handle without excessive stickiness. If, on the other hand, the dough is too crumbly and won’t come together, it needs a touch more liquid. Add milk very sparingly, just half a tablespoon at a time, mixing thoroughly after each addition until the dough becomes cohesive and pliable. The ideal consistency is stiff but smooth, able to be rolled into a ball and flattened without crumbling or sticking excessively to your hands.
Absolutely! While mint extract provides the classic flavor, these creamy confections are wonderfully adaptable to other extracts. Consider using peppermint extract for a more intense mint flavor, or spearmint for a milder, sweeter mint. Beyond mints, you can explore almond extract for a marzipan-like treat, lemon extract for a zesty bite, or even a touch of vanilla or coconut extract for different profiles. The key is to start with a small amount (e.g., ¼ teaspoon) and add more to taste, as some extracts can be quite potent. Matching the extract flavor to your chosen food coloring can also create fun and festive variations, like lemon yellow mints or almond pastel pink mints.
Essential Ingredients for Your Homemade After-Dinner Mints
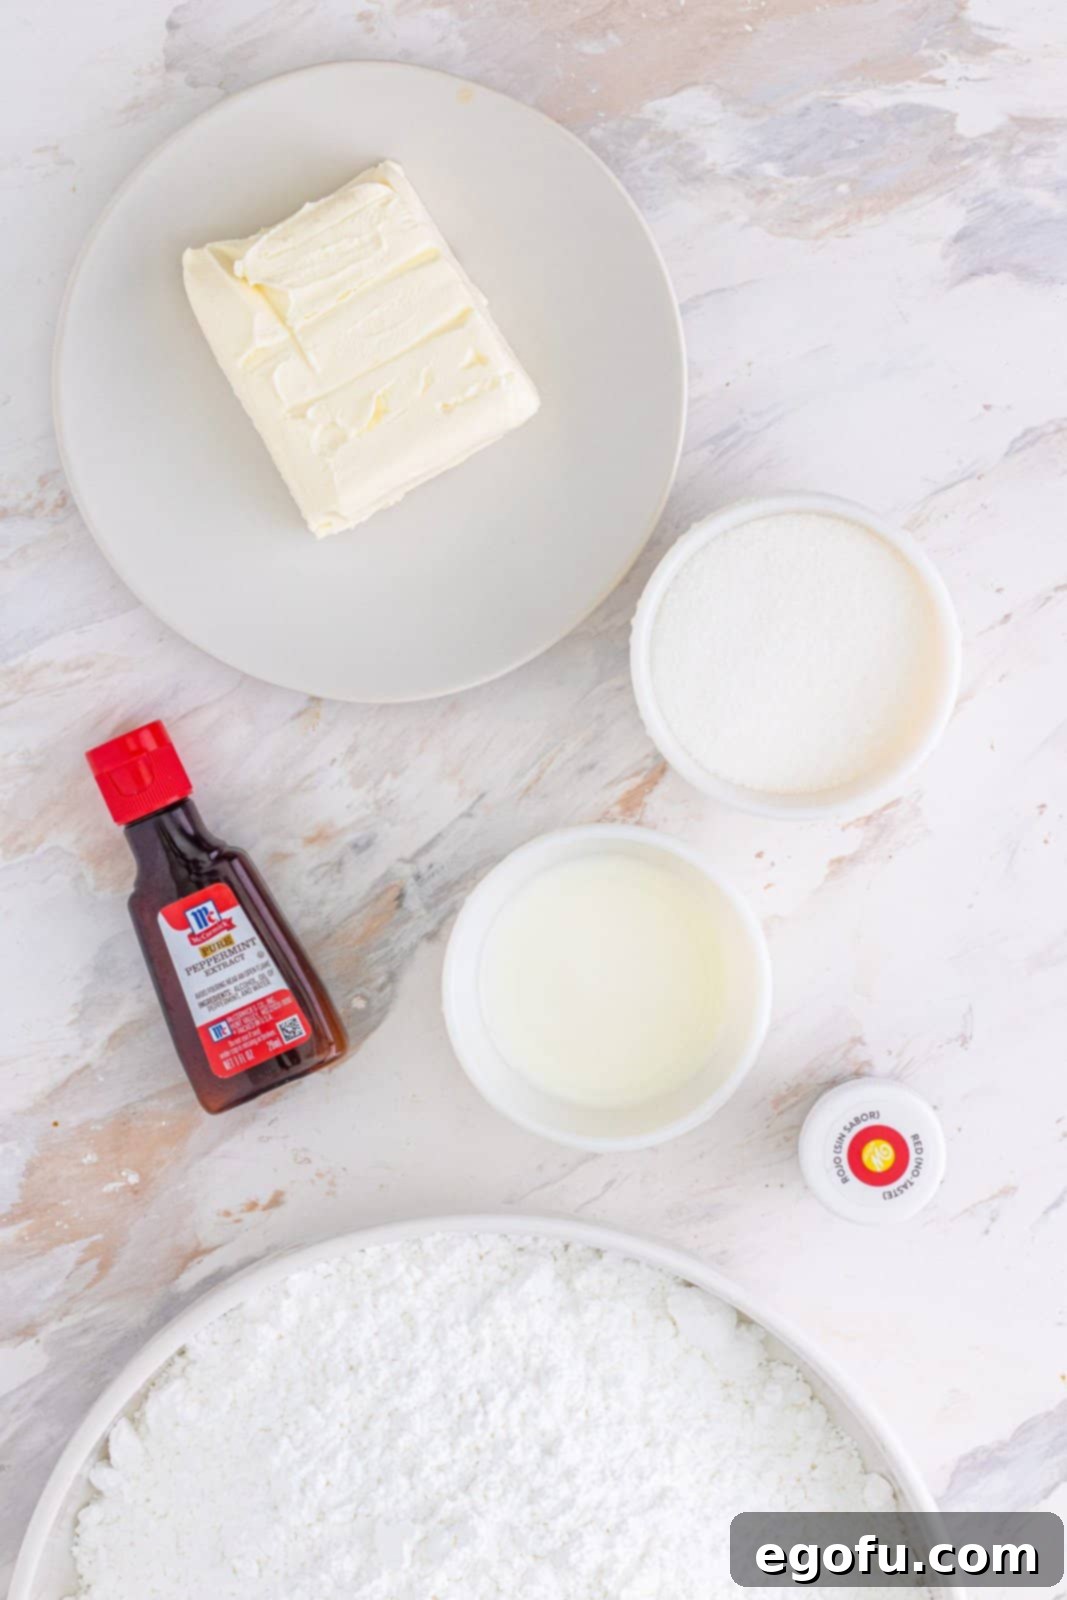
- Cream cheese: The star ingredient that provides the signature creamy texture and rich base for these no-bake mints. Ensure it’s softened to room temperature for smooth blending.
- Mint extract: Delivers that essential refreshing minty flavor. You can adjust the amount to achieve your desired intensity. Peppermint extract can also be used for a stronger flavor.
- Red food color: Optional, but adds a lovely visual appeal. You can choose any color to match a theme or occasion. Gel food coloring often gives more vibrant results.
- Powdered sugar (confectioners’ sugar): Crucial for the mints’ structure and sweetness. It creates the smooth, firm dough.
- Milk: Used sparingly to achieve the perfect stiff, yet pliable dough consistency. Start with a small amount and add more only if needed.
- Granulated sugar: For coating the finished mints, adding a slight textural crunch and sparkling finish.
Step-by-Step Guide: How to Make Homemade After-Dinner Mints
Making these delightful after-dinner mints is a simple and rewarding process, perfect for beginner candy makers. Just follow these easy steps:
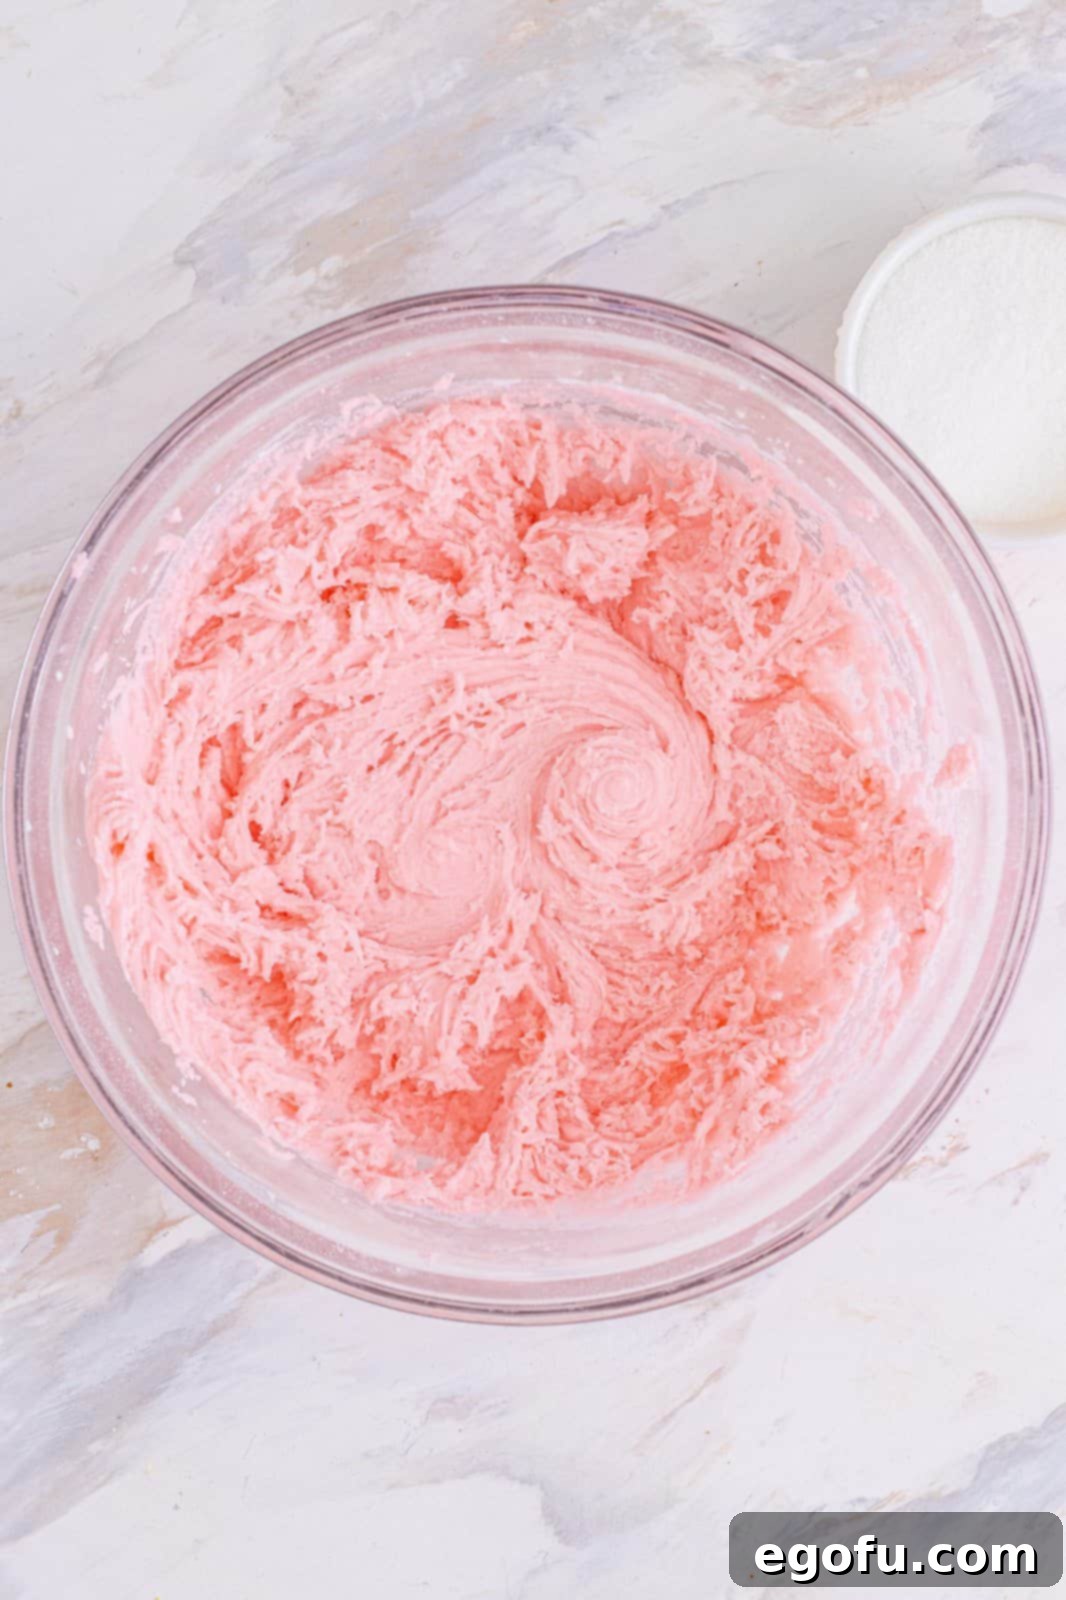
Begin by taking your softened cream cheese and placing it in the bowl of an electric or stand mixer. Add the mint extract and your chosen food coloring. It’s crucial that the cream cheese is truly at room temperature and soft, as this ensures a smooth, lump-free mixture. Beat these ingredients together on medium speed until the mixture is completely smooth, creamy, and evenly colored. If you desire a more intense color, add a few more drops of food coloring until you achieve your preferred shade.

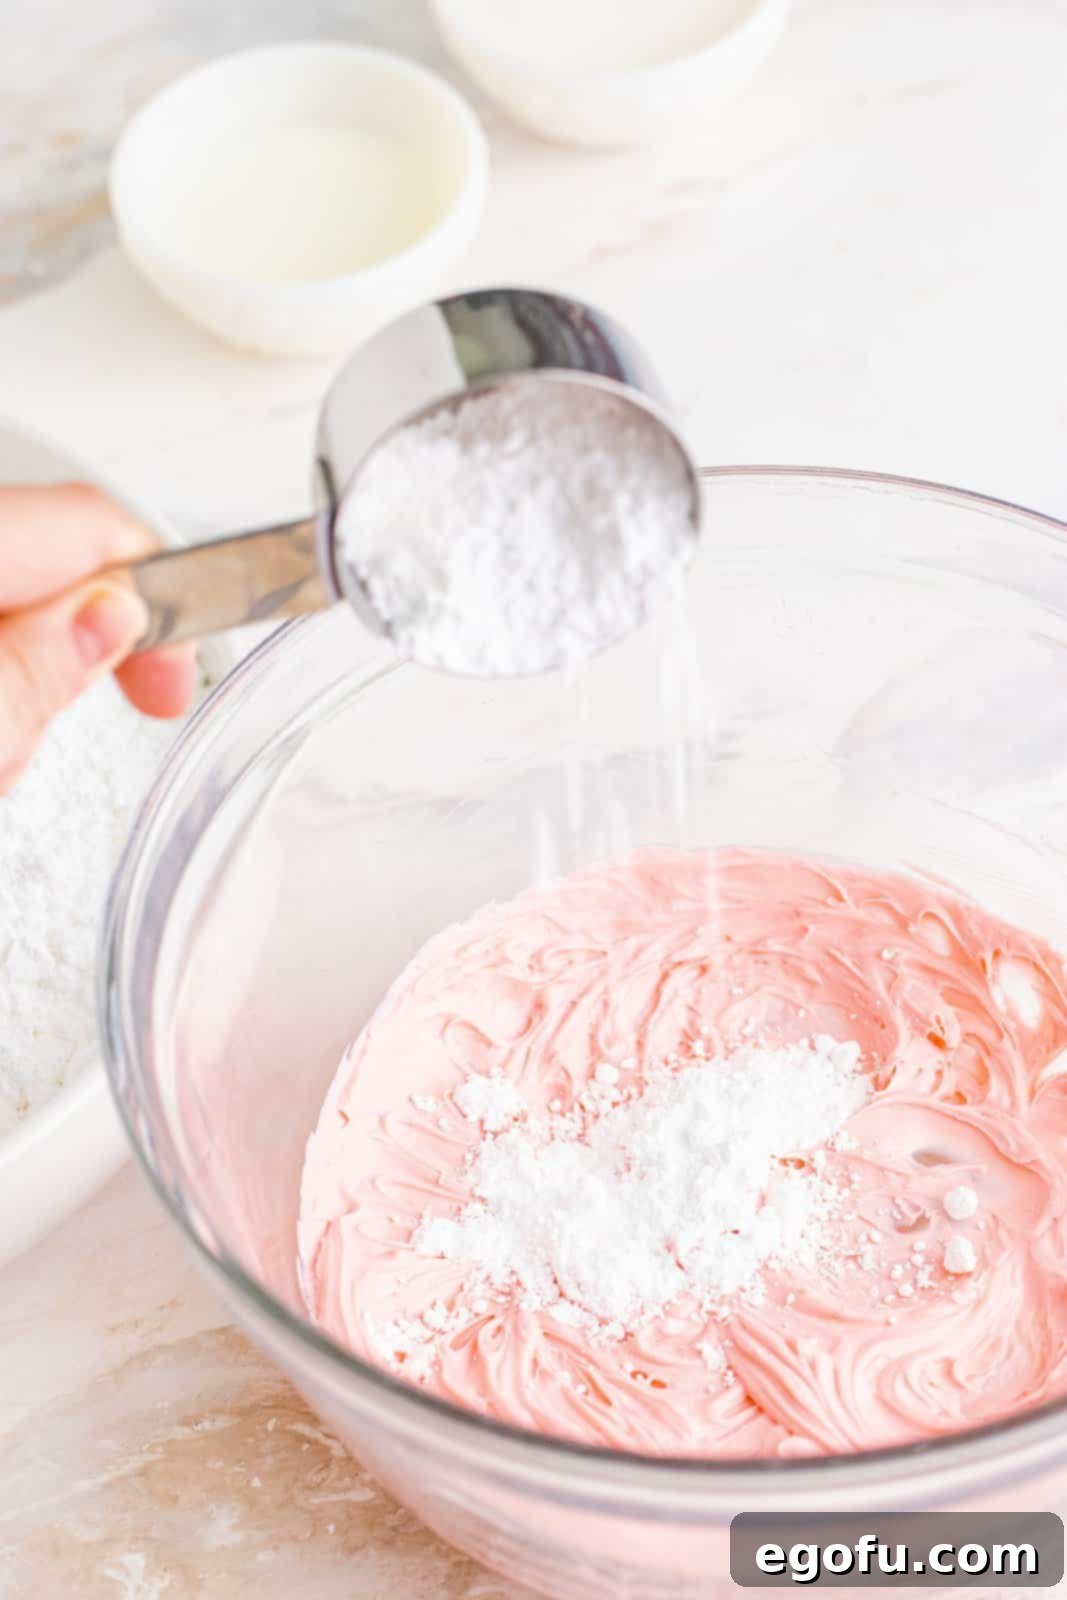
Next, with your mixer on a low speed to prevent a cloud of powdered sugar, slowly begin adding the powdered sugar to the cream cheese mixture. It’s best to add it in small increments, allowing it to incorporate fully before adding more. This gradual addition helps prevent the mixer from seizing up and ensures the sugar is evenly distributed.

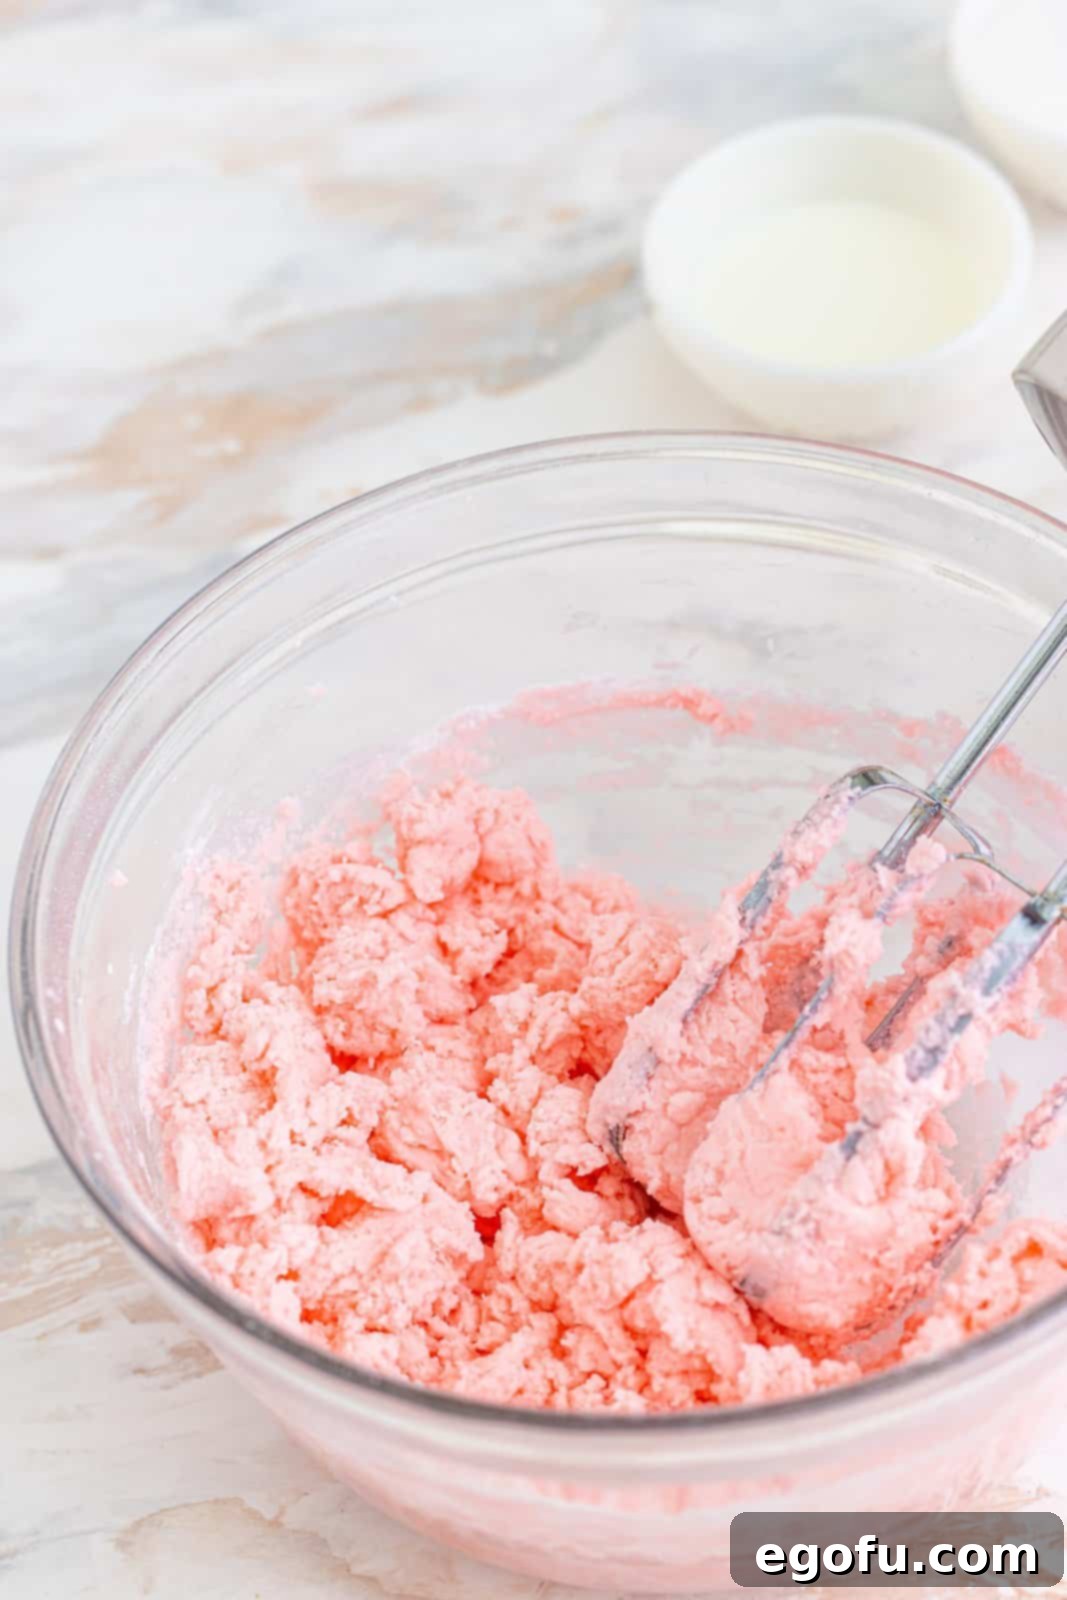
Once you’ve incorporated all the powdered sugar, your mixture will likely appear crumbly. This is perfectly normal! At this stage, it’s time to add the milk. This is a critical step for achieving the right consistency, so be precise. Add just one tablespoon of milk at a time. Mix thoroughly after each addition. You’re aiming for a very stiff dough that is still smooth and pliable, but not sticky. The mixture should start to pull away cleanly from the sides of the bowl. Once it reaches this consistency, stop adding milk – you’ve hit the sweet spot!

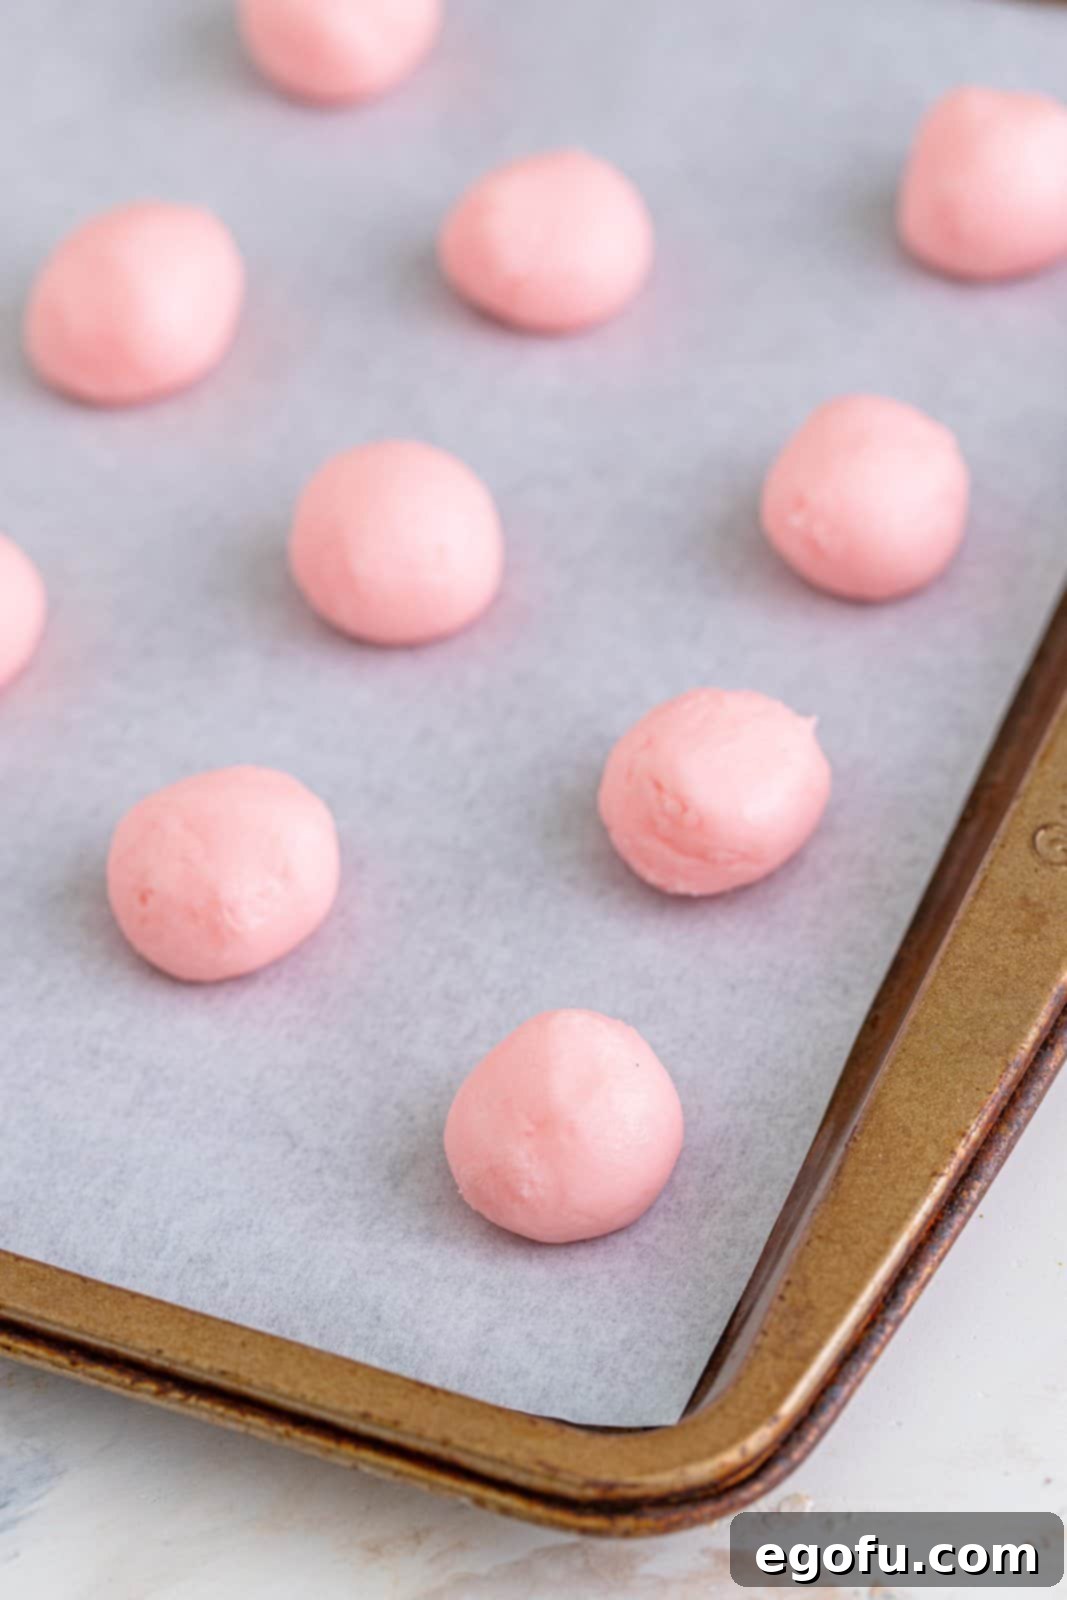
Now for the fun part: shaping your mints! Take approximately a teaspoon of the stiff dough mixture. Roll it between your palms to form a smooth, uniform ball. Aim for relatively small mints; bite-sized portions are generally preferred by most people, as they are delicate and easy to enjoy. Consistent sizing will also make your finished mints look more professional and appealing.

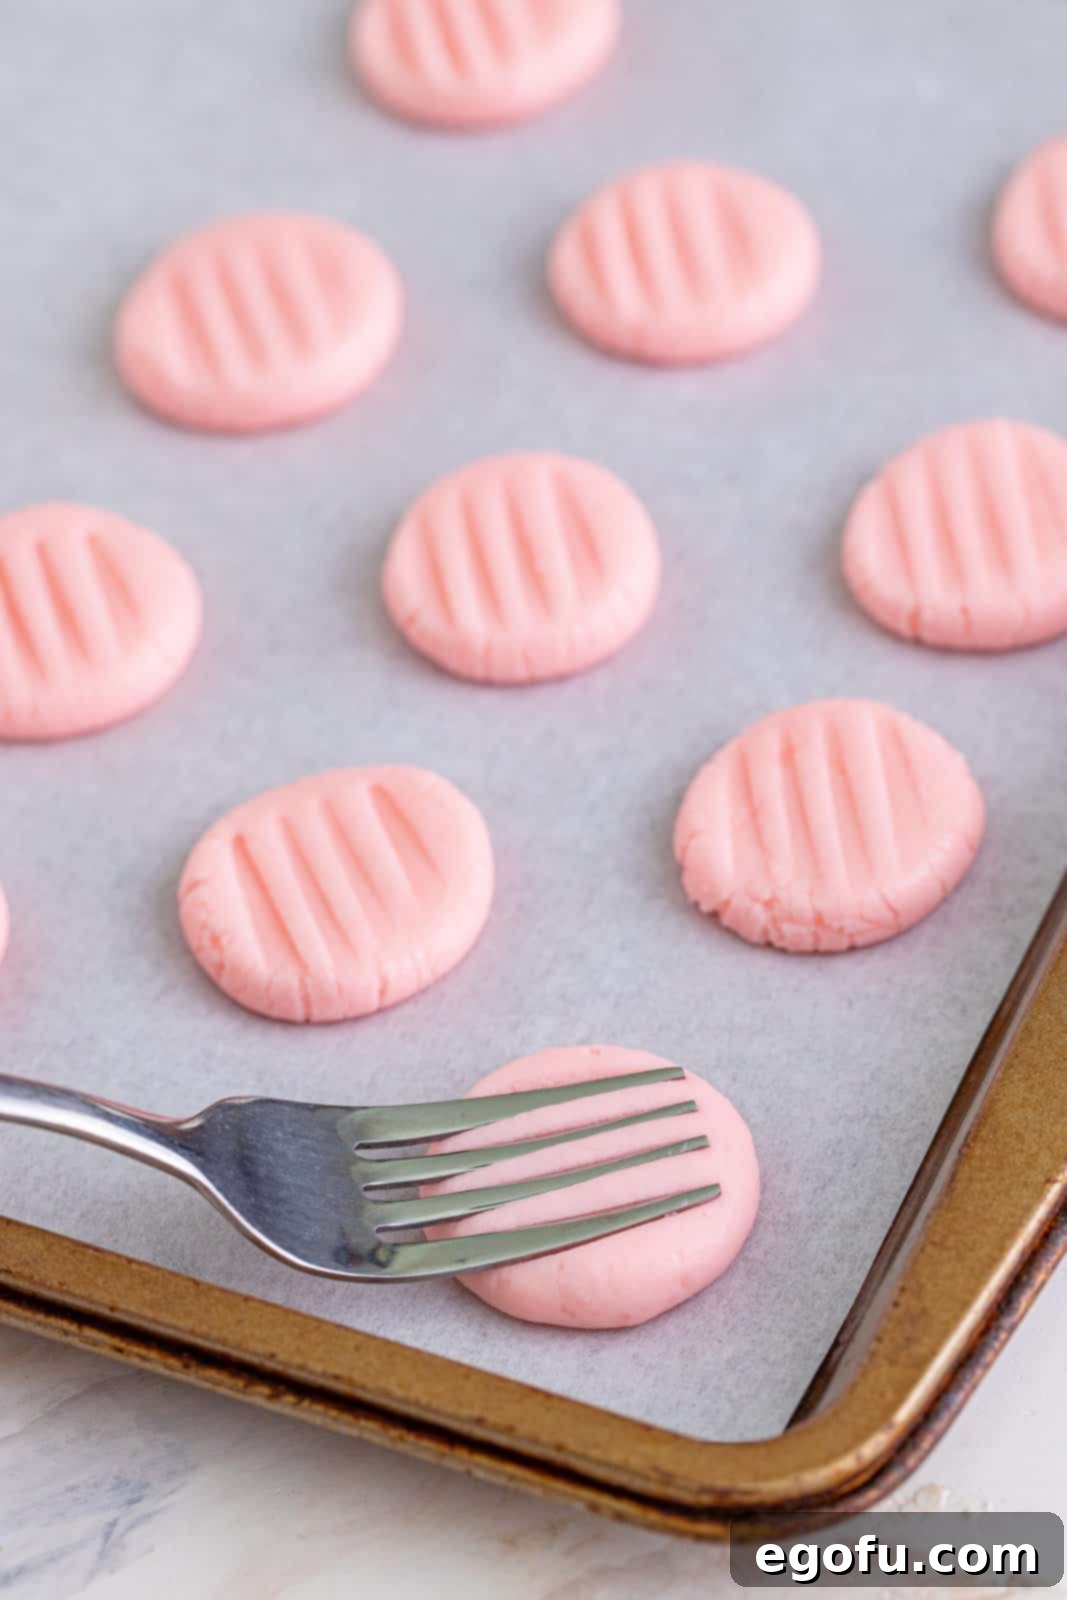
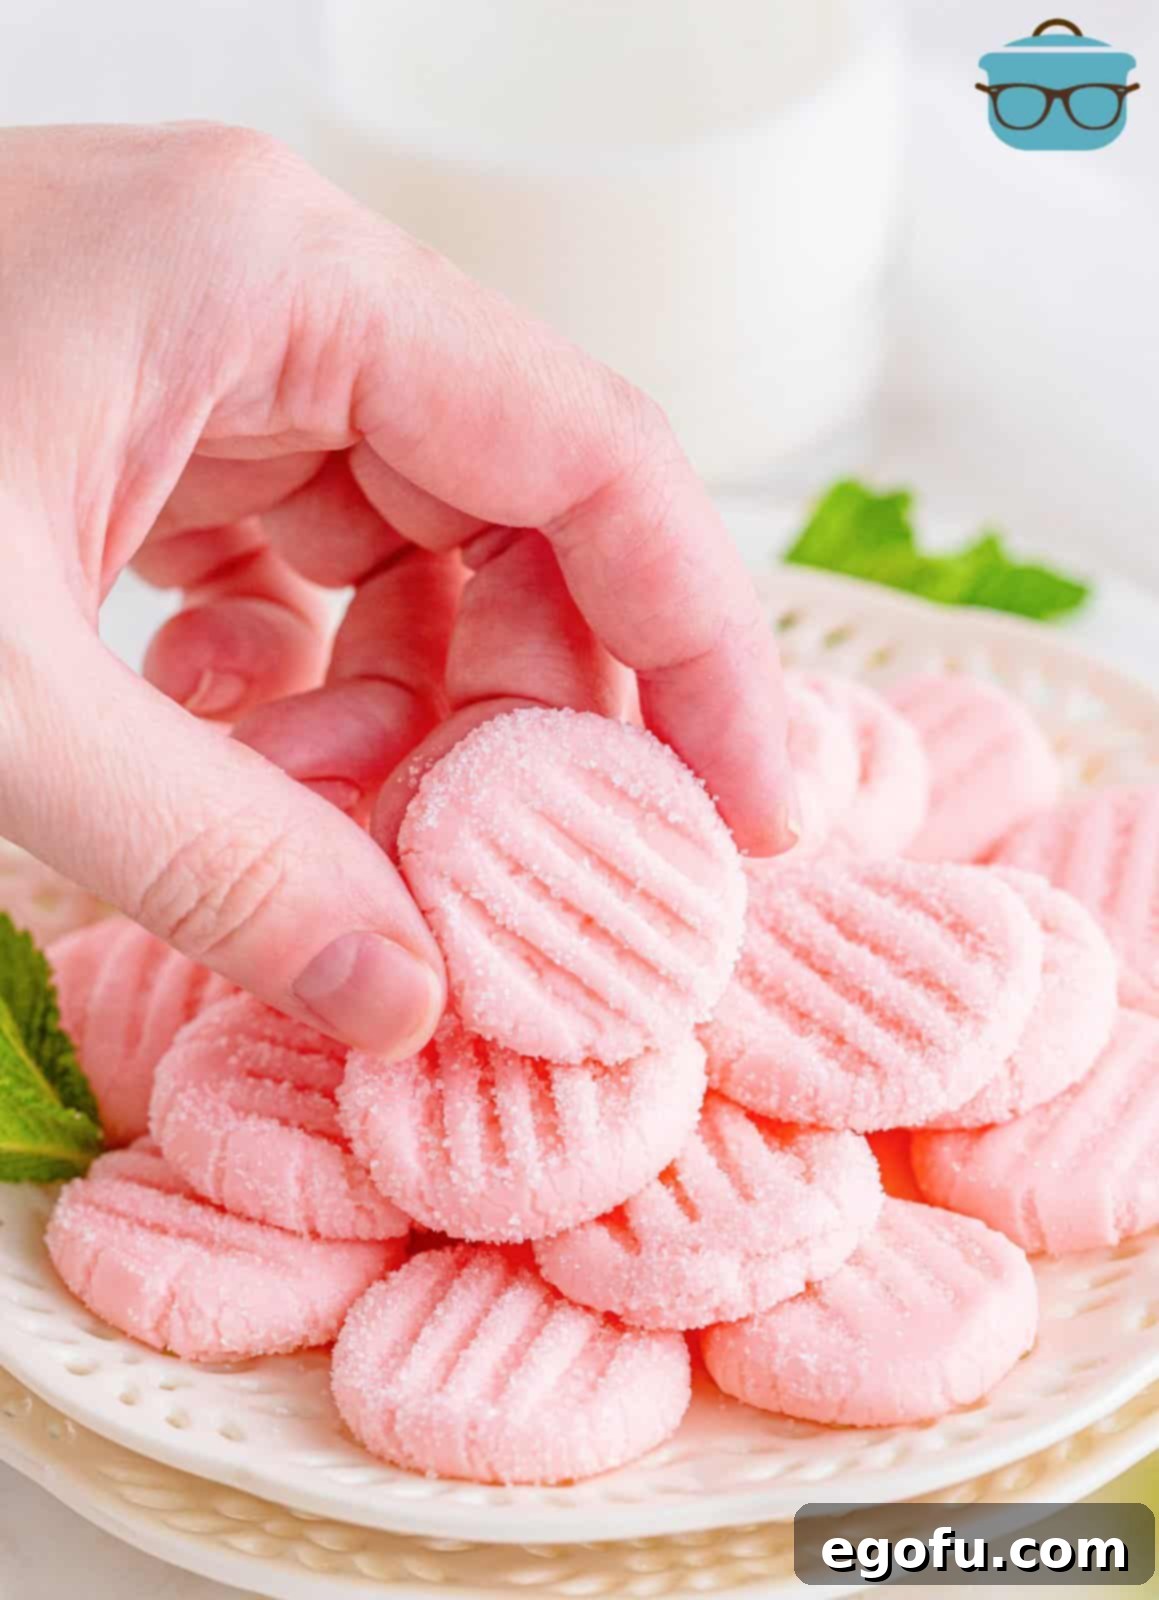
Once you have a smooth ball, place it on a clean surface or your parchment-lined tray. Using the palm of your hand, gently press down on the ball until it flattens to about 1/4 inch thick. Then, take the back of a fork and lightly press it onto the surface of each flattened mint to create distinctive ridges. This not only adds a classic, elegant appearance but also makes them easier to pick up. Think of the pattern you make when pressing down on peanut butter cookies – that’s exactly the effect you’re going for here.

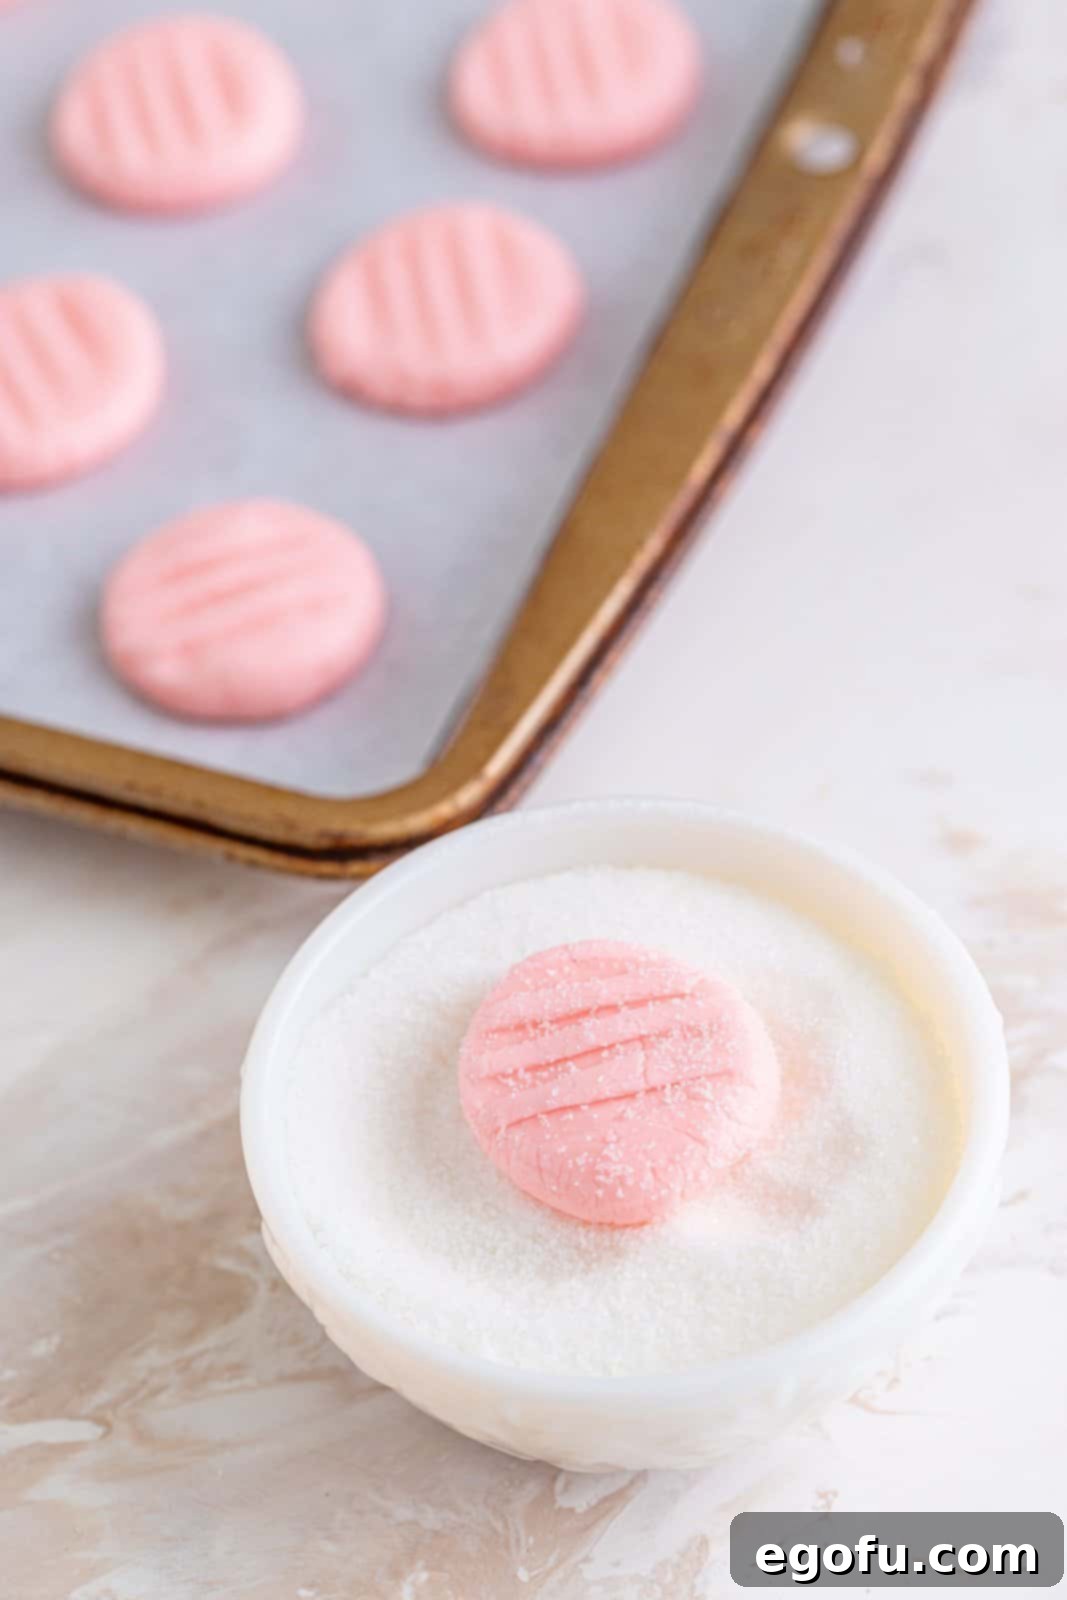
Prepare a small bowl with granulated sugar. Take each shaped mint and gently roll it in the granulated sugar, ensuring it’s evenly coated on all sides. This coating adds a pleasant sparkle and a slight textural crunch, which beautifully contrasts with the creamy interior. It also helps prevent the mints from sticking together.

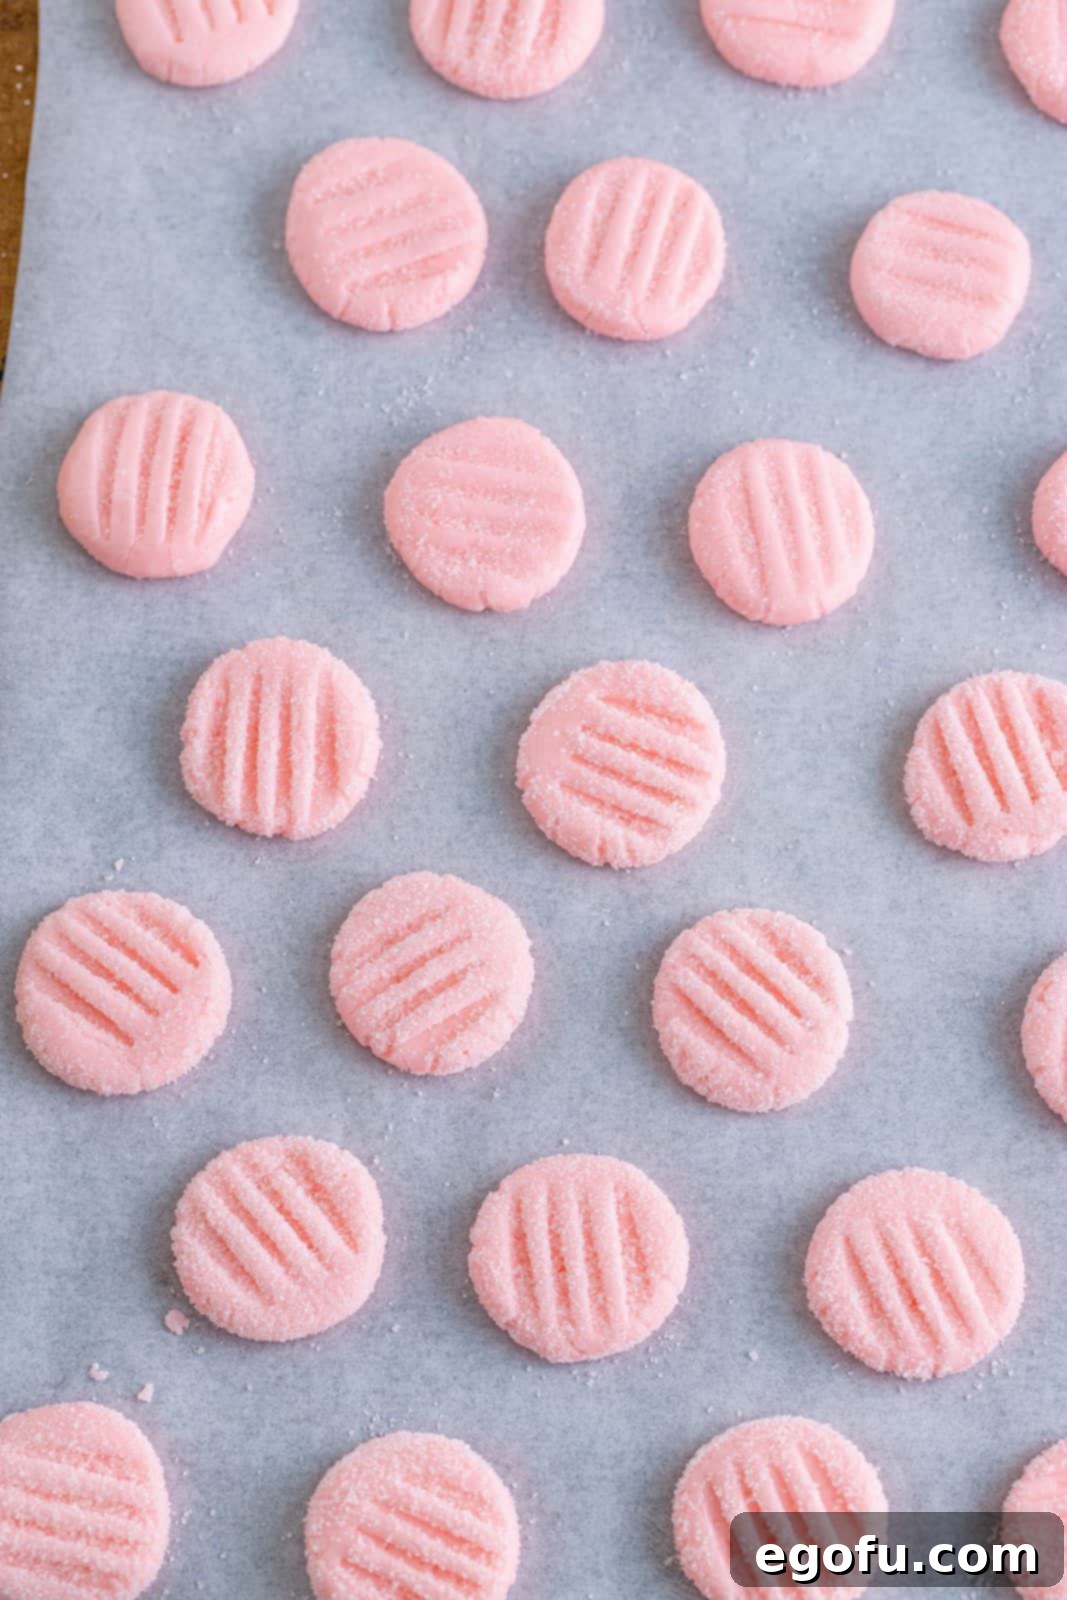
Finally, arrange the sugar-coated mints back on your parchment paper-lined baking trays. Pop the trays into the refrigerator to chill. This cooling period is essential for the mints to firm up and fully set, allowing their flavors to meld and their texture to become perfectly resilient. Once chilled and firm, they are ready to be served and enjoyed!

Remember to store any leftover mints in an airtight container in the refrigerator to maintain their freshness and firm texture.
Pro Tips for Perfect After-Dinner Mints
To ensure your homemade after-dinner mints turn out perfectly every time, keep these expert tips in mind:
- Room Temperature Cream Cheese: This is non-negotiable! Cold cream cheese will result in a lumpy mixture that’s hard to combine smoothly. Take it out of the fridge at least 30 minutes to an hour before you plan to start.
- Gradual Powdered Sugar Addition: Don’t dump all the powdered sugar in at once. Add it slowly, a cup at a time, mixing well after each addition to ensure it’s fully incorporated and to avoid a messy sugar cloud.
- Milk is Key, But Be Careful: The milk amount is crucial for the final dough consistency. Start with the minimum suggested amount, and add in half-tablespoon increments only if the dough is too crumbly to come together. The goal is a stiff, yet pliable dough that pulls away from the bowl and doesn’t stick excessively to your hands.
- Consistent Sizing: For uniform baking and presentation, try to make each ball of dough roughly the same size. A small cookie scoop (about 1 teaspoon) can be helpful for this.
- Don’t Over-Flatten: When pressing the mints, aim for about 1/4 inch thickness. Too thin and they might be brittle; too thick and they lose their delicate melt-in-your-mouth quality.
- Use Parchment Paper: Lining your baking sheets with parchment paper prevents sticking and makes cleanup much easier.
- Chill Thoroughly: The refrigeration step isn’t just to make them firm for handling; it allows the flavors to deepen and the texture to set perfectly. Don’t rush this step!
Creative Variations to Explore
Once you master the basic recipe, the possibilities for customization are endless:
- Flavor Combinations: While mint is classic, try substituting other extracts. Lemon, almond, vanilla, orange, or even coconut extracts can create entirely new flavor profiles. Consider combining a small amount of peppermint with a hint of chocolate extract for a “mint chocolate chip” vibe.
- Color Play: Beyond red, use different food colorings to match seasons, holidays (green for St. Patrick’s Day, pastels for Easter), or party themes. You can even divide the dough into several portions and color each one differently for a multi-colored assortment.
- Textural Coatings: Instead of plain granulated sugar, try rolling the mints in finely crushed sprinkles, cocoa powder (for a richer flavor), or even a mixture of sugar and finely ground nuts for added texture.
- Decorative Touches: After pressing with a fork, you can gently press a small edible pearl or a tiny candy flower into the center of each mint for an extra elegant touch, especially for weddings or baby showers.
- Shape Shifting: Instead of flattening, you can use small candy molds to create intricate shapes. Lightly dust the molds with powdered sugar first to prevent sticking.
Craving More Minty Recipes?
- Mint Chocolate Chip Brownies
- Mint Chip Ice Cream Pie
- Mint Cream Cheese Brownies
- Easy Grasshopper Cake
- No-Churn Mint Ice Cream
Originally published: February 2014
Updated and republished: September 2022
Cream Cheese After Dinner Mints
Print
Pin
Rate
20
20
7 dozen (approx. 84 mints)
Brandie Skibinski
Ingredients
- 4 ounce (1/2 block) cream cheese, softened
- ¼ teaspoon mint extract
- 2-3 drops red food color (or desired color)
- 4 cups powdered sugar
- 1-2 Tablespoons milk (as needed for consistency)
- granulated sugar (for coating)
Instructions
- In an electric or stand mixer, combine the softened cream cheese, mint extract, and food coloring. Beat until the mixture is smooth and creamy. Add more food coloring if a deeper shade is desired.
- Gradually add the powdered sugar to the mixture, keeping the mixer on low speed to prevent it from flying out of the bowl.
- Once all the powdered sugar is incorporated, the mixture will be crumbly. Begin adding milk, one tablespoon at a time, mixing well after each addition.
- Continue adding milk until the mixture forms a stiff but smooth dough that pulls away from the sides of the bowl. Avoid making it too sticky.
- Take about a teaspoon of the dough and roll it into a small ball between your palms. Place it on a parchment-lined baking sheet.
- Gently press each ball down with the palm of your hand until it’s about 1/4 inch thick. Then, lightly press the back of a fork onto each mint to create decorative ridges.
- Roll each shaped mint in granulated sugar until fully coated.
- Arrange the sugar-coated mints back on the baking sheet and refrigerate until they are firm and cool.
- Once thoroughly chilled and hardened, your homemade after-dinner mints are ready to serve and enjoy!
Notes
- Always store these cream cheese mints in an airtight container in the refrigerator to maintain their freshness and texture.
- These mints freeze exceptionally well! Flash freeze them on a tray before transferring to a freezer-safe bag or container for up to 3 months.
- This recipe typically yields approximately 7 dozen (84) mints, depending on their size.
Dessert, Candy
American
Nutrition
Calories:
53kcal
|
Carbohydrates:
11g
|
Sodium:
9mg
|
Sugar:
11g
Nutritional Disclaimer
“The Country Cook” is not a dietician or nutritionist, and any nutritional information shared is an estimate. If calorie count and other nutritional values are important to you, we recommend running the ingredients through whichever online nutritional calculator you prefer. Calories and other nutritional values can vary quite a bit depending on which brands were used.
There you have it – a simple, straightforward, and incredibly rewarding recipe for homemade after-dinner mints. Whether you’re making them for a special occasion, a thoughtful gift, or just to satisfy a sweet craving, these creamy, minty delights are sure to impress. Enjoy the process of creating these beautiful confections and the refreshing burst of flavor they bring!
