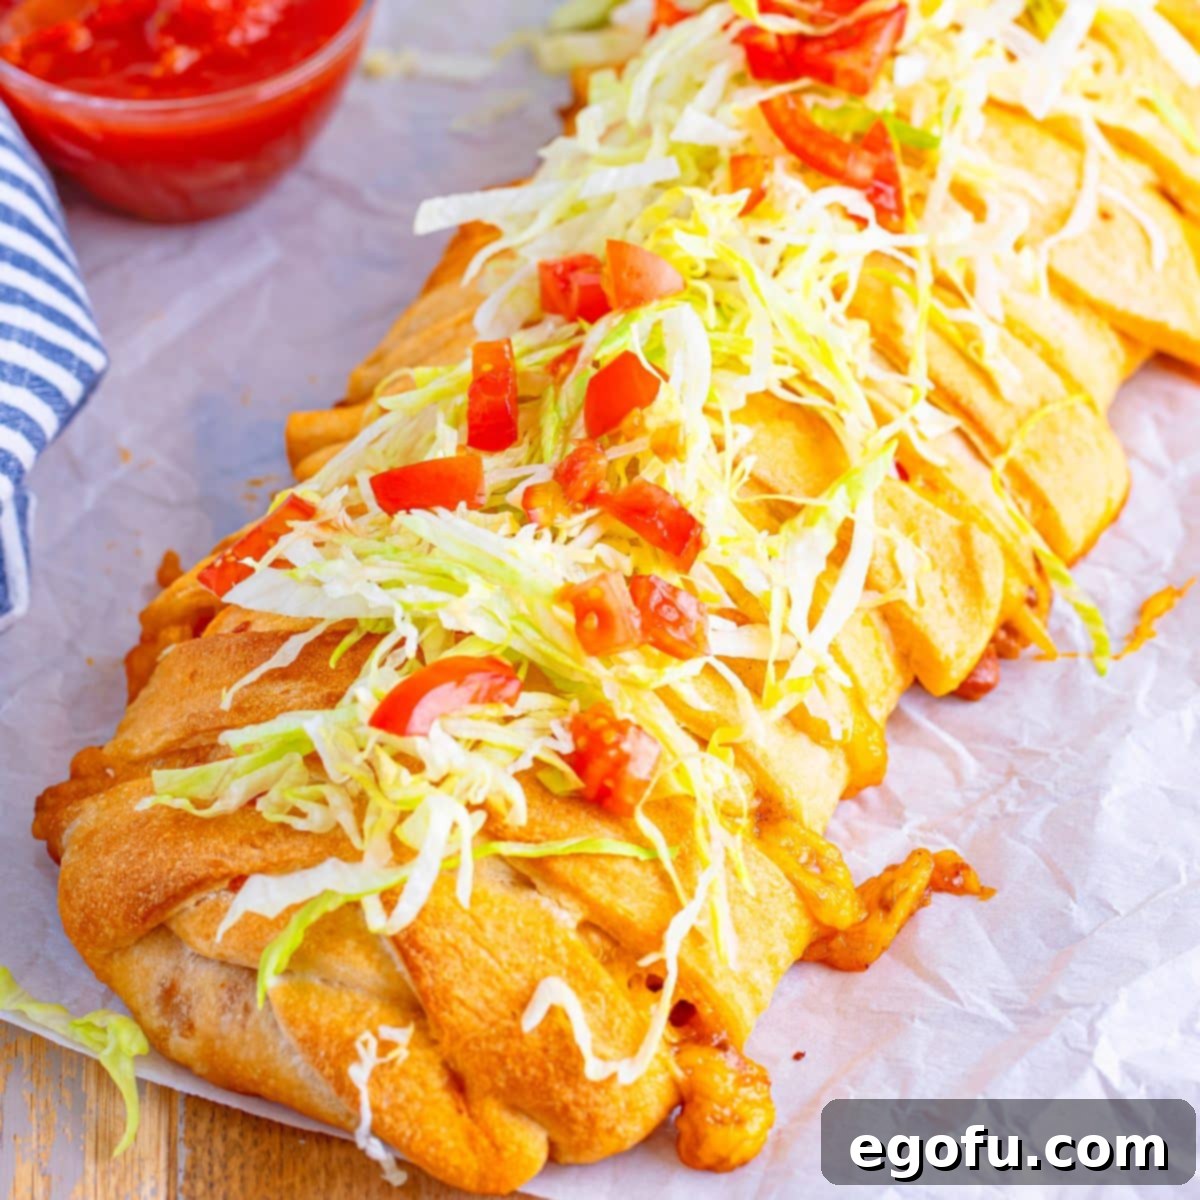
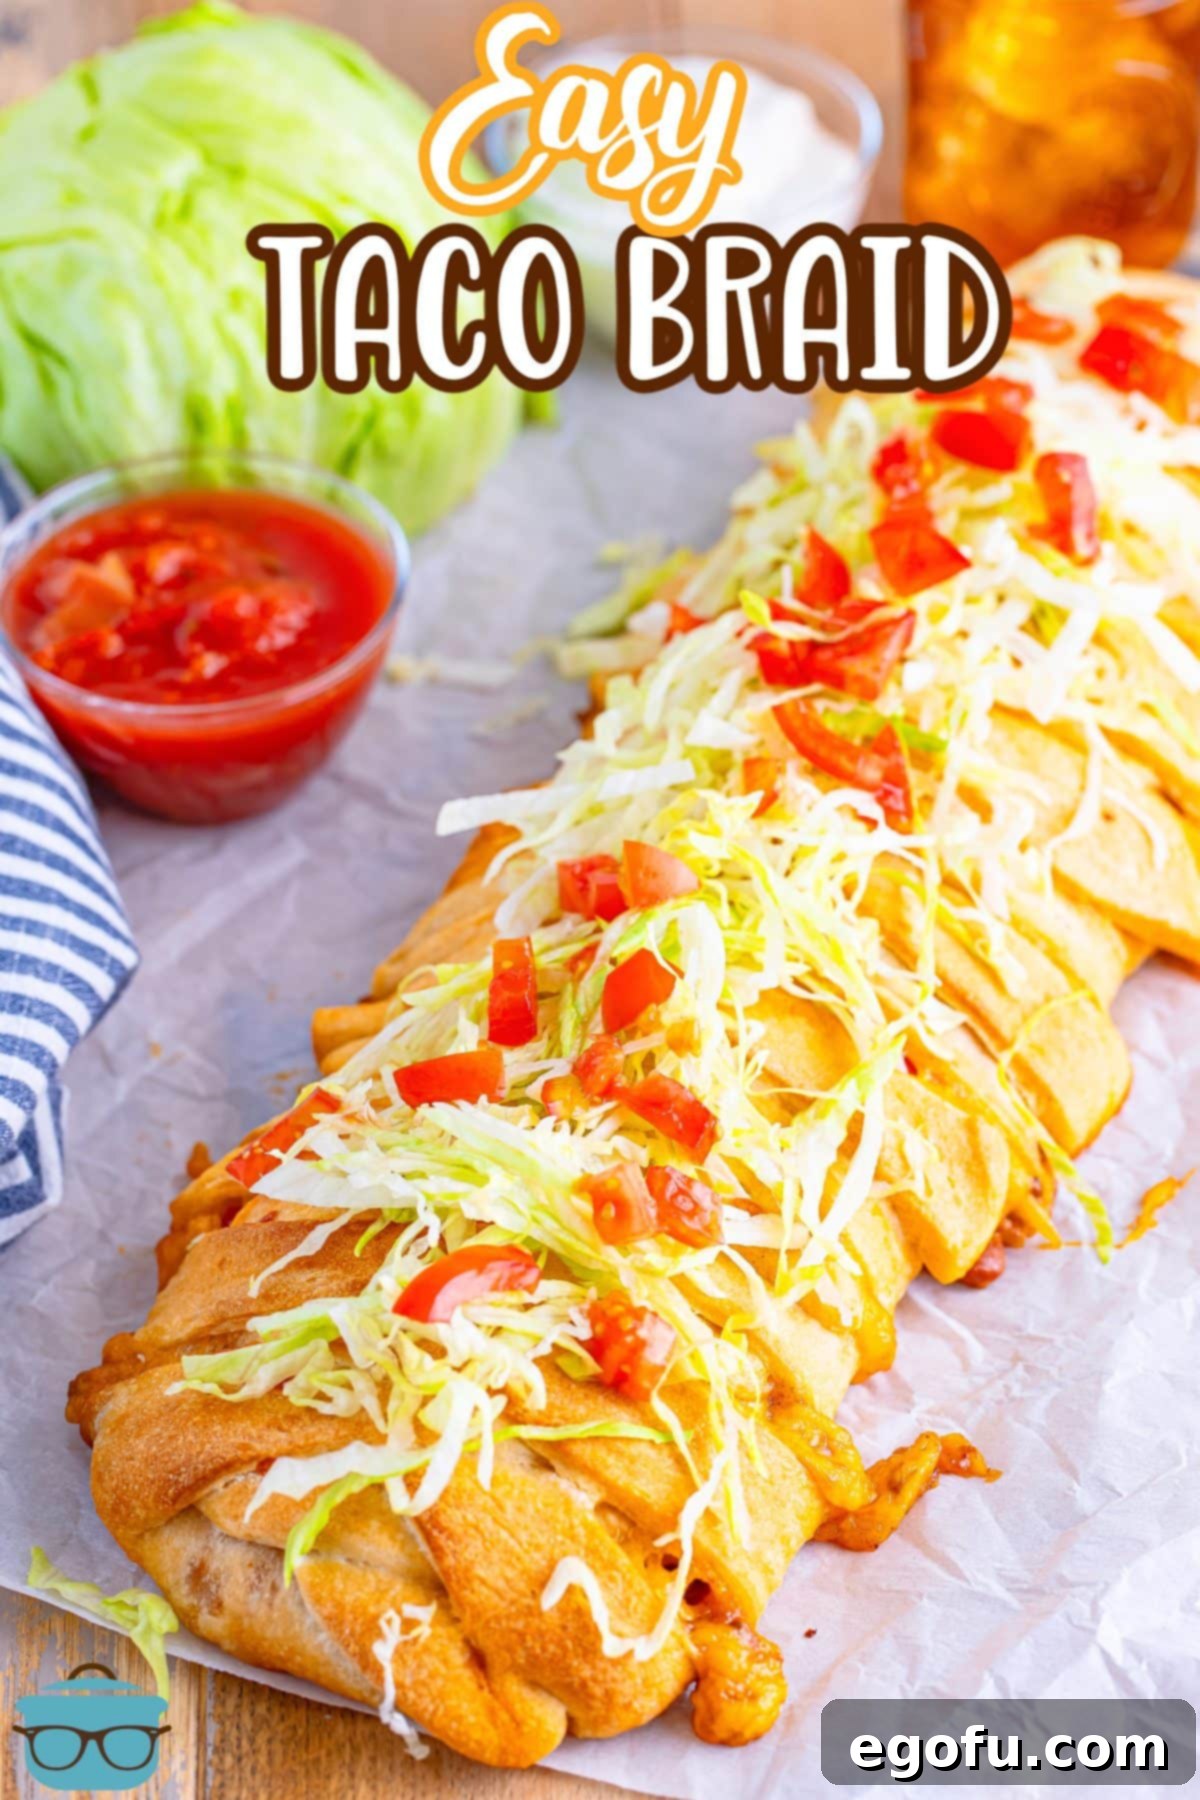
Welcome to your new go-to recipe for a family-friendly weeknight meal! This Easy Taco Braid takes all the beloved flavors of your favorite tacos and wraps them into a convenient, cheesy, and utterly delicious pastry. Using readily available ingredients like store-bought pizza dough, seasoned taco beef, creamy refried beans, melted cheese, and vibrant salsa, this recipe promises a delightful dinner that’s both simple to prepare and a joy to eat. It’s perfect for shaking up your Taco Tuesday routine or impressing guests with minimal effort. Get ready to discover a new family favorite that’s as fun to make as it is to devour!
A Beloved Family Dinner Recipe: The Easy Taco Braid
If you’re searching for a dinner solution that truly pleases everyone at the table, look no further than this Easy Taco Braid. It’s more than just a meal; it’s an experience that brings the family together. The beauty of this recipe lies in its simplicity and versatility. From young kids to adults, everyone appreciates the delightful combination of seasoned ground beef, gooey cheese, and savory beans encased in a golden, flaky crust. It’s a fantastic alternative to traditional tacos, offering a mess-free way to enjoy all those vibrant flavors.
This recipe is designed for busy schedules. With minimal prep time and a straightforward baking process, you can have a wholesome, homemade dinner on the table in under an hour. It’s also incredibly adaptable, allowing you to easily adjust fillings to suit various dietary preferences or picky eaters. Want to involve the kids? They’ll love helping spread the fillings and even assisting with the simple braiding technique. Its generous serving size makes it ideal for larger families, and it doubles effortlessly. Plus, any leftovers freeze beautifully, making it an excellent option for meal prepping and enjoying a homemade dinner even on your busiest days. It’s a dish that truly delivers on convenience, flavor, and family appeal.
Frequently Asked Questions About Our Easy Taco Braid
Absolutely! Using homemade pizza dough can elevate the flavor and texture of your taco braid. If you have a favorite recipe, go for it! Just ensure you roll it out to the specified dimensions (approximately 10×15 inches) to allow for proper braiding and a consistent thickness. Homemade dough often yields a softer, chewier crust compared to refrigerated options. If you’re looking for a reliable recipe, consider trying my homemade pizza dough recipe for a truly from-scratch experience. Remember to let your homemade dough proof adequately for the best results before rolling.
The beauty of this taco braid recipe is its incredible adaptability! You can truly make it your own by adding or swapping out any of your favorite taco fillings. For cheese, feel free to experiment with Monterey Jack, Pepper Jack for a kick, a Mexican blend, or even a smoked cheddar for unique flavor. To enhance the internal filling, consider mixing in fresh pico de gallo for a burst of freshness, or finely diced jalapeños (with or without seeds, depending on your heat preference) for an extra spicy kick. Some people enjoy mixing a dollop of sour cream or cream cheese with finely diced onions directly into the meat mixture for added creaminess and flavor.
Beyond savory, you could even transform this concept entirely! Instead of traditional taco ingredients, envision a “Breakfast Braid” filled with scrambled eggs, cooked sausage or bacon, crispy hash browns, and a sprinkle of cheddar cheese. It’s a fantastic way to utilize the braiding technique for a completely different meal, much like turning an easy breakfast pizza into a braided masterpiece. The possibilities are endless for culinary creativity!
Not at all! While ground beef is a classic choice, this recipe is incredibly forgiving and open to protein substitutions. For a spicier, more robust flavor, chorizo would be absolutely delicious. You could also opt for leaner alternatives like ground chicken, ground turkey, or ground pork. If you prefer, seasoned shredded chicken (perhaps from a rotisserie chicken or slow cooker) or even thinly sliced, chopped skirt steak would work wonderfully.
The key is that whatever meat you choose, it must be fully cooked and drained of excess fat before being added to the dough. Remember that different meats may require different seasoning adjustments and cooking times. For chicken or turkey, you might want to add a touch more oil to prevent dryness or incorporate a creamy element like cream cheese. Adjust seasonings and cooking as needed to ensure your chosen protein is flavorful and cooked through. For vegetarian options, consider seasoned black beans, lentils, or plant-based meat crumbles as a hearty substitute.
The Taco Braid is truly a complete meal in itself, packed with protein, carbs, and vegetables. However, if you’re looking to round out your dinner with a complementary side dish, there are many delicious options. For a classic American pairing, crispy French fries offer a satisfying crunch. To keep with the Mexican theme, consider refreshing cilantro lime rice or a savory Mexican rice. A hearty one-pan taco rice dinner could also work if you’re feeding a crowd and want more starch.
Fresh, vibrant options include a simple green salad with a zesty vinaigrette, creamy homemade guacamole, or the ever-popular chips and salsa. A side of black beans or corn salad would also be excellent. The choice truly depends on whether you prefer something light and refreshing or more substantial to accompany your flavorful braid.
Storing leftover Taco Braid is simple, making it ideal for meal prep or a quick lunch the next day. Once completely cooled, any leftover slices can be placed in an airtight container and refrigerated for up to 3 days. For best reheating results, individual slices can be warmed in the microwave for 1-2 minutes or in a toaster oven at 350°F (175°C) for about 10-15 minutes until heated through and the crust is crisp again.
The Taco Braid also freezes exceptionally well. To freeze, wrap individual slices or the entire cooled braid very tightly in plastic wrap, then an additional layer of aluminum foil. Place the well-wrapped braid into a freezer-safe ziploc bag or container. It can be stored in the freezer for up to 3 months. When ready to enjoy, thaw overnight in the refrigerator and then reheat as desired. For a quicker reheat from frozen, you can warm it in the oven at a lower temperature (around 300°F/150°C) until heated through, which might take 30-40 minutes.
Essential Ingredients for Your Delicious Taco Braid
Gathering your ingredients is the first step towards creating this sensational Taco Braid. Most of these items are pantry staples or easily found at your local grocery store, ensuring a hassle-free preparation.
- Refrigerated Pizza Crust: This is your shortcut to a quick meal. A 13.8-ounce tube is typically perfect. While store-bought is convenient, feel free to use homemade pizza dough for a fresher, chewier crust. Some creative cooks have even experimented with crescent roll dough sheets, which can impart a slightly sweet note to the savory fillings. If using crescent dough, ensure it’s the sheet variety for easier rolling and braiding.
- Ground Beef: One pound of lean ground beef is ideal for a balanced texture. For alternative protein options or vegetarian variations, refer to our FAQ section above. Always remember to cook and drain your chosen meat thoroughly before incorporating it into the braid.
- Taco Seasoning: A 1.25-ounce packet of store-bought taco seasoning simplifies the flavoring process. Alternatively, if you prefer to control the spice level and ingredients, making your own Homemade Taco Seasoning is an excellent option and adds a personalized touch.
- Water: Used to help the taco seasoning blend seamlessly with the ground beef, creating a rich and flavorful mixture that coats every crumble.
- Refried Beans: One cup of your favorite canned refried beans adds a creamy, hearty layer to the braid. For a homemade touch, you can prepare your own Slow Cooker Refried Beans. If you’re not a fan of refried beans, you can omit them or even mix them directly into the seasoned ground beef for a more cohesive filling.
- Salsa: One cup of your preferred salsa brings a fresh, zesty kick. Brands like Herdez are popular for their balanced flavor. Experiment with different heat levels or types, such as a mild garden salsa, a smoky chipotle salsa, or a tangy tomatillo salsa, to best suit your palate.
- Shredded Cheddar Cheese: Two cups of shredded cheddar cheese provide that irresistible, gooey factor. For superior melting and flavor, shredding fresh cheese from a block is always recommended. However, pre-shredded Mexican blend or sharp cheddar cheese from a bag works perfectly well for convenience.
- Finely Diced Tomatoes (divided use): Two cups of fresh, finely diced tomatoes add a burst of color and a juicy, fresh element to the filling and as a garnish. While optional inside the braid, they provide a lovely texture and taste contrast.
- Melted Butter: Two tablespoons of melted butter brushed over the dough before baking ensure a beautiful golden-brown crust and a rich, buttery flavor.
- Your Favorite Toppings (optional): Fresh chopped lettuce, sour cream, and additional diced tomatoes are classic taco toppings that perfectly complement the baked braid. Consider adding sliced black olives, green onions, or even a drizzle of hot sauce for an extra layer of flavor.

Crafting Your Own Easy Taco Braid: A Step-by-Step Guide
Creating this magnificent Taco Braid is a simple and rewarding process. Follow these clear steps to achieve a perfectly baked, flavorful, and visually appealing dinner.
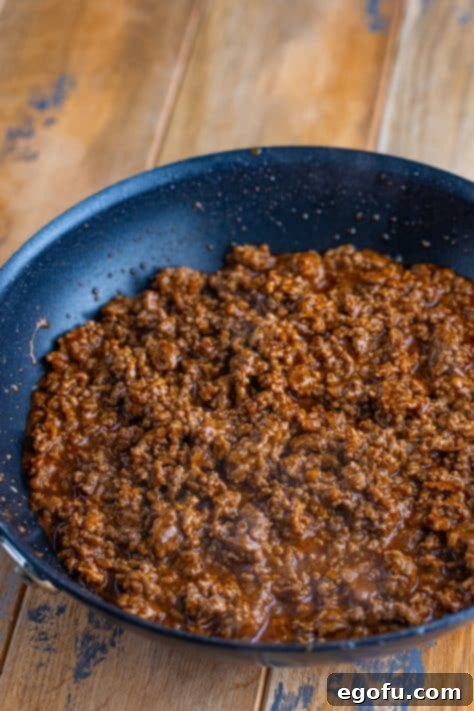
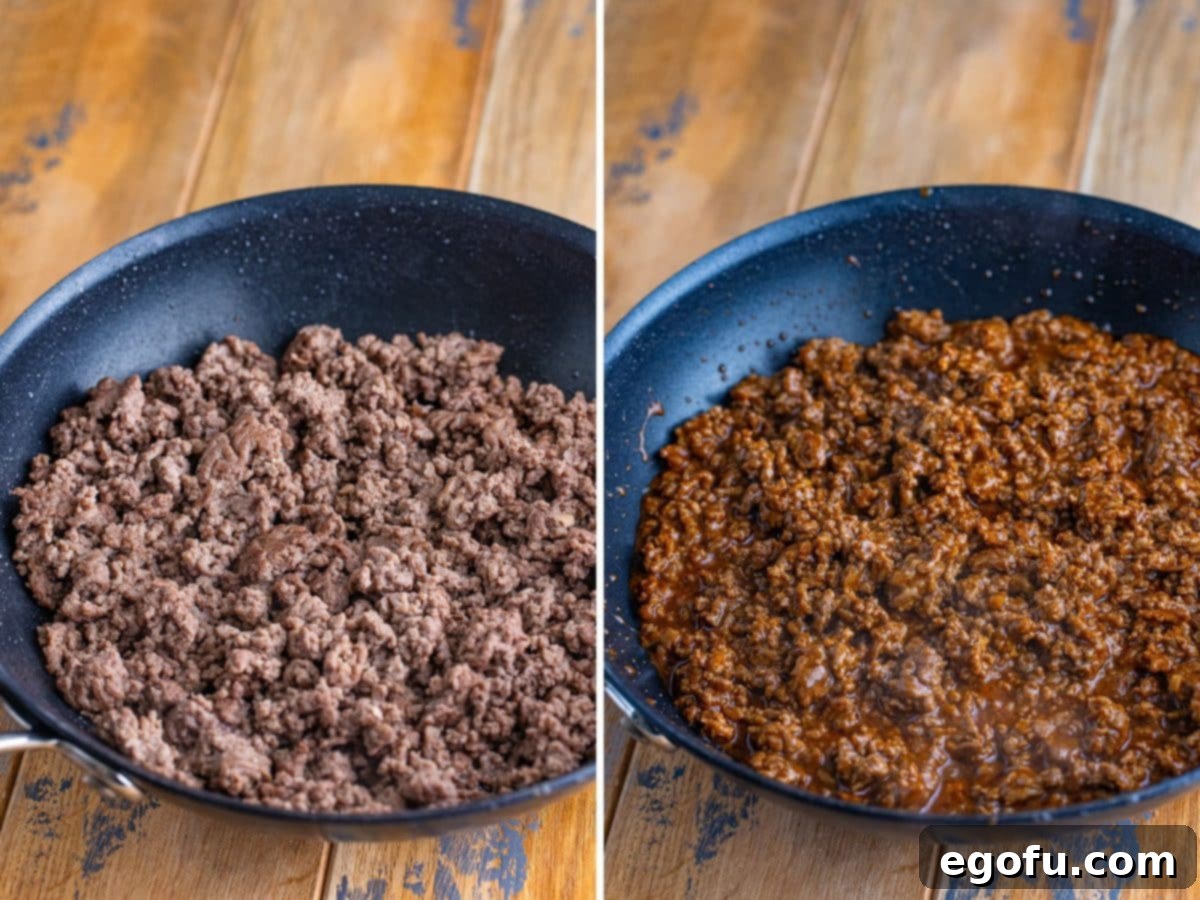
Step 1: Prepare the Taco Meat. Begin by browning and crumbling one pound of ground beef in a large skillet over medium heat. Cook thoroughly until no pink remains, ensuring to break the meat into fine, even crumbles. Once cooked, carefully drain any excess grease from the skillet. This step is crucial for preventing a soggy braid. Stir in the taco seasoning and ¾ cup of water, mixing well until the meat is evenly coated and the seasoning is fully incorporated. Reduce the heat to low and allow the mixture to simmer for 5 to 7 minutes, or until the liquid has thickened and the flavors have melded beautifully. Set aside to cool slightly.
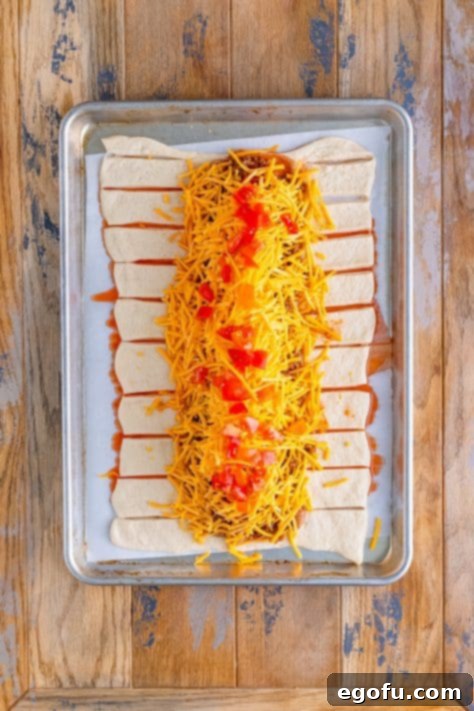
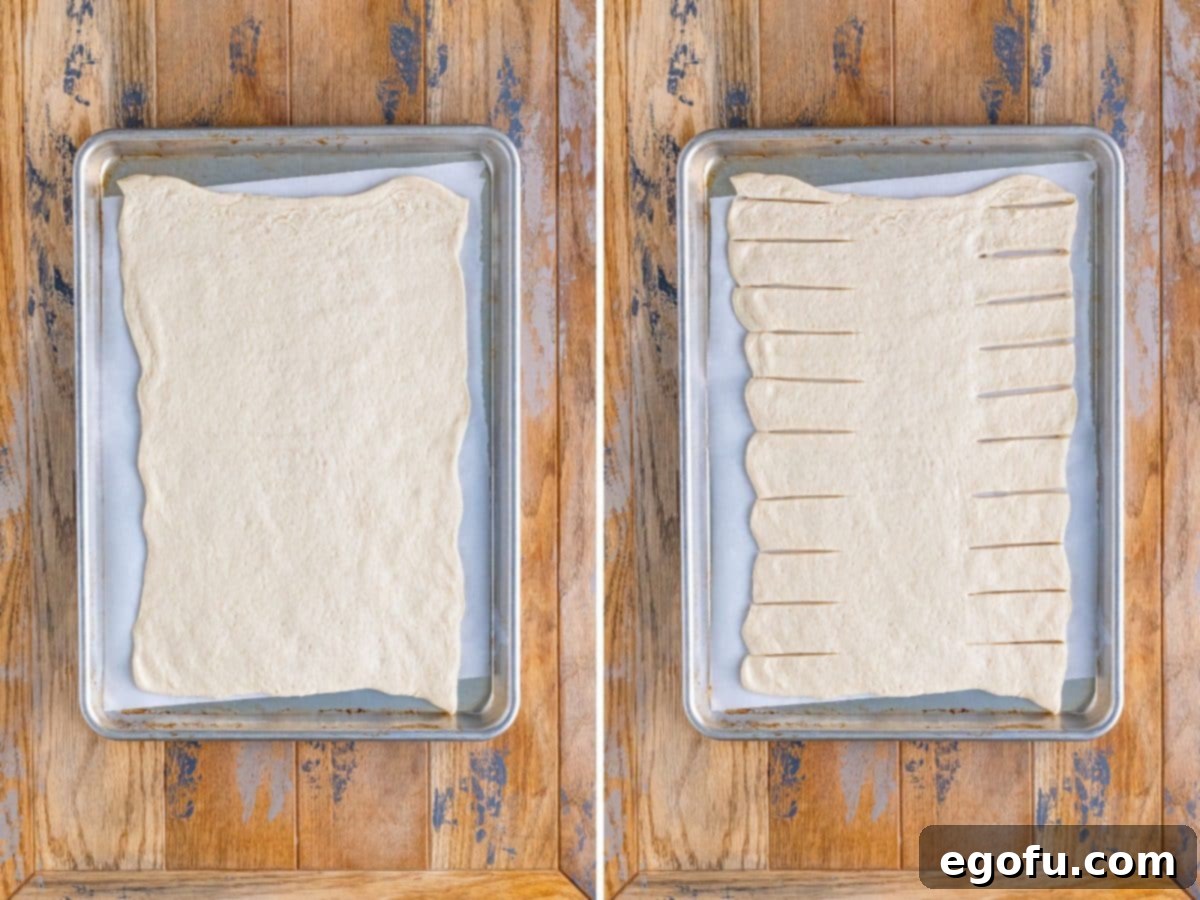
Step 2: Prepare the Pizza Dough. Preheat your oven to 375°F (190°C). Lay a large piece of parchment paper on your countertop or a clean surface. Unroll the refrigerated pizza dough onto the parchment paper. Gently roll or stretch the dough with your hands until it forms a rectangle measuring approximately 10×15 inches. Aim for an even thickness across the entire sheet. Once shaped, carefully transfer the parchment paper and dough onto a large, rimmed baking sheet. Using a pizza cutter or a sharp knife, make even slices along both long sides of the dough. These slices should be about 1 ½ inches wide and extend roughly 3 inches into the dough, leaving a solid 4-inch wide strip down the center for your fillings. These cuts will form the “braid” that encases your delicious fillings.
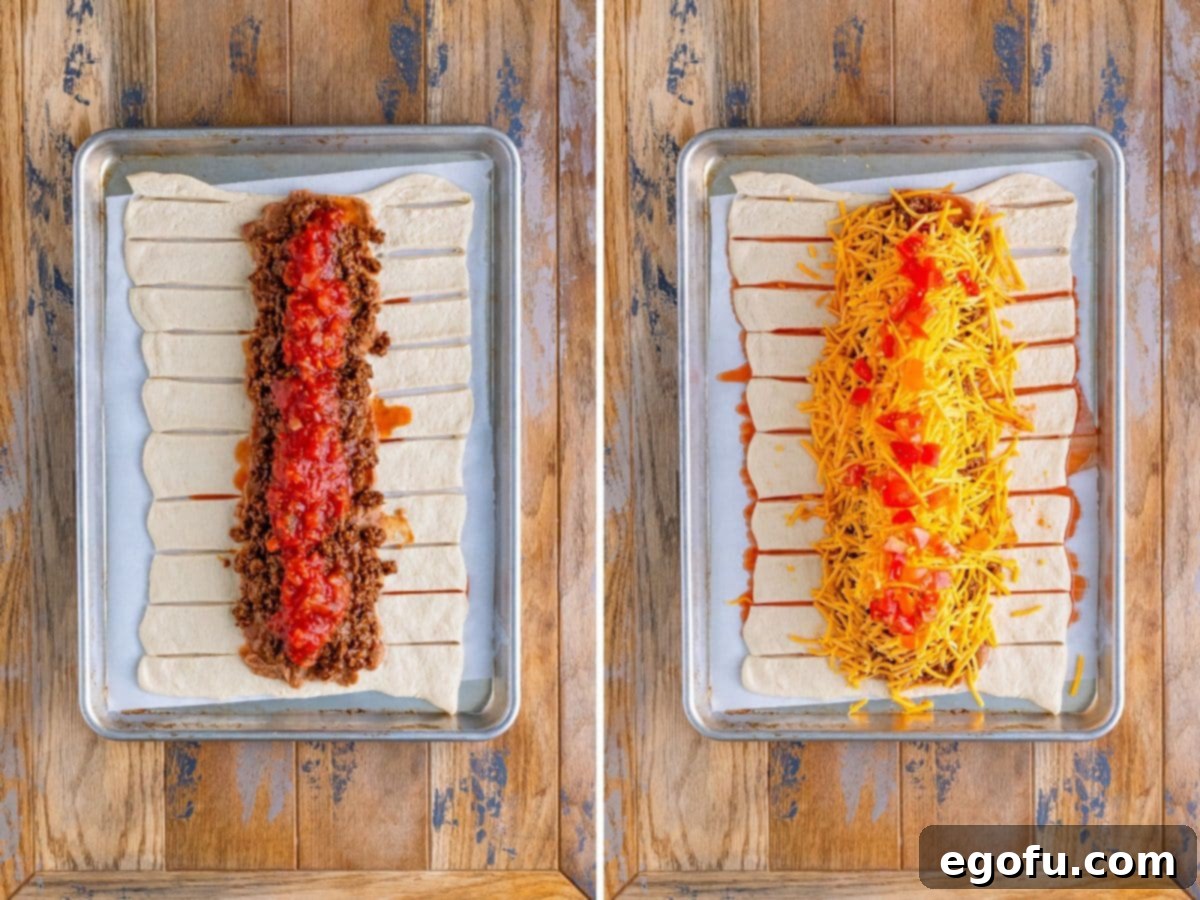
Step 3: Layer the Refried Beans and Beef. In a microwave-safe bowl, warm one cup of refried beans for about 45 seconds to a minute, or until they are soft and easily spreadable. Evenly spread the warmed refried beans down the solid center strip of the pizza dough, extending almost to the ends. Next, spoon the seasoned ground beef mixture directly over the refried beans, creating another consistent layer in the center of the dough.

Step 4: Add Salsa, Cheese, and Tomatoes. Now, it’s time to add the vibrant flavors! Evenly spread one cup of salsa over the layer of seasoned ground beef. Follow this with a generous sprinkle of two cups of shredded cheddar cheese. Finally, distribute one cup of finely diced tomatoes over the cheese layer. These layers create a burst of flavor and a rich, satisfying texture in every bite of your finished braid.
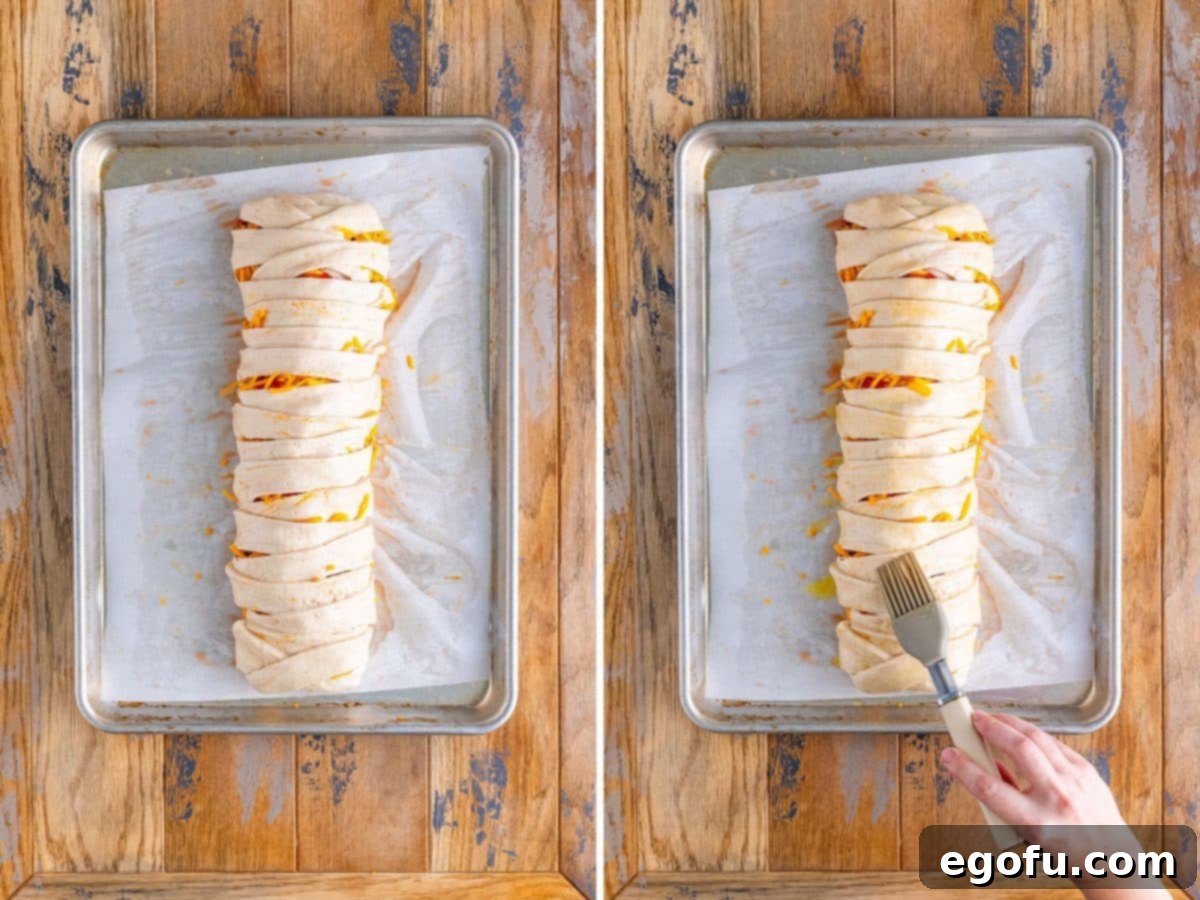
Step 5: Braid the Dough. To begin the braiding process, first fold the shorter end of the dough up and over the filling at one end of your rectangle. Then, take the first cut strip from one side (e.g., the left side) and fold it diagonally over the filling towards the opposite side. Repeat this with the corresponding strip from the other side (e.g., the right side), folding it diagonally over the filling to meet the first strip. Continue this alternating pattern, crossing strips over the center filling, working your way down the length of the dough until you have only two strips left at the bottom. Fold the remaining shorter end of the dough up over the filling, then wrap the last two side strips over it to securely enclose all the delicious contents. This creates a beautifully woven, sealed pastry.
Step 6: Butter and Bake. Gently brush the entire top and sides of the braided dough with two tablespoons of melted butter. This butter wash will help the crust achieve a gorgeous golden-brown color and a lovely, flaky texture. Place the baking sheet with your braided taco on the middle rack of the preheated oven. Bake for 20 to 25 minutes, or until the crust is beautifully golden brown, puffed, and the cheese is bubbly and melted through.
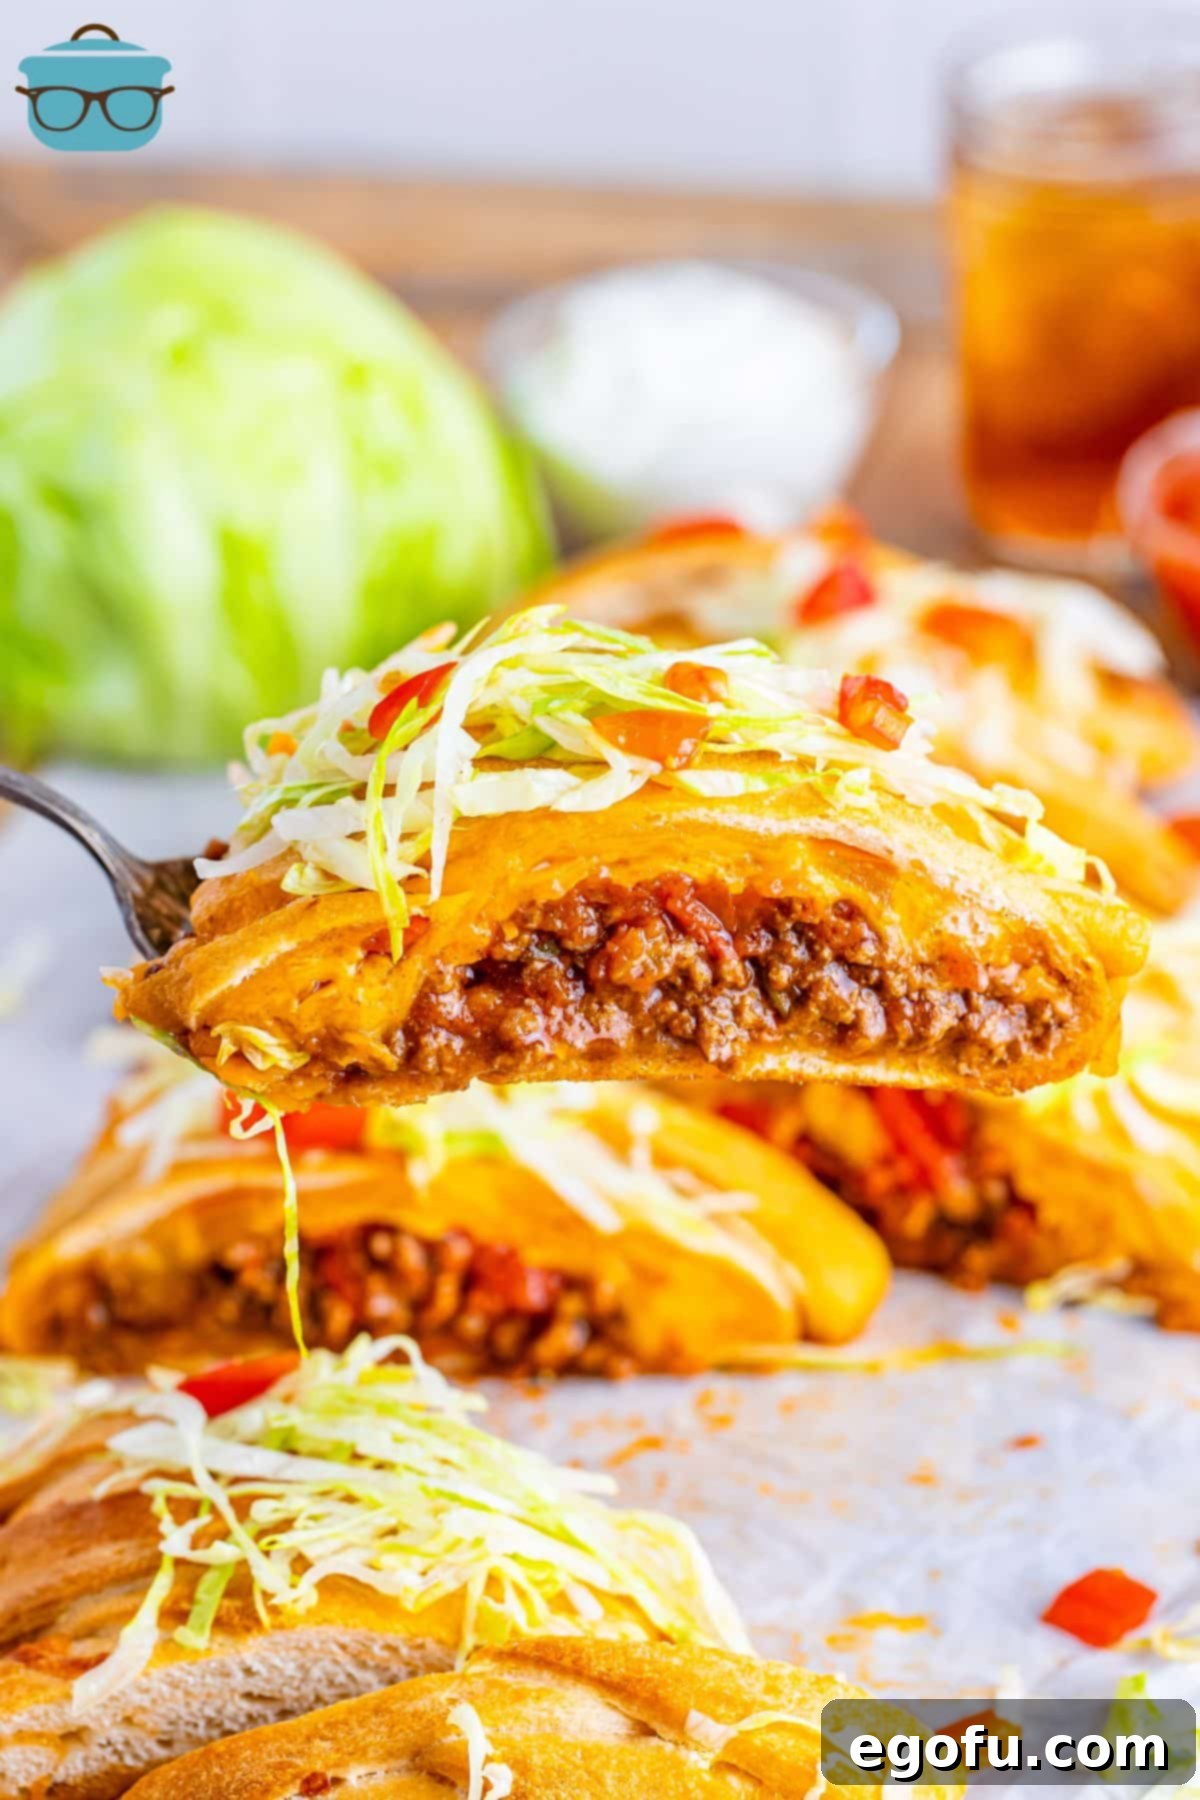
Step 7: Cool, Garnish, and Serve. Once baked to perfection, remove the Taco Braid from the oven. Allow it to cool on the baking sheet for at least 5 minutes before attempting to slice and serve. This brief cooling period helps the fillings set, making it easier to cut clean slices without everything spilling out. Before serving, you can generously top the braid with fresh chopped lettuce and the remaining diced tomatoes, if desired.

For the ultimate taco experience, serve each slice with a dollop of cool sour cream and a drizzle of your favorite taco sauce. Enjoy your homemade, flavorful, and easy Taco Braid!

Craving More Delicious Taco-Inspired Recipes?
If you loved this Easy Taco Braid, you’re in for a treat! The world of taco-inspired dishes is vast and incredibly flavorful. Explore more creative ways to enjoy those classic Mexican flavors with these fantastic recipes:
- Taco Pizza: A delicious fusion of two family favorites!
- Taco Pie: Layers of savory goodness in a pie crust.
- Bisquick Taco Casserole: Quick, easy, and satisfying.
- Taco Bell Mexican Pizza: Recreate this iconic fast-food dish at home.
- Taco Pasta Salad: A refreshing and hearty side dish or light meal.
- Cornbread Taco Bake: Comfort food with a Tex-Mex twist.
- Dorito Taco Casserole: Crunchy, cheesy, and packed with flavor.
- Taco Bake: A simple and delicious one-dish wonder.
- Doritos Taco Salad: A fun and customizable salad.
- Navajo (Fry Bread) Tacos: A unique and traditional take on tacos.
- Crock Pot Taco Soup: Hearty and comforting for colder days.
- Warm Taco Bean Dip: Perfect for parties and snacking.
- Taco Crescent Ring: Another fantastic braided crescent dough option.
- Dorito Walking Tacos: Fun, portable, and perfect for events.
- Taco Rice: A flavorful and complete meal in one pan.
- Taco Potatoes: A delicious and filling twist on baked potatoes.
Post originally published: March 2017
Updated photos and republished: May 2024

Easy Taco Braid
Print
Pin
Rate
25
25
50
6
Brandie Skibinski
Ingredients
-
13.8
ounce
tube refrigerated pizza crust -
1
pound
ground beef -
1.25
ounce
packet taco seasoning -
¾
cup
water -
1
cup
refried beans
-
1
cup
salsa
-
2
cups
shredded cheddar cheese
(or Mexican blend shredded cheese) -
2
cups
finely diced tomatoes, divided use -
2
Tablespoons
melted butter
-
chopped lettuce, for serving
(optional) -
sour cream and salsa, for serving
(optional)
Instructions
- In a large skillet over medium heat, brown and crumble ground beef. Cook until no pink remains, then drain any excess grease thoroughly.

- Add the taco seasoning and water to the browned beef and mix until well incorporated. Reduce heat to low and simmer for 5 – 7 minutes until the liquid has thickened, allowing the flavors to fully develop.

- Preheat oven to 375 degrees F (190°C). Place the refrigerated pizza dough on a large piece of parchment paper and roll or spread the dough out to measure approximately 10 X 15 inches, ensuring an even thickness.

- With a pizza cutter or sharp knife, make even slices (about 1 ½ inches wide and 3 inches long) along both long sides of the dough, leaving a solid center strip of about 4 inches for the fillings.

- Place refried beans into a microwave-safe bowl and microwave for about 45 seconds until soft and easy to spread. Evenly spread the warmed refried beans down the center strip of the dough.

- Top the refried beans with the seasoned ground beef, spreading it evenly down the center of the dough.

- Evenly spread the salsa on top of the ground beef. Then, sprinkle with shredded cheese and one cup of diced tomatoes.

- Beginning at one end of the braid, fold the short end of the dough up and over the filling to secure it. Then, take the first two slices from each side and wrap them diagonally over the filling, meeting in the middle. Repeat this wrapping pattern with the remaining slices, alternating from left and right, until you reach the last two slices at the other end.
- Fold the remaining short end of the dough up over the filling, then wrap the last two side slices over it to completely secure the braid. Gently tuck in any loose ends to ensure the filling is sealed.

- Gently brush the entire top and sides of the braided dough with the two tablespoons of melted butter. This will help create a beautiful golden crust.

- Carefully transfer the parchment paper with the braided taco onto a large, rimmed baking sheet (if you haven’t already). Bake for 20 – 25 minutes, or until the crust is beautifully golden brown and the cheese is melted and bubbly.

- Allow the Taco Braid to cool for 5 minutes on the baking sheet before slicing. This helps the fillings set and prevents them from spilling out. If desired, cover with fresh chopped lettuce and the remaining diced tomatoes before serving. Serve warm with sour cream and your favorite taco sauce.

Video Tutorial
Notes for Success
- For detailed substitutions and answers to common questions, please refer to our comprehensive FAQ section and ingredient list provided above. This will help you customize your Taco Braid to perfection.
- Ensure your ground beef is thoroughly drained of grease before adding seasoning to prevent a greasy braid.
- When spreading fillings, leave a small border around the edges of the center strip to ensure a good seal when braiding.
- Don’t overfill the dough, as this can make braiding difficult and lead to burst seams during baking.
- Letting the braid cool for a few minutes after baking is crucial for easier, cleaner slicing and for the fillings to properly set.
Main Course, Dinner
American, Tex-Mex
Nutrition Information (per serving)
Calories:
430
kcal
|
Carbohydrates:
10
g
|
Protein:
25
g
|
Fat:
31
g
|
Sodium:
874
mg
|
Fiber:
3
g
|
Sugar:
4
g
Nutritional Disclaimer
“The Country Cook” is not a dietician or nutritionist, and any nutritional information shared is an estimate. If calorie count and other nutritional values are important to you, we recommend running the ingredients through whichever online nutritional calculator you prefer. Calories and other nutritional values can vary quite a bit depending on which brands were used.
Did you make this recipe?
Share your creation on Instagram @thecountrycook and mention us with #thecountrycook! We love seeing your delicious results!
