Imagine biting into a Snickers bar that’s even better than the original! Our homemade version captures all the rich, delicious flavor of your favorite candy—creamy caramel, crunchy peanuts, and decadent chocolate—but with a freshness and quality you can only achieve in your own kitchen. Prepare to fall head over heels for these irresistible treats.
Ultimate Homemade Snickers Bars: Your Guide to Crafting the Perfect Candy Bar Experience
For lovers of classic candy bars, the Snickers reigns supreme with its iconic combination of chocolate, caramel, and peanuts. While store-bought versions are a quick fix, there’s an undeniable magic in creating these indulgent treats at home. This comprehensive guide will walk you through crafting your very own homemade Snickers bars, promising a delightful texture and flavor profile that truly surpasses any pre-packaged option. With just about 40 minutes of active prep time before chilling, you’ll soon be enjoying these gourmet candy bars without breaking the bank.
Why You’ll Love Making Your Own Snickers Bars
Beyond the sheer joy of creating something delicious from scratch, there are several compelling reasons to embark on your homemade Snickers journey. Firstly, freshness is unmatched. Unlike commercial candy bars that can sit on shelves for months, your homemade treats will be at their peak, offering a vibrant taste and perfect texture. Secondly, you gain complete control over ingredients, allowing you to choose high-quality components and avoid any unwanted additives or preservatives. This also opens up a world of customization, enabling you to tailor sweetness levels or experiment with different types of chocolate and nuts. Finally, it’s incredibly cost-effective. Making a batch of these delectable bars at home is significantly cheaper than buying individual ones, making it an excellent option for parties, gifts, or simply stocking your pantry with a delightful snack.
The Anatomy of a Perfect Snickers Bar: Layers of Flavor
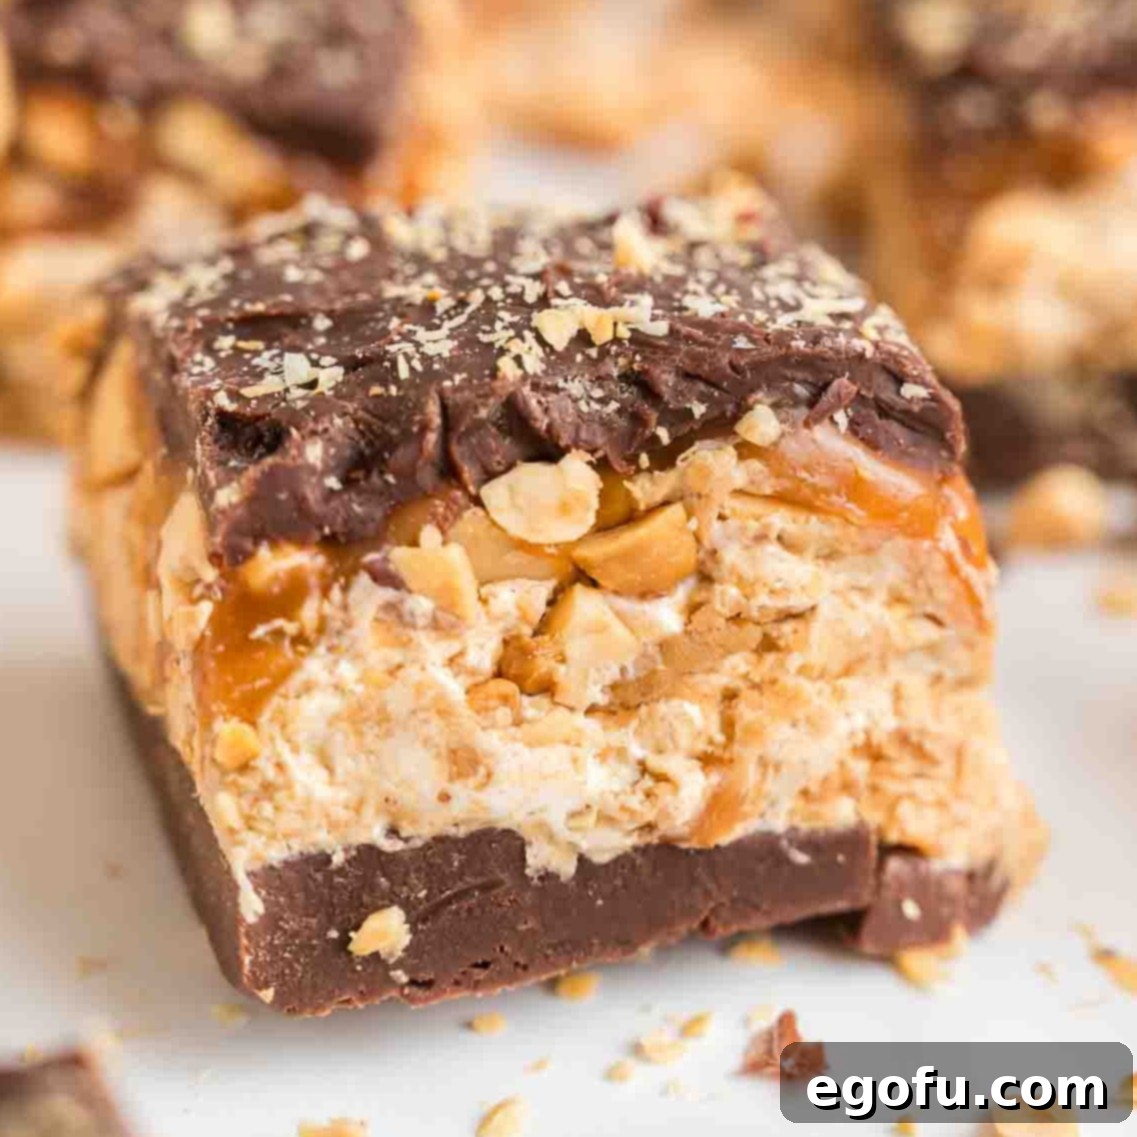
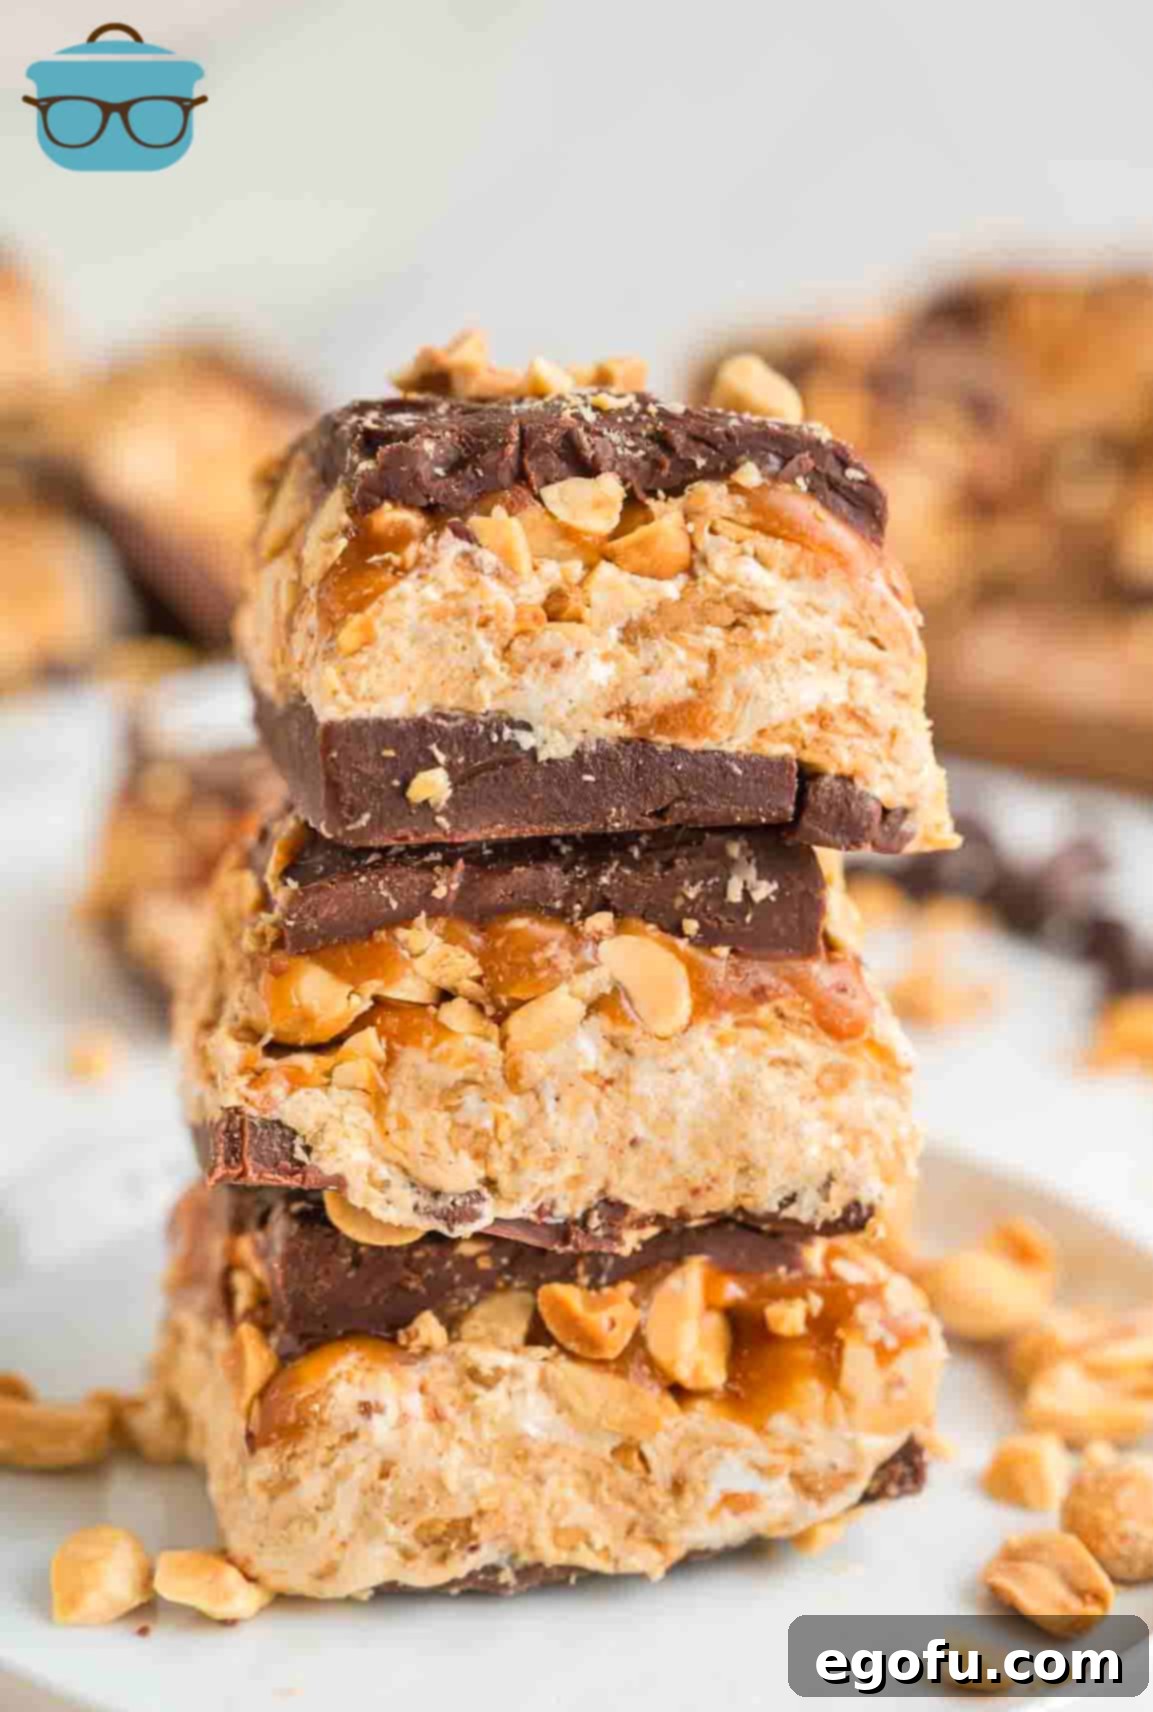
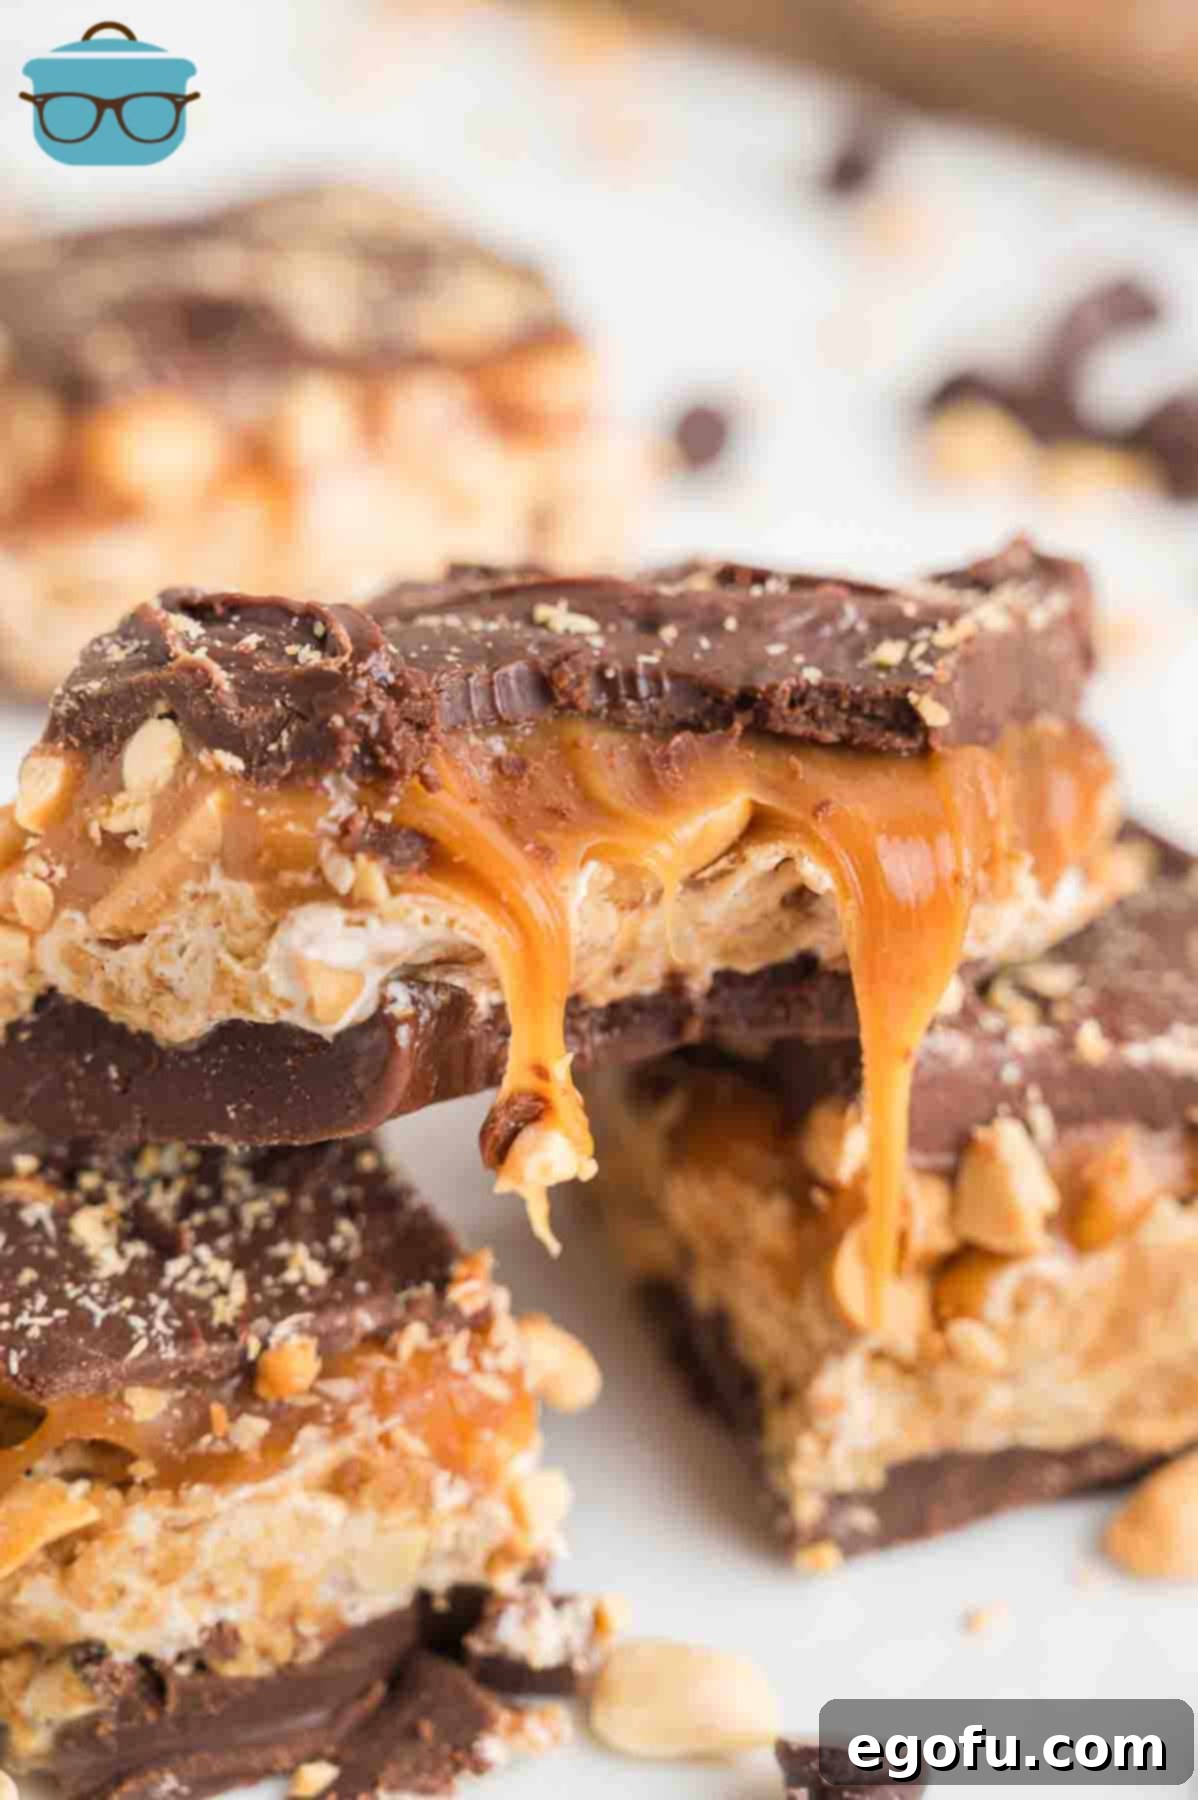
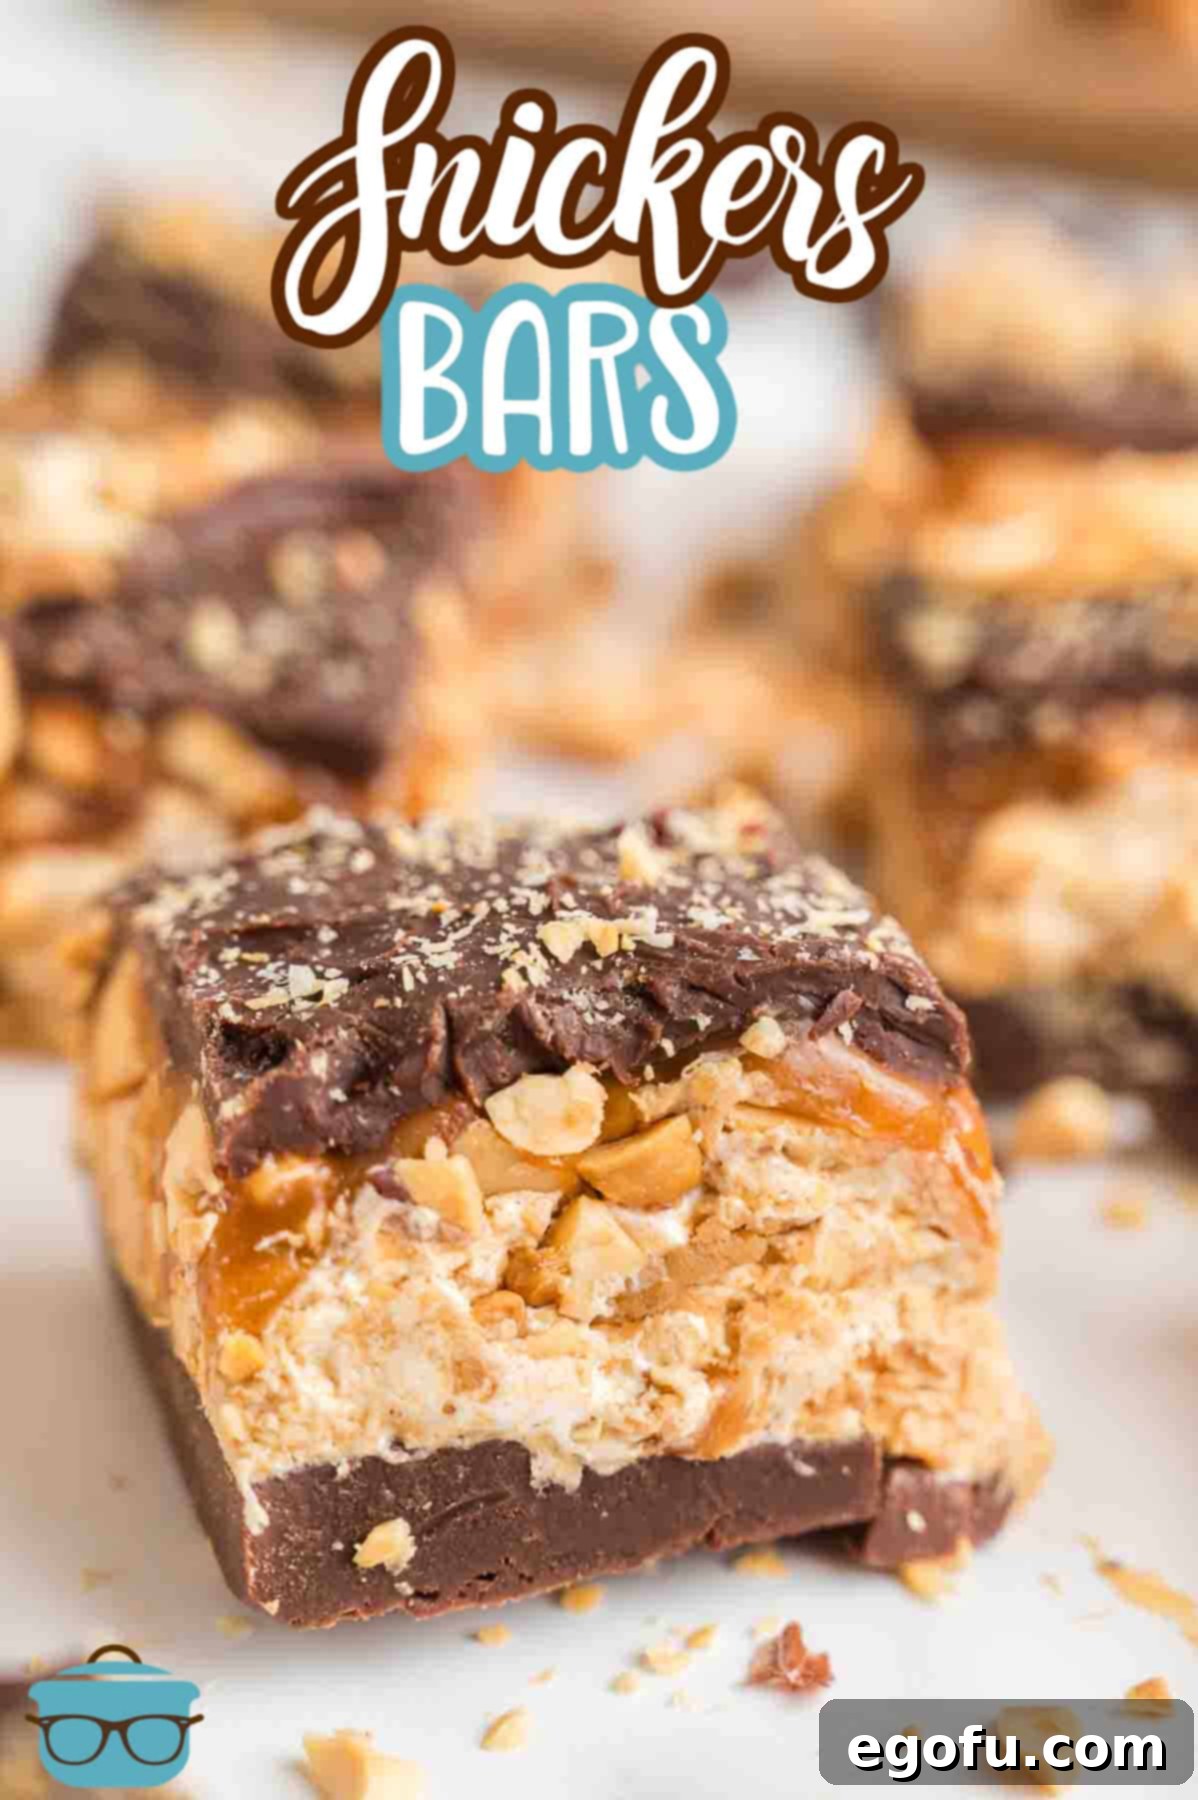
A true Snickers bar is a masterpiece of layered textures and complementary flavors. Understanding each component is key to achieving that authentic, satisfying bite. Our homemade version perfectly replicates this complex profile: a rich chocolate base, followed by a soft and fluffy peanut butter nougat, generously studded with crunchy salted peanuts, all enveloped in a smooth, gooey caramel, and finally coated in a final layer of decadent chocolate. Each layer plays a crucial role, building up to a harmonious symphony of sweet, salty, chewy, and crunchy that defines this beloved candy.
Essential Ingredients for Your DIY Snickers Masterpiece
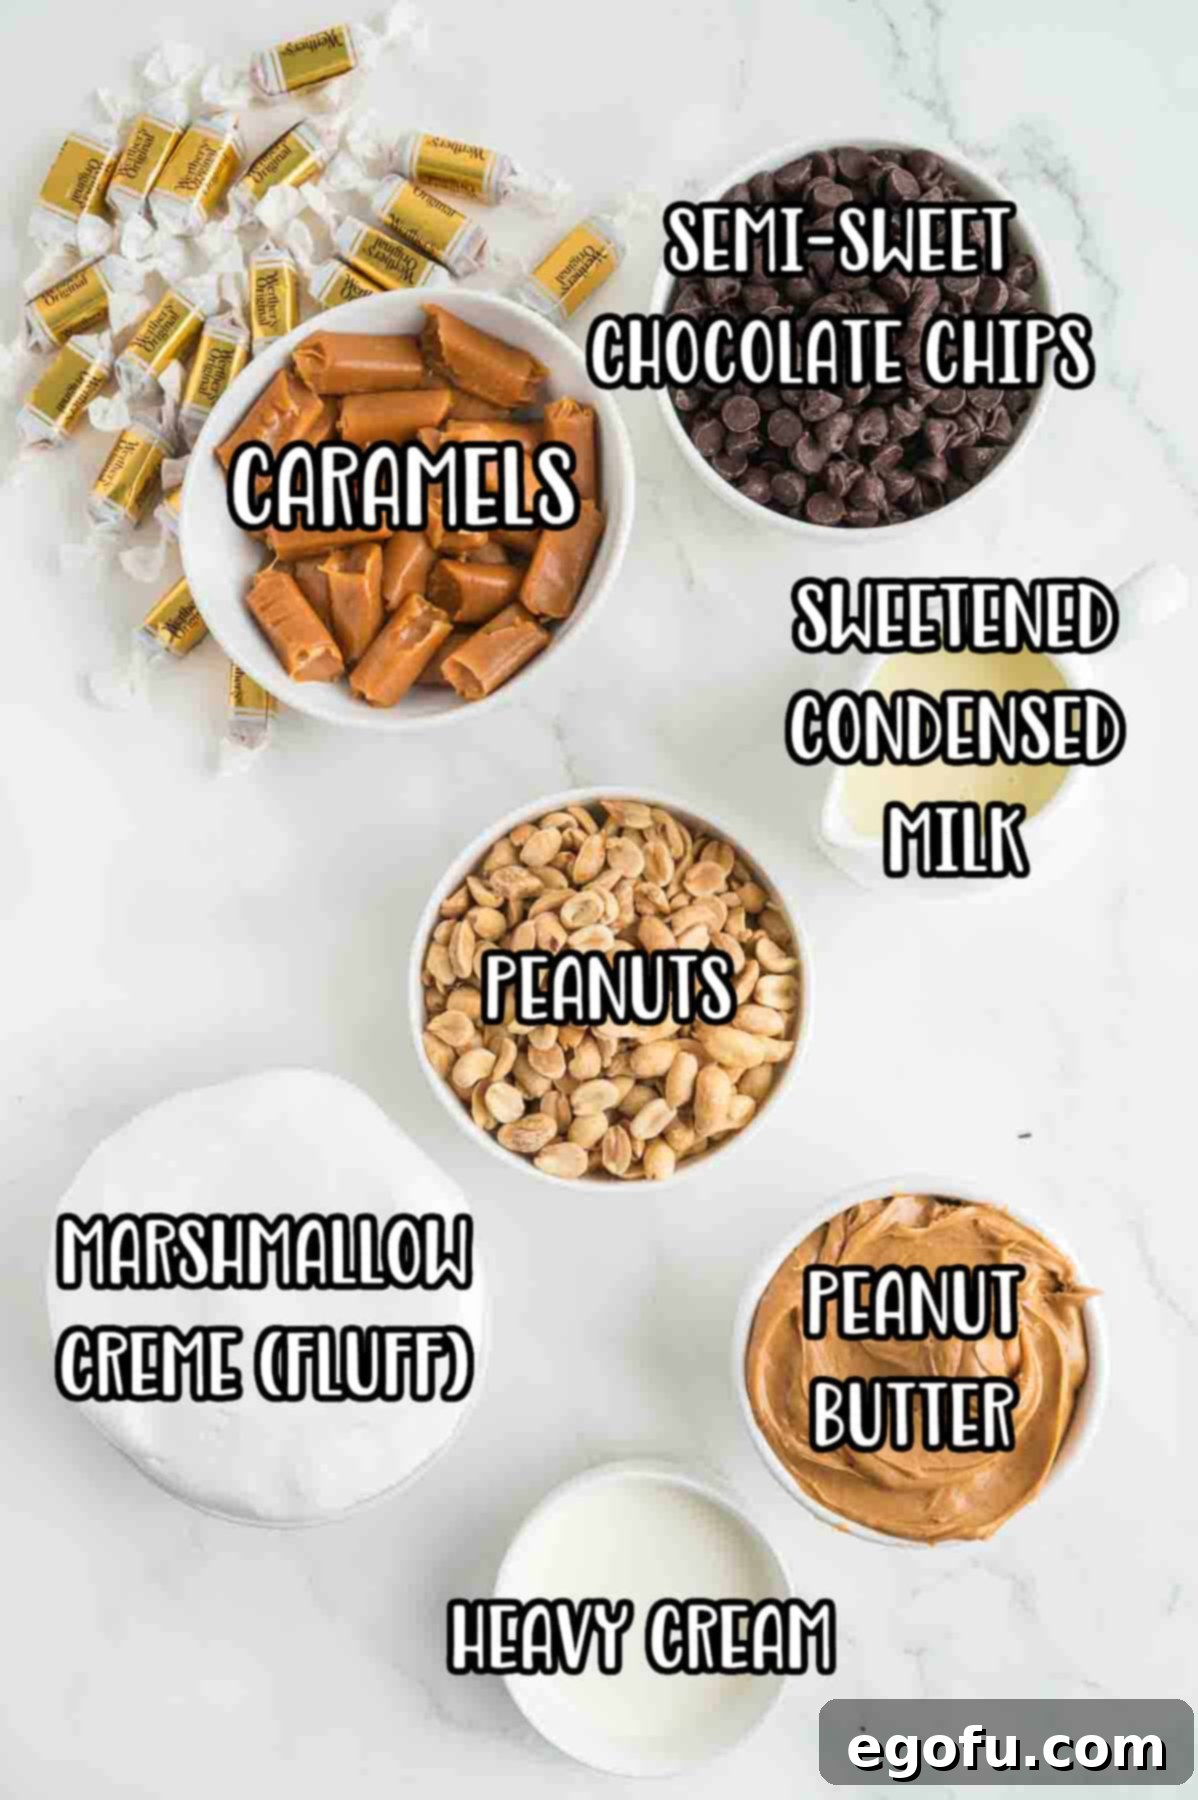
Crafting the perfect homemade Snickers begins with selecting the right ingredients. While the list might seem extensive, each item plays a vital role in achieving the signature taste and texture. Always read through the recipe and gather all your ingredients before you begin, a practice known as “mise en place,” which will make the process much smoother and more enjoyable.
Detailed Ingredients List:
- Semi-sweet Chocolate Chips: We recommend semi-sweet chocolate chips as they strike a perfect balance, preventing the bars from becoming overly sweet while still delivering that rich chocolatey goodness. However, feel free to experiment with milk chocolate for a sweeter profile or dark chocolate for a more intense, less sugary experience, depending on your preference. You’ll need 1 ½ cups total, divided for the base and top layers.
- Sweetened Condensed Milk: This ingredient is absolutely crucial for the texture and sweetness of both the chocolate base and the peanut butter nougat. Be very careful to pick up a can of sweetened condensed milk, not evaporated milk, as they often look similar on the shelf. Using evaporated milk will unfortunately alter the recipe significantly and prevent the layers from setting correctly. You will need a 14-ounce can, divided for use in different layers.
- Creamy Peanut Butter: For that smooth, classic nougat texture, creamy peanut butter is essential. While crunchy peanut butter could be used if you prefer extra crunch, we strongly advise against using natural peanut butter. Natural varieties, especially the “stir” kind, tend to have a thinner consistency and don’t firm up adequately in this recipe, which can affect the overall structure of your candy bars. You’ll need 1 cup of creamy peanut butter.
- Marshmallow Creme: This is the secret to achieving that wonderfully light and airy, yet chewy, nougat-like consistency found in a traditional Snickers. You can easily find marshmallow creme in most grocery stores, or if you’re feeling adventurous, you can even make your own from scratch. A 7-ounce tub will be perfect.
- Salted Peanuts: The contrast of sweet and salty is key to a Snickers bar’s appeal. Using salted peanuts enhances this delicious flavor combination and adds the signature crunch. If you prefer a less salty taste, unsalted peanuts can certainly be used, but you might miss that irresistible sweet-and-salty dynamic. You will need 1 ¼ cups, divided for the nougat layer and topping.
- Caramels: The gooey caramel layer is non-negotiable! Individually wrapped soft caramels, like Werther’s Chewy Caramels, work perfectly and are easy to melt. Alternatively, you can use a bag of caramel bits for convenience. Just ensure they are soft, chewy caramels that will melt into a smooth, pourable consistency. 10 ounces of caramels are needed.
- Heavy Cream: This ingredient is vital for creating a smooth, rich, and pliable caramel sauce. Do not substitute heavy cream with milk (skim, 2%, or whole milk) as it does not have the necessary fat content to achieve the correct texture and consistency for the caramel. Only heavy cream will do! You’ll need 3 tablespoons.
Step-by-Step Guide: How to Make Homemade Snickers Bars
Making homemade Snickers bars is a fun and rewarding process that involves layering delicious components. Follow these detailed steps for a perfect outcome every time. Remember to be patient between layers to ensure proper setting.
- Prepare Your Pan: Begin by lining an 8×8-inch baking dish with parchment paper, leaving an overhang on the sides. This “sling” will make it incredibly easy to lift the entire batch out of the pan once chilled, facilitating clean cuts.
-
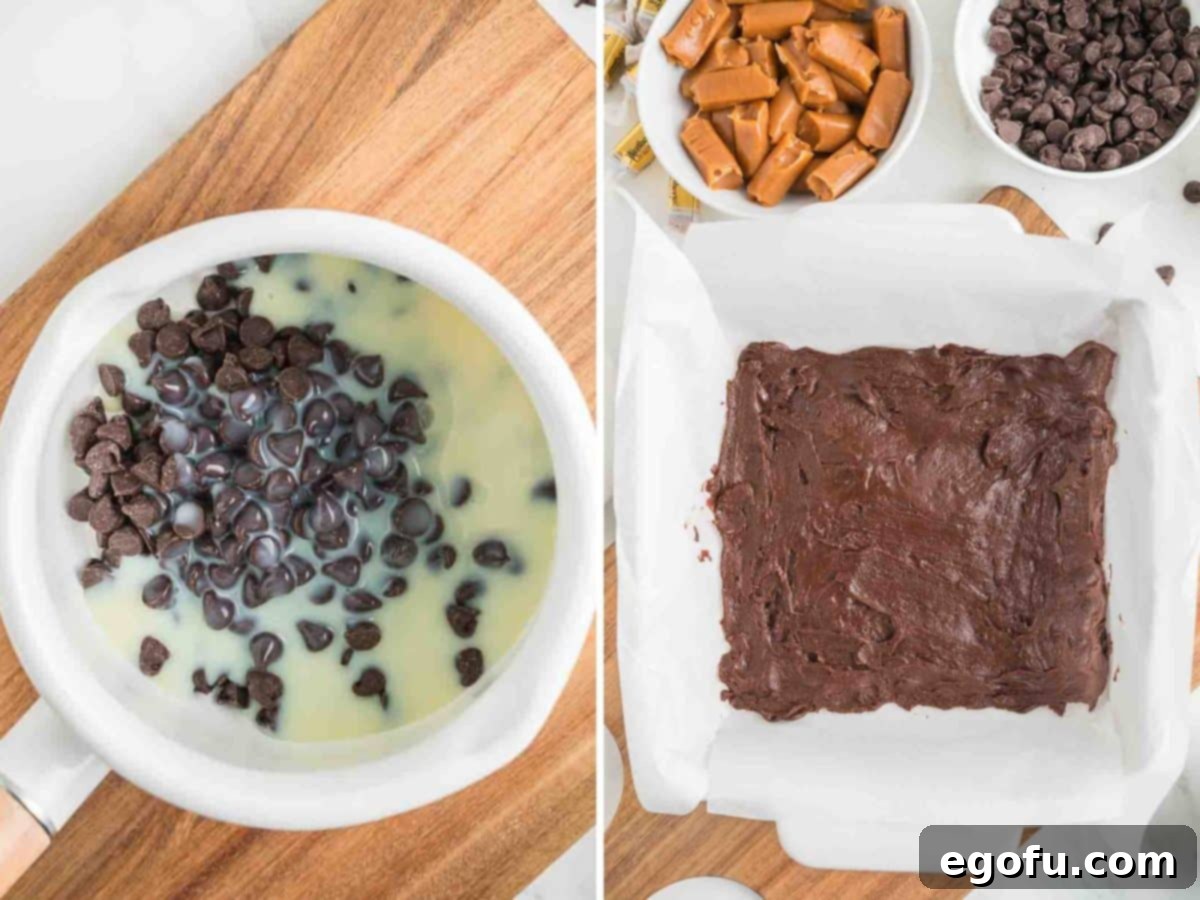
Craft the Chocolate Base: In a small saucepan over low to medium heat, gently melt ¾ cup of the semi-sweet chocolate chips with ½ cup of the sweetened condensed milk. Stir constantly to prevent burning and ensure a smooth, uniform mixture. Once melted and well combined, pour this rich chocolate mixture evenly into the bottom of your prepared baking dish. Transfer the dish to the refrigerator for about 10-15 minutes while you prepare the next layer, allowing it to firm up slightly.

-
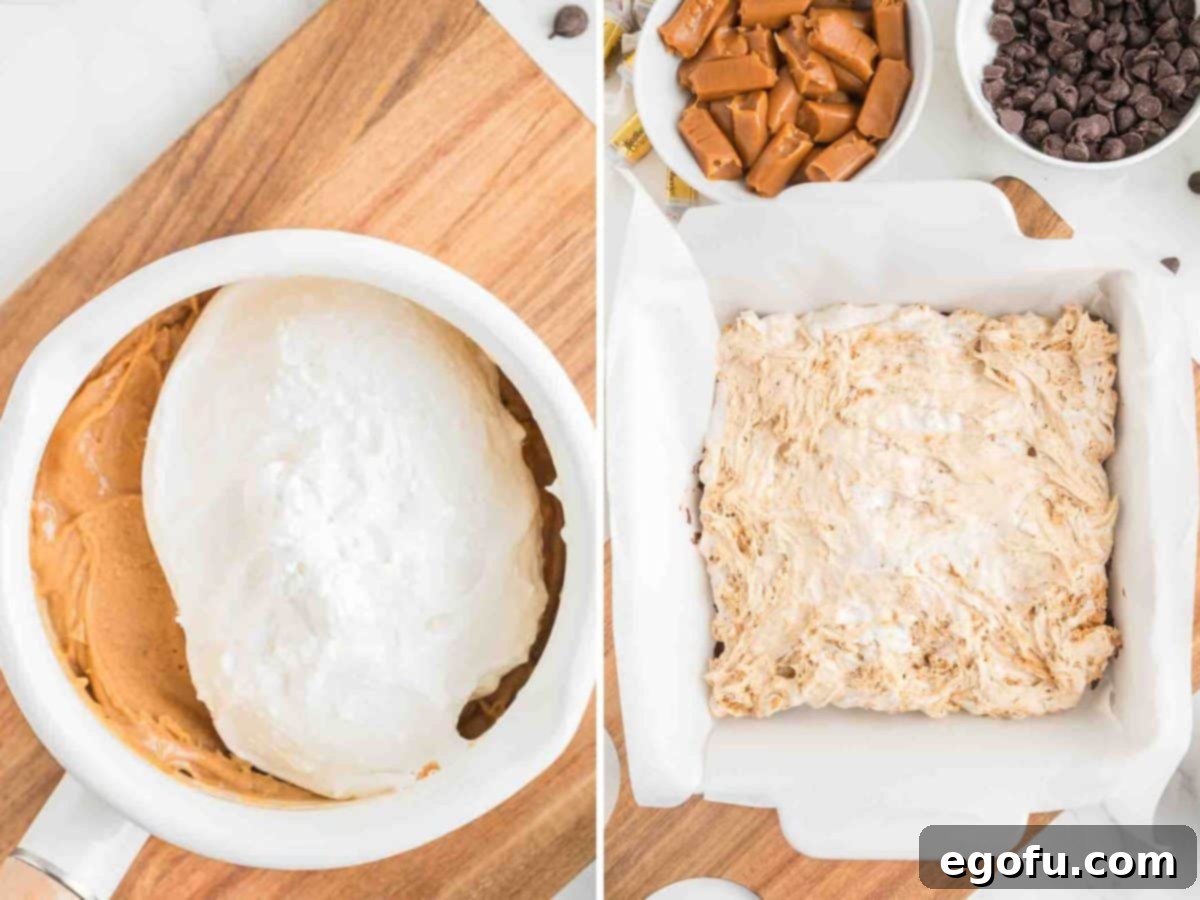
Create the Peanut Butter Nougat: In another saucepan, melt 1 cup of creamy peanut butter with another ½ cup of sweetened condensed milk over low heat. You don’t need it to come to a full boil or melt completely until completely liquid; just warm it enough so it’s easily mixable. Remove from heat and stir in the entire 7-ounce tub of marshmallow creme until smooth and fully incorporated. The marshmallow creme will give it that classic light, chewy nougat texture. Carefully pour this peanut butter nougat layer over the chilled chocolate base. Make sure the chocolate layer is firm enough that it won’t mix with the new layer.

-
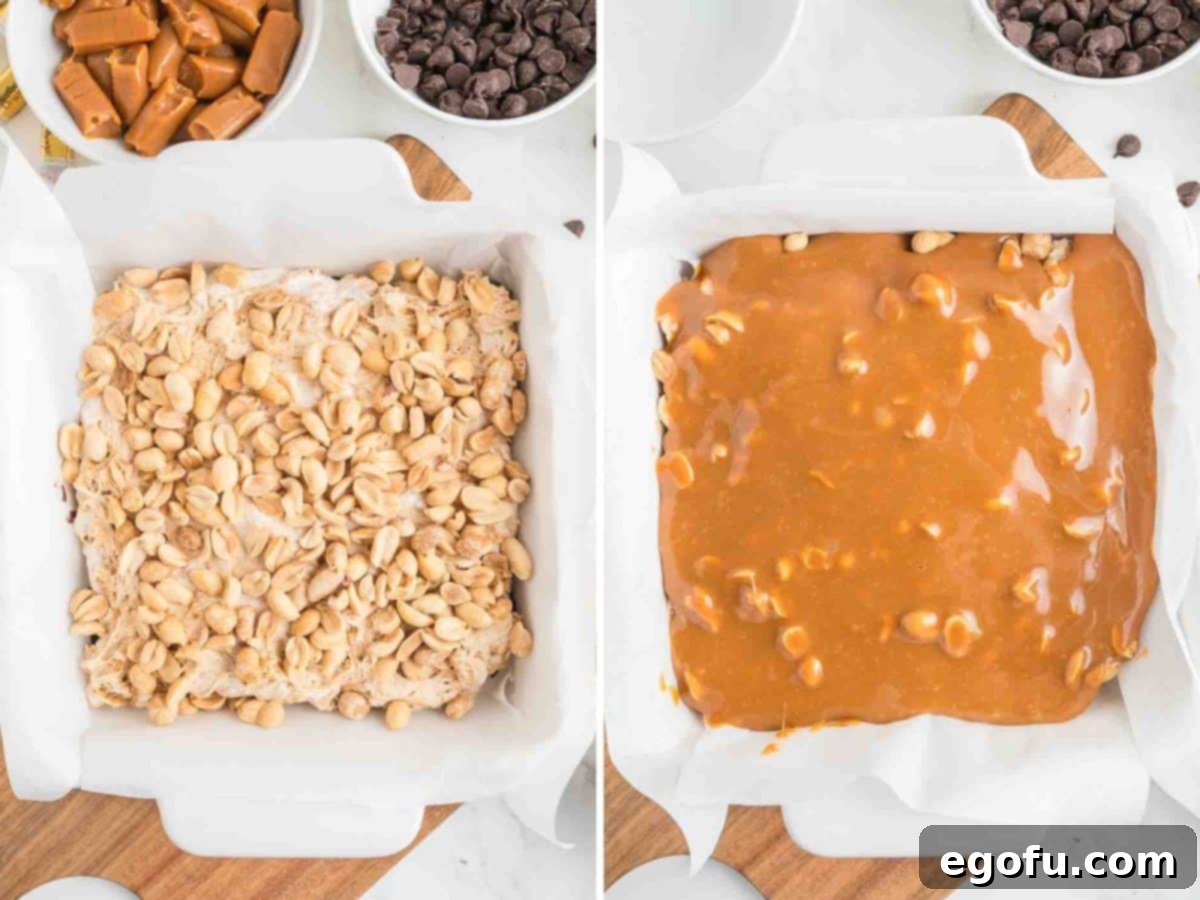
Add the Crunchy Peanuts: Evenly sprinkle 1 cup of the salted peanuts over the peanut butter nougat layer. Gently press them down slightly to ensure they adhere. Return the dish to the refrigerator while you prepare the caramel.

-
Prepare the Creamy Caramel: In a clean small saucepan, melt the 10 ounces of caramels with 3 tablespoons of heavy cream over low heat. This step requires constant stirring to prevent the caramels from sticking and burning. Continue to stir until the caramels are completely melted and the mixture is smooth and luxurious. Once ready, pour this warm caramel layer evenly over the peanuts. Place the dish back into the fridge to chill again while you prepare the final chocolate coating.

-
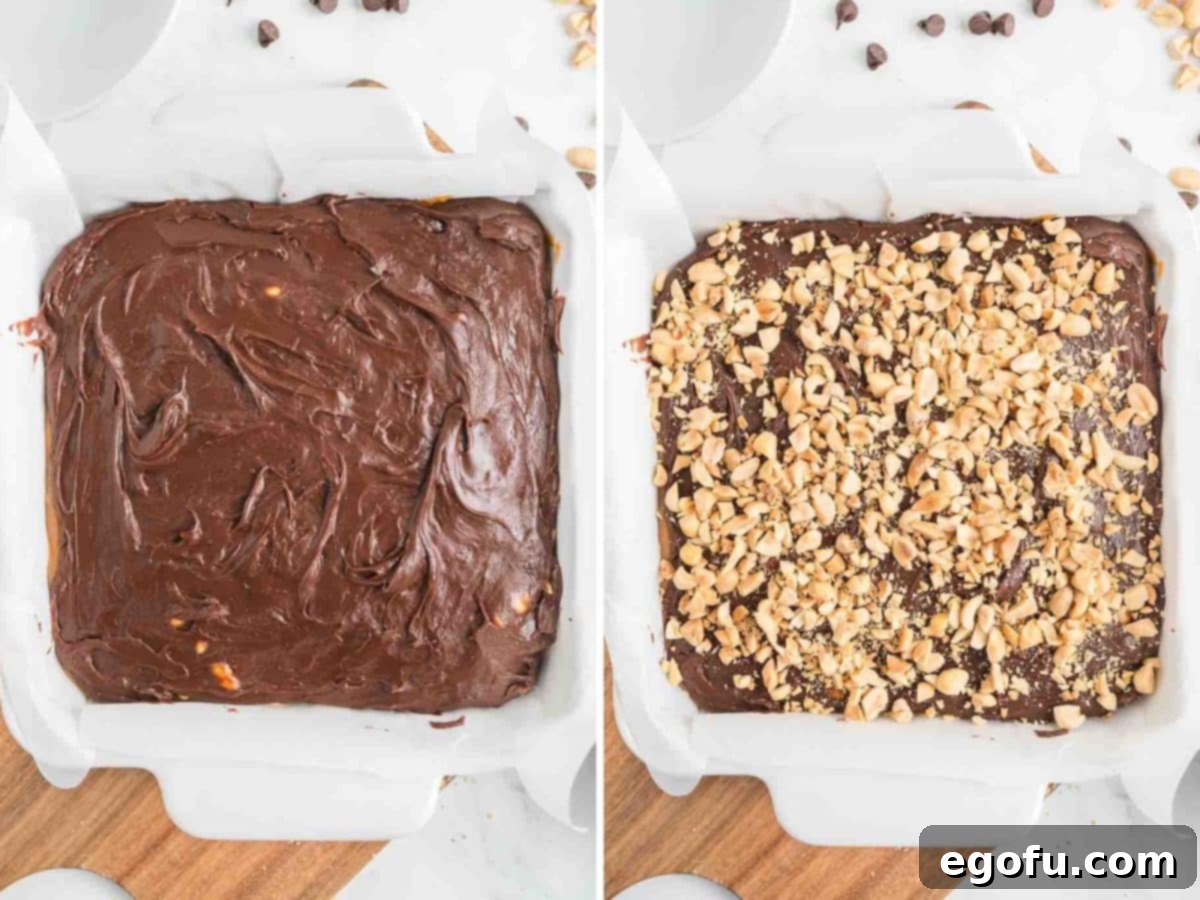
The Grand Finale: Chocolate Topping & Final Peanuts: For the last layer, melt the remaining ¼ cup of semi-sweet chocolate chips with the remaining ½ cup of sweetened condensed milk in a saucepan over low to medium heat, stirring until completely smooth. Pour this decadent chocolate mixture over the chilled caramel layer, spreading it gently to cover the entire surface. Immediately after, chop and sprinkle the remaining ¼ cup of salted peanuts on top of the wet chocolate for an extra flourish and crunch.

- Chill and Enjoy: Allow the bars to cool at room temperature for a few minutes before transferring the dish back to the refrigerator. Chill for at least 1 hour, or until thoroughly firm. Once completely set, use the parchment paper overhang to lift the slab of candy bars out of the dish. Slice into desired bar sizes using a sharp knife.
Frequently Asked Questions (FAQ) for Homemade Snickers
Here are some common questions and helpful answers to ensure your homemade Snickers bars turn out perfectly every time:
Is it hard to make DIY homemade Snickers?
While the process involves multiple layers, don’t let that intimidate you! Making these Snickers bars is much easier than it appears. The steps are straightforward, mostly involving melting and layering. The key is patience, allowing each layer to chill adequately before adding the next. The end result is absolutely worth the minimal effort for a truly amazing homemade dessert.
How long does it take to melt everything on the stovetop?
The melting times can vary slightly depending on your stove and the exact heat setting, but generally, the chocolate and peanut butter mixtures will take approximately 3-5 minutes on low to medium heat. The caramel, which requires constant stirring and a lower heat to prevent burning, may take up to 10 minutes to melt completely and achieve a smooth consistency. Always prioritize low heat and constant stirring to ensure even melting and prevent scorching.
Can I just use the microwave to melt ingredients?
Absolutely! For convenience, you can certainly use a microwave-safe dish to melt ingredients instead of the stovetop. When microwaving, do so in short intervals, typically 15 to 30 seconds, stirring thoroughly after each interval. This method helps to distribute heat evenly and prevents ingredients, especially chocolate and caramel, from burning. Be vigilant, as melting times can be very quick in the microwave.
Do I have to use peanuts?
If you’re aiming for the authentic Snickers experience with its characteristic crunch, then keeping the peanuts in the mix is highly recommended. However, if you prefer a smoother, softer candy bar without the nutty bite, you can definitely omit the peanuts. For an interesting variation, consider swapping peanuts for other nuts like chopped almonds or cashews, or even pretzels for a salty, crunchy twist!
Help! Why aren’t my homemade Snickers Bars firming up?
The most common reason for bars not firming up is insufficient chilling or improper heating of ingredients. Ensure that all ingredients, particularly the chocolate and caramel, are completely melted and thoroughly combined before they are layered. Any un-melted lumps or inconsistencies can affect the setting process. The best way to guarantee proper melting without burning is to use a stovetop over low to medium heat, stirring constantly until smooth. Also, make sure your refrigerator is cold enough and allow ample chilling time (at least 1 hour, or even longer if needed).
Any tips for cutting these candy bars?
Cutting these layered bars can sometimes be a bit messy, but I have a couple of trusty tricks! First, try spraying your knife blade with a non-stick cooking spray before slicing, and wipe the blade clean between each cut. This prevents sticking and ensures cleaner edges. Alternatively, if that doesn’t work as desired, run your knife blade under hot water for a few seconds before each cut, then quickly wipe it dry. The warm blade will glide through the layers more easily. Again, remember to clean the blade after every slice for the best results.
Can I double this recipe?
Yes, absolutely! If you’re looking to make a larger batch for a party, gift-giving, or simply more indulgent snacking, you can easily double the recipe. If doubling, I recommend using two separate 8×8-inch pans to maintain the original bar thickness and ensure even chilling. If you only have one pan, consider using a larger pan (like a 9×13-inch) which will yield thinner bars, but will work just as well.
How do I store leftover homemade DIY Snickers Bars?
Due to their creamy, soft layers, these homemade Snickers bars are best stored in an airtight container in the refrigerator. They will last for 1-2 weeks when properly refrigerated. You can also freeze them for longer storage; just be sure to let them thaw for a few minutes at room temperature before enjoying them. They tend to melt if left out at room temperature for extended periods, especially in warmer climates.
Pro Tips for Success and Variations
Cutting Techniques for Pristine Bars
Achieving clean, professional-looking cuts is the final touch to your homemade Snickers. Beyond the non-stick spray and hot water tricks mentioned in the FAQ, ensure your bars are thoroughly chilled before attempting to slice them. A very cold bar will hold its shape better, resulting in sharper edges. You can also use a ruler to guide your knife for perfectly uniform pieces, ideal for gifting or impressive platters.
Creative Customization Ideas
One of the joys of homemade treats is the ability to personalize them. While the classic Snickers combination is divine, feel free to experiment!
- Nutty Alternatives: Swap out peanuts for roasted almonds, pecans, or even a mix of nuts for a different flavor profile.
- Chocolate Variations: Use dark chocolate for a more sophisticated, less sweet bar, or a milk chocolate blend for extra creaminess. You could even drizzle white chocolate on top for visual appeal.
- Salty Twist: A sprinkle of flaky sea salt on the final chocolate layer enhances the sweet and salty contrast beautifully.
- Add-ins: Consider folding mini pretzel pieces into the nougat layer for an extra salty crunch, or a touch of coffee extract into the chocolate for a mocha-inspired treat.
Troubleshooting Common Issues
Even experienced bakers encounter hiccups. If your caramel seems too stiff, add another half-teaspoon of heavy cream and stir over low heat until it reaches the desired pourable consistency. If your chocolate seize up, it’s likely due to water contamination or overheating; try adding a teaspoon of vegetable oil or shortening and stirring vigorously to rescue it. Always remember that confectionery can be sensitive, so gentle heat and consistent stirring are your best friends.
Storage and Shelf Life
Once your delectable homemade Snickers bars are sliced, store them in an airtight container to maintain their freshness and prevent them from absorbing other odors from the fridge. They will keep beautifully in the refrigerator for up to two weeks. For longer storage, these bars freeze exceptionally well. Simply place them in a freezer-safe, airtight container or freezer bag for up to two months. When you’re ready to indulge, simply let them thaw at room temperature for about 15-30 minutes, or enjoy them straight from the freezer for a different kind of chewy, icy treat! Be aware that they soften quickly at room temperature, so keep them chilled until just before serving.
Craving More Delicious Homemade Treats?
If you’ve enjoyed crafting these homemade Snickers bars, you might be ready to explore more delightful recipes. Here are some other fantastic sweet treats that share similar flavor profiles or offer another fun kitchen adventure:
- Snickers Salad
- Snickers Poke Cake
- Snickers Cookies
- No Bake Twix Pie
- Peanut Butter Rice Krispies Treats
- Chocolate Chip Peanut Butter Fudge
- Chocolate Chip Caramel Butter Bars
- Homemade Kit Kat Bars
- Grandma’s No Bake Peanut Butter Bars
- Homemade 100 Grand Bars
- Homemade Twix Bars
- Scotcheroos
- Twix Cookies
- Lazy Chocolate Chip Cookie Bars
- Brown Sugar Pop Tart Bars
Full Recipe Card: Homemade Snickers Bars
Enjoy these crunchy, creamy, peanut butter, caramel, and chocolate homemade Snickers bars with this easy and satisfying recipe.
Prep Time: 40 minutes
Chill Time: 1 hour
Total Time: 1 hour 40 minutes
Servings: 16 servings
Author: Brandie Skibinski
Ingredients
- 1 ½ cups semi-sweet chocolate chips (divided use)
- 14 ounces can sweetened condensed milk (divided use)
- 1 cup creamy peanut butter
- 7 ounce tub marshmallow creme
- 1 ¼ cups salted peanuts (divided use)
- 10 ounces caramels
- 3 Tablespoons heavy cream
Instructions
- Line an 8×8-inch baking dish with parchment paper.
- Melt ¾ cup semi-sweet chocolate chips with ½ cup sweetened condensed milk on low to medium heat, then pour the mixture into the bottom of the baking dish. Set in the fridge while making the next layer.
- Make the next layer by melting 1 cup creamy peanut butter with ½ cup of sweetened condensed milk on low heat. It doesn’t need to completely melt, just enough to mix together. Then, remove from the heat and stir in 7 ounce tub marshmallow creme.
- Add this peanut butter nougat layer on top of the first chocolate layer, ensuring the chocolate layer is firm enough to support it without mixing.
- Sprinkle 1 cup of peanuts on top and then let sit in the fridge while making the next layer.
- Make the next layer by melting 10 ounces caramels in a small saucepan with 3 Tablespoons heavy cream on low heat, stirring constantly. Once melted and combined, pour on top in the dish. Let sit in the fridge while you make the last layer.
- Make the last layer by melting the remaining 1/4 cup chocolate chips and ½ cup sweetened condensed milk together on low to medium heat, and then pour over the top of the dessert.
- Chop and sprinkle the remaining 1/4 cup salted peanuts on top, let cool to room temperature, and then set in the fridge for at least 1 hour before slicing and enjoying!
Notes
- Please refer to the Frequently Asked Questions (FAQ) and detailed ingredient list above for other substitutions, tips, or answers to common questions.
Nutrition
Course: Dessert, Snack
Cuisine: American
Carbohydrates: 52g |
Protein: 10g |
Fat: 25g |
Sodium: 149mg |
Fiber: 3g |
Sugar: 41g
Nutritional Disclaimer
“The Country Cook” is not a dietician or nutritionist, and any nutritional information shared is an estimate. If calorie count and other nutritional values are important to you, we recommend running the ingredients through whichever online nutritional calculator you prefer. Calories and other nutritional values can vary quite a bit depending on which brands were used.
Did you make this recipe? Share it on Instagram @thecountrycook and mention us #thecountrycook!
