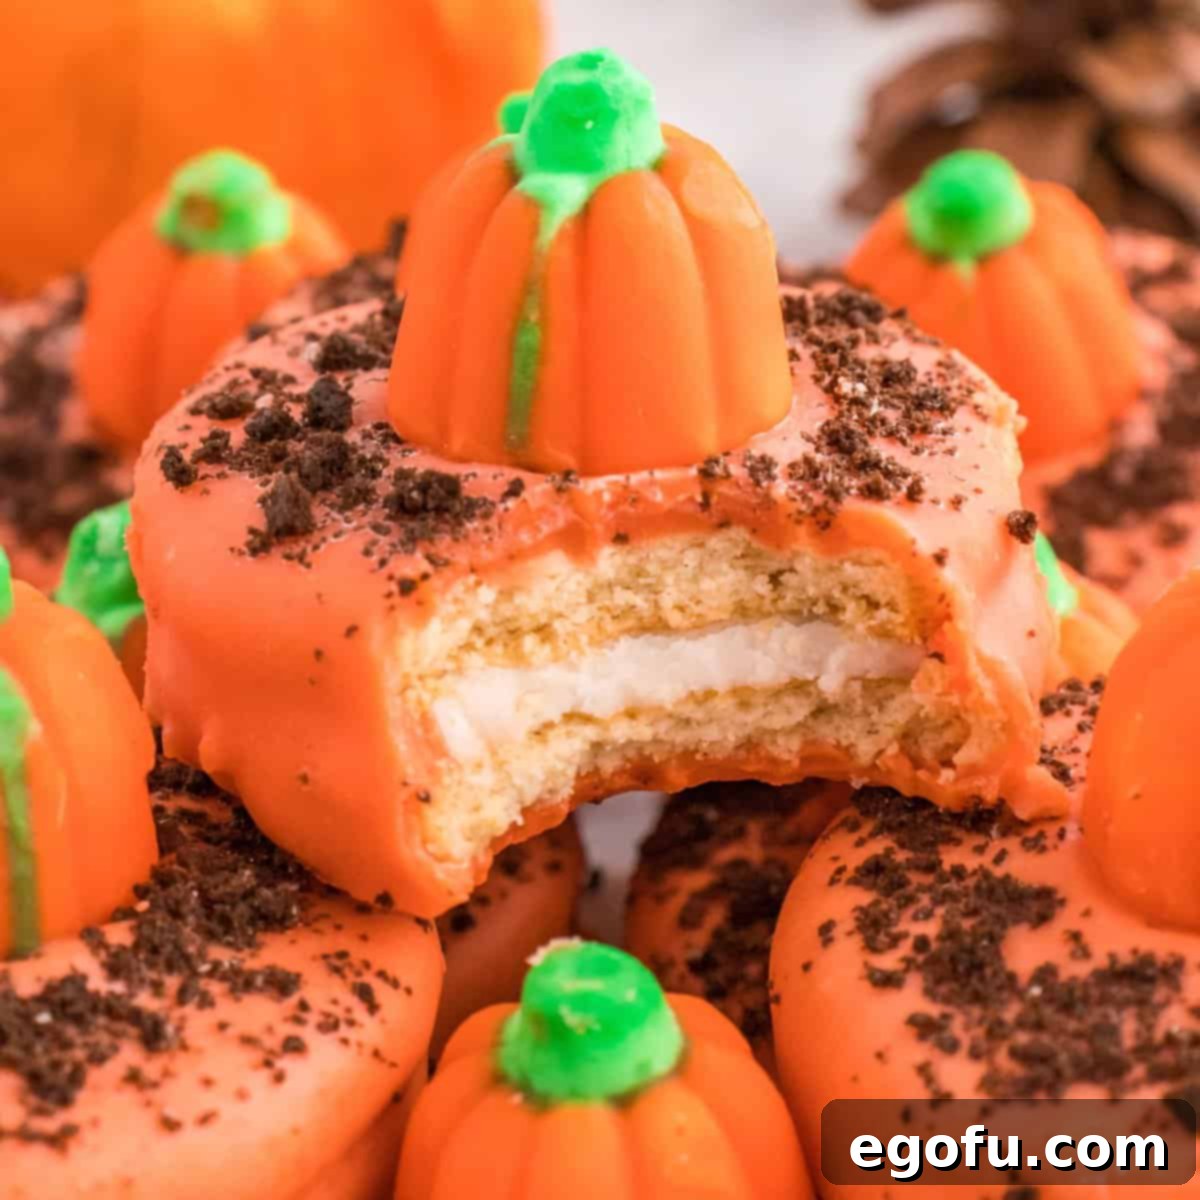
Transform ordinary Oreo cookies into extraordinary, festive treats with this incredibly fun and easy Pumpkin Patch Cookies recipe! Perfect for bringing vibrant fall colors and delicious flavors to any occasion.
Easy Pumpkin Patch Cookies: Your Go-To No-Bake Fall Treat
Welcome to the ultimate guide for crafting delightful Pumpkin Patch Cookies – a seasonal sensation that’s as fun to make as it is to eat! This recipe takes simple, readily available ingredients like classic Oreo cookies, creamy white chocolate, and charming pumpkin-shaped candies, transforming them into a visually stunning and absolutely delicious autumn treat. Whether you’re planning a Halloween bash, hosting a cozy Thanksgiving dinner, or simply looking for a fun activity with the kids, these no-bake cookies are guaranteed to be a crowd-pleaser and spread smiles all around.
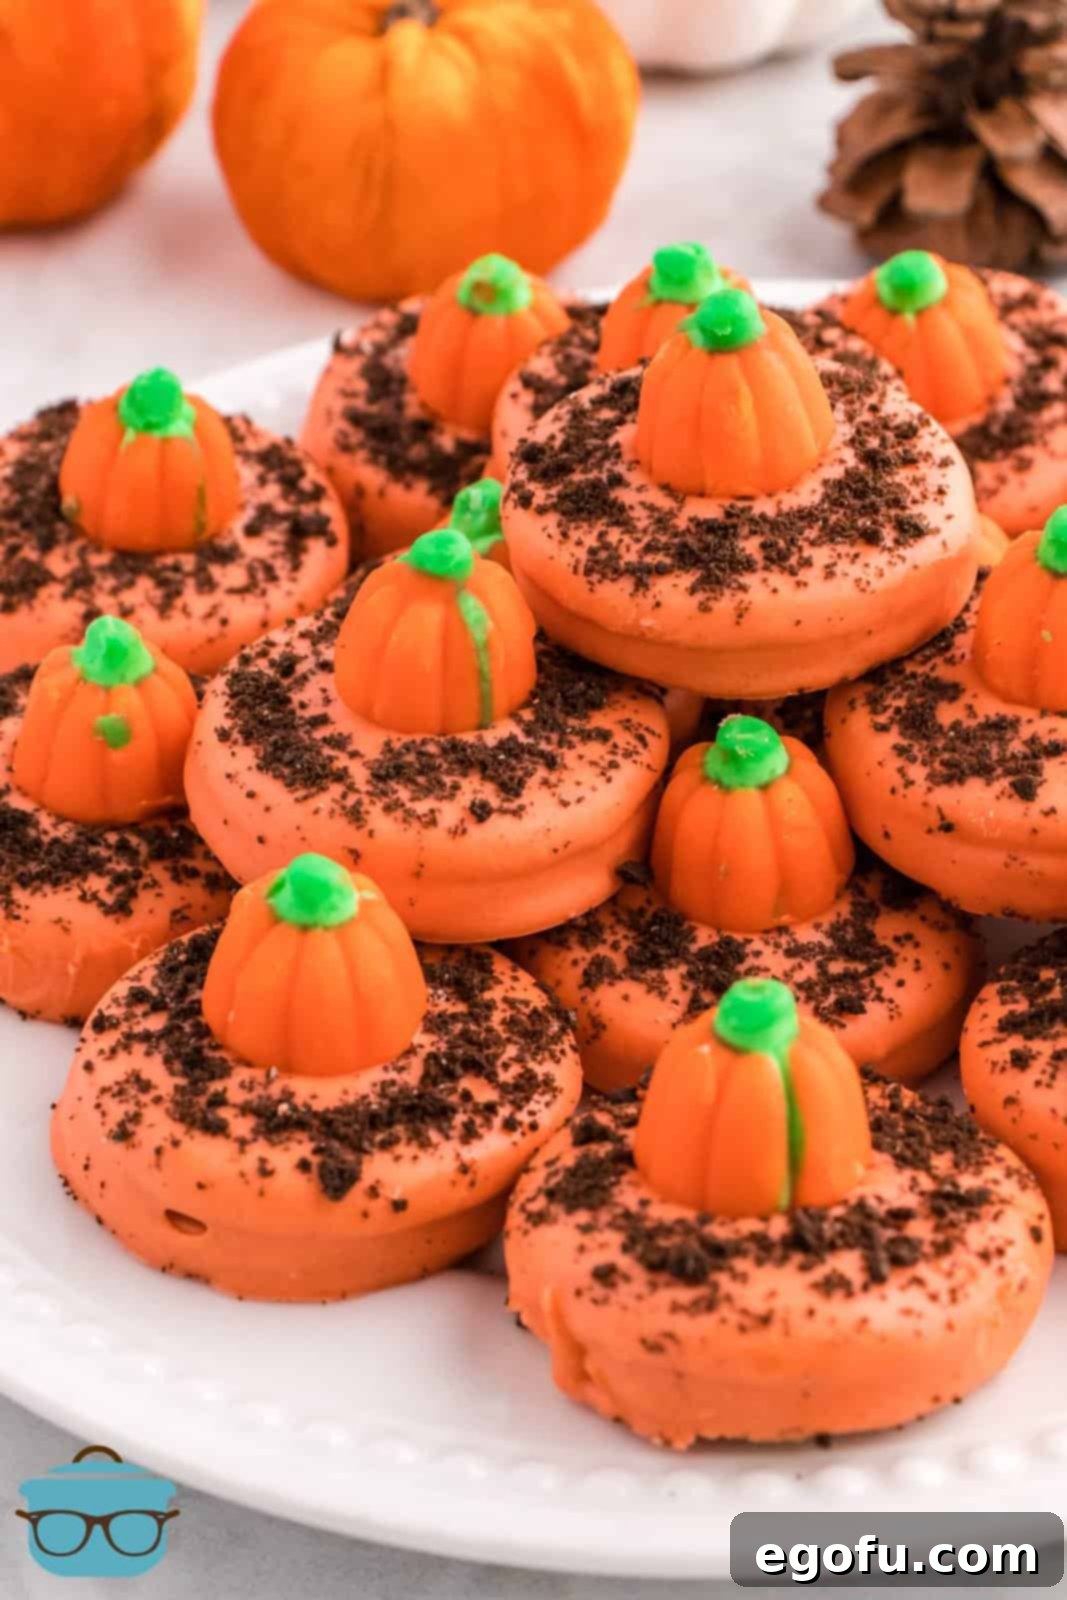
Forget the oven and complex baking techniques; these easy pumpkin cookies require just four ingredients and a few simple steps. The vibrant orange coating, earthy cookie “dirt,” and adorable pumpkin candy toppers create a mini edible pumpkin patch that’s irresistibly cute. They’re quick to prepare, making them ideal for last-minute gatherings or when you need a festive dessert without the fuss. Imagine these colorful cookies adorning your dessert table, adding a touch of whimsical charm to your fall celebrations. They’re not just a dessert; they’re a conversation starter, a joyful craft, and a delicious bite of autumn magic.
Why You’ll Love These Easy Fall Cookies
There are countless reasons why these Pumpkin Patch Cookies will become a staple in your fall recipe collection. Their simplicity and festive charm make them stand out:
- Effortlessly Easy: With only 4 core ingredients, this recipe minimizes shopping and maximizes convenience. It’s truly a beginner-friendly project.
- No-Bake Wonder: No need to turn on the oven! This makes them perfect for busy days, hot kitchens, or when you want to involve younger children without the heat.
- Kid-Friendly Fun: Children will adore helping with the crushing, dipping, and decorating steps. It’s a fantastic way to engage them in holiday preparations.
- Versatile for Any Fall Occasion: From casual autumn get-togethers to more formal holiday events like Halloween parties or Thanksgiving feasts, these cookies fit right in.
- Visually Stunning: The vibrant orange, chocolate “dirt,” and pumpkin candy create an attractive and Instagram-worthy treat that’s sure to impress.
- Customizable: Easily adapt the recipe with different Oreo flavors, chocolate types, or candy toppers to suit your taste and theme.
Frequently Asked Questions About Pumpkin Patch Cookies
For the best results, I highly recommend using white chocolate baking bars or high-quality white chocolate melting wafers. These varieties are specifically formulated for melting smoothly and achieving a lovely, even coating on your cookies. While white chocolate chips can work in a pinch, they sometimes contain stabilizers that prevent them from melting as smoothly as baking bars or wafers, potentially resulting in a thicker consistency. For an even quicker and more vibrant process, if you can find pre-colored orange candy melts (also known as “candy quik” or “melting candies”) in the baking aisle, they will save you the step of adding food coloring altogether!
Yes, using gel food coloring is absolutely crucial for this recipe. If you attempt to add liquid food coloring to melted chocolate, the chocolate will “seize.” This means the liquid will cause the melted chocolate to instantly transform from a smooth, liquid state into a thick, lumpy, unworkable mess. Even a tiny amount of water or liquid food coloring can trigger this reaction. Gel food coloring, on the other hand, is oil-based and concentrated, allowing you to achieve vibrant colors without compromising the chocolate’s texture. Always add it sparingly, a few drops at a time, until your desired shade of orange is reached.
While it’s certainly possible to cool your Pumpkin Patch Cookies at room temperature, it will take significantly longer for the chocolate to set completely. Expect them to need approximately 45 minutes to an hour to firm up properly at room temperature, compared to just 10-15 minutes in the refrigerator. If you’re short on fridge space or prefer to avoid chilling, just ensure they are placed in a cool, dry spot and allow ample time before handling or serving to prevent smudging.
You have two excellent options for melting chocolate: the microwave or a double-boiler. The microwave method is faster and great for small batches: place your chocolate in a microwave-safe bowl, microwave for 45 seconds, stir thoroughly, then continue in short 15-second intervals, stirring vigorously after each, until mostly melted. The residual heat will melt any remaining small lumps as you stir. The double-boiler method offers more controlled, gentle heat, which is ideal if you’re making a large batch or want more time before the chocolate starts to cool. Simply place a heat-safe bowl over a pot of gently simmering water (ensure the bottom of the bowl does not touch the water). Stir continuously until the chocolate is smooth and melted, then remove from heat. Both methods are effective, but slow and steady wins the race when melting chocolate.
Yes, chocolate can definitely overheat, especially in the microwave, leading to a burnt taste, grainy texture, or a thick, unworkable consistency. This is why microwaving in short intervals and stirring frequently is key. Never try to melt chocolate all at once. Even if there are a few semi-solid pieces remaining after the last interval, continuous stirring will usually melt them into the warm chocolate. If using a double-boiler, ensure the water never boils vigorously and that no steam or water gets into the chocolate, as this can also cause it to seize. Patience is a virtue when melting chocolate!
Leftover Pumpkin Patch Cookies should be stored in an airtight container at room temperature. They will remain fresh and delicious for about 3-4 days. To prevent them from sticking together, you can place a piece of parchment paper between layers if stacking. I do not recommend freezing these cookies. The chocolate coating and Oreo base can become soggy or develop an undesirable texture upon thawing. They are best enjoyed fresh within a few days of preparation.
Absolutely! These Pumpkin Patch Cookies are an excellent make-ahead treat. Since they store well at room temperature for several days, you can easily prepare them a day or two before your event. This allows you to focus on other party preparations on the day of the gathering. Just remember to store them in an airtight container to maintain their freshness and prevent them from drying out.
If your melted chocolate is too thick, it can be challenging to dip the cookies smoothly. You can thin it out by adding a very small amount (half a teaspoon at a time) of a neutral oil like vegetable oil, coconut oil, or shortening. Stir well after each addition until you reach your desired consistency. Be careful not to add too much, or the chocolate won’t set properly. If your chocolate seems too thin, it’s generally harder to fix without adding more solid chocolate. Often, chocolate that seems too thin might actually be too hot; allowing it to cool slightly can thicken it up. Ensure you’re using chocolate specifically designed for melting to avoid these issues.

Essential Ingredients for Your Pumpkin Patch
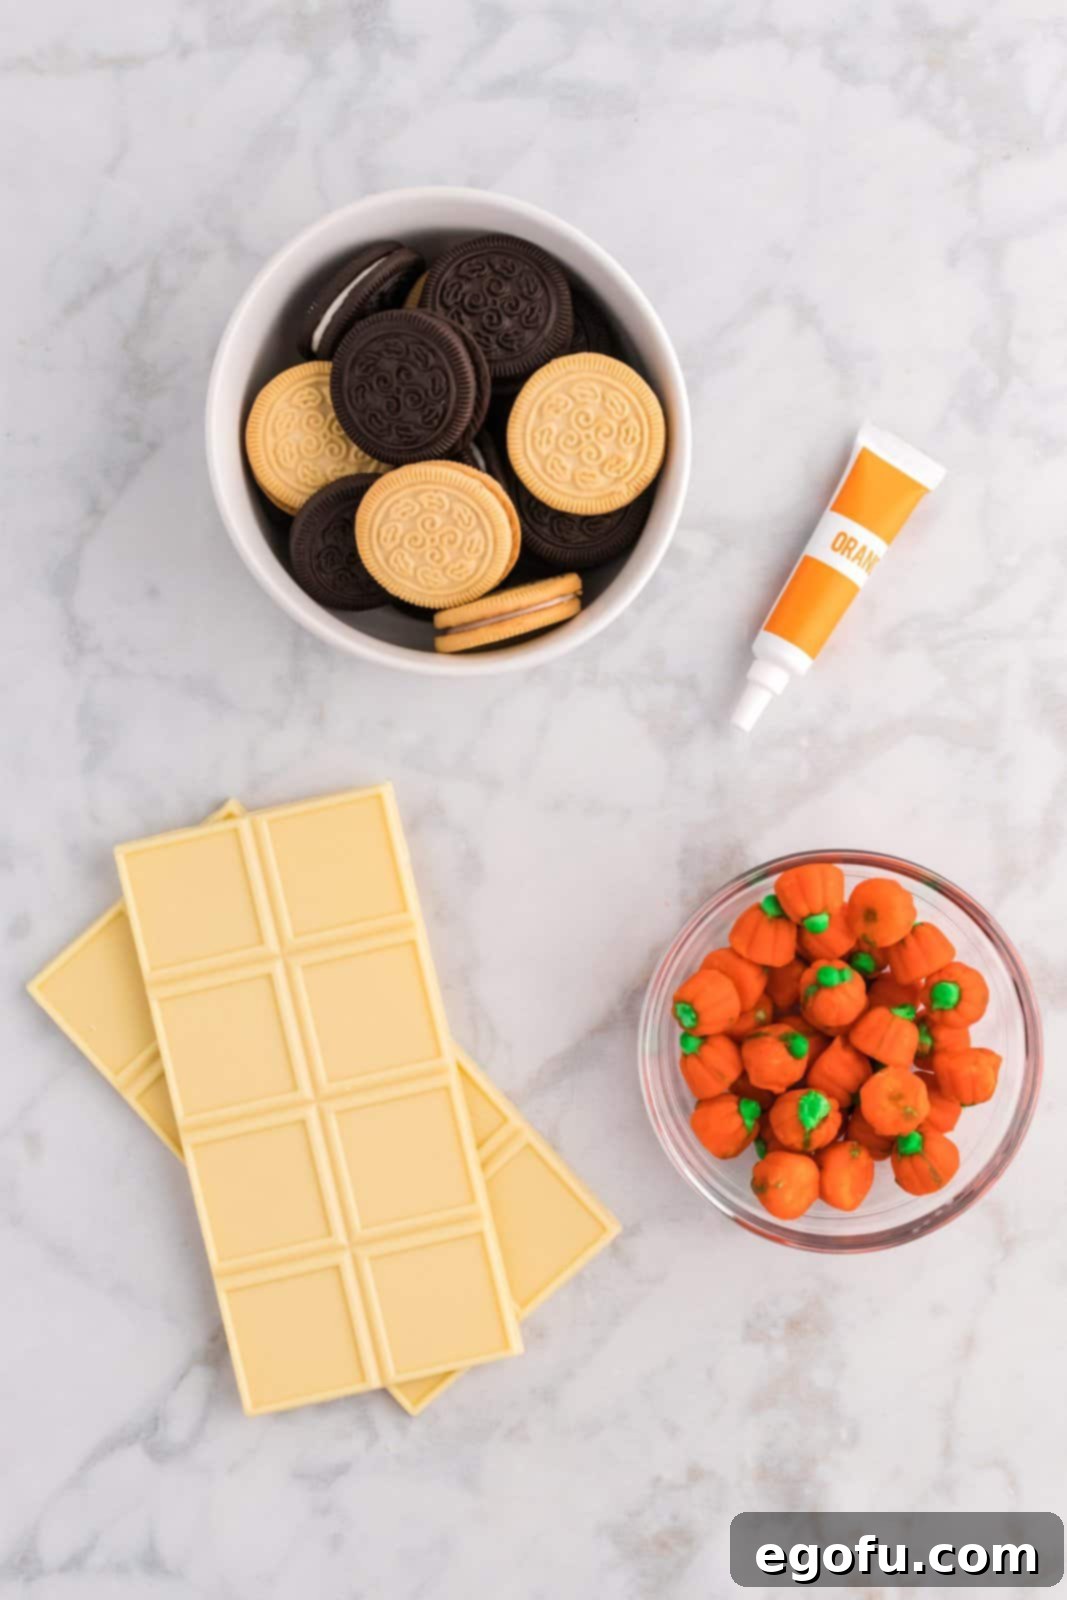
Gathering your ingredients is the first step to creating these delightful fall cookies. You’ll be surprised at how few items you need for such a festive outcome!
- Oreo Cookies: You’ll need about 18 cookies for the main base, plus an additional 3 chocolate Oreos specifically for crushing into “dirt.” Feel free to use classic chocolate Oreos, or opt for golden Oreos if you prefer a vanilla base. A mix of both can also add interesting variety!
- White Melting Chocolate: Approximately 8 ounces. As discussed in the FAQs, white chocolate baking bars, melting wafers, or even quality white chocolate chips are excellent choices. Make sure it’s a type that melts smoothly for easy dipping.
- Orange Gel Food Coloring: A small amount is all you need to transform your white chocolate into a vibrant pumpkin hue. Remember, gel food coloring is key to avoid seizing the chocolate.
- Mellowcreme Pumpkin Candies: You’ll need 18 of these charming little pumpkin candies to top each cookie, completing the “pumpkin patch” look.
These simple ingredients combine to create a treat that is greater than the sum of its parts, proving that you don’t need a pantry full of exotic items to make something truly special for the autumn season.
How to Make Delicious Pumpkin Patch Cookies: A Step-by-Step Guide
Creating these festive Pumpkin Patch Cookies is a rewarding and enjoyable process. Follow these detailed steps to ensure your cookies turn out perfectly:
Step 1: Prepare Your Workspace
Begin by lining a large baking sheet with parchment paper. This will provide a non-stick surface for your dipped cookies and make cleanup a breeze. Set this aside, as you’ll be placing your finished cookies here to set.
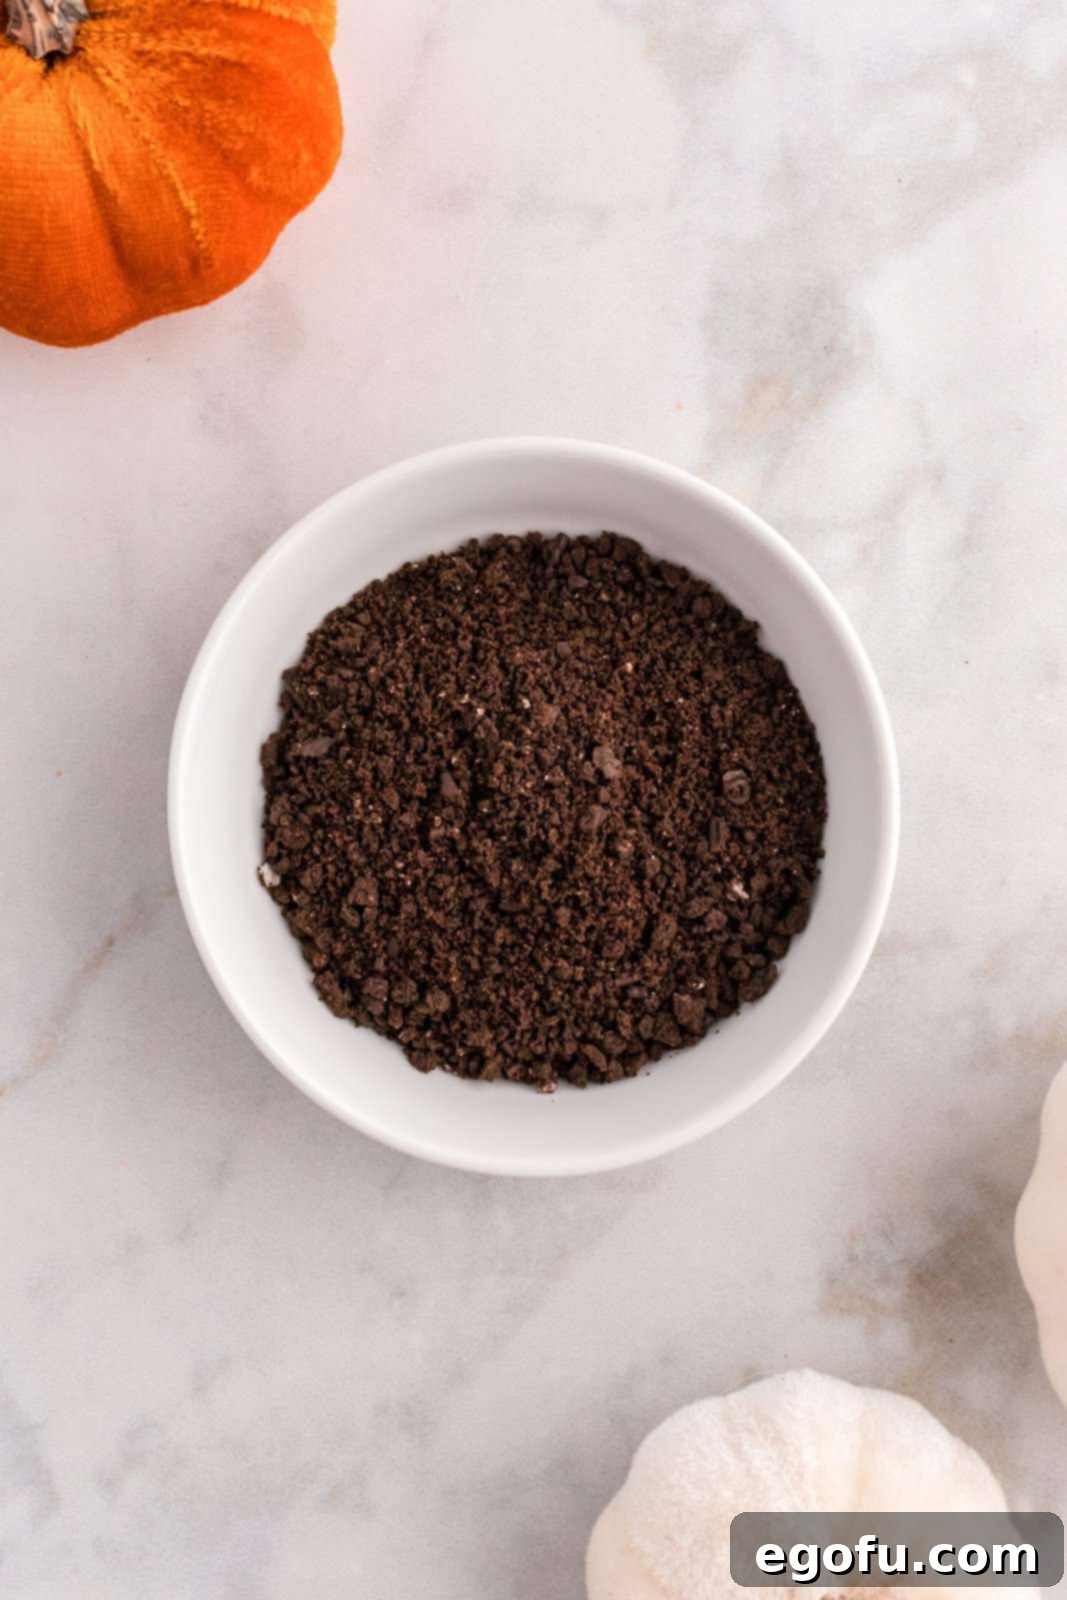
Step 2: Create Your Cookie “Dirt”
Take three chocolate Oreo cookies and carefully twist them apart to remove the cream filling. You can enjoy the cream as a snack or discard it. Place the de-creamed chocolate wafers into a sturdy Ziploc bag or a shallow bowl. Using a rolling pin or the back of a spoon, crush the cookies until they resemble fine, powdery “dirt.” This will be sprinkled on top of your cookies, giving them that authentic pumpkin patch feel. Set these crumbs aside.
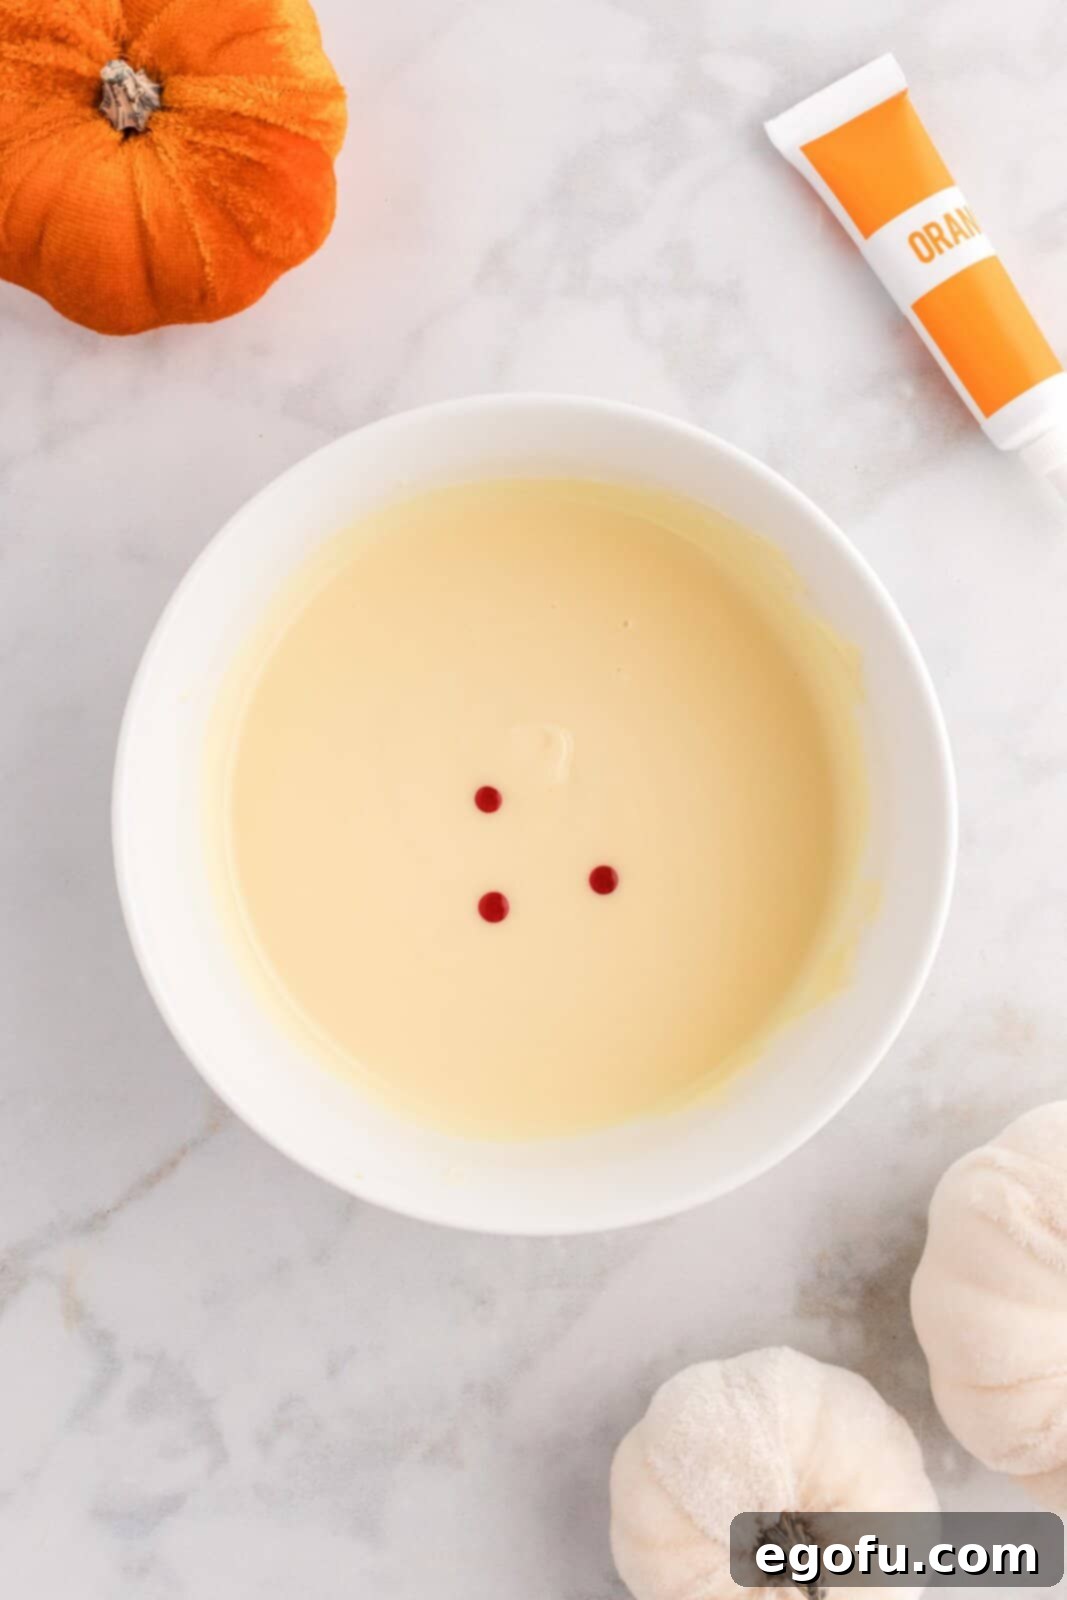
Step 3: Melt and Color the White Chocolate
In a small, microwave-safe bowl, place your 8 ounces of white melting chocolate. If using a baking bar, break it into smaller, uniform pieces to ensure even melting. Microwave the chocolate for 45 seconds on medium power. Remove and stir thoroughly. Continue to microwave in 15-second intervals, stirring well after each, until the chocolate is completely melted and smooth. Be extremely cautious not to overheat the chocolate, as this can cause it to burn or seize. Once fully melted, add a few drops of orange gel food coloring. Stir continuously until the color is vibrant and evenly distributed. Add more drops if a deeper orange is desired, remembering that a little gel color goes a long way!
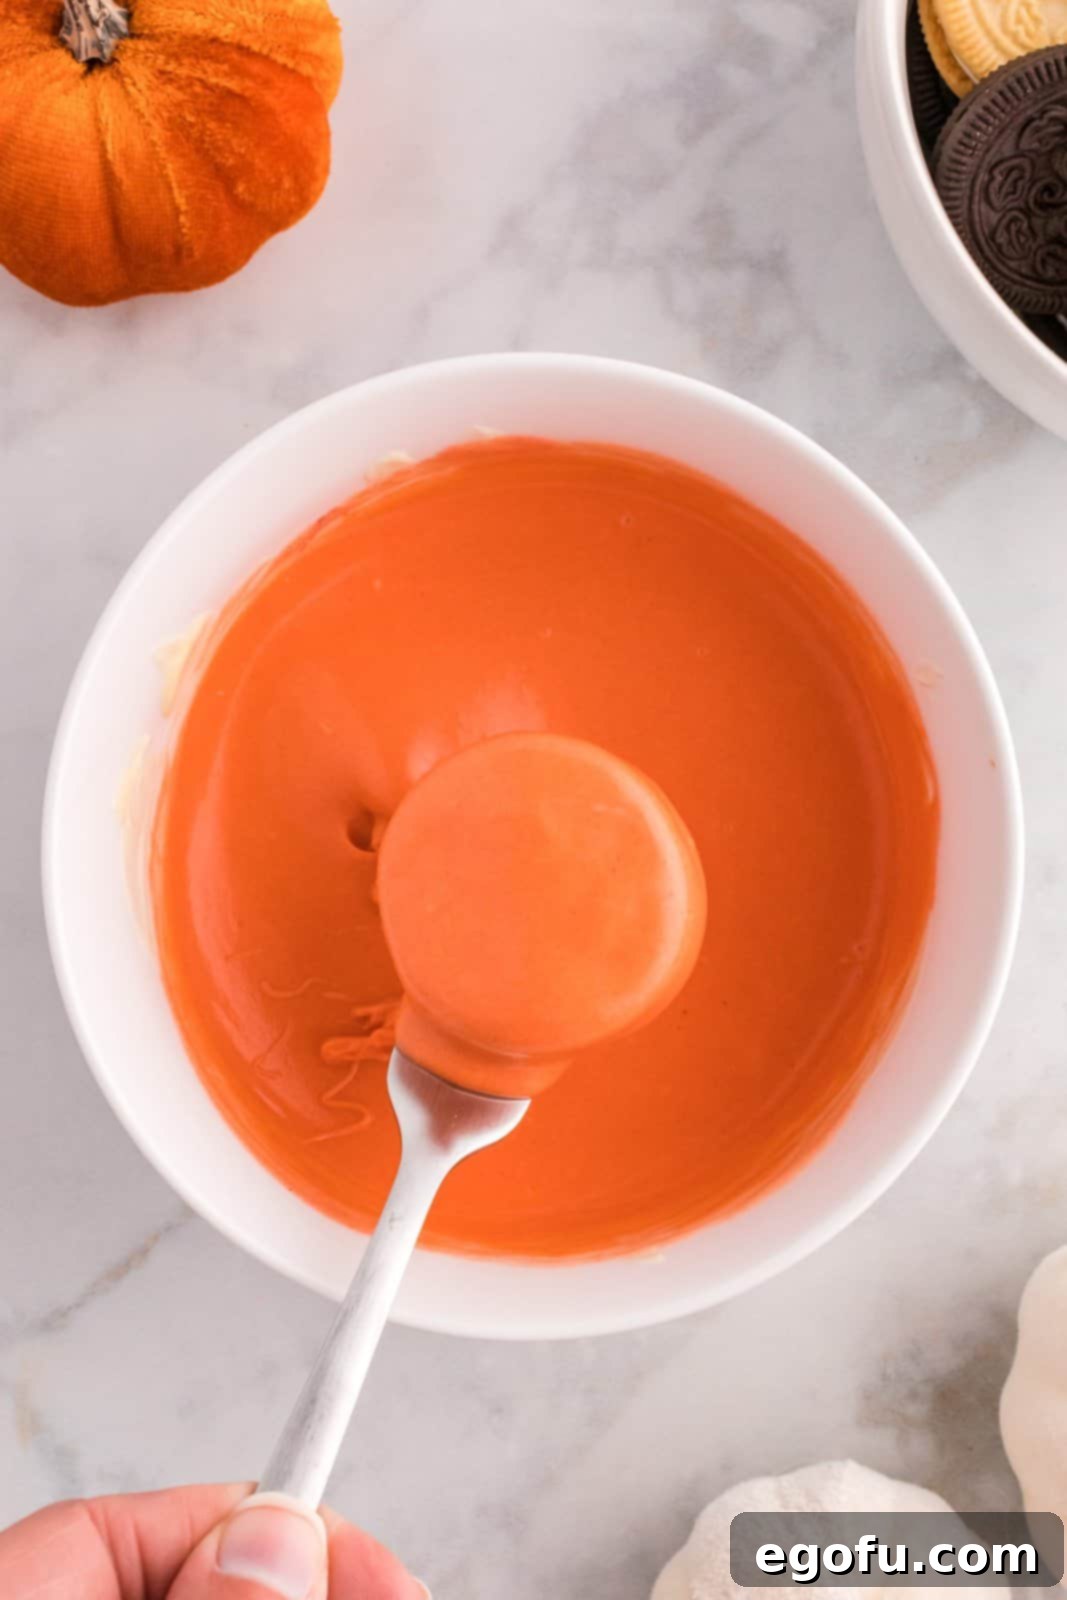
Step 4: Dip the Oreo Cookies
Now for the fun part! Using a fork, carefully pick up one Oreo cookie at a time. Dip it into the melted orange chocolate. If your bowl isn’t deep enough to fully submerge the cookie, dip one side, then gently flip it over to coat the other side completely. Ensure the entire cookie is covered in a smooth layer of orange chocolate. Lift the chocolate-covered cookie from the bowl and gently tap the fork against the edge of the bowl a few times. This helps remove any excess chocolate, ensuring a neat and even coating without thick drips.
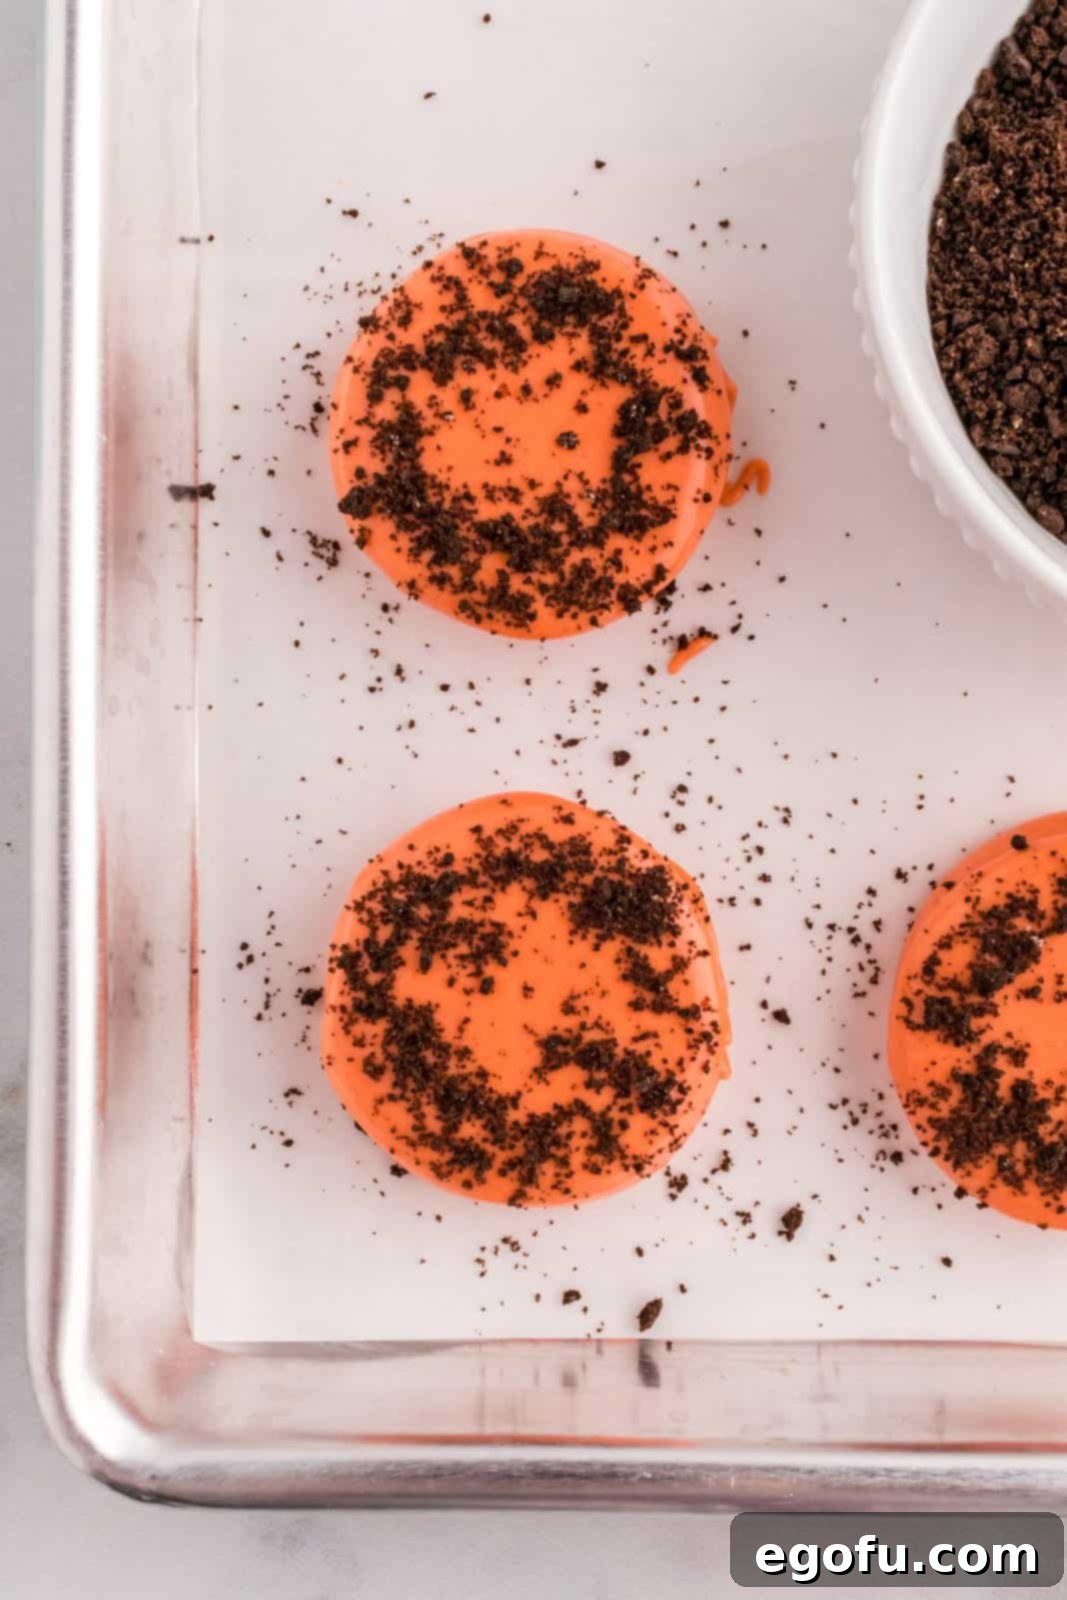
Step 5: Add the “Dirt” Topping
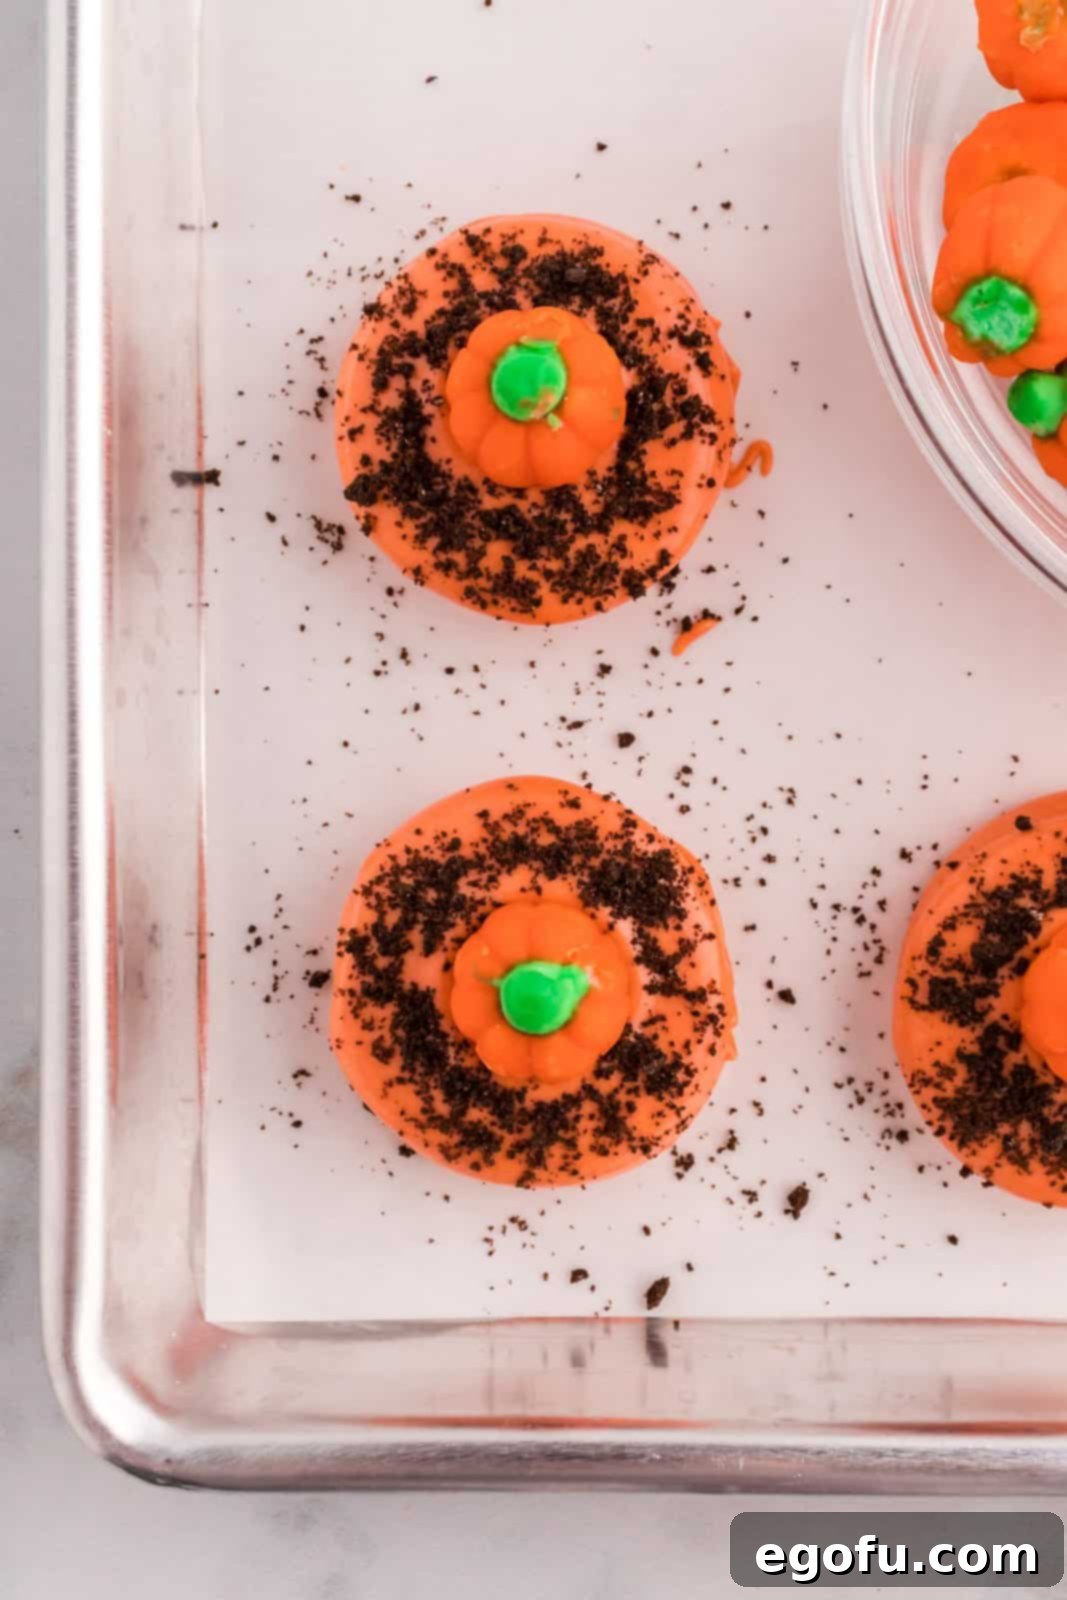
Immediately after dipping, carefully place the chocolate-covered cookie onto the prepared parchment-lined baking sheet. While the chocolate is still wet and tacky, generously sprinkle the crushed chocolate Oreo crumbs on top of the cookie. This creates the illusion of rich, dark “dirt” for your pumpkin patch. Don’t be shy with the crumbs; they add wonderful texture and visual appeal.
Step 6: Place Your Pumpkins
While the chocolate is still soft and the crumbs are settled, gently press one mellowcreme pumpkin candy directly into the middle of each cookie. The wet chocolate will act as an adhesive, securing the pumpkin in place. Repeat these dipping, sprinkling, and pumpkin-placing steps for all your remaining Oreo cookies until your baking sheet is filled with a vibrant pumpkin patch.
Step 7: Chill and Serve!
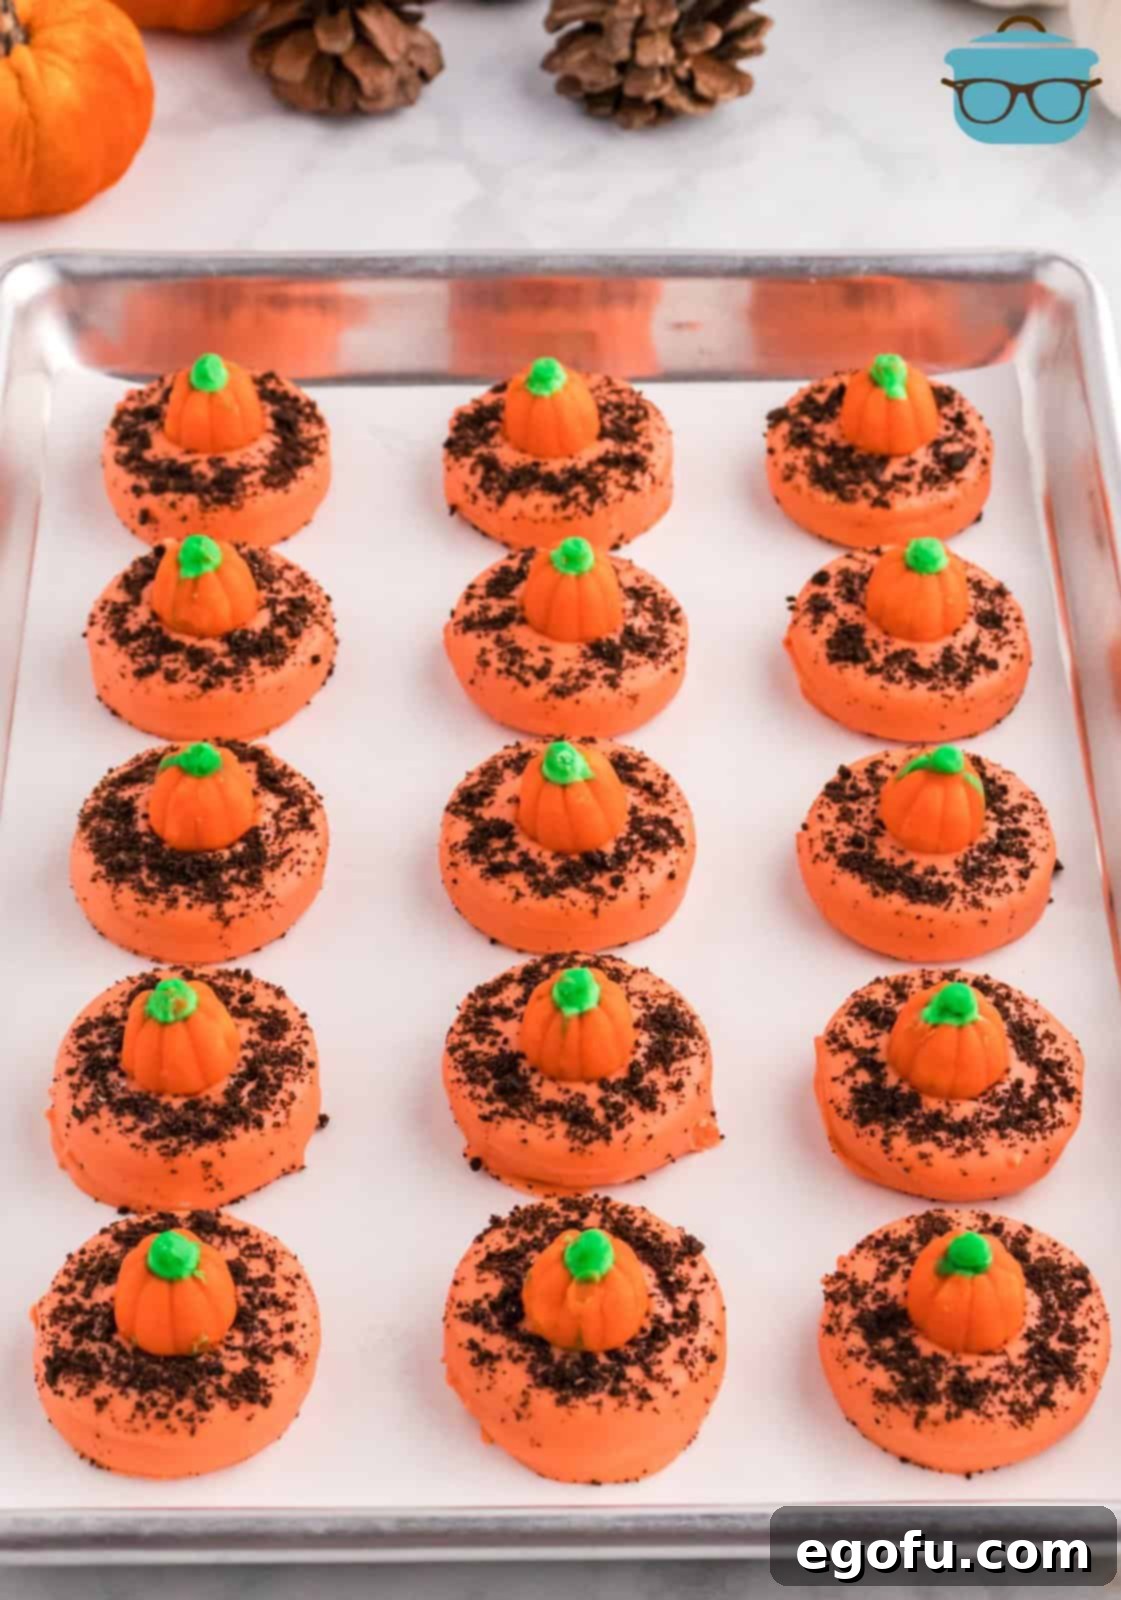
Once all your cookies are decorated and arranged on the baking sheet, place the entire tray into the refrigerator. Allow them to chill for about 10-15 minutes, or until the chocolate coating is completely firm and set. Once hardened, your delightful Pumpkin Patch Cookies are ready to be served and enjoyed! Gently peel them off the parchment paper and arrange them on a festive platter. These cookies are a perfect blend of crunchy, sweet, and wonderfully autumnal.
Tips for Perfect Pumpkin Patch Cookies Every Time
To ensure your Pumpkin Patch Cookies are absolutely flawless, here are some extra tips and tricks:
- Work Quickly: Melted chocolate can start to set fairly fast. Have all your ingredients prepped and ready (parchment paper lined, cookie crumbs made, pumpkin candies unwrapped) before you start melting the chocolate.
- Use Quality Chocolate: The taste and texture of your finished cookies largely depend on the quality of your melting chocolate. Invest in a good brand that melts smoothly.
- Don’t Over-Color: Start with just a few drops of gel food coloring. You can always add more to achieve a darker orange, but you can’t take it away!
- Creative Crumb Variations: While crushed chocolate Oreos are traditional for “dirt,” you could also use crushed graham crackers, finely crushed gingersnaps, or even a mix of chocolate and golden Oreo crumbs for varied texture and color.
- Alternative Toppings: If mellowcreme pumpkins aren’t available, small green candy leaves, fall-themed sprinkles, or even a tiny dot of green icing to simulate a stem can work as a creative alternative.
- Even Coating: When dipping, aim for a relatively thin, even layer of chocolate. Too thick, and it can be messy to eat; too thin, and the cookie might show through. Shaking off excess is crucial.
- Batch Size: This recipe is easily scalable. If you’re hosting a large gathering, simply double or triple the ingredients. Just make sure you have enough baking sheets and fridge space!
Serving Suggestions and Occasions
These Pumpkin Patch Cookies are incredibly versatile and can be served in many delightful ways:
- Halloween Parties: Arrange them on a spooky-themed platter alongside other Halloween treats. They add a cheerful, child-friendly touch.
- Thanksgiving Dessert Table: A wonderful addition to the dessert spread, especially on the kids’ table. Their bright colors will stand out amongst the traditional brown and orange pies.
- Fall Harvest Gatherings: Perfect for autumn potlucks, school events, or neighborhood parties. They travel well and are easy to serve.
- Cozy Evenings: Enjoy them with a warm mug of apple cider, pumpkin spice latte, or hot cocoa during a crisp fall evening.
- Edible Gifts: Package a few cookies in a cellophane bag tied with a festive ribbon for a thoughtful homemade gift for friends, teachers, or neighbors.
- Bake Sale Success: Their eye-catching appearance and delicious taste make them a fantastic item for fall bake sales.
No matter the occasion, these delightful cookies are sure to bring joy and a taste of the season!
Want More Delicious Fall & Holiday Recipes?
- Frosted Soft Pumpkin Cookies
- Crock Pot Pumpkin Hot Chocolate
- Pumpkin Oreo Balls
- Pumpkin Patch Dirt Pudding
- Pumpkin Chocolate Chip Cake
- Halloween Graveyard Cups
- Pumpkin Shaped Cookies
- Witch Hat Halloween Cookies
- Halloween Oreo Spiders
- Halloween White Trash

Pumpkin Patch Cookies
These Pumpkin Patch Cookies are a fun and easy recipe to turn regular Oreo cookies into a colorful and vibrant treat!
Pin Recipe
Prep Time: 30 minutes
Cook Time: 2 minutes
Cooling Time: 10 minutes
Total Time: 42 minutes
Servings: 18 cookies
Author: Brandie Skibinski
Ingredients
- 18 Oreo cookies (golden or regular)
- 8 ounces white melting chocolate
- Orange gel food coloring
- 18 mellowcreme pumpkin candies
Instructions
- Line a large baking sheet with parchment paper and set aside.
- Take 3 chocolate Oreo cookies and remove the cream from between them (eat or discard). Crush the cookies until they form a fine powder, then set aside.
- In a small microwave-safe bowl, melt the 8 ounces of chocolate. If using a baking bar, break it into smaller pieces. Microwave for 45 seconds, stir, then continue cooking in 15-second intervals until fully melted, stirring well after each. Avoid overheating.
- Once the white chocolate is completely melted and smooth, add a few drops of orange gel food coloring. Stir until the desired vibrant orange color is reached.
- Using a fork, dip one Oreo cookie at a time into the orange-colored chocolate, ensuring both sides are fully coated. Gently shake the cookie to remove any excess chocolate.
- Place the chocolate-covered cookie onto the parchment paper. While the chocolate is still wet, sprinkle the crushed chocolate cookie crumbs on top.
- Immediately place one mellowcreme pumpkin candy in the middle of each cookie, gently pressing it down to secure.
- Once all cookies are dipped and decorated, place the baking sheet in the refrigerator for 10-15 minutes, or until the chocolate has completely hardened. Serve and enjoy!
Notes
- You can use golden or regular Oreos, or a mix of both, for the base of your cookies.
- For best results, use white chocolate baking bars, melting wafers, or quality white chocolate chips. These are typically found in the baking aisle.
- Always use gel food coloring (not liquid) to prevent the melted chocolate from seizing and becoming lumpy.
Course: Dessert
Cuisine: American
Nutrition
(Estimated values per serving)
- Calories: 131 kcal
- Carbohydrates: 18g
- Protein: 1g
- Fat: 6g
- Sodium: 63mg
- Fiber: 0.4g
- Sugar: 14g
Nutritional Disclaimer
“The Country Cook” is not a dietician or nutritionist, and any nutritional information shared is an estimate. If calorie count and other nutritional values are important to you, we recommend running the ingredients through whichever online nutritional calculator you prefer. Calories and other nutritional values can vary quite a bit depending on which brands were used.
Did you make this recipe?
Share it on Instagram @thecountrycook and mention us #thecountrycook!
