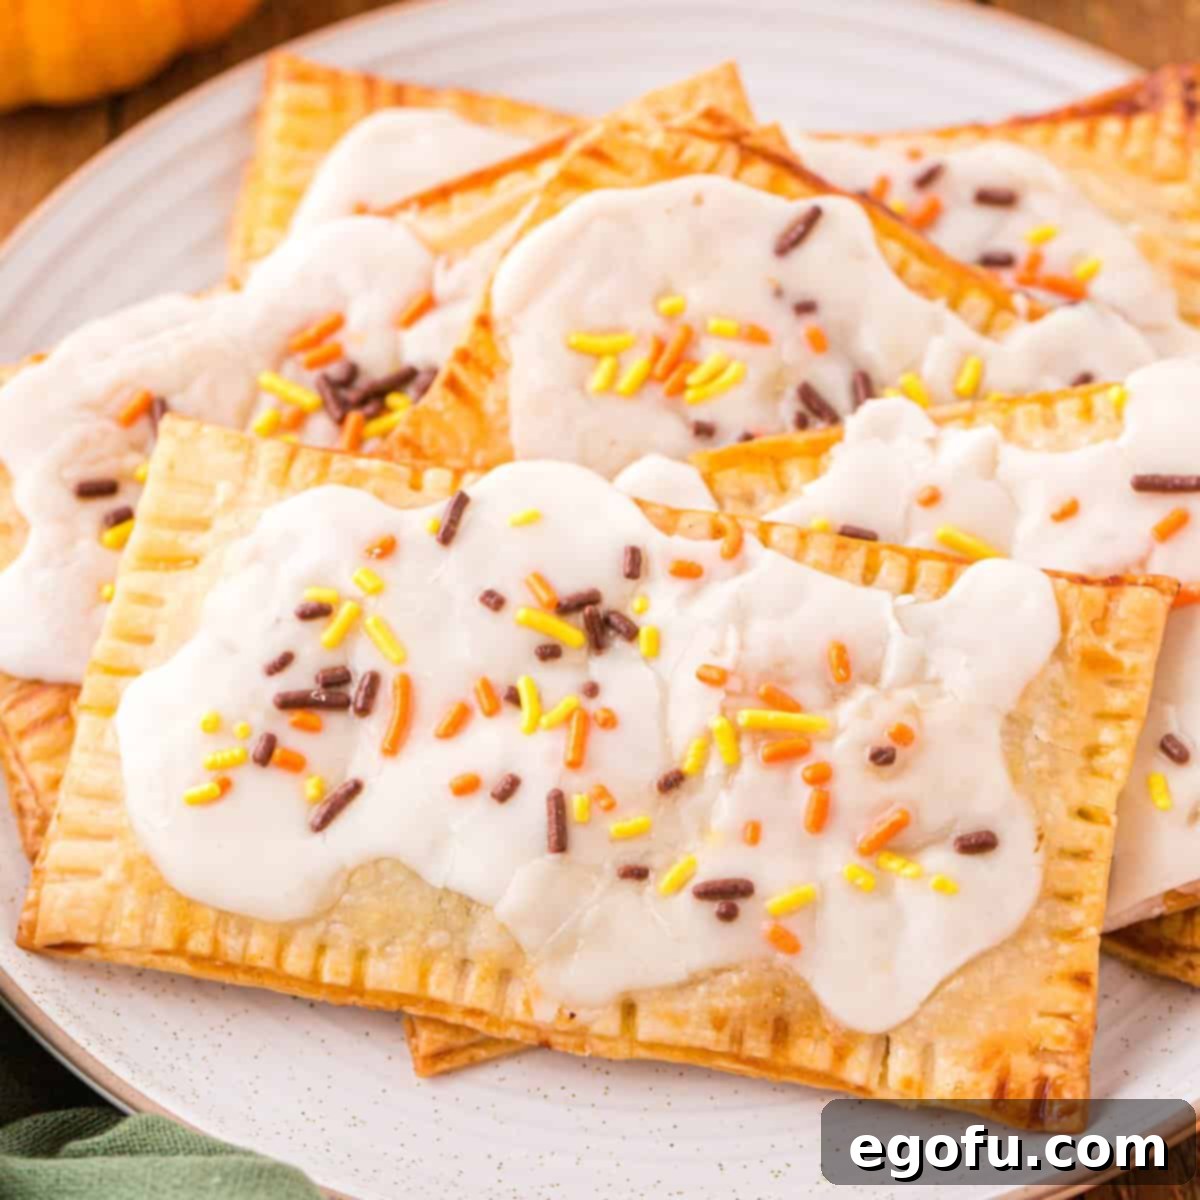
Imagine the comforting aroma of warm pumpkin and sweet maple filling your kitchen. Crafting your own homemade pop tarts isn’t just a delightful culinary adventure; it’s surprisingly straightforward and yields a treat far superior to any store-bought version. These delightful Pumpkin Pop Tarts, featuring a creamy, spiced pumpkin filling and a luscious sweet maple glaze, are an absolute must-try for the enchanting autumn season. They embody everything we love about fall baking: warmth, flavor, and a touch of homemade magic.
Homemade Pumpkin Pop Tarts: Quick, Easy, and Irresistibly Delicious for Fall
Embrace the vibrant flavors of autumn with these incredibly easy-to-make homemade Pumpkin Pop Tarts. Whether you’re seeking a cozy breakfast, a special brunch item, or a comforting fall dessert, these delightful pastry pockets are bursting with sweet, spiced pumpkin goodness. Forget about complicated recipes and endless steps – with just a few readily available ingredients and straightforward instructions, you can effortlessly craft these delicious treats right in your own kitchen. They’re guaranteed to be a huge hit with family and friends, bringing a touch of homemade warmth and festive cheer to any occasion. Plus, the joy of biting into a warm, flaky pastry filled with autumn’s signature flavor is simply unmatched.
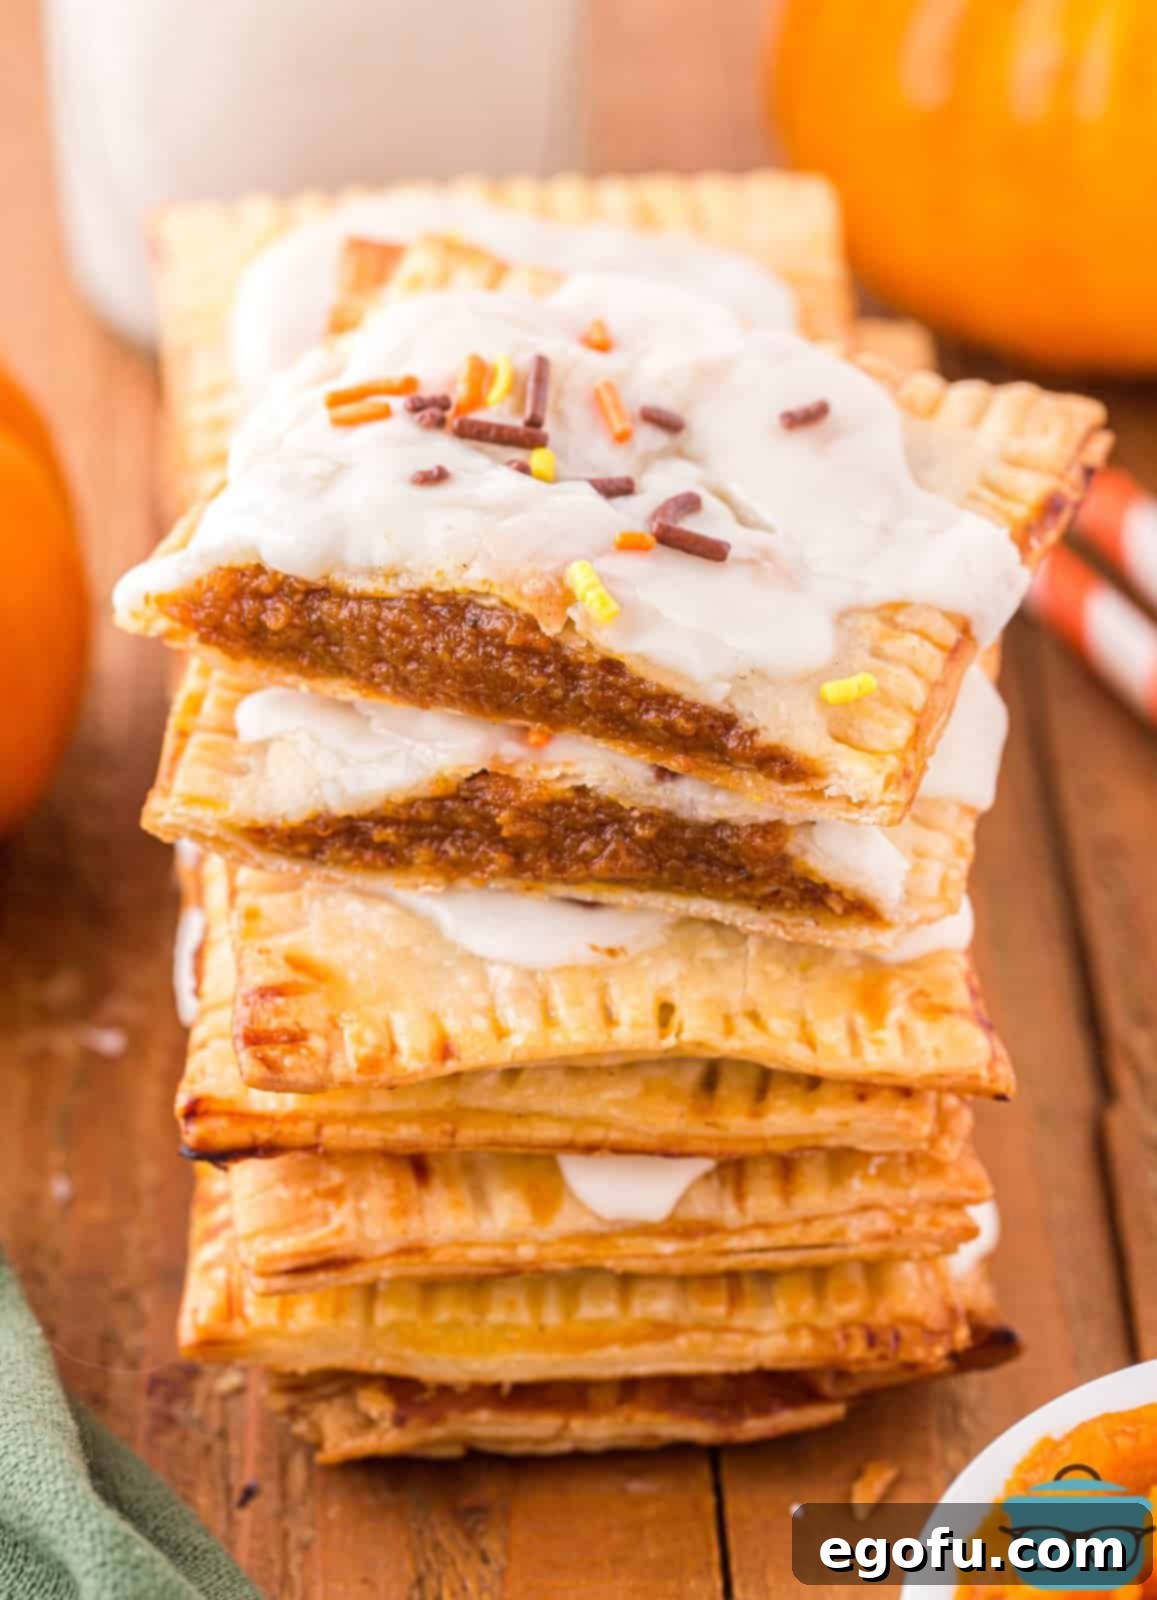
Your Top Questions Answered: Homemade Pumpkin Pop Tarts FAQ
Absolutely! While the spiced pumpkin filling is undeniably a fall favorite, these homemade pop tarts are wonderfully versatile and invite creativity. Feel free to experiment with various flavor combinations to suit your personal preferences or seasonal availability. Some fantastic autumn-inspired ideas include a classic apple cinnamon filling, made with finely diced apples and a dash of cinnamon; a rich and creamy sweet potato filling, offering a similar texture to pumpkin but with a unique earthy sweetness; or even a decadent hazelnut Nutella filling for chocolate lovers seeking an indulgent treat. Don’t be afraid to get creative and make these pop tarts uniquely yours!
To deepen and elevate the warm, inviting flavor of the pumpkin, you can certainly adjust the spice blend to your liking. If you adore a strong, aromatic pumpkin spice presence, simply add an extra ½ to 1 teaspoon of pumpkin pie spice to the filling mixture. For complementary notes that will make your pop tarts even more fragrant and complex, consider incorporating individual spices such as additional pinches of ground cinnamon for warmth, ginger for a subtle kick, nutmeg for its sweet and woody notes, or cloves for a deep, pungent aroma. These spices are classic pairings with pumpkin and will enrich the overall taste experience.
Yes, indeed! While a classic maple glaze provides a wonderful autumnal touch that perfectly complements the pumpkin, you have plenty of delicious options to switch things up. A rich cream cheese glaze would add a delightful tangy sweetness, balancing the richness of the pumpkin. A simple vanilla glaze, made with powdered sugar, milk, and a splash of vanilla extract, offers a timeless and universally appealing sweetness. Alternatively, a luscious caramel glaze would provide an extra layer of indulgence, pairing beautifully with the spiced pumpkin interior. Any of these choices will create a fantastic topping that enhances the yummy pumpkin filling on the inside of your homemade pop tarts.
Certainly! Don’t feel limited to the traditional rectangle shape. Homemade pop tarts offer a fantastic opportunity to get creative with your presentation. You can easily make squares, triangles, or even use fun cookie cutters to create unique and festive shapes. For a truly charming and seasonal touch, I highly recommend getting a pumpkin or leaf-shaped cookie cutter. This is especially fun if you’re making these treats with children, and it adds an extra layer of visual appeal and holiday spirit to your pumpkin-flavored pop tarts.
While festive fall sprinkles are always a wonderful and easy choice, there are many other delightful toppings you can add to personalize your homemade pop tarts! Consider scattering finely crushed nuts, such as pecans, walnuts, or almonds, for a textural crunch and nutty flavor. Grated dark or white chocolate can add a touch of sophistication and richness. Toasted shredded coconut offers an exotic twist and a lovely chewiness. For an extra indulgent finish, drizzle additional sauces like melted chocolate or warm caramel on top of the glaze. A sprinkle of coarse sugar before baking can also add sparkle and a slight crunch.
Once your Pumpkin Pop Tarts have completely cooled down to room temperature, proper storage is key to maintaining their deliciousness. You can store them in an airtight container at room temperature for up to 2 days, which helps preserve their flakiness. Alternatively, for slightly longer storage, you can refrigerate them for up to a week. If you plan to refrigerate, ensure they are well-wrapped in plastic wrap or placed in an airtight container to prevent them from drying out. Also, it’s worth remembering that homemade pop tarts, like most freshly baked pastries, are always best enjoyed on the day you first make them, as the crust will naturally soften over time.
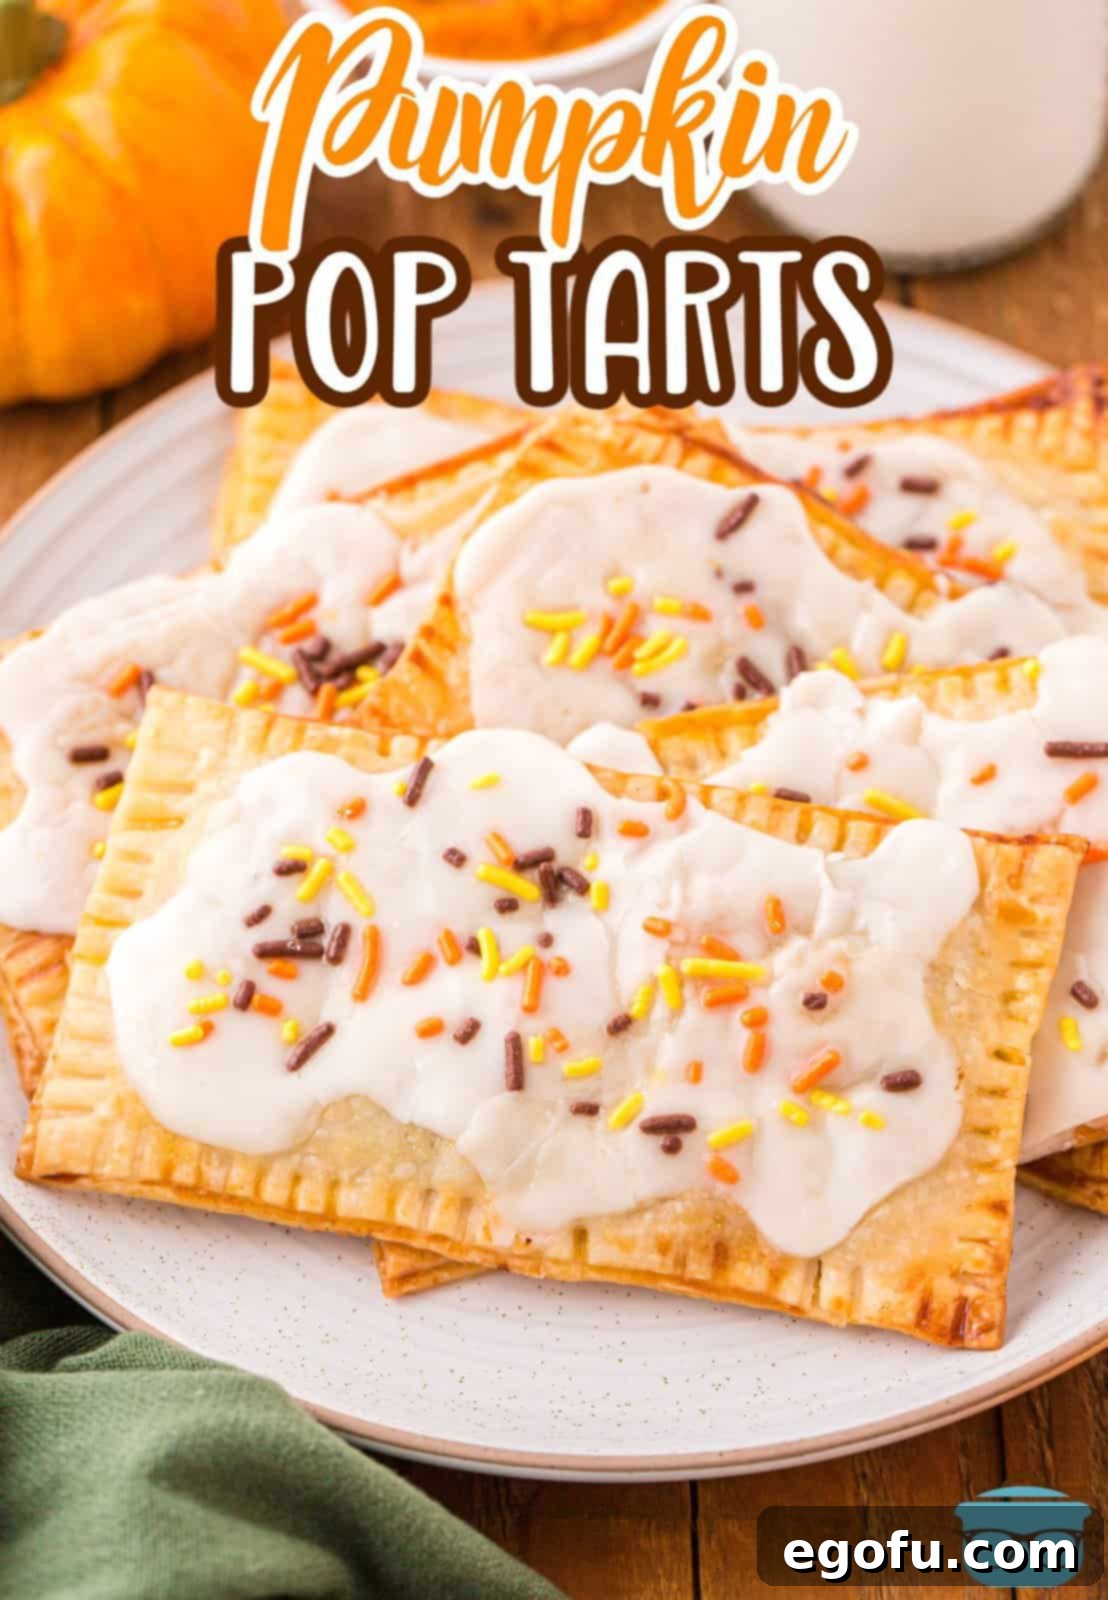
Essential Ingredients for Your Perfect Pumpkin Pop Tarts
Crafting these delectable homemade Pumpkin Pop Tarts requires a short list of simple, readily available ingredients, many of which you likely already have in your pantry or can easily find at any grocery store. For a comprehensive list with exact measurements, please refer to the full recipe card below. Here’s a detailed breakdown of what you’ll need and some helpful tips for selecting and using each component:
- Refrigerated Pie Crusts: A standard 15-ounce box typically contains two pre-rolled pie crusts, which is precisely what you’ll need to make 12 pop tarts. While you can certainly indulge your inner baker and make your own homemade pie crust from scratch, using pre-made refrigerated crusts significantly streamlines this recipe, making it incredibly quick and easy without compromising on flavor or that beloved flaky texture. They provide an authentic, sturdy, yet tender base, very much like an actual pop tart. Although puff pastry can be a substitute for an even flakier result, pie crusts tend to offer a more traditional and familiar pop tart feel.
- Pumpkin Puree: This is the undeniable star of our creamy fall filling! When selecting your canned pumpkin, it is absolutely crucial to ensure the label clearly states “pure pumpkin” or “pumpkin puree.” Be extra vigilant not to accidentally grab pumpkin pie filling, which is a pre-seasoned and often sweetened product designed for pies, and is usually located right next to the pure puree in grocery stores. Using pure pumpkin allows you complete control over the sweetness and spice levels of your filling, ensuring a perfectly balanced flavor profile.
- Light Brown Sugar (packed): This ingredient adds a wonderful depth of flavor with its subtle molasses notes and essential sweetness to our pumpkin filling. For those who enjoy a richer, deeper molasses flavor, feel free to substitute with dark brown sugar, which offers a more robust taste. When measuring brown sugar, it’s important to pack it firmly into your measuring cup. This ensures you’re getting an accurate amount, which is critical for the ideal sweetness and texture of your filling.
- Pumpkin Pie Spice: This iconic blend of cinnamon, nutmeg, ginger, and cloves is what infuses our pop tarts with their quintessential and comforting fall aroma and taste. If you don’t happen to have a pre-made pumpkin pie spice blend on hand, you can easily use plain ground cinnamon for a simpler flavor, or even create your own custom blend using individual spices to match your exact taste preferences. This allows for great flexibility and personalization.
- Egg and Milk (for egg wash): A simple egg wash, expertly prepared by whisking one large egg with a tablespoon of milk, serves a vital dual purpose in this recipe. Firstly, it acts as a highly effective “glue,” helping to securely hold the top and bottom pie crusts together and preventing the delicious pumpkin filling from leaking out during baking. Secondly, when brushed over the raw pastry, it contributes significantly to a beautiful, appetizing golden-brown color and a slightly glossy finish on the baked pop tarts. If milk is unavailable, water can be used as a perfectly acceptable substitute for the egg wash.
- Powdered Sugar and Pure Maple Syrup (for glaze): These two ingredients form the essential base for our delectable and smooth maple glaze. When combined with a small amount of milk (or a touch of heavy cream for an even richer glaze), they create a smooth, pourable, and incredibly sweet topping that perfectly complements the spiced pumpkin. If you’re not particularly fond of maple syrup’s distinctive flavor, you can easily substitute it with honey for a different, yet equally delicious, flavor profile. Alternatively, for a classic, simple vanilla-like glaze, you can use only powdered sugar and milk, perhaps adding a drop of vanilla extract for extra aromatic sweetness.
- Fall Sprinkles (optional garnish): A sprinkle of colorful, fall-themed sprinkles adds a wonderfully festive touch and a bit of fun texture to your finished pop tarts. While entirely optional, they certainly enhance the visual appeal, especially if you’re serving these for a special occasion or making them with children. Feel free to use any sprinkles you like, or omit them entirely for a simpler look.
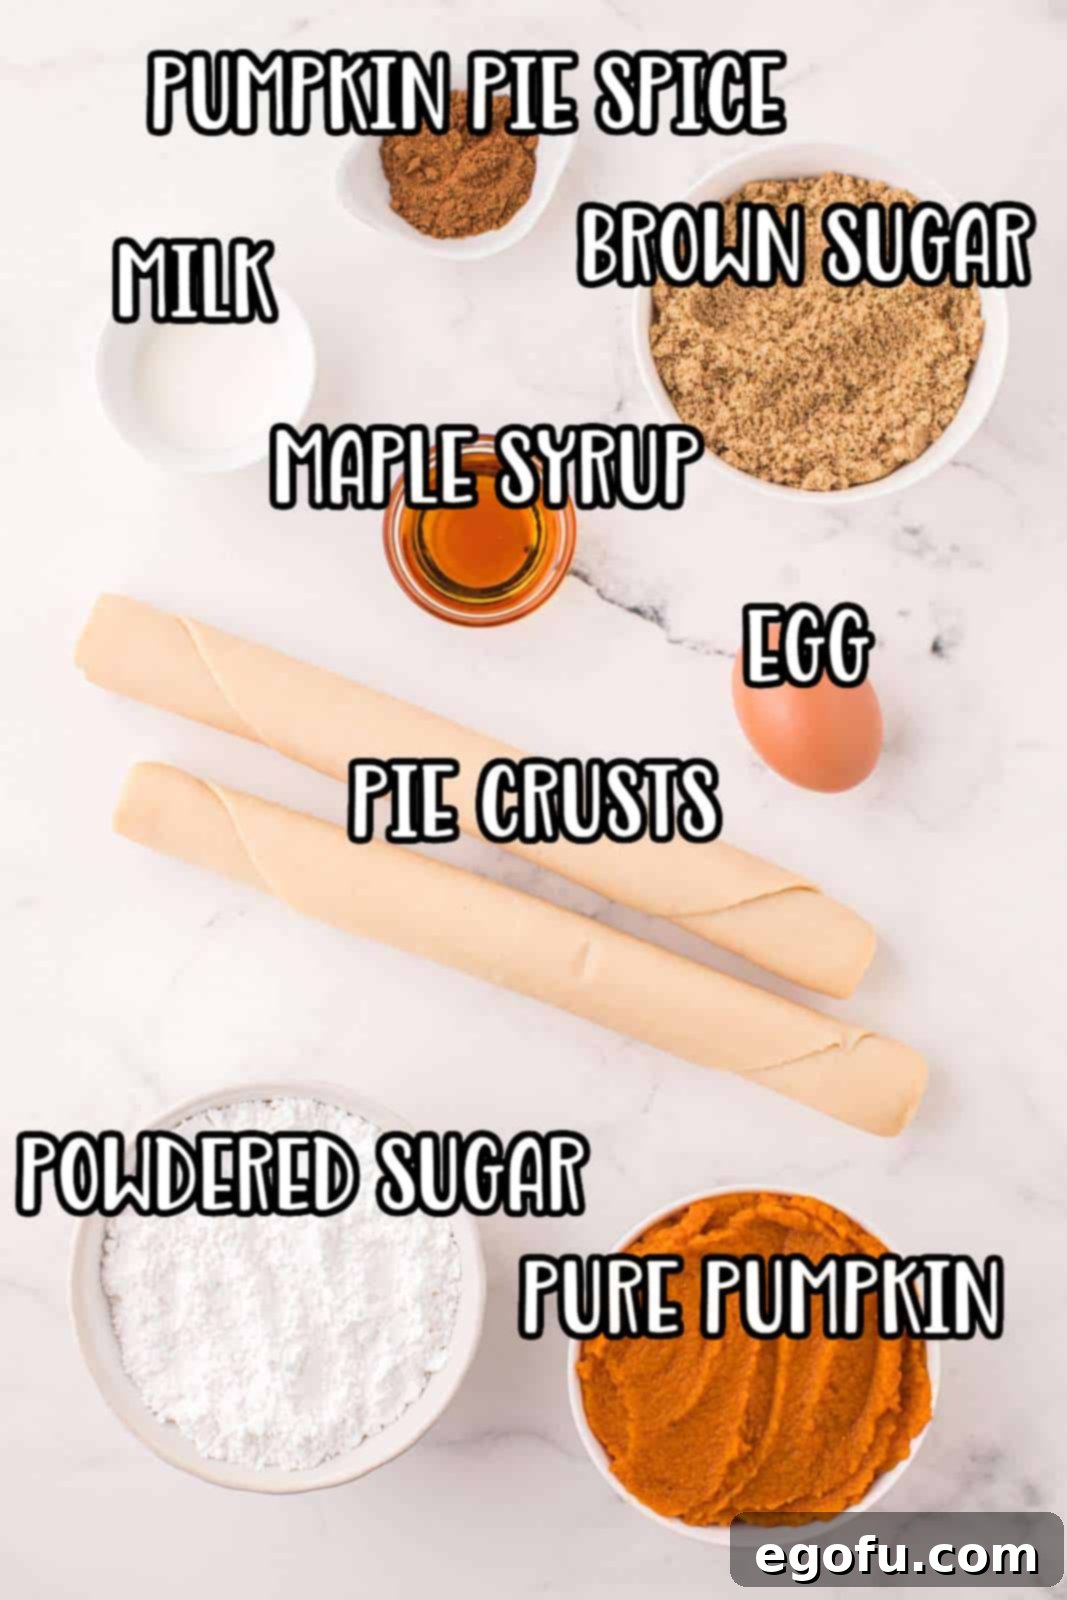
Step-by-Step Guide: How to Bake Perfect Homemade Pumpkin Pop Tarts
Follow these precise and easy-to-understand instructions to create your own batch of delightful homemade Pumpkin Pop Tarts. A little attention to detail will ensure perfectly flaky crusts, a rich, evenly distributed filling, and a truly professional-looking result.
- Prepare Your Baking Station: Begin by preheating your oven to a robust 450°F (232°C). While the oven heats, take a large baking sheet and line it meticulously with parchment paper. This crucial step prevents the pop tarts from sticking and makes for an effortless cleanup later.
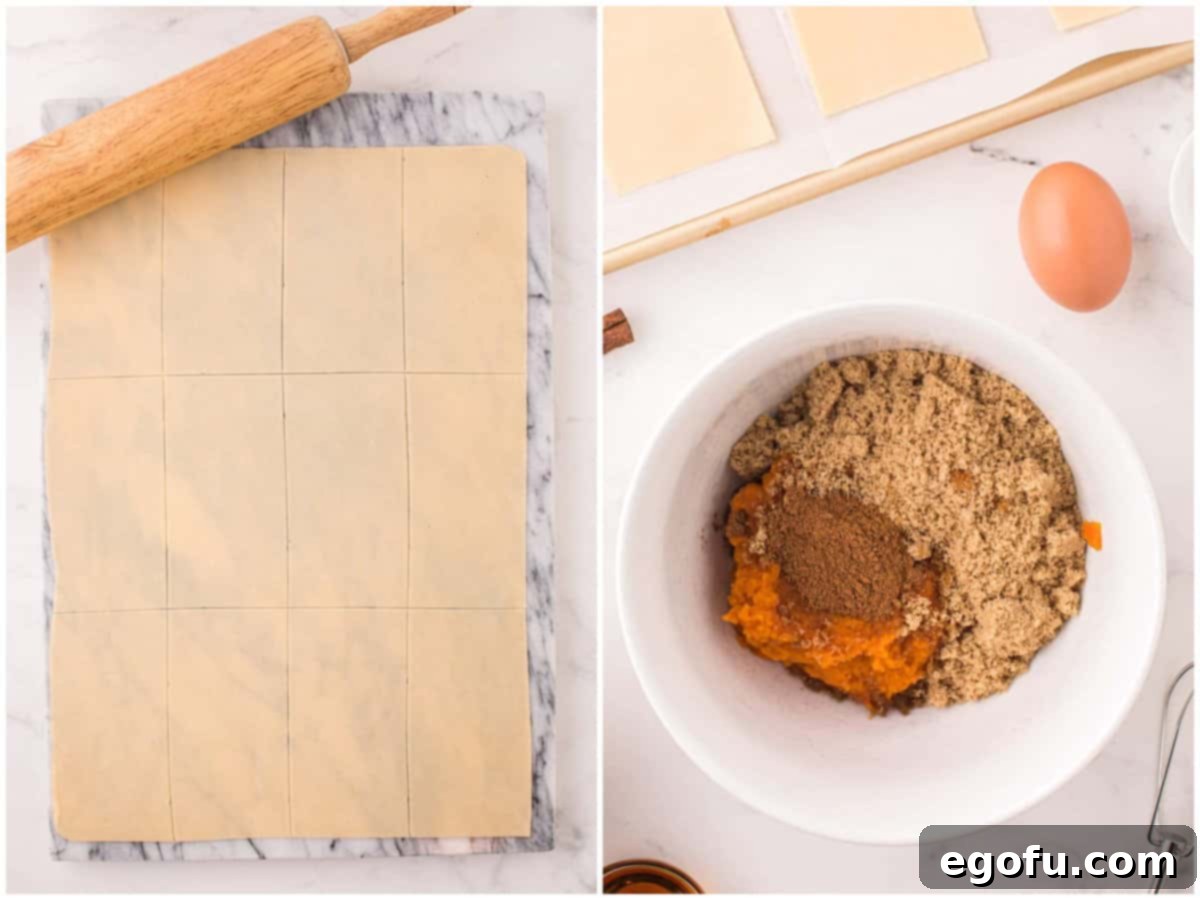
- Roll Out the First Pie Crust: On a clean, lightly floured countertop or a generously sized cutting board, carefully unroll one of the refrigerated pie crusts. Using a rolling pin, gently but firmly roll the crust until it becomes exceptionally thin – you should almost be able to see through it. The primary objective here is to transform the original circular crust into a much larger, more flexible, and workable surface. If the dough shows any signs of sticking, lightly dust your rolling pin with just a tiny amount of additional flour.
- Shape and Cut Your Rectangles: With precision, carefully trim the irregular edges of the rolled-out pie crust to form a neat, large rectangle. Next, using either a butter knife or a pizza cutter (a ruler can be incredibly helpful here to ensure straight lines and uniform sizes), meticulously cut this large rectangle into 12 equally sized smaller rectangles. Do not be concerned if you accumulate dough scraps; you can gently gather and lightly re-roll them to cut out any additional rectangles needed until you achieve 12 perfect pieces from this first crust.
- Repeat for the Second Crust: Follow precisely the same rolling, trimming, and cutting process with the second refrigerated pie dough from its package. This will yield another 12 perfectly sized rectangles, bringing your total to 24.
- Arrange and Prepare for Filling: Carefully place 12 of your freshly cut pie crust rectangles onto the prepared baking sheet, ensuring they are spaced adequately apart. Set the remaining 12 rectangles aside for now; these will serve as the top crusts for your pop tarts.
- Mix the Pumpkin Filling: In a medium-sized mixing bowl, combine the pumpkin puree, the packed light brown sugar, and the aromatic pumpkin pie spice. Stir vigorously and thoroughly until all the ingredients are impeccably blended, resulting in a smooth, evenly spiced, and visually appealing mixture.
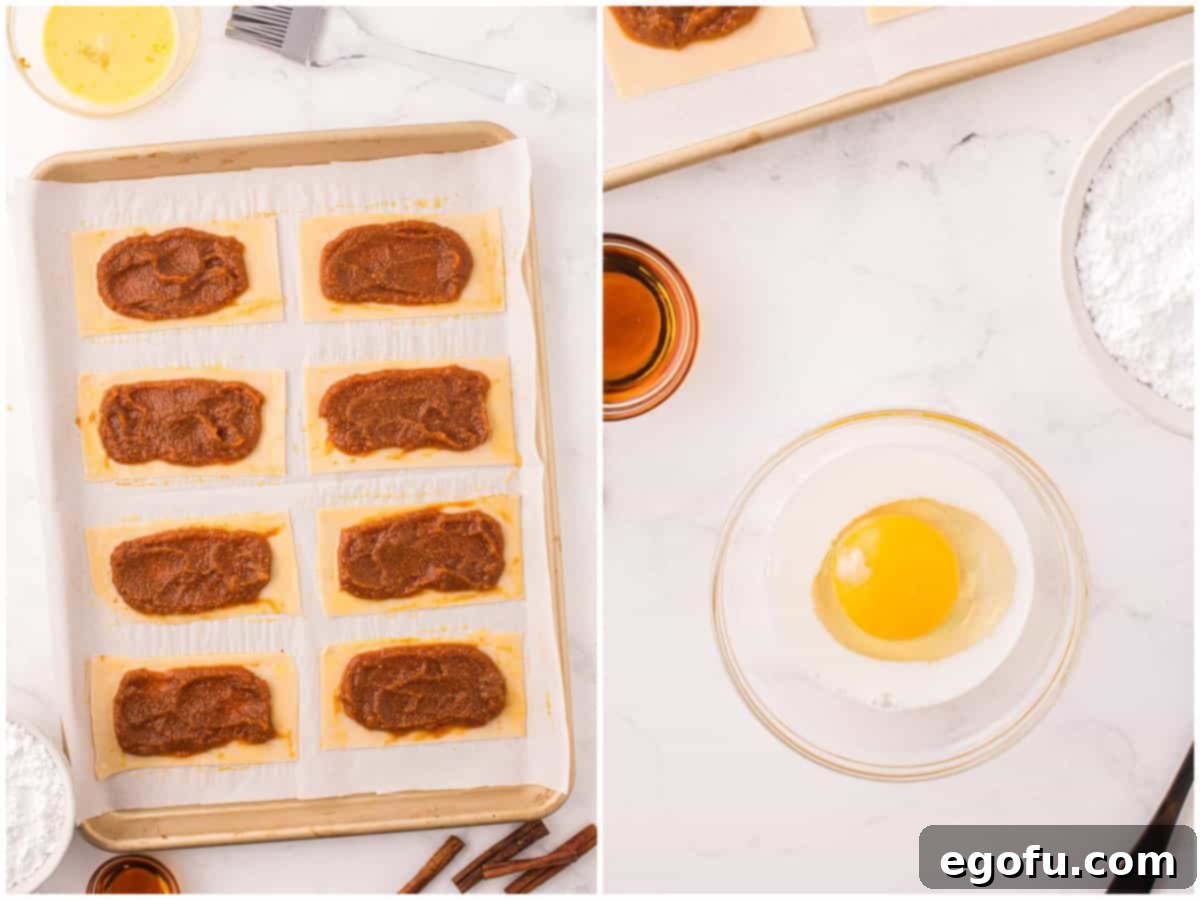
- Apply the Filling: Divide the prepared pumpkin mixture evenly among the 12 rectangles already positioned on your baking sheet. Each rectangle should receive approximately 2 generous tablespoons of filling. Spread the filling gently, ensuring you leave a clear border of about ½-inch around all edges of each rectangle. This unfilled border is absolutely crucial for successfully sealing the pop tarts.
- Prepare the Egg Wash: In a small mixing bowl, whisk together the large egg and 1 tablespoon of milk until they are perfectly combined and frothy. Using a pastry brush, lightly but evenly brush this egg wash around the ½-inch clear border of each pie crust rectangle that contains the pumpkin filling. This acts as the essential adhesive to create a tight seal for your pop tarts.
- Assemble the Pop Tarts: Carefully take the 12 reserved pie crust rectangles and gently place one on top of each filled rectangle, taking care to align the edges as precisely as possible.
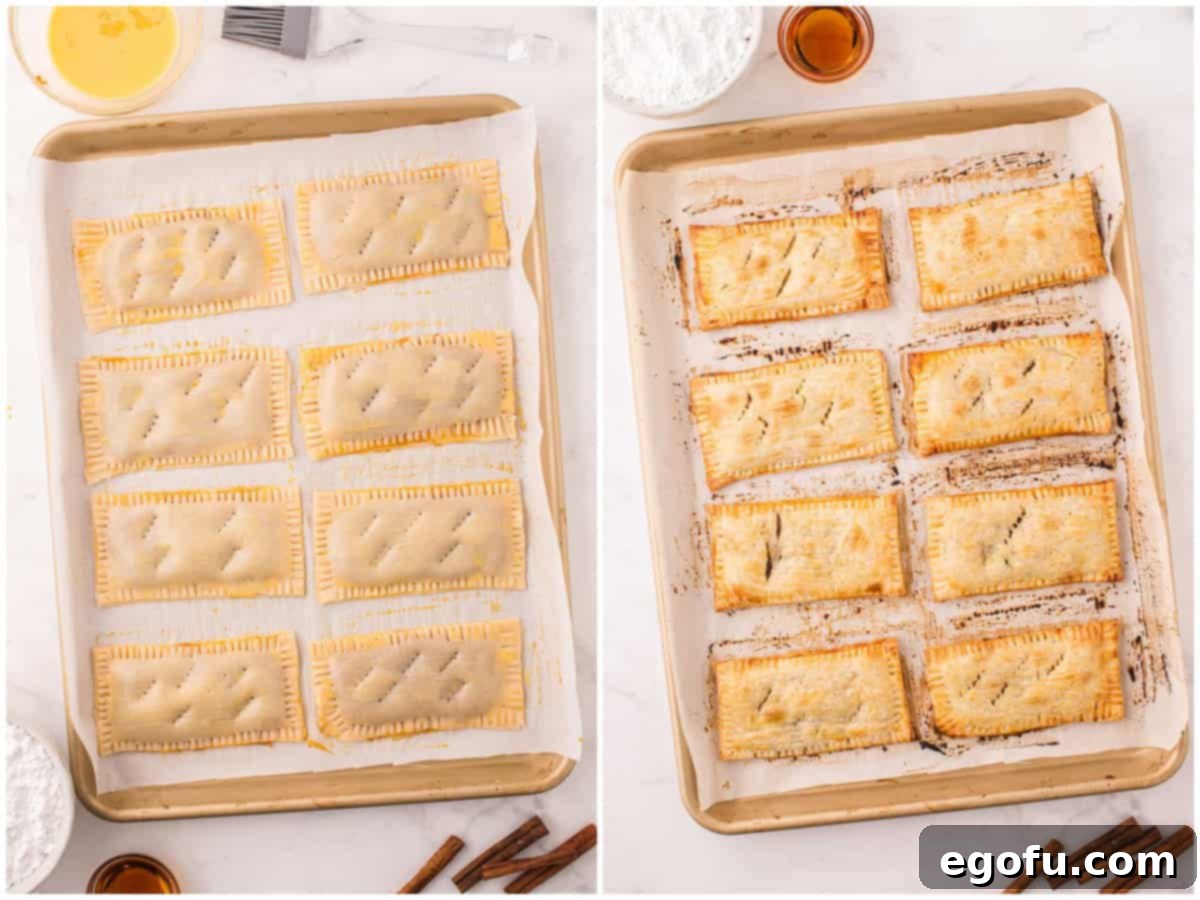
- Seal the Edges: Using the tines of a fork, gently but firmly crimp all around the edges of each assembled pop tart. This vital step not only securely seals the two crusts together, preventing any of that delicious filling from leaking out during the baking process, but also creates that classic, charming, and rustic pop tart appearance.
- Egg Wash and Vent: Brush the remaining egg wash liberally and evenly over the tops of all the assembled pop tarts. Then, with the tip of a small, sharp knife or a fork, gently poke two or three small holes in the center of each pop tart. These tiny holes serve as essential vents, allowing steam to escape during baking and preventing the pop tarts from puffing up excessively or bursting.
- Bake to Golden Perfection: Carefully transfer the baking sheet into your preheated oven and bake for approximately 8-12 minutes. It is important to keep a close eye on them; they are perfectly ready when the crusts achieve a beautiful, uniform golden-brown color all over and the edges appear slightly crisp. Baking times can fluctuate depending on the calibration of your individual oven, so watch diligently for that perfect golden hue.
- Cool Down: Once baked to perfection, carefully remove the pop tarts from the oven and transfer them immediately to a wire cooling rack. Allow them to cool completely to room temperature before applying the glaze. This step is critical; applying glaze to warm pop tarts will cause it to melt, run off, and create a messy result.
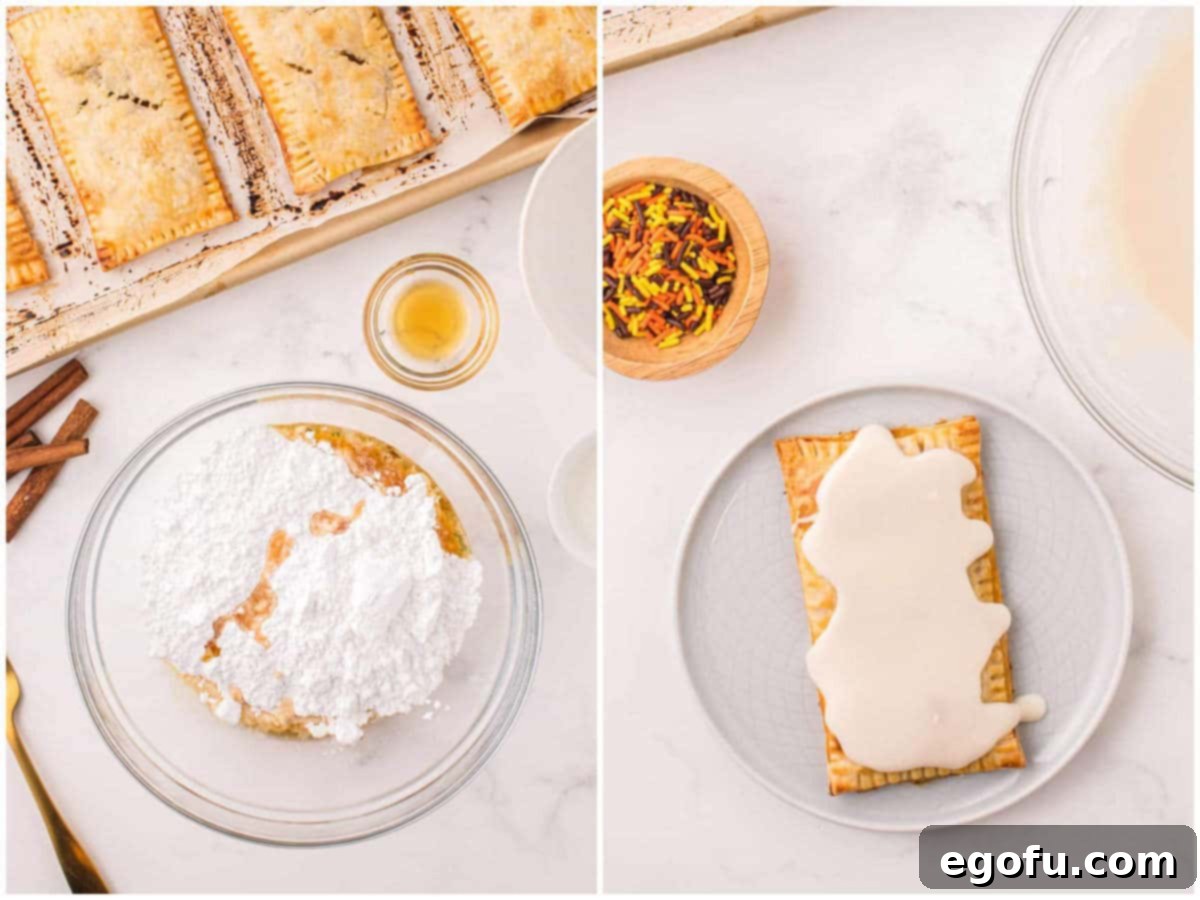
- Prepare the Maple Glaze: While the pop tarts are undergoing their cooling process, prepare your irresistible glaze. In a small mixing bowl, vigorously whisk together the powdered sugar and the pure maple syrup until the mixture is smooth and lump-free.
- Adjust Glaze Consistency: Slowly, and with careful attention, add the remaining milk to the glaze mixture, one tiny teaspoon at a time, whisking continuously after each addition. Continue this process until you achieve a thick, yet perfectly spreadable consistency. You have the flexibility to make your glaze as thin (for a light drizzle) or as thick (for a substantial coating) as you prefer by adjusting the precise amount of milk added.
- Glaze and Garnish: Once the pop tarts are fully and completely cooled, spread a generous spoonful of the finished maple glaze evenly over the top of each one. For a final, vibrant, and festive touch, immediately sprinkle them with your chosen fall sprinkles before the glaze sets.
And there you have it! Your very own batch of absolutely delicious, homemade Pumpkin Pop Tarts, ready to bring joy, warmth, and festive fall flavor to your days. Serve them warm from a quick reheat or at room temperature, and watch how quickly these delightful treats disappear!
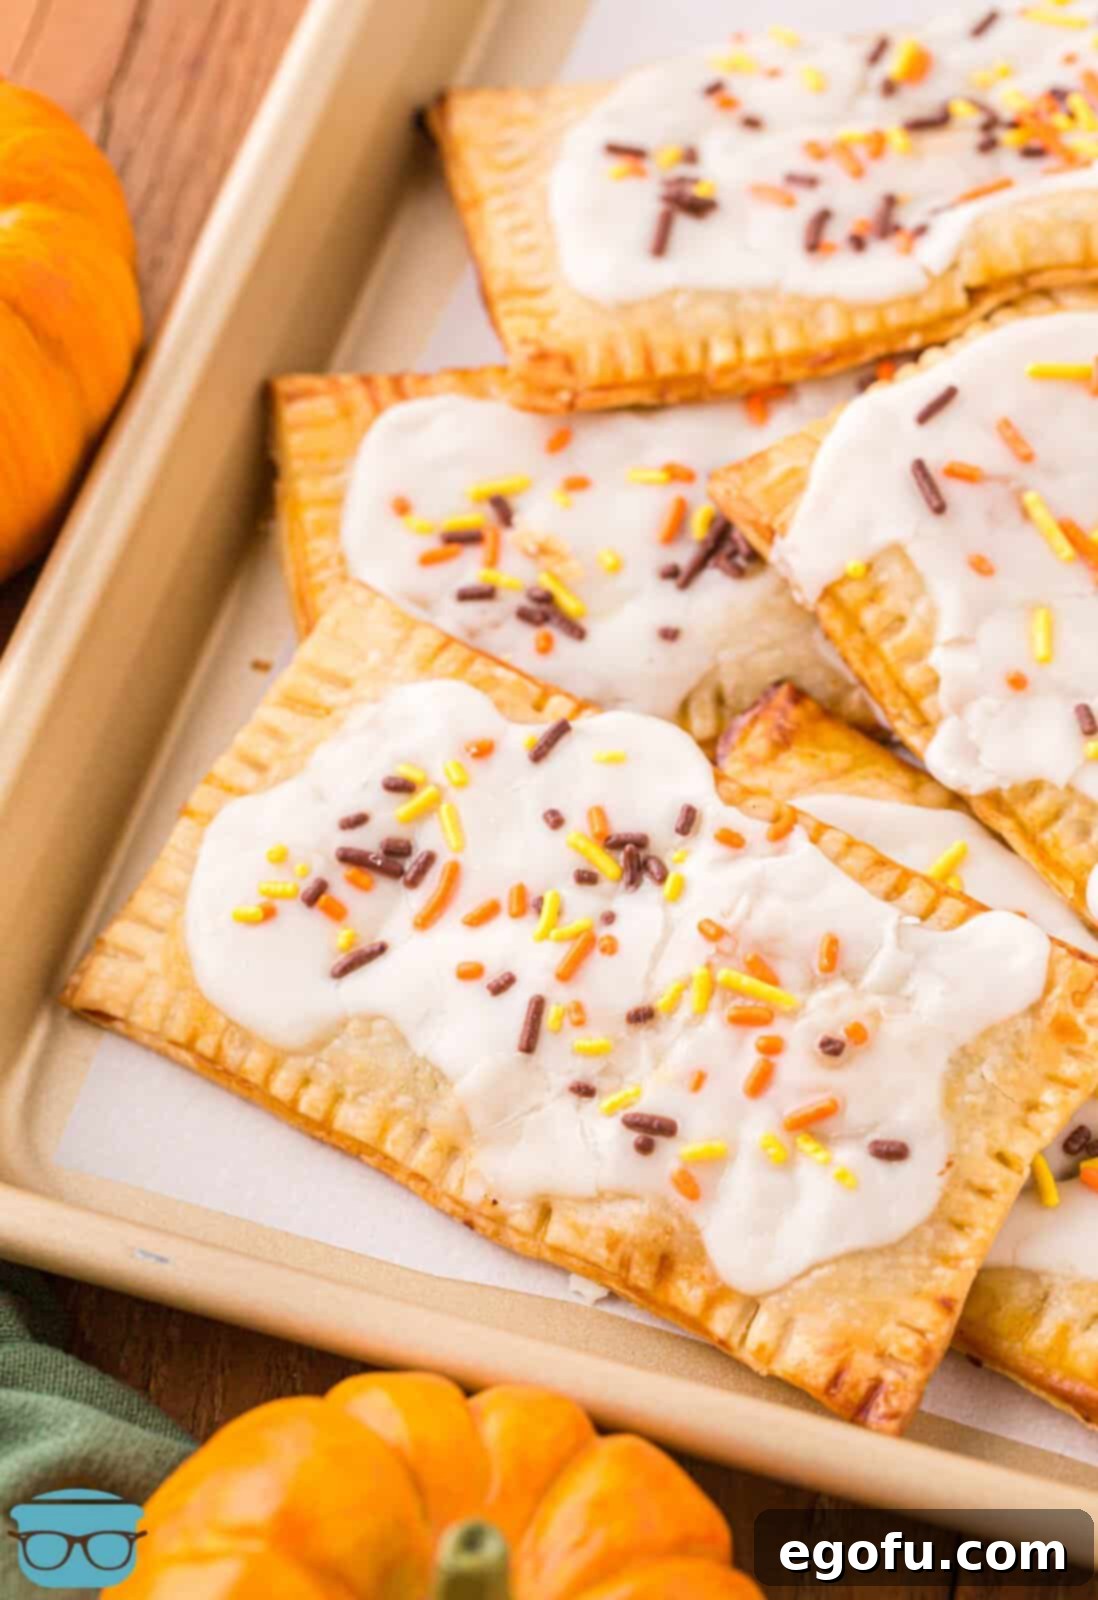
Pumpkin Pop Tarts
These homemade Pumpkin Pop Tarts are a delightful fall treat featuring a creamy, warmly spiced pumpkin filling encased in a flaky pastry, and crowned with a luscious sweet maple glaze!
Prep Time: 15 minutes
Cook Time: 8-12 minutes
Total Time: Approximately 27 minutes (plus cooling time)
Yields: 12 servings
Author: Brandie Skibinski
Ingredients
For the Poptarts:
- 2 refrigerated pie crusts (typically one 15-ounce box, containing two crusts)
- 1 ⅓ cups pure pumpkin puree (ensure it’s not pumpkin pie filling)
- ⅔ cup light brown sugar, packed (dark brown sugar can be used for a deeper molasses flavor)
- 2 teaspoons pumpkin pie spice (or individual spices like cinnamon, ginger, nutmeg, cloves to taste)
- 1 large egg (for the egg wash)
- 1 Tablespoon milk (for the egg wash; water can be substituted)
For the Maple Glaze:
- 1 ½ cups powdered sugar
- 2 Tablespoons pure maple syrup (honey or additional milk for a plain glaze can be substituted)
- 4-5 teaspoons milk (adjust amount for desired glaze consistency)
- Fall sprinkles, optional for garnish
Instructions
- Preheat your oven to 450°F (232°C). Line a large baking sheet with parchment paper to prevent sticking.
- On a clean, lightly floured surface, roll out one of the refrigerated pie crusts with a rolling pin until it is very thin, almost translucent.
- Trim the edges of the rolled crust to form a large rectangle. Cut this rectangle into 12 equal smaller rectangles using a butter knife or pizza cutter. Gather and re-roll any scraps if necessary to achieve 12 pieces.
- Repeat the rolling, trimming, and cutting process with the second pie crust.
- Place 12 of the pie crust rectangles onto your prepared baking sheet. Set the other 12 rectangles aside; these will be the tops of your pop tarts.
- In a medium bowl, combine the pumpkin puree, packed light brown sugar, and pumpkin pie spice. Mix thoroughly until well combined.
- Evenly spoon about 2 tablespoons of the pumpkin mixture onto the center of each of the 12 rectangles on the baking sheet, leaving approximately a ½-inch border clear around the edges.
- In a small bowl, whisk together the large egg and 1 tablespoon of milk to create an egg wash. Use a pastry brush to apply the egg wash along the clear borders of the filled pie crust rectangles.
- Carefully place the reserved 12 pie crust rectangles on top of the filled ones, aligning the edges.
- Securely seal the pop tarts by crimping firmly around all edges with a fork.
- Brush the remaining egg wash over the tops of all the assembled pop tarts. Gently poke two or three small holes in the center of each pop tart to allow steam to vent during baking.
- Bake for 8-12 minutes, or until the pop tarts are beautifully golden brown and cooked through. Watch carefully as oven temperatures can vary.
- Remove from the oven and transfer the pop tarts to a wire cooling rack. Allow them to cool completely before proceeding with the glaze.
- While the pop tarts cool, prepare the glaze: In a small bowl, whisk together the powdered sugar and pure maple syrup until smooth.
- Gradually add the 4-5 teaspoons of milk, one teaspoon at a time, whisking continuously until the glaze reaches a thick, yet spreadable consistency. Adjust the milk amount to achieve your desired thickness.
- Once the pop tarts are completely cool, spread a thin layer of the maple glaze over each one. Garnish with fall sprinkles immediately, if desired, before the glaze sets.
Chef’s Notes & Tips
- For detailed answers to common questions, helpful tips, and ingredient substitution ideas, please refer to the Frequently Asked Questions and the comprehensive ingredient list provided earlier in this article.
- While pie crusts offer a classic pop tart texture, you could substitute them with puff pastry for an even flakier result, though the texture will be slightly different.
- A standard 15-ounce box of refrigerated pie crusts typically includes two crusts, which is the perfect quantity for this recipe.
- If you’d like to try a different topping, consider making a cream cheese glaze, a simple vanilla glaze (powdered sugar, milk, vanilla extract), or a rich caramel glaze instead of the maple.
- Feel free to get creative with the shapes! Instead of traditional rectangles, you can use cookie cutters for festive fall designs like pumpkins or leaves, or simply make squares or triangles.
- Store cooled pop tarts in an airtight container or wrapped individually with plastic wrap at room temperature for up to 2 days. For longer storage, they can be refrigerated for up to a week. Remember that homemade pastries are at their best when fresh and tend to soften over time.
Recipe Information
Course: Breakfast, Dessert, Snack
Cuisine: American
Craving More Cozy Fall & Holiday Recipes?
If you’ve fallen in love with the comforting flavors and satisfying process of making these homemade Pumpkin Pop Tarts, you’re in for a continued treat! The autumn season, and indeed the approaching holidays, are brimming with opportunities to enjoy delightful, heartwarming flavors and easy-to-make desserts. We have plenty more recipes that celebrate the very best of fall baking and beyond. From other delightful pumpkin-centric dishes to festive treats perfect for any gathering, there’s something here to satisfy every craving and inspire your next baking project. Explore these related recipes and keep the delicious, cozy vibes going strong in your kitchen throughout the season:
- Festive Christmas Tree Pop Tarts (Perfect for holiday celebrations!)
- Creamy Pumpkin Pie Dip (A fantastic, easy-to-make appetizer or dessert dip for crowds!)
- Adorable Mini Pumpkin Hand Pies (Individual servings of pumpkin pie goodness, ideal for parties!)
- Generous Pumpkin Slab Pie (A wonderful option for feeding a larger gathering with ease!)
- Decadent Pumpkin Delight Dessert (A layered, no-bake favorite that’s always a hit!)
- Easy Brown Sugar Pop Tart Bars (A simpler, pan-style approach to enjoying the classic pop tart flavor!)
- Classic Homemade Brown Sugar Pop Tarts (For when you crave the timeless, buttery sweetness of a traditional flavor!)
We sincerely hope you thoroughly enjoy baking and sharing these wonderful autumn treats with your loved ones. Happy cooking and happy fall!
