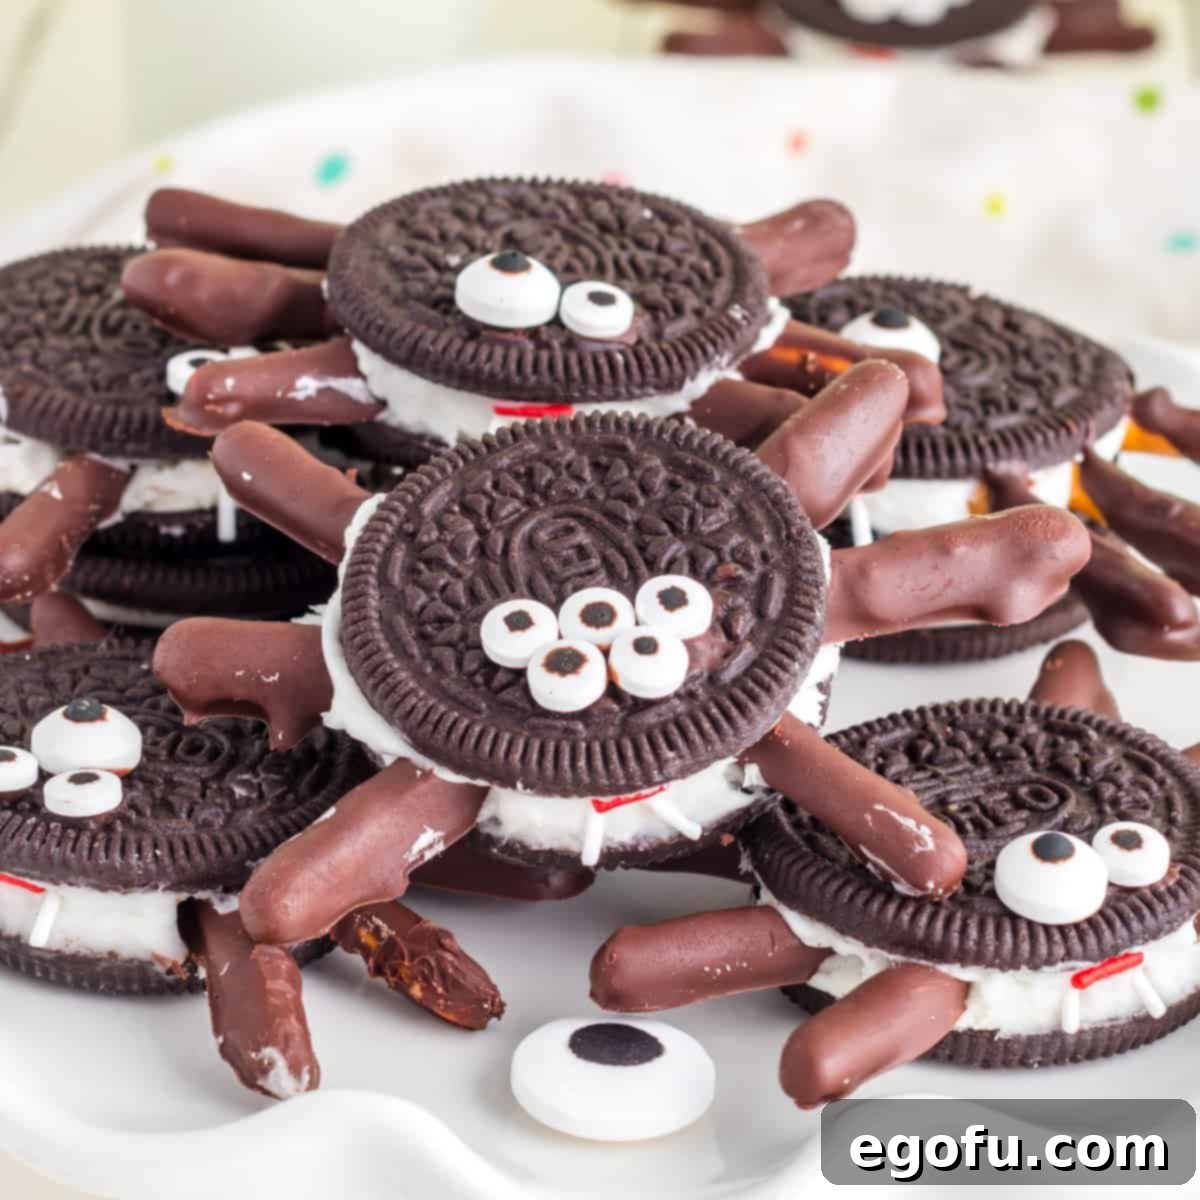
A delightful and simple treat, these Halloween Oreo Spiders are the perfect spooky snack to enchant guests at any of your Halloween festivities!
Creepy-Crawly Fun: The Ultimate Halloween Oreo Spiders Recipe
As the air grows crisp and autumn leaves begin to fall, our thoughts inevitably turn to Halloween – a time for costumes, haunted houses, and, of course, deliciously spooky treats! If you’re searching for an incredibly easy, incredibly fun, and utterly irresistible snack that will captivate both kids and adults, look no further than these charming Halloween Oreo Spiders. Forget complicated baking or extensive ingredient lists; this recipe transforms humble Oreo cookies into adorable, edible arachnids with minimal effort and maximum impact. They are a cherished staple in our Halloween repertoire, loved for their simplicity and the boundless joy they bring to any gathering. These creepy-crawly cookies are not just a snack; they’re a centerpiece, a conversation starter, and a fantastic way to immerse everyone in the festive spirit of the season.
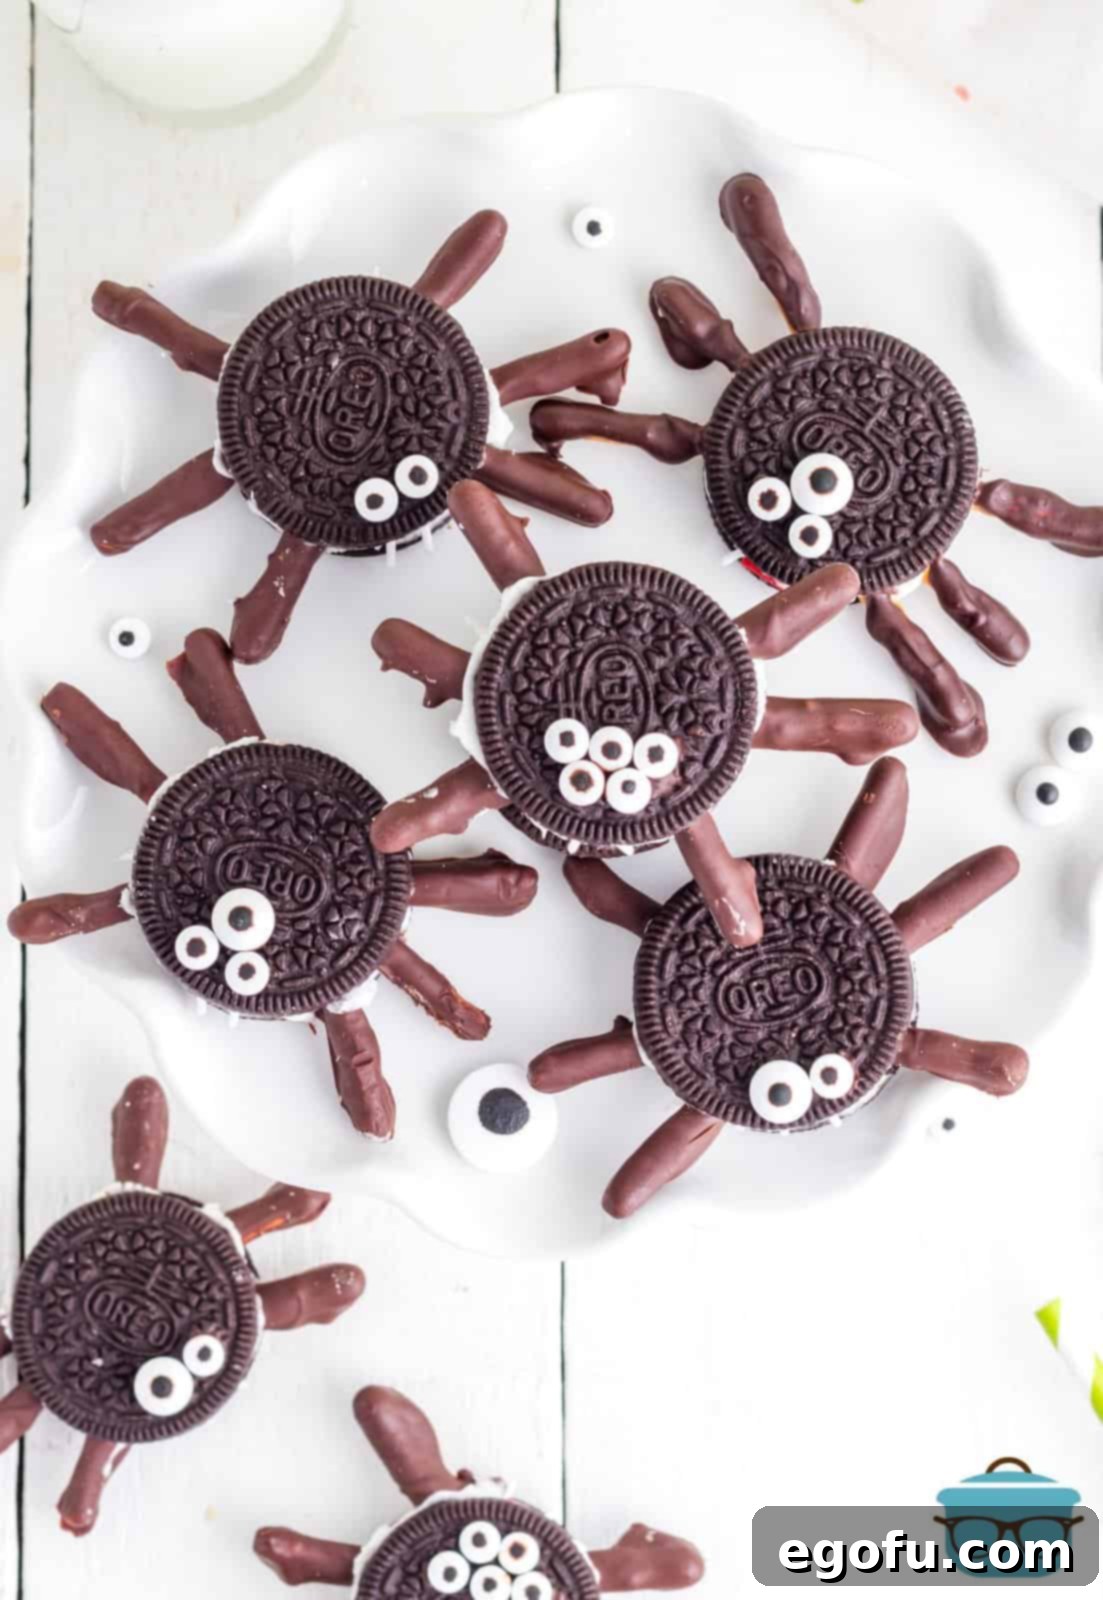
Why These Oreo Spiders Are a Halloween Must-Make
Halloween is all about embracing the playful side of spooky, and these Oreo spiders perfectly embody that spirit. Here’s why they’ll become your new favorite festive snack:
- Effortlessly Simple: With no baking required, these treats come together quickly, making them ideal for busy schedules or last-minute party preparations.
- Kid-Friendly Fun: Little hands will absolutely adore helping to assemble these spiders, from sticking on the wiggly candy eyes to carefully arranging the pretzel legs. It’s a fantastic, hands-on activity that involves children in holiday preparations and sparks their creativity in the kitchen.
- Irresistibly Delicious: Who can resist the classic, beloved combination of rich Oreo cookies and smooth chocolate? The added crunch of the pretzel legs provides a delightful texture contrast, making each bite even more satisfying.
- Visually Striking: These aren’t just tasty; they’re also incredibly cute and will undoubtedly be a standout on any Halloween dessert table, drawing smiles, curious glances, and maybe a few playful “eek!”s from your guests.
- Perfect for Any Occasion: Whether it’s a bustling school party, a casual neighborhood get-together, a fun trick-or-treat snack station for visitors, or just a cozy afternoon activity at home with the family, these spiders fit right in and elevate the festive mood.
- Minimal Cleanup: Since we’re dealing with a no-bake recipe, the cleanup is significantly reduced, allowing you more time to enjoy your Halloween celebrations rather than scrubbing pots and pans.
Ready to spin some sweet magic and create your own adorable army of edible arachnids? Let’s dive into making these super cute and utterly delicious Halloween Oreo Spiders!
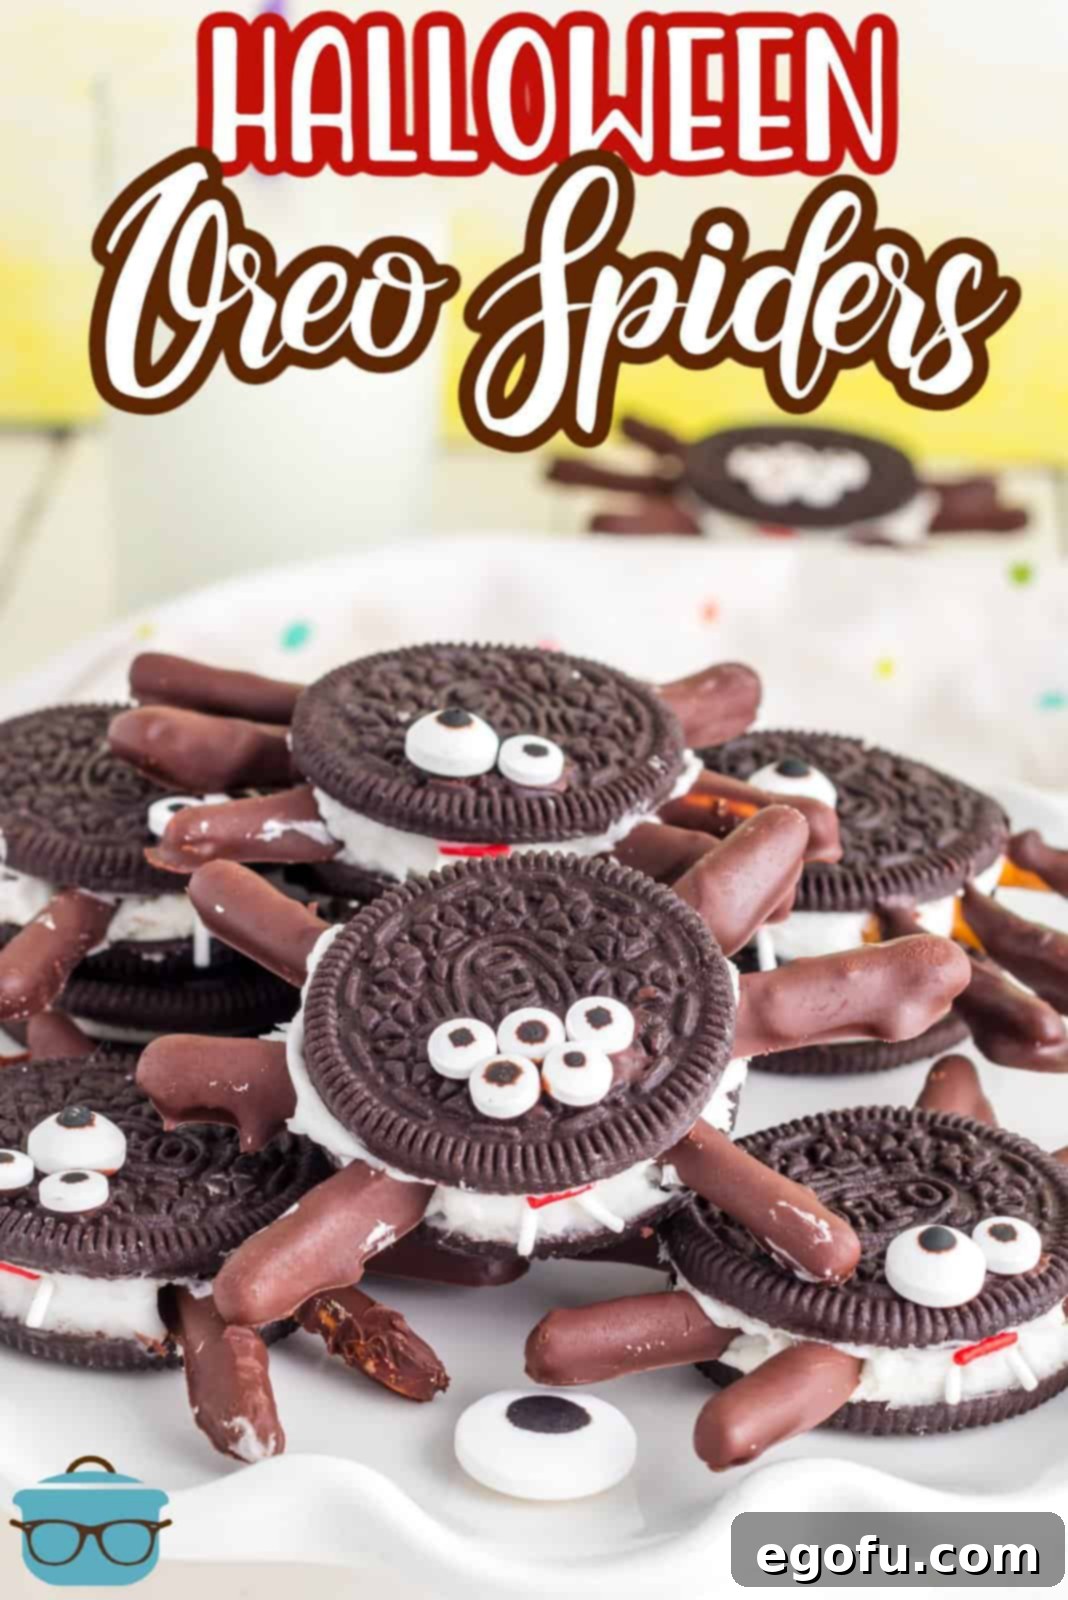
Frequently Asked Questions: Your Guide to Perfect Oreo Spiders
Do I have to use Double Stuf Oreos for this recipe?
While you can technically use regular Oreos if that’s all you have on hand, I highly recommend opting for Double Stuf or even Mega Stuf Oreos for this recipe. The generous amount of cream filling in these thicker cookies provides essential space and stability for securely inserting the chocolate-covered pretzel legs. This extra cushioning ensures that the legs stay firmly in place and your adorable spiders don’t lose their appendages, preventing any Halloween mishaps. Plus, the additional cream simply makes for a richer, more satisfying bite, enhancing the overall treat experience.
Can I make these Halloween Oreo Spiders ahead of time?
These spooky treats are undoubtedly at their absolute best when enjoyed fresh, ideally on the very day they are made, for optimal texture and appearance. The pretzels will be crispest, and the chocolate coating will be perfectly firm. However, if your schedule demands advance preparation, you can certainly store them. Simply place the assembled spiders gently in an airtight container or bag and keep them at room temperature. They will maintain their quality, albeit with a slight softening of the pretzels, for about 1 day. For longer storage, the freezer isn’t recommended as it can affect the texture of the Oreos and pretzels.
Where can I easily find candy eyes for my spiders?
Candy eyes are a fantastic and easy way to bring your Halloween treats to life with personality! You can typically find them in the baking or cake decorating aisle of most major grocery stores, such as Walmart, Target, or your local supermarket. Craft stores like Michaels or Hobby Lobby also frequently stock a variety of sizes and styles. For the widest selection, including various colors and bulk options, check online retailers like Amazon. Don’t be afraid to mix and match different sizes for a truly whimsical and unique spider army – some big, some small, all adorable!
Can I use another type of chocolate for the pretzel coating?
Absolutely! The beauty of this recipe lies in its flexibility and adaptability. While dark chocolate chips provide a lovely contrast and depth of flavor, feel free to experiment with your personal favorites or what you have on hand. Semi-sweet chocolate chips, classic milk chocolate chips, or even colorful candy melting wafers (often referred to as candy melts) are all excellent alternatives. Candy melts are particularly great if you want to introduce different colors to your spider legs (like green for a slime monster spider!) or if you need a very smooth, easy-to-work-with coating that sets quickly.
How long do the chocolate-covered pretzels need to set?
Patience is key for perfectly firm and sturdy spider legs! After you’ve dipped your pretzel sticks in the melted chocolate, they will need approximately 30 minutes to set completely. Chilling them in the refrigerator significantly speeds up this process, ensuring the chocolate hardens nicely and the legs are sturdy enough to be inserted into the Oreo cream without breaking or creating a chocolatey mess. Don’t rush this step – well-set legs are crucial for a successful spider assembly!
How should I store any leftover Halloween Oreo Spiders?
As mentioned, these delightful spiders are truly best enjoyed fresh. However, should you find yourself with a few eight-legged friends remaining after your festivities, the best way to store them is in an airtight container at room temperature. They will remain delicious for approximately one day. To prevent them from sticking together, damaging their delicate legs, or smudging their cute candy eyes, consider placing parchment paper or waxed paper between layers if you need to stack them.
Can I adapt this recipe to be vegan or gluten-free?
Yes, with a few mindful substitutions, you can absolutely make these Halloween Oreo Spiders suitable for various dietary needs! Many brands now offer delicious vegan-friendly Oreo cookies and excellent gluten-free Oreo-style sandwich cookies. Similarly, you can easily find gluten-free pretzel sticks in most grocery stores. If you’re aiming for a fully vegan treat, ensure your chosen chocolate chips are also certified vegan. Always make it a practice to double-check all ingredient labels to confirm dietary compatibility and avoid any unwanted allergens.
What are Jimmie sprinkles, and can I use other sprinkle types?
Jimmie sprinkles are the classic rod-shaped sprinkles, known for their distinct elongated form. For these Halloween Oreo Spiders, red Jimmie sprinkles are perfect for creating a vibrant “mouth,” while white Jimmies can represent tiny, spooky fangs. Of course, you absolutely can use other types of sprinkles! Feel free to get creative with different colors or shapes to give your spiders unique characteristics. Tiny edible pearls could also work wonderfully for eyes or additional accents, or even small edible black sugar pearls for a different kind of mouth detail. The sky’s the limit when it comes to decorating!
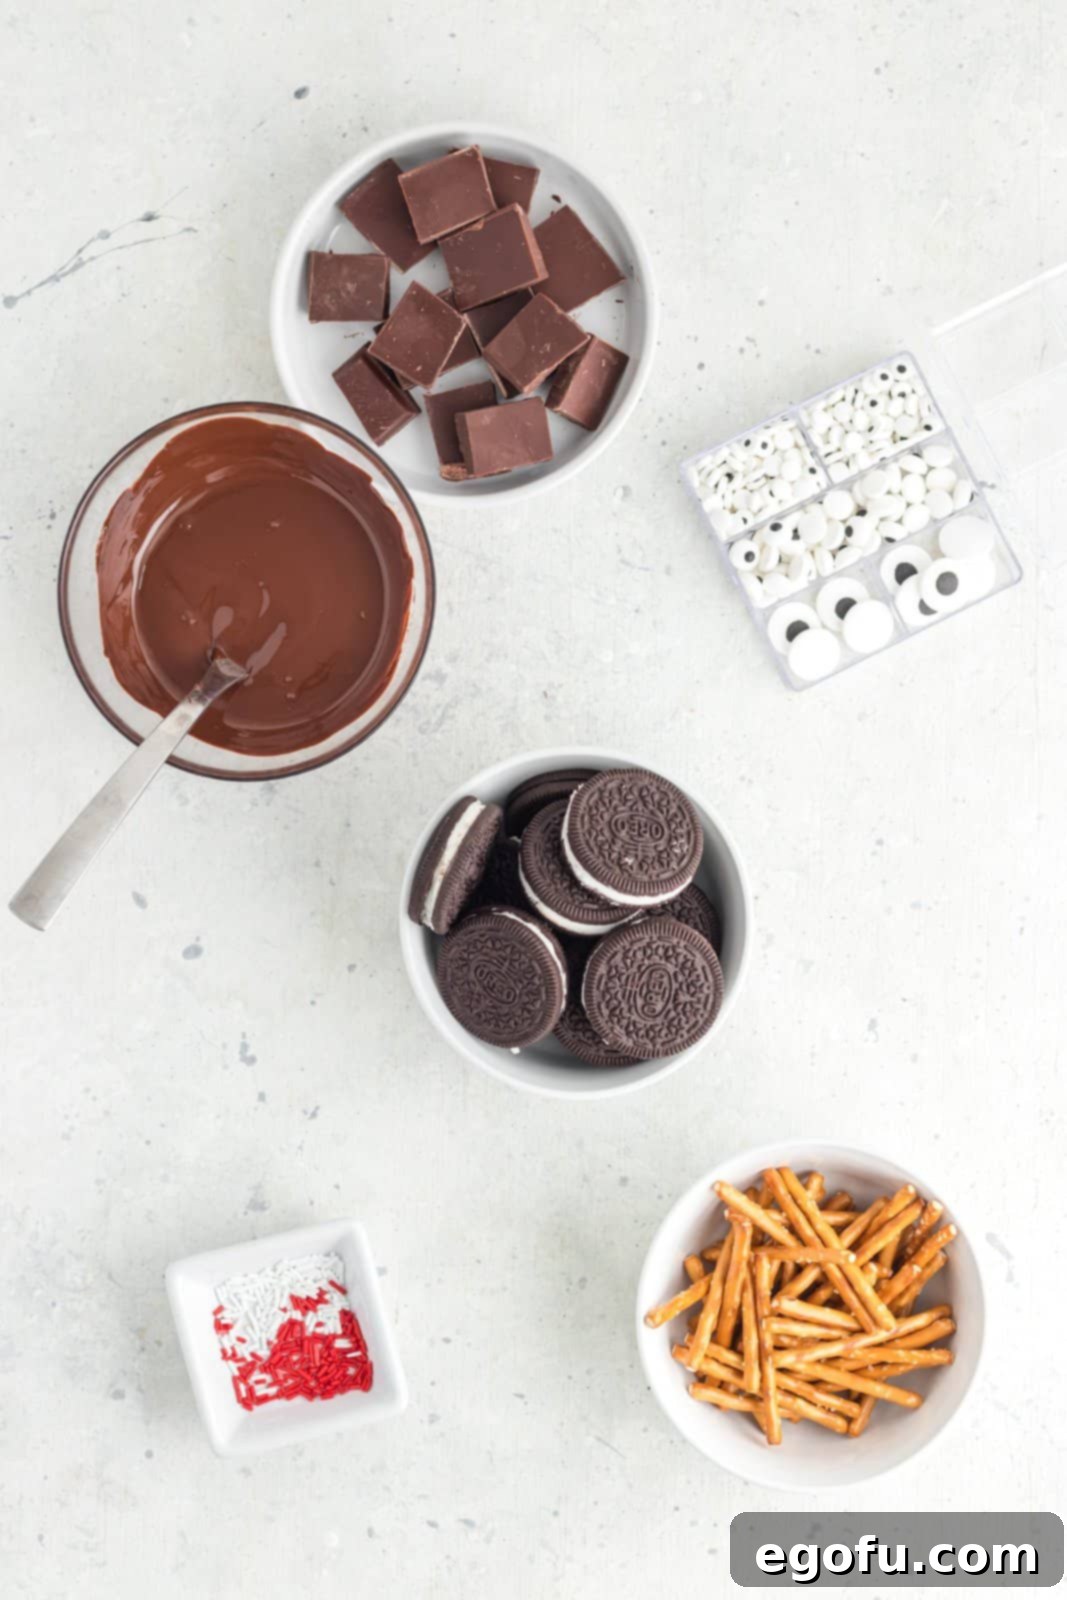
Ingredients for Your Spooky-Sweet Oreo Spiders
Gathering your ingredients is the first exciting step to bringing your Halloween Oreo Spiders to life. This recipe calls for simple, readily available items that combine to create a treat that’s as fun to make as it is to eat. The beauty of these ingredients is their accessibility and the delightful combination they create.
- 12 Double Stuf Oreo Cookies: These are the foundational body of our spiders. The extra cream filling is absolutely crucial for securely holding the pretzel legs in place, giving your spiders a sturdy base.
- 36 Pretzel Sticks: These will gracefully transform into our spiders’ eight creepy-crawly legs (enough for 12 spiders, as each full stick will be cut in half to make two legs). Ensure they are sturdy enough to withstand dipping in chocolate and subsequent insertion into the cookie cream.
- ½ cup Dark Chocolate Chips, melted: Used for melting and coating the pretzel legs, giving them that classic, deep dark spider appearance. For variety, feel free to substitute with milk chocolate, semi-sweet chocolate, or even white chocolate that can be tinted with food coloring.
- Assorted Candy Eyes: The magical, expressive touch that gives each spider its unique, whimsical personality. Having various sizes on hand adds an extra layer of charm and fun to your spider army!
- Red and White Jimmie Sprinkles: These are for those final, fang-tastic details – a vibrant red sprinkle to create a delightful mouth and sharp white sprinkles to represent tiny, playful fangs, bringing your spiders fully to life.
How to Make Halloween Oreo Spiders: Step-by-Step Guide
Creating these delightful Halloween Oreo Spiders is a fun, easy, and straightforward process that even novice bakers can master. Follow these clear, step-by-step instructions to craft your own adorable army of edible arachnids, perfect for adding a touch of spooky charm to your Halloween celebrations!
Step 1: Prepare Your Workspace and Melt Chocolate
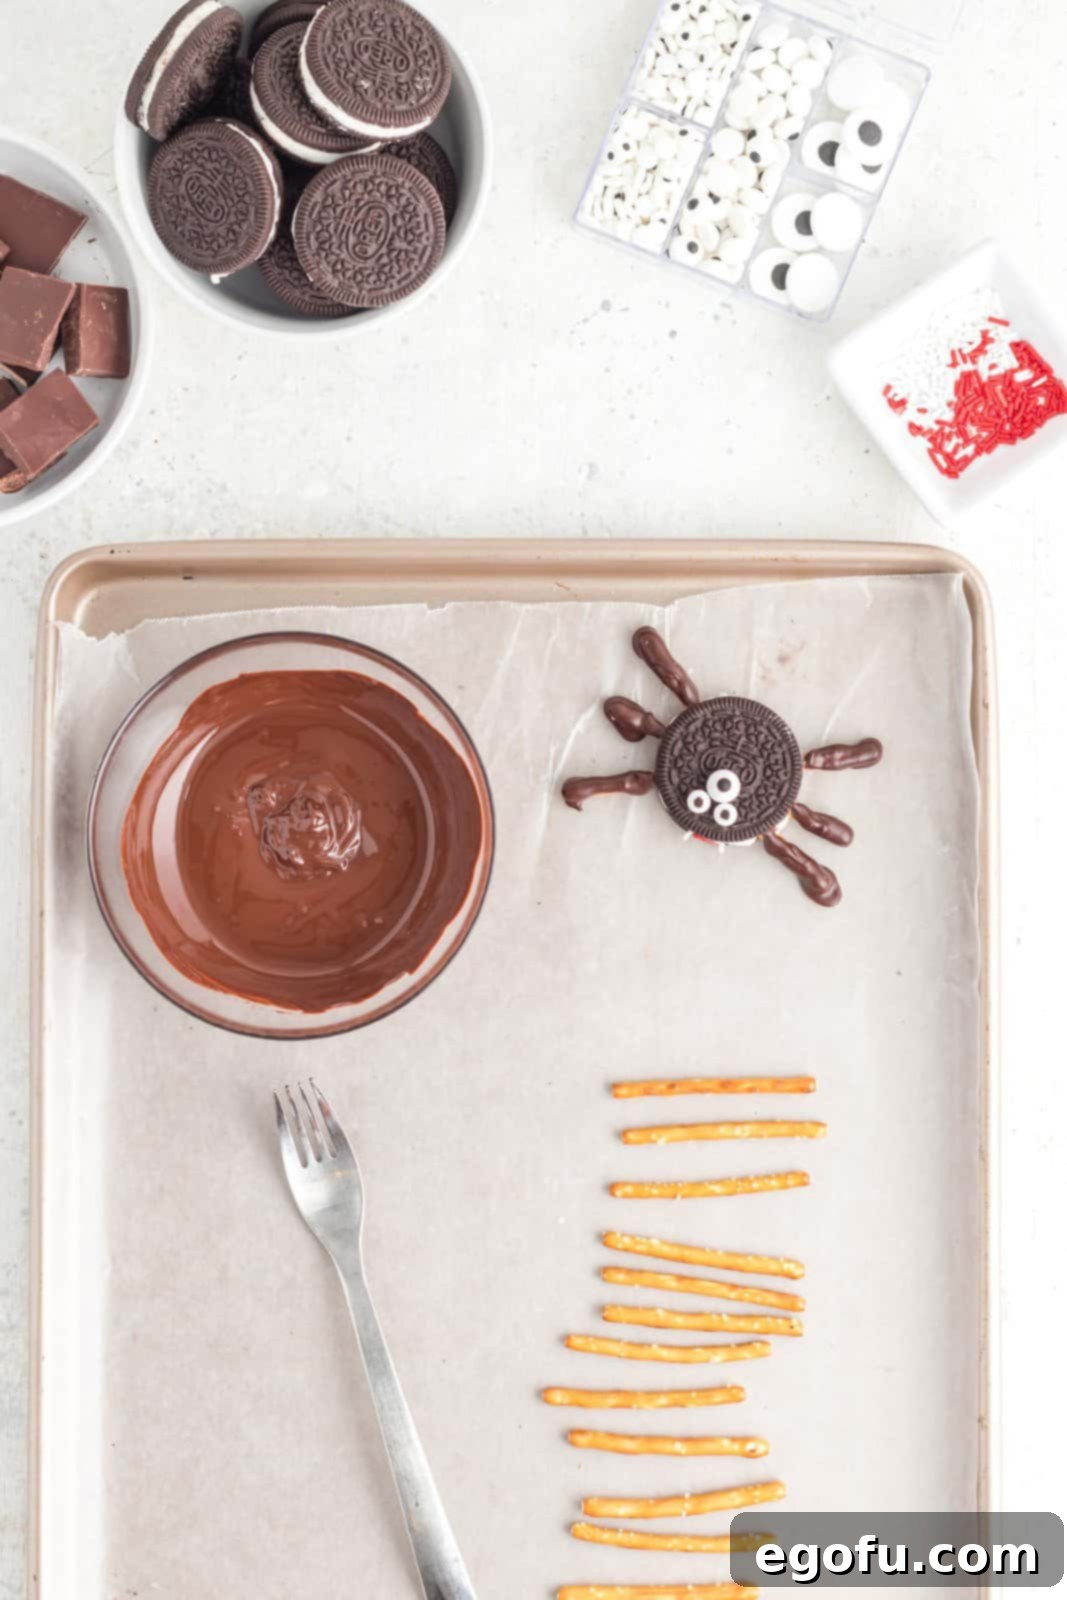
Begin by setting up your workstation. Line a baking sheet with waxed paper or parchment paper. This will provide a crucial non-stick surface for your chocolate-dipped pretzels, ensuring they set without sticking and are easy to remove. Next, prepare your chocolate. In a medium, microwave-safe bowl, place your dark chocolate chips. Melt them in short 20-second increments in the microwave, stirring thoroughly after each interval. This gradual melting process is key to preventing the chocolate from burning or seizing, ensuring you achieve a perfectly smooth, dippable consistency. Continue heating and stirring until the chocolate is fully melted and beautifully silky.
Step 2: Dip the Pretzel Legs
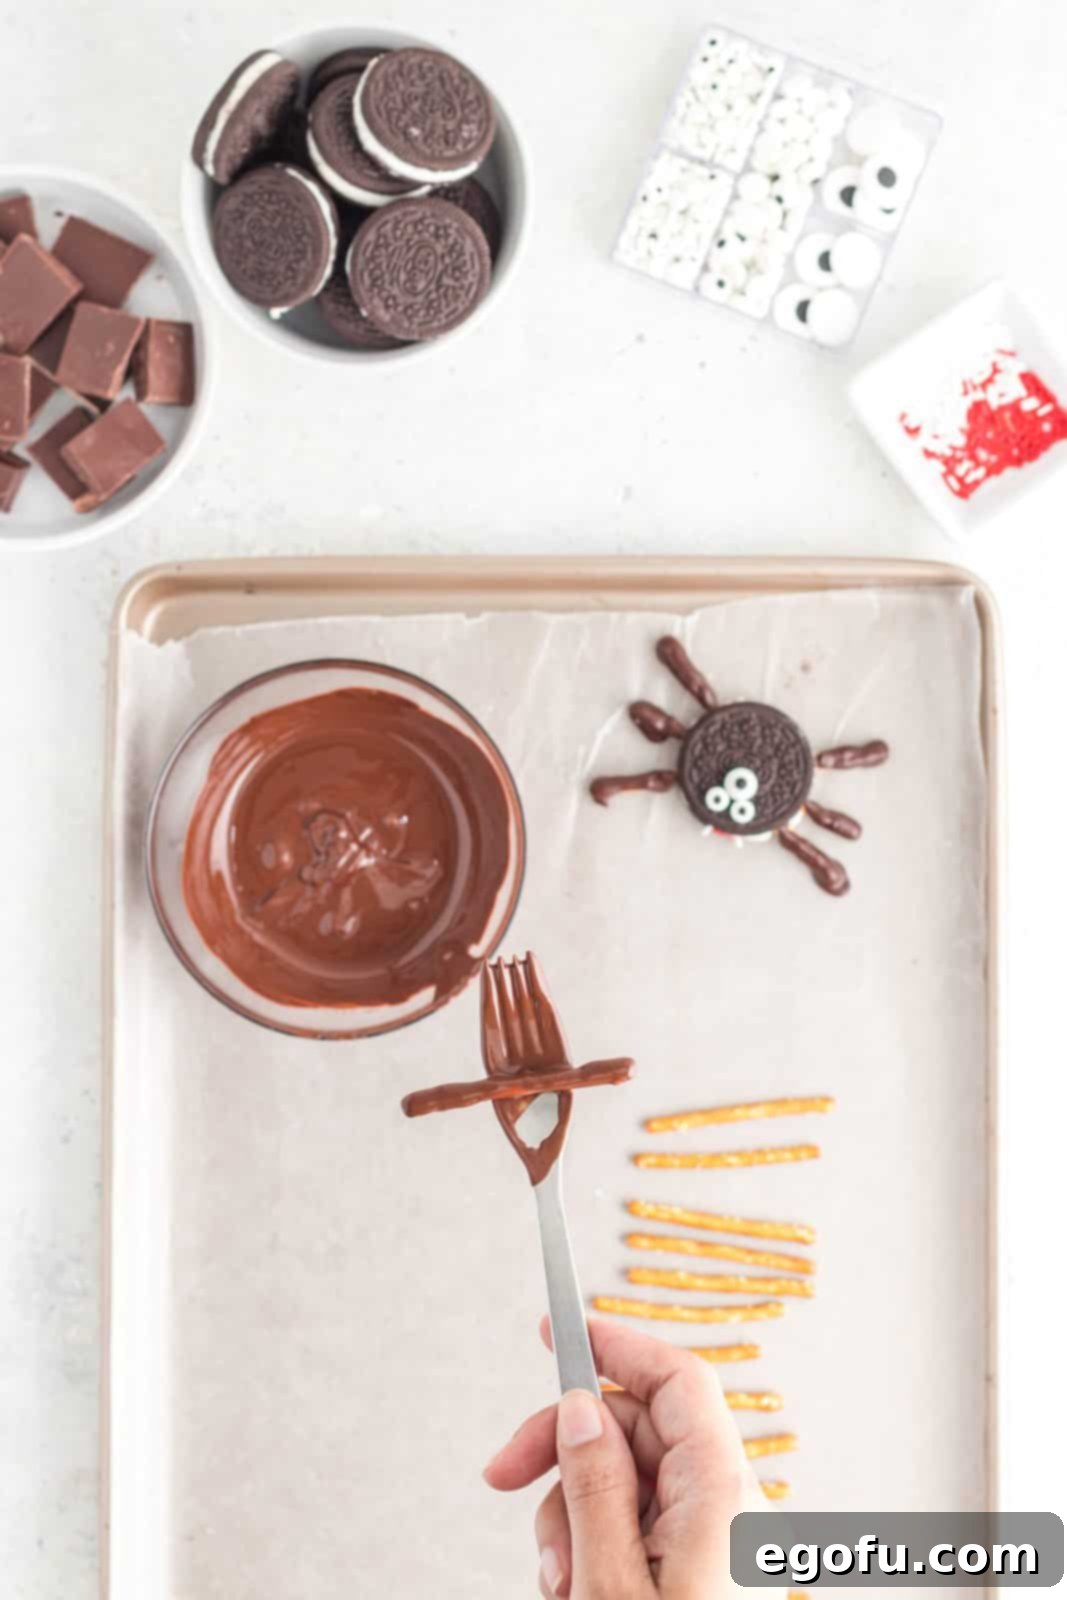
Once your chocolate is melted to perfection, it’s time to create the creepy-crawly spider legs. Using a fork or a pair of small tongs, carefully dip each pretzel stick into the warm, melted chocolate. Ensure the pretzel is fully coated. After dipping, gently lift the pretzel and allow any excess chocolate to drip back into the bowl. This step helps create a clean, even coating on each pretzel, ensuring your spider legs look neat and professional without being too clumpy. Repeat this process for all 36 pretzel sticks.
Step 3: Chill and Prepare Legs
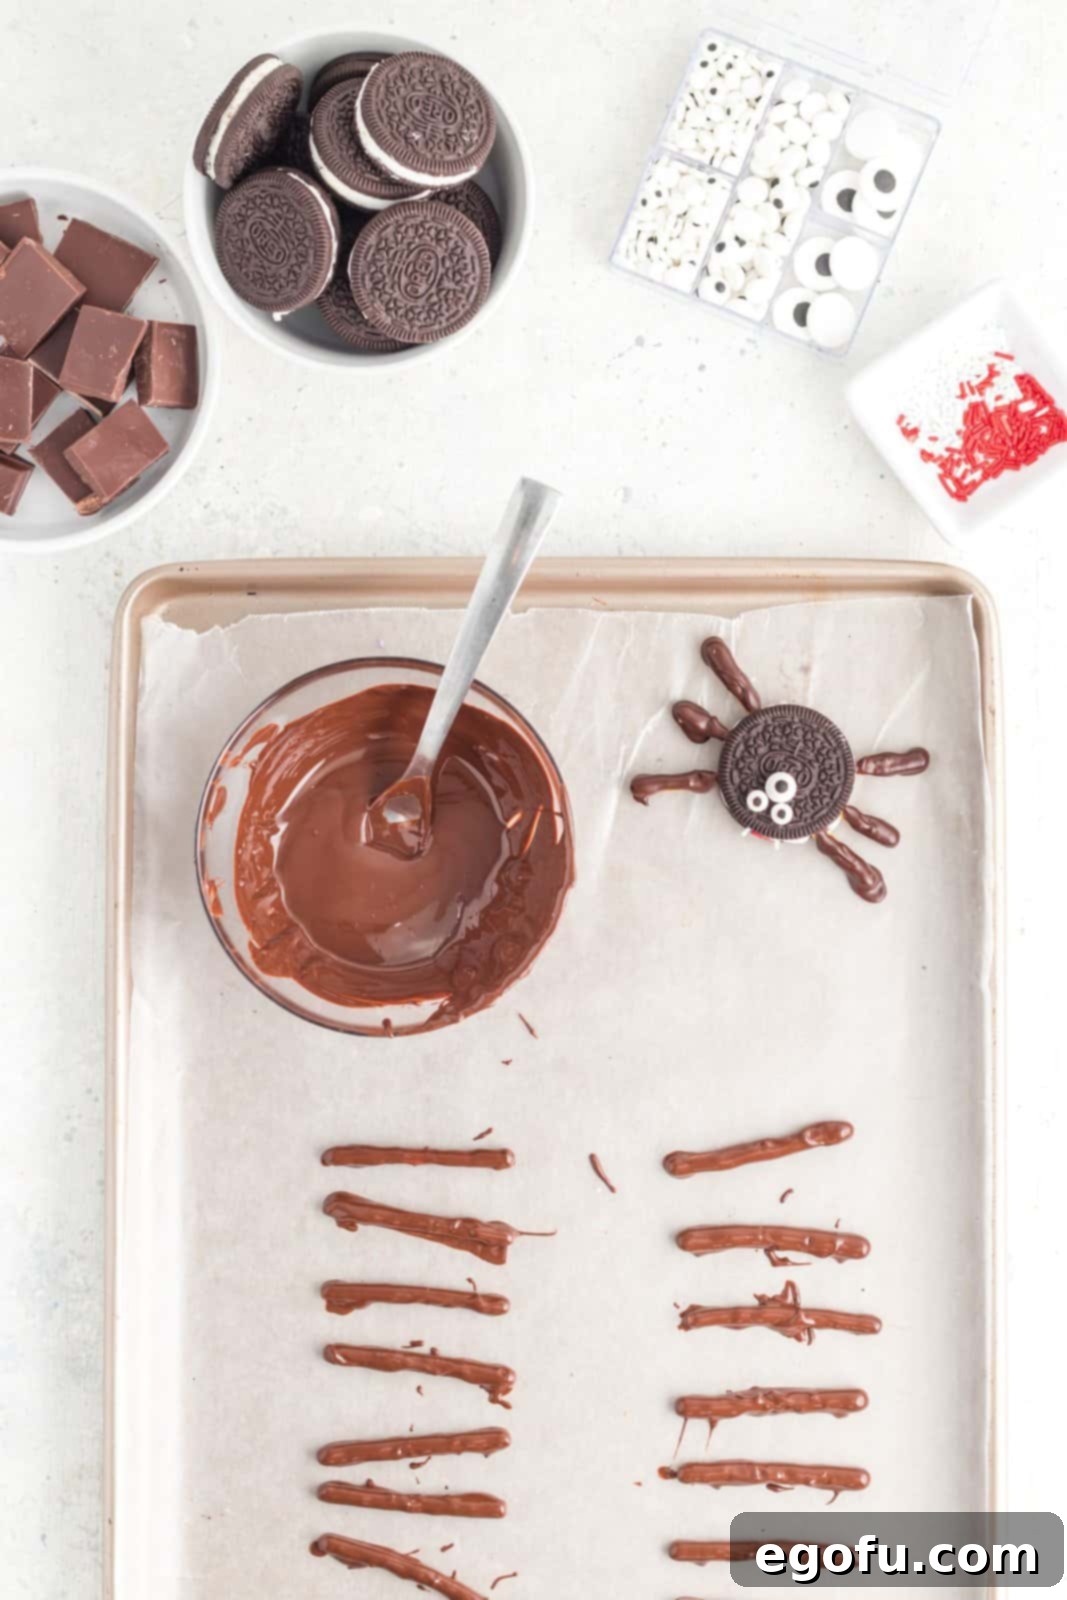
Carefully place each chocolate-dipped pretzel onto your prepared baking sheet, ensuring they don’t touch each other while they set. Once all pretzels are coated and arranged on the sheet, transfer the entire baking sheet to the refrigerator. Chill them for approximately 30 minutes, or until the chocolate is completely set and firm to the touch. This chilling step is absolutely crucial for creating sturdy spider legs that won’t break when you handle them. After they’ve set, remove them from the fridge. Now, take all 36 full pretzel sticks and carefully cut each one in half. This will yield a total of 72 shorter pretzel pieces, which are perfect for forming the six legs for each of your 12 spiders.
Step 4: Assemble the Oreo Base
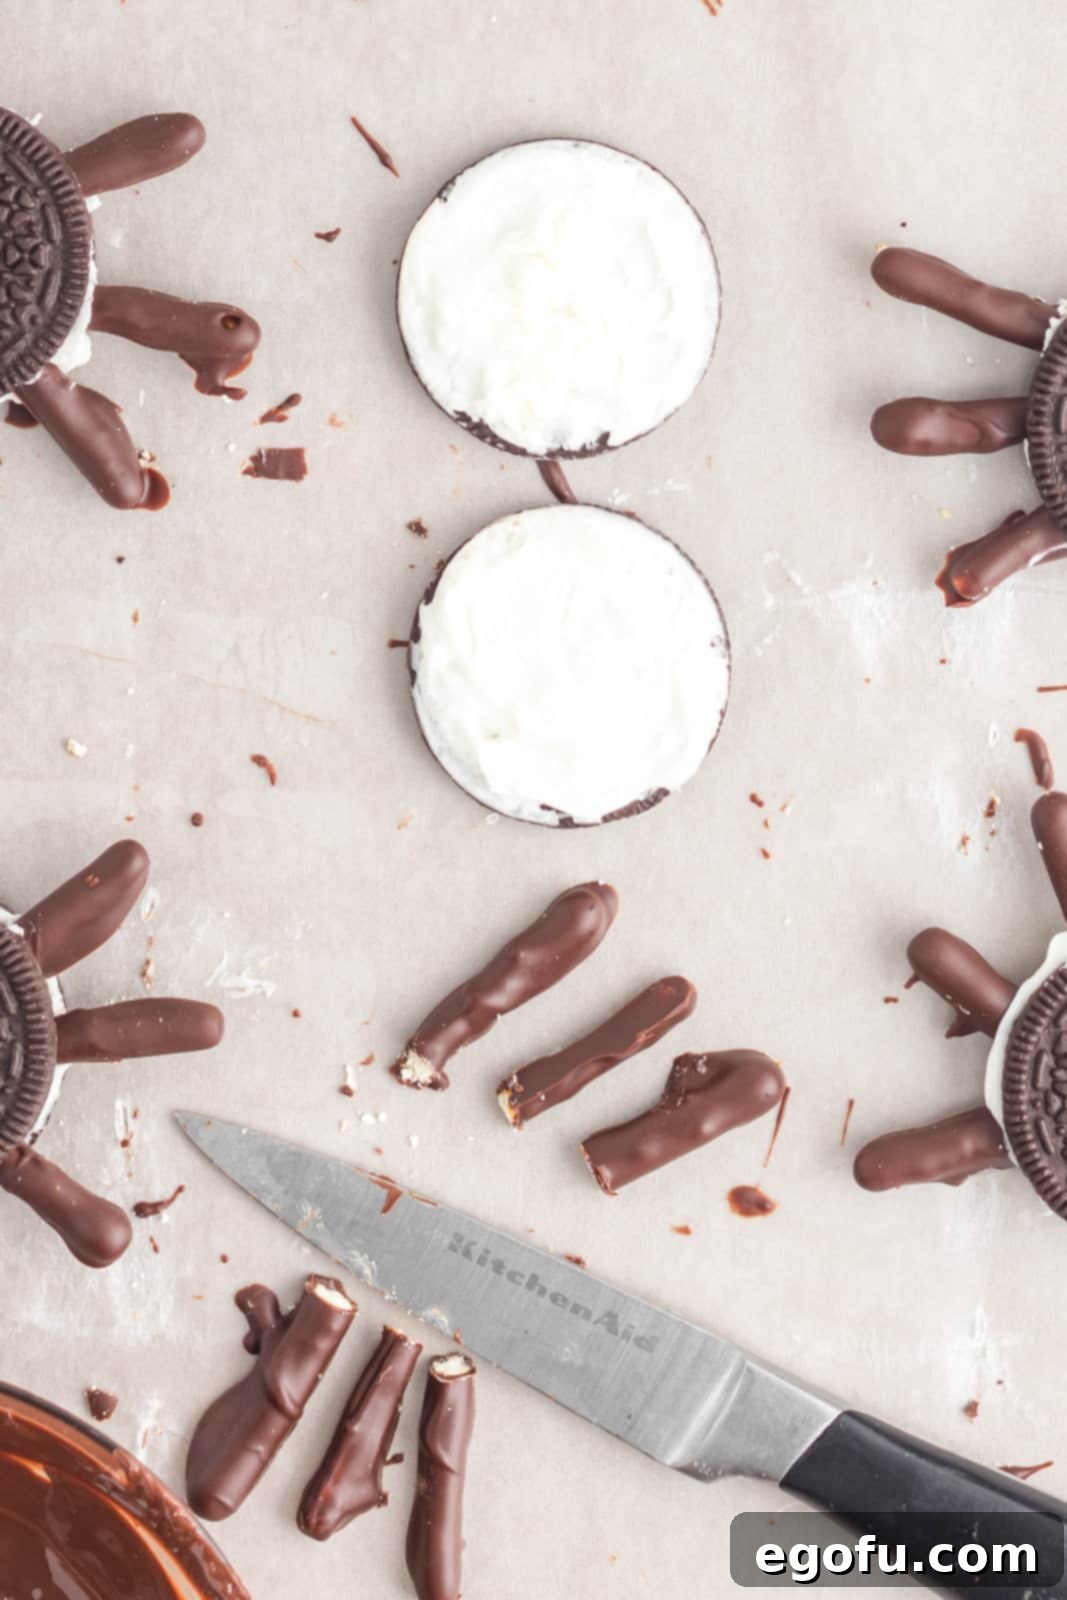
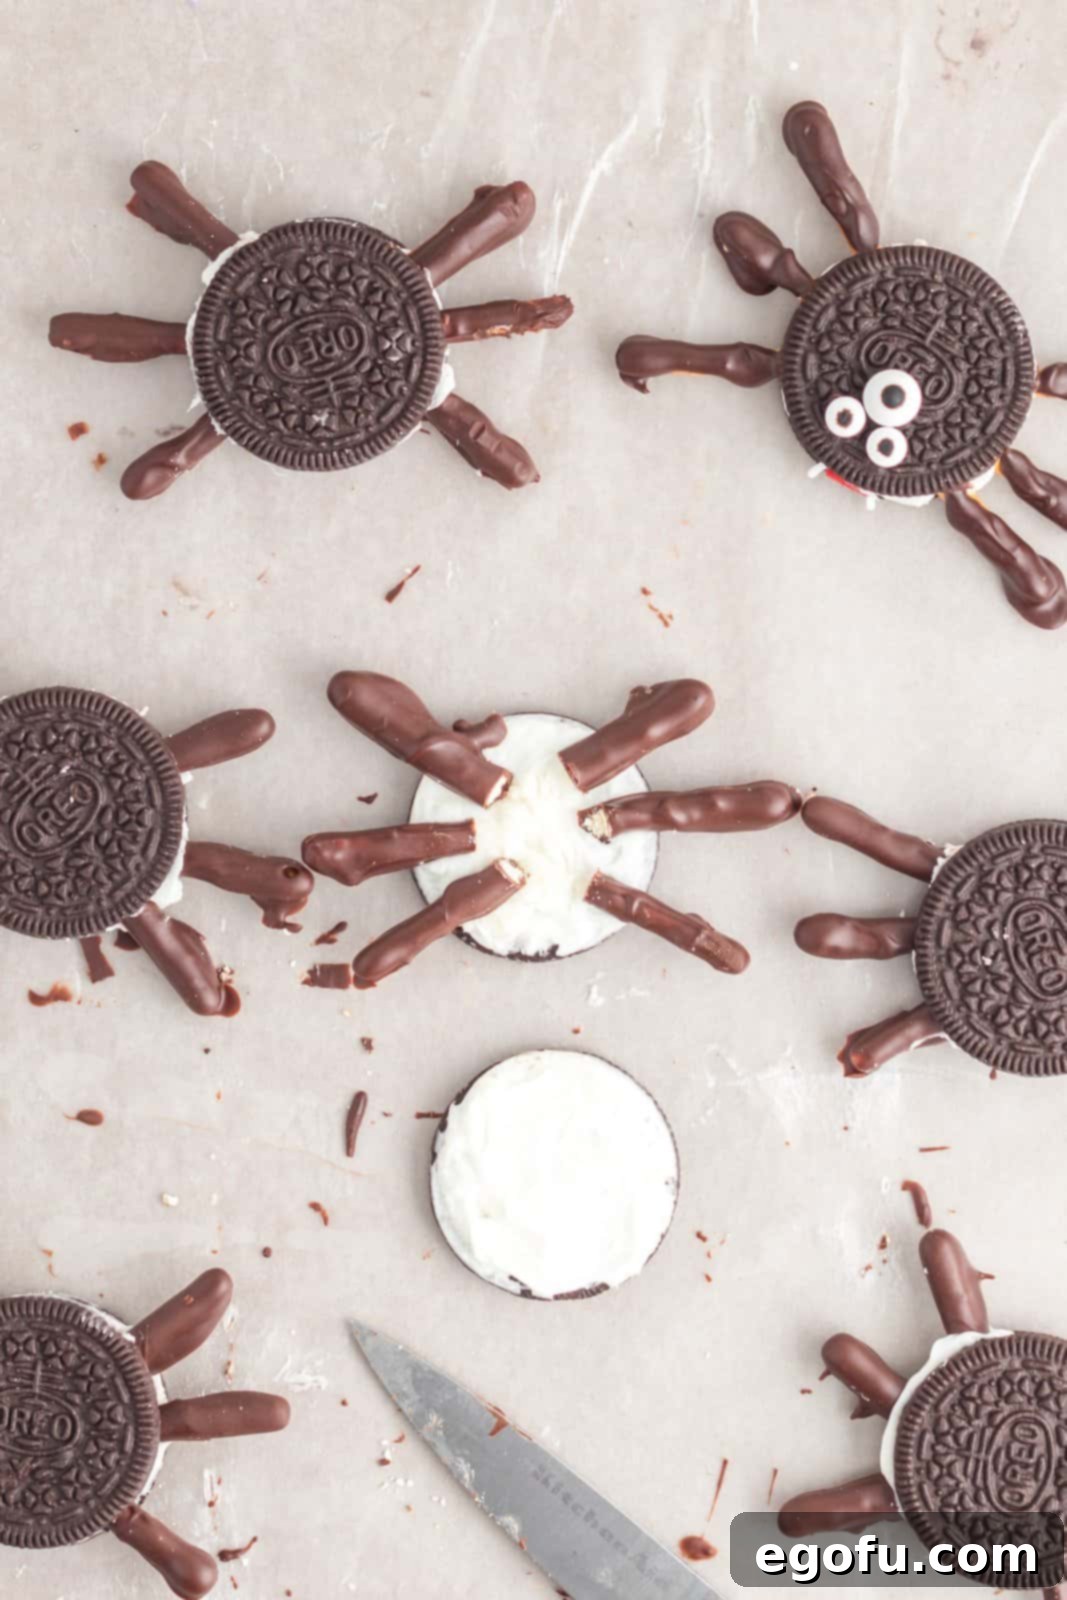
Now, let’s prepare the body of our spiders. Gently separate an Oreo cookie in half. A gentle twisting motion of the cookie shells usually helps to loosen them without causing them to break. Place one cookie half, cream-side up, on your baking sheet. If the cream filling appears uneven or a bit messy, you can carefully smooth it out with the tip of a butter knife or an offset spatula. This smooth cream layer is where the magic happens – it serves as the perfect adhesive for securely attaching our spider legs, so make sure it’s ready!
Step 5: Attach the Pretzel Legs
With your cookie base ready and your pretzel legs chilled, it’s time to give your spiders their distinctive look. Carefully take three of your chocolate-covered pretzel leg halves (ensure the cut side is facing inwards, towards the center of the cookie) and gently press them into the cream filling on one side of the cookie half. Arrange them to resemble spider legs extending outwards. Repeat this on the opposite side of the cookie, pressing three more legs into the cream. Once all six legs are securely in place, gently reassemble the Oreo by placing the other cookie half on top. Press down very lightly to ensure the cream is evenly distributed and the cookie is securely closed around the legs without crushing them.
Step 6: Add the Candy Eyes
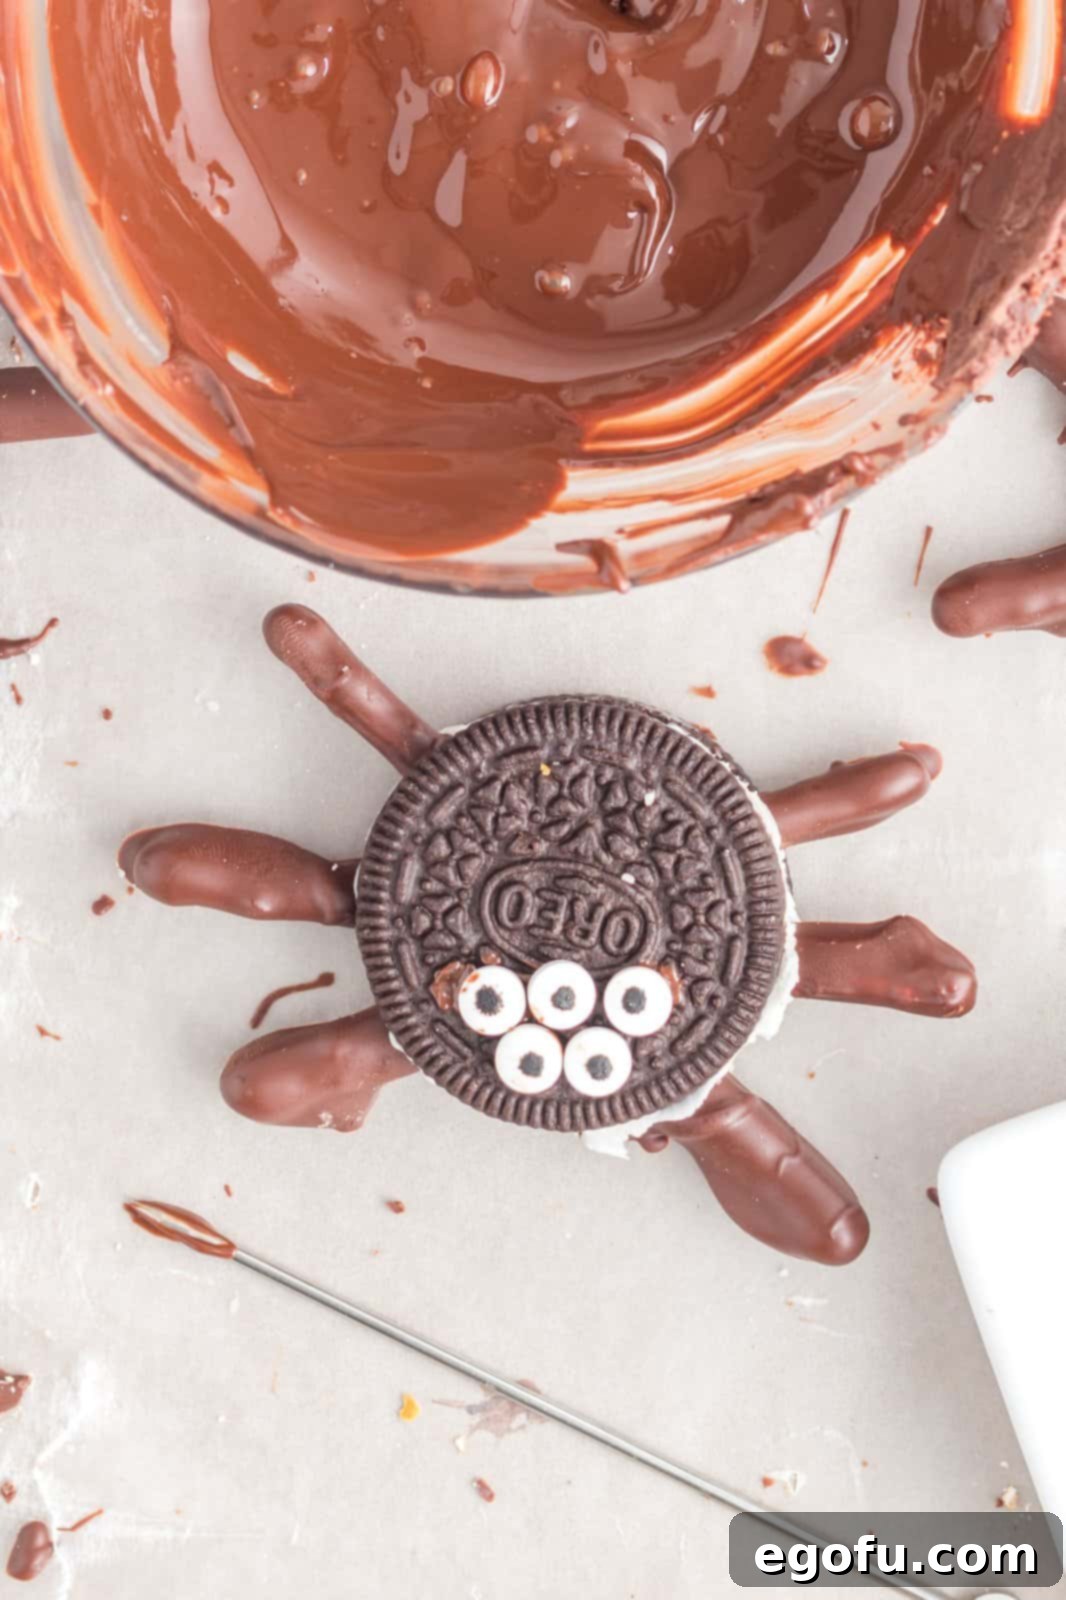
Now for the most expressive part – the eyes! For this step, you’ll use a tiny dab of the remaining melted chocolate as edible “glue.” Dip the very tip of a toothpick or a cocktail stick into the melted chocolate, then lightly touch it to the back of a candy eye. Carefully attach two (or for an extra spooky effect, three or even eight!) candy eyes onto the top cookie of your assembled Oreo spider. Feel free to use different sizes of candy eyes to give each spider its own unique, somewhat goofy, and utterly charming personality. This is where your spiders truly come to life!
Finally, for those extra creepy-crawly details that truly make these spiders stand out, take a single red Jimmie sprinkle and gently press it into the cream filling, just under the top cookie, to create a perfect little mouth. Then, add a couple of small white Jimmie sprinkles on either side of the red Jimmie to represent tiny, playful fangs. This final decorative touch truly brings your spiders to life, adding that perfect blend of spooky and sweet that Halloween is all about!
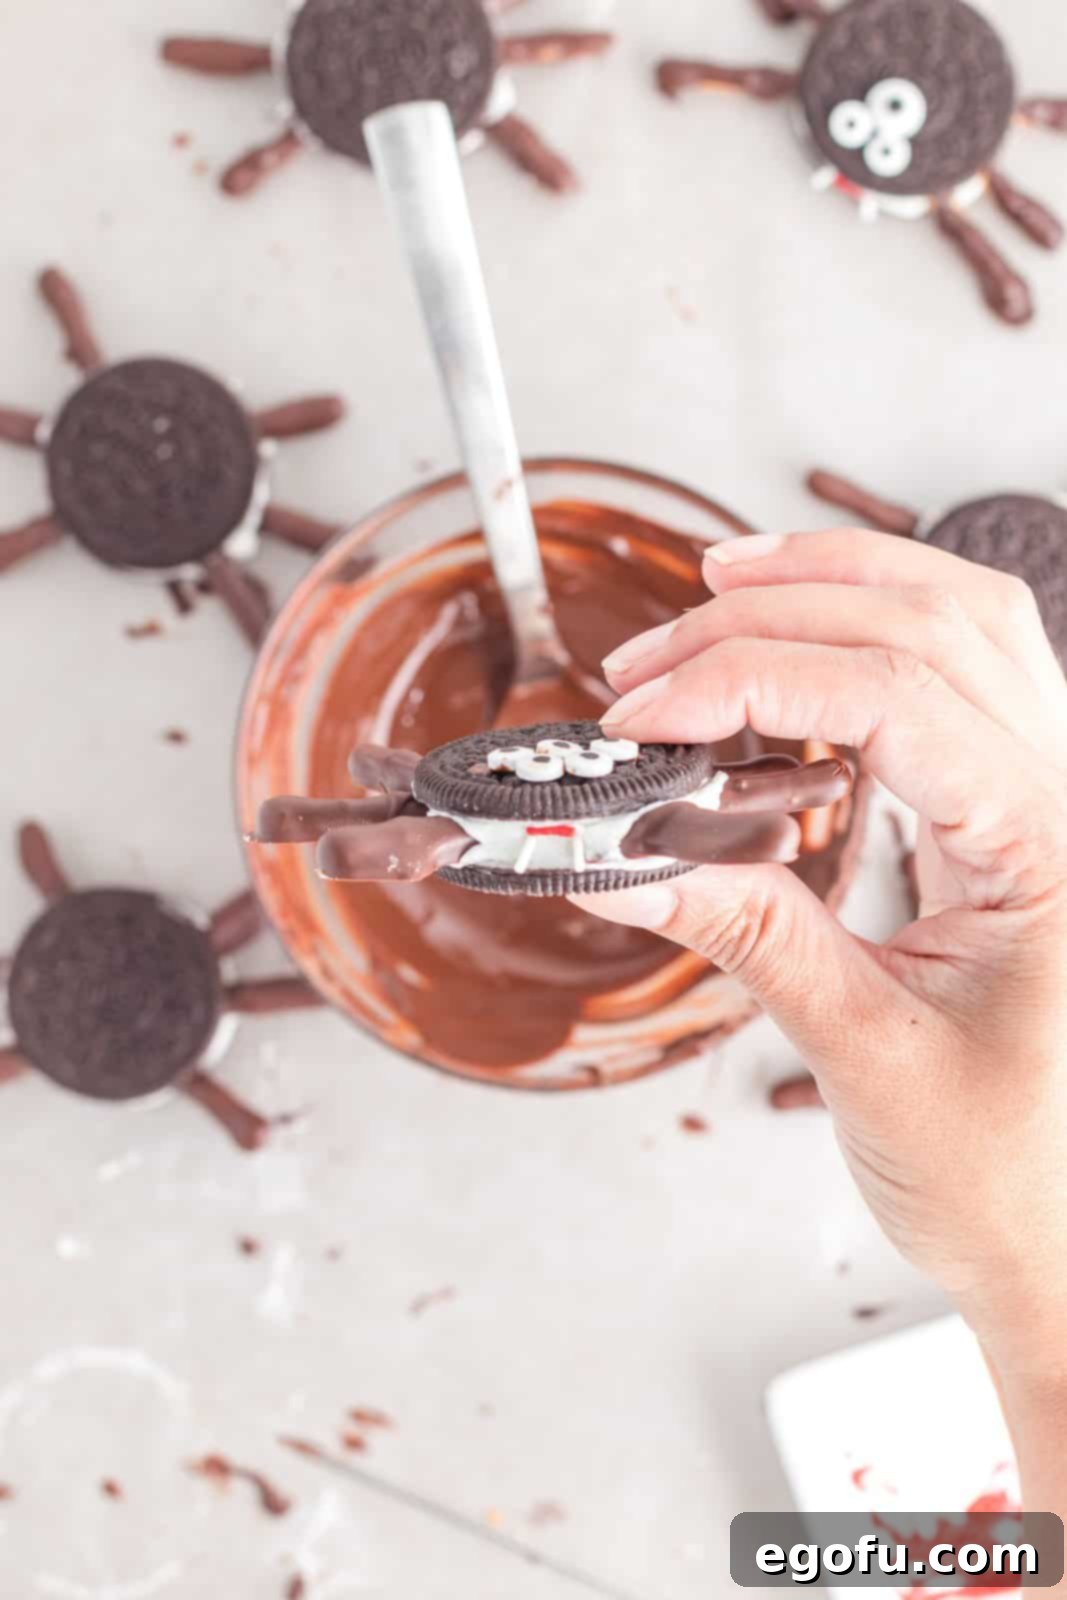
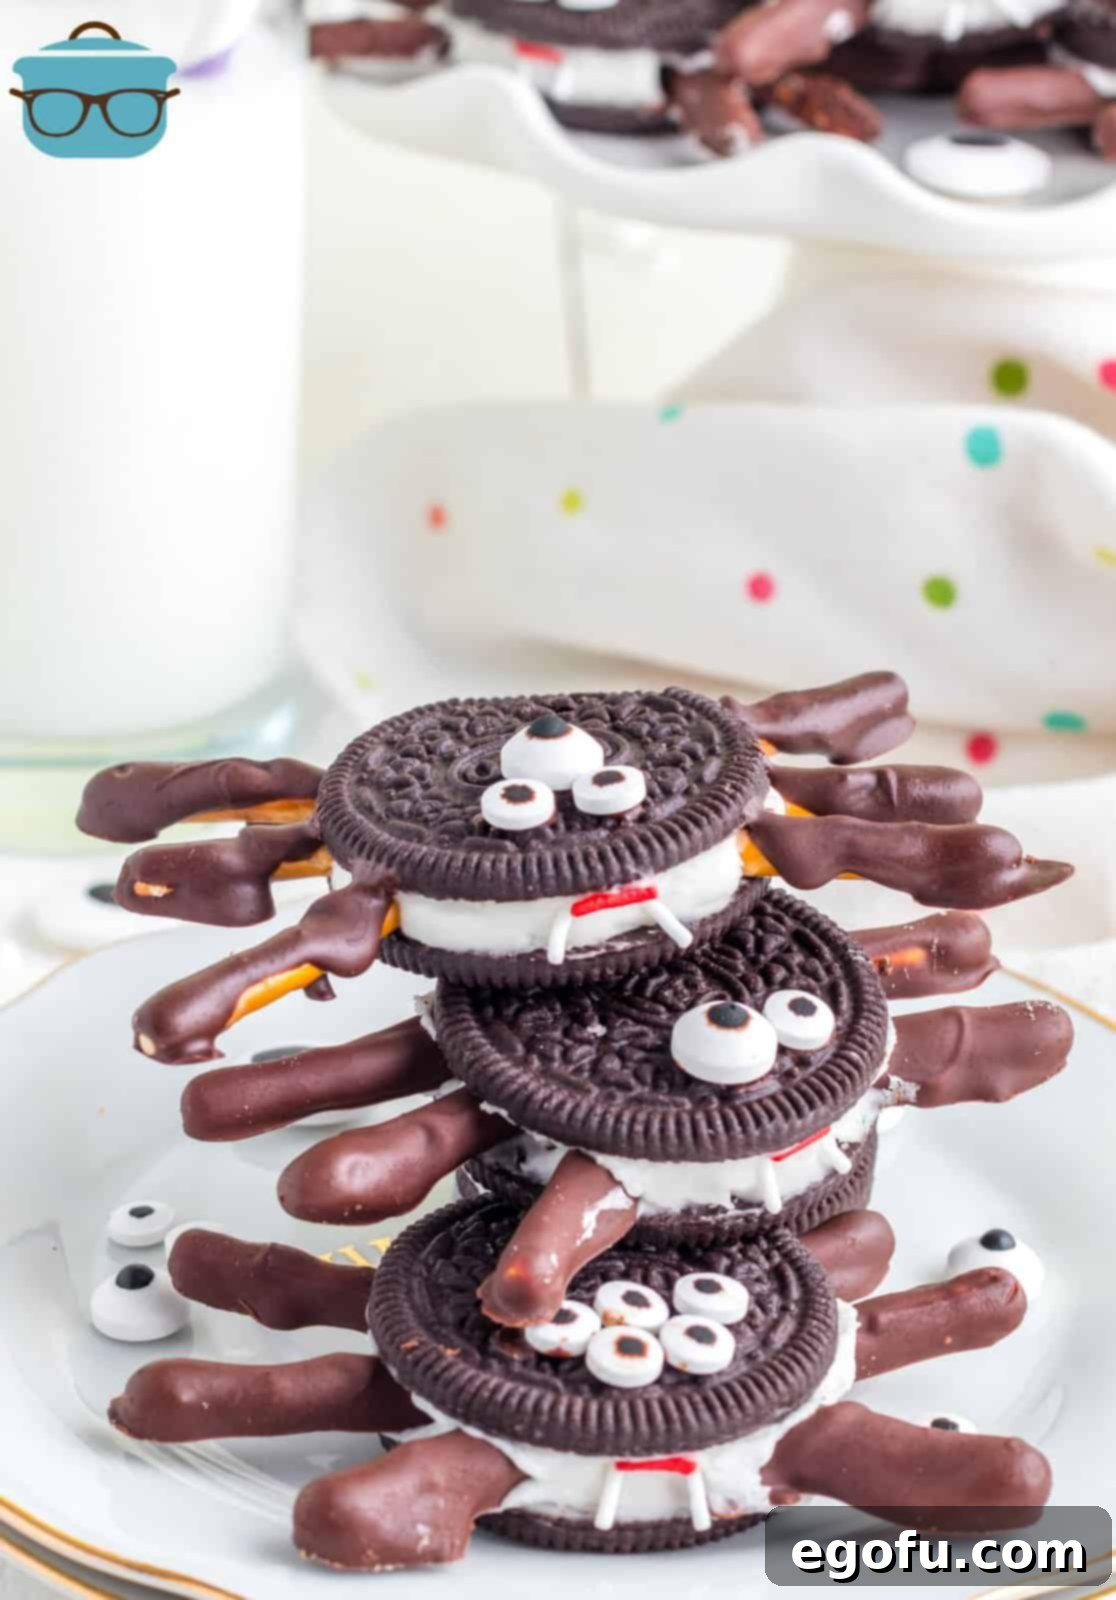
Continue this delightful assembly process until all your charming spider treats are complete, with their legs, eyes, mouths, and fangs perfectly in place. Allow them a final moment to fully set and firm up before carefully arranging and presenting them to your eager guests. These little edible arachnids are guaranteed to be a monstrously popular hit at any Halloween gathering, sparking joy and smiles all around!
Creative Variations and Serving Ideas
Once you’ve mastered the classic Halloween Oreo Spider, don’t hesitate to get creative with variations to match your party theme or simply to add more flair! Here are a few ideas to inspire your spooky sweet creations:
- Color Them Up: Instead of traditional dark chocolate for the legs, use white chocolate dyed with food coloring. Black, orange, green, or vibrant purple candy melts work wonderfully for a pop of color. You can even dip the entire Oreo in colored candy melts before adding the legs and eyes for an extra vibrant effect.
- Flavor Twists: Experiment with different Oreo flavors to introduce unique taste profiles. Golden Oreos, Mint Oreos, Peanut Butter Oreos, or even seasonal varieties can add an exciting twist to your spiders.
- Web Effects: For a truly immersive display, drizzle a little extra melted white chocolate in a swirling, web-like pattern on your serving platter. Arrange your finished spiders on top of or around this edible web for a dramatically spooky presentation.
- Ghoulish Glitter: Before the chocolate on the legs fully sets, sprinkle them with edible glitter in silver, gold, or iridescent colors for a shimmering, enchanted, and truly magical look that catches the light.
- Mini Spiders: For bite-sized versions that are just as adorable and perfect for smaller appetites, use mini Oreos and mini pretzel sticks. They make fantastic additions to a treat bag or a crowded dessert table.
These versatile Oreo spiders are perfect for a multitude of Halloween-themed occasions:
- Halloween Parties: Arrange them artfully on a platter with other spooky treats like “graveyard dirt cups,” “witch hat cookies,” or “mummy hot dogs” for an impressive spread.
- School Events or Bake Sales: As a no-bake and relatively simple treat, they’re a safe bet (if using appropriate nut-free pretzels/Oreos) and easy to transport to school parties or community bake sales.
- Family Movie Night: Make them a fun, hands-on activity before settling down with a delicious snack to enjoy your favorite Halloween films or spooky cartoons.
- Trick-or-Treat Stations: Offer them as a charming homemade alternative to store-bought candy for guests visiting your home on Halloween night.
More Spooktacular Recipes to Try
If you loved making these fun and easy Halloween Oreo Spiders, then you’re in for a treat! We know you’ll be thrilled to discover even more of our favorite festive recipes that are perfect for the spooky season. Get ready to bewitch your taste buds and impress your guests with these other fun, creative, and deliciously easy Halloween treats that are sure to be a hit:
- HALLOWEEN WITCH HAT COOKIES
- HALLOWEEN MONSTERS RICE KRISPIES TREATS
- WITCHES BREW SNACK BAGS
- JACK-O-LANTERN OREO BALLS
- HALLOWEEN HOT DOG FINGERS
- HALLOWEEN GRAVEYARD DIRT CUPS
Halloween Oreo Spiders Recipe Card
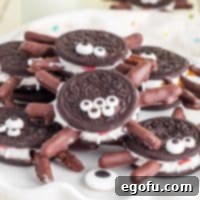
Halloween Oreo Spiders
A delightful and simple treat, these Halloween Oreo Spiders are the perfect spooky snack to enchant guests at any of your Halloween festivities!
- Prep Time:
- 30 minutes
- Cook Time:
- 0 minutes
- Chill Time:
- 30 minutes
- Total Time:
- 1 hour
- Servings:
- 12 spiders
- Author:
- Brandie Skibinski
Ingredients
- 12 Double Stuf Oreo cookies
- 36 pretzel sticks (each will be cut in half to yield 72 legs for 12 spiders)
- ½ cup dark chocolate chips, melted
- Assorted candy eyes
- Red and white jimmie sprinkles
Instructions
- Line a baking sheet with waxed paper or parchment paper. This will provide a non-stick surface for your chocolate-dipped pretzels.
- In a medium, microwave-safe bowl, melt dark chocolate chips in 20-second increments in the microwave until fully melted. Stir well in between melting intervals to prevent burning and ensure a smooth, silky consistency.
- Using a fork or small tongs, dip each pretzel stick into the melted chocolate, allowing any excess chocolate to drip back into the bowl for a clean coating.
- Place the chocolate-dipped pretzels on the prepared baking sheet, ensuring they do not touch. Repeat for all 36 pretzel sticks.
- Chill the pretzels in the refrigerator for about 30 minutes, or until the chocolate is completely set and firm to the touch. This creates sturdy spider legs.
- Once the pretzels are set, take all 36 full pretzel sticks and carefully cut each one in half. This will yield a total of 72 shorter pretzel pieces, perfect for the 12 spiders (6 legs per spider).
- Carefully separate an Oreo cookie in half by gently twisting the cookie shells. Place one cookie half, cream-side up, on the baking sheet. Smooth the cream with a butter knife or offset spatula if necessary to create an even surface.
- Press three pretzel legs (with the cut side facing into the cream) into the cream filling on one side of a cookie half. Arrange them to resemble spider legs. Repeat this on the opposite side of the cookie half, pressing three more legs into the cream.
- Reassemble the cookie by gently placing the other half of the Oreo on top of the base. Press down very lightly to evenly distribute the cream and securely hold the legs in place.
- Using a tiny amount of melted chocolate on a toothpick or cocktail stick as adhesive, carefully attach two (or more!) candy eyes onto the top of each assembled Oreo spider.
- Add a red Jimmie sprinkle to create a mouth by gently pressing it into the cream under the top cookie. Then, place two white Jimmie sprinkles on either side for fangs.
- Continue this assembly process until all 12 spiders are complete. Allow them to fully set before enjoying your delightful, creepy-crawly creations!
Notes
- For the best and most secure results, always use Double Stuf Oreos to ensure you have ample cream filling for anchoring the pretzel legs.
- Feel free to substitute the dark chocolate with semi-sweet chocolate chips, milk chocolate chips, or even colorful candy melting wafers to match your desired aesthetic.
- Utilize an assortment of candy eye sizes to give each spider a unique, whimsical, and slightly goofy personality.
- It’s important to ensure the chocolate-covered pretzels chill for at least 30 minutes. This crucial step guarantees maximum sturdiness for the spider legs.
- The nutritional values provided are estimates and do not include the candy eyes or sprinkles, as their contribution to the overall nutritional profile is typically minimal and highly variable by brand.
- Course:
- Dessert
- Cuisine:
- American
Nutrition Facts (Estimated Per Serving)
Please note: “The Country Cook” is not a registered dietician or nutritionist, and any nutritional information shared here is an estimate. If calorie count and other specific nutritional values are important to your dietary needs, we highly recommend running the ingredients through your preferred online nutritional calculator. Calories and other nutritional values can vary quite a bit depending on the specific brands of ingredients used. This estimation also does not include the candy eyes or sprinkles.
- Calories:
- 102 kcal
- Carbohydrates:
- 14g
- Protein:
- 1g
- Fat:
- 5g
- Sodium:
- 74mg
- Fiber:
- 1g
- Sugar:
- 7g
