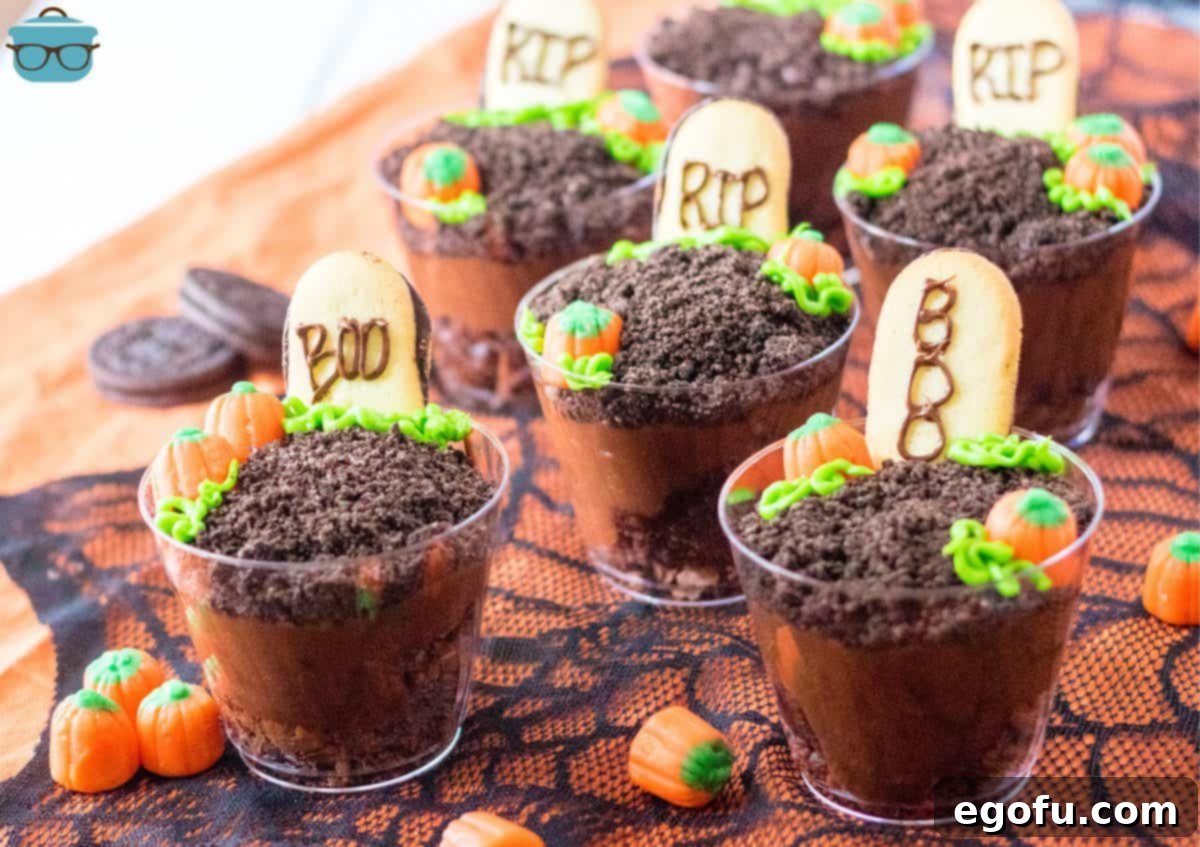
Looking for a delightfully spooky and incredibly easy treat to make this Halloween? These **Halloween Graveyard Dirt Cups** are not just a dessert; they’re an experience! Perfect for captivating the imaginations of kids and delighting adults, this recipe brings together rich brownies, creamy chocolate pudding, and crushed cookies to create an edible graveyard scene that’s as fun to assemble as it is to devour. Get ready for a fuss-free, fantastically festive dessert that will become a highlight of your Halloween celebrations!
Spooktacular Halloween Graveyard Dirt Cups: An Easy & Fun Treat
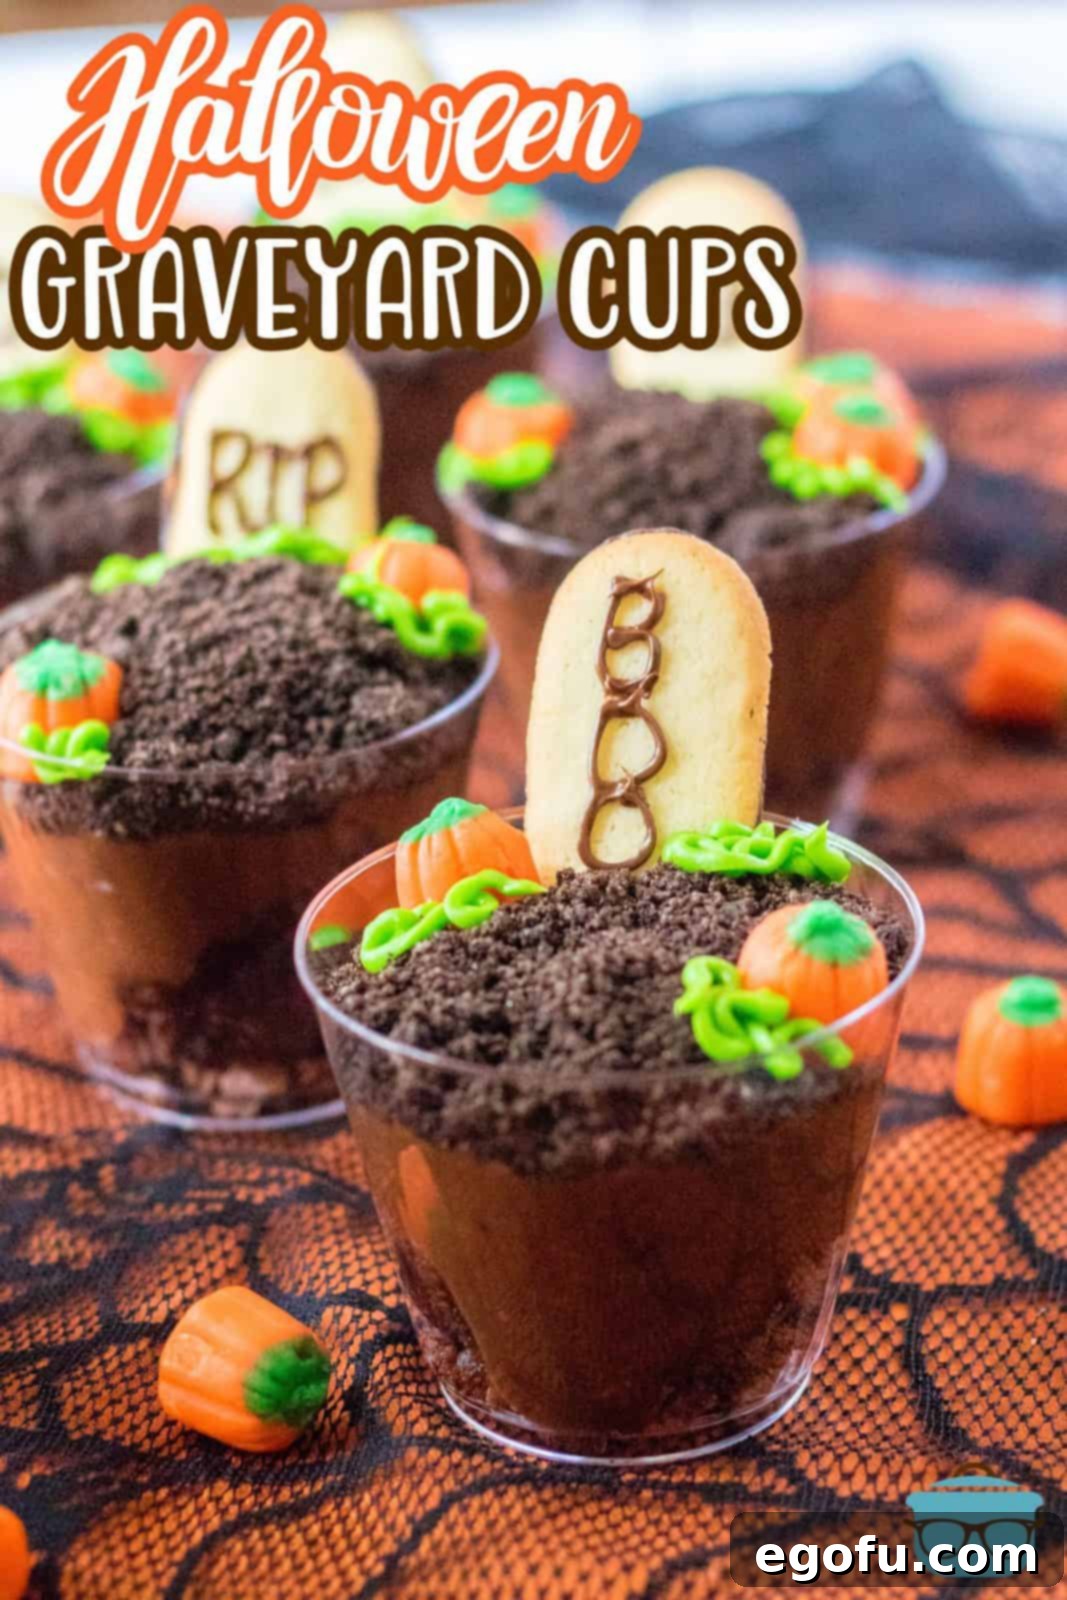
Halloween is a time for costumes, decorations, and, of course, deliciously eerie treats! While some holiday recipes can be complicated and time-consuming, our **Halloween Graveyard Dirt Cups** stand out for their delightful simplicity and impressive presentation. Imagine a rich, fudgy brownie base, layered with silky smooth chocolate pudding, and topped with crumbled cookies that resemble fresh earth. Add some ghostly Milano cookie tombstones and festive candy pumpkins, and you’ve got a mini edible graveyard that’s sure to draw gasps and giggles.
This recipe is designed for maximum fun with minimal effort. It’s a fantastic opportunity to gather the family in the kitchen, allowing everyone to contribute to the creative decorating process. Kids especially love layering the “dirt” and placing the “tombstones” and “pumpkins.” Even grown-up kids (and regular grown-ups!) will find joy in personalizing their spooky dessert. The best part? These treats are served in individual cups, making them perfectly portioned, hygienic for parties, and incredibly convenient for everyone to enjoy their own personal haunted dessert. If you’re searching for a festive, tasty, and utterly charming Halloween treat, these **Graveyard Dirt Cups** are an absolute must-make!
Frequently Asked Questions About Halloween Graveyard Dirt Cups
Absolutely! Using your favorite homemade brownie recipe will add an extra layer of deliciousness and personal touch to these dirt cups. Just ensure you bake enough to fill a standard 9×13-inch baking pan, as this quantity typically yields enough brownies for six generous servings. While the recipe is fantastic with simpler options, going homemade can elevate the flavor profile even further, allowing you to control the richness and texture of your brownie base.
Yes, definitely! If you’re short on time or prefer a quicker assembly, store-bought brownies from your local grocery store’s bakery section are a perfect substitute. Many pre-made brownie trays come in sizes comparable to a 9×13-inch pan, making them incredibly convenient. This option allows you to focus more on the fun decorating aspect, saving precious time without compromising on taste or the festive spirit of your **Halloween Graveyard Dirt Cups**.
Yes, this recipe is wonderfully versatile! If you prefer a communal dessert rather than individual cups, you can certainly assemble everything in a single 9×13-inch pan. Simply spread your crumbled brownies evenly at the bottom, follow with the pudding layer, and then top with the crushed Oreo “dirt.” You can then arrange your Milano cookie tombstones and candy pumpkins across the surface to create a large graveyard scene. Guests can easily scoop their desired portion directly from the pan.
For precise decorating, I highly recommend using pre-packaged cookie frosting tubes. These often come with various decorating tips, making it incredibly easy to pipe “R.I.P.” or “Boo” onto your Milano cookie tombstones and to create realistic green “grass” effects. Look for green and brown (or black) colors in the baking aisle. If decorating tips aren’t included with the tubes, you might need to purchase them separately. Alternatively, you can use regular pre-made cake frosting. Simply transfer some colored frosting (green for grass, chocolate for writing) into a zip-top bag, push it to one corner, and snip off a tiny bit of the tip to create a makeshift piping bag. This method offers excellent control and is a great workaround if you don’t have specialized tubes.
For the best quality and texture, these **Halloween Graveyard Dirt Cups** are ideally enjoyed shortly after assembly. The combination of pudding, brownies, and cookie crumbs can become soggy if left to sit for too long. If you do have leftovers, I recommend storing them in the refrigerator for no more than 24 hours. Beyond that, the textures will start to degrade. Freezing these dirt cups is not recommended, as the pudding and brownies can develop an unappealing consistency once thawed. If you need to prepare components ahead of time, consider keeping the brownies, pudding, and crushed cookies separate and assembling the cups just a few hours before serving.
Essential Ingredients for Your Halloween Graveyard Dirt Cups
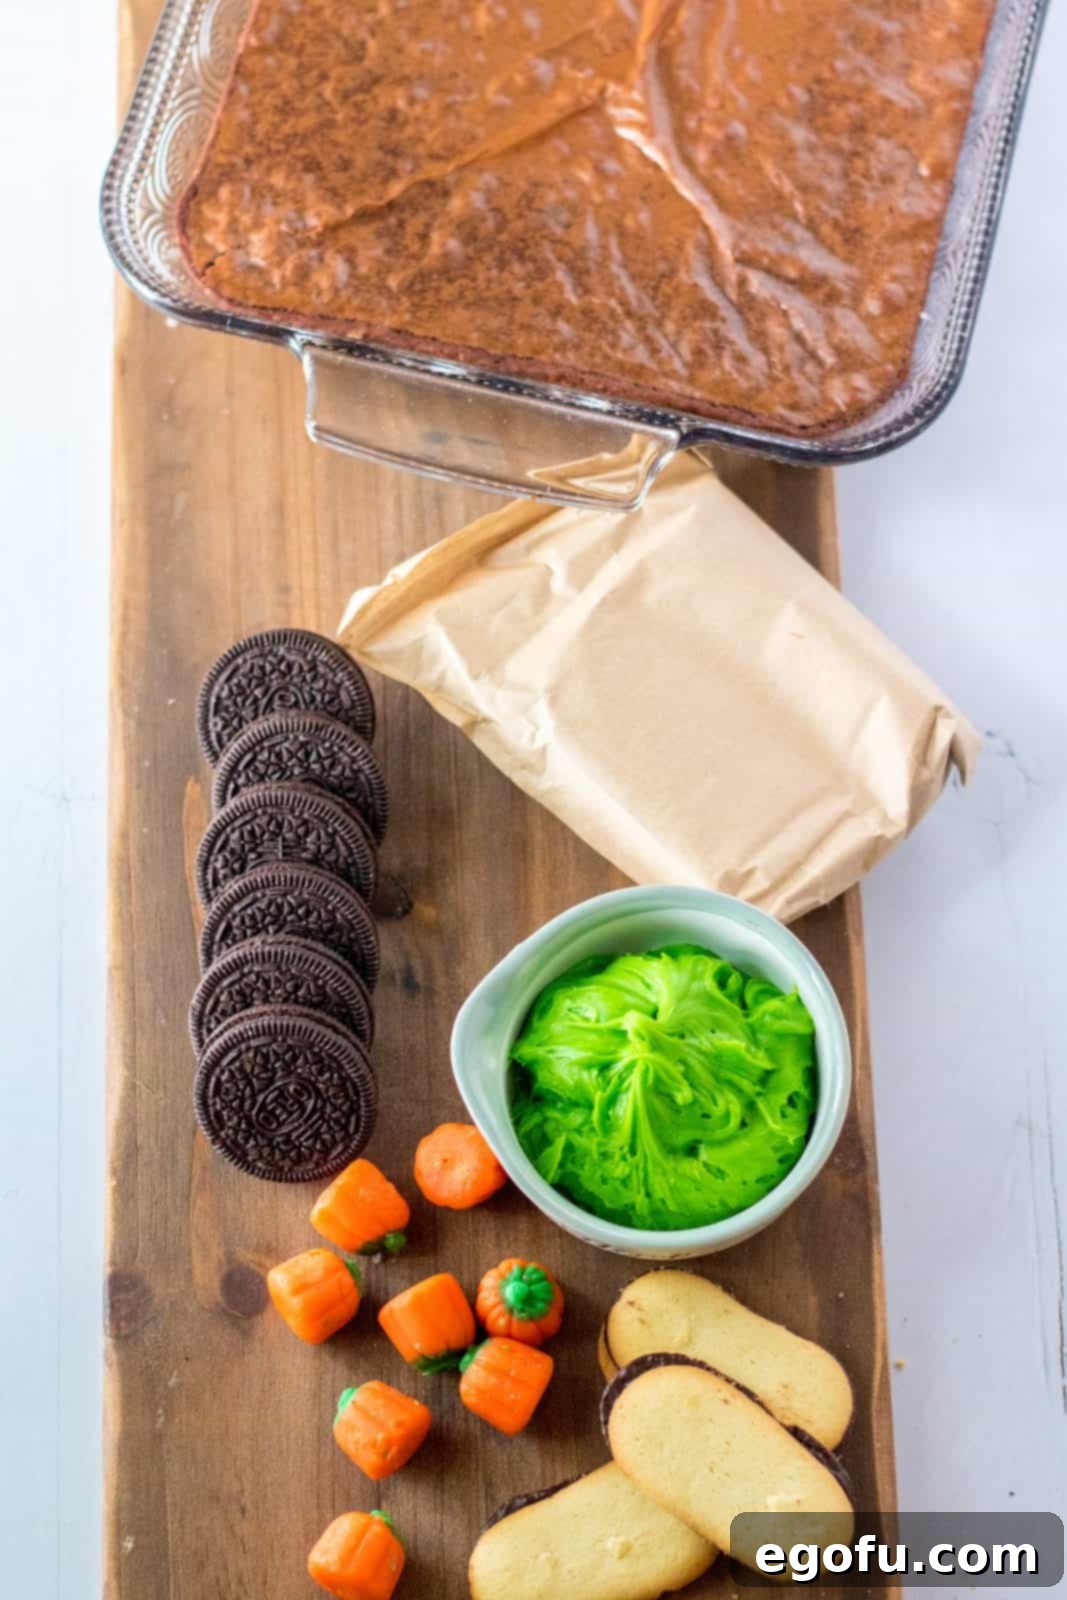
Crafting these spooky treats requires a simple list of readily available ingredients. You’ll find most of these items in your local grocery store, ensuring a quick and easy shopping trip for your Halloween baking adventure. The key is combining classic flavors and textures to create a cohesive and delicious graveyard theme.
- Baked brownies (from a box mix, store-bought, or homemade – a 9×13-inch pan’s worth)
- Instant chocolate pudding mix (a large 5.9-ounce box for optimal creaminess)
- Cold milk (the amount specified on your pudding box, typically 3 cups)
- Oreo cookies (approximately 20 cookies, perfect for creating “dirt”)
- Pepperidge Farm Milano cookies (6 cookies, ideal for tombstones)
- Prepared chocolate or brown frosting (in a tube with a decorating tip or a small piping bag)
- Prepared green frosting (in a tube with a decorating tip or a small piping bag)
- Mellowcreme pumpkin candies (or other Halloween-themed candies for decoration)
How to Assemble Halloween Graveyard Dirt Cups: Step-by-Step Guide
Assembling these graveyard dirt cups is a breeze, making it a perfect activity for little hands to help. Follow these simple steps to create your delightful Halloween treats:
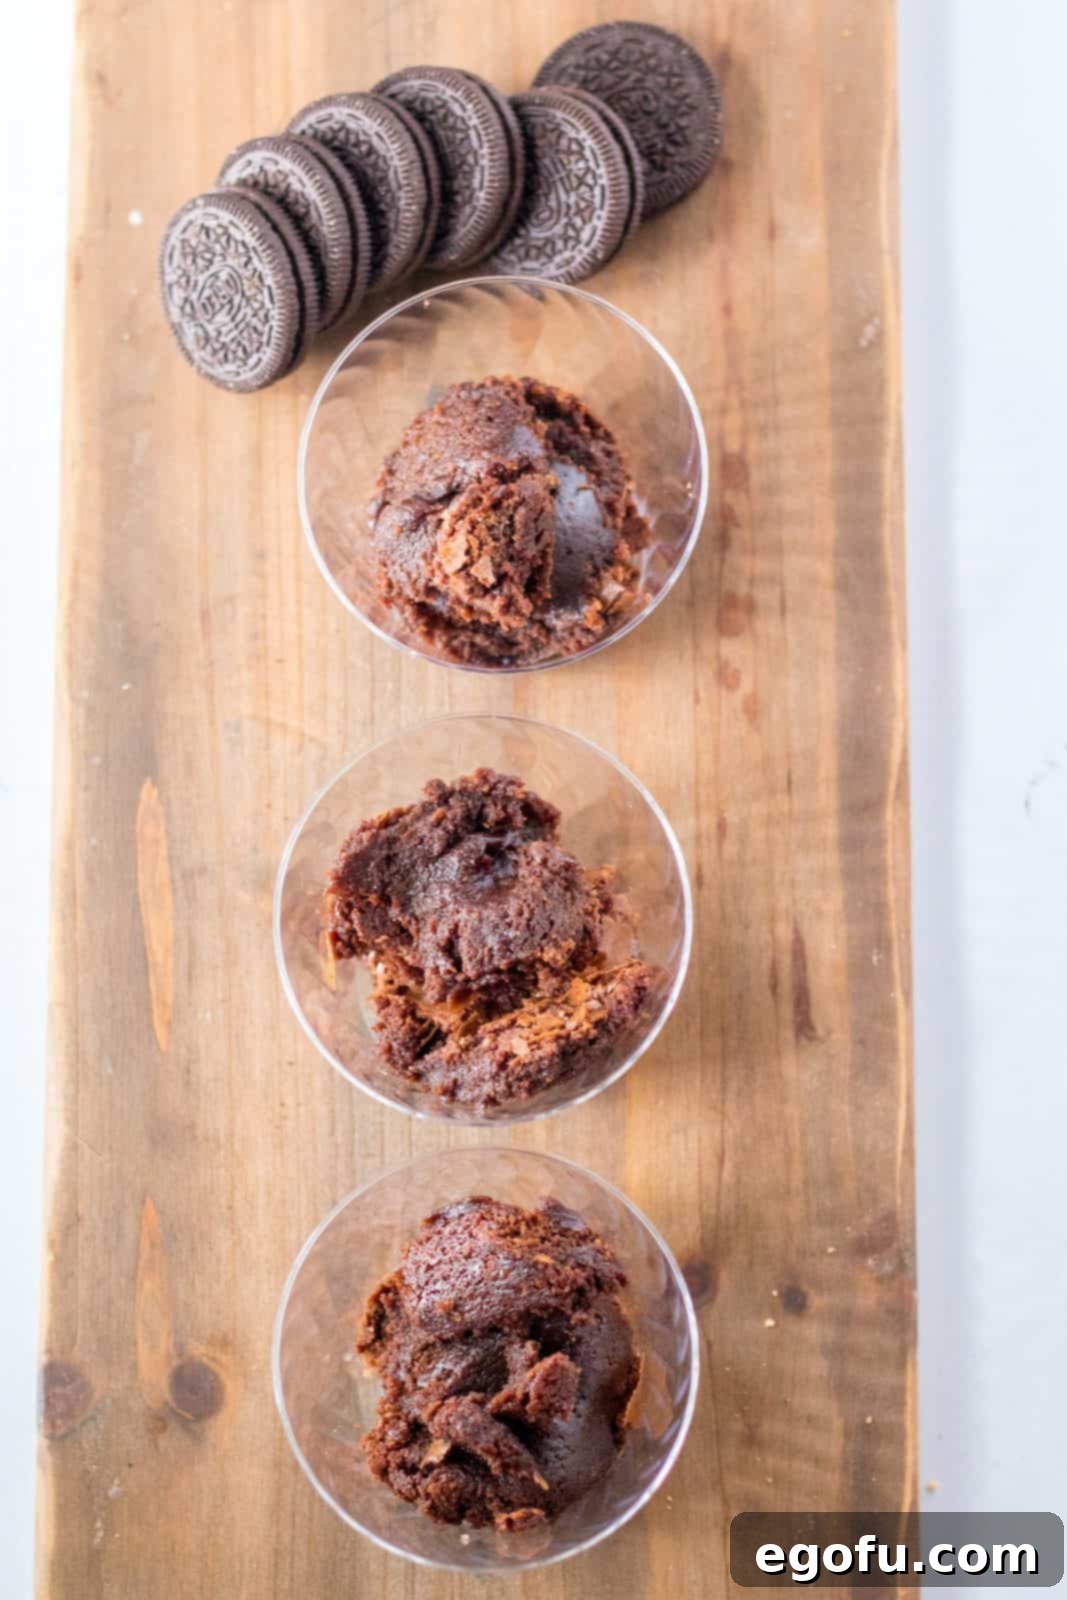
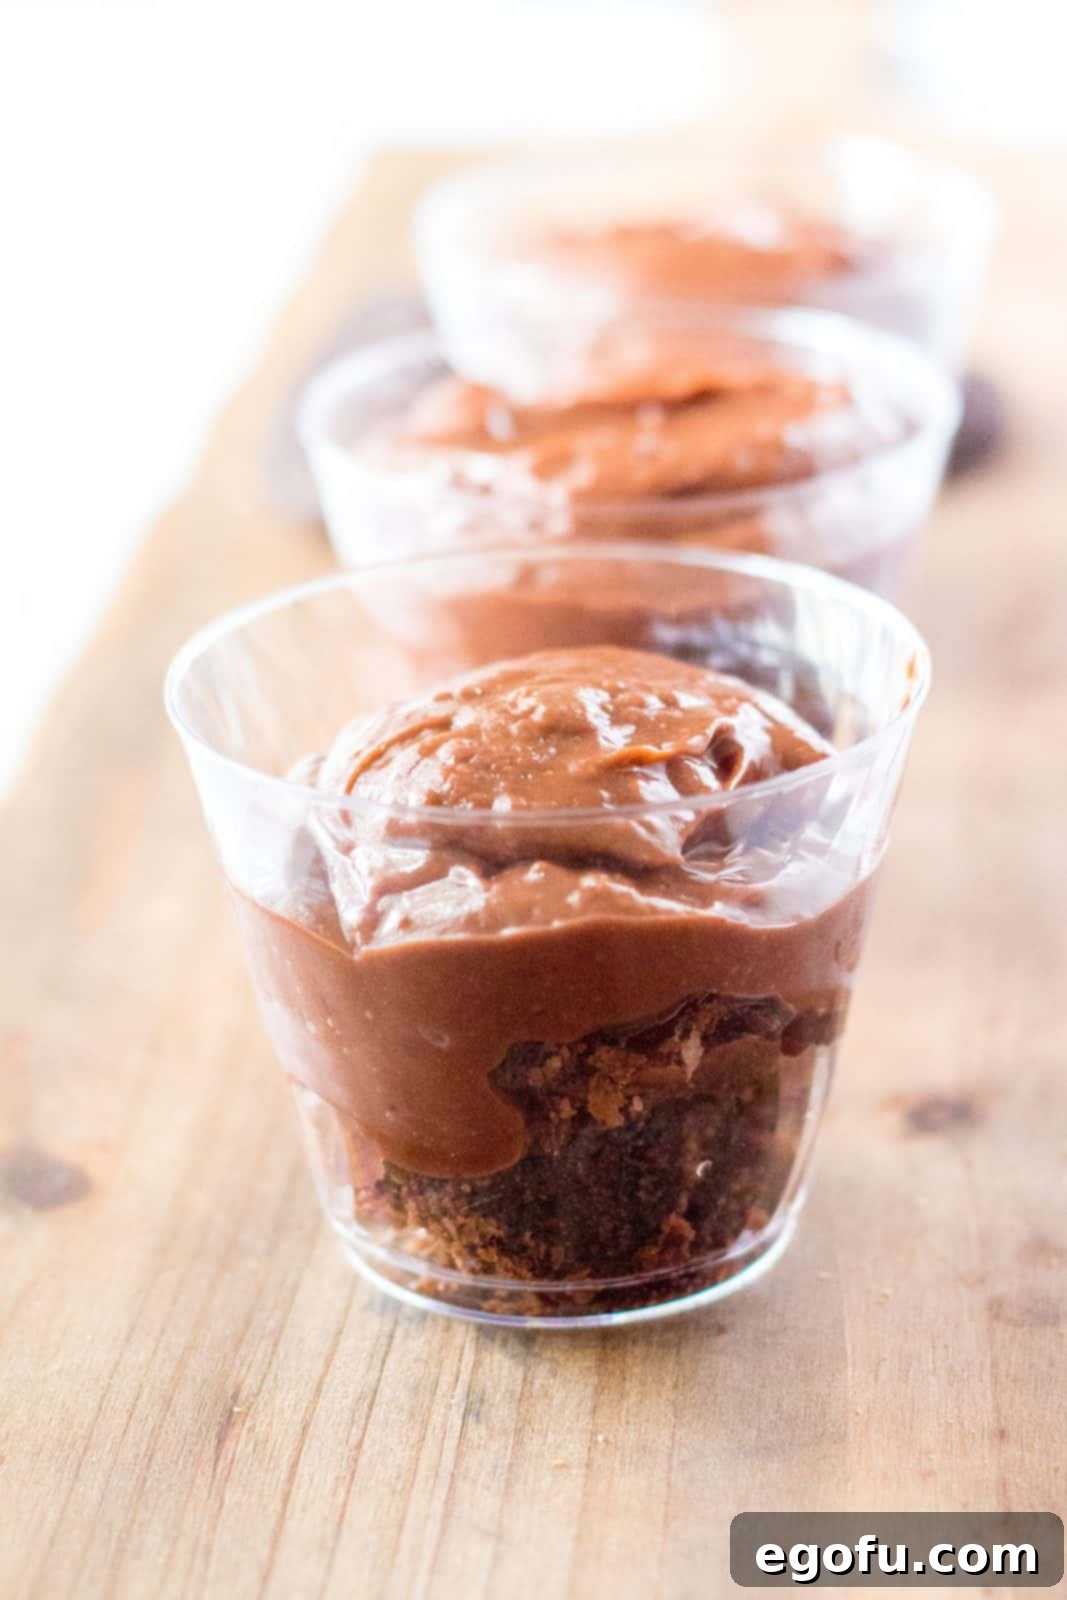
Prepare the Brownie Base: Begin by crumbling your baked brownies. You can do this with your hands or roughly chop them into small pieces. In the bottom of six clear, disposable cups (9-ounce size works well), evenly distribute the brownie crumbles, filling each cup approximately halfway. This creates the rich, sturdy “earth” layer of your graveyard.
Whisk the Pudding: In a medium bowl, combine the instant chocolate pudding mix with the cold milk. Whisk vigorously for about 2-3 minutes until the mixture is smooth and well combined. Let the pudding sit for 5 minutes to allow it to thicken properly. This quick setting time is crucial for achieving that perfectly creamy texture.
Layer with Pudding: Once the pudding has thickened, divide it evenly among the six cups, spooning it directly over the brownie layer. Gently spread the pudding to create an even surface. This creates a rich, decadent layer that mimics freshly dug earth.
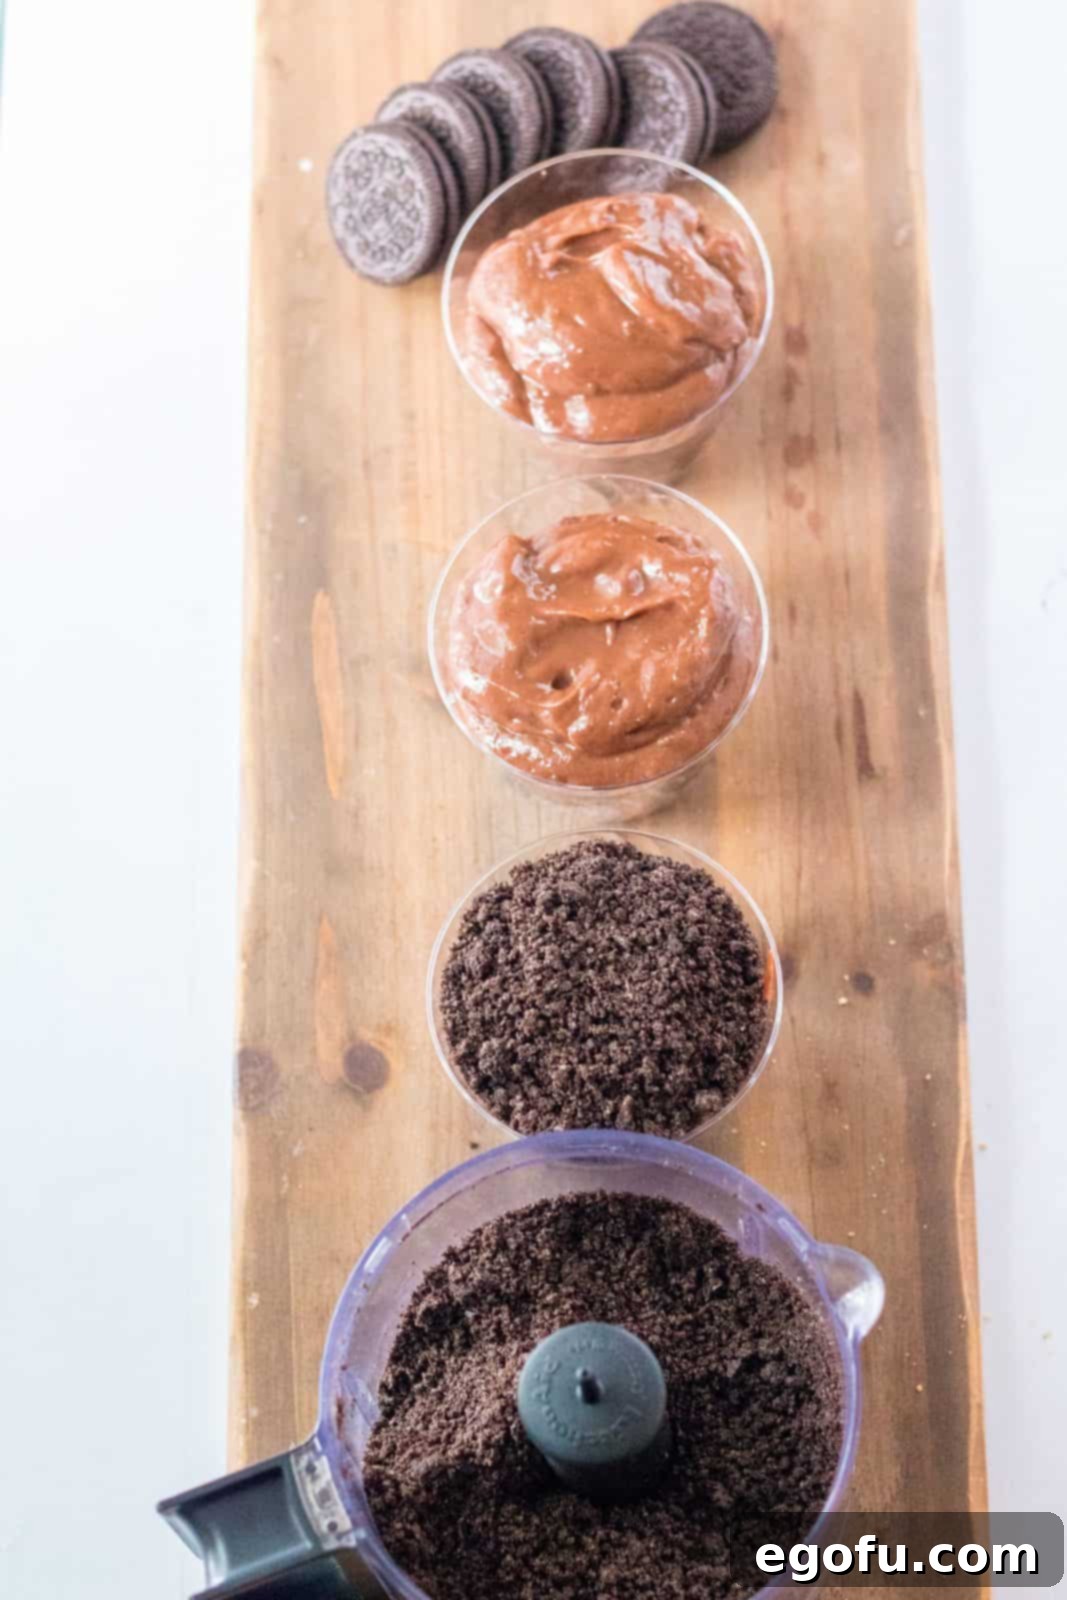
Create the “Dirt” Topping: Place the Oreo cookies into a food processor and pulse until they form fine crumbs that resemble dirt. Alternatively, you can place the cookies in a large zip-top bag and crush them thoroughly with a rolling pin. Spoon these fine Oreo crumbs generously over the top of the pudding in each cup, ensuring the entire surface is covered. This creates the iconic “dirt” look.
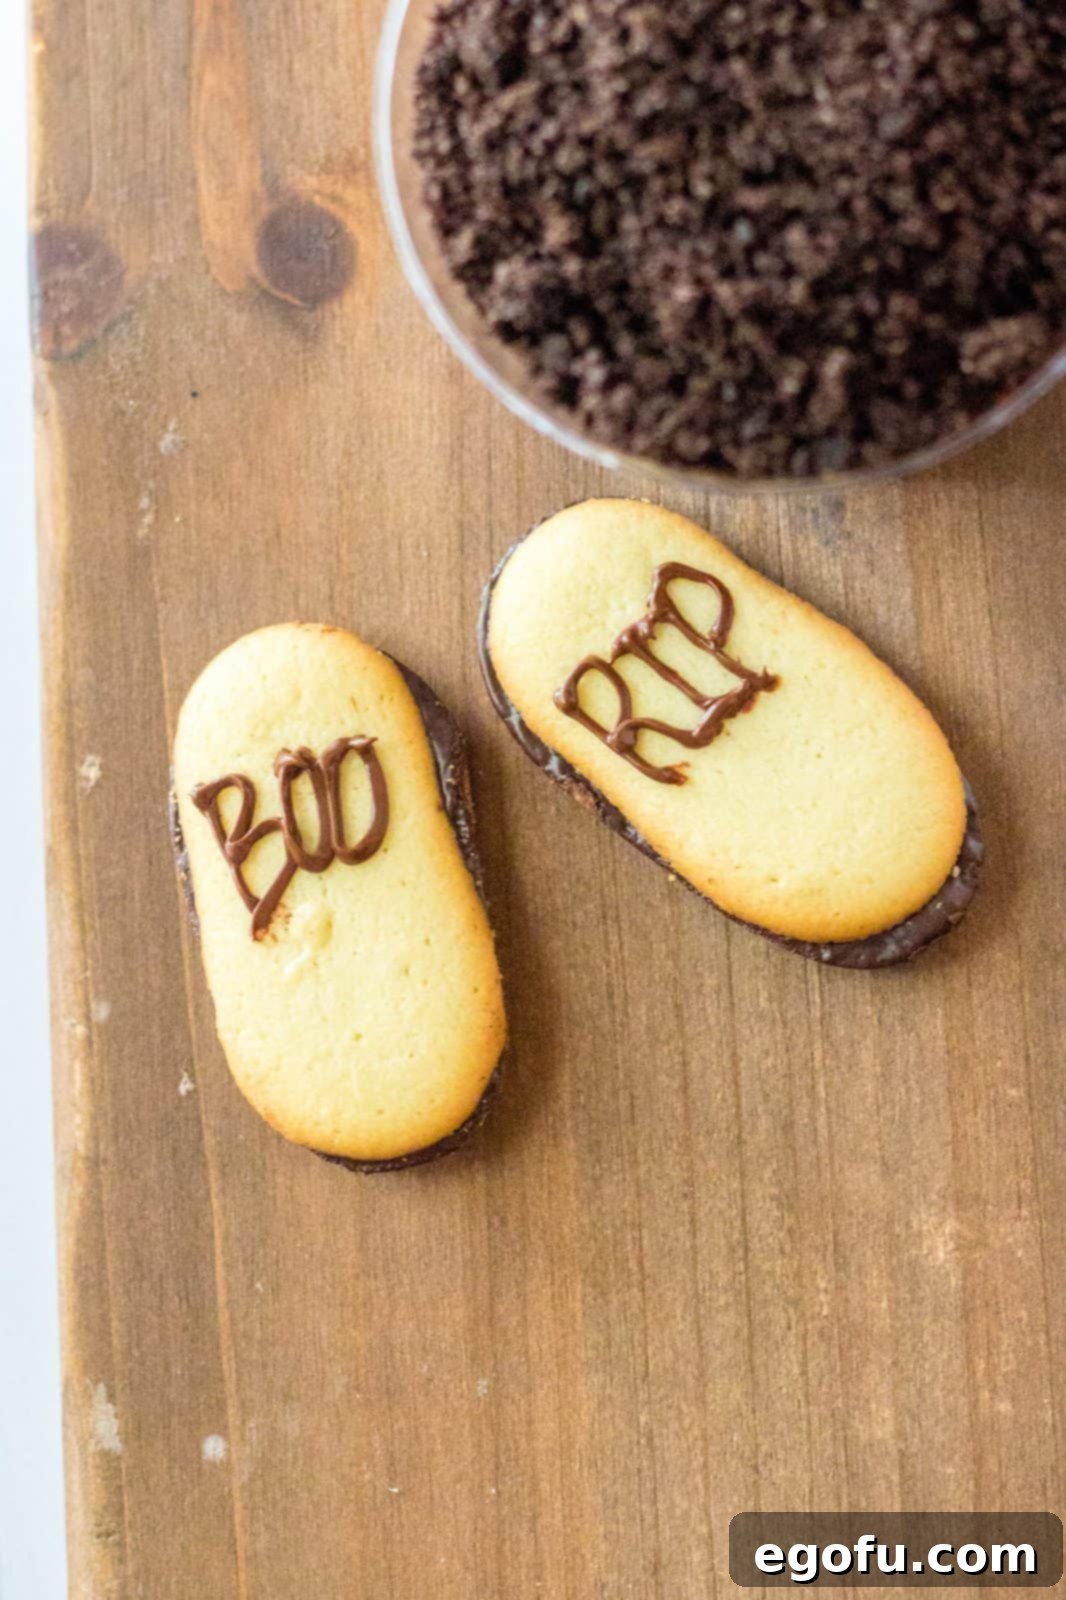
Decorate the Milano Tombstones: Take your Pepperidge Farm Milano cookies and, using the prepared chocolate or brown frosting, pipe spooky messages like “R.I.P.” or “Boo” onto them. If using a frosting tube, choose a fine tip for best results. If using a makeshift piping bag, snip a very tiny corner for controlled writing. These elegant cookies are the ideal shape for realistic tombstones.
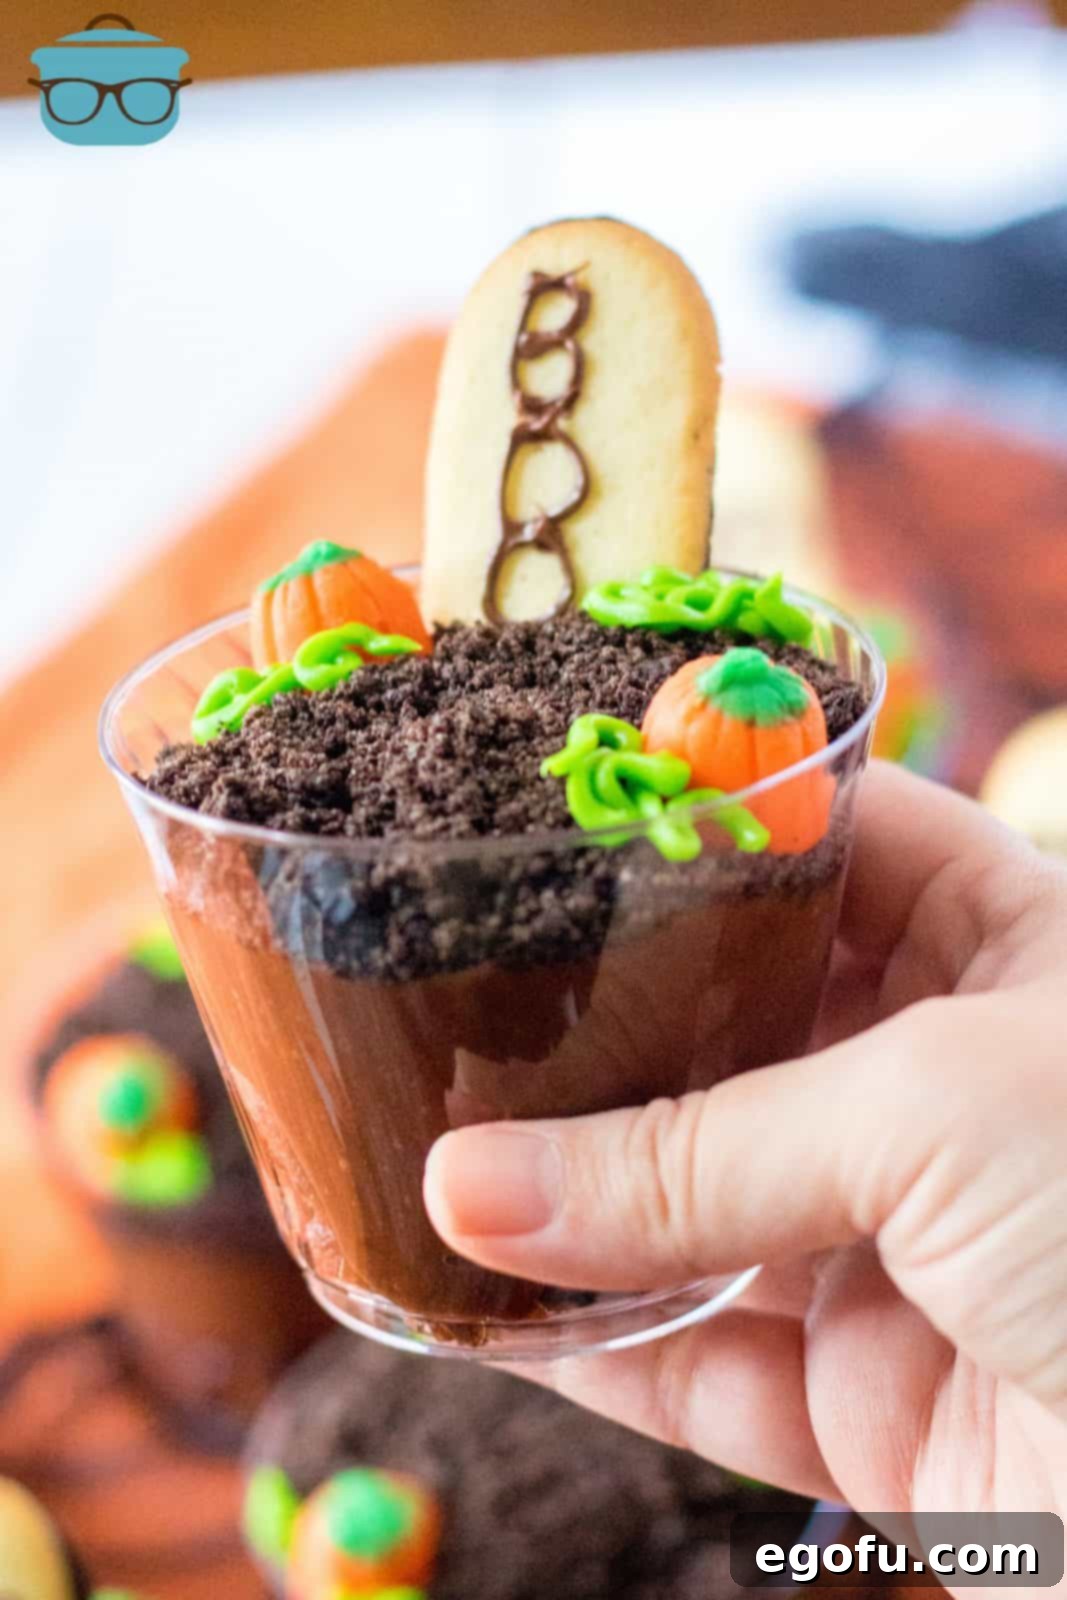
Final Assembly & Serving: Carefully place one decorated Milano cookie “tombstone” upright into the Oreo “dirt” of each cup. Arrange a couple of mellowcreme pumpkin candies (or other small Halloween candies like gummy worms or candy corn) around the base of the tombstone. Finally, use the green frosting (with a grass tip if available, or just a small opening for squiggly lines) to pipe “grass” around the tombstones and pumpkins. Serve your **Halloween Graveyard Dirt Cups** immediately and watch them disappear!
Tips for Perfectly Spooky Graveyard Dirt Cups
While this recipe is incredibly straightforward, a few extra tips can ensure your **Halloween Graveyard Dirt Cups** are the talk of the party:
- Chilling is Key: After assembling, a quick 30-minute chill in the refrigerator can help the pudding set even firmer and meld the flavors beautifully, resulting in a more enjoyable texture.
- Get Creative with Crushing: If you don’t have a food processor, a heavy-duty zip-top bag and a rolling pin work wonders for crushing Oreos. Just ensure the bag is well-sealed to prevent crumbs from escaping.
- More Spooky Decorations: Don’t limit yourself to just pumpkins! Add gummy worms crawling out of the dirt, candy corn for extra color, or even edible googly eyes for a truly creepy effect. Small candy skeletons or ghosts can also enhance the graveyard theme.
- Make it a Family Affair: This recipe is fantastic for involving kids. Let them help crumble brownies, spoon pudding, crush cookies, and especially with the final decorating. It fosters creativity and makes the treat even more special.
- Prepare Components Ahead: If hosting a party, you can bake (or buy) and crumble the brownies a day in advance. You can also crush the Oreos and prepare the frosting. Store everything separately in airtight containers in the fridge until just before assembly.
- Cup Size Matters: The recipe uses 9-ounce clear disposable cups, which provide a good serving size and allow the layers to be visible. Using smaller cups will yield more servings from the same ingredients, while larger cups will yield fewer.
Delicious Variations to Customize Your Dirt Cups
Feel free to experiment with these fun variations to make your **Halloween Graveyard Dirt Cups** uniquely yours:
- Flavor Twists: Swap chocolate pudding for vanilla, white chocolate, or even pistachio pudding for a different color and flavor profile. You could also use different cookie types, like chocolate chip cookies or graham crackers, for the “dirt.”
- “Grown-Up” Graveyard Cups: For an adult Halloween party, consider adding a splash of coffee liqueur or Irish cream to the pudding mix for a sophisticated twist. Just remember to label them for adults!
- Gluten-Free & Dairy-Free Options: Easily adapt this recipe by using gluten-free brownies, gluten-free sandwich cookies, and dairy-free instant pudding mixes prepared with plant-based milk. Always check ingredient labels to ensure they meet dietary restrictions.
- No-Bake Brownie Option: If you want a completely no-bake version, you can substitute the brownies with a layer of crushed chocolate wafer cookies mixed with a little melted butter for a firm base.
Explore More Delicious Halloween Recipes!
If you loved making these fun and spooky **Halloween Graveyard Dirt Cups**, you’ll surely enjoy these other festive treats. Get inspired for your next Halloween gathering with more creative and delicious ideas:
- 20 Spooktacular Halloween Recipes
- Halloween White Trash Mix (Sweet & Salty)
- Pumpkin Patch Dirt Pudding
- Halloween Witch Hat Cookies
- Creepy Crawly Spider Oreos
- Spicy Mummy Jalapeno Poppers
- Frankenstein Monster Donuts
- Witches Brew Snack Bags
- Frankenstein Pudding Cups
Halloween Graveyard Dirt Cups
Looking for a fun treat for the kids? These Halloween Graveyard Dirt Cups are easy, tasty and a fun recipe that gets everyone involved.
Prep Time: 20 minutes
Cook Time: 35 minutes
Total Time: 55 minutes
Yields: 6 servings
Author: Brandie Skibinski
Print Recipe
Pin Recipe
Ingredients
- 1 (9×13-inch) pan of baked brownies (from a box mix, store-bought, or homemade)
- 1 (5.9 ounce) box instant chocolate pudding mix
- 3 cups cold milk
- 20 Oreo Cookies
- 6 Pepperidge Farm Milano cookies
- Prepared brown frosting (from a cookie frosting tube or piping bag)
- Prepared green frosting (from a cookie frosting tube or piping bag)
- Mellowcreme pumpkin candies (for decoration)
Instructions
- In the bottom of 6 disposable clear cups, fill the cups halfway up with crumbled brownies.
- Next, mix the instant chocolate pudding with the cold milk in a bowl and stir until well combined. Let sit for 5 minutes to thicken.
- Divide the thickened pudding evenly between the 6 cups, spooning it over the brownie layer.
- In a food processor, crush the Oreo cookies until they are fine crumbs (or use a zip-top bag and a rolling pin).
- Spoon the Oreo cookie crumbs all over the top of each cup, creating the “dirt” layer.
- Using the prepared brown frosting, pipe the words “R.I.P” and “Boo” onto the Milano Cookies. If using a piping bag, cut a very small corner for precise writing.
- Place one Milano “tombstone” upright into the Oreo “dirt” in each cup.
- Decorate with a couple of mellowcreme candy pumpkins in each cup and use the prepared green frosting to pipe “grass” on top around the tombstones and pumpkins. Serve immediately.
Notes
- You can use homemade, store-bought, or a boxed brownie mix for your brownies. For boxed mixes, look for a “family” size.
- I recommend breaking up the brownies into crumbles before scooping them into the cups for easier layering.
- Ensure you use instant chocolate pudding mix, not the “cook and serve” variety, as it thickens much faster.
- Store-bought cookie frosting tubes often come with decorating tips, making the piping of words and grass much easier. Try to find both brown and green colors.
- Milano cookies are ideal for tombstones due to their shape, but any plain, rectangular cookie will work as a substitute if Milano cookies are unavailable.
- The cups used in this recipe are typically 9-ounce clear plastic cups (e.g., Chinet Crystal brand). Adjust the number of servings if using different cup sizes.
Nutrition
Calories: 783kcal | Carbohydrates: 133g | Protein: 12g | Fat: 24g | Sodium: 943mg | Fiber: 2g | Sugar: 86g
Nutritional Disclaimer
“The Country Cook” is not a dietician or nutritionist, and any nutritional information shared is an estimate. If calorie count and other nutritional values are important to you, we recommend running the ingredients through whichever online nutritional calculator you prefer. Calories and other nutritional values can vary quite a bit depending on which brands were used.
Did you make this recipe?
Share your creation on Instagram @thecountrycook and mention us #thecountrycook! We’d love to see your spooky masterpieces!
