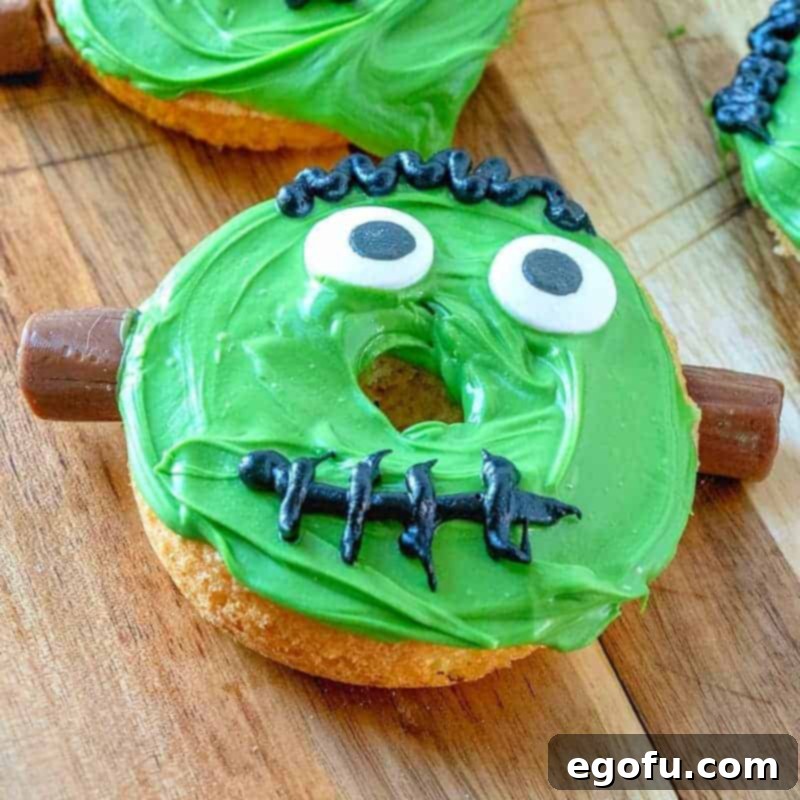
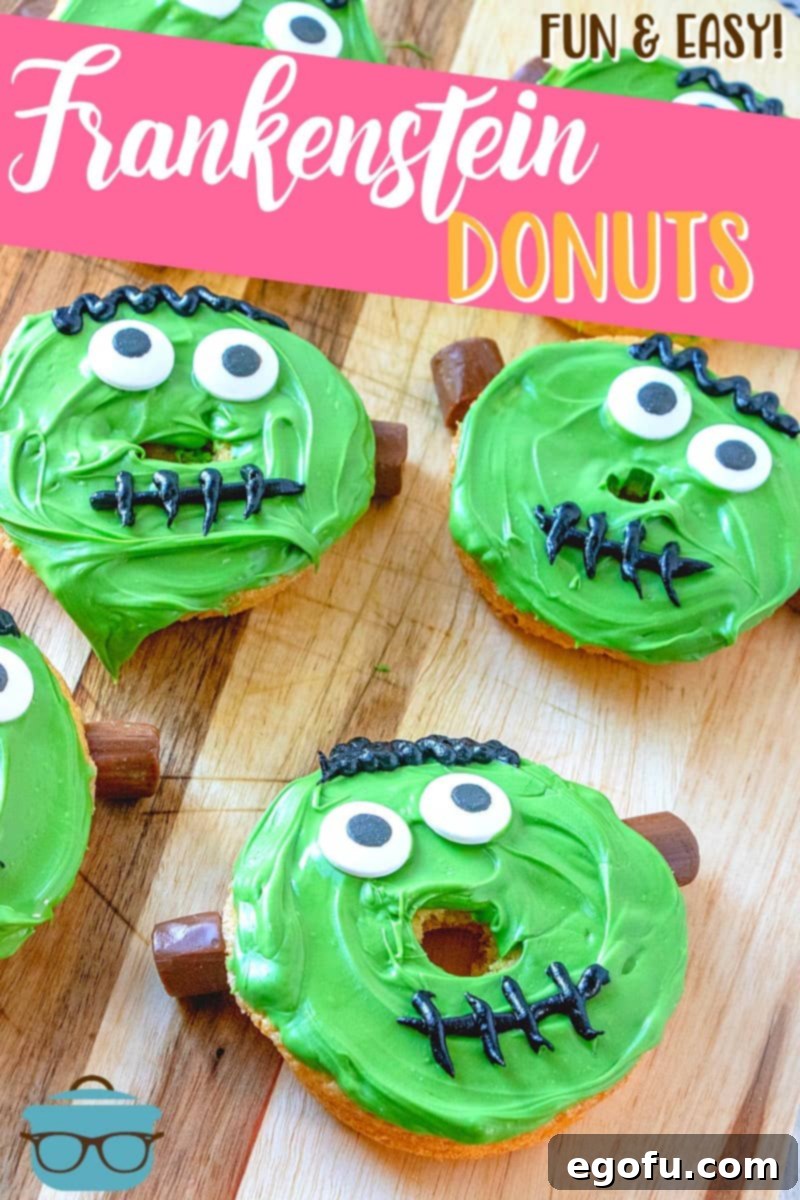
Get ready for a treat that’s more sweet than spooky! Our **Frankenstein Donuts** are the ultimate Halloween delight, perfect for bringing smiles to both little monsters and grown-up ghouls. Whether you’re a seasoned baker or just looking for a quick and fun activity, these adorable donuts offer incredible versatility. You can whip them up from scratch with a homemade doughnut batter, simplify things with a convenient cake mix, or even transform plain store-bought doughnuts into these iconic green creatures. This comprehensive guide will walk you through every step, ensuring your Halloween festivities are deliciously memorable and a hit with everyone.
Unleash Your Inner Mad Scientist: A Fun & Easy Halloween Treat for Everyone!
Halloween is all about embracing the playful side of the eerie, and what could be more charming than a friendly Frankenstein monster? These donuts are designed for maximum fun with minimal fuss, making them an ideal project for non-decorators, busy parents, and anyone looking for a creative outlet this spooky season. Forget the elaborate, time-consuming decorations; our Frankenstein Donuts are a “cheater” treat that delivers big on visual appeal without the stress. They’re wonderfully whimsical, making them a fantastic addition to any Halloween party spread, school lunchbox, or simply as a delightful snack while enjoying your favorite spooky movies.
The beauty of these monster donuts lies in their simplicity and versatility. They are genuinely fun to create and absolutely not scary, ensuring everyone, from the tiniest trick-or-treater to the oldest Halloween enthusiast, can enjoy a bite without a fright. Plus, involving kids in the decorating process is a fantastic way to create lasting holiday memories. Imagine their delight as they bring their very own green-faced monsters to life!
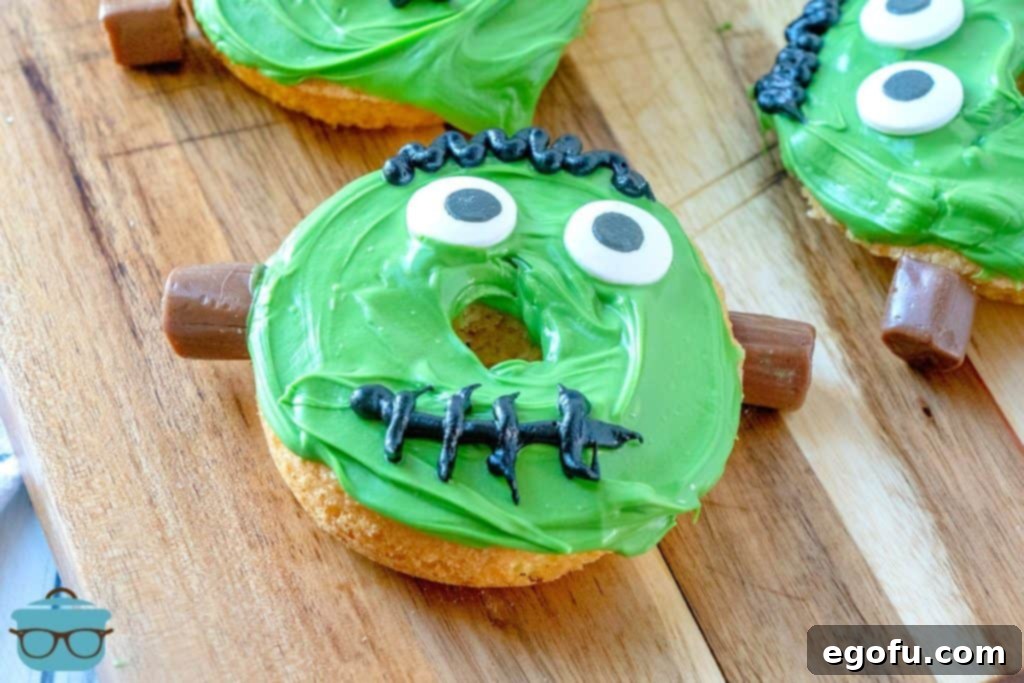
Baking from Scratch vs. The Ultimate Shortcut: Homemade or Store-Bought Donuts?
Absolutely, you can use store-bought doughnuts – and we heartily encourage it! One of the fantastic aspects of this Frankenstein Donut recipe is its incredible flexibility, catering to every level of baking enthusiasm and time constraint. Whether you love the aroma of freshly baked goods filling your kitchen or prefer to streamline your holiday preparations, there’s a perfect path for you to create these monstrously cute treats.
Embracing the Bake: Homemade Donuts with a Cake Mix Shortcut
For those who enjoy the process of baking but appreciate a good shortcut, using a boxed cake mix is your best friend. It’s a fantastic “cheat” that ensures consistently delicious and moist donuts every time, without the need for complex scratch recipes. Donut baking pans are relatively cheap to purchase and incredibly fun to use. They allow you to create baked donuts, which are often a lighter alternative to their fried counterparts.
Simply follow the recipe instructions below, which are perfectly tailored for a standard cake mix, and you’ll have perfectly shaped donuts ready for decorating in no time. Don’t be afraid to experiment with different cake mix flavors, either! A chocolate cake mix could make for a darker, moodier Frankenstein, or a vanilla mix could provide a neutral base for a vibrant green. You could even try a funfetti cake mix for an unexpected burst of color inside your monster. The possibilities are endless, allowing you to customize your spooky creations to your heart’s content and suit any taste preference.
The Easiest Route: Decorating Store-Bought Plain Donuts
For the ultimate stress-free Halloween treat, bypass the baking entirely and head straight to your local grocery store. Look for plain, cake-style donuts – these work exceptionally well as they provide a sturdy base and a smooth surface for your green candy melt “skin.” While glazed donuts can work in a pinch, a plain cake donut will give you the cleanest, most authentic Frankenstein look. The texture of cake donuts also holds up beautifully to the candy coating and subsequent decorations.
This method is especially ideal for last-minute party preparations, when you’re short on time, or when involving very young children in the decorating process. It transforms a simple, ready-made dessert into a festive masterpiece with minimal effort, proving that you don’t need to be a pastry chef to create memorable Halloween fun. Just grab a dozen or two, and you’re halfway to a spooky spectacle!
Gather Your Mad Scientist Supplies: Essential Ingredients for Frankenstein Donuts
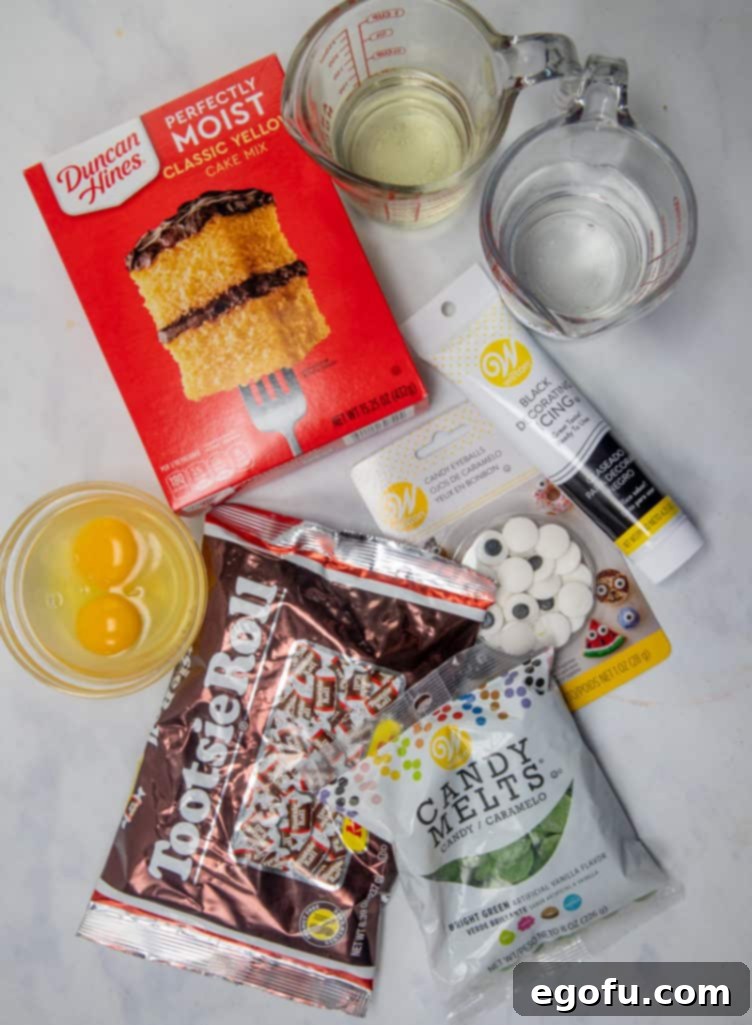
Before you embark on your creative journey to bring these friendly monsters to life, make sure you have all your ingredients ready. Having everything prepped and measured makes the process smooth and enjoyable. The full, detailed recipe card with exact measurements is conveniently provided at the bottom of this post, but here’s a quick overview of what you’ll need to transform ordinary donuts into extraordinary, eye-catching monsters:
- **Cake Mix (15.25 ounce box, any flavor):** This serves as the incredibly convenient base for your baked donuts. Choose a vanilla or yellow cake mix for a classic donut taste, or chocolate for a deeper flavor profile.
- **Large Eggs (2):** Essential for binding the ingredients together, adding structure, and contributing to the richness and moisture of your donut batter.
- **Water (⅔ cup):** Used to achieve the perfect batter consistency, ensuring your baked donuts are light, airy, and fluffy.
- **Vegetable Oil (⅓ cup):** Adds additional moisture and helps in creating a tender crumb for your baked donuts, giving them that irresistible soft texture.
- **Green Candy Melts (12 ounce bag):** The star ingredient for creating Frankenstein’s iconic green complexion. These special confectionery melts are designed to melt smoothly and harden quickly, providing a beautiful, even coating.
- **Black Ready-to-Use Icing (10 ounce bottle):** Comes in a convenient squeeze bottle or tube, making it incredibly easy to draw Frankenstein’s jagged hair and stitched mouth with precision and control.
- **Large Candy Eyeballs (2.5 ounce container):** These edible eyes are what truly bring your Frankenstein monsters to life, giving them a whimsical and friendly gaze.
- **Tootsie Rolls (18 pieces):** These classic chewy candies are cleverly transformed into the signature bolts on the sides of Frankenstein’s neck, adding a unique, edible detail that’s both fun and delicious.
Step-by-Step Guide: How to Make (and Decorate!) Frankenstein Donuts
Let’s get started on bringing these adorable monsters to life! Follow these simple instructions for baking homemade donuts. If you’re using store-bought donuts, you can skip straight to step 5 for the decorating process.
1. Prepare Your Donut Pan and Preheat Oven
Begin by preheating your oven to 350°F (175°C). Ensuring your oven is at the correct temperature from the start is key for even baking and perfectly risen donuts. Next, take your donut pan and generously spray each cavity with a nonstick cooking spray. A well-greased pan is crucial for easy removal of your freshly baked donuts and helps prevent them from sticking, thus maintaining their perfect ring shape. Don’t skimp on this step – thorough greasing will save you headaches later!
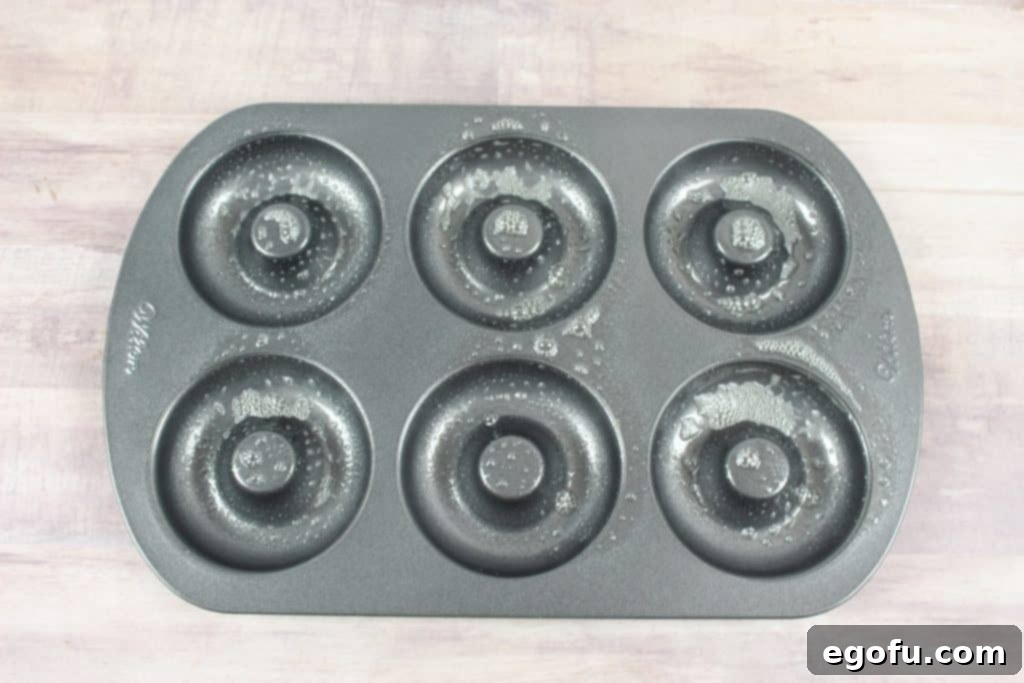
2. Mix the Donut Batter Until Smooth
In a large mixing bowl, combine the boxed cake mix, water, vegetable oil, and eggs. Using an electric mixer on medium speed or a sturdy whisk, mix these ingredients until the batter is smooth and well combined. It’s important to mix until just combined, being careful not to overmix, as this can develop the gluten too much and lead to tougher, less tender donuts. A few small lumps are perfectly fine and will bake out as the donuts rise in the oven.
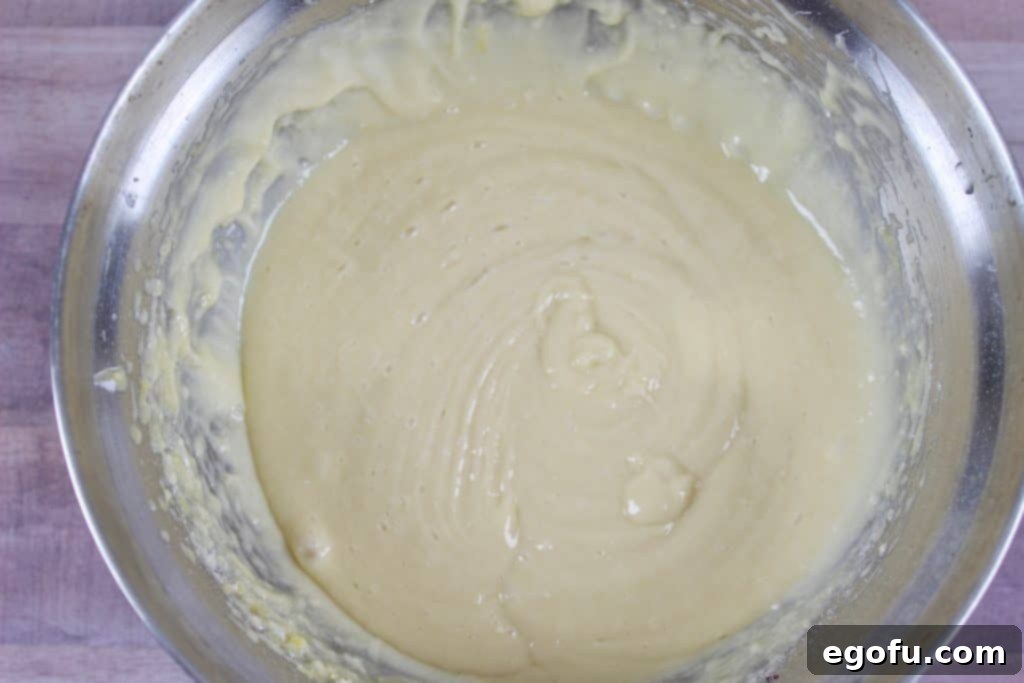
3. Carefully Fill the Donut Pan Cavities
Pour the donut batter into the prepared donut pan. A helpful trick to avoid a mess and ensure even filling is to transfer the batter into a piping bag (with the tip snipped off), a large Ziploc bag with one corner cut, or simply use a measuring cup or a spoon with a spout. Fill each donut cavity about two-thirds of the way full. This precise filling level is crucial; it allows ample room for the donuts to rise without overflowing and ensures they maintain that classic donut shape with a distinct hole. Overfilling can lead to misshapen donuts that might lose their central hole!
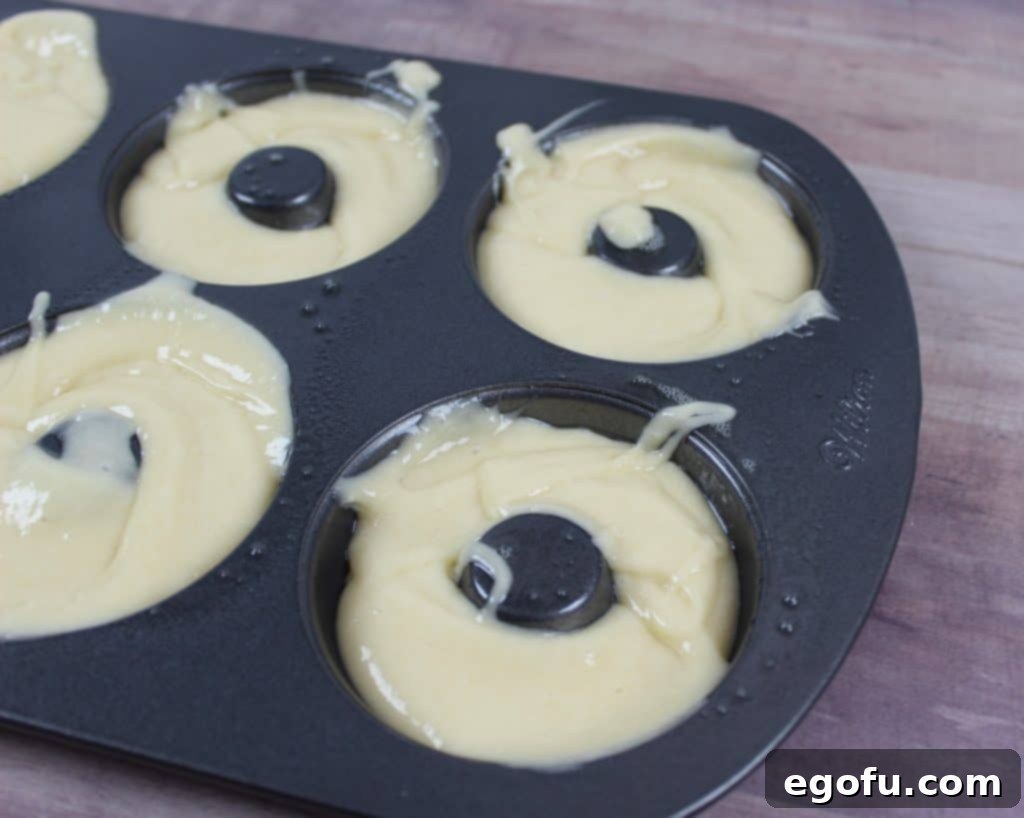
4. Bake to Golden Perfection and Cool Properly
Bake the donuts for 12-15 minutes, or until they are lightly golden brown and spring back when gently touched in the center. The exact baking time may vary slightly depending on your oven, so it’s always a good idea to keep a close eye on them towards the end. Once baked, remove the pan from the oven and let the donuts cool in the pan for about 5 minutes. This initial cooling period in the pan helps them firm up. Then, carefully transfer them to a wire rack to cool completely. Complete cooling is vital before decorating, as warm donuts will cause the candy melts to run and not set properly. Continue this process until all your batter is used and all your donuts are baked.
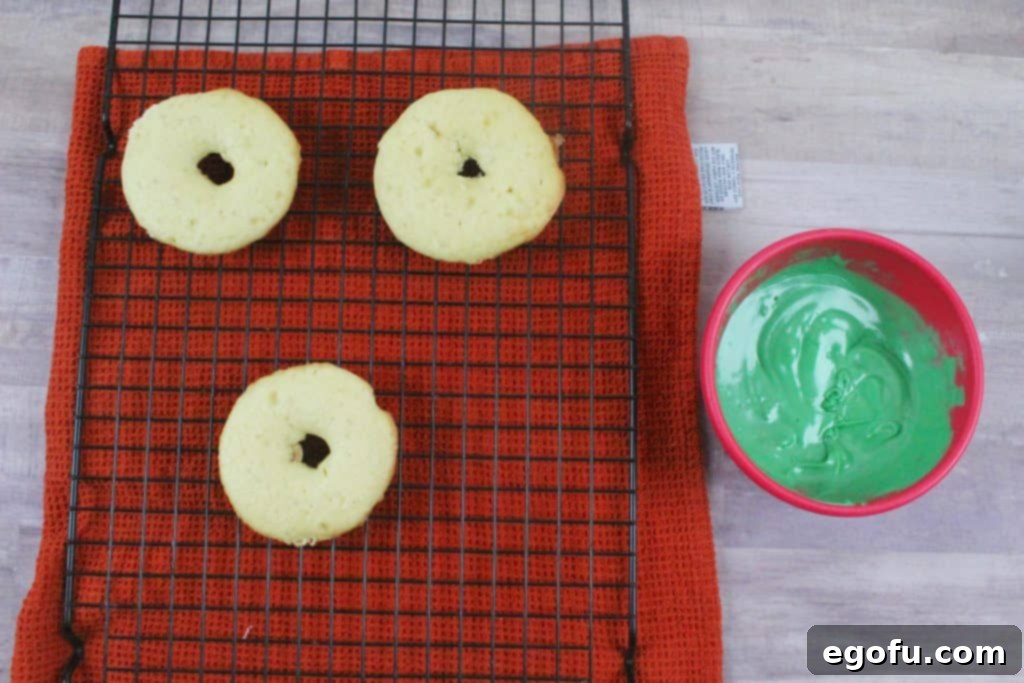
5. Melt the Vibrant Green Candy Melts
Following the package directions carefully, melt the green candy melts. This can typically be done in the microwave in 30-second intervals, stirring thoroughly in between each interval, until the candy is smooth and fluid. Be cautious not to overheat the candy melts, as they can seize up and become lumpy or unusable. Alternatively, you can use a double boiler method for a more controlled and gentle melting process, which is often preferred for a perfectly smooth consistency. Have your cooled donuts ready once the candy is melted.
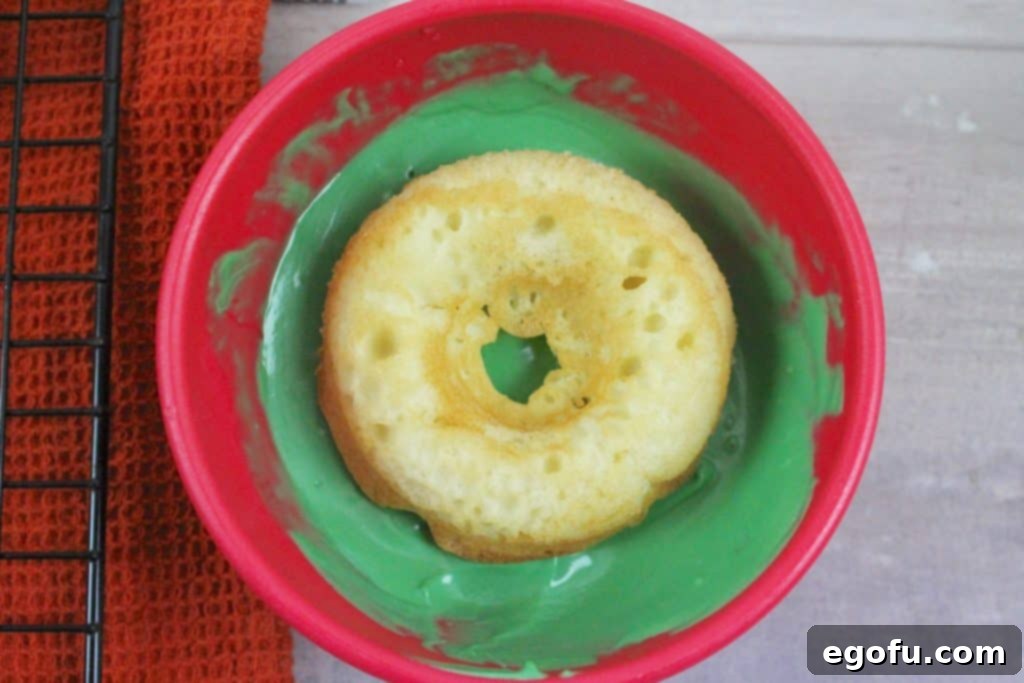
6. Dip and Allow the Green Coating to Set
Once the green candy melts are perfectly smooth, dip the top half of each cooled donut into the melted green candy. Ensure a good, even coating. Allow any excess candy to drip off back into the bowl before carefully placing the dipped donut onto a piece of parchment paper or a wire rack set over a baking sheet. The parchment paper will prevent sticking and the baking sheet will catch any drips, making cleanup a breeze. While the candy coating is still wet and tacky, you’ll need to proceed to the next step quickly to ensure your decorations adhere properly!
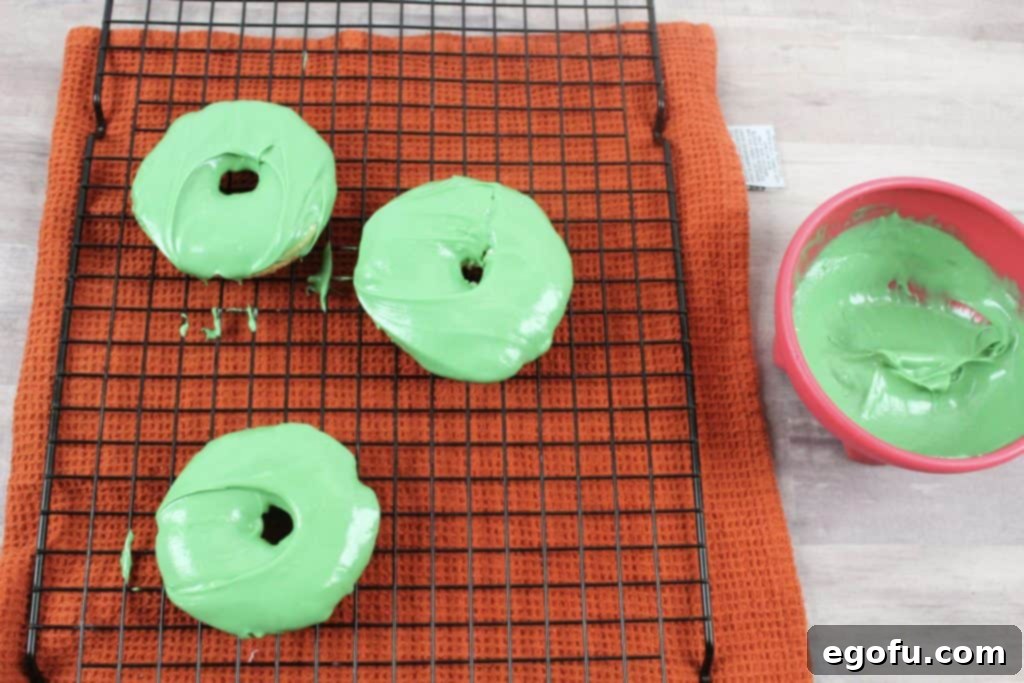
7. Add the Playful Candy Eyeballs
Immediately after dipping each donut, while the green candy melts are still soft and sticky, carefully place two candy eyeballs just above the donut hole (or where the hole would be for store-bought, filled donuts). The melted candy will act as a natural adhesive, securing the eyes firmly in place as it cools. Press gently but firmly to ensure they adhere well and don’t fall off later. These eyes are what truly give your Frankenstein donuts their charming personality!
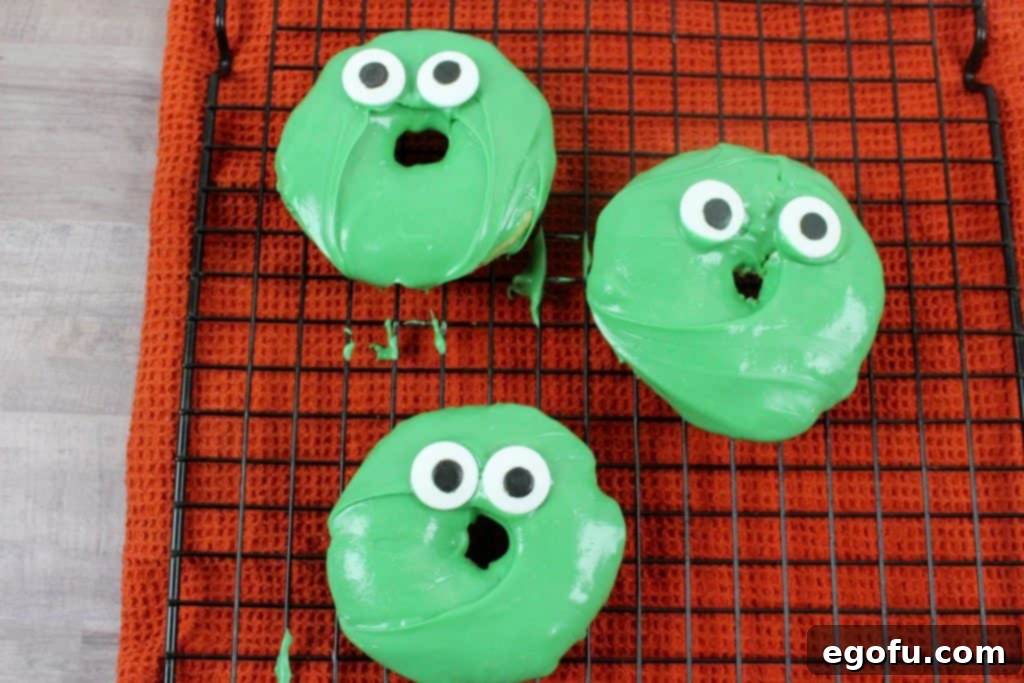
8. Create Hair, Mouth, and Iconic Bolts
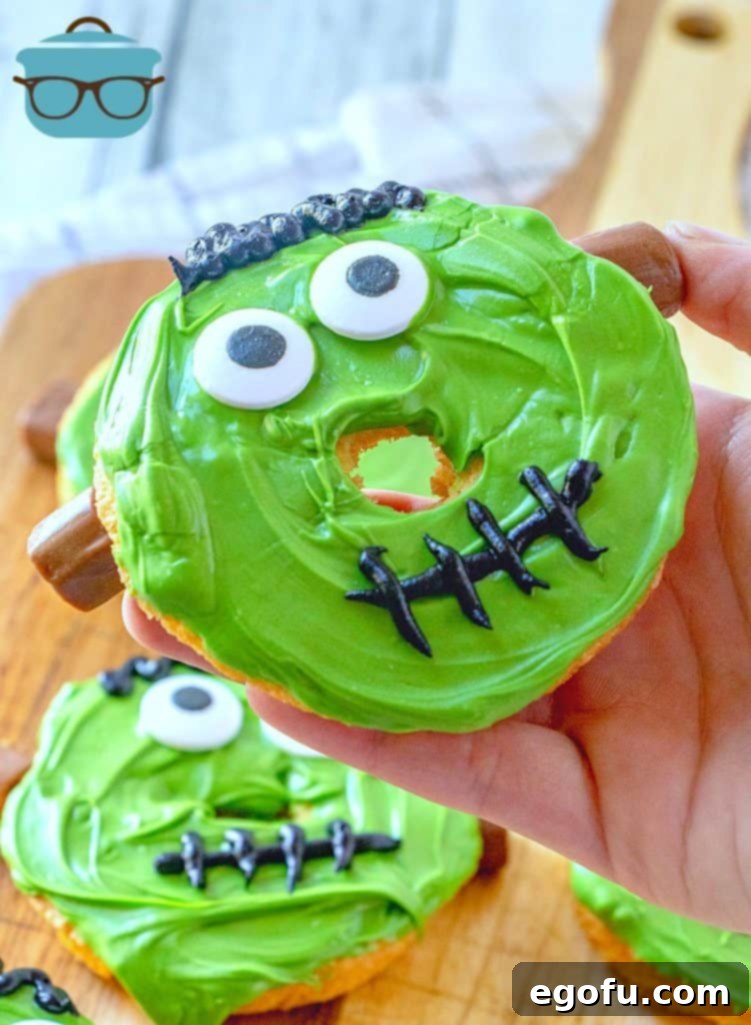
Once the green coating and eyeballs have had a chance to set (you can speed this up by placing the donuts in the fridge for 5-10 minutes), it’s time for the final touches! Use the black ready-to-use icing to draw on Frankenstein’s signature features. Pipe a jagged hairline above the eyes to give him a classic monster look. Then, draw a simple, slightly crooked stitched mouth under the donut hole for a friendly, playful grimace. For his iconic neck bolts, take a Tootsie Roll, cut it in half crosswise, and gently press one half into each side of the donut. The softness of the Tootsie Roll allows it to stick easily and hold its position. And just like that, your friendly, monstrously delicious Frankenstein Donuts are complete and ready to be devoured!
Tips for Spooktacular Success and Creative Variations
Making Frankenstein Donuts is already a blast, but these extra tips and creative ideas can help you elevate your Halloween baking and decorating game even further, ensuring a truly memorable and delicious experience for everyone:
- **Troubleshooting Candy Melts:** If your green candy melts are too thick after melting and difficult to dip smoothly, you can add a small amount of vegetable shortening or coconut oil (start with ½ to 1 teaspoon at a time) and stir thoroughly until you reach a smoother, more fluid consistency. This will help them coat the donuts more easily and evenly.
- **Piping Bag Alternative:** Don’t have a dedicated piping bag for filling the donut batter or applying the black icing? No problem! A sturdy Ziploc bag with one corner snipped off (a small cut for icing, a larger cut for batter) works just as effectively.
- **Optimal Storage:** To keep your Frankenstein Donuts fresh and delicious, store them in an airtight container at room temperature for up to 2-3 days. If your kitchen is particularly warm, or if you want to extend their freshness slightly, you might consider refrigerating them. However, for the best texture and flavor, bring them back to room temperature before serving.
- **Make Ahead Strategy:** To reduce stress on Halloween day, you can bake the plain donuts a day in advance and store them in an airtight container. Then, simply decorate them the day of your event for the freshest and most vibrant results.
- **Creative Monster Mash-up:** Why stop at just Frankenstein? Use different colored candy melts (think purple, orange, white, or even red) and various candies (mini chocolate chips, sprinkles, M&Ms) to create a whole assortment of friendly monsters. Imagine mummies made with white chocolate and thin icing lines, vampires with red icing fangs, or one-eyed monsters with a single large candy eye!
- **Add Some Sparkle:** Before the green candy melts fully set, you could sprinkle some fun Halloween-themed sprinkles (like bats, ghosts, or classic orange and black) on top for added texture, glimmer, and festive appeal.
- **Edible Markers for Detail:** For older kids or if you desire more precise details like tiny stitches, eyebrows, or scars, edible food markers can be a fantastic tool. Use them after the green coating has completely set and hardened for clean lines.
- **Different Donut Base:** While cake donuts are recommended, you can also experiment with yeast donuts if you prefer that lighter, chewier texture. Just ensure they are plain and completely cooled before dipping.
Why These Frankenstein Donuts Are a Must-Make This Halloween
These Frankenstein Donuts aren’t just a treat; they’re an experience that captures the very essence of Halloween. They embody the holiday spirit: fun, creative, and just a little bit whimsical. They are simple enough for beginner bakers, incredibly engaging for families looking for a delightful holiday activity, and impressive enough to be the star attraction of any Halloween party dessert table.
The combination of moist, cake-like donuts (whether homemade or store-bought) with a sweet, vibrant candy coating and playful, edible decorations makes them utterly irresistible. Plus, the ease of customization – from choosing your donut base to experimenting with different monster faces and accessories – ensures that each batch can be uniquely yours. These donuts are a testament to how effortless and enjoyable holiday baking can be, providing maximum festive impact with minimal stress.
So, gather your ingredients, call your little helpers, and get ready to create some monstrously delicious memories this Halloween. These Frankenstein Donuts are guaranteed to be a hit and quickly become a cherished tradition in your spooky season celebrations!
CRAVING MORE SPOOKY HALLOWEEN RECIPES?
If these Frankenstein Donuts have awakened your inner Halloween spirit and you’re ready for more frightfully fun food, you’re in luck! We have a cauldron full of other fantastic recipes to make your holiday extra special, covering everything from sweet treats to savory bites. Explore these other terrifyingly tasty dishes and broaden your Halloween menu:
- 20 Ultimate Halloween Recipes
- Spooky Halloween White Trash Mix
- Bewitching Witch Hat Cookies
- Creepy-Crawly Spider Oreos
- Mummy Jalapeno Poppers (Savory!)
- Witches Brew Snack Bags
- Layered Candy Corn Pudding Parfaits
- Graveyard Pudding Cups
- Poisoned Apple Jell-O Shots (Adult Treat!)
- Mummy Meatloaves (Dinner Fun!)
- Hocus Pocus Jell-O Shots
- Frankenstein Cookies
- Frankenstein Pudding Cups

Frankenstein Donuts
(Based on 2 Reviews)
Print Recipe
Pin Recipe
15 minutes
15 minutes
30 minutes
18
Brandie Skibinski
Ingredients
- 15.25 ounce boxed cake mix (any flavor)
- 2 eggs
- ⅔ cup water
- ⅓ cup vegetable oil
- 12 ounce bag green candy melts
- 10 ounce bottle black ready-to-use icing
- 2.5 ounce container large candy eyeballs
- 18 Tootsie Rolls
Instructions
- Preheat oven to 350°F (175°C). Spray donut pan generously with nonstick cooking spray.
- In a large bowl, mix the cake mix, water, vegetable oil, and eggs until smooth. Do not overmix.
- Pour the batter into the donut pan, filling each cavity about two-thirds full. Use a piping bag or spoon for easier filling.
- Bake for 12-15 minutes, or until golden brown. Let cool in the pan for 5 minutes, then transfer to a wire rack to cool completely. Repeat for all donuts.
- Melt green candy melts in the microwave according to package directions until smooth and fluid.
- Dip the top of each cooled donut into the melted green candy melts. Let excess drip off.
- Immediately place two candy eyeballs above the donut hole while the green coating is still wet.
- Once the green coating has set, use the black icing to create jagged hair above the eyes and draw a mouth under the donut hole.
- Cut Tootsie Rolls in half and gently stick one half into each side of the donut to create Frankenstein’s bolts. Enjoy your monstrously cute treats!
Video Tutorial
Notes
- For a super quick shortcut, simply use store-bought plain cake donuts and jump straight to the decorating steps!
- If candy melts are too thick, stir in a small amount of vegetable shortening or coconut oil (½ – 1 tsp) until desired consistency is reached.
- To speed up the setting of the green candy melts, place the dipped donuts in the refrigerator for 5-10 minutes.
Dessert
American
Nutrition
Calories: 279kcal
|
Carbohydrates: 35g
|
Protein: 1g
|
Fat: 14g
|
Sodium: 71mg
|
Sugar: 32g
Nutritional Disclaimer
“The Country Cook” is not a dietician or nutritionist, and any nutritional information shared is an estimate. If calorie count and other nutritional values are important to you, we recommend running the ingredients through whichever online nutritional calculator you prefer. Calories and other nutritional values can vary quite a bit depending on which brands were used.
Did you make this recipe?
Share it on Instagram @thecountrycook and mention us #thecountrycook!
