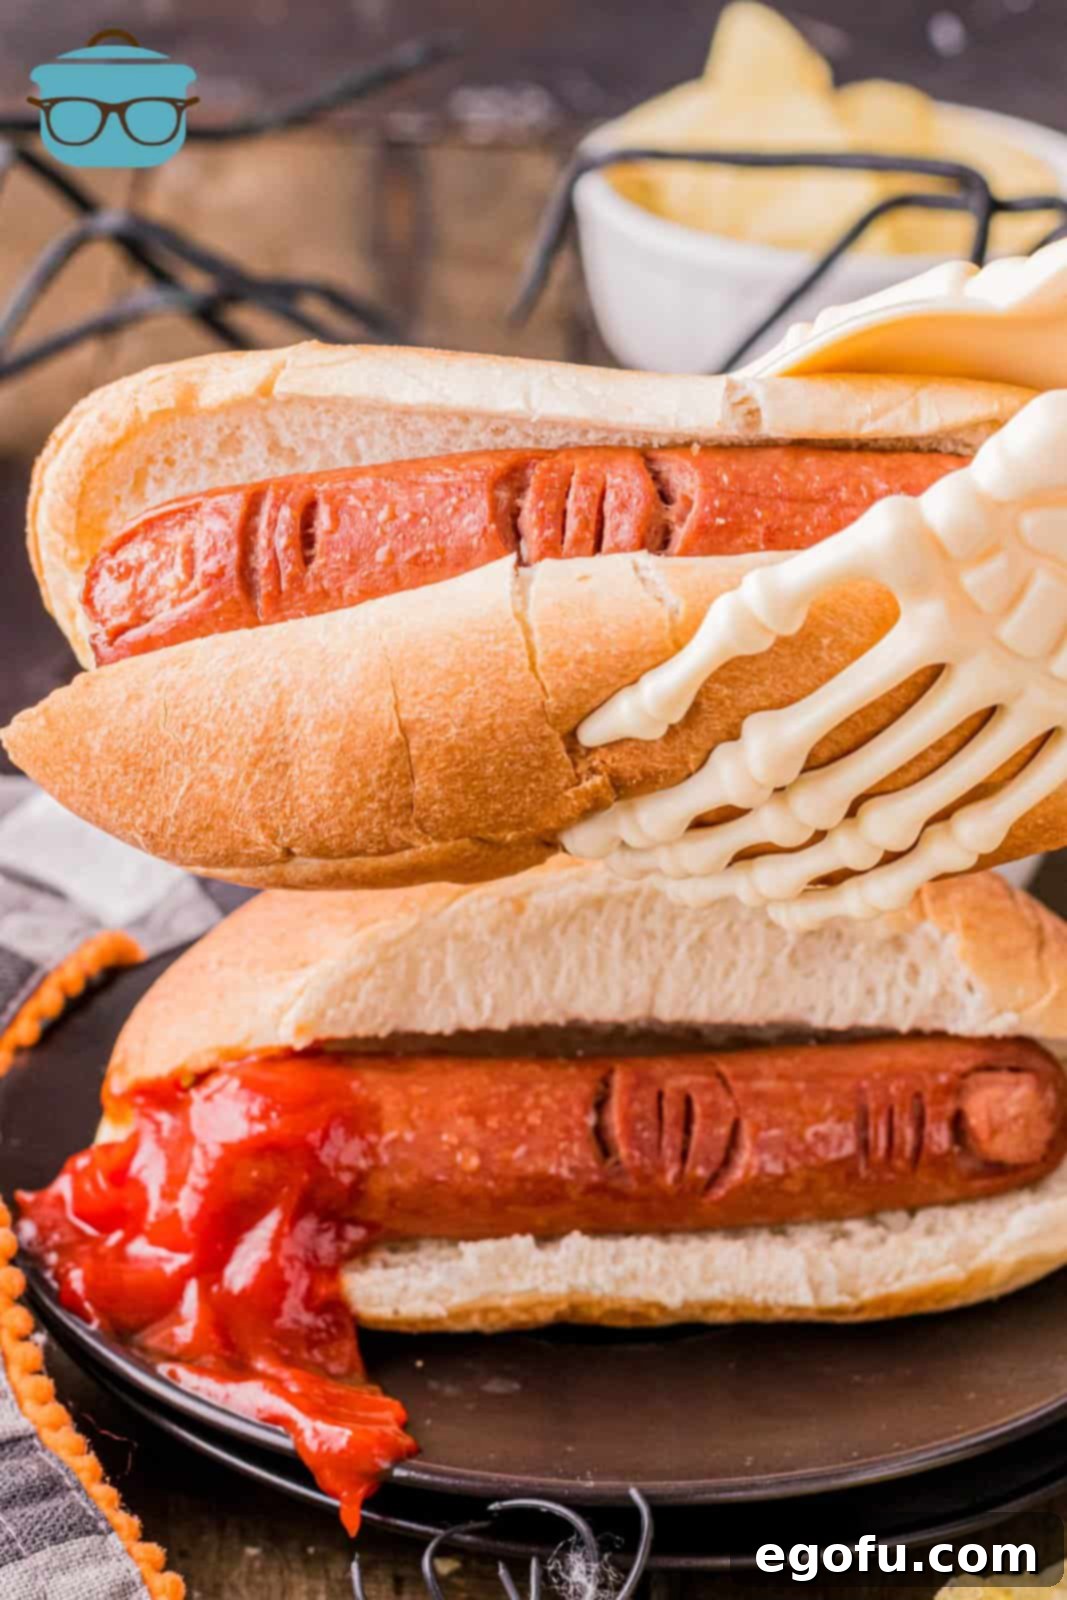
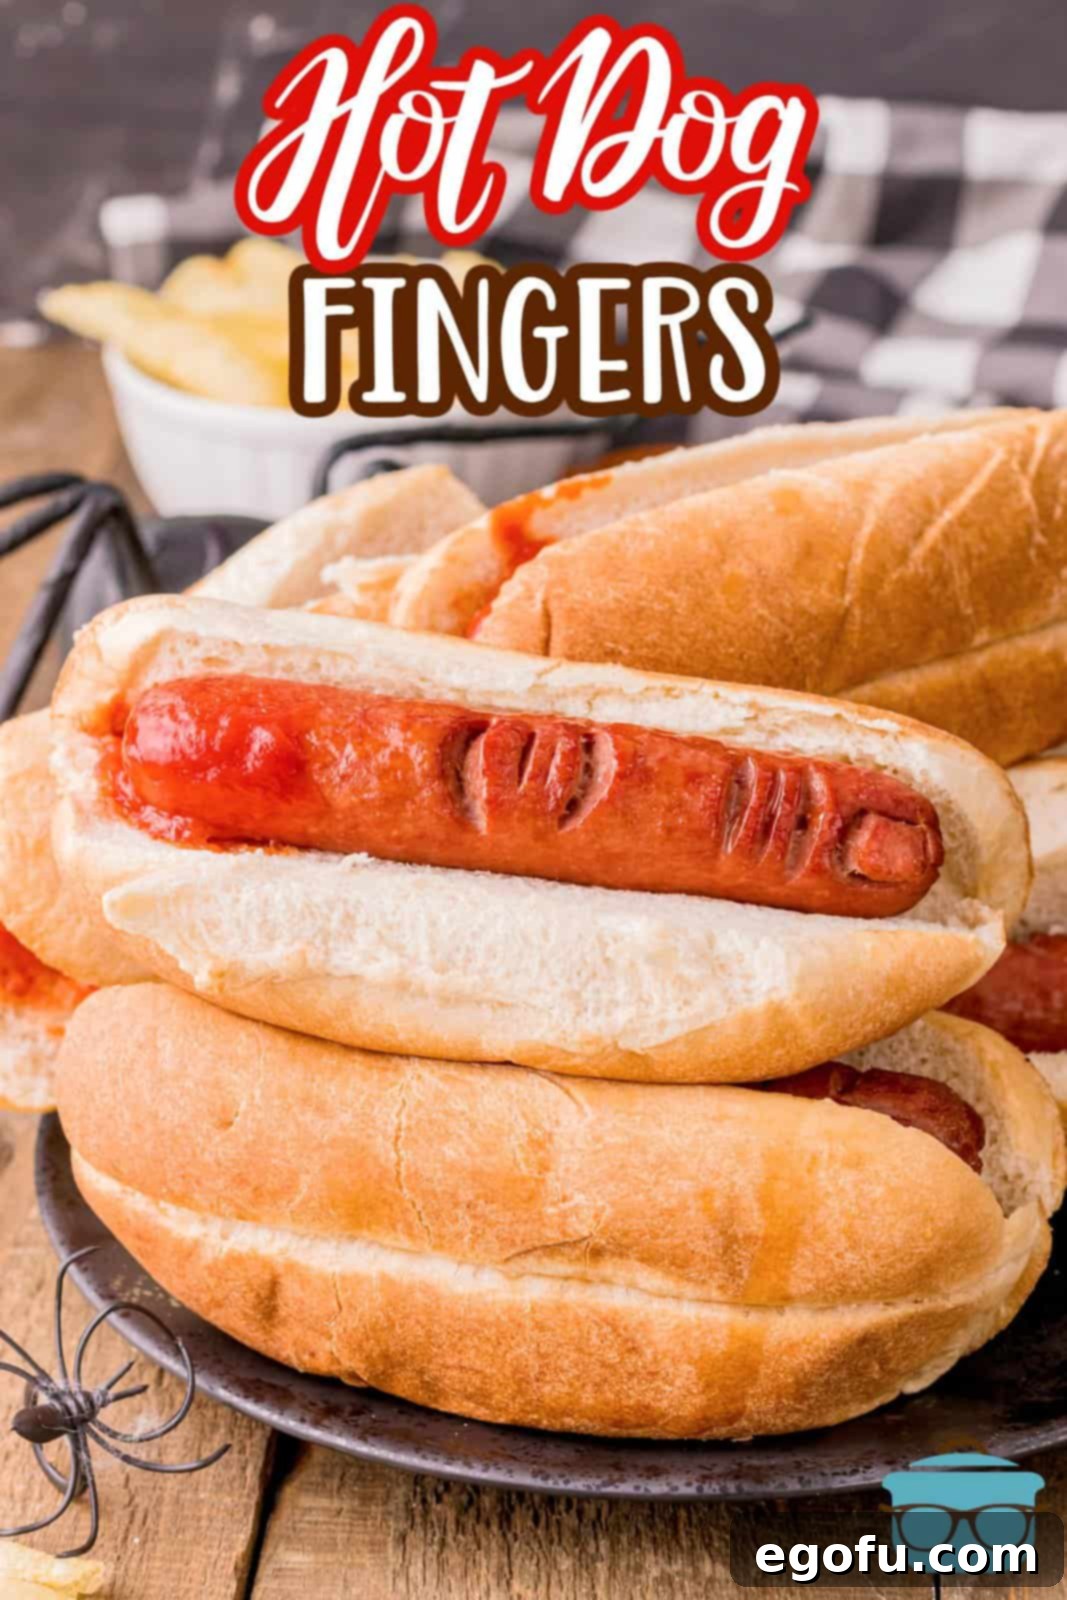
Get ready for a wickedly fun and delightfully spooky meal! These Halloween Hot Dog Fingers are incredibly easy to create and perfectly gruesome for your upcoming holiday celebrations. They’re sure to be a creepy hit with both kids and adults!
Spooky & Easy Halloween Hot Dog Fingers: The Ultimate Fun Meal
As the leaves change and the air turns crisp, the spirit of Halloween fills the atmosphere, bringing with it a craving for all things spooky and delicious. While ghosts and goblins might roam the streets, we’re bringing the spooky fun right into your kitchen with a recipe that’s as simple as it is ghoulish: Halloween Hot Dog Fingers! Forget the complex Halloween spreads – this creative twist on a classic comfort food promises maximum impact with minimal effort, making it the perfect treat for any Halloween gathering or a frightfully fun family dinner.
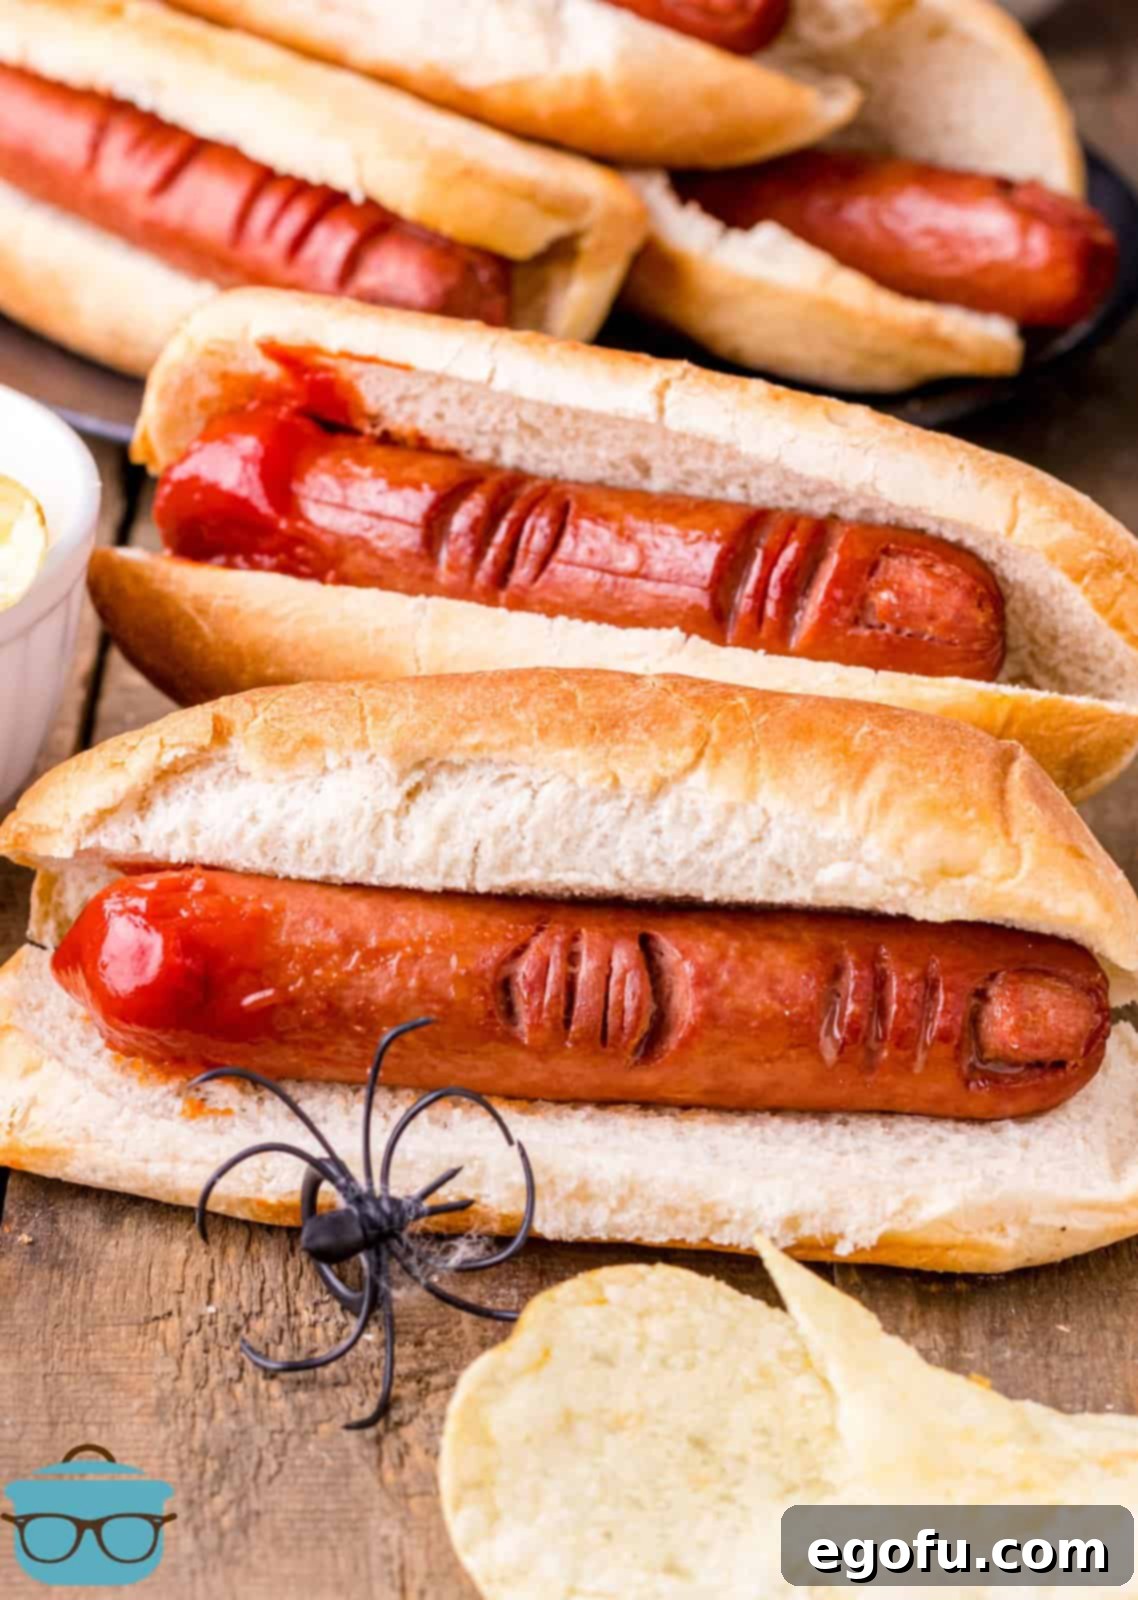
Who doesn’t love a good hot dog? They’re a staple for barbecues, picnics, and quick meals, enjoyed by almost everyone. But when October rolls around, it’s time to elevate our everyday favorites into something extraordinary. With just a few strategic cuts and a touch of creative plating, these ordinary hot dogs transform into deliciously “severed” fingers, complete with gruesome “nails” and realistic “knuckles.” Add a generous dollop of ketchup – the essential “blood” – and nestle them into warm hot dog buns, and you’ve got yourself a tasty yet terrifying meal that will elicit gasps and giggles from everyone at the table. This Halloween Hot Dog Finger recipe isn’t just a meal; it’s an experience, a simple and engaging culinary craft that everyone will love making and enjoying!
Why Hot Dog Fingers Are Your Go-To Halloween Treat
In the vast landscape of Halloween party food, the goal is often to strike a balance between spooky aesthetics and palatable deliciousness. Many intricate Halloween recipes can be time-consuming and challenging, often leaving you exhausted before the party even begins. That’s where Halloween Hot Dog Fingers shine! This recipe is a brilliant example of how simple ingredients can create a truly memorable and impressive dish. It’s a fantastic activity to involve children in the kitchen, letting them help with the “gross” details (under supervision, of course!). The visual appeal is undeniable – those realistic cuts, enhanced by the vibrant “blood” of ketchup, make for an unforgettable presentation that’s perfect for Instagram-worthy party pictures. It’s not just food; it’s a conversation starter, a centerpiece, and a testament to the fact that Halloween food can be both spooky and supremely satisfying.
Frequently Asked Questions: Your Guide to Perfect Hot Dog Fingers
The beauty of this recipe is its flexibility! You can certainly use any of your favorite type or brand of hot dogs. However, for the most realistic and impressive “finger” effect, we highly recommend using a larger, all-beef hot dog. Brands like Nathan’s or Ball Park hot dogs work exceptionally well because their size provides more surface area for carving the details, and their texture holds up beautifully during the cooking process, ensuring those gruesome cuts remain visible and distinct. A thicker hot dog also allows for easier and safer carving, reducing the risk of cutting all the way through.
While grilling is a fantastic way to cook hot dogs and infuse them with a smoky flavor, it might not be the best method if you’re aiming for maximum realism with your Halloween Hot Dog Fingers. Grilling will inevitably leave grill marks, which can detract from the “flesh-like” appearance you’re trying to achieve. For the most authentically gross and realistic look, we suggest sticking to boiling followed by a quick pan-fry. These methods ensure an even color and a slightly blistered skin, which really makes the carved features pop and enhances the creepy factor!
Absolutely! The air fryer is a convenient and quick way to cook your hot dogs. While the air fryer might not get quite as dark and “crispy” around the cut areas as pan-frying would, it will still work perfectly to cook them through and add some color. To use an air fryer, cook your hot dogs at 390°F (199°C) for 4-5 minutes. There’s no need to boil them first when using this method, and you typically don’t need to preheat your air fryer either, saving you time and effort.
Yes, definitely! This recipe is incredibly scalable, so you can absolutely make as many of these Halloween Hot Dog Fingers as you’d like to feed your hungry hoard of monsters and goblins. If you’re preparing a very large batch, you might just need to cook them in several batches, especially if you’re pan-frying, to ensure they cook evenly and get that desired golden finish without overcrowding your pan or air fryer.
If by some miracle you have any leftover Halloween Hot Dog Fingers (they tend to disappear quickly!), they can be stored in an airtight container in the refrigerator. They will keep well for 3-4 days. For longer storage, you can also freeze these cooked hot dogs. Simply place them in a freezer bag or an appropriate freezer-safe container, and they will keep for up to 1 month. To defrost, transfer them to the refrigerator overnight. You can then reheat them in the microwave until they are thoroughly warmed through, or even give them a quick pan-fry for a slightly crisper texture.
Yes! Many brands now offer excellent vegetarian or vegan hot dog alternatives that would work wonderfully in this recipe. Just ensure the vegetarian hot dogs you choose are firm enough to hold their shape during the carving process. Follow the same cutting and cooking instructions, adjusting cooking times if necessary based on the package directions for your chosen plant-based hot dogs.
While ketchup is the classic choice for its color and convenience, you can get creative with other red sauces! Sriracha or a spicy chili sauce can add a kick for adult palates. For a milder option, use a blend of tomato paste and a little water, or even a thinned-out barbecue sauce. For a truly unique and spooky twist, a drizzle of beet juice could provide an unnervingly realistic crimson hue!
Ingredients & Essential Tools for Your Spooky Creation
Gathering your ingredients and tools is the first step toward crafting these terrifyingly tasty treats. You’ll be surprised at how few items you actually need to achieve such a dramatic effect!
Ingredients Needed:
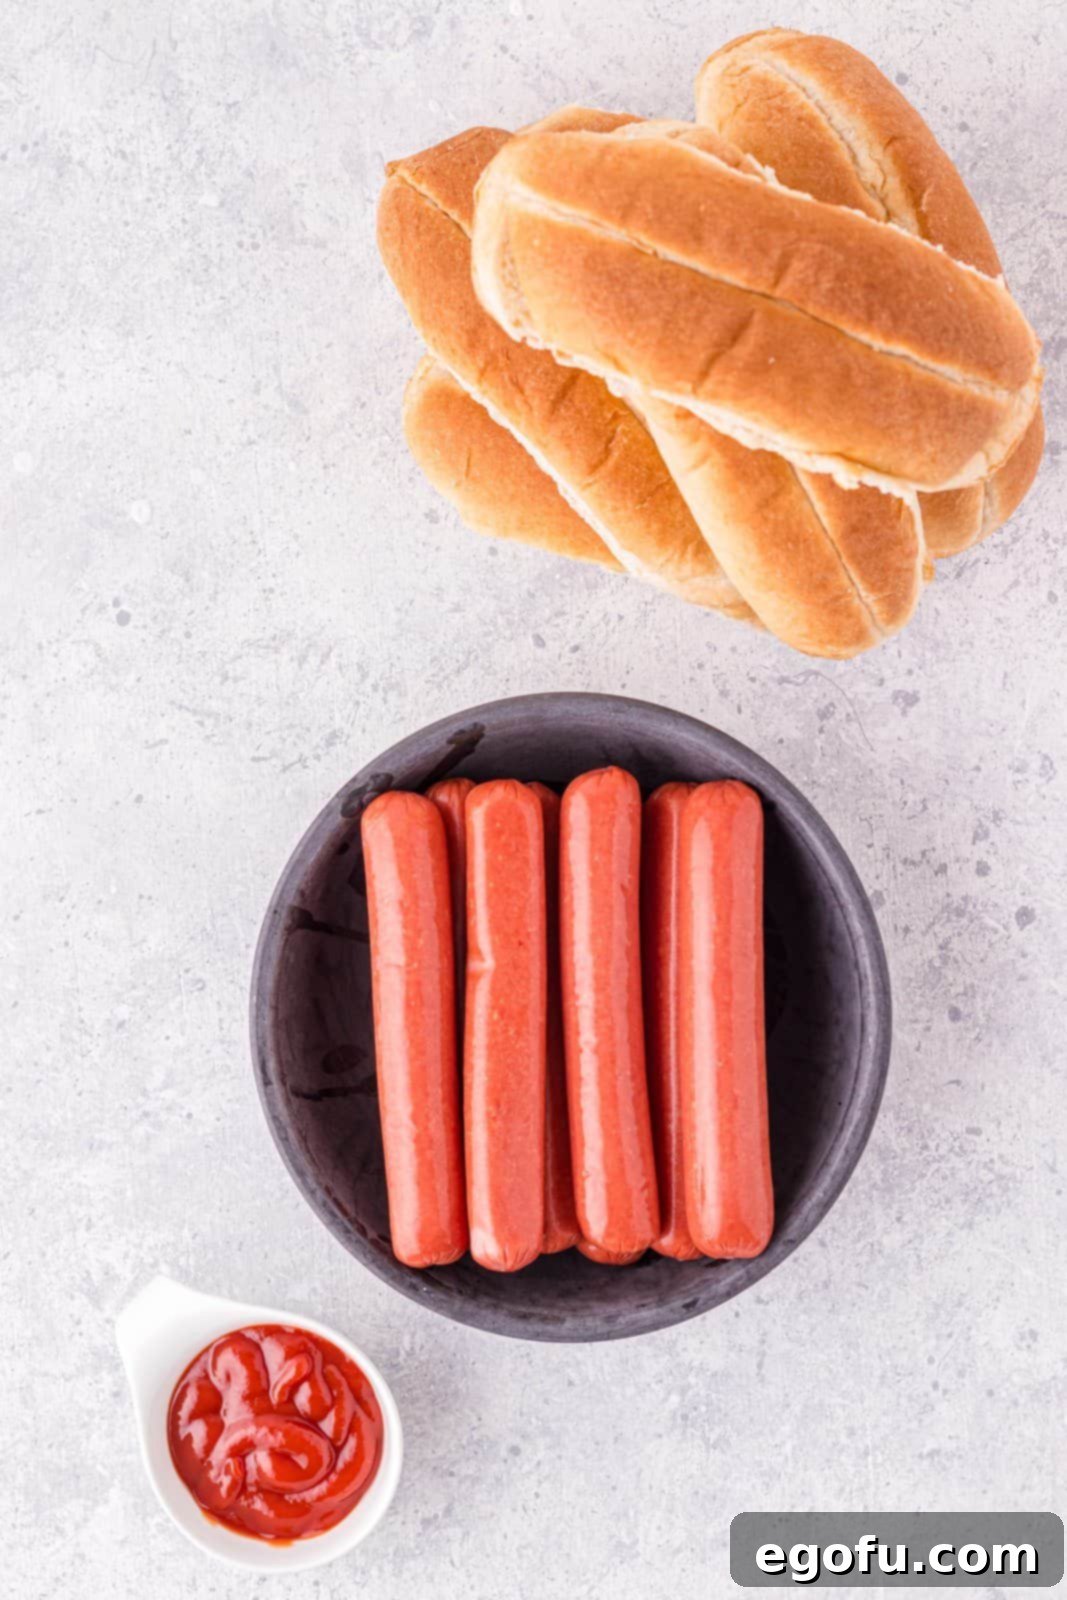
- Hot Dogs: Approximately 6 all-beef hot dogs (or your preferred brand). As mentioned, larger, thicker hot dogs like Nathan’s or Ball Park work best for detailed carving. Adjust quantity based on desired servings.
- Ketchup: A generous amount for the essential “blood” effect.
- Hot Dog Buns: 6 soft hot dog buns, one for each “finger.”
Essential Tools:
- Large Pot: For boiling the hot dogs.
- Cutting Board: A stable surface for safe and precise carving.
- Paring Knife: A small, sharp knife is crucial for creating the intricate nail and knuckle details.
- Frying Pan (Optional): For pan-frying to get that perfect golden-brown finish.
- Tongs: For safely handling hot dogs during cooking.
How to Make Horrifically Delicious Halloween Hot Dog Fingers: Step-by-Step
Now for the main event – transforming innocent hot dogs into gruesome Halloween delights! Follow these detailed steps to ensure your Hot Dog Fingers are perfectly spooky.
Step 1: Prepare Your Hot Dogs. First, fill a large pot with water and bring it to a rolling boil. While the water heats, remove your chosen hot dogs from their packaging and place them on a clean, stable cutting board. This is where the artistic (and slightly disturbing) transformation begins!
Step 2: Carve the “Nail.” With a small, sharp paring knife, start by carefully cutting the “nail” shape at the very top of each hot dog. For reference, you can use your own thumbnail to gently trace out the size and rounded shape lightly on the hot dog skin. Once you have the outline, meticulously peel off the thin outer layer of hot dog skin within that traced shape. This reveals the lighter flesh underneath, creating a stark contrast that perfectly mimics a fingernail. Be patient and gentle to avoid tearing the hot dog itself.
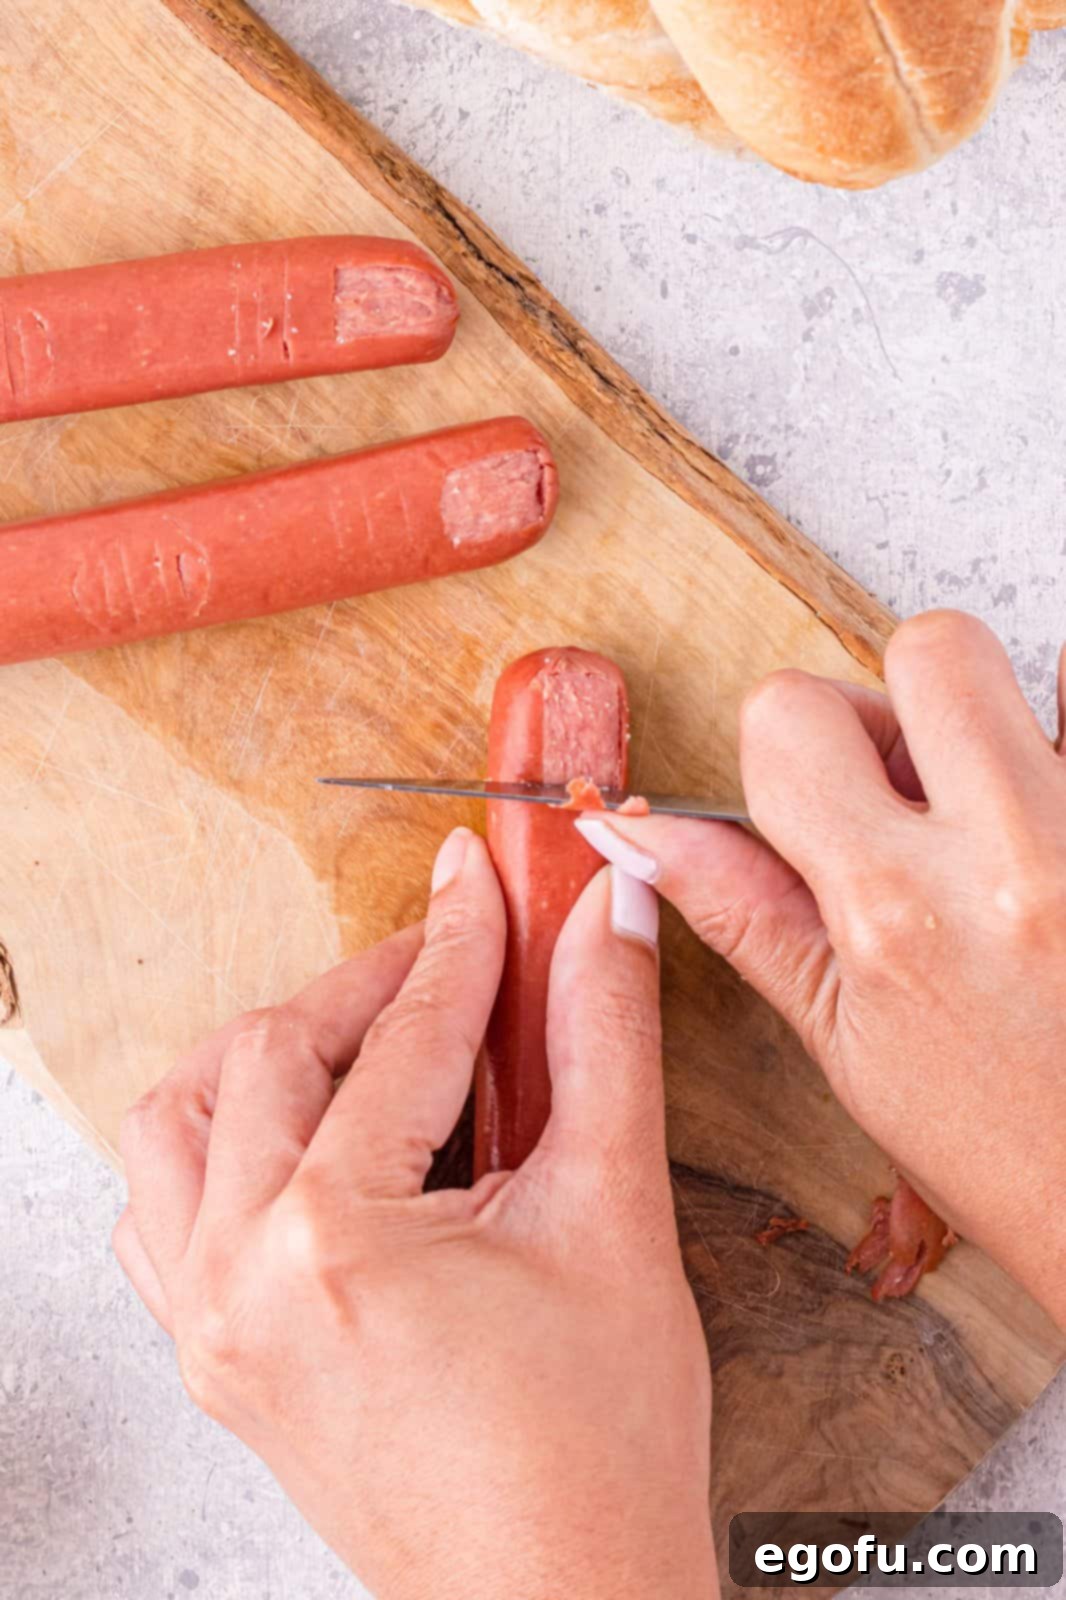
Step 3: Create the Upper Knuckle Creases. Next, just below the newly formed “nail bed,” use your paring knife to make three shallow, straight lines across the hot dog. These lines should be parallel to each other and not extend all the way through the hot dog. Their purpose is to mimic the natural creases found on the first knuckle of a human finger. The shallower you cut, the more realistic the crease will look after cooking.
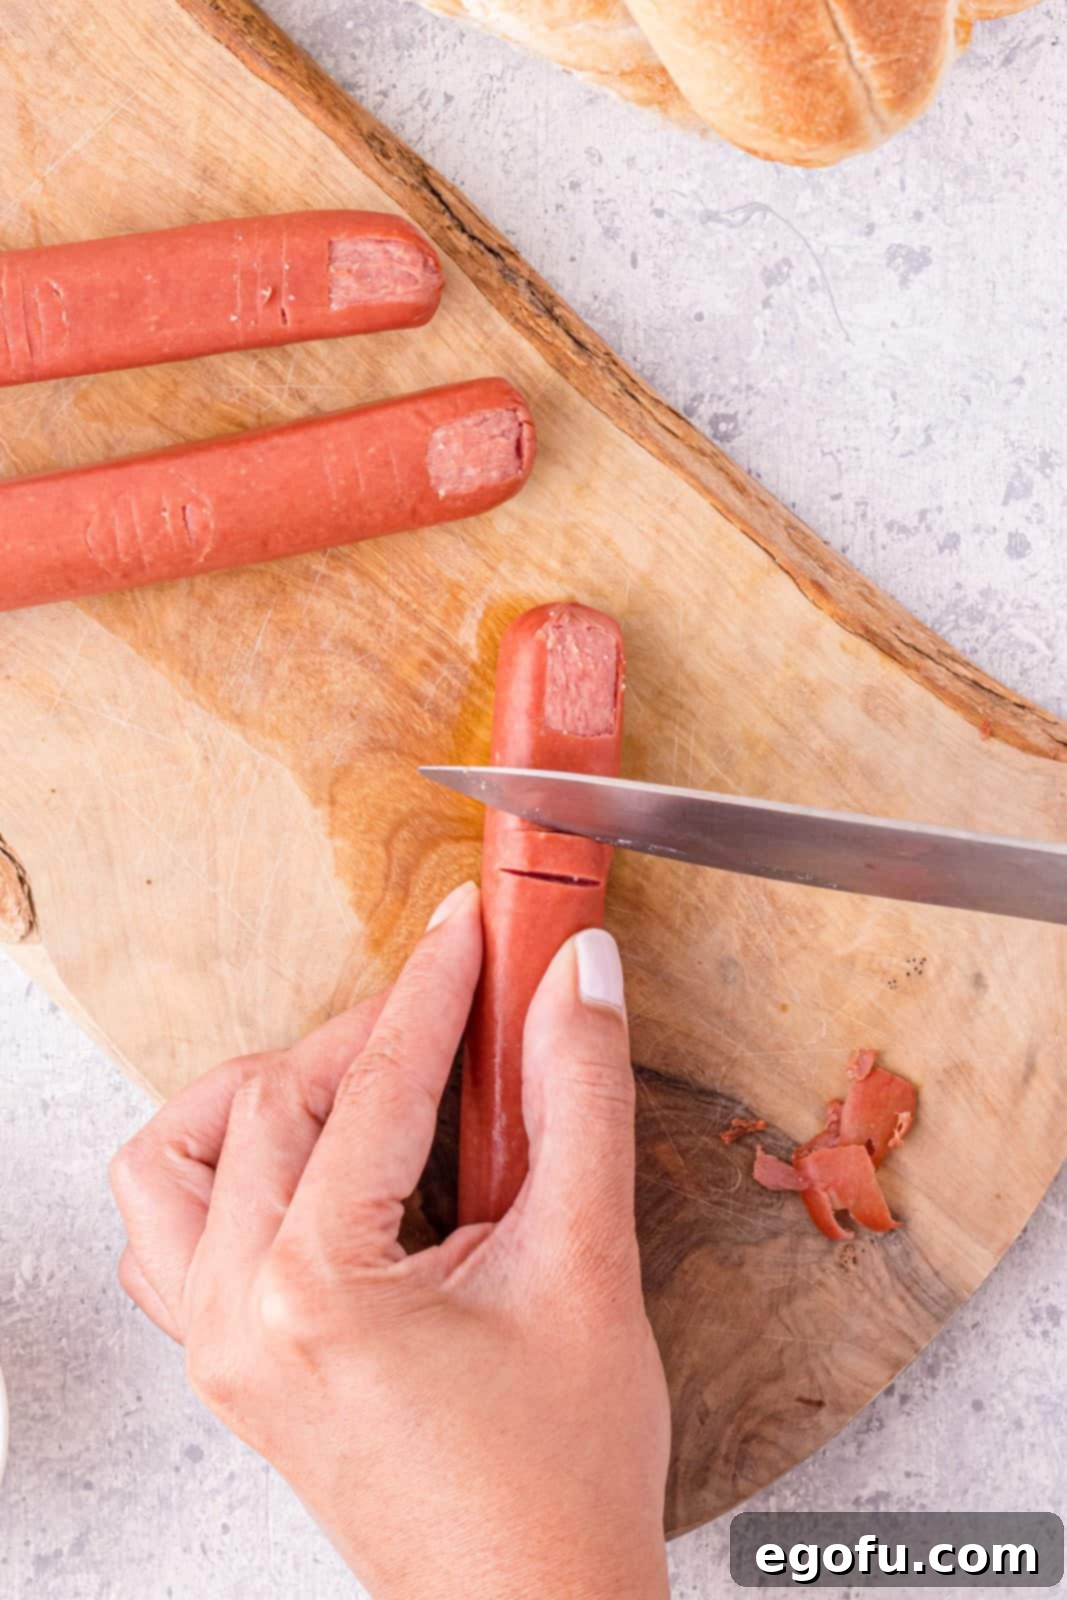
Step 4: Carve the Main Knuckle. Move further down to the center of the hot dog to create the main knuckle shape. This requires a bit more detail. Start by carving a semi-circle facing downwards. Follow this with two short, straight horizontal lines extending from the ends of the semi-circle. Conclude the knuckle by carving another semi-circle, this time facing upwards, connecting the ends of the two straight lines. This intricate pattern gives the hot dog a convincing jointed appearance, essential for that “severed finger” look.

Step 5: Repeat and Prepare for Cooking. Once you’ve mastered the technique, repeat all the carving steps (nail, upper creases, main knuckle) with the remaining hot dogs. Take your time to ensure each “finger” looks uniquely creepy. Set aside the carved hot dogs as you prepare for the next cooking stage.

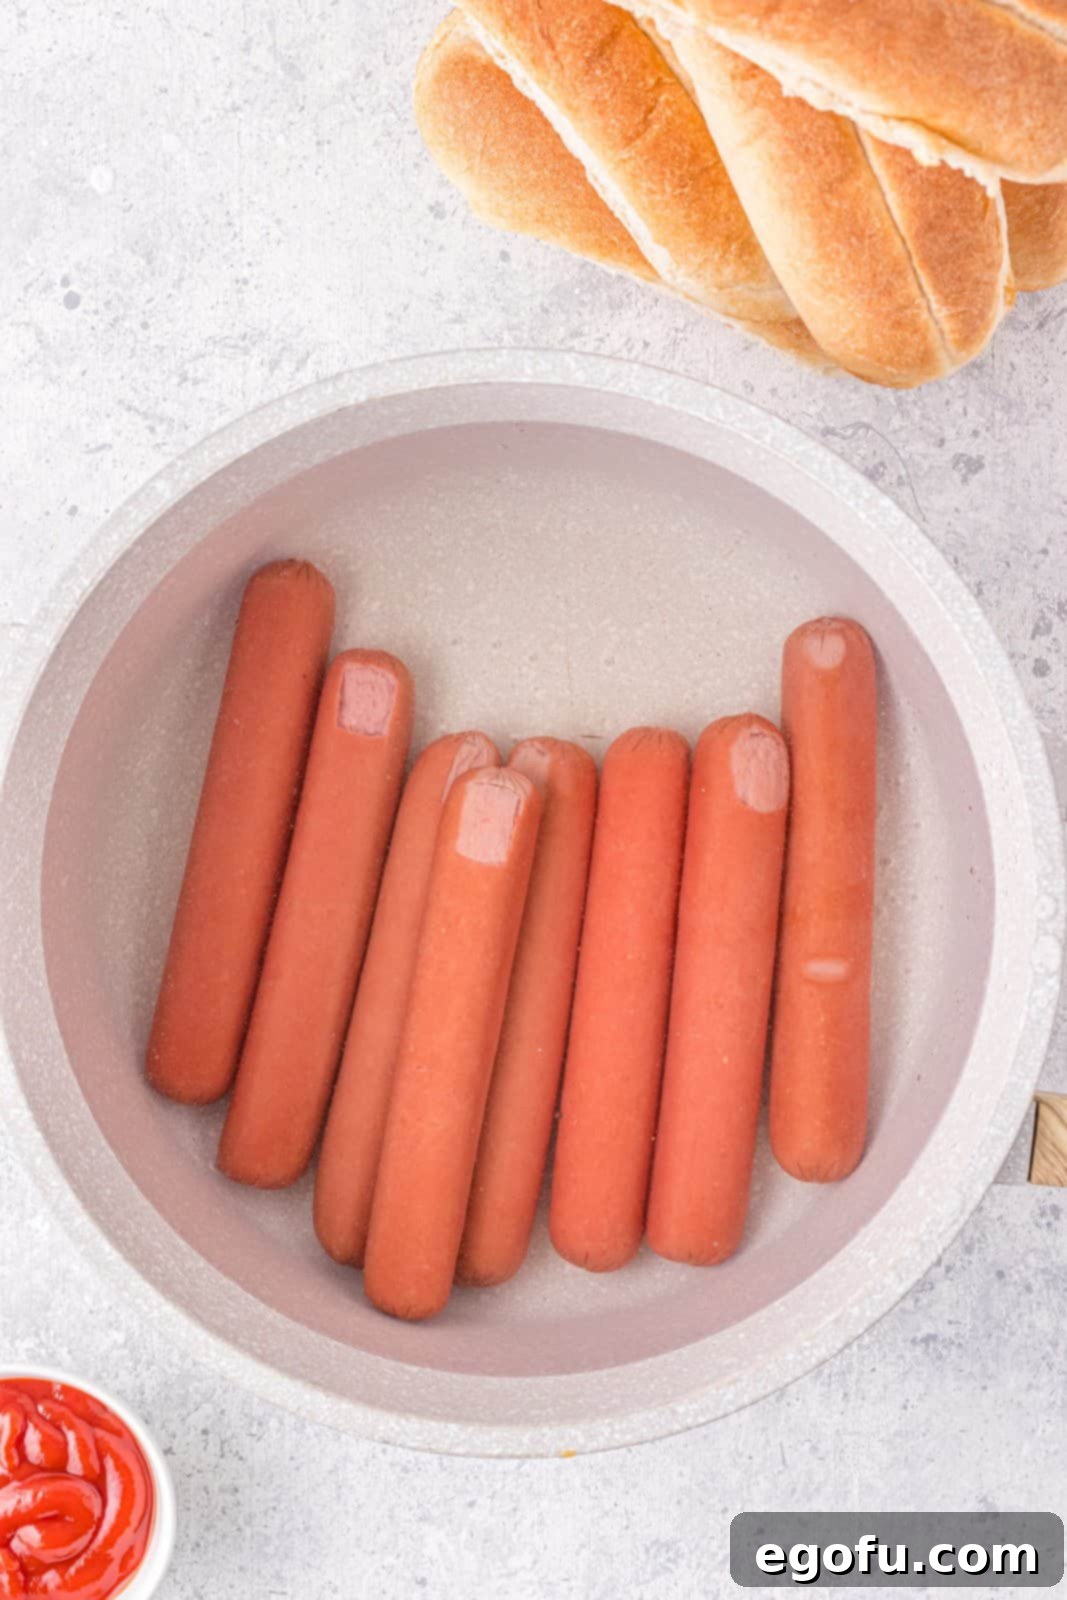
Step 6: Boil the Hot Dogs. Carefully place the carved hot dogs into the pot of boiling water. Boil them according to their package instructions, usually for about 3-5 minutes. Boiling helps to cook them thoroughly and slightly plump them up, making the carved features more prominent.
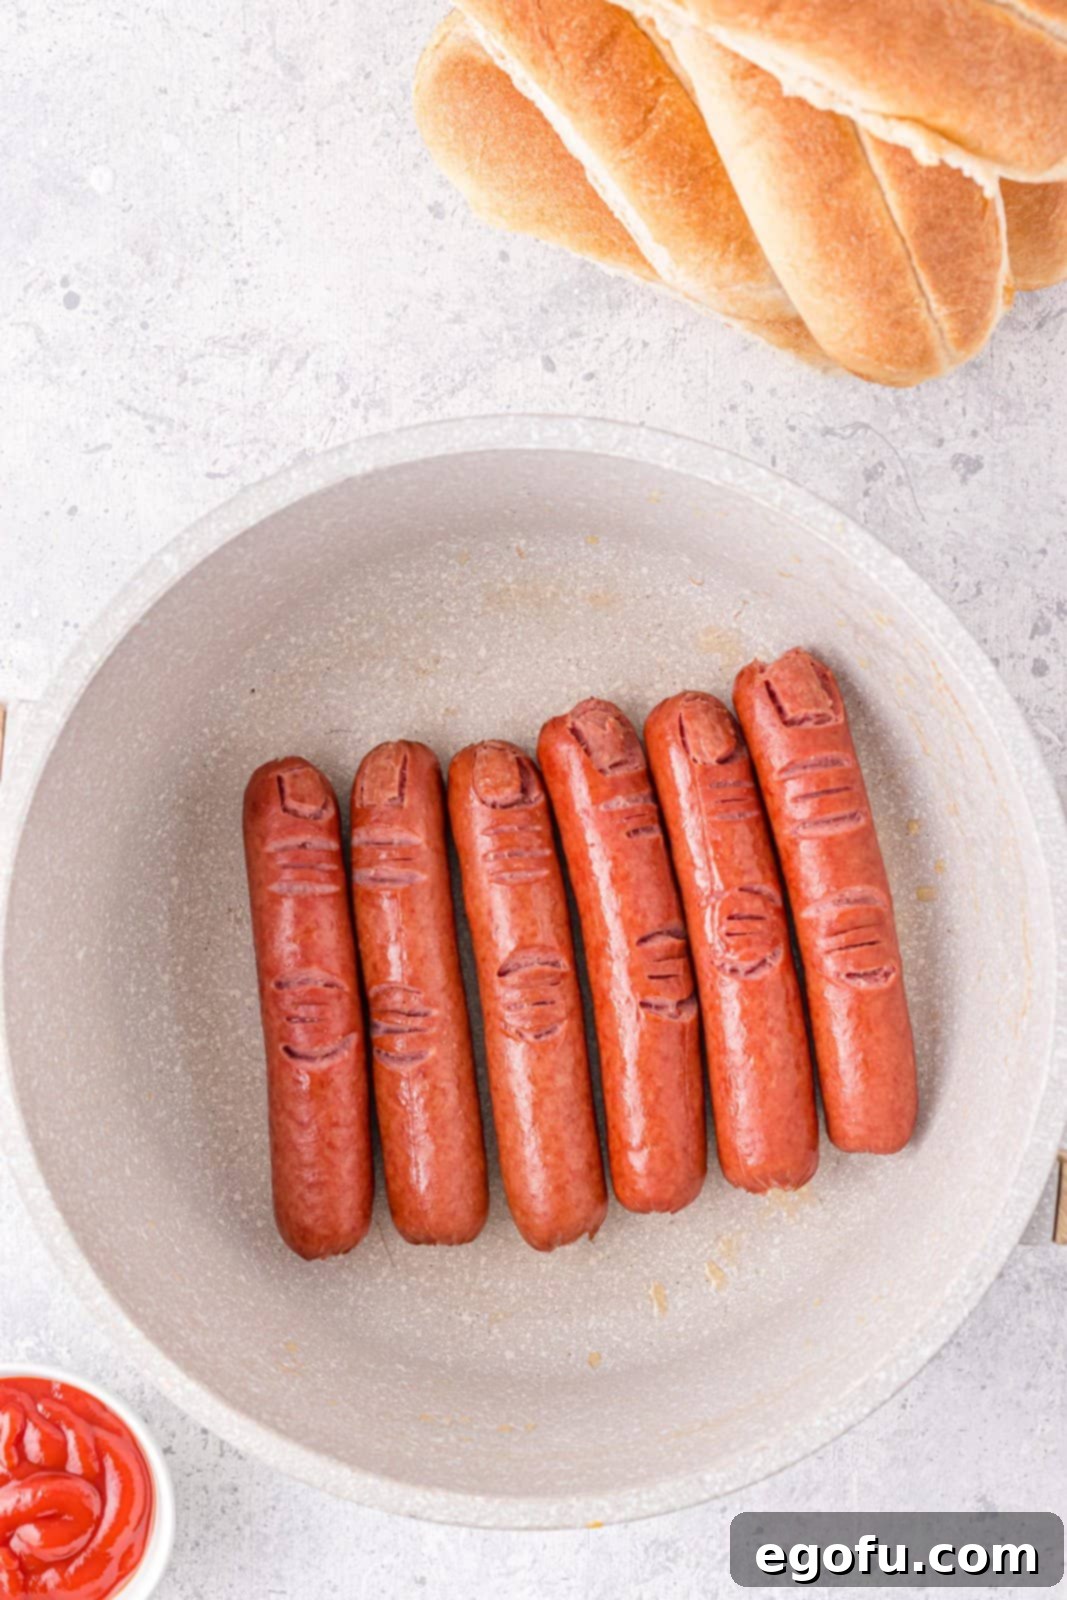
Step 7: Fry for a Golden Finish. After the hot dogs are boiled, carefully drain them of all water. Then, transfer them to a hot pan (you can add a tiny bit of oil if needed to prevent sticking). Fry the hot dogs for a few minutes, turning occasionally, until they achieve a nice golden-brown color and the carved areas appear slightly crisped. This frying step adds depth to their appearance, making them look even more “realistically” cooked and gruesome.
Step 8: Assemble Your Ghastly Delights. Once the hot dogs are perfectly cooked and slightly cooled to handle, it’s time for the final touch. Dip the bottom, cut end of each hot dog “finger” into a generous amount of ketchup. Let the excess drip off slightly, creating a truly unsettling “blood” effect. Then, carefully place each ketchup-dipped finger into a waiting hot dog bun. The ketchup should pool just enough at the bottom of the bun to enhance the gory illusion.
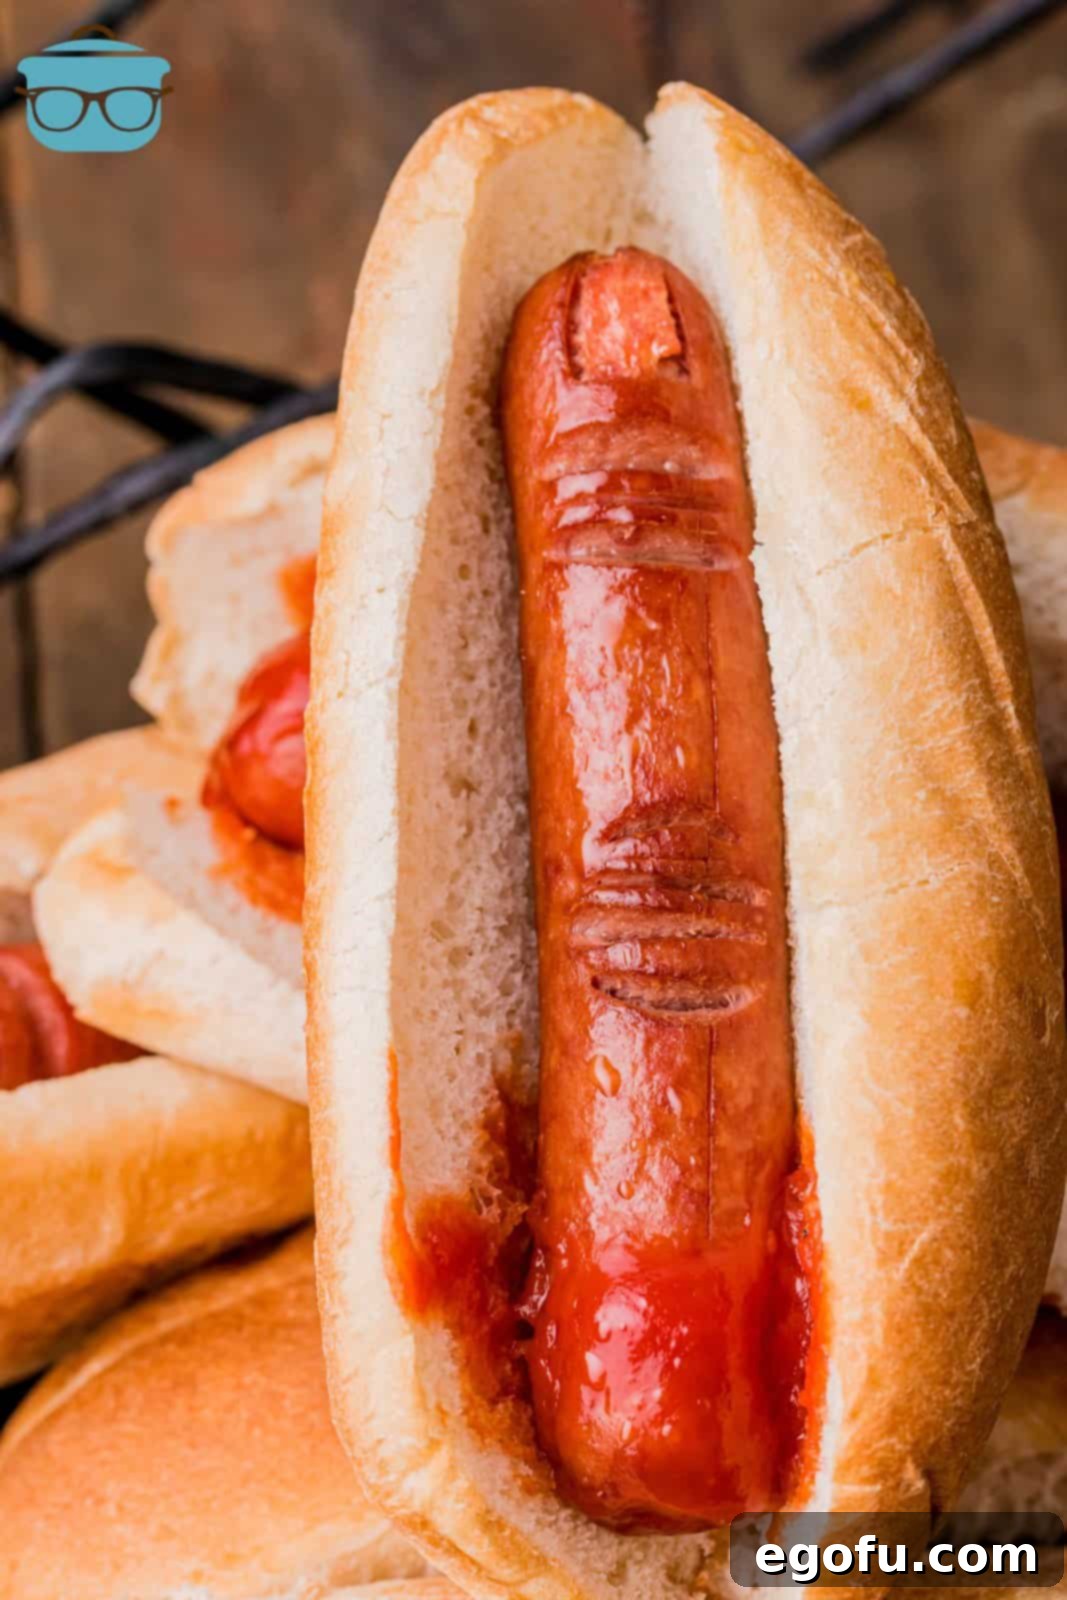
Step 9: Serve Immediately. Repeat the dipping and bun-placement with all remaining hot dogs. Arrange them on a platter for maximum impact, perhaps with some spooky Halloween decorations like fake spiders or cobwebs. Serve these terrifyingly tasty Halloween Hot Dog Fingers immediately to eager trick-or-treaters and party guests!
Tips for Success & Creative Variations
To make your Halloween Hot Dog Fingers truly stand out, consider these extra tips and variations:
- Perfect the Cuts: Practice on one hot dog first to get a feel for the paring knife. Remember, shallow cuts for creases are key.
- Smoked Paprika Dust: For an even more “aged” or “burnt” look, lightly dust your fried hot dogs with a pinch of smoked paprika.
- Mustard for Pus: For an extra gross factor, offer yellow mustard as a “pus” dipping sauce alongside the ketchup “blood.”
- Onion Fingernails: Instead of peeling the hot dog skin for the nail, you can cut a thin slice of white onion into a nail shape and press it onto the hot dog before cooking.
- Green Food Coloring: For a truly monstrous twist, you could boil your hot dogs in water with a few drops of green food coloring to create “Zombie Fingers!”
- Mini Fingers: Use cocktail sausages for mini Halloween Hot Dog Fingers, perfect for appetizers.
- Cheese Bandages: Wrap some thin strips of cheese around the “fingers” before heating to create a “bandaged” effect.
Serving Suggestions for Your Spooky Spread
These Halloween Hot Dog Fingers are fantastic on their own, but they also pair wonderfully with other spooky sides to create a full Halloween feast:
- “Witches Brew” Drink: Serve with a vibrant green or purple punch.
- “Wormy” Mac and Cheese: Cooked pasta (like rotini or elbow macaroni) mixed with cheese sauce makes a great side.
- “Spiderweb” Dip: Layer guacamole or a creamy dip in a bowl and pipe sour cream or a contrasting sauce in concentric circles on top. Drag a toothpick from the center outwards to create a spiderweb effect.
- “Graveyard” Veggie Platter: Arrange carrot sticks, celery, and bell pepper strips in a “garden” around a dip, using a small bowl for the dip and perhaps some pretzel stick “tombstones.”
- Chips & Dips: Simple potato chips or “monster” themed tortilla chips are always a hit.
Want More Hauntingly Good Halloween Recipes?
If you’re looking to fill your Halloween table with even more creative and delicious treats, be sure to explore these other spooky recipes:
- 20 Halloween Recipes: A collection of diverse and delightful Halloween culinary ideas.
- Halloween White Trash Mix: A sweet and savory snack mix perfect for munching during spooky movie nights.
- Witch Hat Cookies: Adorable and easy-to-make cookies that resemble classic witch hats.
- Spider Oreos: Simple yet effective treats using Oreos and pretzels to create creepy crawlers.
- Mummy Jalapeno Poppers: Spicy jalapenos wrapped in pastry “bandages” for a savory bite.
- Frankenstein Donuts: Transform plain donuts into friendly green monsters with frosting and candies.
- Witches Brew Snack Bags: Fun and customizable snack bags, great for party favors or on-the-go treats.
- Candy Corn Pudding Parfaits: Layered desserts that capture the iconic colors of candy corn.
- Graveyard Cups: Individual dessert cups designed to look like mini graveyards, complete with cookie “dirt” and gummy “worms.”
- Poisoned Apple Jell-O shots: An adult-friendly treat that’s as enchanting as it is delicious.
- Mummy Dogs: A classic Halloween favorite, hot dogs wrapped in crescent roll “bandages.”
- Mummy Meatloaves: Mini meatloaves decorated to resemble mummies, a hearty and fun dinner option.

Halloween Hot Dog Fingers
A fun and spooky meal, these Halloween Hot Dog Fingers are easy to make (and perfectly gross) for the upcoming holiday!
Prep Time: 10 minutes
Cook Time: 10 minutes
Total Time: 20 minutes
Servings: 6
Author: Brandie Skibinski
Print Recipe
Pin Recipe
Ingredients
- 6 all-beef hot dogs (such as Nathan’s or Ball Park for best results)
- Ketchup (for the “blood” effect)
- 6 hot dog buns
Instructions
- Fill a large pot with water and bring to a boil.
- Remove hot dogs from their packaging and place them on a cutting board.
- Start by cutting the “nail” shape at the top of the hot dog with a paring knife. Using your own nail for reference, lightly trace the shape. Carefully peel off the outer layer of hot dog skin to reveal the nail shape.
- Next, cut 3 straight, shallow lines under the nail bed of the hot dog finger, being careful not to cut all the way through.
- Finally, move down to the center of the hot dog and cut the knuckle shape: start with a semi-circle facing down, followed by two straight lines, and then a semi-circle facing up to complete the knuckle.
- Complete these carving steps with all remaining hot dogs.
- Boil the carved hot dogs according to package instructions (typically 3-5 minutes).
- After boiling, drain the hot dogs. Then, fry them for a few minutes in a hot pan (add a little oil if necessary) until golden brown.
- Dip the bottom of each hot dog “finger” into a generous amount of ketchup “blood” and place it into a hot dog bun.
- Repeat with the remaining hot dogs and serve immediately for a deliciously spooky meal!
Notes
- Feel free to use any brand or flavor of hot dogs you prefer.
- Hot dogs can also be cooked in an air fryer at 390°F (199°C) for 4-5 minutes, no pre-boiling or preheating required.
- This recipe is very easy to double or multiply for larger gatherings; simply cook in batches if needed.
Course: Lunch, Main Course, Appetizer
Cuisine: American, Halloween
Nutrition
Calories: 230 kcal
Carbohydrates: 30 g
Protein: 9 g
Fat: 8 g
Sodium: 518 mg
Fiber: 1 g
Sugar: 3 g
Nutritional Disclaimer
“The Country Cook” is not a dietician or nutritionist, and any nutritional information shared is an estimate. If calorie count and other nutritional values are important to you, we recommend running the ingredients through whichever online nutritional calculator you prefer. Calories and other nutritional values can vary quite a bit depending on which brands were used.
Did you make this recipe? Share your spooky creations on Instagram @thecountrycook and mention us #thecountrycook! We’d love to see your terrifyingly delicious results!
